Bienvenidos mis amigos de @jewelry a mi blog. 🎀🥰🎀
Hola 🙋♀️ feliz día que el creador los cubra de bendiciones hoy, mañana y siempre para está creativa comunidad y todo el mundo, hoy vengo con una creación hermosa de ganchos colegiales hecho a mano...como saben ya inicio un año escolar y siempre estamos creando lindos accesorios lazos, cintillo, moños entre otros que sirva, para complementar el uniforme de las niñas en el colegio así se verán más lindas y arregladas.
Es muy fácil y rápido de hacer con pocos materiales cinta azul y cinta blanca con media perlas decorativas y aquí le explico paso a paso.
Welcome my @jewelry friends to my blog. 🎀🥰🎀
Hello 🙋♀️ happy day may the creator cover you with blessings today, tomorrow and always for this creative community and the whole world, today I come with a beautiful creation of handmade school hooks...as you know already start a school year and we are always creating cute accessories bows, headband, bows among others that serve, to complement the uniform of the girls at school so they will look more cute and arranged.
It is very easy and quick to make with few materials blue ribbon and white ribbon with half decorative pearls and here I explain step by step.
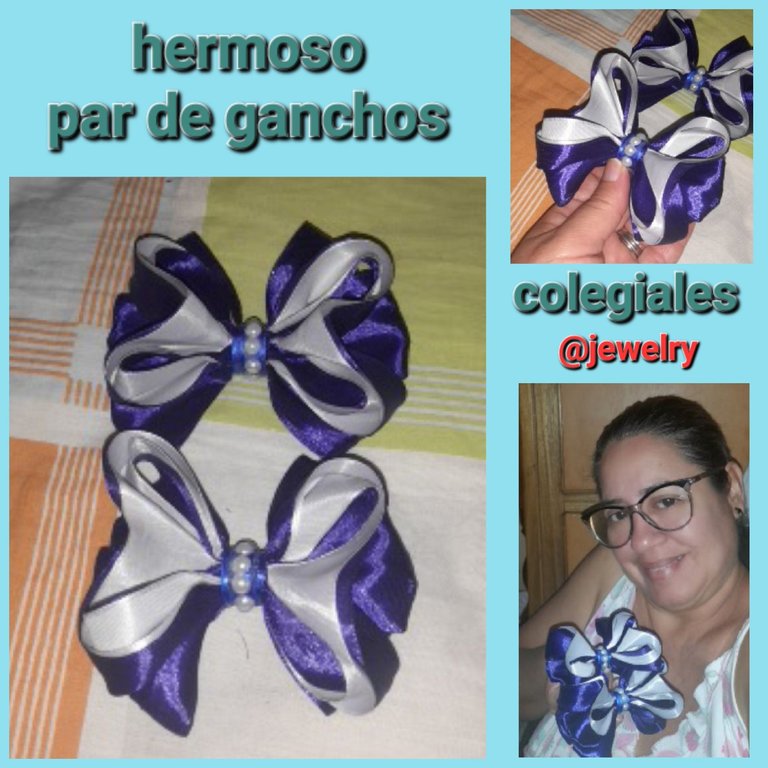
Miren como quedan estos hermosos lazos con ganchos blanco y azules el color del uniforme colegial un lindo accesorio para el look de su princesa.🙍♀️🎀
Look at these beautiful bows with white and blue hooks, the color of the school uniform, a nice accessory for your princess look.🙍♀️🎀
MATERIALES PARA SU ELABORACIÓN:
● 2 metros de cinta de 4 cm azul.
● 80 cm de cinta de 4 cm blanca.
● 15 cm de cinta azul de 1 cm.
● 8 medias perlas blancas.
● 2 alfiler con cabeza.
● Silicon barra.
● Tijera.
● Hilo.
● Aguja.
● Yesquero.
● Regla.
MATERIALS FOR ITS ELABORATION:
● 2 meters of 4 cm blue ribbon.
● 80 cm of 4 cm white ribbon.
● 15 cm of 1 cm blue ribbon.
● 8 white half pearls.
● 2 pins with heads.
● Silicon rod.
● Scissors.
● Thread.
● Needle.
● Tinder.
● Ruler.

ELABORACIÓN DEL LAZO COLEGIAL :
PASO A PASO :
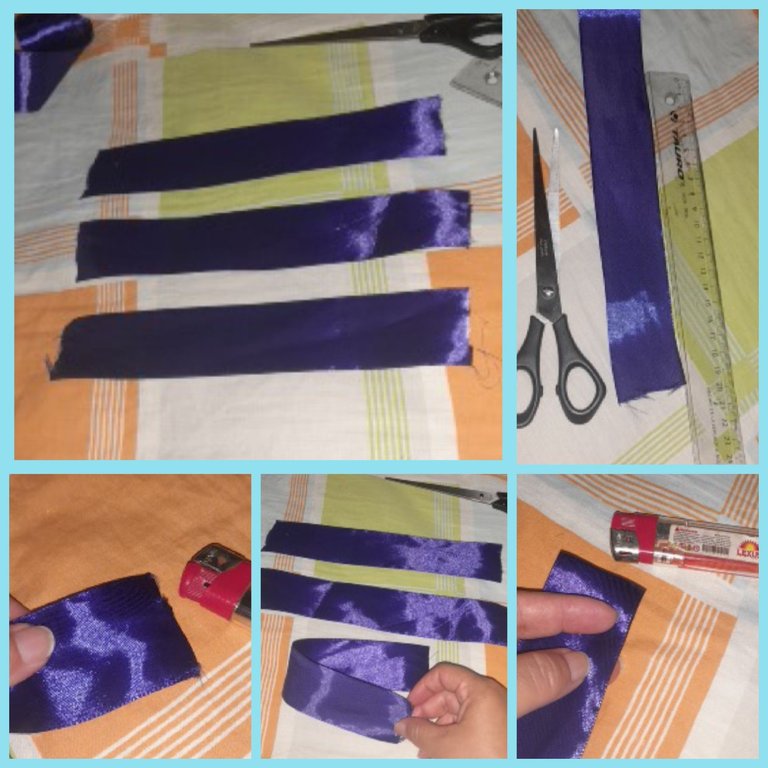
Hacemos un lazo base :
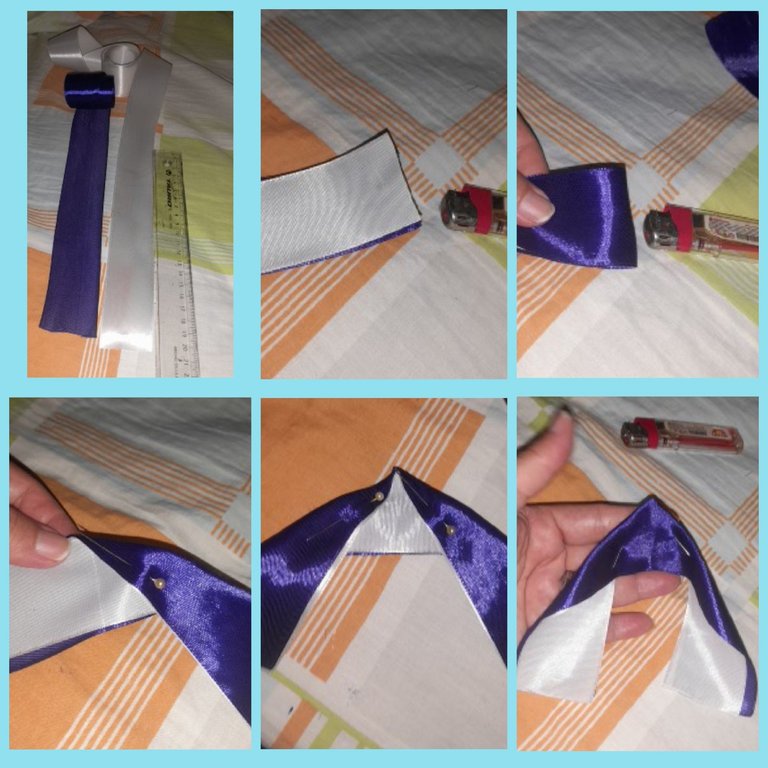
● Cortamos tres trozos de cinta azul con la tijera de 20 cm cada uno y con el yesquero quemamos cada extremos de la cinta.
● Doblamos cada trozo de la cinta por el centro y le pasamos el yesquero rápido solo para marcar el centro.
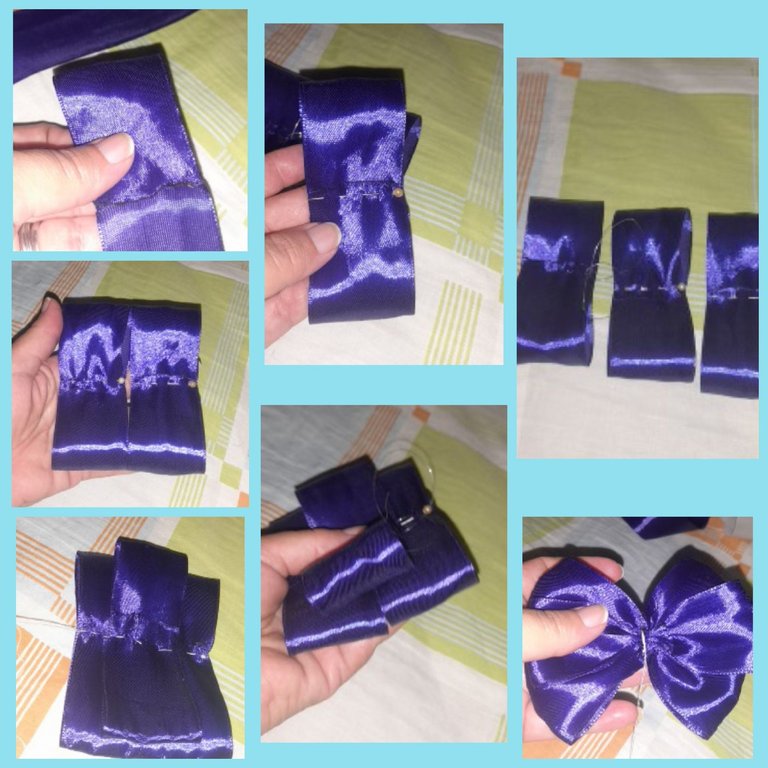
● Luego tomamos cada extremo de la cinta y la llevamos al centro de la cinta quecya marcamos colocamos una encima de la otra y la cosemos con un alfiler con cabeza.
● Seguidamente cosemos con una aguja e hilo por el centro dando 10 puntadas, arruchamos el centro y le damos tres vuelta y amarramos.
Así queda el lazo base para estos ganchos colegiales.
ELABORATION OF THE SCHOOL RIBBON :
STEP BY STEP :
We make a base ribbon :
● We cut three pieces of blue ribbon with the scissors of 20 cm each and with the tinder we burn each end of the ribbon.
● We fold each piece of the ribbon down the center and pass the quick tinder just to mark the center.
● Then we take each end of the ribbon and bring it to the center of the ribbon we marked we place one on top of the other and sew with a headed pin.
● Next we sew with a needle and thread through the center giving 10 stitches, we ruffle the center and give it three turns and tie.
This is how the base loop for these school hooks looks like.
Hacemos el segundo lazo del centro del gancho:
● Tomamos la cinta blanca y la azul cortamos 20 cm de cada una.
● Colocamos la cinta blanca y azul una encima de la otra doblamos y quemamos cada extremo.
● Doblamos las dos cintas y marcamos con el yesquero por el centro de las dos cintas .
● Doblamos un lado partiendo desde la marca un cm en forma de semi triangulo y fijamos con una alfiler.
● Repetimos el mismo procedimiento del otro lado de la marca el centro de la cinta.
● Ya tenemos la forma de triangulo volteamos al lado azul todo y volvemos a doblar en forma de semi triangulo.
● Ahora más cerrado queda el triangulo sacamos los alfileres y lo colocamos cruzando por el centro del triangulo.
● Volteamos ahora el triangulo donde se vea más la vinta blanca.
● Pegamos las puntas de abajo del triangulo que van hacer las colas .
We make the second loop from the center of the hook:
● We take the white and blue ribbon we cut 20 cm from each.
● We place the white and blue ribbon one on top of the other we fold and burn each end.
● Fold the two ribbons and mark with tinder through the center of the two ribbons .
● Fold one side starting from the mark one cm in the shape of a half triangle and fix with a pin.
● We repeat the same procedure on the other side of the mark the center of the tape.
● Now we have the triangle shape, turn the blue side all the way around and fold again in the shape of a half triangle.
● Now the triangle is tighter, remove the pins and place it across the center of the triangle.
● Now flip the triangle where the white ribbon is more visible.
● Glue the bottom ends of the triangle that will make the tails.
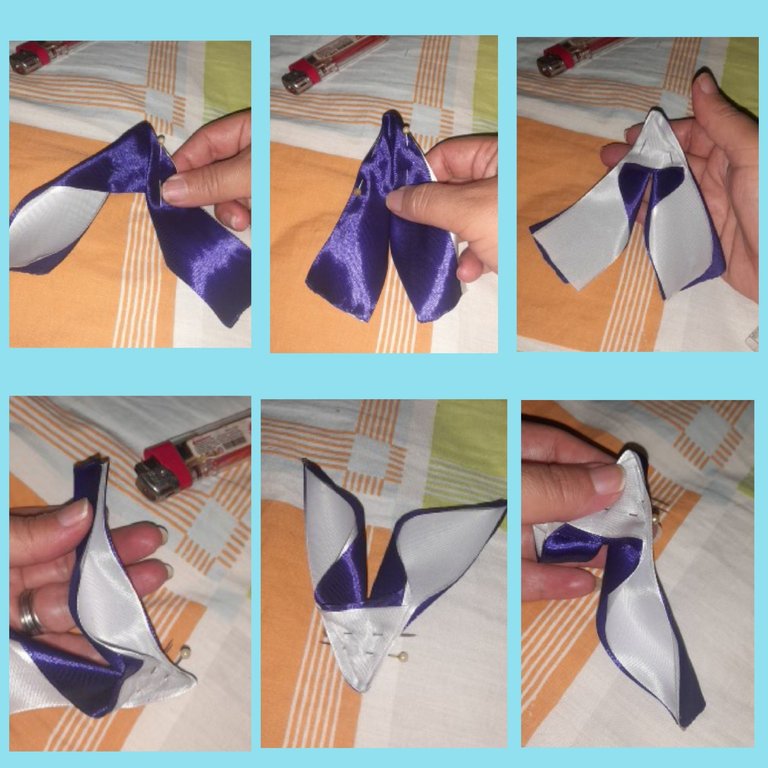
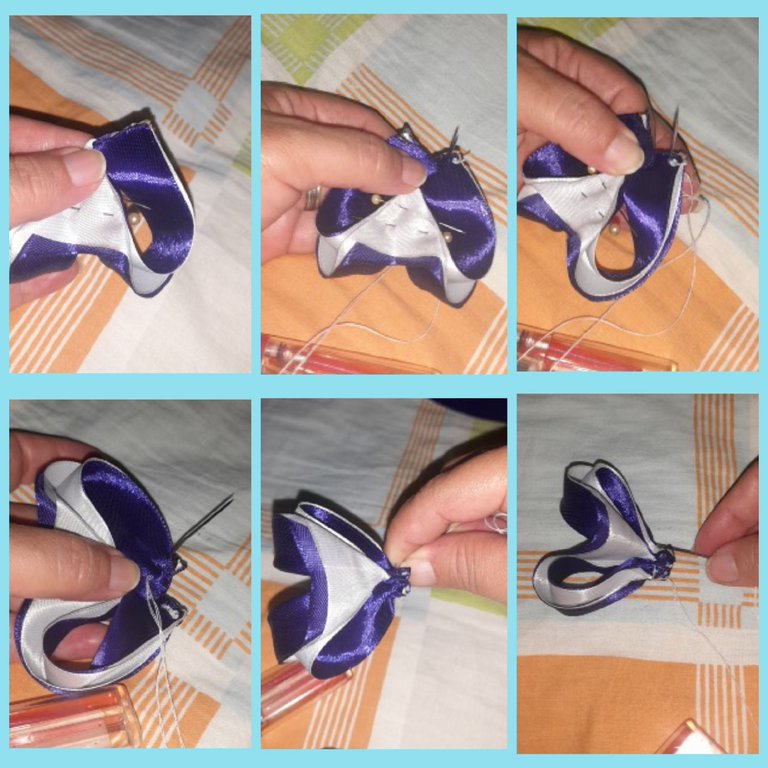
● Seguidamente te echamos atrás cada cola del triangulo y la colocamos por encima de la punta del triangulo.
● Aquí se encuentra las dos cola o puntas como ven podemos coser con el hilo y la aguja dando puntadas.
● Arruchamos y pasamos varias veces la aguja e hilo y luego amarramos .
● Ya hicimos un lado del lazo repetimos los mismos procedimientos y hacemos el otro lado del lazo .
● Cosemos o pegamos las dos parte de lazo ....Quedando un solo lazo.
● Next we pull back each tail of the triangle and place it over the tip of the triangle.
● Here are the two tails or tips as you can see we can sew with the thread and needle giving stitches.
● We ruffle and pass several times the needle and thread and then we tie .
● Once we have made one side of the loop, we repeat the same procedures and make the other side of the loop .
● We sew or glue the two parts of the loop together .... , leaving only one loop.
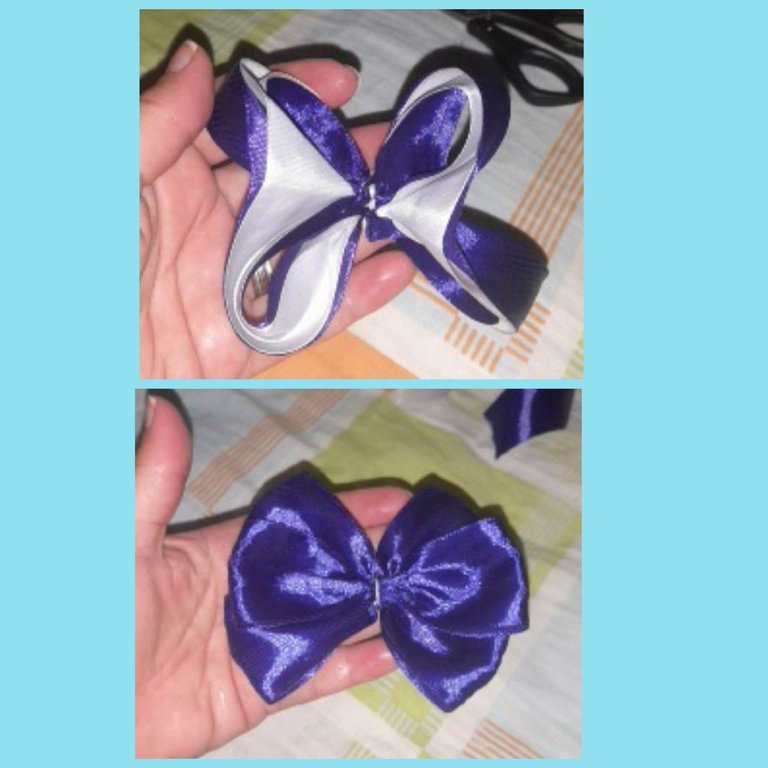
Miren aquí como queda los dos lazos para un gancho así que repetimos la misma técnica para hacer el segundo lazo y así tener el par de lindos ganchos.🎀🎀
See here how the two loops for one hook look like, so we repeat the same technique to make the second loop to have the pair of nice hooks.🎀🎀
Terminamos el par de lazo con gancho:
● Aquí están los dos pares de lazo terminados pegamos el lazo blanco y azul encima del lazo azul base que hicimos primero.
● Luego tomamos la cinta azul de un cm por 15 cm de largo y damos dos vuelta al alrededor del centro del lazo .
● Pegamos la cinta y pegamos luego las 8 medias perlas en el centro del lazo.
● Finalmente pegamos el gancho en cada lazo en la parte posterior del lazo.
We finished the loop pair with hook:
● Here are the two finished loop pairs we glue the white and blue loop on top of the base blue loop we made first.
● Then we take the one cm by 15 cm long blue ribbon and give two turns to the around the center of the loop .
● We glue the ribbon and then glue the 8 half pearls in the center of the bow.
● Finally we glue the hook on each loop on the back of the loop.

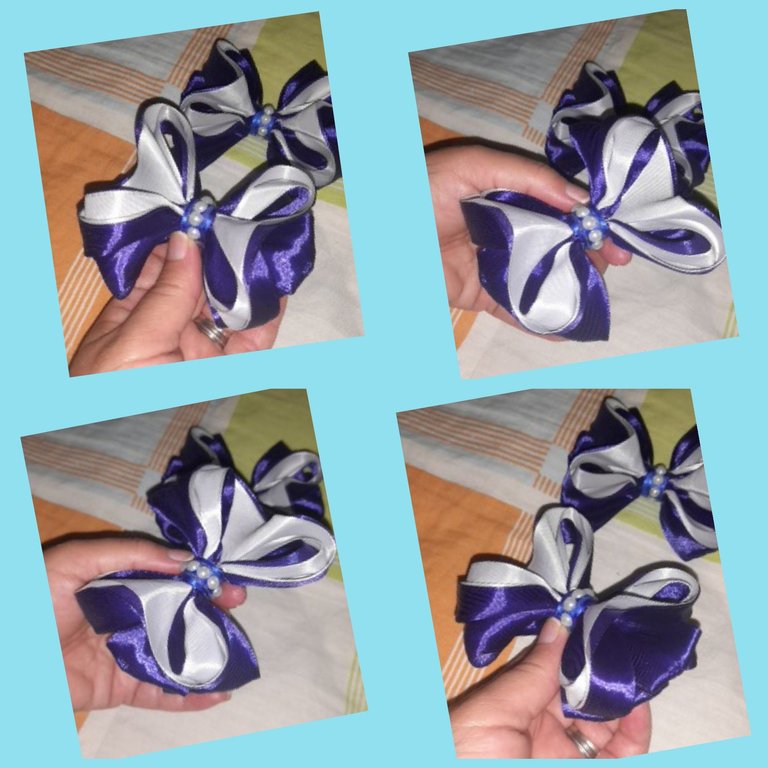
Aquí les muestro mi hermoso trabajo ya terminado un par de lindos lazos con gancho para las princesas y su look para el colegio. 🙍♀️🎀
Here I show you my beautiful work already finished a pair of cute hooked bows for the princesses and their look for school. 🙍♀️🎀
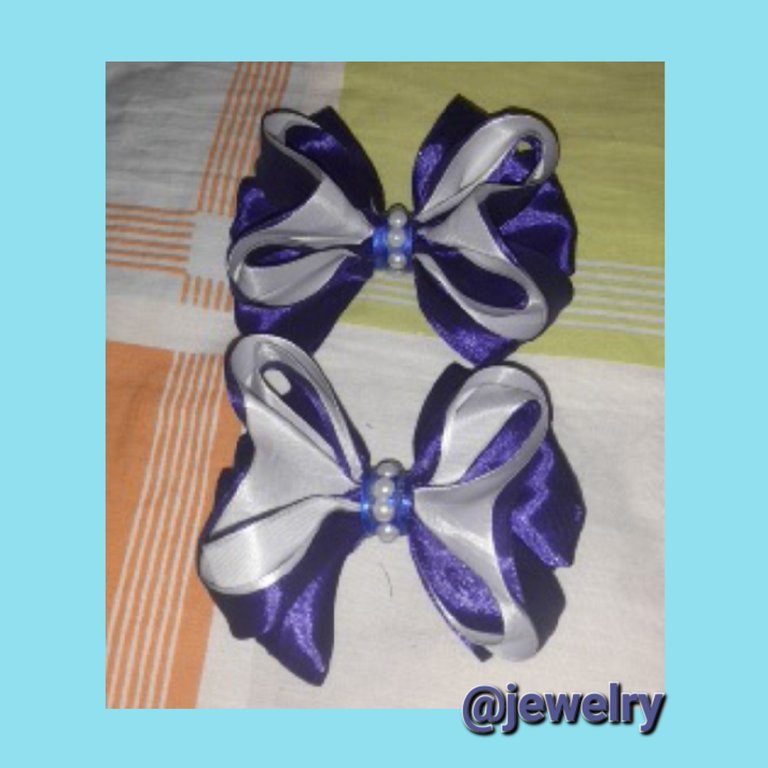
Trabajo terminados 🙋♀️ éste es un regalo para mi sobrina más pequeña y le quedará muy lindo con su uniforme del colegio, como ven amigos quedan muy lindos los lazos con ganchos y lo puede hacer usted misma fácilmente para dar un regalo o para vender es también una buena opción.
Finished work 🙋♀️ this is a gift for my youngest niece and it will look very nice with her school uniform, as you can see friends are very nice bows with hooks and you can do it yourself easily to give a gift or to sell is also a good option.

Siempre agradecida de ustedes amigos @jewelry por su apoyo, seguimos creando lindos accesorios para ustedes...espero que les guste. 🙋♀️🥰
Son fotos mías tomadas desde mí teléfono Samsung, editadas con foto collage frame y traducida por Deepl.
Always grateful to you friends @jewelry for your support, we keep creating cute accessories for you...hope you like it. 🙋♀️🥰
These are photos of me taken from my Samsung phone, edited with photo collage frame and translated by Deepl.
It's a Creative idea. I'll try it.
Si te gustará los resultados gracias por compartir
It is stylish, attractive, and elegant. Love its design and it shows your creativity. Nice work! Thanks!
Gracias por apoyar mi post
This is so stylish, and pretty. I loved the color combination of purple and white❤
Gracias que bueno que te gustó