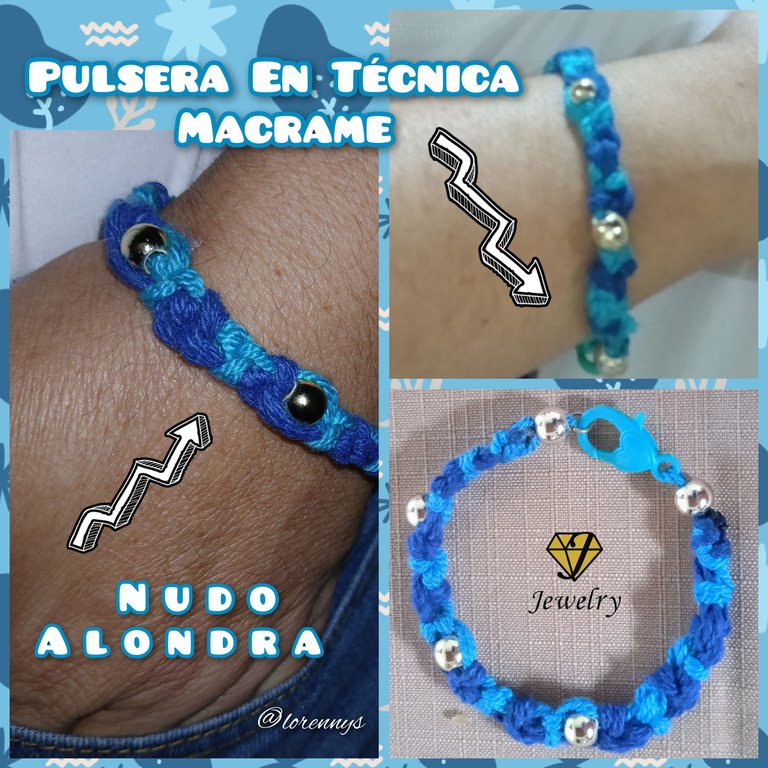
Hola hola familia Hive y amigos de Jewelry, espero como de costumbre que todos estén sanos y feliz. Hoy les traigo en macrame el punto Alondra que me encanta y como si fuese poco lo pude realizar en una combinación de hilos maravillosa ya que como he comentado en otras ocasiones el color azul es mi favorito. Estoy feliz de haber podido realizar esta pulsera la verdad es que estar de nuevo en casa es muy ventajoso para mi y seguir perfeccionando y aprendiendo esta técnica macrame y realmente sin lugar a duda tiene cada nudo más hermoso que el otro. Sin más que decir quédate hasta el final y veras.
English Version
Hello hello Hive family and Jewelry friends, I hope as usual that everyone is healthy and happy. Today I bring you in macrame the Alondra stitch that I love and as if that were not enough I was able to make it in a wonderful combination of threads because as I have said in other occasions the blue color is my favorite. I am happy to have been able to make this bracelet the truth is that being back at home is very advantageous for me and continue perfecting and learning this technique macrame and really undoubtedly has each knot more beautiful than the other. Without more to say stay until the end and you will see.
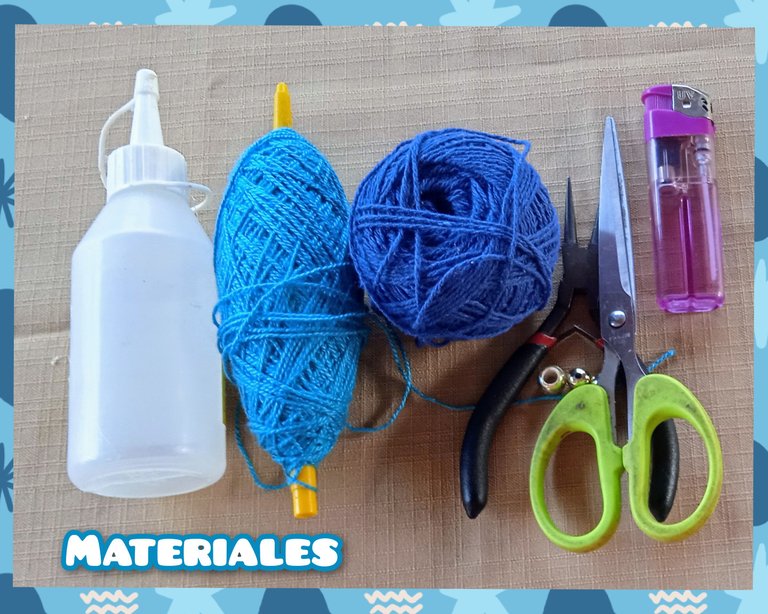
MATERIALES USADOS PARA ELABORAR LA ESPULSERA:
✔️Hilo chino turquesa.
✔️Hilo chino azul marino.
✔️Cinco balines dorados.
✔️Una tranca o terminal turquesa.
✔️Argollas.
✔️Silicón frio.
✔️Regla.
✔️Tijeras.
✔️Encendedor.
✔️Pinza.
English Version
MATERIALS USED TO MAKE THE BRACELET:
✔️Hilo turquoise chino.
✔️Hilo navy blue chino.
✔️Cinco gold-colored balls.
✔️Una turquoise terminal.
✔️Argollas.
✔️Silicón frio.
✔️Regla.
✔️Tijeras.
✔️Encendedor.
✔️Pinza.
PASO A PASO:
Primer Paso:
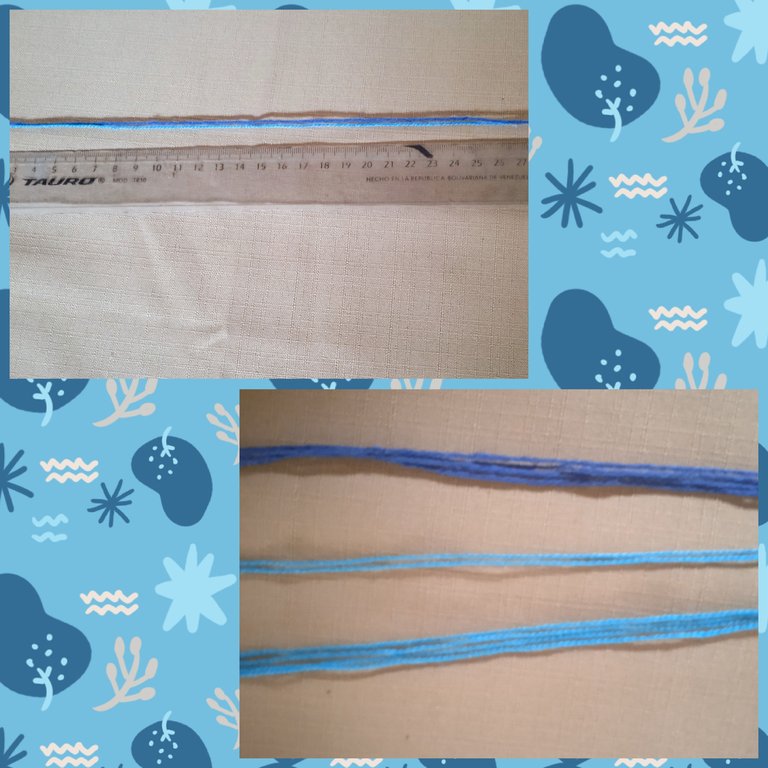
Comenzamos midiendo con la regla, Cuatro cordones del hilo azul marino y cuatro cordones del hilo turquesa de un metro cada uno, usamos las tijeras y cortamos, luego medimos otro cordón turquesa de cuarenta centímetros y cortamos.
English Version
STEP BY STEP:
First Step:
We start by measuring with the ruler, Four strands of the navy blue thread and four strands of the turquoise thread of one meter each, we use the scissors and cut, then we measure another turquoise strand of forty centimeters and cut.
Segundo Paso:
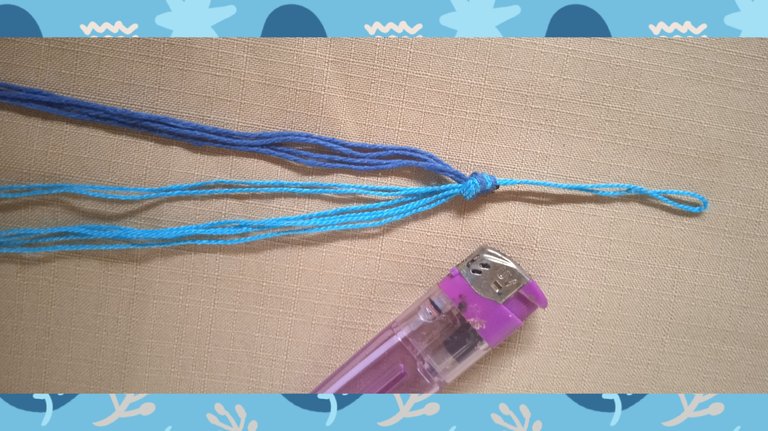
Una vez que tengo listos todos los cordones tomo el de cuarenta centímetros lo doblo a la mitad o sea veinte centímetros y lo coloco en el centro, pongo de un lado los Cuatro hilos turquesa y del otro lado los Cuatro hilos azul marino. Ahora junto los hilos y hago un nudo simple con todos, uso las tijeras y corto los excedentes dejando tres centímetros del hilo central, con el encendedor quemó todas las puntas y sello bien para empezar a tejer la labor.
English Version
Second step:
Once I have all the cords ready I take the one of forty centimeters I fold it in half or twenty centimeters and place it in the center, I put on one side the Four turquoise threads and on the other side the Four navy blue threads. Now I join the threads and make a simple knot with all of them, I use the scissors and cut the excess leaving three centimeters of the central thread, with the lighter I burn all the ends and seal well to begin to weave the work.
Tercero Paso:
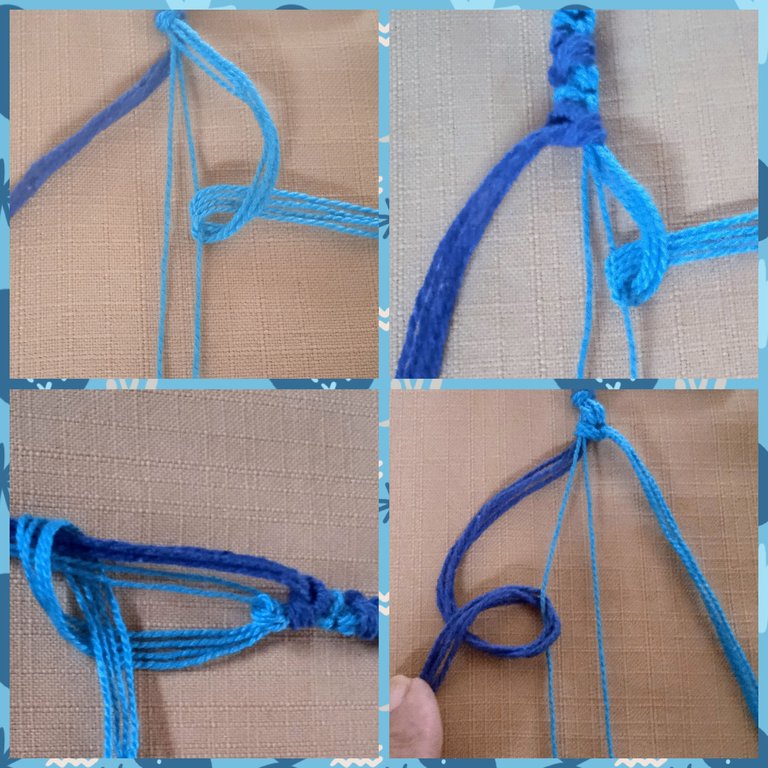
Para realizar este nudo de la técnica macramé, aquí lo voy a explicar llamando a los hilos turquesa derechos y los azul marino izquierdos; comienzo con los del lado derecho o sean los turquesa y voy a realizar un nudo alondra, este lo hago así: paso los cuatro hilos por debajo del hilo derecho central luego por encima me queda una forma de "P" con el mismo hilo abrazo el hilo central y lo saco así como se ve en la foto que muestro , ahora con los hilos azul marino hago el mismo procedimiento, tengo un nudo alondra de cada lado, después con los hilos turquesa abrazo los otros hilos y realizó un nudo alondra con todos, así.
English Version
Third step:
To make this knot of the macramé technique, here I am going to explain it by calling the right turquoise threads and the left navy blue ones; I start with the right side or the turquoise ones and I am going to make a lark knot, I do it like this: I pass the four threads under the right central thread and then over it I have a "P" shape, with the same thread I embrace the central thread and I pull it out as shown in the photo, now with the navy blue threads I do the same procedure, I have a lark knot on each side, then with the turquoise threads I embrace the other threads and I make a lark knot with all of them, like this.
Cuarto Paso:
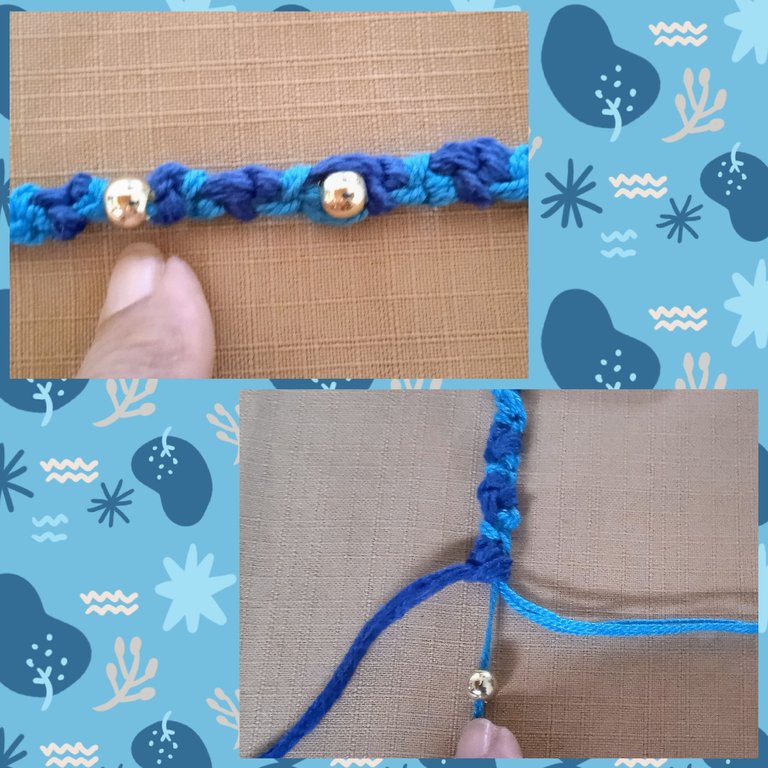
En este paso a una medida de seis centímetros en los hilos centrales inserto un balín y sigo tejiendo el punto insertando los balines a un espacio de dos centímetros entre balin, inserto tres en total y sigo tejiendo hasta tener un largo de dieciocho centímetros que es el largo deseado.
English Version
Fourth step:
In this step at a measure of six centimeters in the central threads I insert a ball and continue knitting the stitch inserting the balls at a space of two centimeters between balls, I insert three in total and continue knitting until I have a length of eighteen centimeters which is the desired length.
Quinto Paso:
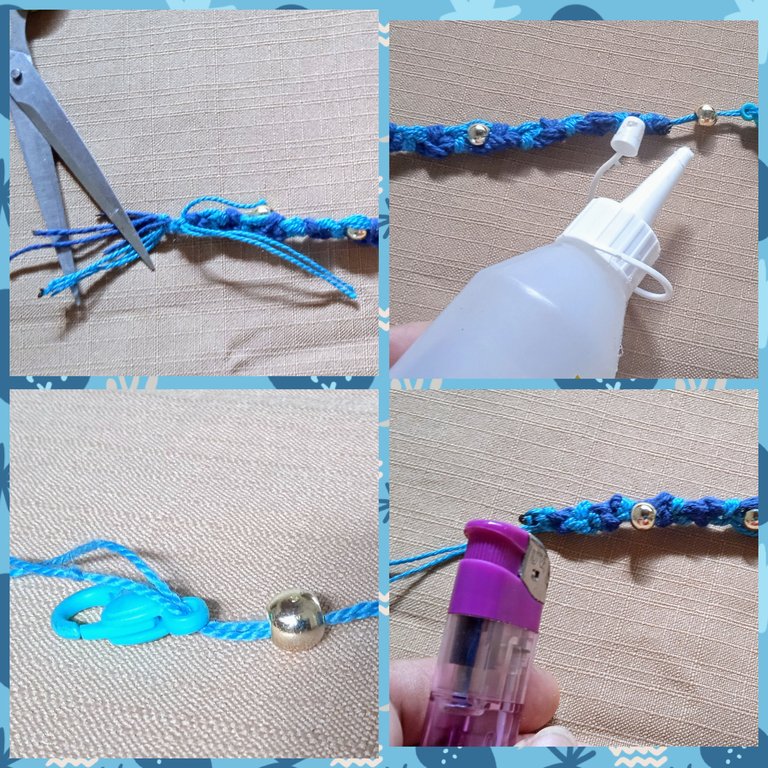
En este paso uso de nuevo las tijeras y corto los excedentes, quemó con el encendedor y sello las puntas, dejando solo los hilos centrales, en un extremo pongo un balín, coloco una argolla en los hilos y paso de nuevo por el balín, pará rematar halo hasta pegar bien para que la labor sea más prolija y sin detalles, del otro lado realizó un procedimiento parecido pero aquí coloco el cierre tipo caimán.
English Version
Fifth step:
In this step I use the scissors again and cut the excess, I burn with the lighter and seal the ends, leaving only the central threads, at one end I put a ball, I place a ring in the threads and pass again through the ball, to finish off I pull until I glue well so that the work is neater and without details, on the other side performed a similar procedure but here I place the alligator type closure.
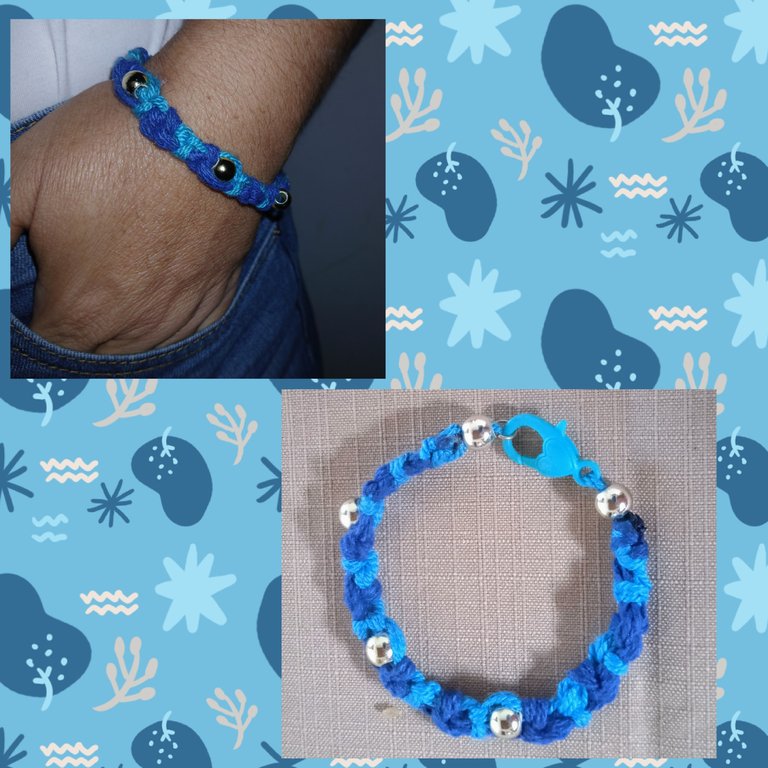
Aquí les muestro mi resultado final, espero que este proyecto sea del total agrado para ustedes y les sirva de inspiración para realizar otros.
English Version
Here I show you my final result, I hope you like this project and that it will inspire you to make others.
Todas las imágenes son de mi propiedad, capturadas con mi Samsung A15.📸 Editadas con GridArt versión gratuita.
Imagen principal y Banner final editado con Canva versión libre.
🔁Deeptraductor fue utilizado para esta publicación.📶
English Version
All images are my own, captured with my Samsung A15.📸 Edited with GridArt free version.
Main image and final Banner edited with Canva free version.
🔁Deeptranslator was used for this publication.📶
Este nudo es muy hermoso y las pulseras quedan muy bonitas, me gusta los azules que utilizaste le dan un estilo original 😉
Gracias amiga 🤗 por tu buen comentario 😉 me alegra te haya gustado 😊 la verdad lis azules me encantaron 💙 también.
Beautiful
Thank
I'm very comfortable following your bracelet tutorial because I love how you added bead to it.
I am glad it has been useful for you. Thanks for stopping by and commenting.
This design look amazing. I love it
Thank friends