*** BIENVENIDOS A MI BLOG 📝***
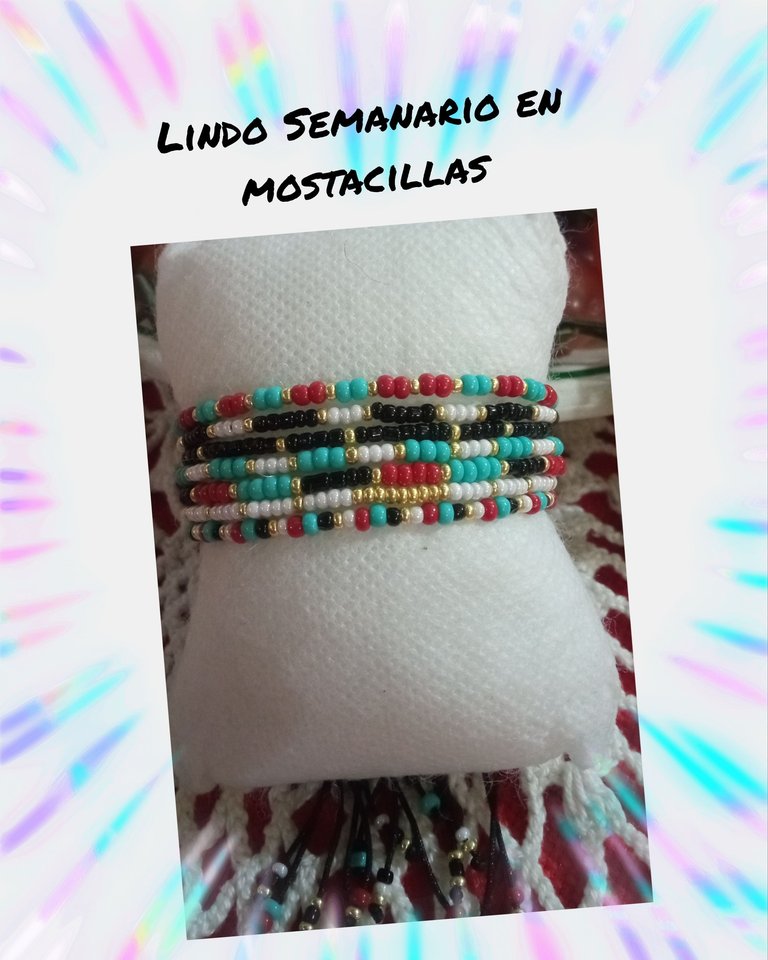
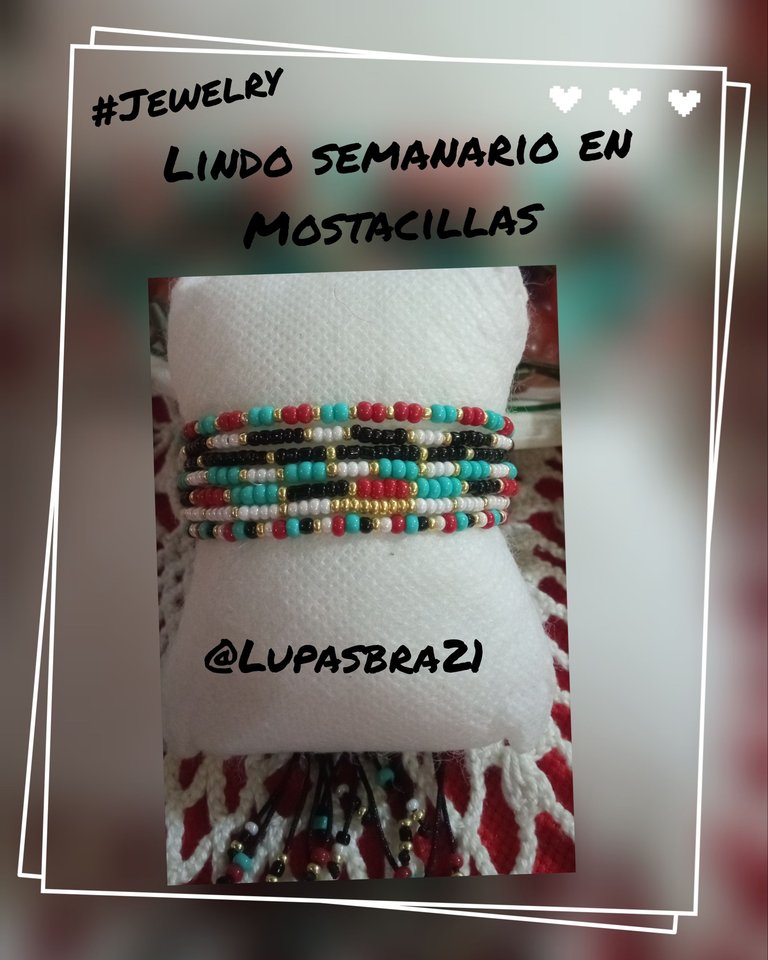
Hola, hola comunidad de #hive y mi querida comunidad de #Jewelry , deseo se encuentren todos bien y que hayan disfrutado de un buen fin de semana, así que les deseo un feliz comienzo de semana con la mejor actitud, por acá con ustedes les traigo el tutorial o paso a paso para elaborar una bella pulsera semanario en Mostacillas muy colorida , la verdad ya yo la habia realizado con cristales en un solo color y quedó muy elegante, pero esta quedo espectacular, bueno para mi ... Combine diferentes colores de mostacillas tanto calibradas como no calibradas y un poco más grandes y el resultado fue maravilloso, el color dorado en mostacilla le dió un toque bonito a la pulsera , espero de verdad sea de su agrado este proyecto , les invito lean hasta el final para que puedan detallar el paso a paso.
*** WELCOME TO MY BLOG 📝***.
Hello, hello #hive community and my dear community of #Jewelry, I hope you are all well and have enjoyed a good weekend, so I wish you a happy start of the week with the best attitude, here with you I bring you the tutorial or step by step to develop a beautiful bracelet weekly in very colorful beads, the truth I had already done it with crystals in one color and was very elegant, but this was spectacular, well for me ... I combined different colors of beads both calibrated and uncalibrated and a little larger and the result was wonderful, the golden color in beads gave a nice touch to the bracelet, I really hope you like this project, I invite you to read to the end so you can detail the step by step.
Materiales a utilizar
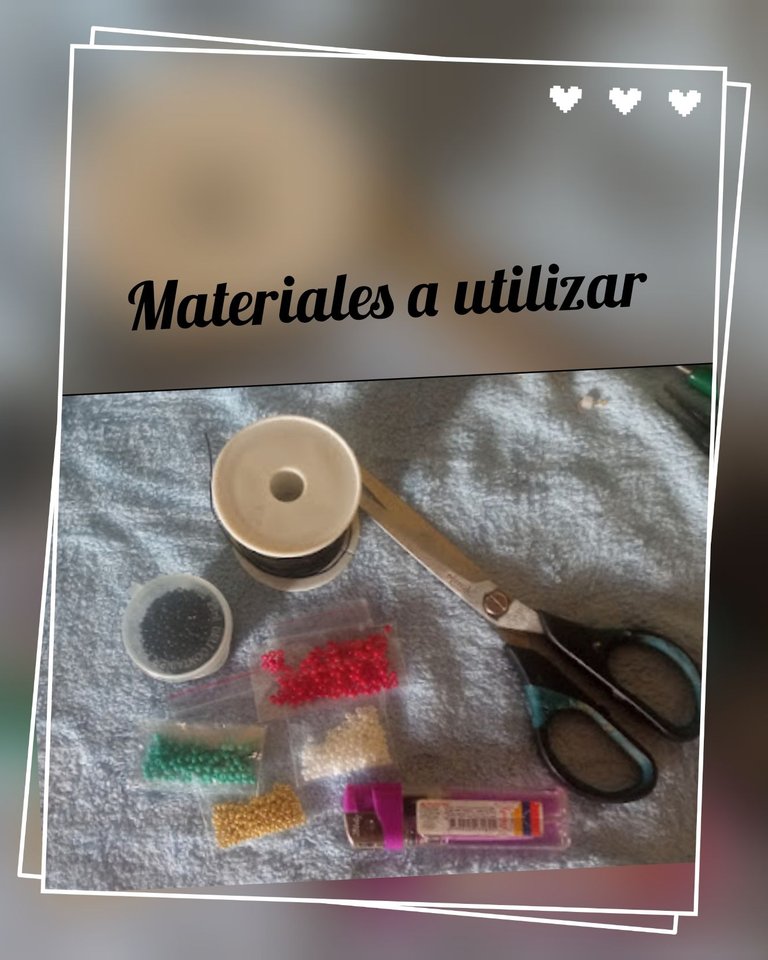
☑️ Mostacillas calibradas en colores blanca, negra, dorada.
☑️ Mostacillas no calibradas y un poco más grandes en colores Turquesas y rojas.
☑️ 3 metros de hilo chino negro.
☑️ Tijeras ✂️.
☑️ Yesquero o encendedor.
Materials to use
☑️ Calibrated beads in white, black and gold colors.
☑️ Non-calibrated and slightly larger beads in Turquoise and red colors.
☑️ 3 meters of black Chinese thread.
☑️ Scissors ✂️.
☑️ Tinder or lighter.
Tutorial o paso a paso.
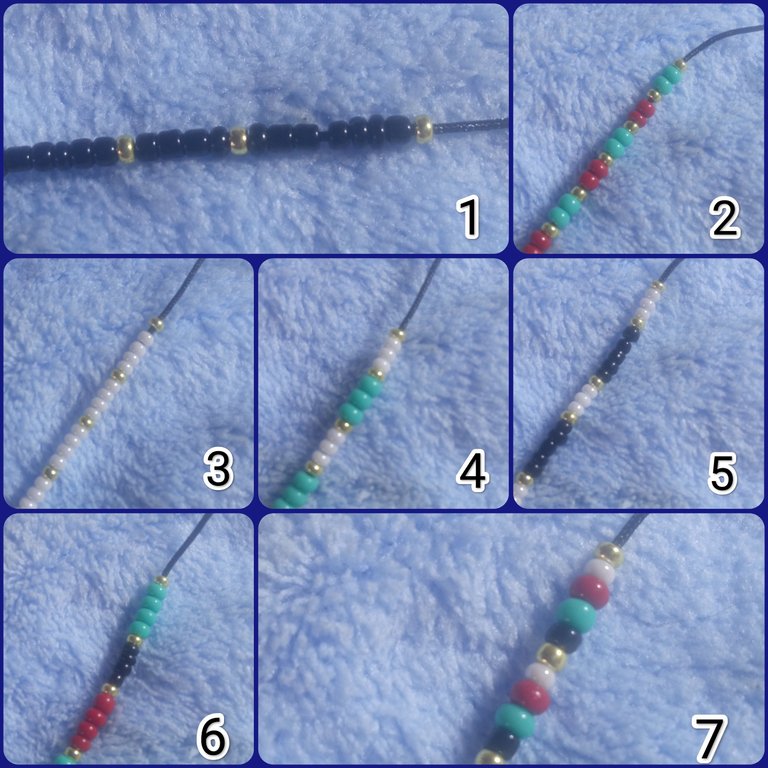
Empiezo cortando 7 piezas de hilo chino de 38 cm cada una , porqué 38 cm y no 35 cm cada una? Por que voy a quemar la punta de un extremo de los hilos y dejar lo más delgado posible para que puedan entrar bien las Mostacillas, en especial las calibradas y a veces debemos quemar mas de una vez y se pierde hilo,y asi evitamos que queden cortas las bases, luego empiezo a introducir las mostacillas, siempre en cada pieza empecé y terminé con una mostacilla dorada empiezo con las negras, luego las turquesas y rojas combinadas, luego las blancas y luego los otros colores siempre intercalando mostacillas doradas para darle un toque bonito a cada una de las piezas y así relleno 14 cm de mostacillas en cada pieza de hilo chino tanto de mostacillas calibradas como de no calibradas (1 al 7)
Tutorial or step by step.
I start by cutting 7 pieces of Chinese thread of 38 cm each, why 38 cm and not 35 cm each? Because I am going to burn the tip of one end of the threads and leave as thin as possible so that they can enter well the beads, especially the calibrated and sometimes we must burn more than once and thread is lost, and thus avoid that the bases are short, then I begin to introduce the beads, always in each piece I started and finished with a golden bead I start with the black ones, then the turquoise and red ones combined, then the white ones and then the other colors always interspersing golden beads to give a nice touch to each of the pieces and so I fill 14 cm of beads in each piece of Chinese thread both calibrated and uncalibrated beads (1 to 7).
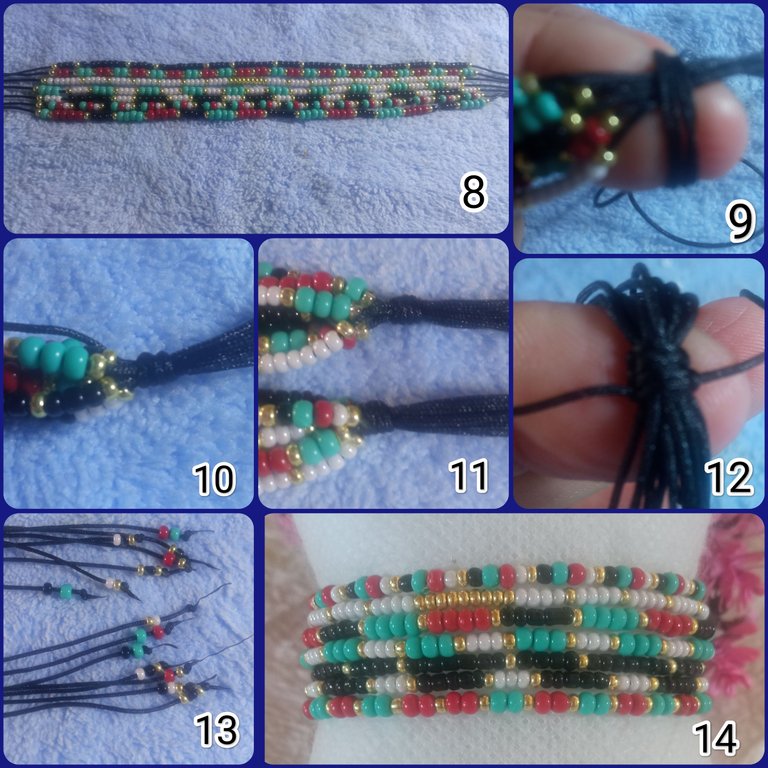
Luego junto todas las piezas corto un hilo chino de 15 cm y paso a realizar un nudo franciscano para asegurar todo , aprieto bien el nudo , corto el sobrante y quemo y aseguro bien , repito ese mismo proceso en el otro extremo de la pulsera, luego procedo a realizar el cierre de la pulsera con nudo corredizo plano macramé, realizo al rededor de 3 puntos , corto y quemo , luego en cada punta de las piezas 14 en total procedo a colocar mostacillas en unas dos y en otras 3 , realizo un nudo básico corto y quemo, verifico que este todo bien y doy por terminado este bello trabajo ( 8 al 14).
Then together all the pieces I cut a 15 cm Chinese thread and I make a Franciscan knot to secure everything, I tighten the knot well, cut the excess and burn and secure well, I repeat the same process at the other end of the bracelet, then I proceed to make the closure of the bracelet with flat macramé slip knot, I make around 3 points, cut and burn, then at each end of the 14 pieces in total I proceed to place beads in some two and in others 3, I make a basic knot cut and burn, I check that everything is okay and I finish this beautiful work (8 to 14).
Espero haya sido de su agrado este bello proyecto , todas las fotos son de mi autoría @Lupasbra21, fueron tomadas con mi teléfono inteligente Redmi 9, utilicé la aplicación polish para la edición de fotos y usé el traductor Deepl translate, sera hasta una próxima oportunidad que este nuevamente con ustedes compartiendo mis trabajos, un abrazo fuerte para todos 🫂.
I hope you liked this beautiful project , all the photos are of my authorship @Lupasbra21, were taken with my smartphone Redmi 9, I used the polish application for photo editing and used the translator Deepl translate, it will be until a next opportunity that I am again with you sharing my work, a big hug for all 🫂.
This are looking beautiful
Gracias amiga @patience2 , saludos
Is so pretty
Gracias
Congratulations @lupasbra21! You received a personal badge!
You can view your badges on your board and compare yourself to others in the Ranking
Gracias
Feliz cumpleaños en Hive @lupasbra21
🎉🎈🎂🎉🎈
Gracias.
De nada @lupasbra21
Por cierto, me di cuenta de que extraño tu voto de testigo 😪
Siéntete libre de apoyarme y votar por mí como testigo. ¡Sería muy apreciado!