
Hola, les voy a relatar más o menos como hice totalmente a mano con herramientas básicas de orfebrería este dije de geometría sagrada llamado el cubo de Metatron; su nombre es en honor al arcángel Metatron, es una figura tridimensional compuesta por 13 círculos unidos por líneas, que conectan con el centro, representando aspectos fundamentales de la realidad. Es usado para meditación, ya que su forma es una especie mandala, también es un poderoso amuleto o talismán de protección. Este símbolo es una puerta a la conciencia, permitiendo una comprensión más elevada del universo y todo lo que existe; da equilibrio, limpia los espacios de energías negativas, creando un entorno equilibrado y sagrado; se emplea para prácticas de curación espiritual, ayudando con el flujo energético del cuerpo y la alineación de los chakras; ayuda con la manifestación de deseos y objetivos. Si quieren saber más sobre el cubo de metatron pueden ver esta fuente, que es de donde saco la información: Gaia
Para la elaboración de esta pieza usé la técnica de calado sobre metal, que no es más que hacer cortes con una segueta de joyería, siendo un reto por la cantidad de cortes internos que lleva el Cubo de Metatron, ya antes había intentado hacerlo, pero sin éxito, otra cosa que quería comentar es que la única forma de sacar esta pieza adelante es hacerla en un diámetro de 5 cm o más, porque al abrir los huecos para hacer los cortes entre menos sea el espacio más difícil o imposible es el corte, asunto que también tiene que ver con el grosor de la sierra de la segueta.
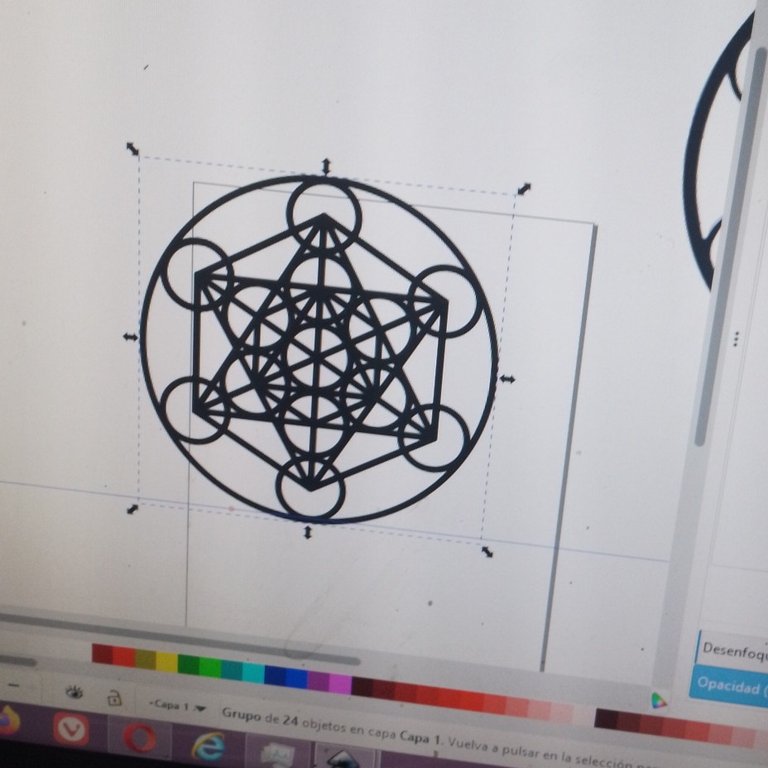
Lo primero que debía hacer es diseñar el cubo dentro de un programa de diseño para ajustar ciertas cosas como el diámetro de las líneas y poder visualizar mejor los espacios, ya que la figura debía imprimirla, me guie viendo distintas imágenes del cubo de Metatron y dibujándolo desde cero, para esto use Inkscape que es un programa de diseño vectorial gratuito que funciona muy bien para estas tareas y que uso habitualmente. Ya logrado el diseño lo puse del tamaño de 5 cm de diámetro e imprimí.
Sobre las herramientas y materiales que use para esta pieza estan:
- Lamina de bronce o laton de 1 mm de espesor y otra de 0.6 mm para el pasador de la cadena.
- Arco de segueta de joyeria y sierra 2/0
- Lija 220, 360 y 400, algunas limas.
- Fresa o broca de 0.7 mm para abrir huecos en la lamina.
- Dremel.
- Motor de banco, disco de tela para pullr y cera de pulir.
- Pega.
- Soplete orca, soldadura.
Proceso
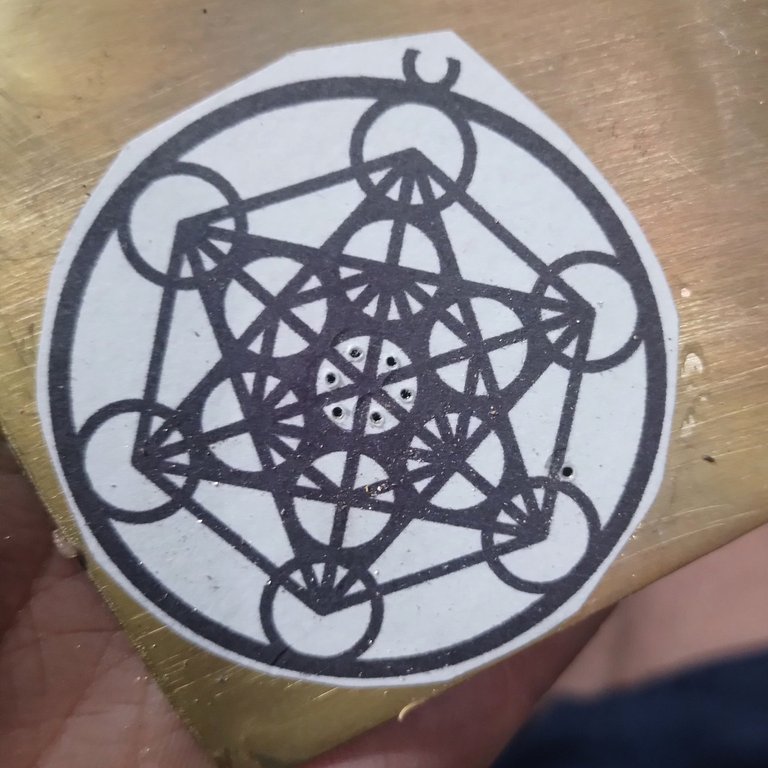
Pegué sobre la lámina de bronce de 1 mm la figura del Cubo de Metatrón; en este caso, la pega fue cola blanca. Dejé secar un poco y luego puse el diseño impreso sobre la lámina. Con mucho cuidado, después de que se pegó el diseño, agarré el Dremel y con la fresa de 0.7 mm abrí algunos huecos para hacer los cortes internos.
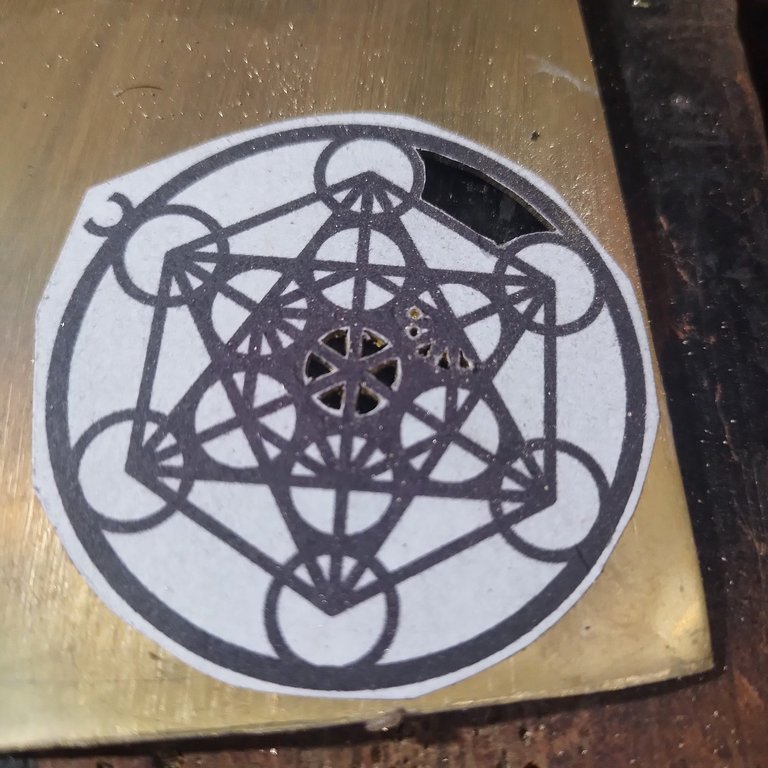
Tomé determinación y valentía para agarrar la segueta, monté las sierras de corte 2/0 y empecé con paciencia y seguridad a cortar parte de los espacios internos del Cubo de Metatrón.
Fui avanzando con los cortes internos, pero la lámina era muy grande para el tamaño del arco de segueta, así que corté la silueta exterior. El espesor de la lámina es lo bastante duro para hacer los cortes internos sin tener miedo a que se me deforme la superficie. Les cuento que, a pesar del reto que representaba esta figura, fui avanzando a buen ritmo.
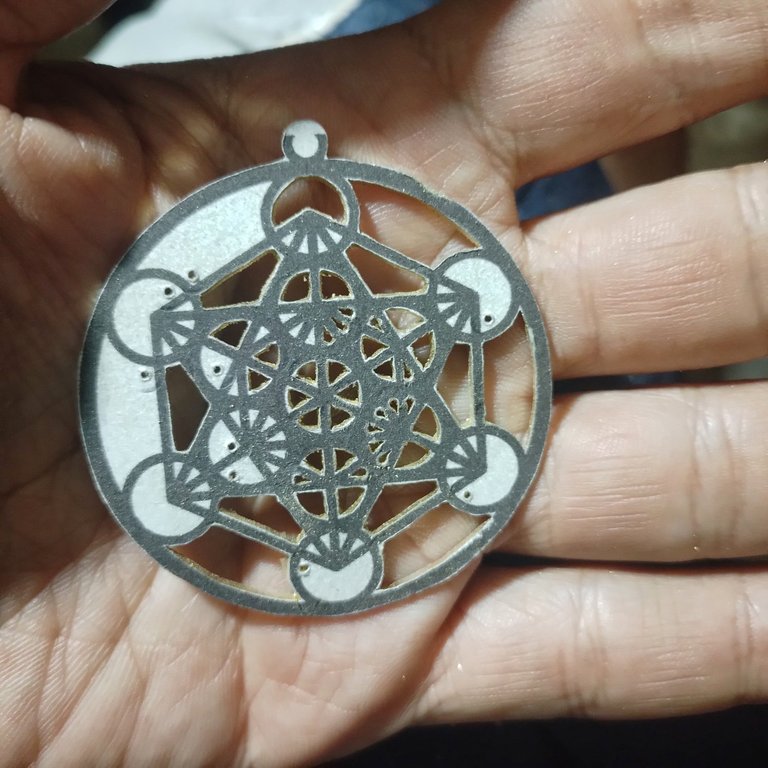
Después de unas horas y mucha paciencia, logré culminar los cortes internos. Falta remover la impresión para ir al proceso de corregir detalles.
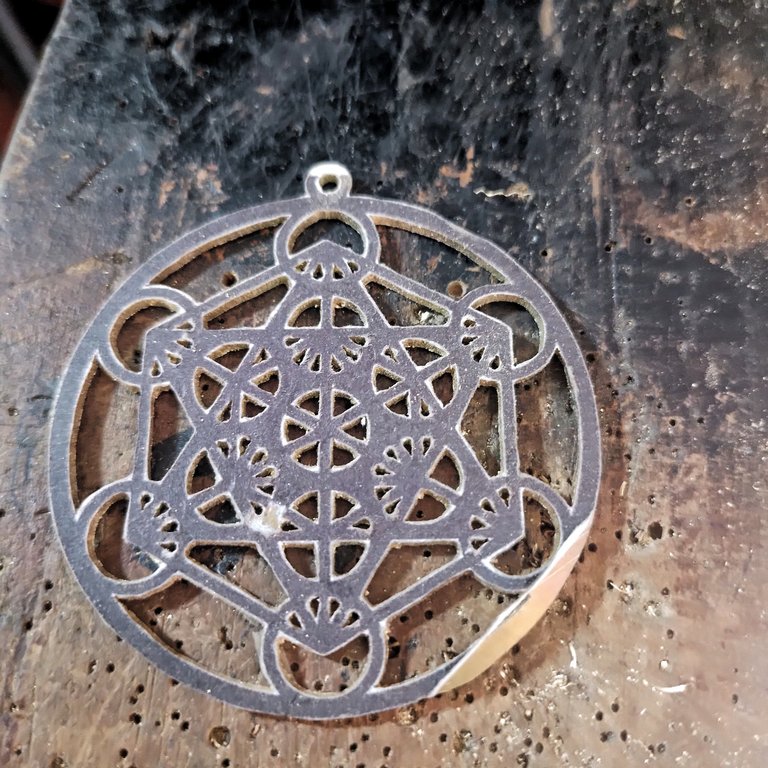
Deje la pieza en agua un rato, le quité la impresión, revelándose el gran trabajo hecho y me alegra que las correcciones que hay que hacer son mínimas. Estos arreglos básicamente consistieron en repasar con la segueta las áreas internas para que las líneas quedaran lo más rectas posible, limar las áreas exteriores y pasar lija 220, 360 y 400 para que la pieza quedara lista para pulir.
Se me olvidaba el pasador para la cadena o collar. Este lo hice con un recorte de lámina de 0.65 mm de espesor, pero antes agarré un pedazo de papel, lo doblé y con la tijera fui dando forma hasta que quedó un tamaño adecuado. Ahora que lo pienso, debería tener una plantilla para no perder el tiempo así.
Pues ya llevado al tamaño correcto, lo pegué y corté con la segueta, lo doblé con la pinza redonda de joyería y lo soldé con el soplete y un poco de soldadura. Lijé con las lijas desde la 220 a la 400.
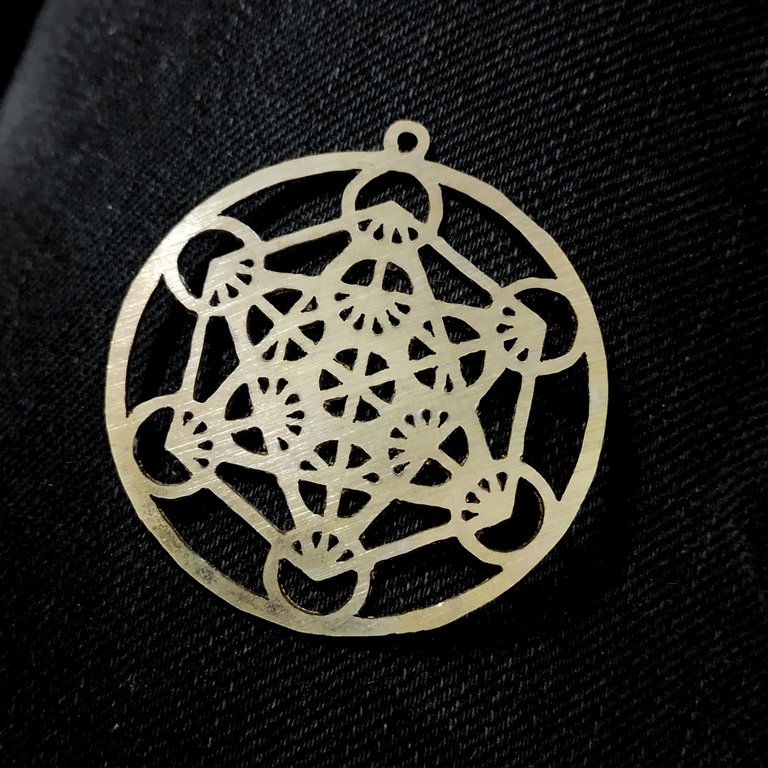
Para pulir usé el motor de banco y le puse su disco de tela, apliqué cera de pulir y le fui dando con cuidado. La pieza la aguanté con un trozo de cuero, que es lo que uso habitualmente. Una vez terminados todos los procesos de acabado, lo lavé con agua y jabón desengrasante.
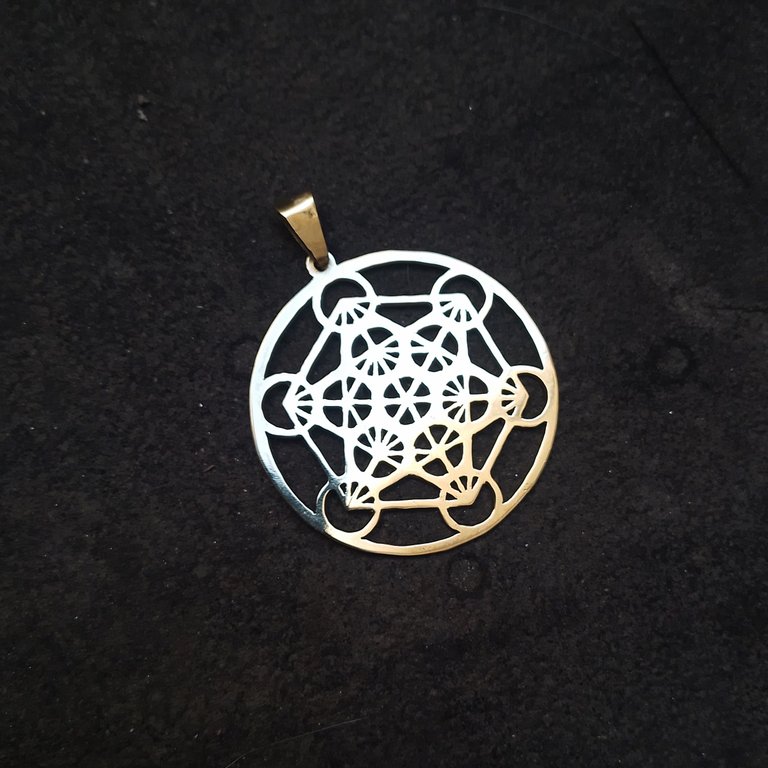
Después lo mandé a bañar en oro.
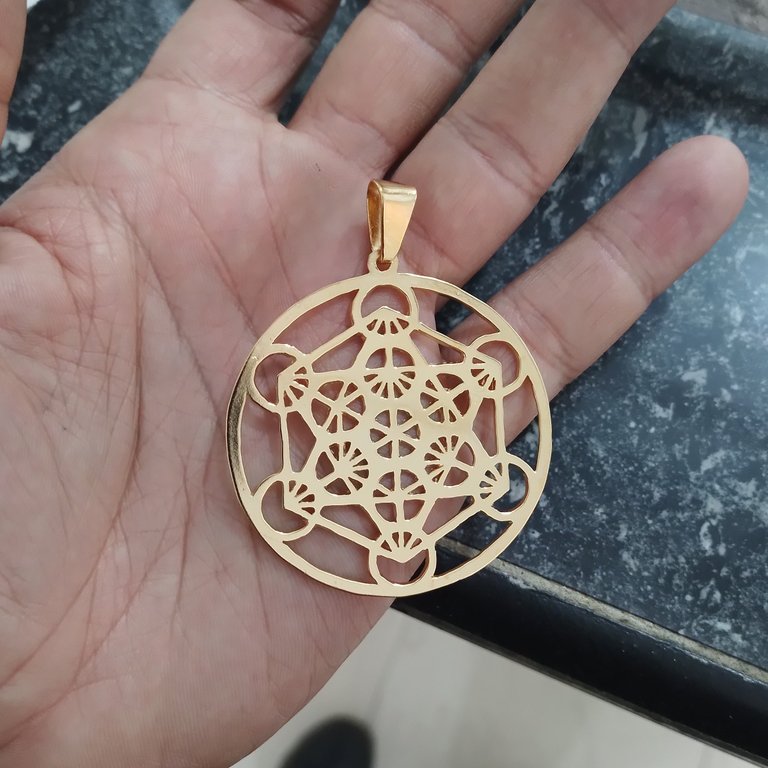
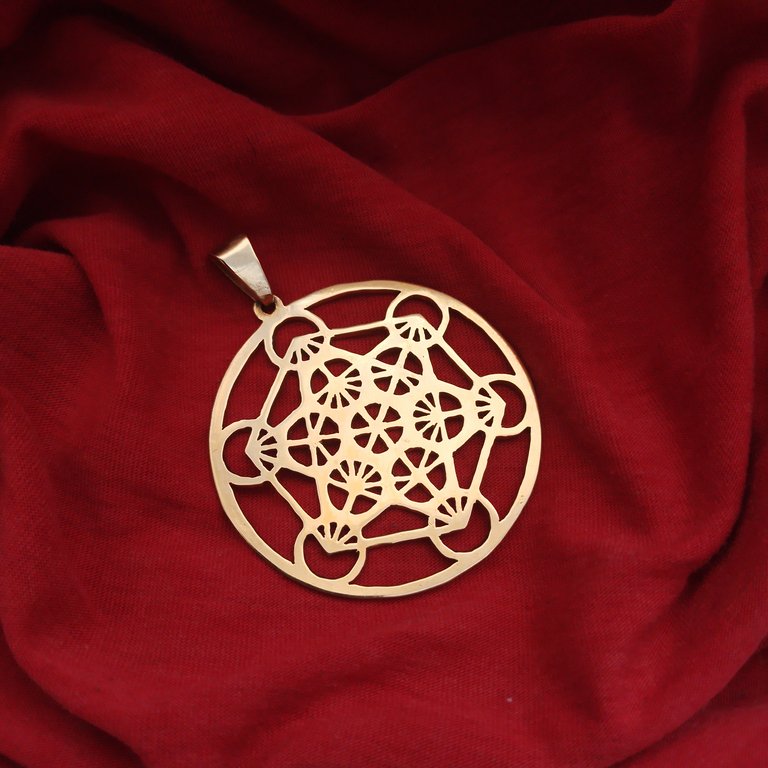
Este es el resultado final con el baño de oro aplicado.
Espero honestamente que les haya gustado esta pieza de joyeria junto a su proceso de elaboracion, me pueden dar sus valiosas opiniones en los comentarios y si gustan ver mas de mi trabajo en https://www.instagram.com/m16ueljoyas
///////////
#ENGLISH /// Google Translate
Hello, I'm going to tell you more or less how I made this sacred geometry pendant called Metatron's Cube, entirely by hand with basic goldsmithing tools. Its name is in honor of the archangel Metatron. It is a three-dimensional figure composed of 13 circles connected by lines, which connect to the center, representing fundamental aspects of reality. It is used for meditation, as its shape is a mandala-like shape, and it is also a powerful amulet or talisman of protection. This symbol is a gateway to consciousness, allowing a higher understanding of the universe and all that exists; it brings balance, cleanses spaces of negative energies, creating a balanced and sacred environment; it is used for spiritual healing practices, helping with the body's energy flow and chakra alignment. Help with manifesting wishes and goals. If you want to know more about Metatron's Cube, you can check out this source, which is where I got my information: Gaia
To make this piece, I used the openwork technique on metal, which is nothing more than making cuts with a jewelry saw. This is a challenge due to the number of internal cuts Metatron's Cube has. I had previously attempted to do this, but without success. Another thing I wanted to mention is that the only way to make this piece is to make it in a diameter of 5 cm or more, because when opening the holes to make the cuts, the smaller the space, the more difficult or impossible the cut is. This issue also has to do with the thickness of the saw blade.
The first thing I had to do was design the cube within a design program to adjust certain things like the diameter of the lines and better visualize the spaces. Since the figure had to be printed, I guided myself by looking at different images of Metatron's Cube and drawing it from scratch. For this, I used Inkscape, a free vector design program that works very well for these tasks and that I use regularly. Once I had the design, I sized it to 5 cm in diameter and printed it.
As for the tools and materials I used for this piece, they are:
- 1 mm thick bronze or brass sheet and another 0.6 mm thick sheet for the chain pin.
- Jeweler's hacksaw and 2/0 saw
- 220, 360, and 400 grit sandpaper, some files.
- 0.7 mm router bit or drill bit for opening holes in the sheet metal.
- Dremel.
- Bench motor, cloth grinding wheel, and polishing wax.
- Glue.
- Orca blowtorch, solder.
Process
I glued the Metatron's Cube figure onto the 1 mm bronze sheet; in this case, I glued it with white glue. I let it dry a bit and then applied the printed design to the sheet metal. Very carefully, after the design was glued, I grabbed the Dremel and, using the 0.7 mm bit, cut some holes to make the internal cuts.
I took the determination and courage to grab the hacksaw, set up the 2/0 miter saws, and patiently and confidently began to cut out some of the internal spaces of Metatron's Cube.
I made progress with the internal cuts, but the sheet metal was too large for the size of the hacksaw bow, so I cut the outer silhouette. The thickness of the sheet metal is hard enough to make the internal cuts without fear of warping the surface. I can tell you that, despite the challenge this figure represented, I made good progress.
After a few hours and a lot of patience, I managed to complete the internal cuts. I need to remove the print to move on to correcting details.
I left the piece in water for a while, removed the print, revealing the great work I'd done, and I'm pleased that the corrections needed to be made are minimal. These adjustments basically consisted of going over the internal areas with the hacksaw to make the lines as straight as possible, filing the external areas, and sanding with 220, 360, and 400 grit sandpaper to get the piece ready for polishing.
I had forgotten the pin for the chain or necklace. I made this from a 0.65 mm thick sheet metal cutout, but first, I grabbed a piece of paper, folded it, and shaped it with scissors until it was the right size. Now that I think about it, I should have a template so I wouldn't waste time like this.
Once I got it to the correct size, I glued and cut it with the hacksaw, bent it with the round jewelry pliers, and soldered it with the blowtorch and a little solder. I sanded with 220 to 400 grit sandpaper.
To polish, I used the bench polisher and attached its cloth disc. I applied polishing wax and polished it carefully. I held the piece with a piece of leather, which is what I usually use. Once all the finishing processes were completed, I washed it with water and degreasing soap.
Then I sent it to be gold-plated.
This is the final result with the gold plating applied.
I sincerely hope you enjoyed this piece of jewelry and its creation process. Please share your valuable feedback in the comments. I'd love to see more of my work at https://www.instagram.com/m16ueljoyas
Sinceramente no se qué decir, me quedé sin palabras. Pero que tamaña belleza la de este símbolo, su significado y por supuesto el trabajo que has realizado.. Es sencillamente hermoso.
Gracias. Fue un reto duperado
Tremendo reto, me gustó mucho ese símbolo. Voy a estudiarlo a profundidad.
Hágalo en el post hay un enlace si quieres más información.
This pendant you made is absolutely stunning, an elegant gold color.
Hermoso amigo, tienes in gran talento para que te quede perfecto al.limar y al pulir, excelente trabajo 🤩✌️
Gracias, Me daba miedo pero la final fue bastante fluido el trabajo y salió bien
Oh my goodness 😳, this is absolutely 😍, you are so skilled in making this type of stuff. I wish i can make this too🥲
This is really amazing
Creativity indeed
Thank you friend
You are welcome