Esp-Eng Pulsera de Cristales en dos colores.//Crystal Bracelet in two colors.
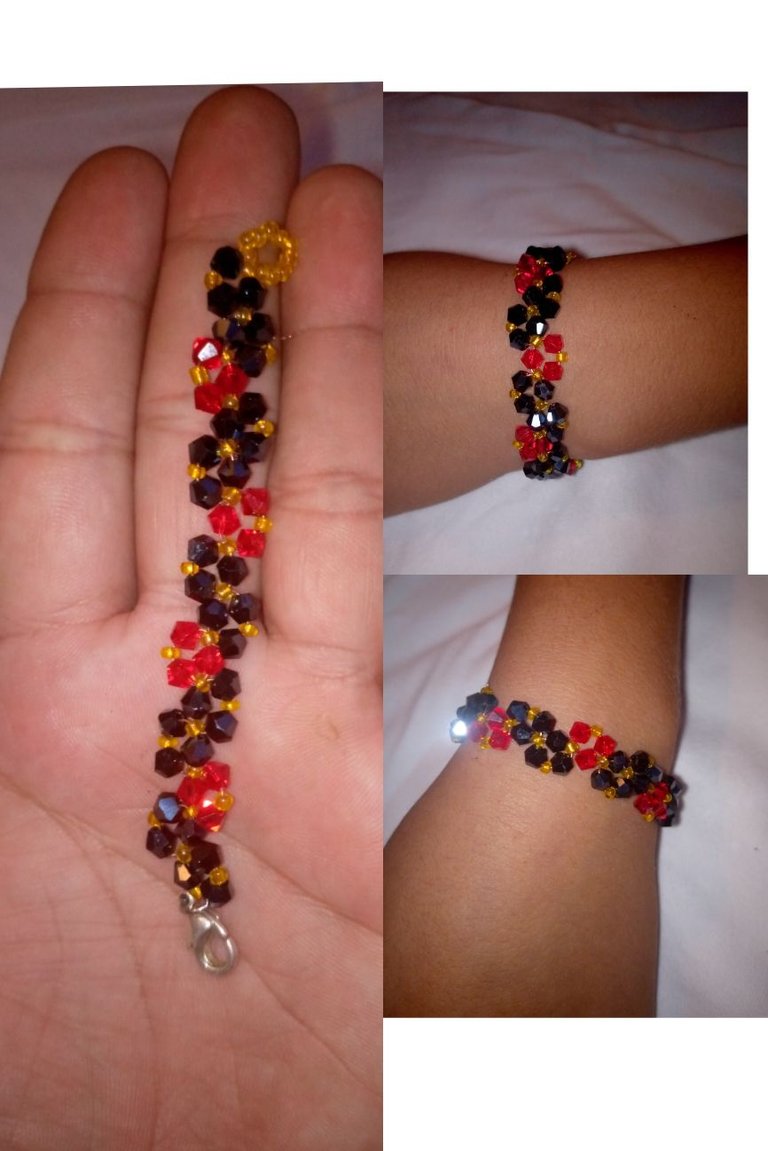
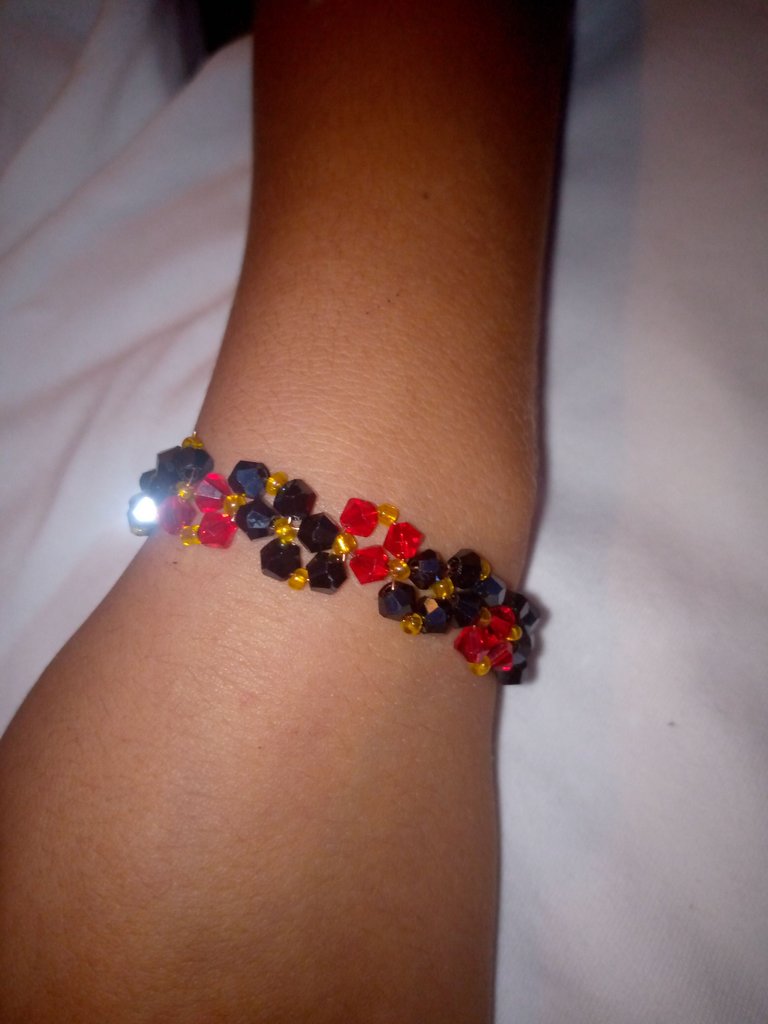
Hola muy buenas noches mis queridos amigos hivers y de esta hermosa comunidad creativa de #jewelry, cómo están? espero que muy bien feliz inicio de día de reyes para todos espero que todavía estén disfrutando de la compañía de sus familiares y amigos más queridos hoy me encuentro nuevamente por acá por esta comunidad para compartirles un tutorial más y en esta ocasión traigo el paso a paso para realizar una hermosa pulsera de cristales en dos colores muy sencilla pero elegante y sobre todo muy fácil de realizar espero que les guste este paso a paso y sin más que decirles les iré a continuación los materiales que utilicé para esta hermosa creación.
Hello, good evening, my dear winter friends and this beautiful creative #jewelry community, how are you? I hope very well, happy start to Kings Day to everyone, I hope you are still enjoying the company of your dearest family and friends. Today I am here again in this community to share one more tutorial with you and this time I bring you the step by step To make a beautiful crystal bracelet in two colors, very simple but elegant and above all very easy to make, I hope you like this step by step and without further ado, I will show you below the materials I used for this beautiful creation.
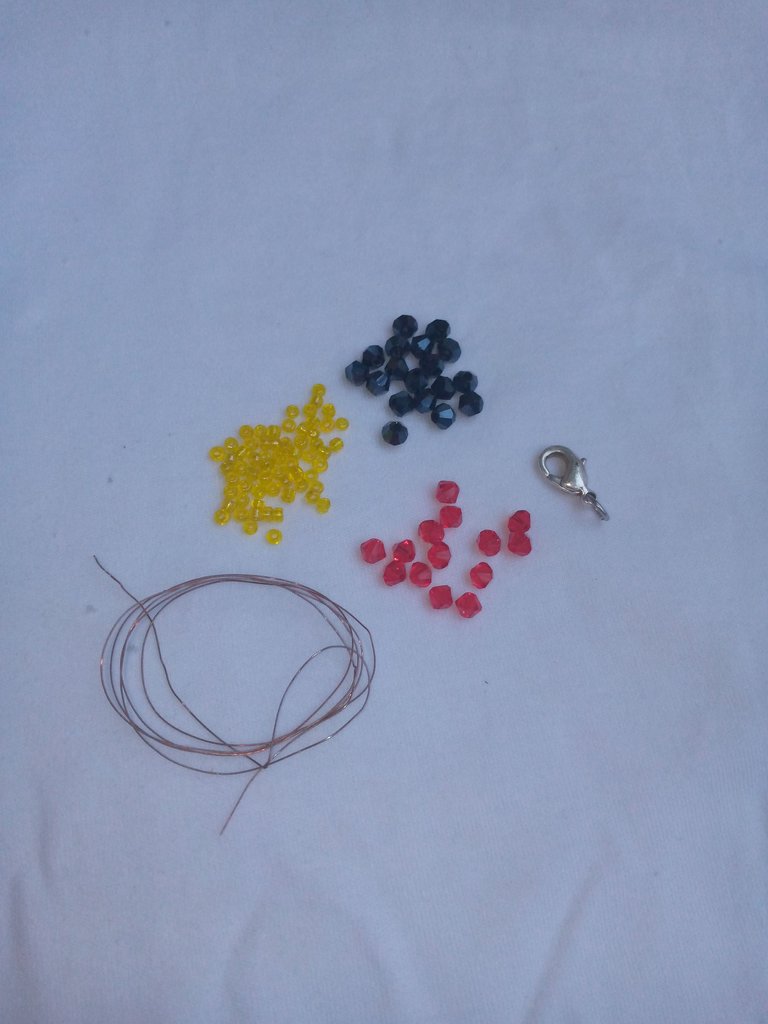
Materiales
💎 Cristales azul marino
💎 Cristales rojos
💎 Tanza metálica
💎 Mostacillas amarillas
💎 Pasador pico de loro
Materials
💎 Navy blue crystals
💎 Red crystals
💎 Metallic tanza
💎 Yellow beads
💎 Parrot beak pin
paso a paso
comencemos!
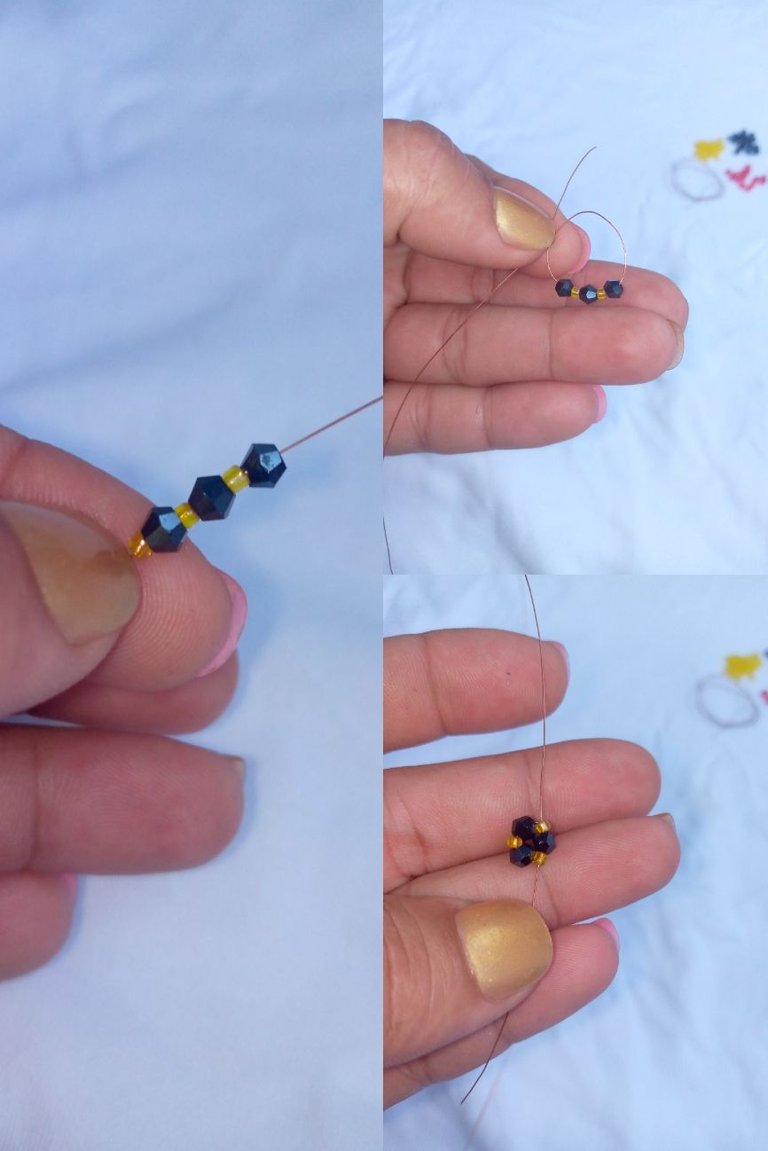
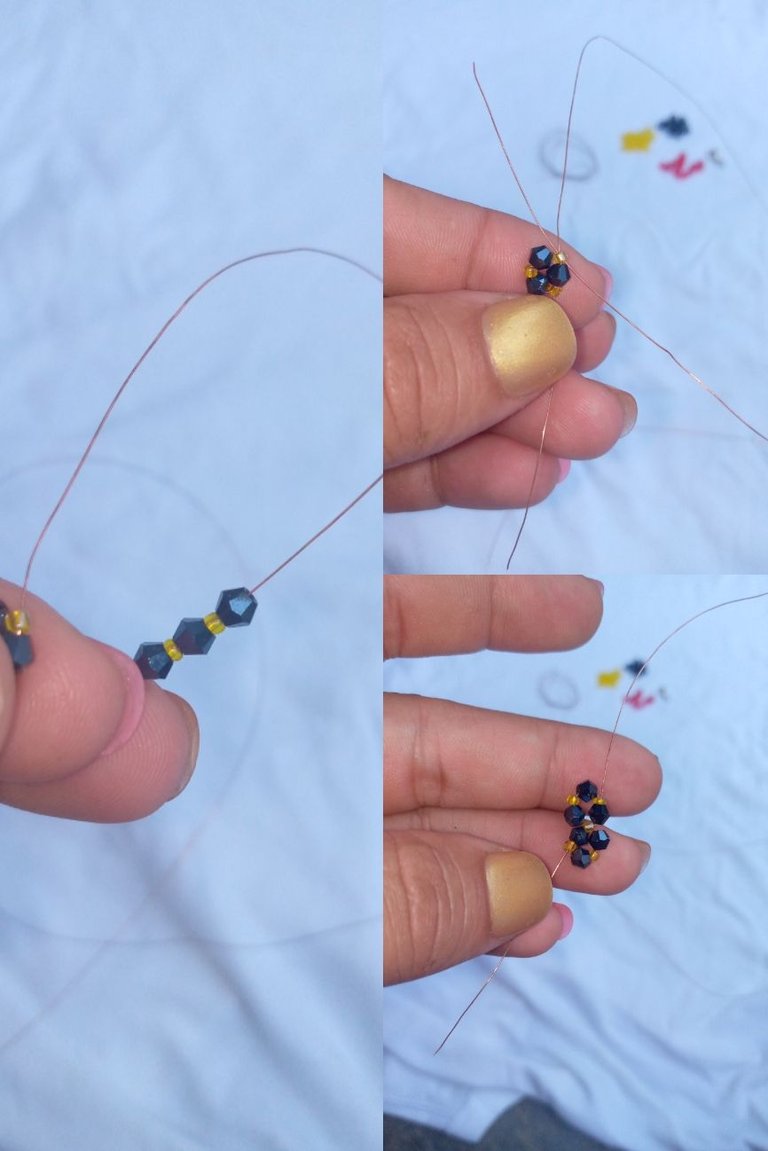
Bueno mis queridos amigos como ya les dije este paso a paso es muy fácil de realizar y para comenzar lo primero que realice fue cortar aproximadamente un metro de la tanza metálica para luego pasar por una de sus puntas una mostacilla amarilla, un cristal azul marino, una mostacilla amarilla un cristal azul marino y así hasta colocar tres cristales azul marino y tres mostacillas amarillas esto lo bajé hasta el extremo de la otra punta de la tanza metálica para luego pasar una de las puntas por una de las mostacillas de la punta y formar cun aro o triángulo con los cristales.
Step by Step
let's get started!
Well, my dear friends, as I already told you, this step by step is very easy to do and to begin, the first thing I did was cut approximately one meter of the metal string and then pass a yellow bead, a navy blue crystal, through one of its ends, a yellow bead a navy blue crystal and so on until I placed three navy blue crystals and three yellow beads I lowered this to the end of the other end of the metal string and then passed one of the ends through one of the beads at the end and formed with a ring or triangle with crystals.
El siguiente paso que realicé fue colocar la misma secuencia de los cristales azul marino y coloqué en esta ocasión solo dos mostacillas amarillas y lo hice en el siguiente orden primero coloqué un cristal luego una mostacilla un cristal una mostacilla Y por último un cristal azul marino esto pasó la punta de la tanza metálica por la mostacilla amarilla de donde está saliendo la tasa metálica de manera contraria y formo mi siguiente triángulo con los cristales cómo me queda la punta en la en el centro de los dos triángulos paso la danza metálica por un cristal azul y una mostacilla amarilla.
The next step I did was to place the same sequence of the navy blue crystals and on this occasion I placed only two yellow beads and I did it in the following order, first I placed a crystal then a bead a crystal a bead And finally a navy blue crystal this I passed the tip of the metal rope through the yellow bead from which the metal cup is coming out in the opposite way and I formed my next triangle with the crystals, how does the tip look in the center of the two triangles, I pass the metallic dance through a crystal blue and a yellow bead.
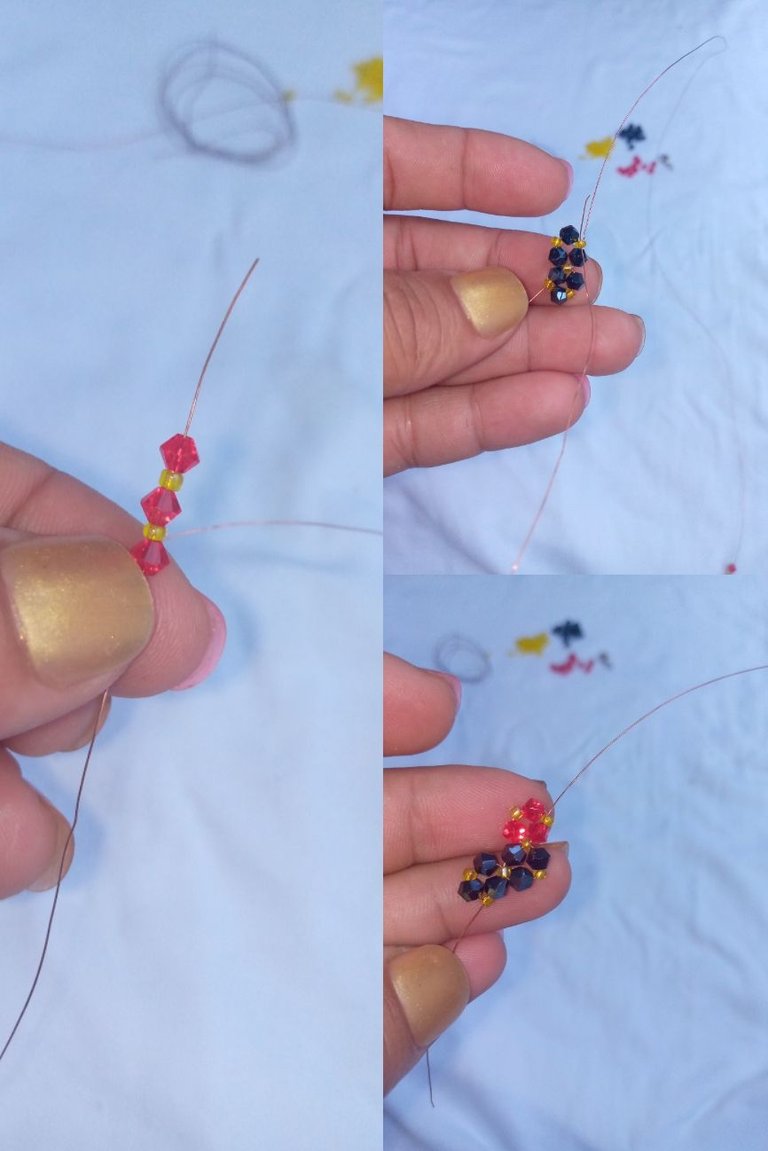
Ahora en este paso cambio el color de los cristales y coloco la misma cantidad de los cristales pero ahora en color rojo de igual manera de la misma secuencia anteriormente primero el cristal rojo luego la mostacilla amarilla el cristal rojo la mostacilla amarilla Y por último en cristal rojo y paso nuevamente a la punta por la mostacilla dónde está saliendo la punta de la tanza metálica y formo ahora un triángulo de color rojo.
Now in this step I change the color of the crystals and place the same amount of crystals but now in red in the same way in the same sequence as before, first the red crystal then the yellow bead the red crystal the yellow bead And finally in crystal red and I pass again to the tip through the bead where the tip of the metal string is coming out and now form a red triangle.
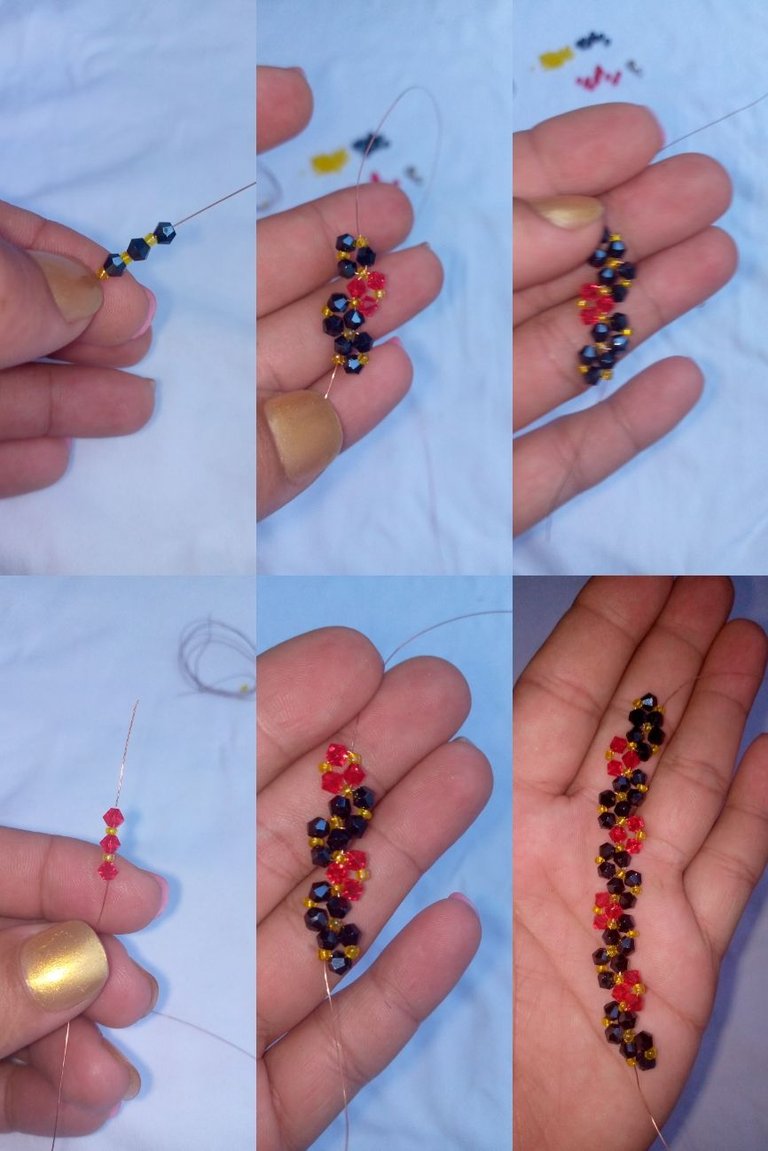
Aquí nuevamente cambió el color de los cristales y coloco nuevamente el color azul marino hago el mismo procedimiento colocando los cristales y las mostacillas en el mismo orden y este paso lo voy repitiendo hasta obtener el largo adecuado para mi pulsera.
Here again I changed the color of the crystals and placed the navy blue color again. I did the same procedure by placing the crystals and the beads in the same order and I repeated this step until I obtained the appropriate length for my bracelet.
Ya con el largo listo coloqué a la tanza metálica 10 mostacillas amarillas y como está saliendo de una mostacilla amarilla paso nuevamente por esa amarilla de manera contraria para así formar un aro amarillo de ese lado y amarro muy bien para que no se me suelte más adelante de igual manera del otro lado coloqué el pasador directamente del arito con el resto de la tanza que dejé sobrante y también aseguré muy bien y listo.
With the length ready, I placed 10 yellow beads on the metal rope and since it is coming out of a yellow bead, I pass through that yellow one again in the opposite way to form a yellow ring on that side and I tie it very well so that it does not come loose later. In the same way, on the other side I placed the pin directly from the ring with the rest of the string that I left left over and I also secured it very well and that's it.
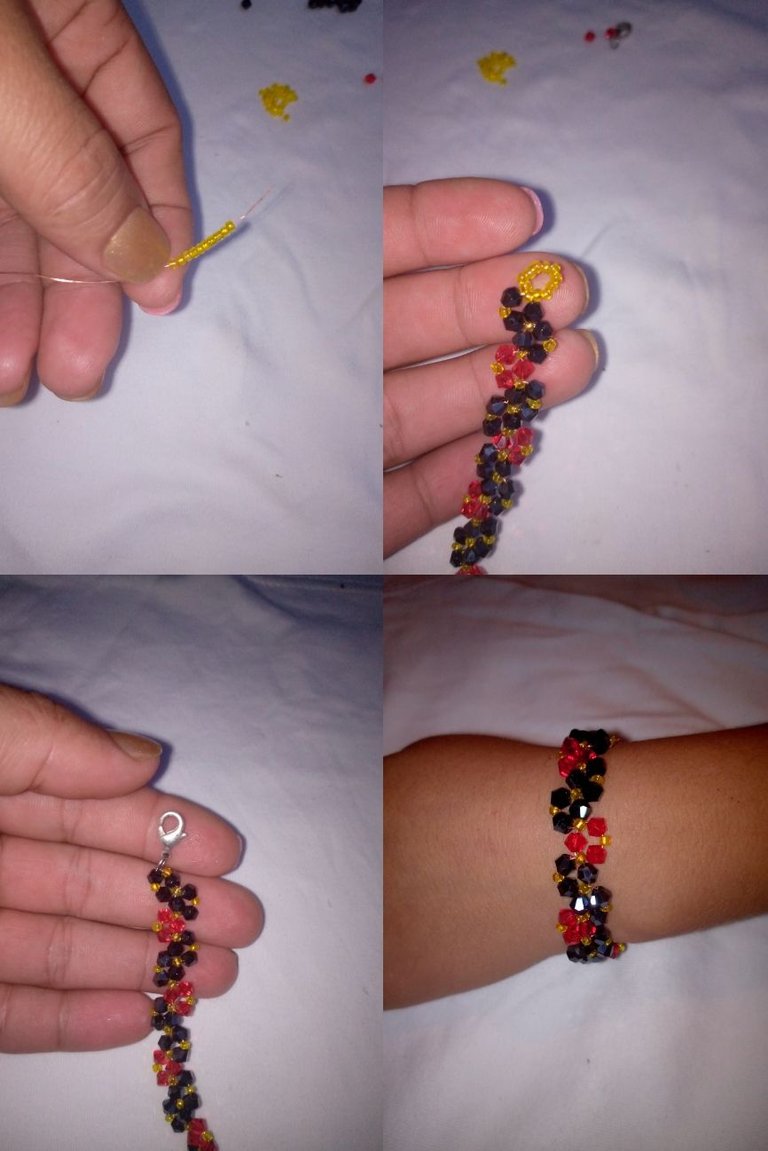
Así terminé esta hermosa pulsera de cristales en dos colores espero que les haya gustado este tutorial y paso a paso al igual que a mí me despido de ustedes hasta una próxima ocasión y muchas gracias a todos por visitar mi blog.
This is how I finished this beautiful crystal bracelet in two colors. I hope you liked this tutorial and step by step, just like me. I say goodbye to you until the next time and thank you all very much for visiting my blog.

Todas las fotos son de mi autoría
@mariaj151305
All photos are my author
@mariaj151305
Un interesante y bello trabajo manual que requiere no solo destreza, también mucha creatividad. Saludos, @mariaj151305
Muy lindo trabajo, el rojo y negro siempre van bien juntos. Saludos 😊
WOW! The design of this bracelet is impressive. It is colorful, shining and attractive. Great job. Thank you for sharing this.
Gracias a ti colmena 🤗