Hola amigos de Jewelry 💎, un cordial saludo para esta linda comunidad llena de creatividad y talento.
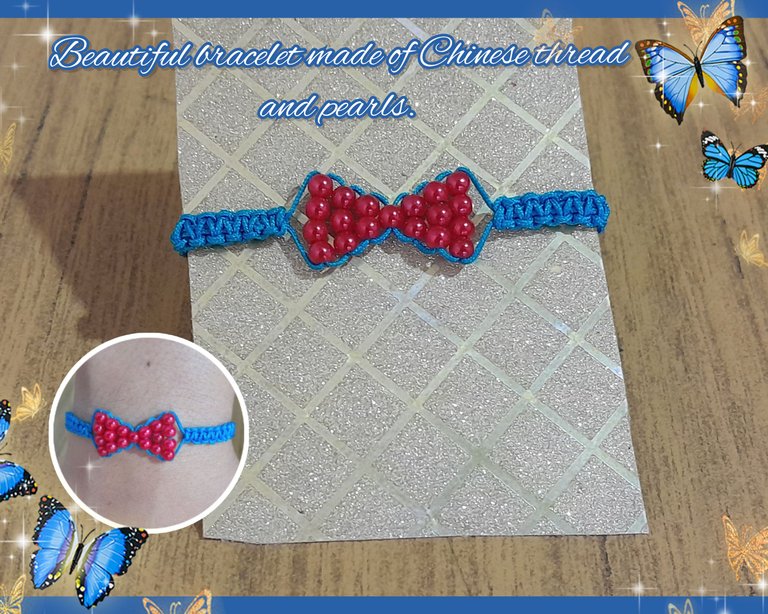
Como siempre es un placer poder compartir con ustedes, hoy les traigo un nuevo proyecto, una linda pulsera elaborada en hilo chino, su decoración central es un hermoso lazo hecho con perlas, no confiaba tanto en la combinación del rojo y el azul, pero me encantó el resultado final, el hilo chino azul hizo resaltar más el color rojo de las perlas.
Es un lindo accesorio para lucir con cualquier atuendo, lo mejor es que es muy fácil de hacer, tiene un toque jovial y romántico, aquí te dejo el paso a paso para hacerla.
Hello friends of Jewelry 💎, a warm greeting to this beautiful community full of creativity and talent.
As always it's a pleasure to share with you, today I bring you a new project, a nice bracelet made in Chinese thread, its central decoration is a beautiful bow made with pearls, I didn't trust so much in the combination of red and blue, but I loved the final result, the blue Chinese thread made the red colour of the pearls stand out more.
It is a nice accessory to wear with any outfit, the best thing is that it is very easy to make, it has a jovial and romantic touch, here you have the step by step to make it.

Materiales| Materials

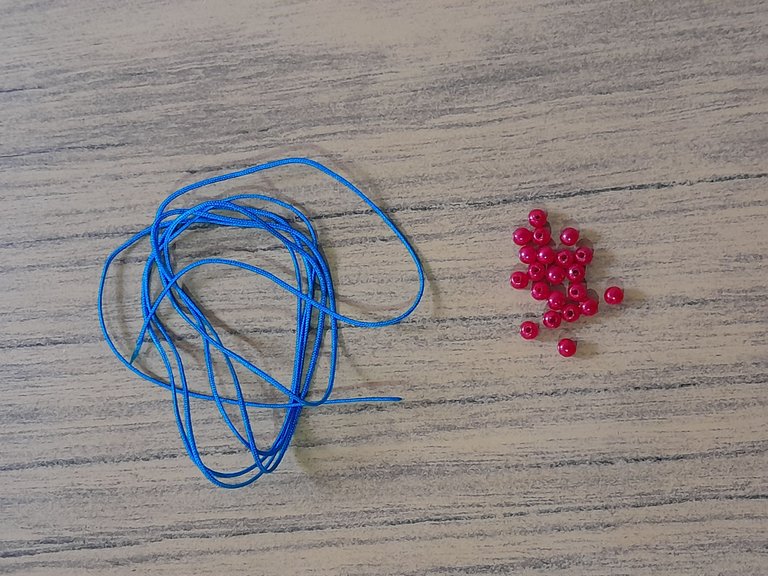
Para este proyecto necesitaremos los siguientes materiales:
🎀 1.20 metros de hilo chino.
🎀 19 perlas rojas.
For this project we will need the following materials:
🎀 1.20 metres of Chinese thread.
🎀 19 red pearls.
Para este proyecto no necesitaremos tantos materiales y el resultado es muy lindo, también podemos usar los materiales que más nos gusten.
For this project we won't need so many materials and the result is very nice, we can also use the materials we like the most.

Paso 1| Step 1

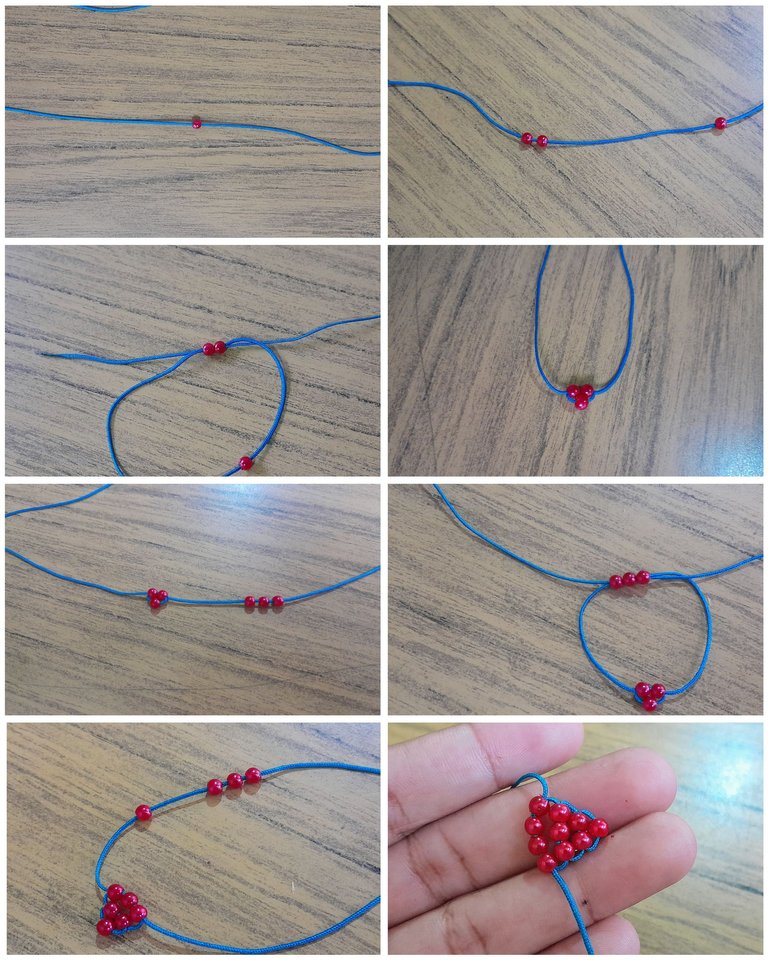
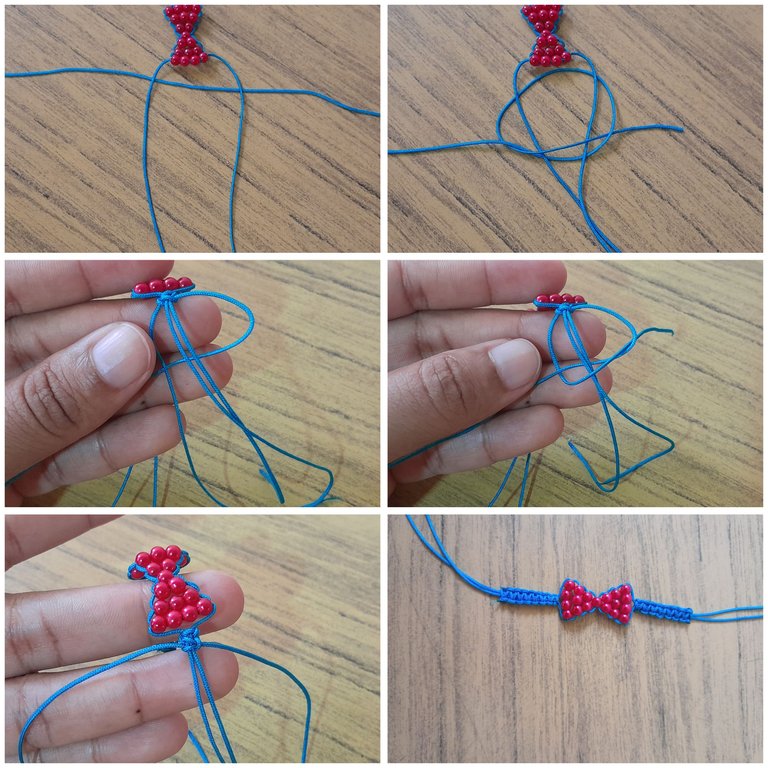
Cortamos dos pedazos de hilo cada uno de 30 centímetros, introducimos una perla y la llevamos a la mitad del hilo. Luego introducimos dos perlas por uno de los lados del hilo, cruzamos por dentro el otro lado del hilo como se ve en la imagen. Luego introducimos tres perlas y repetimos el mismo procedimiento, cerrando con cuatro perlas, nos quedará un triángulo de perlas.
We cut two pieces of thread each of 30 centimetres, insert a pearl and bring it to the middle of the thread. Then we introduce two pearls on one side of the thread, we cross the other side of the thread as shown in the picture. Then we introduce three pearls and repeat the same procedure, closing with four pearls, we will have a triangle of pearls.

Paso 2| Step 2

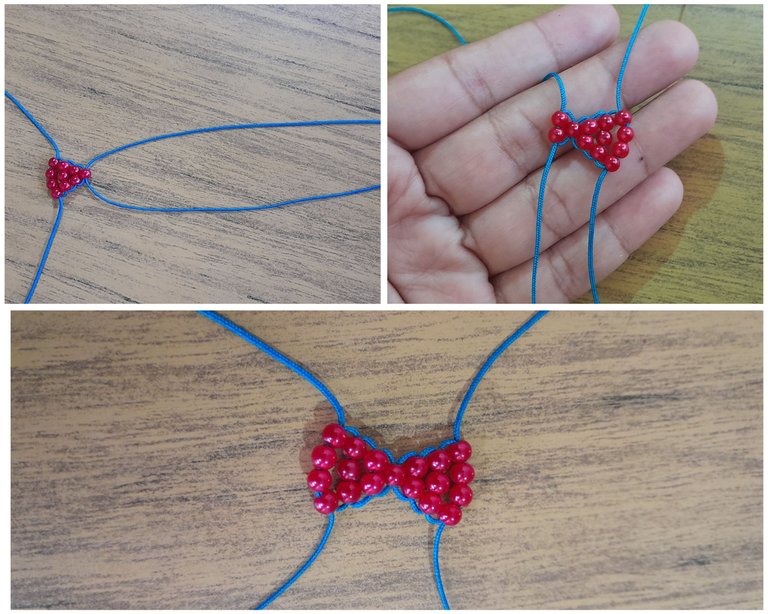
Pasamos el otro hilo por dentro de la primera mostacilla del triángulo, introducimos en uno de los hilos dos perlas y el otro hilo lo cruzaremos también por las dos perlas, hacemos lo mismo que en el paso anterior hasta completar un hermoso lazo de perlas.
We pass the other thread through the inside of the first bead of the triangle, we introduce two beads in one of the threads and we cross the other thread also through the two beads, we do the same as in the previous step until we complete a beautiful loop of beads.

Paso 3| Step 3

Con un hilo de 15 centímetros vamos a pasar por la parte de abajo de los hilos sobrante de nuestro lazo de perlas, con un lado del hilo haremos un semicírculo en este caso del lado derecho, con el hilo del lado izquierdo vamos hacer otro semicírculo, pasamos el hilo del lado derecho por dentro del semicírculo del lado izquierdo, el hilo izquierdo lo pasamos por arriba de los hilos centrales y por dentro del semicírculo derecho, halamos hasta ajustar, ahora el hilo izquierdo es el que estará por debajo repetimos el mismo procedimiento hasta completar un tejido, recordando que el hilo con el que comenzamos siempre ira por debajo.
Para el cerrador hice el mismo tejido de nudos planos, con un hilo de 15 centímetros,corte el hilo sobrante y queme las puntas.
Espero les haya gustado, esta pulsera es sencilla y muy bonita, también la podemos hacer con otro tipos se materiales cómo, chaquiras, cristales y otros tipos de hilos, todo queda en nuestra preferencia.
With a thread of 15 centimetres we are going to pass through the bottom of the excess threads of our pearl loop, with one side of the thread we will make a semicircle in this case of the right side, with the thread of the left side we are going to make another semicircle, we pass the thread of the right side through the inside of the semicircle of the left side, the left thread we pass it above the central threads and inside the right semicircle, we pull until adjusting, now the left thread is the one that will be below, we repeat the same procedure until completing a weave, remembering that the thread with which we started always will go below.
For the closer I did the same weaving of flat knots, with a 15 centimetre thread, cut the excess thread and burn the ends.
I hope you liked it, this bracelet is simple and very pretty, we can also make it with other types of materials such as beads, crystals and other types of threads, everything is in our preference.

Presentación final| Final presentation

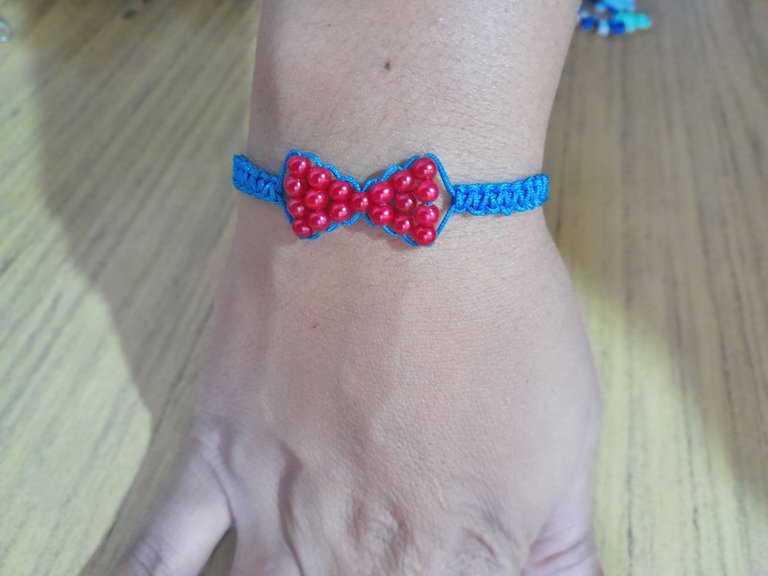
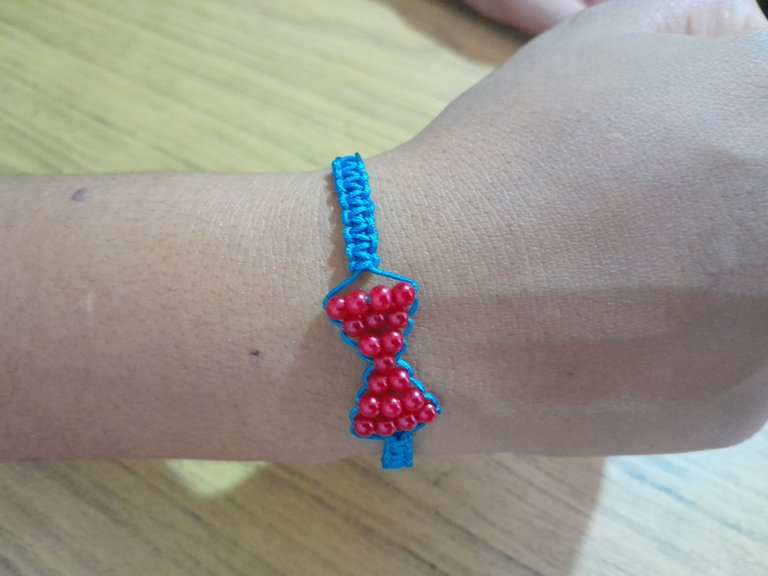
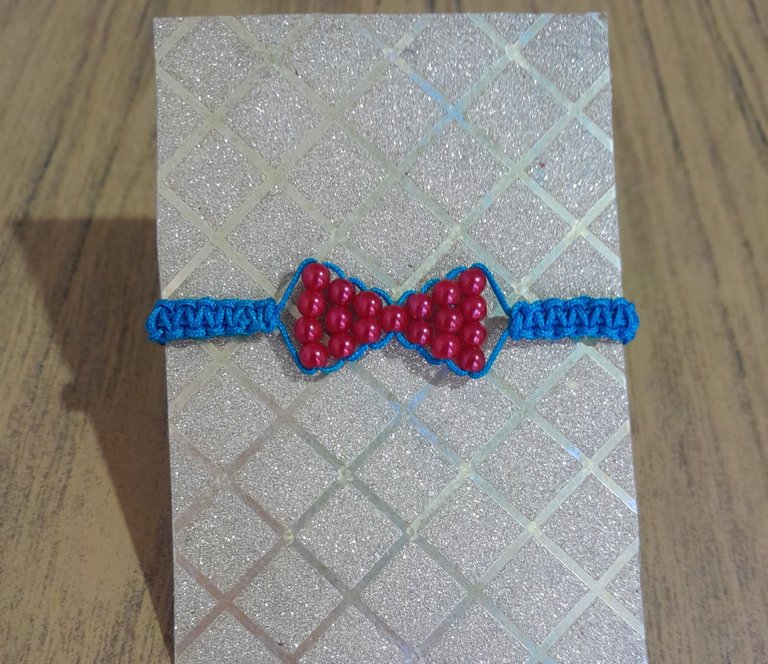
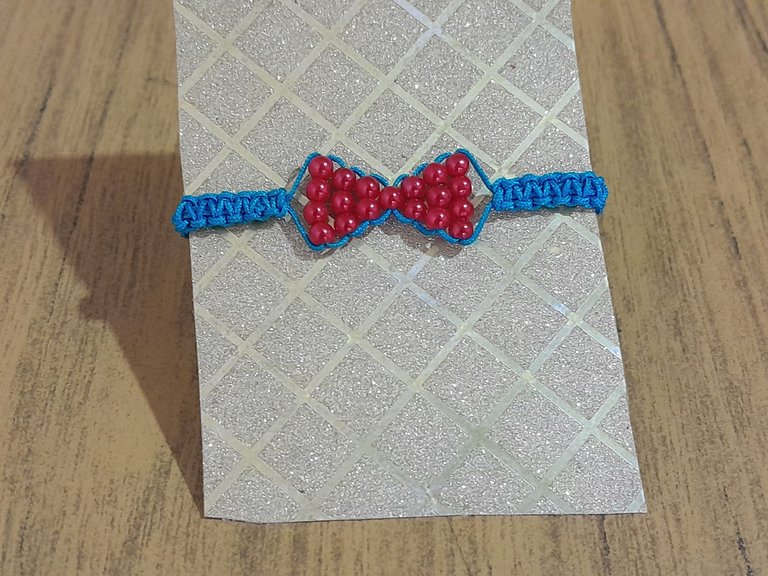
Muchas gracias por este lindo espacio, espero les haya gustado mi elaboración de hoy, mis mejores deseos, nos vemos pronto, saludos ☺️.
Thank you very much for this nice space, I hope you liked my elaboration today, best wishes, see you soon, greetings ☺️.
Fotos propias tomadas con mi teléfono Samsung A13, 50 mp. Edición de portada con Picsart collage en Gridart. Contenido exclusivo para hive.
Traducción -->deepl
Own photos taken with my Samsung A13 phone, 50 mp. Cover editing with Picsart collage in Gridart.
Exclusive content for hive.
Translation -->deepl

Nos vemos pronto‼️
See you soon‼️

Hermosa pulsera y combinación amiga, se ve hermosa con el lazo rojo, un lindo paso a paso 😉
Muchas gracias 🥰🥰
Click on the badge to view your board.Well done @meivys! You successfully guessed the match result and unlocked your badge!
Thank you to our sponsors. Please consider supporting them.
Check out our last posts:
Muy bonita pulsera @meivys, está muy coqueta y juvenil me encantó , saluditos 🤗
Click on the badge to view your board.Well done @meivys! You successfully guessed the match result and unlocked your badge!
Thank you to our sponsors. Please consider supporting them.
Check out our last posts:
Click on the badge to view your board.Well done @meivys! You successfully guessed the match result and unlocked your badge!
Thank you to our sponsors. Please consider supporting them.
Check out our last posts:
Click on the badge to view your board.Well done @meivys! You successfully guessed the match result and unlocked your badge!
Thank you to our sponsors. Please consider supporting them.
Check out our last posts:
Click on the badge to view your board.Well done @meivys! You successfully guessed the match result and unlocked your badge!
Thank you to our sponsors. Please consider supporting them.
Check out our last posts:
Click on the badge to view your board.Well done @meivys! You successfully guessed the match result and unlocked your badge!
Thank you to our sponsors. Please consider supporting them.
Check out our last posts:
Click on the badge to view your board.Well done @meivys! You successfully guessed the match result and unlocked your badge!
Thank you to our sponsors. Please consider supporting them.
Check out our last posts: