Hola amigos de Jewelry 💎, un cordial saludo para esta linda comunidad llena de creatividad y talento.
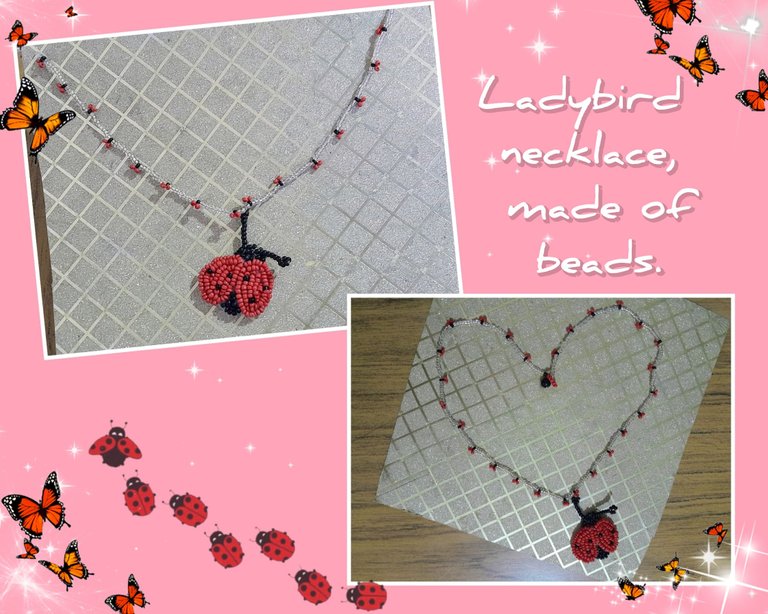
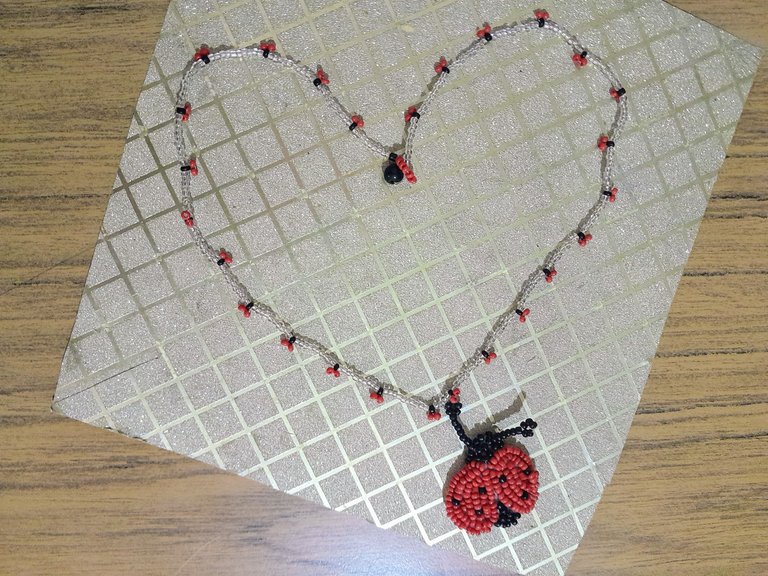
Como siempre es un placer compartir con ustedes mis proyectos, aquí les traigo la elaboración de un hermoso collar de mostacillas inspirado en las mariquitas. Me encantó este proyecto, ya que es un obsequio para mi pequeña que es fanática a la serie Miraculous: las aventuras de Ladybug, ya se acerca su cumpleaños y este será uno de sus regalos, tenía tiempo pidiendo que le hiciera un accesorio de Ladybug, espero darle este obsequio, aunque no es muy costoso, está hecho con mucho amor y dedicación, espero les guste, aquí comparto el paso a paso.
Hello friends of Jewelry 💎, a warm greeting to this beautiful community full of creativity and talent.
As always it is a pleasure to share with you my projects, here I bring you the making of a beautiful bead necklace inspired by ladybirds. I loved this project, as it is a gift for my little girl who is a fan of the series Miraculous: the adventures of Ladybug, her birthday is coming up and this will be one of her gifts, she had been asking for a Ladybug accessory, I hope to give her this gift, although it is not very expensive, it is made with lots of love and dedication, I hope you like it, here I share the step by step.

Materiales| Materials

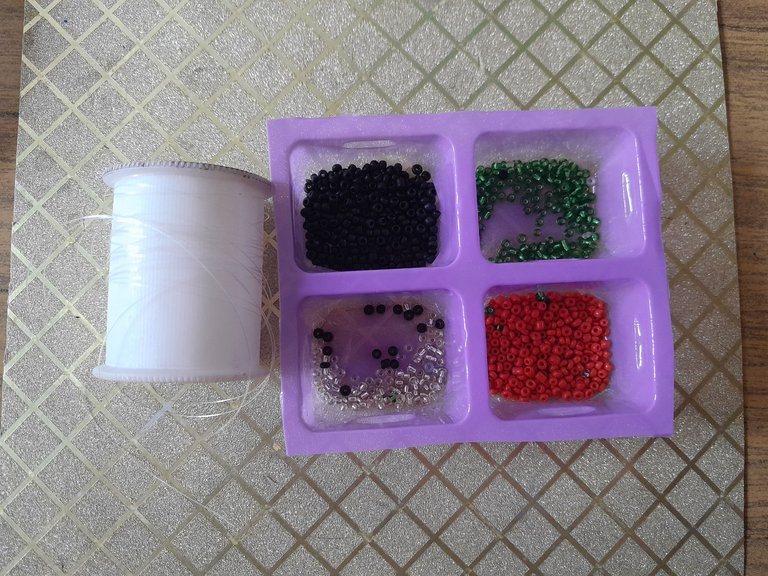
Para este proyecto necesitaremos los siguientes materiales:
🐞 Mostacillas, rojas, negras y plateadas.
🐞 Nailon trasparente número 0.30.
🐞 Fieltro blanco.
🐞 Una perla negra.
🐞 Aguja.
For this project we will need the following materials:
🐞 Red, black and silver beads.
🐞 Transparent nylon number 0.30.
🐞 White felt.
🐞 One black pearl.
🐞 Needle.

Paso 1| Step 1

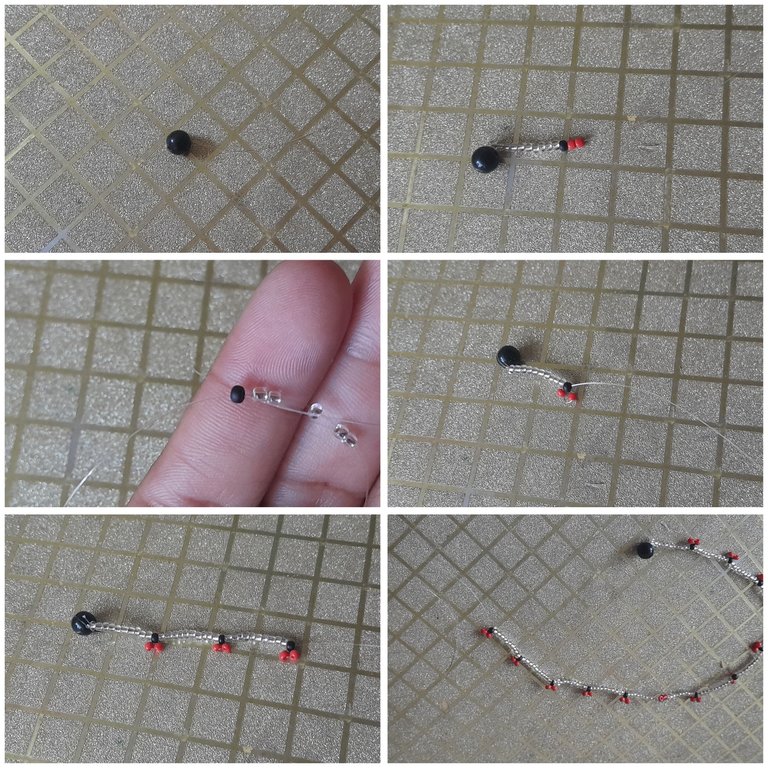
Comenzaremos haciendo el collar, usaremos 70 centímetros de nailon, introducimos una perla negra y amarramos bien, cortamos la parte más pequeña del nailon que nos sobra, pasamos diez mostacillas plateadas, una negra y dos rojas, cruzamos el hilo por la negra, para obtener una pequeña mariquita, volvemos a repetir hasta hacer dieciséis mariquitas el cual será la mitad de nuestro collar.
We will start making the necklace, we will use 70 centimetres of nylon, we introduce a black pearl and we tie it well, we cut the smallest part of the nylon that we have left, we pass ten silver beads, one black and two red, we cross the thread through the black one, to obtain a small ladybird, we repeat again until we make sixteen ladybirds which will be half of our necklace.

Paso 2| Step 2

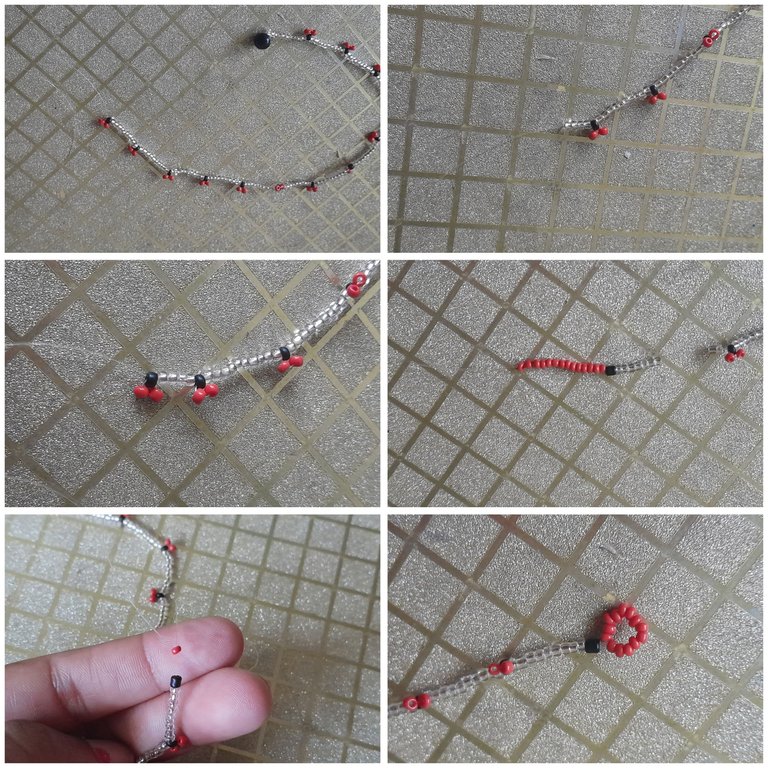
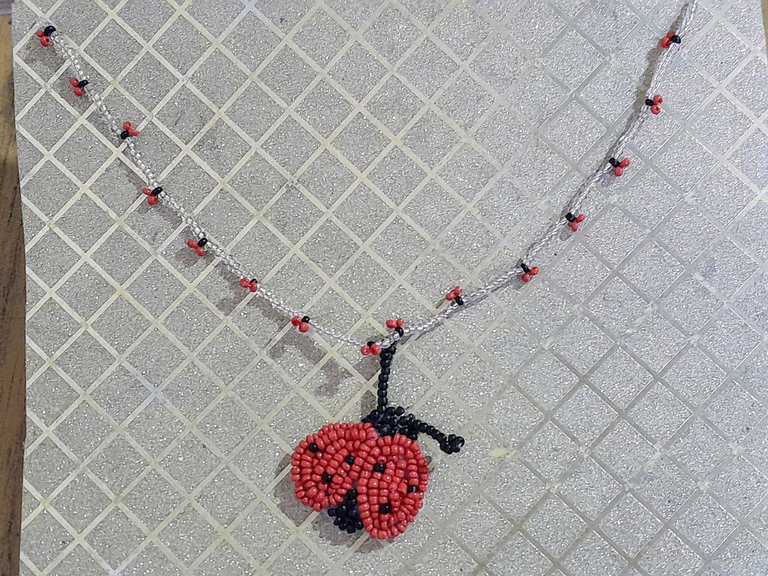
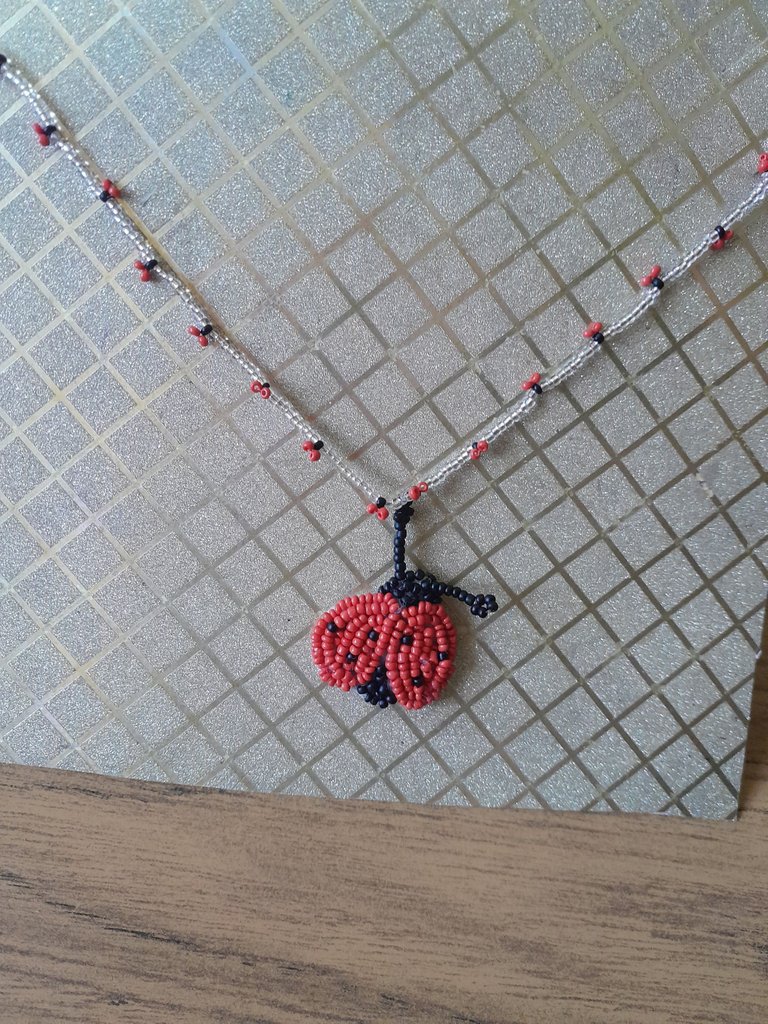
Una vez en la mitad, vamos a introducir cuatro mostacillas plateadas y una mariquita, después seguimos con la misma secuencia de diez mostacillas y una mariquita hasta completar las dieciséis del otro lado, ya finalizando el collar vamos a introducir nueve mostacillas plateadas, una negra y catorce rojas, cruzamos el nailon por la primera mostacilla roja y formamos un círculo, amarramos y cortamos el nailon sobrante, ya tenemos nuestro collar, es hora del dije.
Once in the middle, we are going to introduce four silver beads and a ladybird, then we continue with the same sequence of ten beads and a ladybird until completing the sixteen on the other side, and finishing the necklace we are going to introduce nine silver beads, one black and fourteen red, we cross the nylon through the first red bead and form a circle, we tie and cut the excess nylon, we have our necklace, it is time for the pendant.

Paso 3| Step 3

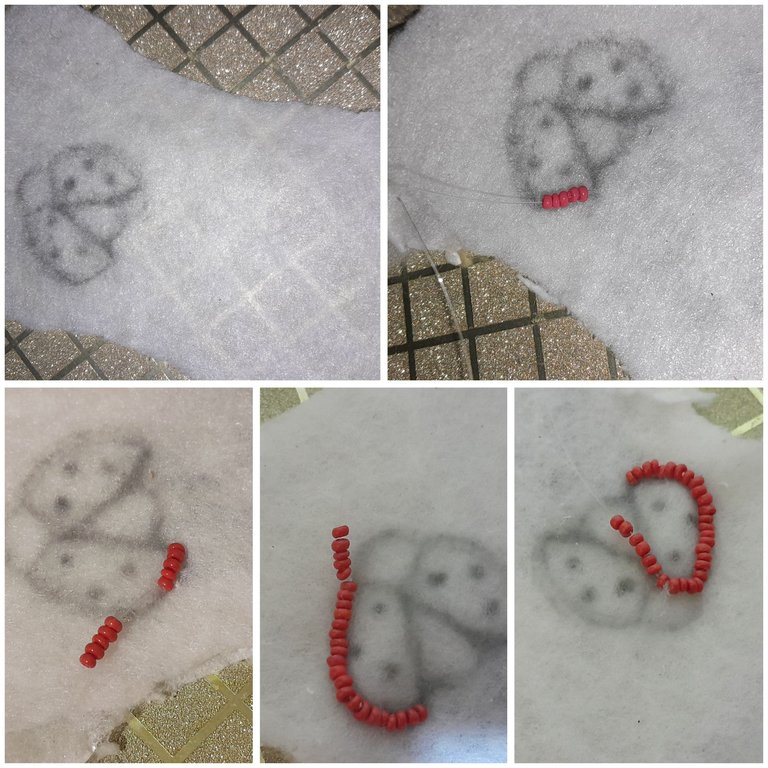
Con un lápiz haremos nuestro patrón de mariquita en el fieltro, con agua y nailon comenzamos a rellenar, introducimos cinco mostacillas rojas y ajustamos, pasamos el nailon nuevamente hacia arriba y volvemos a introducir cinco mostacillas y seguimos haciendo el borde de las alas, rodeamos todo, para comenzar a rellenar.
With a pencil we will make our ladybird pattern on the felt, with water and nylon we begin to fill, we introduce five red beads and adjust, we pass the nylon upwards again and we introduce five beads again and we continue making the edge of the wings, we surround everything, to begin to fill.

Paso 4| Step 4

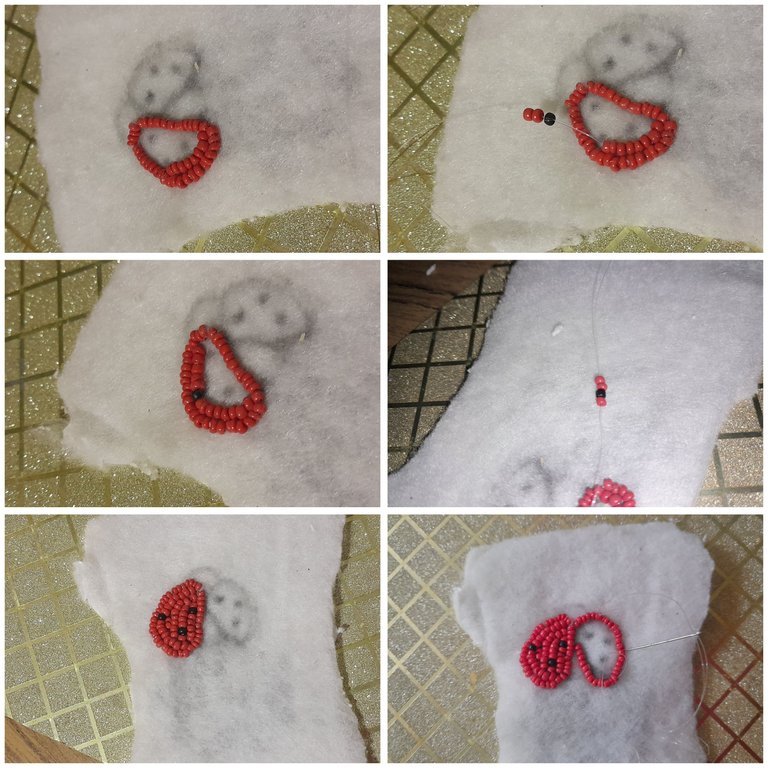
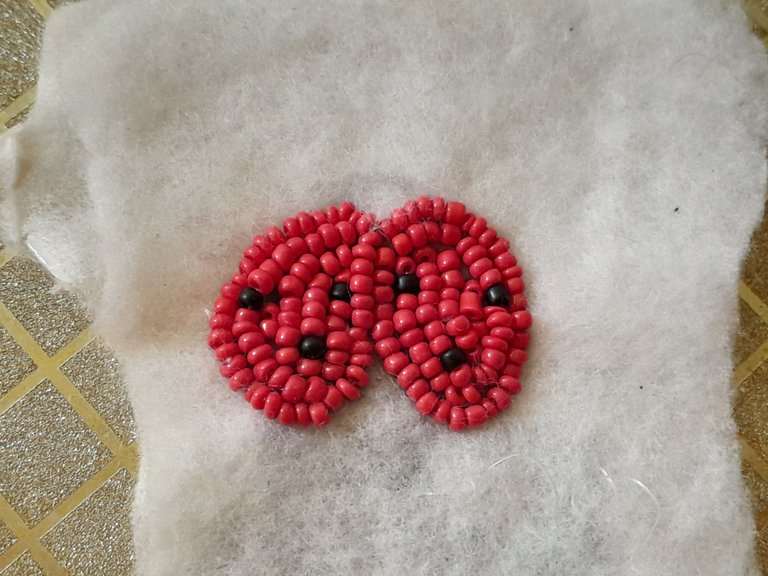
Ahora comenzamos a rellenar, pasamos el nailon a la parte de adentro de el ala, introducimos cinco mostacillas rojas y ajustamos, debe quedar pegado al primer borde de mostacillas, ahora introducimos cuatro mostacillas más, luego una mostacilla negra y cuatro rojas, ajustamos y vamos a repetir el mismo procedimiento e introducimos dos mostacillas negras más, pero que tenga un espacio con las mostacillas rojas, como se muestra en la imagen, hacemos lo mismo con la otra ala de la mariquita.
Now we begin to fill, we pass the nylon to the inside of the wing, we introduce five red beads and adjust, it must be glued to the first edge of beads, now we introduce four more beads, then a black bead and four red beads, we adjust and we will repeat the same procedure and introduce two more black beads, but that has a space with the red beads, as shown in the image, we do the same with the other wing of the ladybird.

Paso 5| Step 5

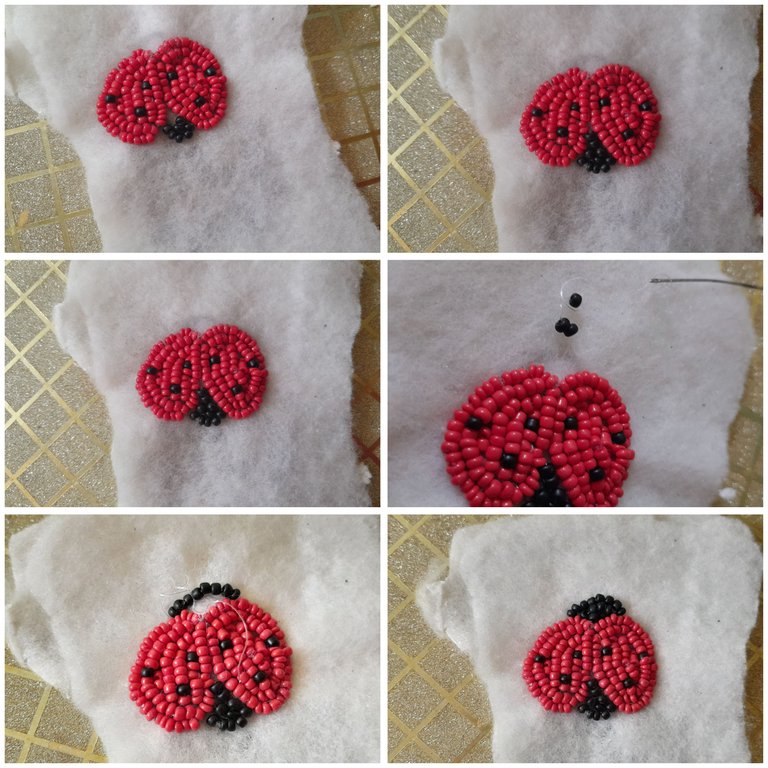
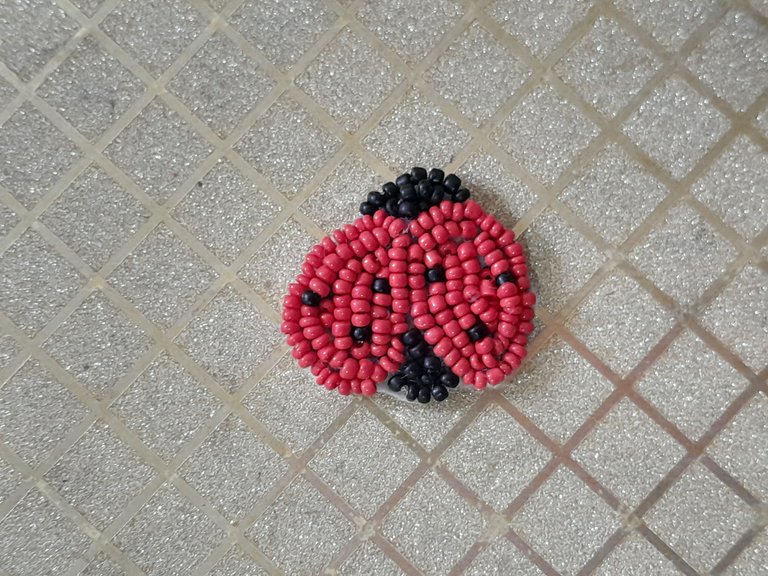
En la parte de abajo rellenamos con negro, introducimos cinco mostacillas negras y ajustamos, luego pasamos el nailon por la tercera mostacilla y ajustamos hacia abajo de manera que quede un semicírculo en la parte de abajo, terminamos de rellenar con las mostacillas negras la parte de abajo.
En la cabeza de la mariquita, también haremos un semicírculo con mostacillas negras y luego vamos rellenando, una vez listo cortamos el fieltro sobrante y quemamos las puntas.
At the bottom we fill with black, insert five black beads and adjust, then we pass the nylon through the third bead and adjust downwards so that there is a semicircle at the bottom, we finish filling the bottom with the black beads.
On the head of the ladybird, we also make a semicircle with black beads and then we fill it in. Once ready, we cut off the excess felt and burn the ends.

Paso 6| Step 6

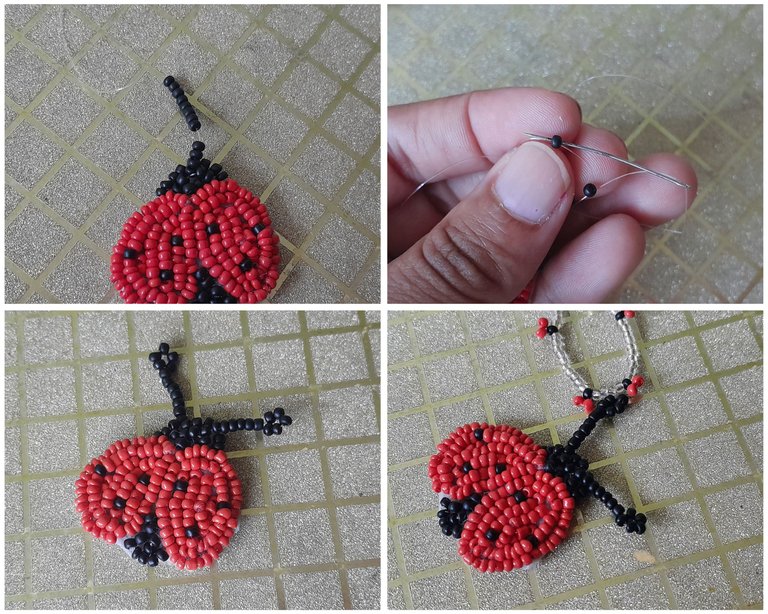
Para las antenas, vamos a introducir doce mostacillas negras, cortamos desde la última que introducimos hasta la quinta mostacilla y cruzamos el hilo haciendo un círculo, pasamos hasta abajo hasta llegar nuevamente a la cabeza, repetimos el mismo procedimiento con la otra antena, luego por una de las antenas lo ajustamos al collar y ya lo tenemos listo.
For the antennae, we are going to introduce twelve black beads, we cut from the last one we introduce to the fifth bead and we cross the thread making a circle, we go down until we reach the head again, we repeat the same procedure with the other antennae, then we adjust it to the necklace through one of the antennae and we have it ready.

Muchas gracias por este lindo espacio, espero les haya gustado mi elaboración de hoy, mis mejores deseos, nos vemos pronto, saludos ☺️.
Thank you very much for this nice space, I hope you liked my elaboration today, best wishes, see you soon, greetings ☺️.
Fotos propias tomadas con mi teléfono Samsung A13, 50 mp. Edición de portada con Picsart collage en Gridart. Contenido exclusivo para hive.
Traducción -->deepl
Own photos taken with my Samsung A13 phone, 50 mp. Cover editing with Picsart collage in Gridart.
Exclusive content for hive.
Translation -->deepl

Nos vemos pronto‼️
See you soon‼️

!discovery 40
Gracias por el apoyo 🥰🥰
This post was shared and voted inside the discord by the curators team of discovery-it
Join our Community and follow our Curation Trail
Discovery-it is also a Witness, vote for us here
Delegate to us for passive income. Check our 80% fee-back Program
Muy lindo la verdad 33 mariquitas en total😁
Si jejeje, muchas gracias por tu visita, saludos.
Saludos @meivys como estás? Te quedaron lindas las 🐞 me hicistes recordar que yo también pase por esa adicción a esos bichitos pero mi hija los tenía de verdad eran sus mascotas😃😃
Jejeje si son hermosos, cuando era niña también jugaba con ellos.
This necklace looks very beautiful. That will be a fantastic gift for her birthday! Since she likes ladybug accessories, she will be happy to get this.
Thank you very much ❤️, I hope you like the gift.
Click on the badge to view your board.
Thank you to our sponsors. Please consider supporting them.
Check out our last posts:
Click on the badge to view your board.
Thank you to our sponsors. Please consider supporting them.
Check out our last posts:
Que hermoso trabajo, me encantó como quedaron los élitros de la mariquita 🖤😍 Saludos 🤗
Muchas gracias amiga 💖
That was a pretty good result, creative craft! :D
Thank 💖💖
Click on the badge to view your board.
Thank you to our sponsors. Please consider supporting them.
Check out our last posts:
Click on the badge to view your board.
Thank you to our sponsors. Please consider supporting them.
Check out our last posts:
Click on the badge to view your board.
Thank you to our sponsors. Please consider supporting them.
Check out our last posts:
Click on the badge to view your board.
Thank you to our sponsors. Please consider supporting them.
Check out our last posts:
Click on the badge to view your board.
Thank you to our sponsors. Please consider supporting them.
Check out our last posts:
Click on the badge to view your board.
Thank you to our sponsors. Please consider supporting them.
Check out our last posts: