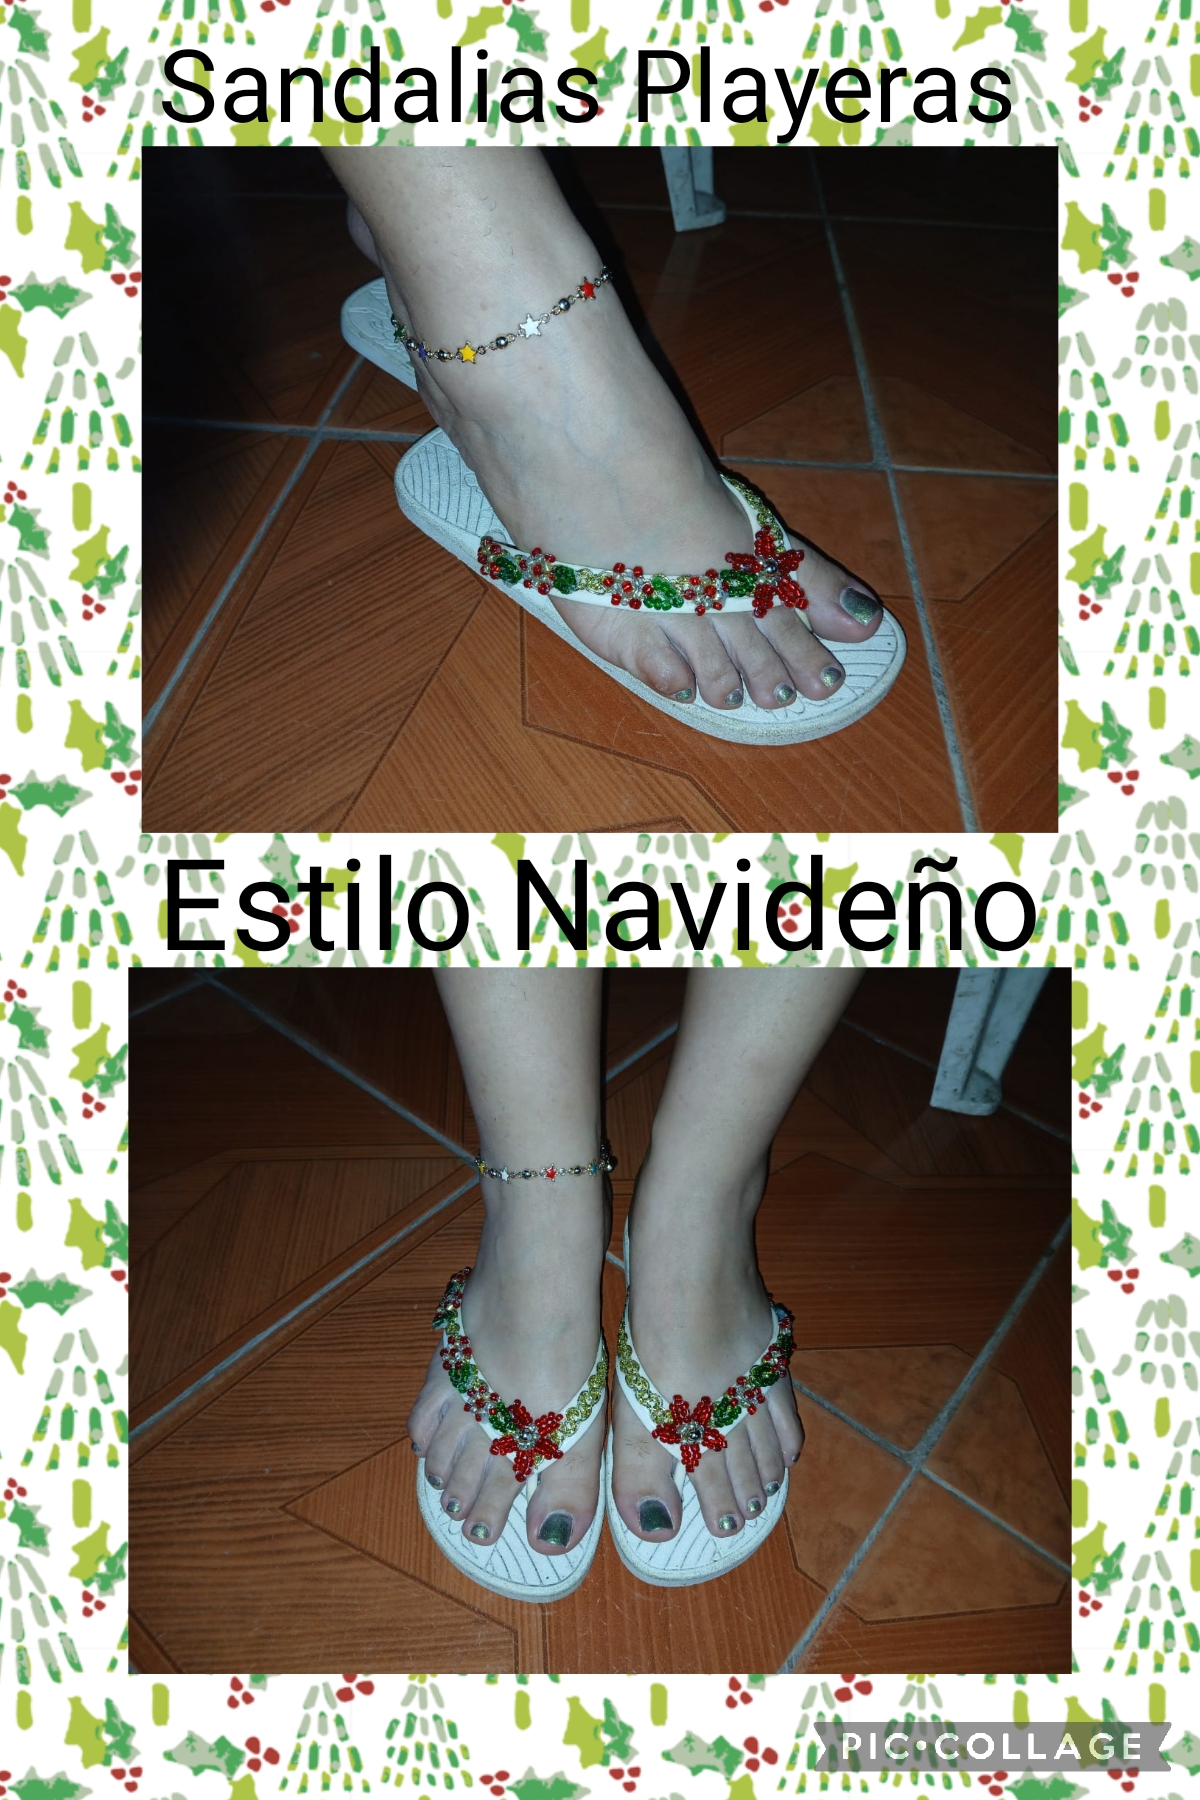
Saluditos mis Artistas Creativos de las manualidades y la Joyería, espero que todos estén muy felices, disfrutando de estas maravillosas navidades en unión familiar; les comento que casi no llego a tiempo para mí participación en este fabuloso concurso demasiado trabajo las treinta horas del día no me alcanzan para todo🤭 pero aquí estoy, les digo que la manualidad que escogí para mí participación es un bonito par de sandalias con la temática navideña por supuesto, y para quien creen que es?.. Para la coqueta de mi nieta, la Navidad para mí lo más representativo son las Poinsettia me encantan esas flores en si toda la planta su cambio de color de ese verde intenso a un rojo espectacular me parece algo maravilloso por eso me inspire y fue el diseño elegido.
Aquí les dejo el paso a paso y sigan leyendo para que vean cómo lo hice:
Greetings my Creative Artists of crafts and jewelry, I hope you are all very happy, enjoying this wonderful Christmas with your family; I tell you that I almost did not make it in time for my participation in this fabulous contest, too much work, thirty hours a day are not enough for everything🤭 but here I am, I tell you that the craft that I chose for my participation is a nice pair of sandals with a Christmas theme of course, and who do you think it is for? For my flirtatious granddaughter, Christmas for me the most representative thing is the Poinsettia, I love those flowers, the whole plant, its color change from that intense green to a spectacular red seems wonderful to me, that is why I was inspired and it was the design chosen.
Here I leave you the step by step and keep reading to see how I did it:
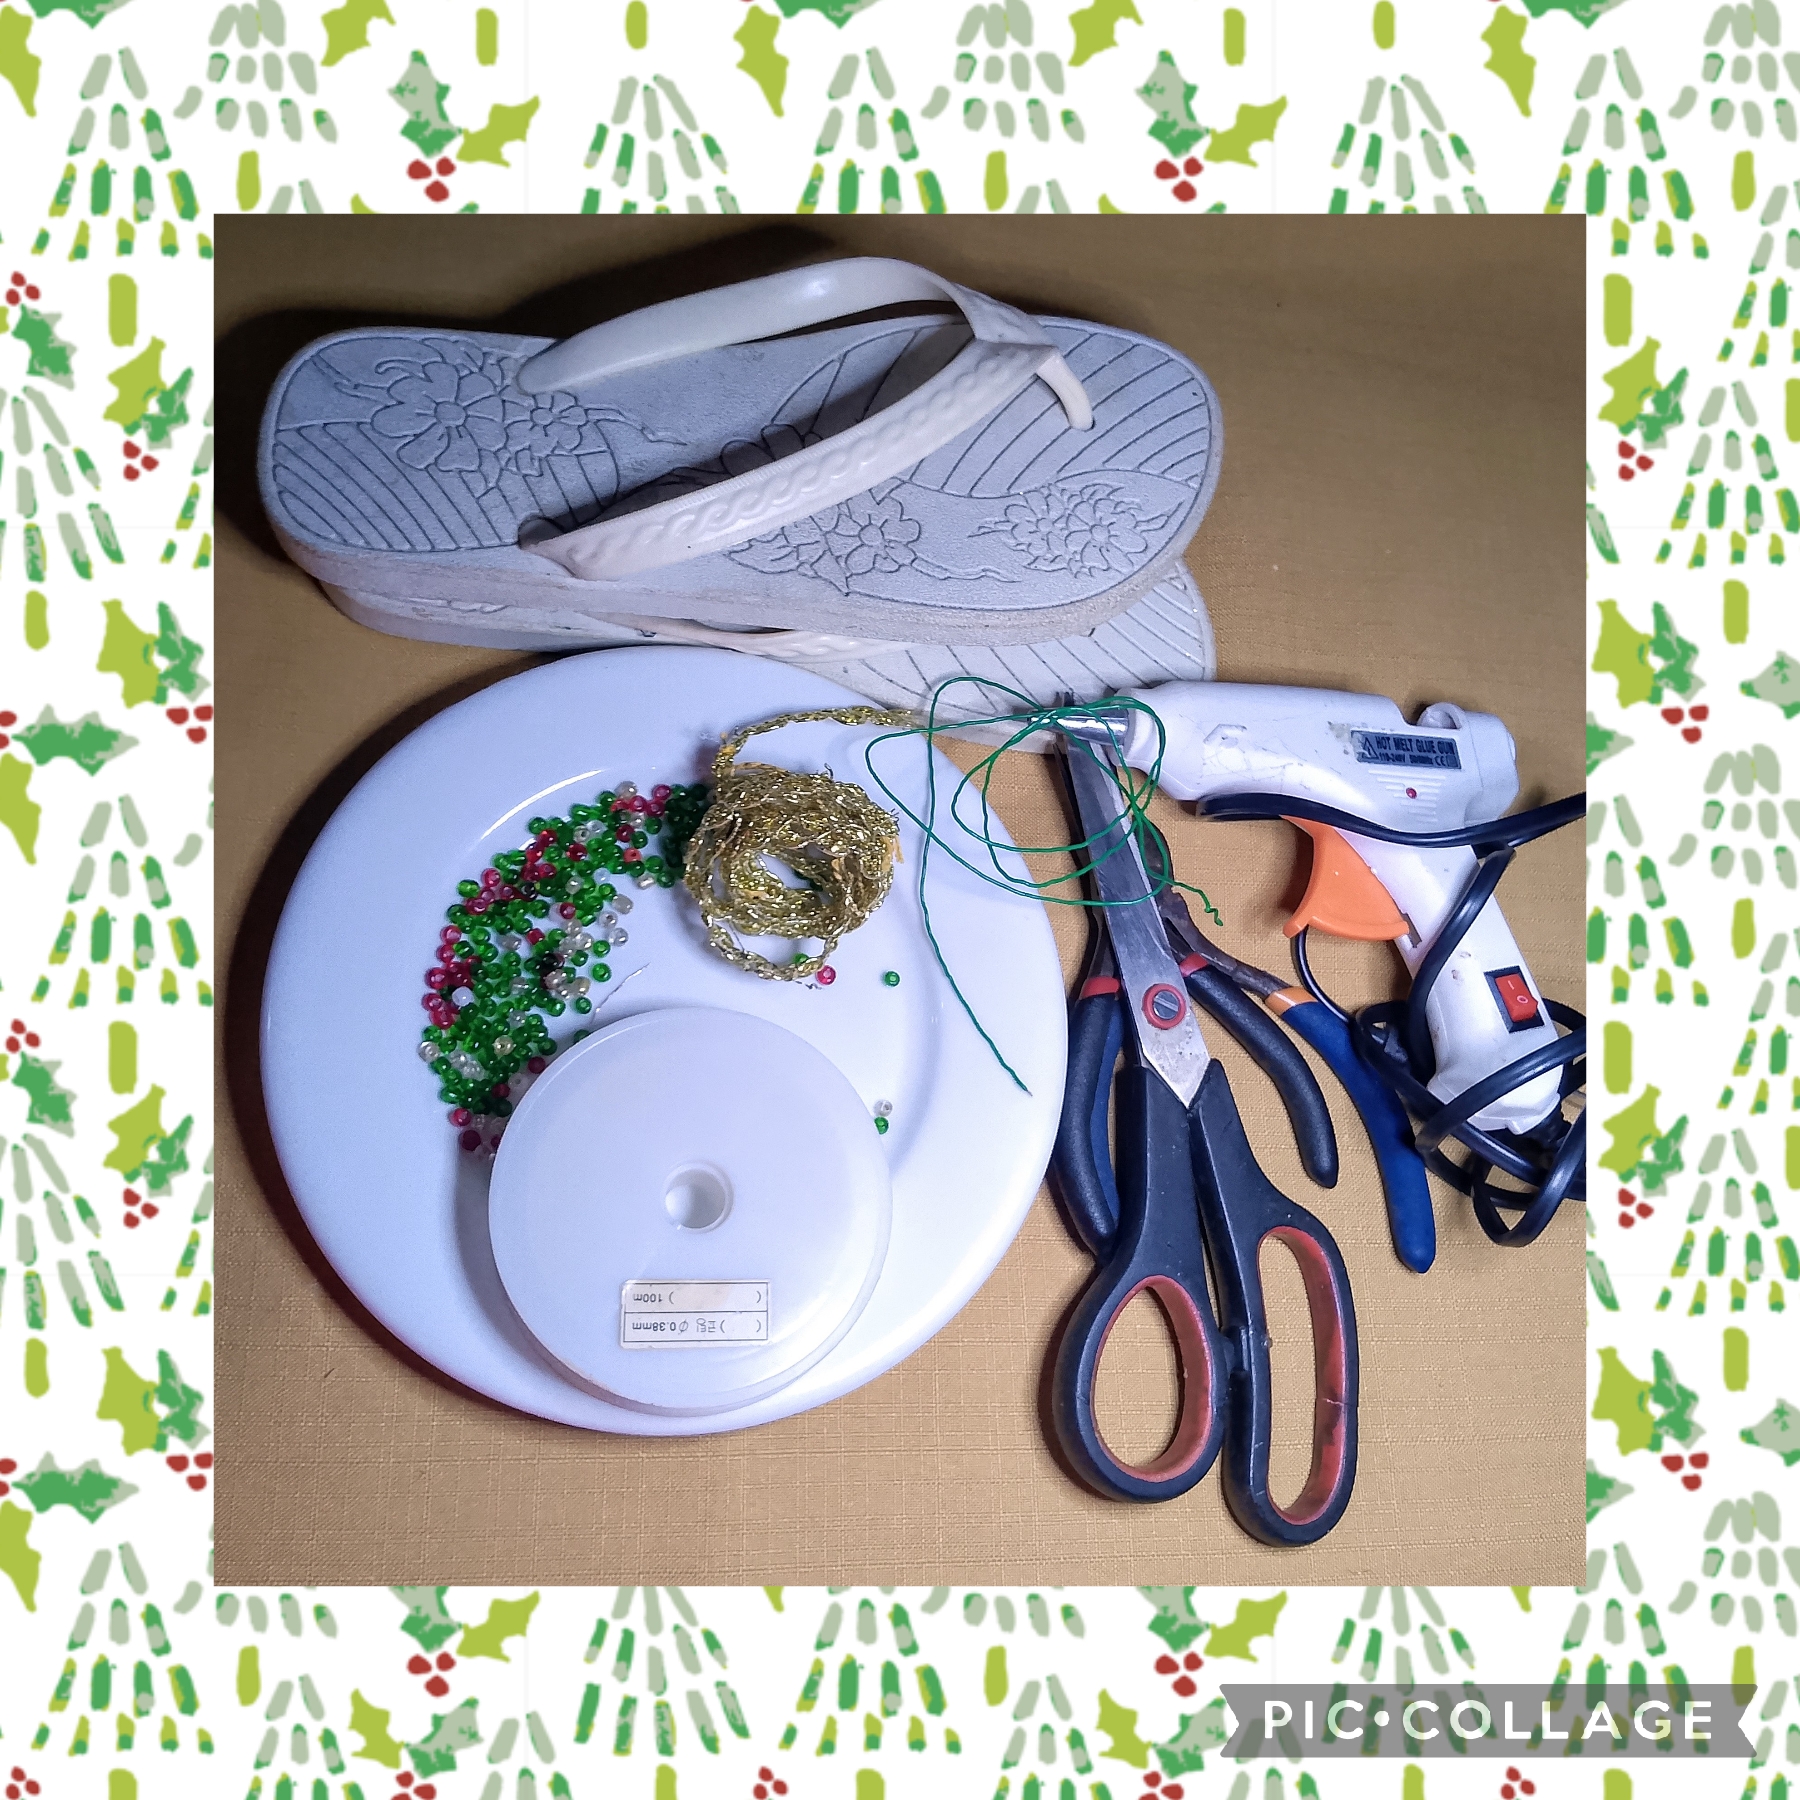
MATERIALES USADOS EN SU ELABORACIÓN:
✓ Un par de sandalias.
✓ Un metro de puntilla dorada.
✓ Mostacillones verdes.
✓ Mostacillones rojos.
✓ Mostacillones dorados.
✓ Dos balines dorados.
✓ Guaya o cola de tigre.
✓ Silicón caliente.
✓ Aguja.
✓ Hilo.
✓ Tijeras.
✓ Pinzas.
MATERIALS USED IN ITS PREPARATION:
✓ A pair of sandals.
✓ A meter of gold lace.
✓ Green beads.
✓ Red beads.
✓ Gold beads.
✓ Two gold beads.
✓ Tiger's tail.
✓ Hot silicone.
✓ Needle.
✓ Thread.
✓ Scissors.
✓ Tweezers.
CON ESTOS PASOS SENCILLOS REALICÉ MI HERMOSO PROYECTO.
PRIMER PASO:
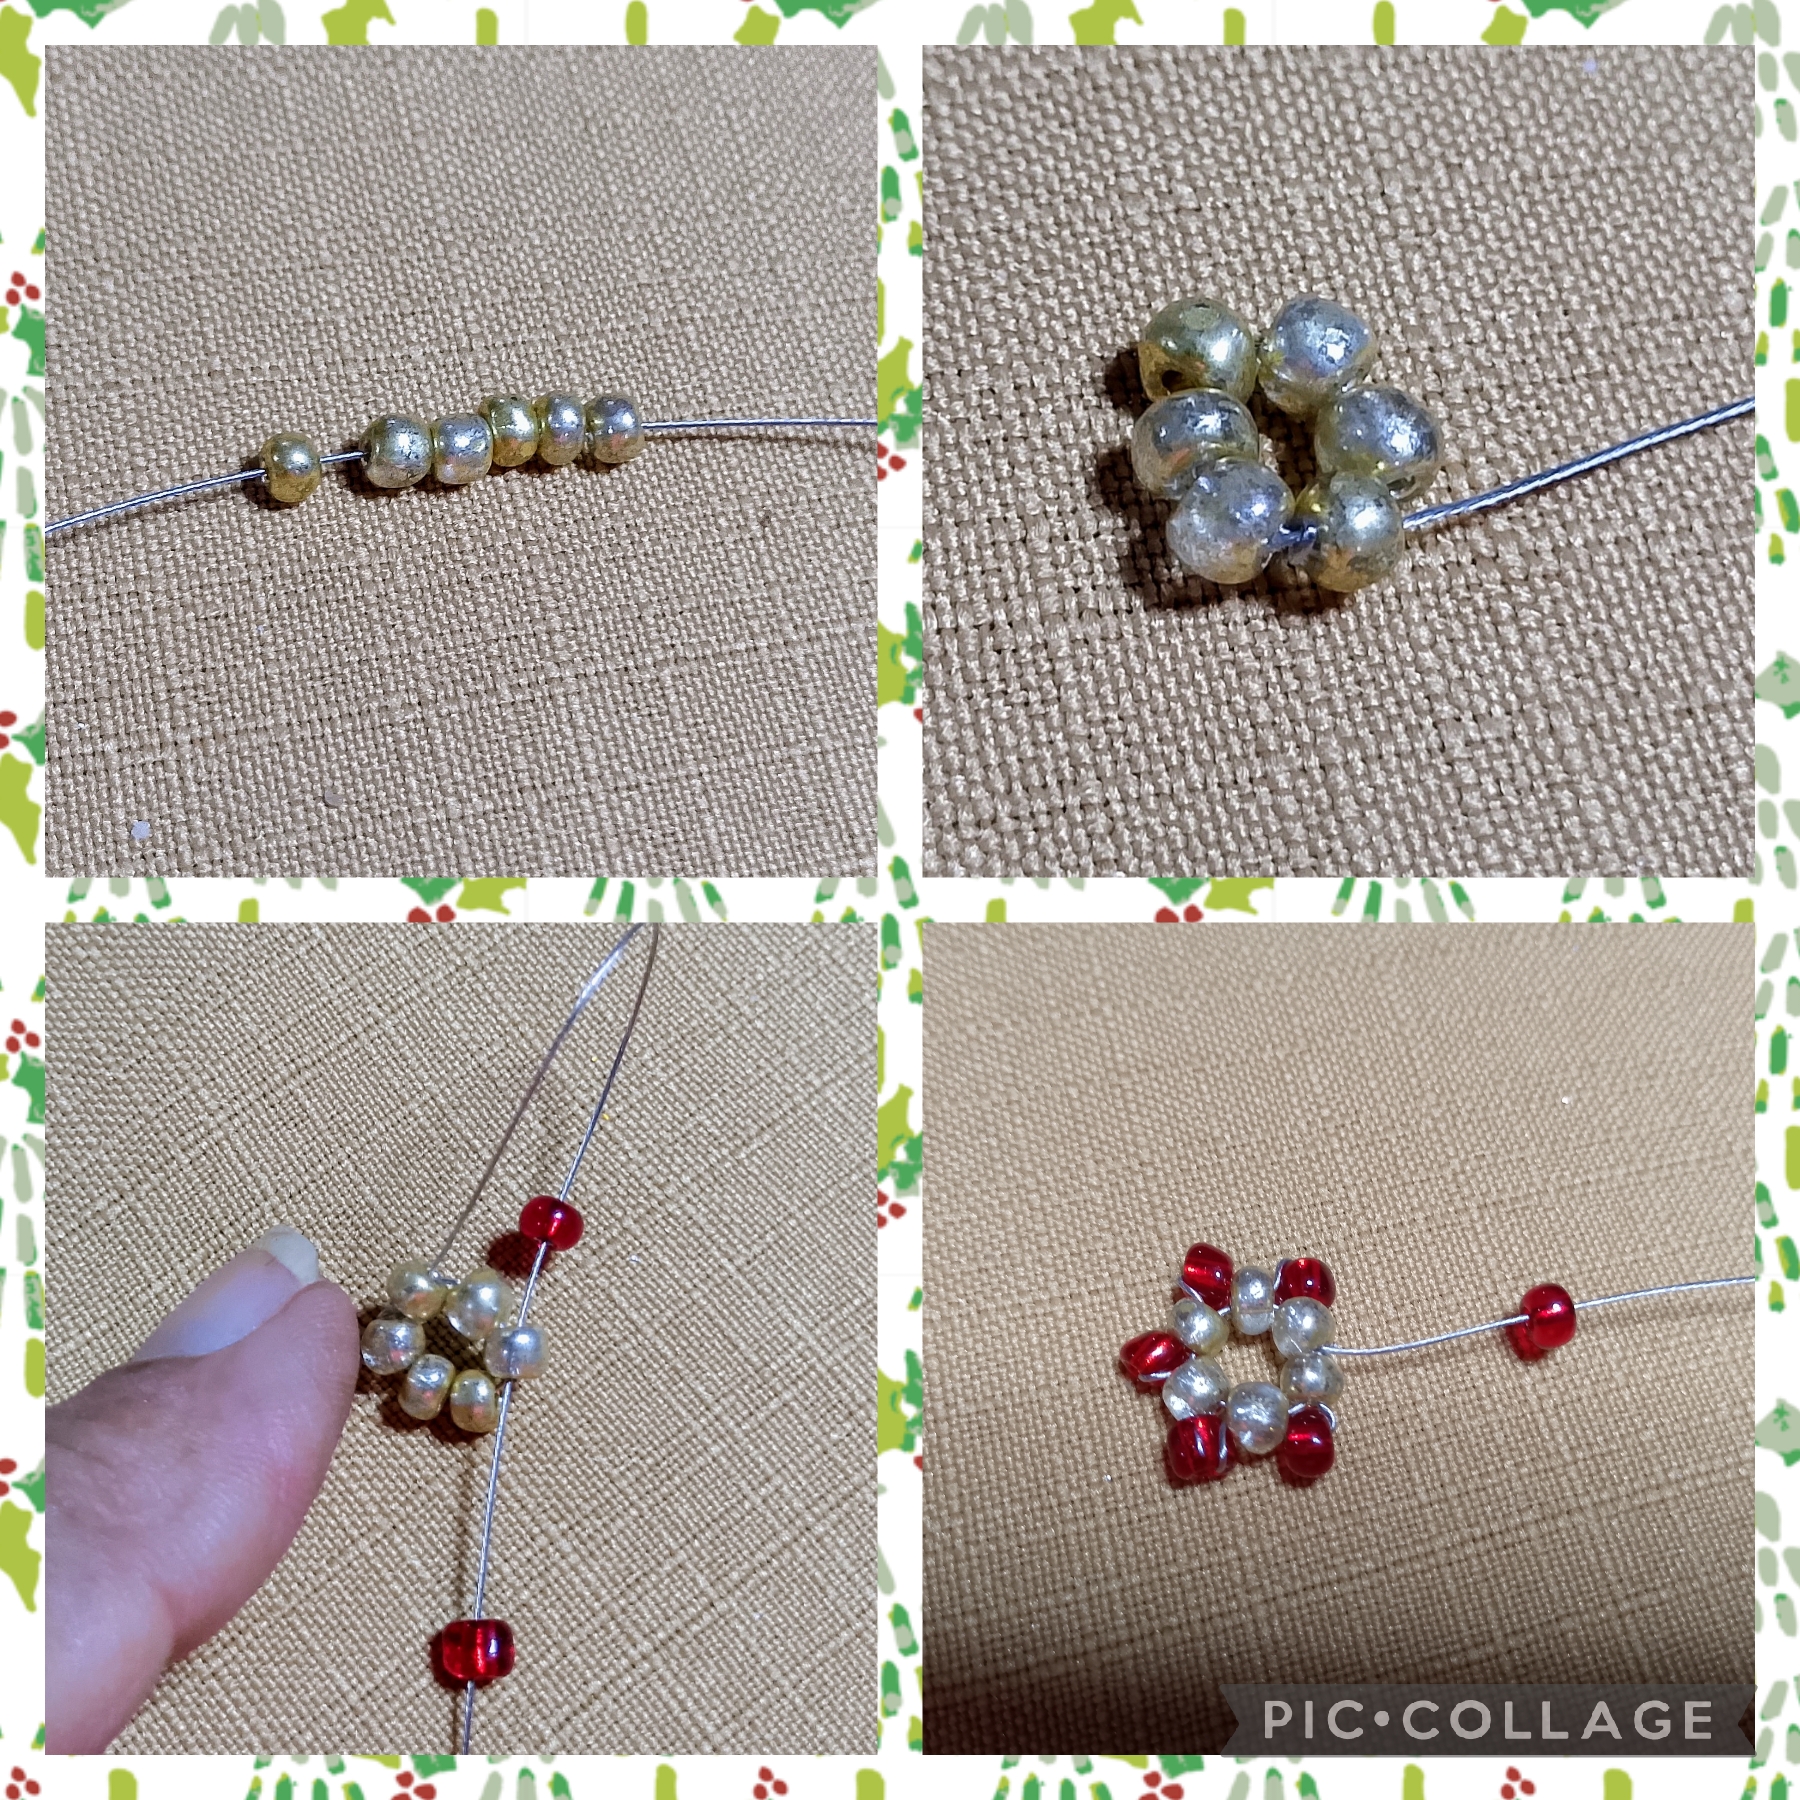
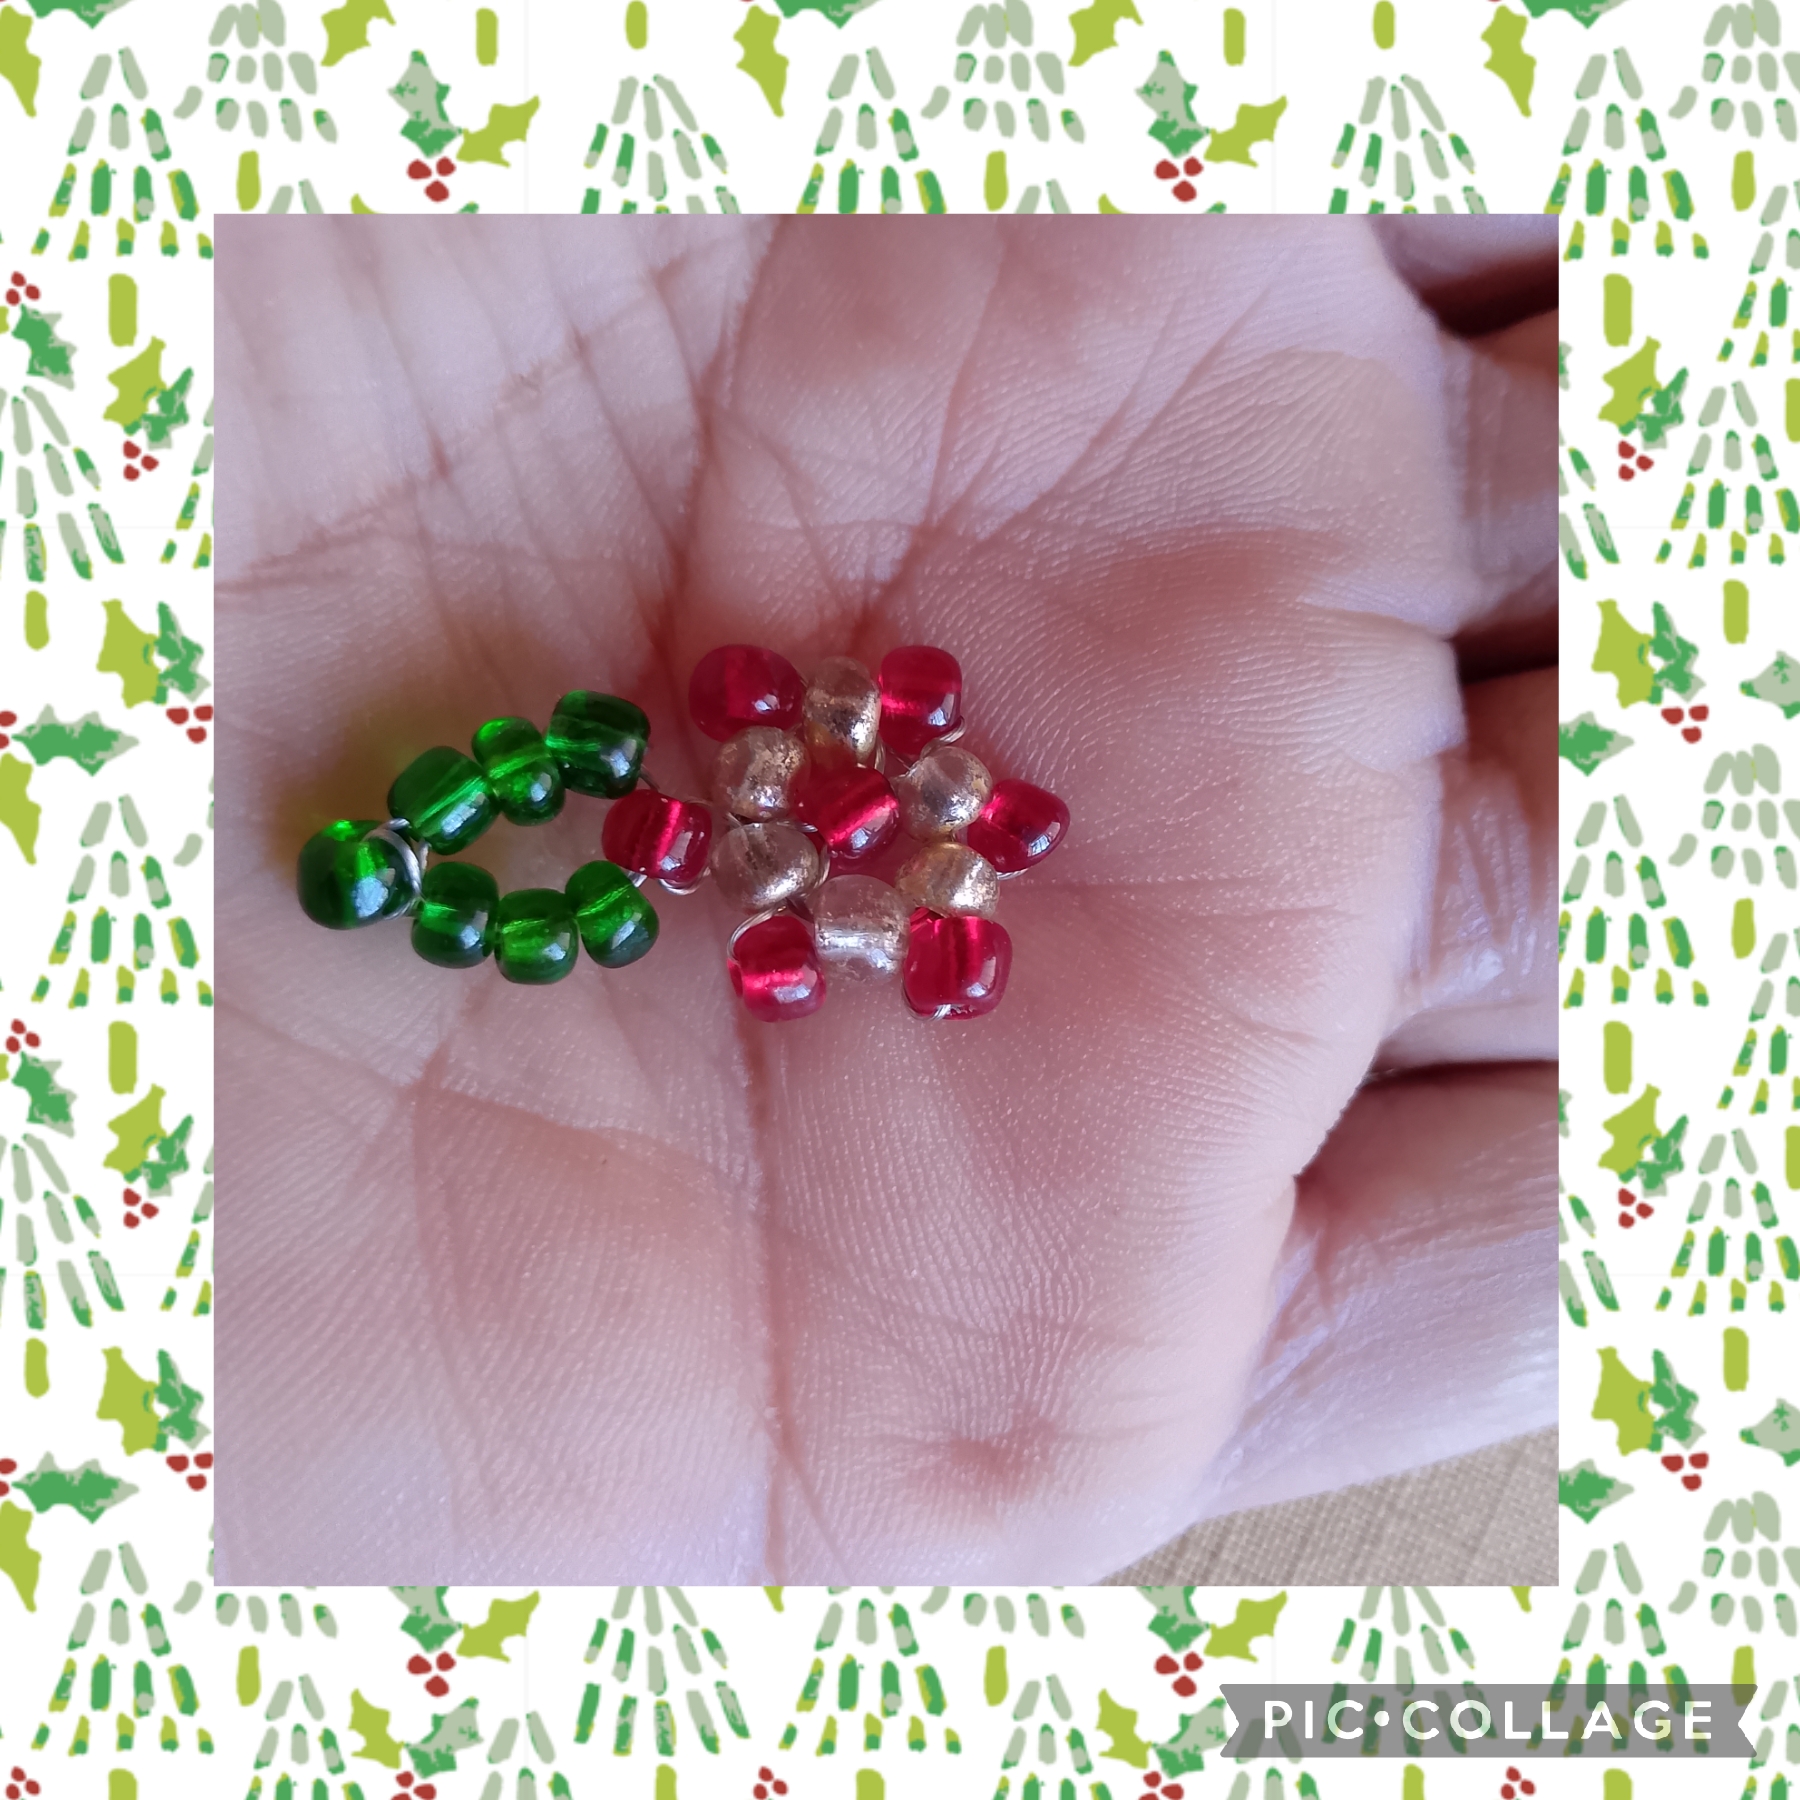
Voy a comenzar elaborando unas pequeñas flores con los colores navideños para que parezcan Poinsettia, corto usando las tijeras doce centímetros de guaya o cola de tigre y por una punta inserto seis mostacillones dorados, con la otra punta los paso y hago nudo simple doble, corto el exceso de un lado y tejo con una sola hebra inserto un mostacillón rojo y lo paso por el primer mostacillón dorado, inserto otro mostacillón rojo y lo paso por el siguiente mostacillón dorado en secuencia hasta colocar seis mostacillones rojos, ahora después de colocar el último mostacillón rojo, inserto seis mostacillones verdes y lo paso de nuevo por el mostacillón rojo, subo por los tres mostacillones verdes, pongo otro mostacillón verde para hacer la punta de la hoja y bajo por los tres mostacillones verdes, cruzo por el mostacillón rojo y hago un nudo simple, lo paso por el siguiente mostacillón para perder el nudo halo y corto los excedentes y muestro el resultado de mi flor.
WITH THESE SIMPLE STEPS I COMPLETED MY BEAUTIFUL PROJECT.
FIRST STEP:
I'm going to start by making some small flowers with Christmas colors to make them look like Poinsettia. Using scissors, I cut twelve centimeters of tiger's tail and through one end I insert six golden beads, with the other end I thread them and make a simple double knot, cut the excess on one side and weave with a single strand, insert a red bead and pass it through the first golden bead, insert another red bead and pass it through the next golden bead in sequence until I place six red beads, now after placing the last red bead, I insert six green beads and pass it through the red bead again, go up through the three green beads, put another green bead to make the tip of the leaf and go down through the three green beads, cross through the red bead and make a simple knot, pass it through the next bead to lose the halo knot and cut the excess and I show the result of my flower.
SEGUNDO PASO:
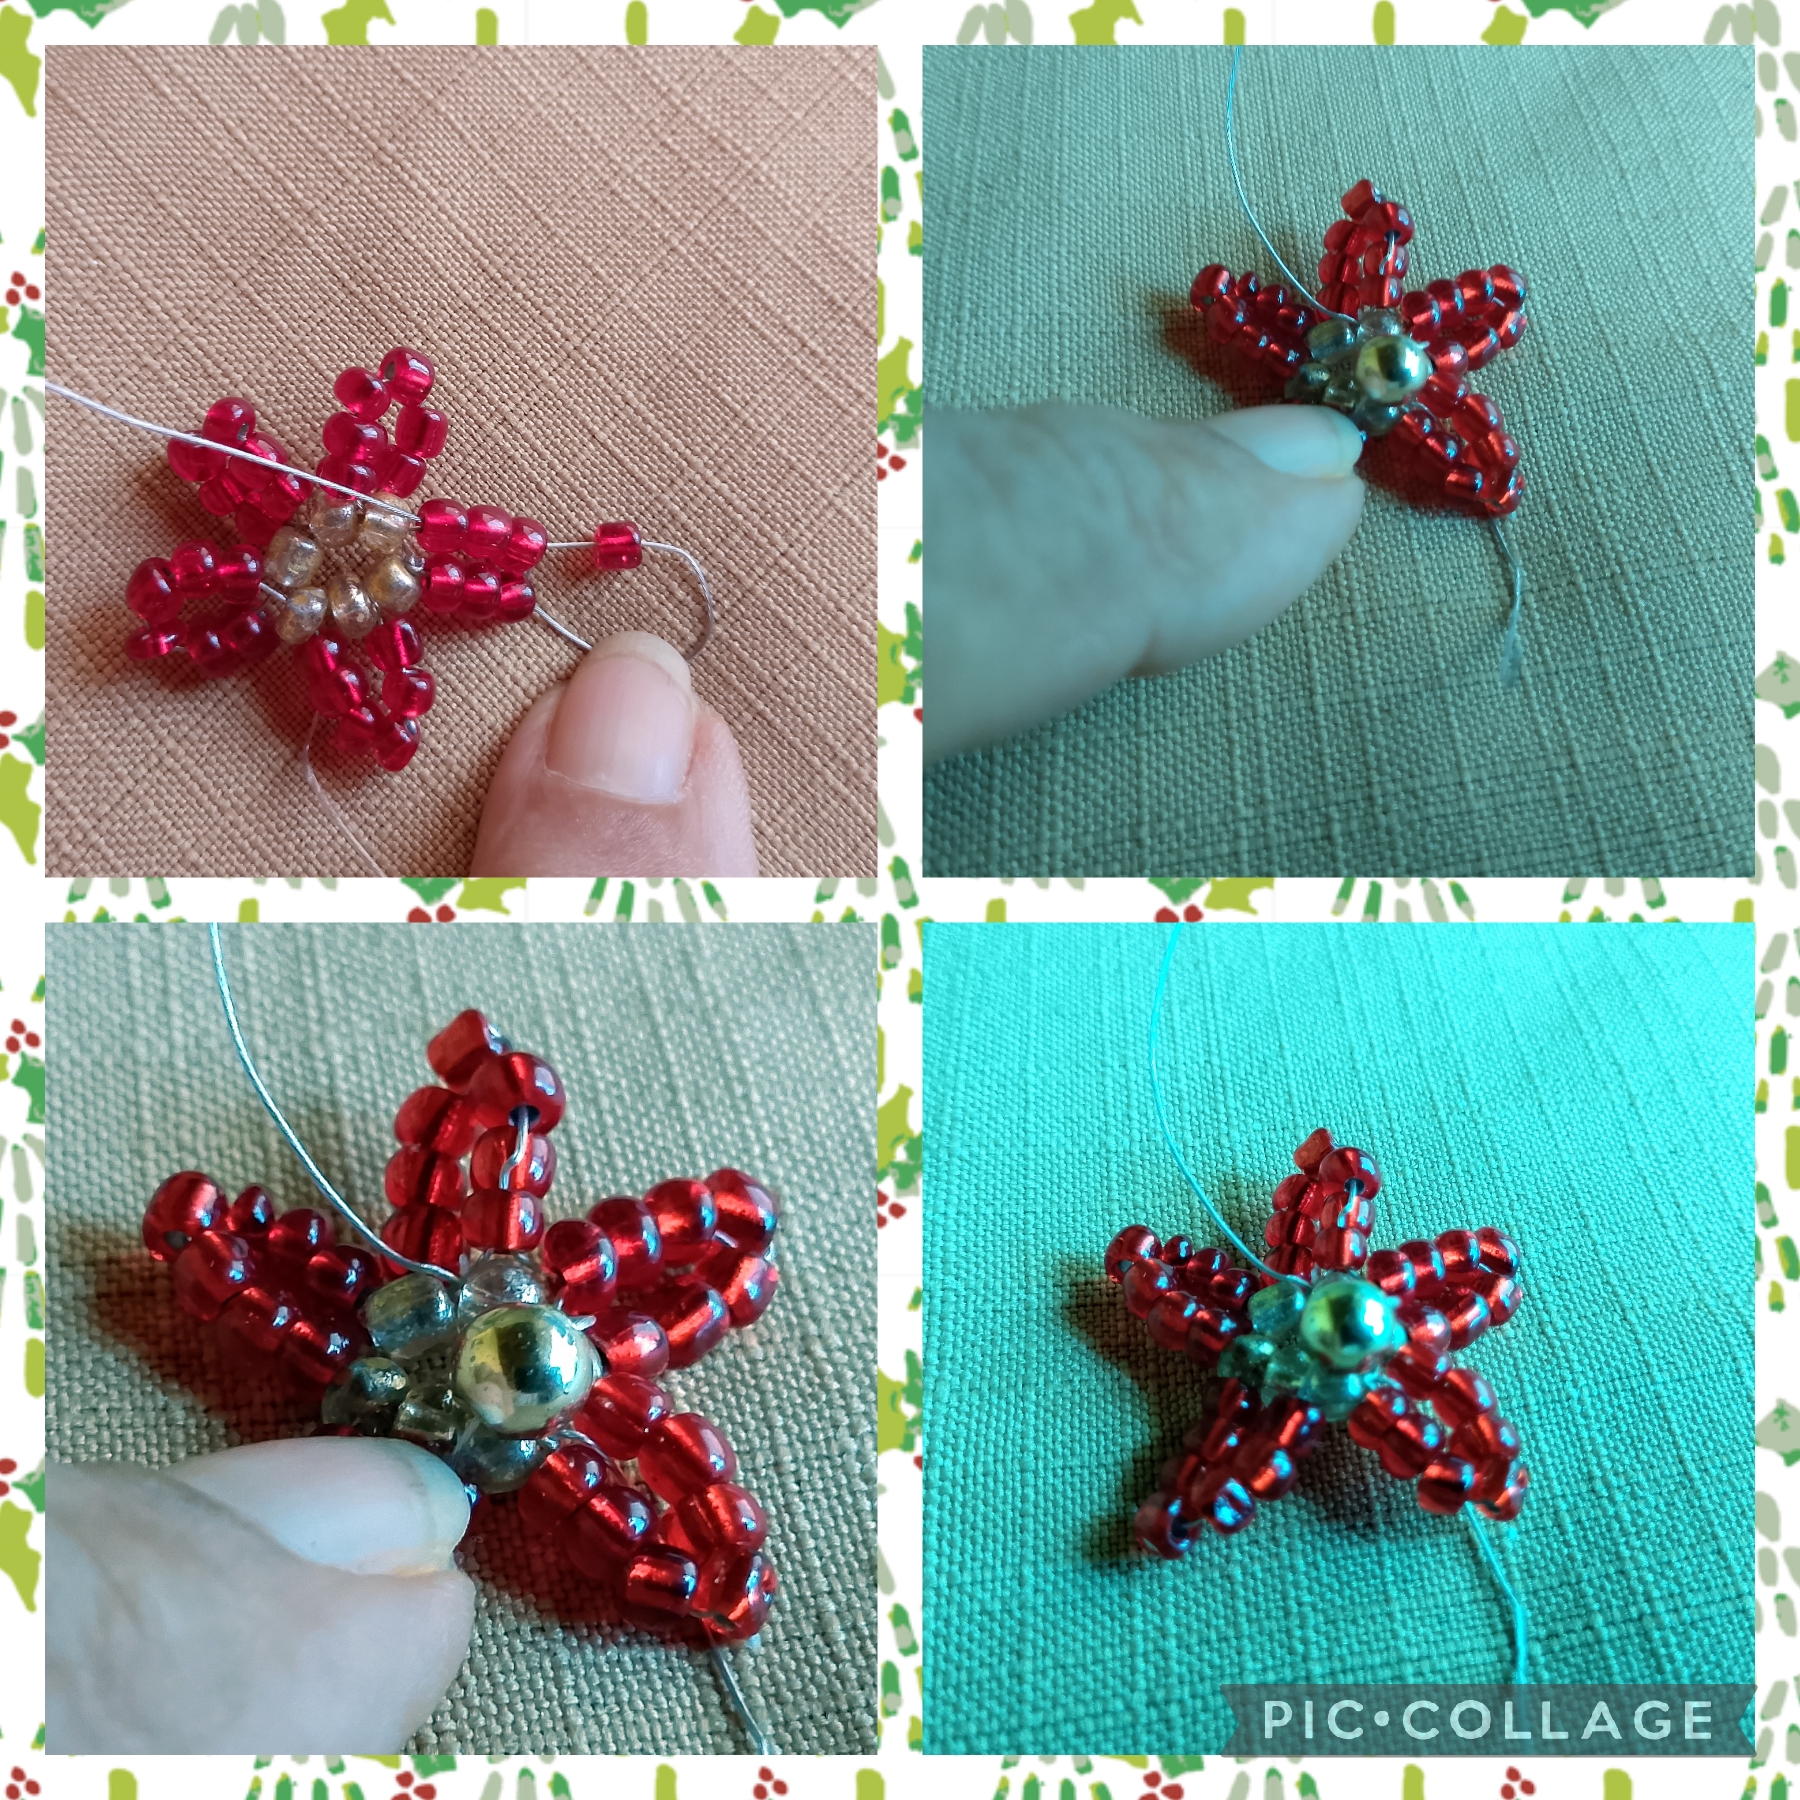
Aquí en este paso elaboro mi Poinsettia de esta manera: corto un trozo de guaya o cola de tigre de quince centímetros, inserto por una punta seis mostacillones dorados con la otra punta los cruzo y hago nudo simple para fijar, corto el exceso de una punta y trabajo con una sola punta inserto seis mostacillones rojos y lo paso por el siguiente mostacillón dorado, inserto de nuevo seis mostacillones rojos y los paso por el mostacillón dorado hasta tener las cinco puntas de la flor, subo por los tres mostacillones rojos de la primera punta inserto un mostacillón rojo y bajo por los tres del otro lado para formar la punta, esto lo hago en todas los pétalos ahora pongo un balín dorado lo bajo hasta el centro y lo cruzo en el tercer mostacillón dorado, paso el hilo por todos los mostacillones dorados lo halo fuerte, corto el exceso y este es el resultado.
SECOND STEP:
Here in this step I make my Poinsettia this way: I cut a fifteen centimeter piece of guaya or tiger tail, I insert six golden beads at one end, I cross the other end and tie a simple knot to secure, I cut the excess of one end and working with only one end I insert six red beads and pass it through the next golden bead, I insert six red beads again and pass them through the golden bead until I have the five points of the flower, I go up the three red beads of the first point, I insert a red bead and go down the three on the other side to form the point, I do this on all the petals now I put a golden ball I lower it to the center and cross it on the third golden bead, I pass the thread through all the golden beads I pull it tight, I cut the excess and this is the result.
TERCER PASO:
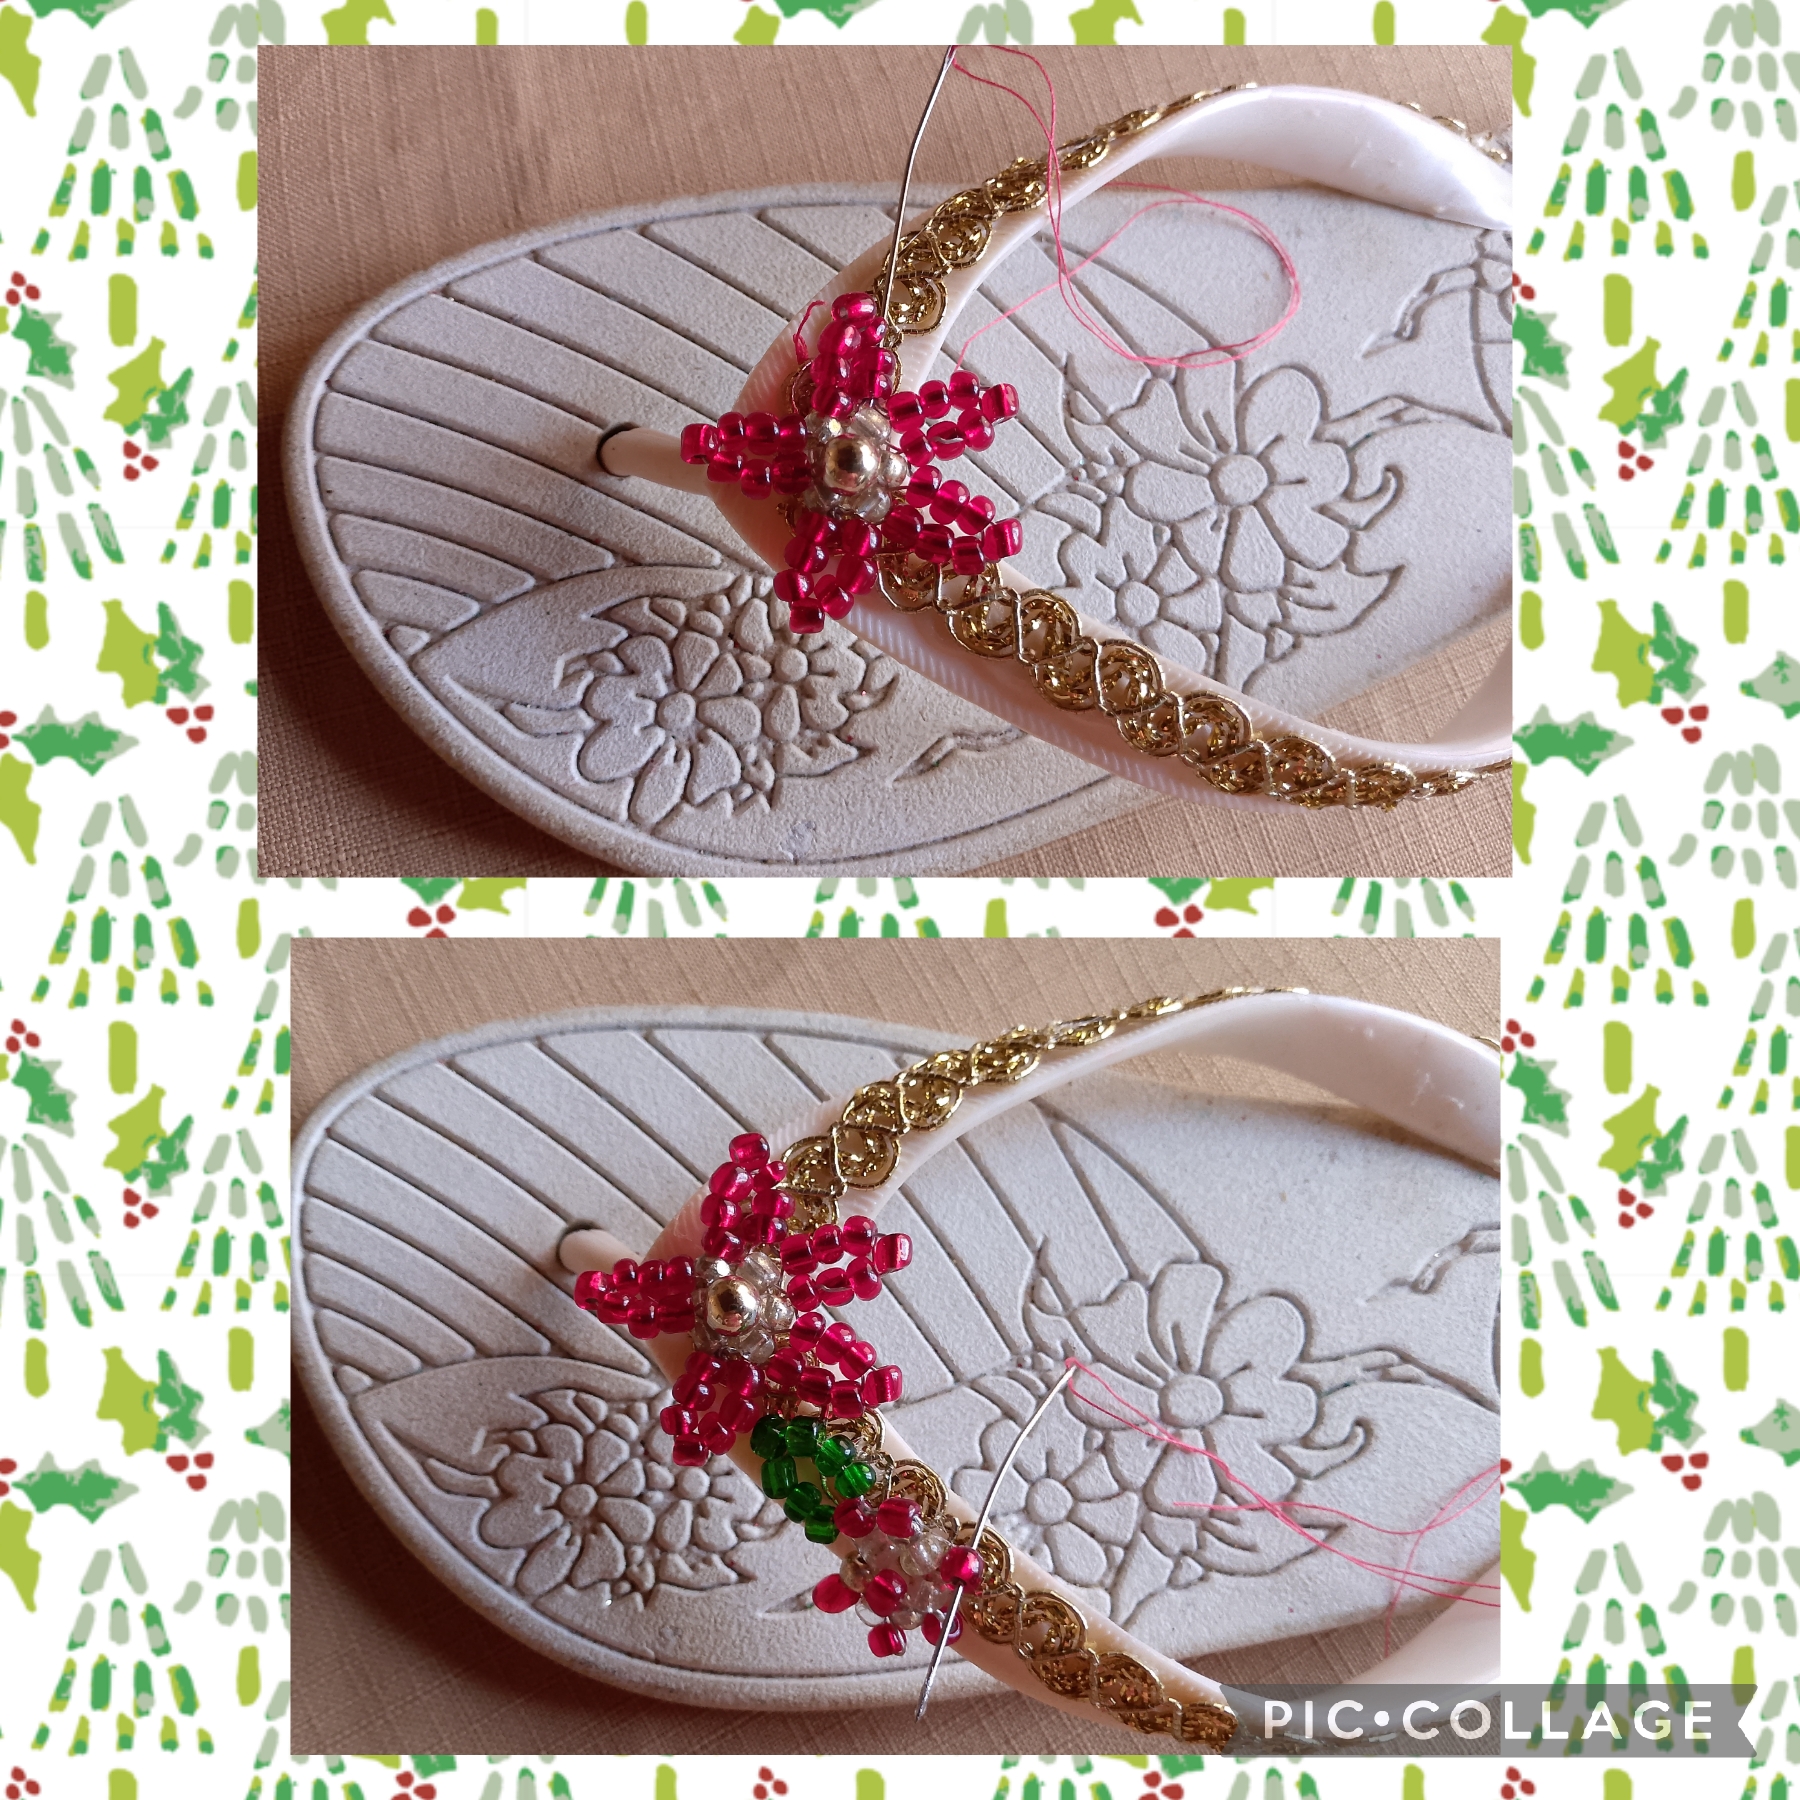
Ahora tomo la sandalia y usando la pistola de silicón caliente pongo la puntilla dorada por todo el contorno como se ve en la imagen, luego empiezo a completar el diseño con las flores de esta manera: uso la aguja y el hilo para fijar las flores, primero pongo la del centro y después las cuatro pequeñas , una vez que está lista realizo el mismo procedimiento para formar la otra y así tengo el par.
THIRD STEP:
Now I take the sandal and using the hot glue gun I put the golden lace around the entire outline as seen in the image, then I begin to complete the design with the flowers in this way: I use the needle and thread to attach the flowers, first I put the one in the center and then the four small ones, once it is ready I do the same procedure to form the other one and thus I have the pair
 ]
]
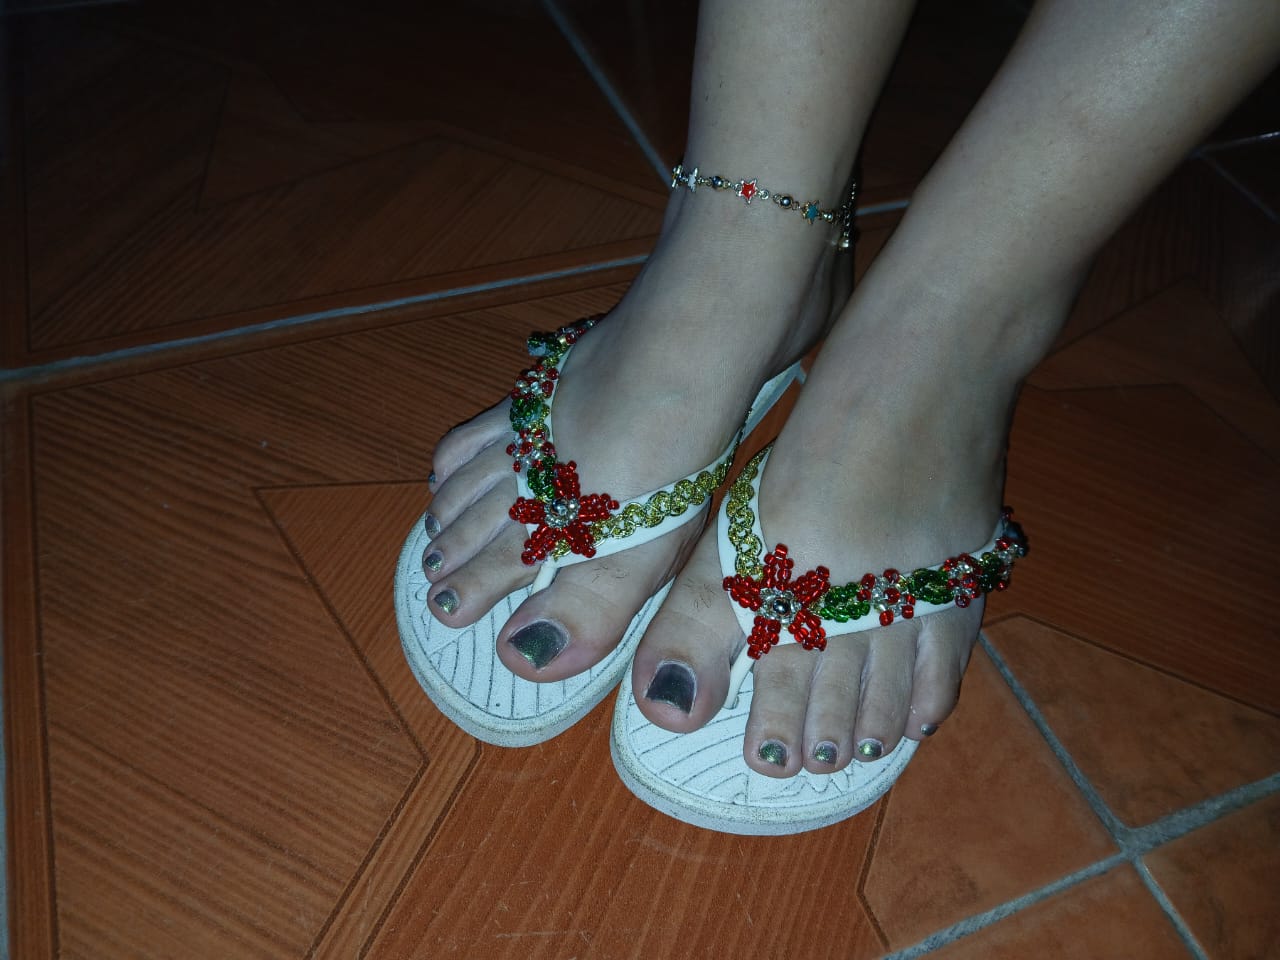
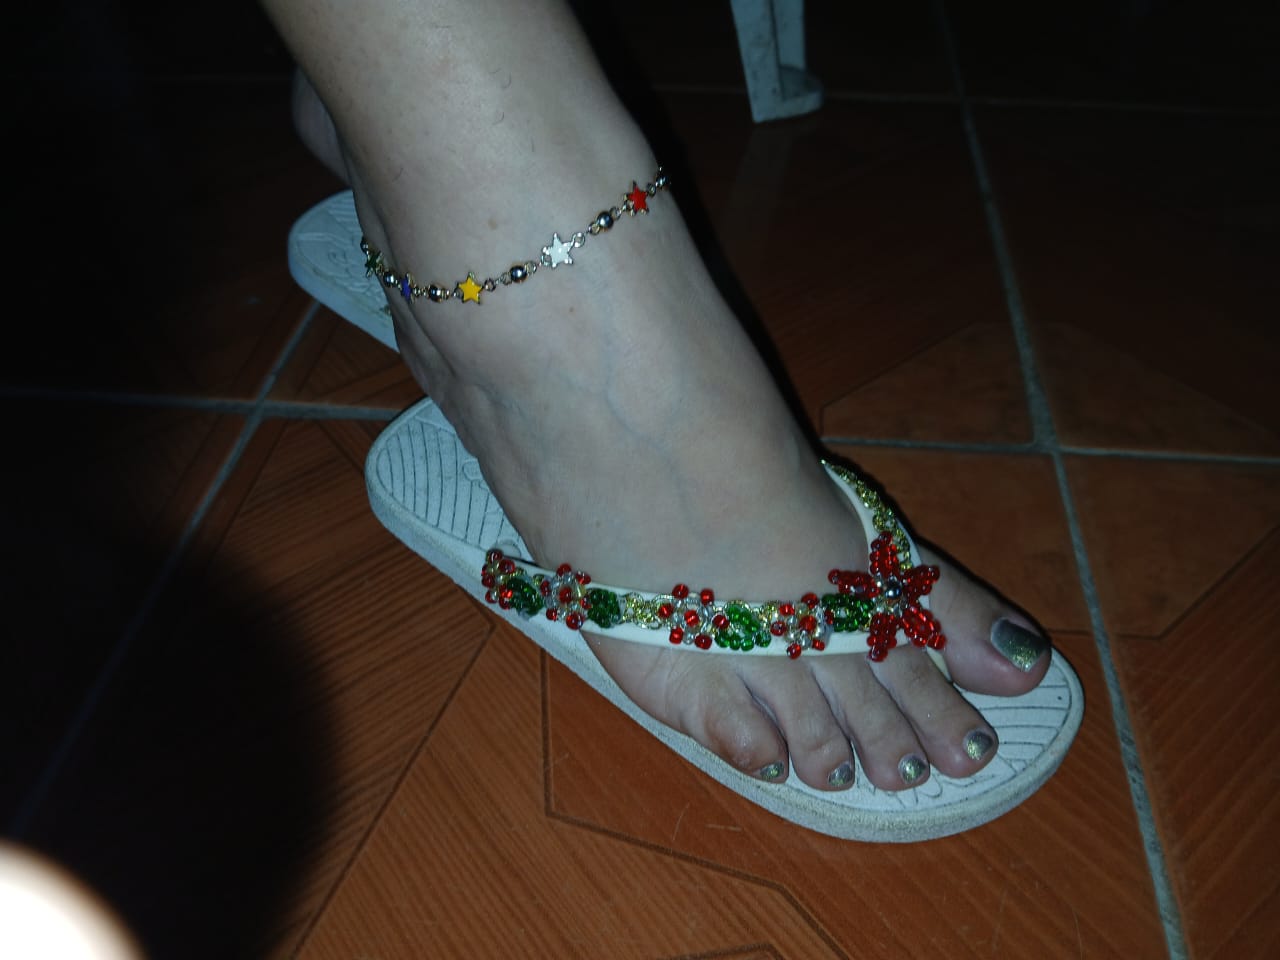
Artistas Creativos de las manualidades y la Joyería, este es el resultado final de mi manualidad, como les dije es un obsequio para mí nieta ir de playa en estás festividades, espero que les guste a ella le fascinaron y las poso en sus bonitos pies, quiero invitar a las Hivers @artesugar, @marciabon, @delvallecedeño para que participen en este navideño concurso ho,ho,ho, que pasen una feliz noche y nos vemos en la próxima manualidad. bye, bye.
Creative Artists of crafts and jewelry, this is the final result of my craft, as I told you it is a gift for my granddaughter to go to the beach during these holidays, I hope you like it, she was fascinated and placed them on her pretty feet, I want to invite the Hivers @artesugar, @marciabon, @delvallecedeño to participate in this Christmas contest ho, ho, ho, have a happy night and see you in the next craft. bye, bye.
Las imágenes y redacción de este tutorial son de mi propiedad, las fotos fueron tomadas con mi teléfono celular Tecno Spark 20 Go y las edite con una aplicación gratis del mismo.
Para traducir texto use Google traductor.
The images and writing of this tutorial are my property, the photos were taken with my Tecno Spark 20 Go cell phone and I edited them with a free application of the same.
To translate text use Google Translate.

Wow! What a nice idea!
I like your idea to convert any normal slippers into fancy and amazing piece of slippers
Thank you for your idea I will also try
My granddaughter really looked very flirtatious in her beach dress, thanks for your comment, Merry Christmas 🤗
Que bonitas quedaron. Hiciste un trabajo bonito, delicado y al mismo tiempo llamativo.
Gracias por la información sobre las plantas navideñas. no sabía que así se llamaban.
Hola amiga que gusto saludarte, si es el nombre de la planta pero nos acostumbramos por la fecha llamarla flor de pascua o de navidad, gracias por tu comentario que tengas un próspero año nuevo.🎄
Que nieta tan afortunada con esos diseños 😊. Quedaron hermosas y espero que las disfruten mucho🤗. Felices fiestas 🎄.
Gracias por el comentario @florecitamejias de verdad está muy contenta con ellas, te deseo que tengas un muy feliz año.🥂
Es un delicado diseño para resaltar nuestros pies, nunca podemos quedar mal así. Me encanta
Algunas veces mi nieta escoge sus propios diseños, y está vez como tú dices quiso consentir sus pies 🤣 que tengas un feliz año @yennyferm🤗