Hola, holaaa! Saluditos Artistas Creativos de la Joyería, feliz inicio de semana, tormenta de bendiciones, que el entusiasmo y la armonía se manifieste en todos sus hogares y que esas energías positivas vibren para ustedes.
Bueno iniciamos la última semana del mes de agosto y pronto estaremos en septiembre a solo tres meses para que el 2023 se despida.
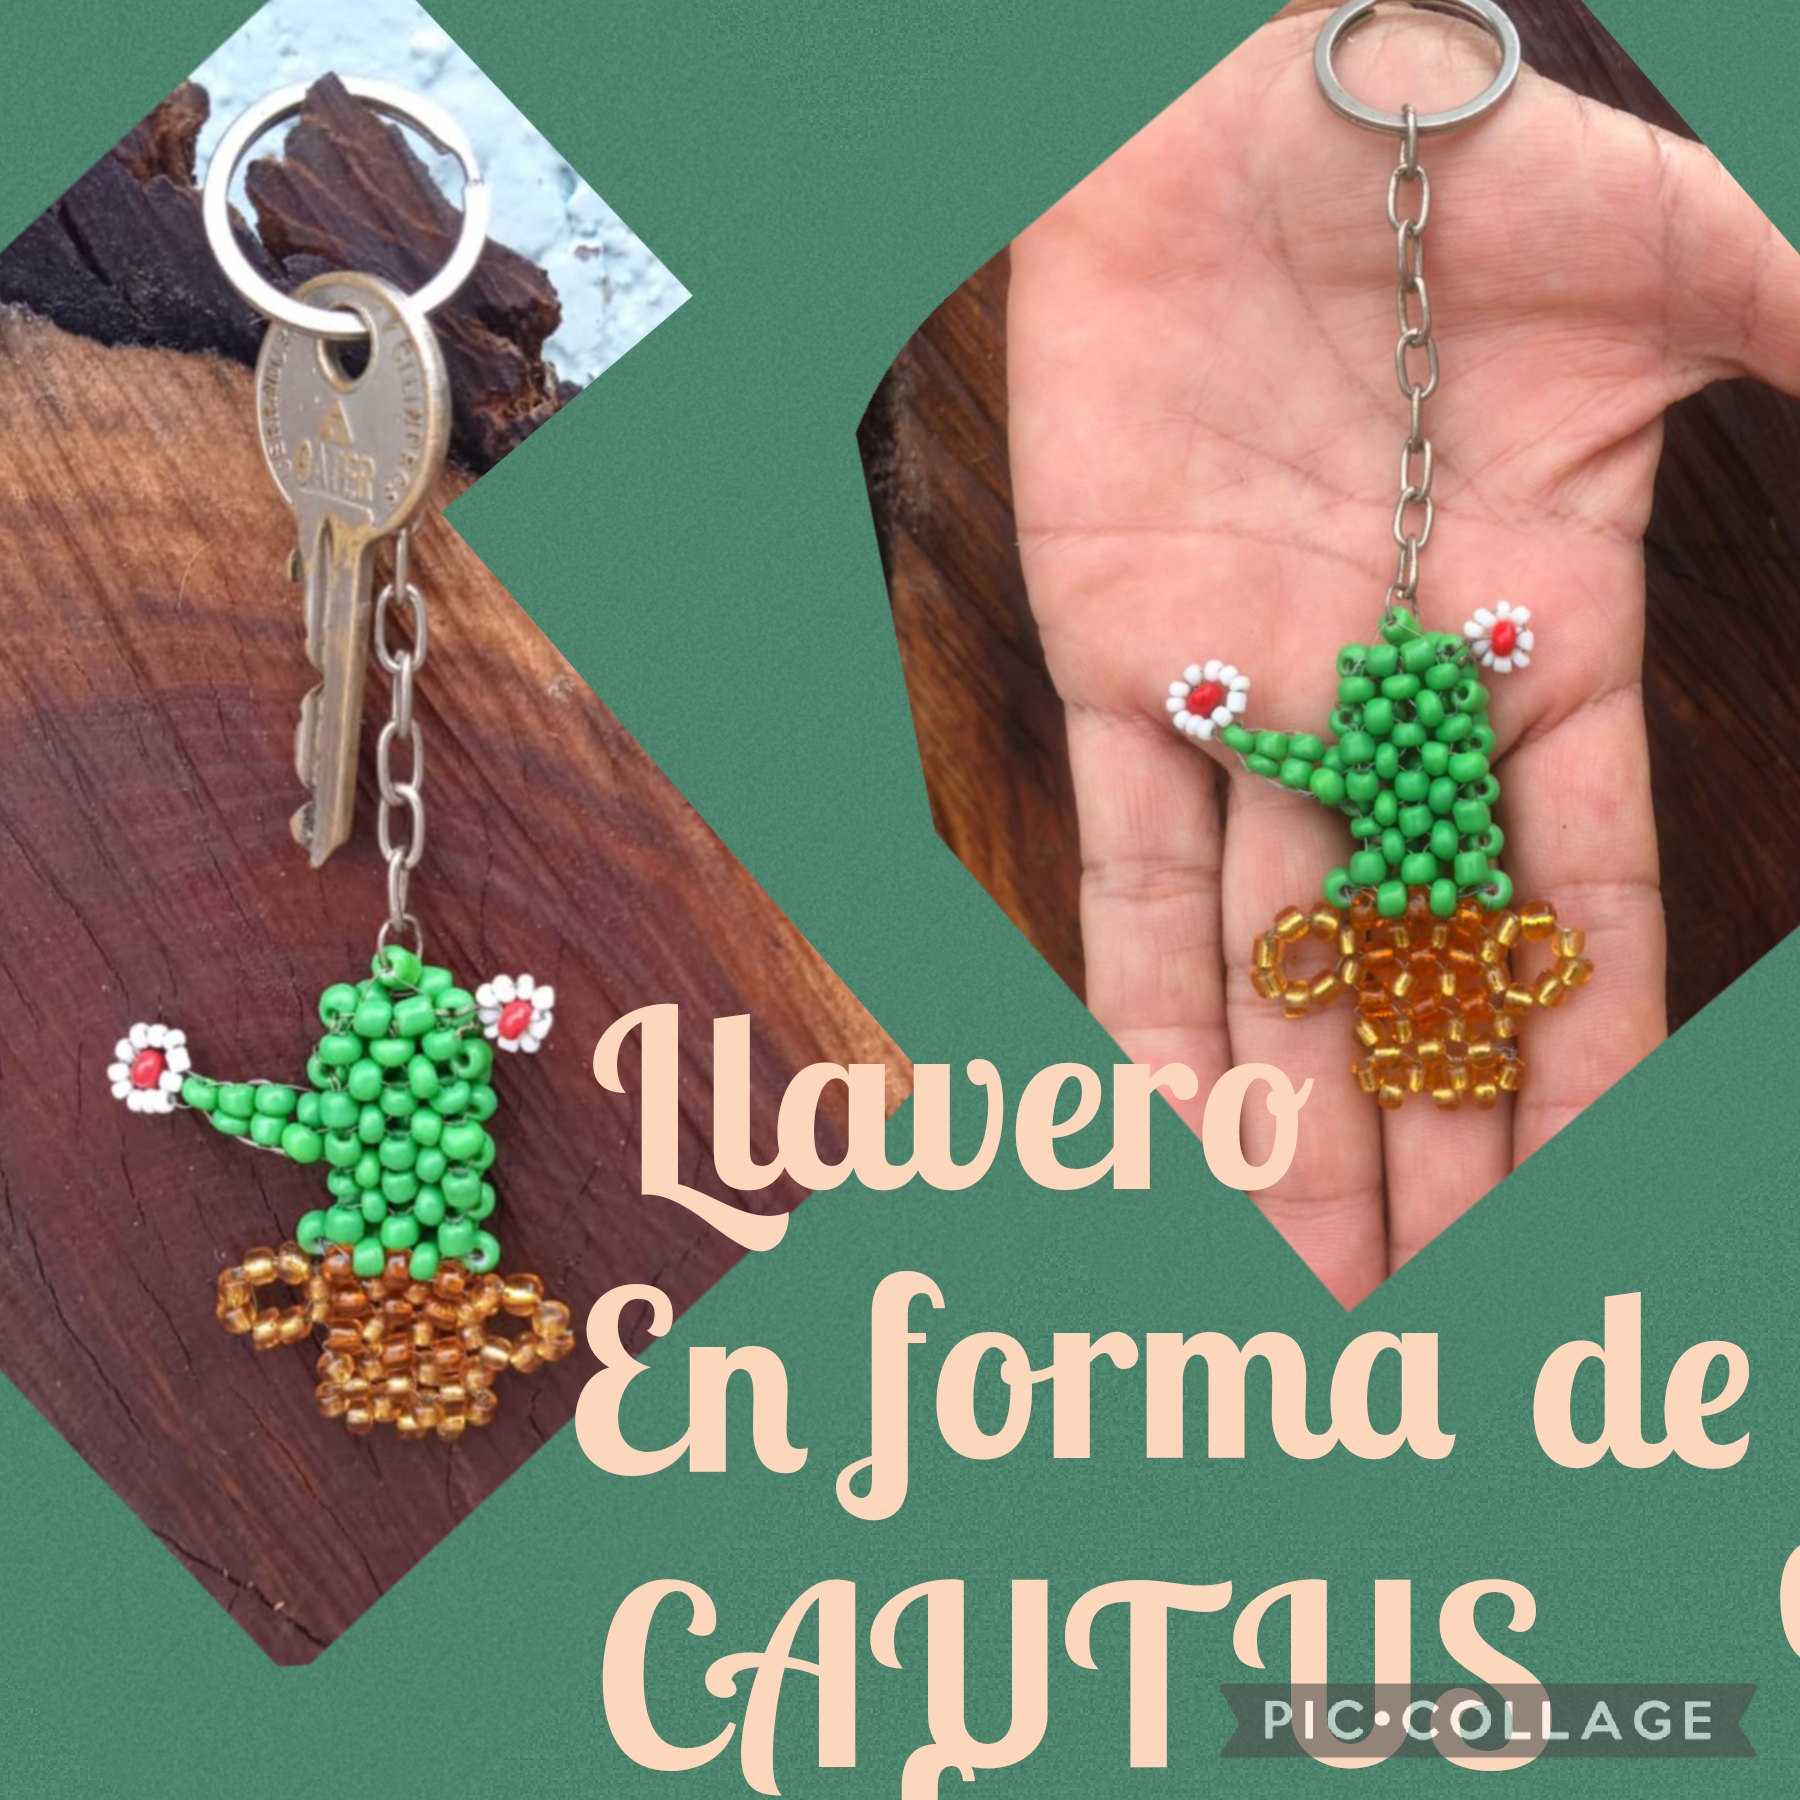
Hoy compartiré con ustedes como realicé Un Bonito y original Llavero con motivo de CAUTUS.
Estás exóticas plantitas usadas tanto en exteriores, como interiores; últimamente se han convertido en un boom de la decoración, y es que su naturaleza suculenta la hace ideal para quienes les gusta tener el Reino Vegetal en casa, pues no necesitan de cuidados especiales incluyendo mucho riego.
Muchas veces les he comentado que soy amante de las plantas mis favoritas son las orquídeas y los Cautus de hecho tengo una gran variedad, que he convertido en un orquidiario cuando estoy en el hogar es mi sitio de relax.
Para mi manualidad de hoy, use esa temática, me inspire en un Cautus con flor, de los que en su gran mayoría se encuentran en el desierto; un amigo me pidió que le hiciera ese diseño, y sigan leyendo para que vean el paso a de como lo hice:
Hello, hello! Greetings Creative Jewelry Artists, happy start to the week, storm of blessings, may enthusiasm and harmony manifest in all your homes and may those positive energies vibrate for you.
Well, we started the last week of August and soon we will be in September, just three months away from 2023.
Today I will share with you how I made a beautiful and original Keychain for CAUTUS.
You are exotic little plants used both outdoors and indoors; Lately they have become a decoration boom, and its succulent nature makes it ideal for those who like to have the Plant Kingdom at home, since they do not need special care, including a lot of watering.
Many times I have told you that I am a lover of plants, my favorites are orchids and the Cautus, in fact I have a great variety, which I have turned into an orchid garden when I am at home, it is my place of relaxation.
For my craft today, I used that theme, I was inspired by a Cautus with a flower, the vast majority of which are found in the desert; a friend asked me to make that design for him, and keep reading to see the step a of how I did it:
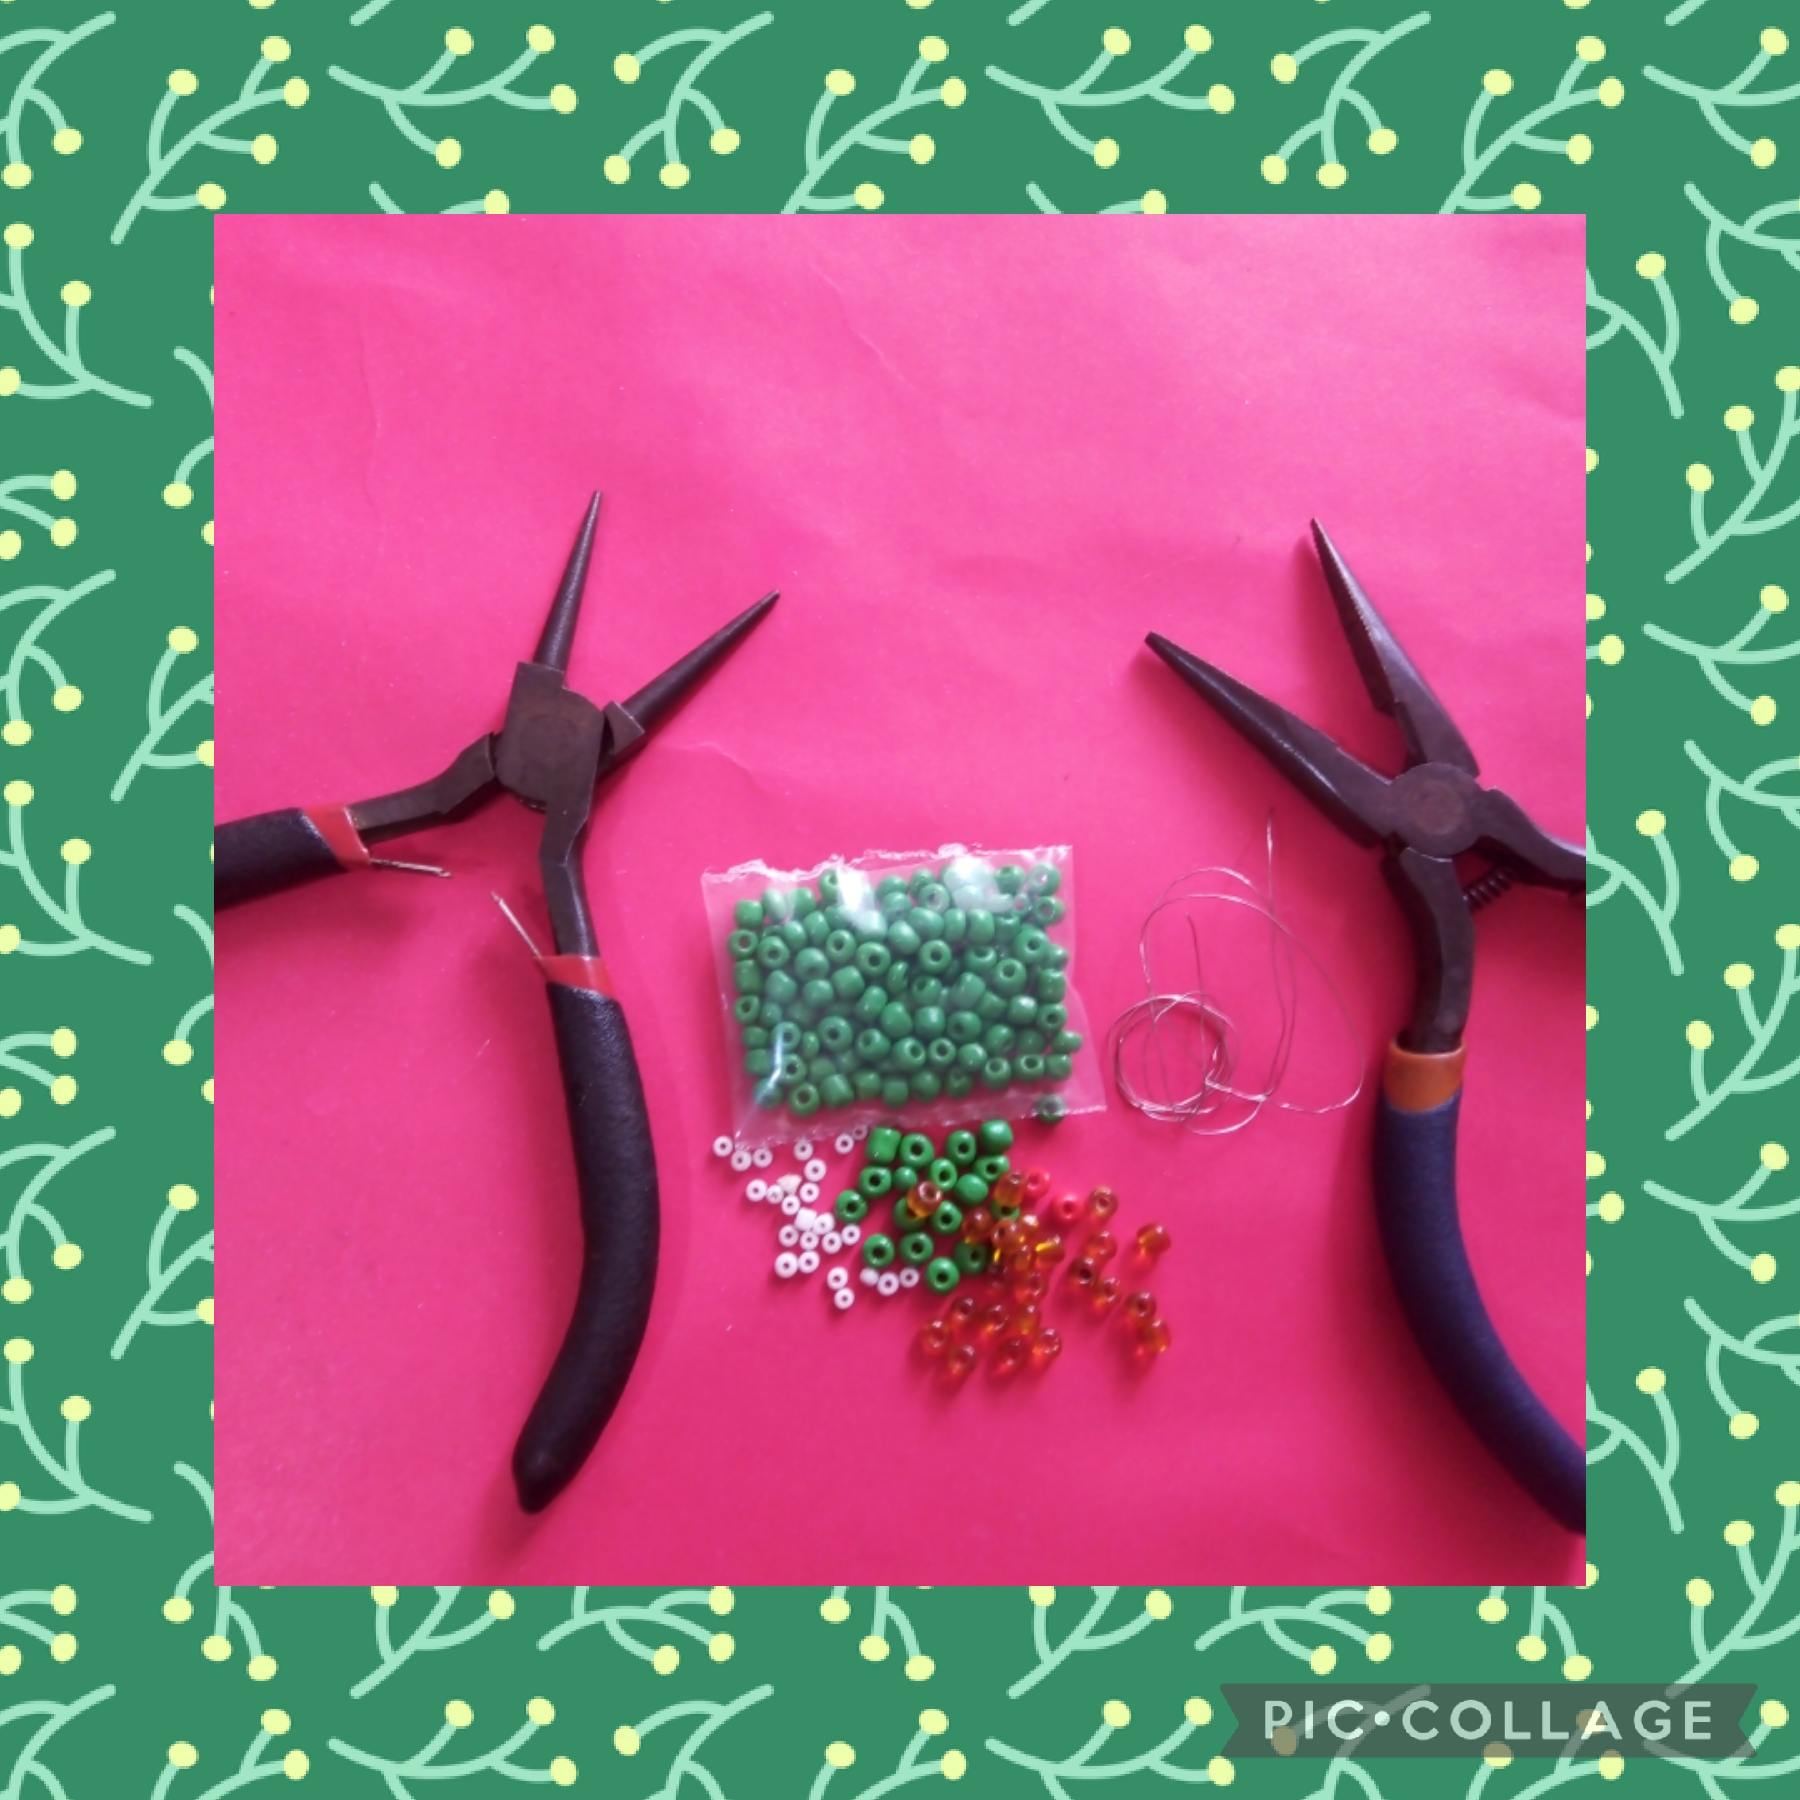
MATERIALES QUE USE PARA REALIZAR ESTE HERMOSO PROYECTO:
*Dos metros de alambre
para bisutería calibre 26 ".
*Mostacillones color verde
bosque.
*Mostacillas color blancas.
*Mostacillas color rojas.
*Mostacillones color
dorado.
*Mostacillones color cobre.
*Tres argollas .
- cuatro centímetros de
cadena plateada eslabones
pequeños.
*Un aro para llavero.
*Pinza punta redonda.
*Tijeras.
*Llave.
MATERIALS THAT YOU USE TO MAKE THIS BEAUTIFUL PROJECT:
*Two meters of wire
for 26" gauge jewelry.
*Green beads
forest.
*White beads.
*Red beads.
- Color beads
golden.
*Copper colored beads.
*Three rings. - four centimeters of
silver chain links
little ones.
*A key ring.
*Round tip pliers.
*Scissors.
*Key.
CON ESTOS SENCILLOS Y POCOS PASOS REALICÉ MI BONITO LLAVERO:
PRIMER PASO:
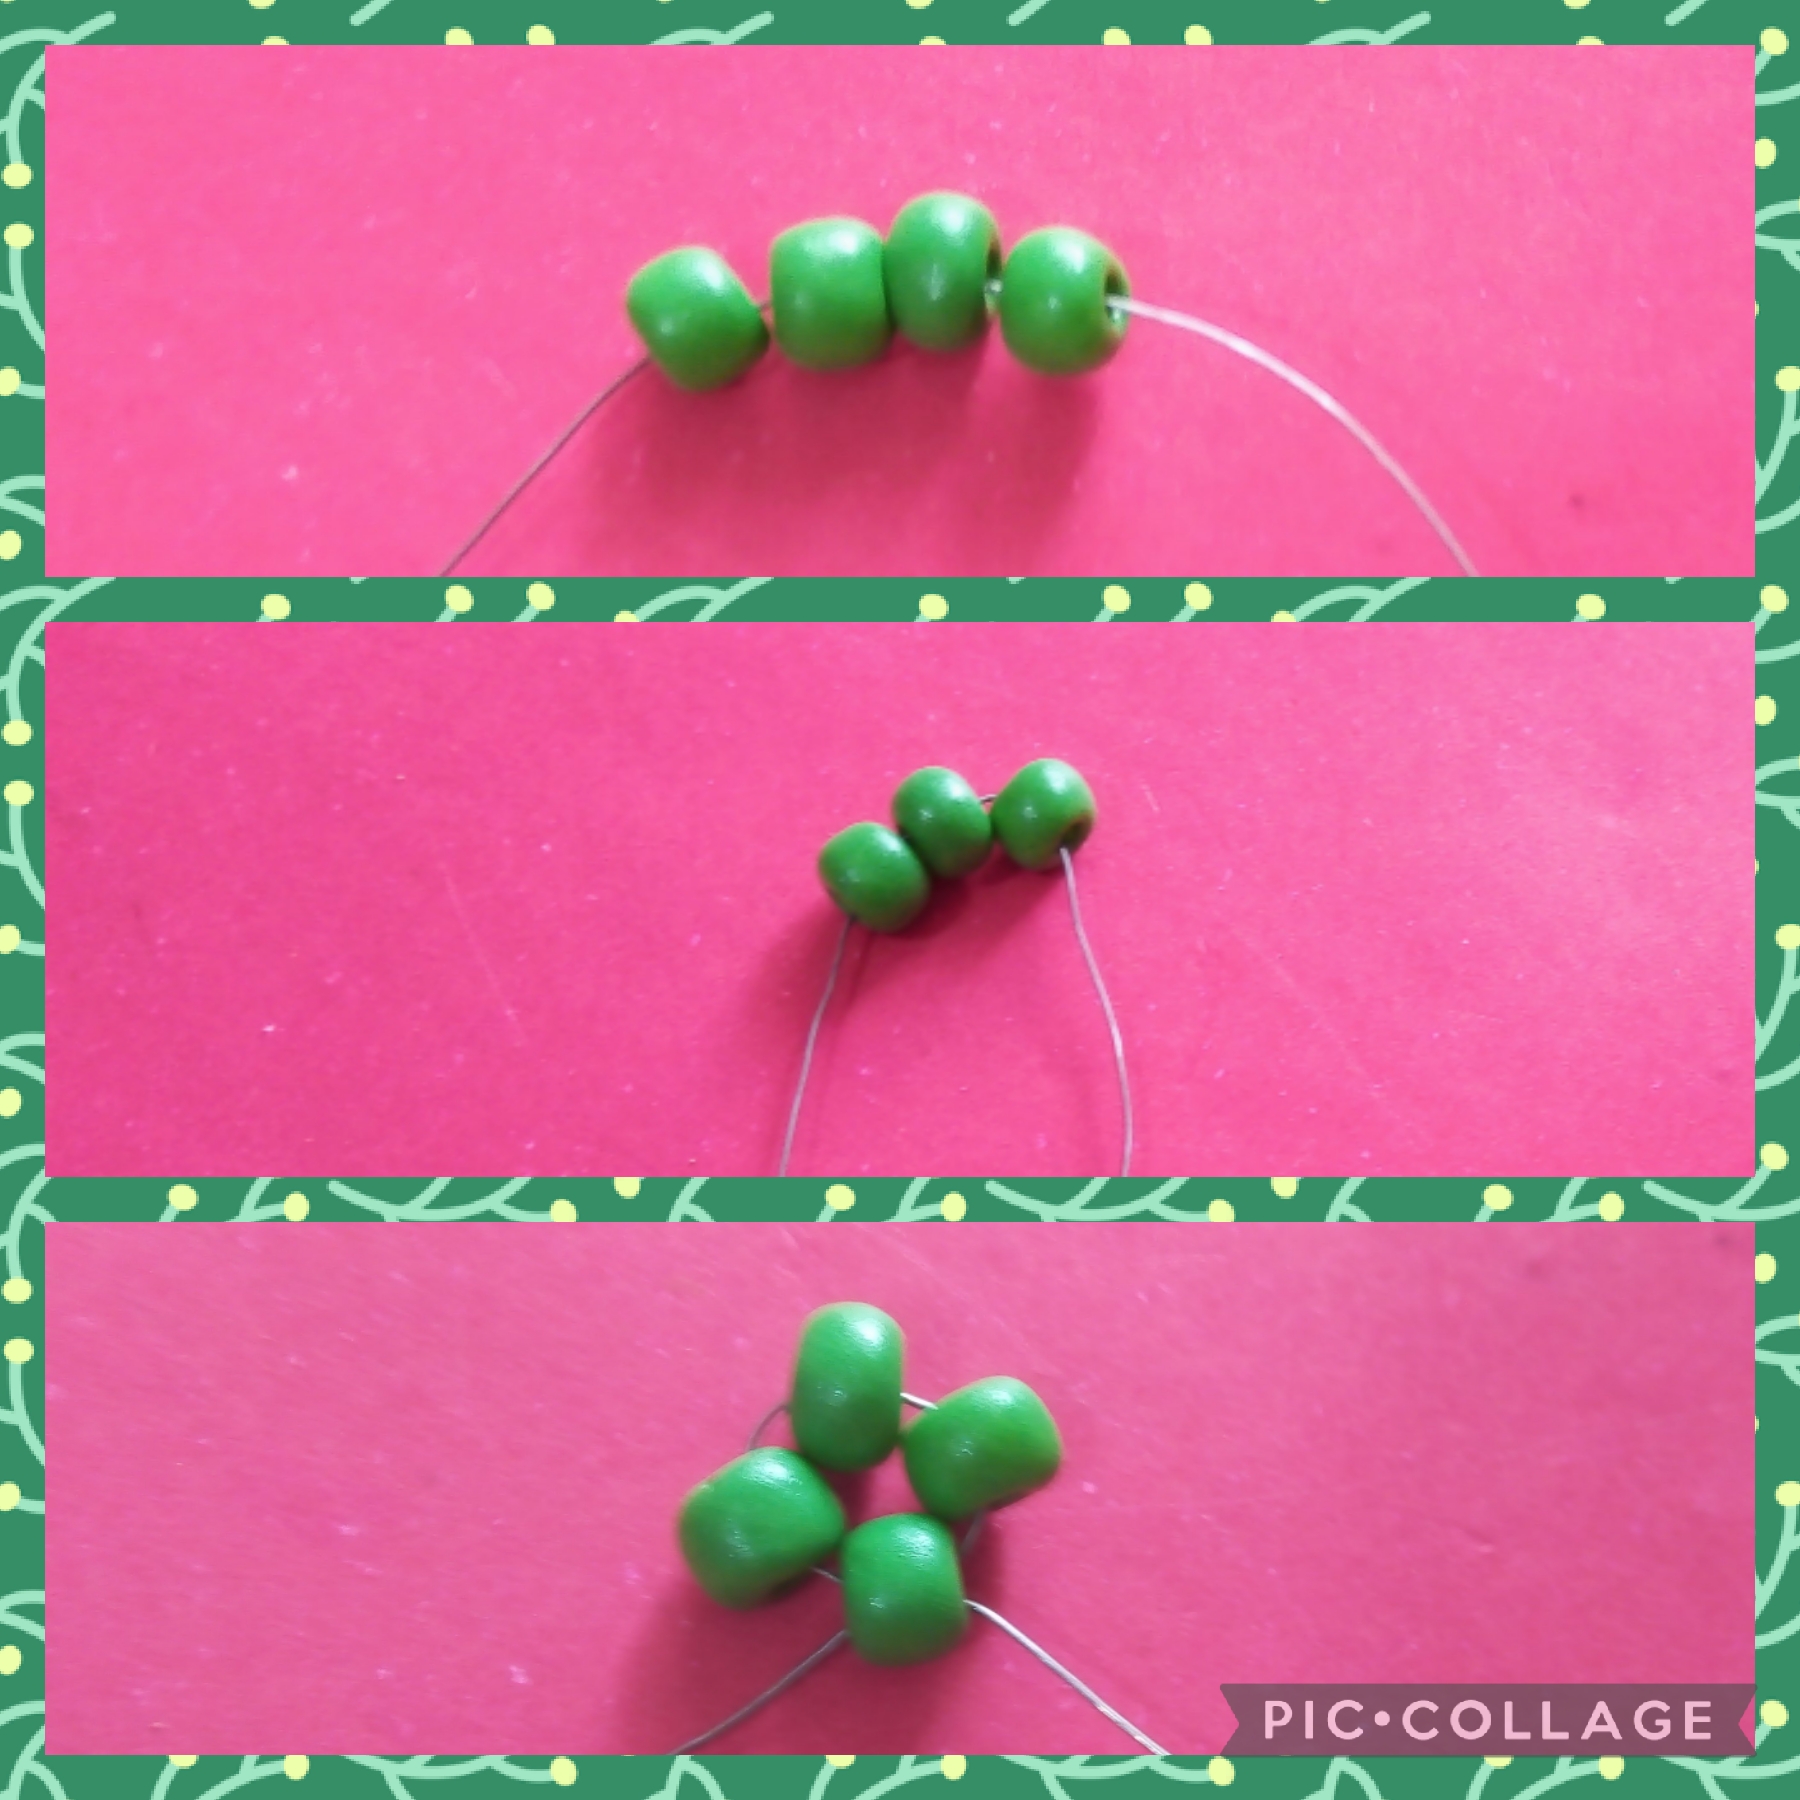
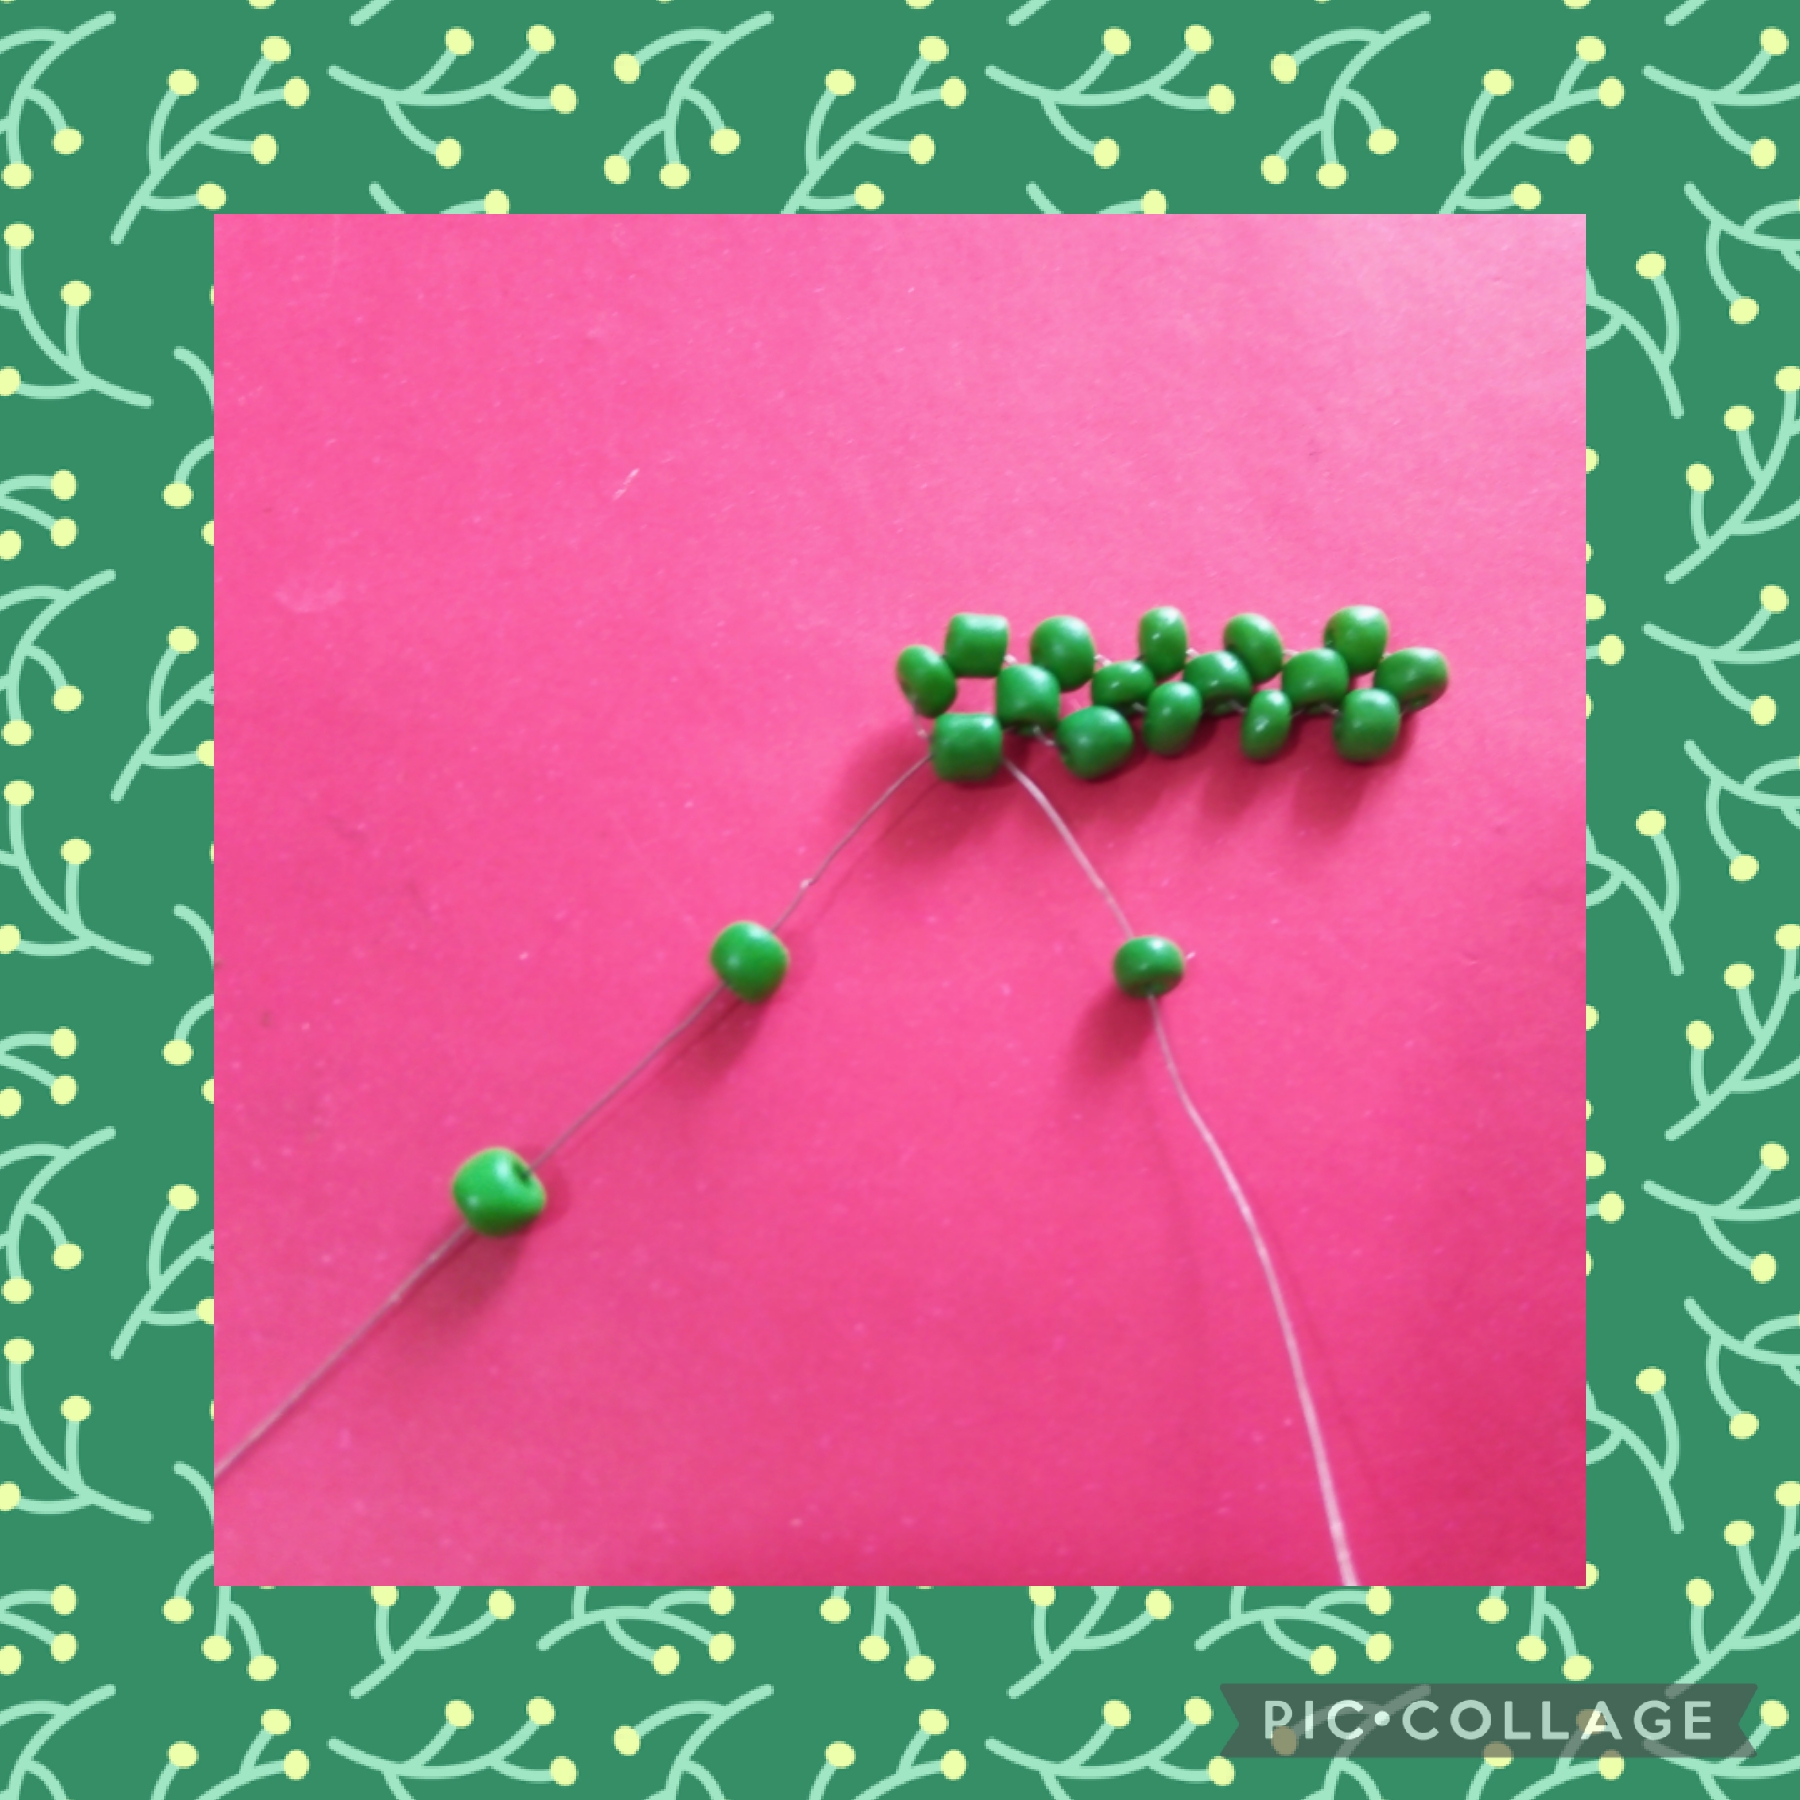
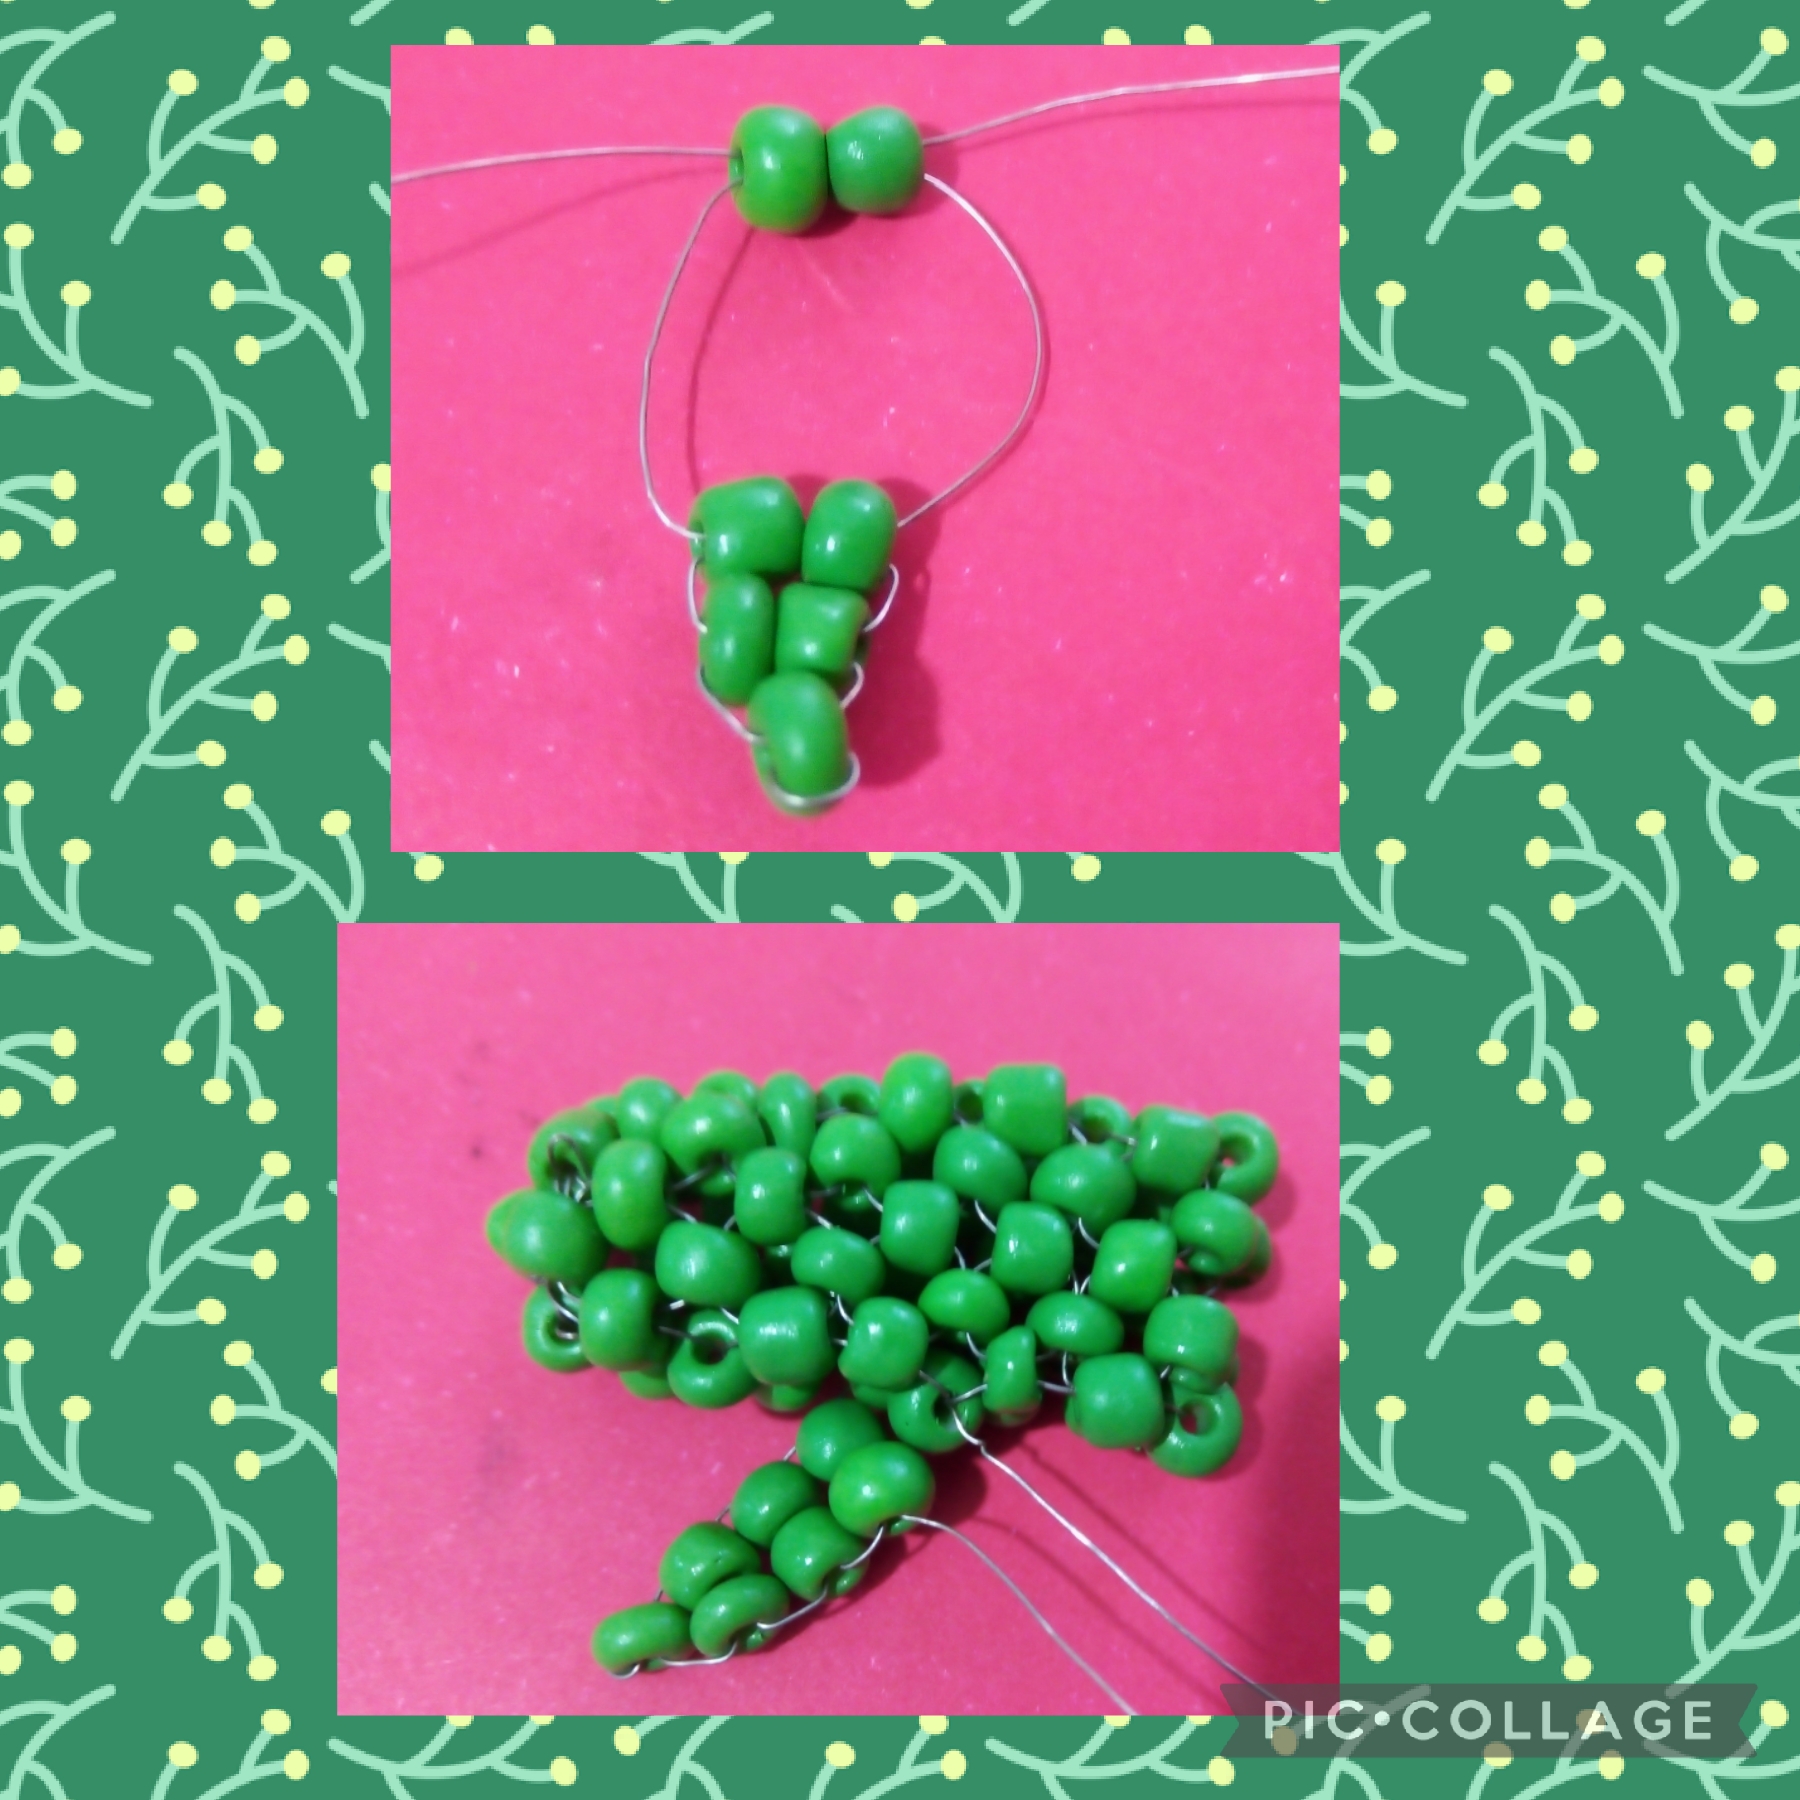
Para comenzar este primer paso, uso los dos metros de alambre calibre 26 " ; inserto en una punta cuatro mostacillones verde bosque, ahora el último mostacillón lo cruzo formo un módulo de cuatro parecido a una pequeña flor y lo llevo a la mitad del alambre, como en la foto.
WITH THESE SIMPLE AND FEW STEPS I MADE MY BEAUTIFUL KEYCHAIN:
FIRST STEP:
To start this first step, I use the two meters of 26" gauge wire; I insert four forest green beads at one end, now I cross the last beads, I form a module of four like a small flower and I bring it to the middle of the wire, as in the photo.
SEGUNDO PASO:
Una vez que realizo el paso anterior, tengo dos puntas del alambre, en cada punta pongo un mostacillón verde bosque, pongo otro mostacillón verde bosque que cruzo con la otra punta del alambre, de nuevo formo módulo de cuatro, este procedimiento lo elaboraré cinco veces para tener el largo del Cautus.
SECOND STEP:
Once I carry out the previous step, I have two ends of the wire, at each end I put a forest green bead, I put another forest green bead that I cross with the other end of the wire, again I form a module of four, I will elaborate this procedure five times to have the length of the Cautus.
TERCER PASO:
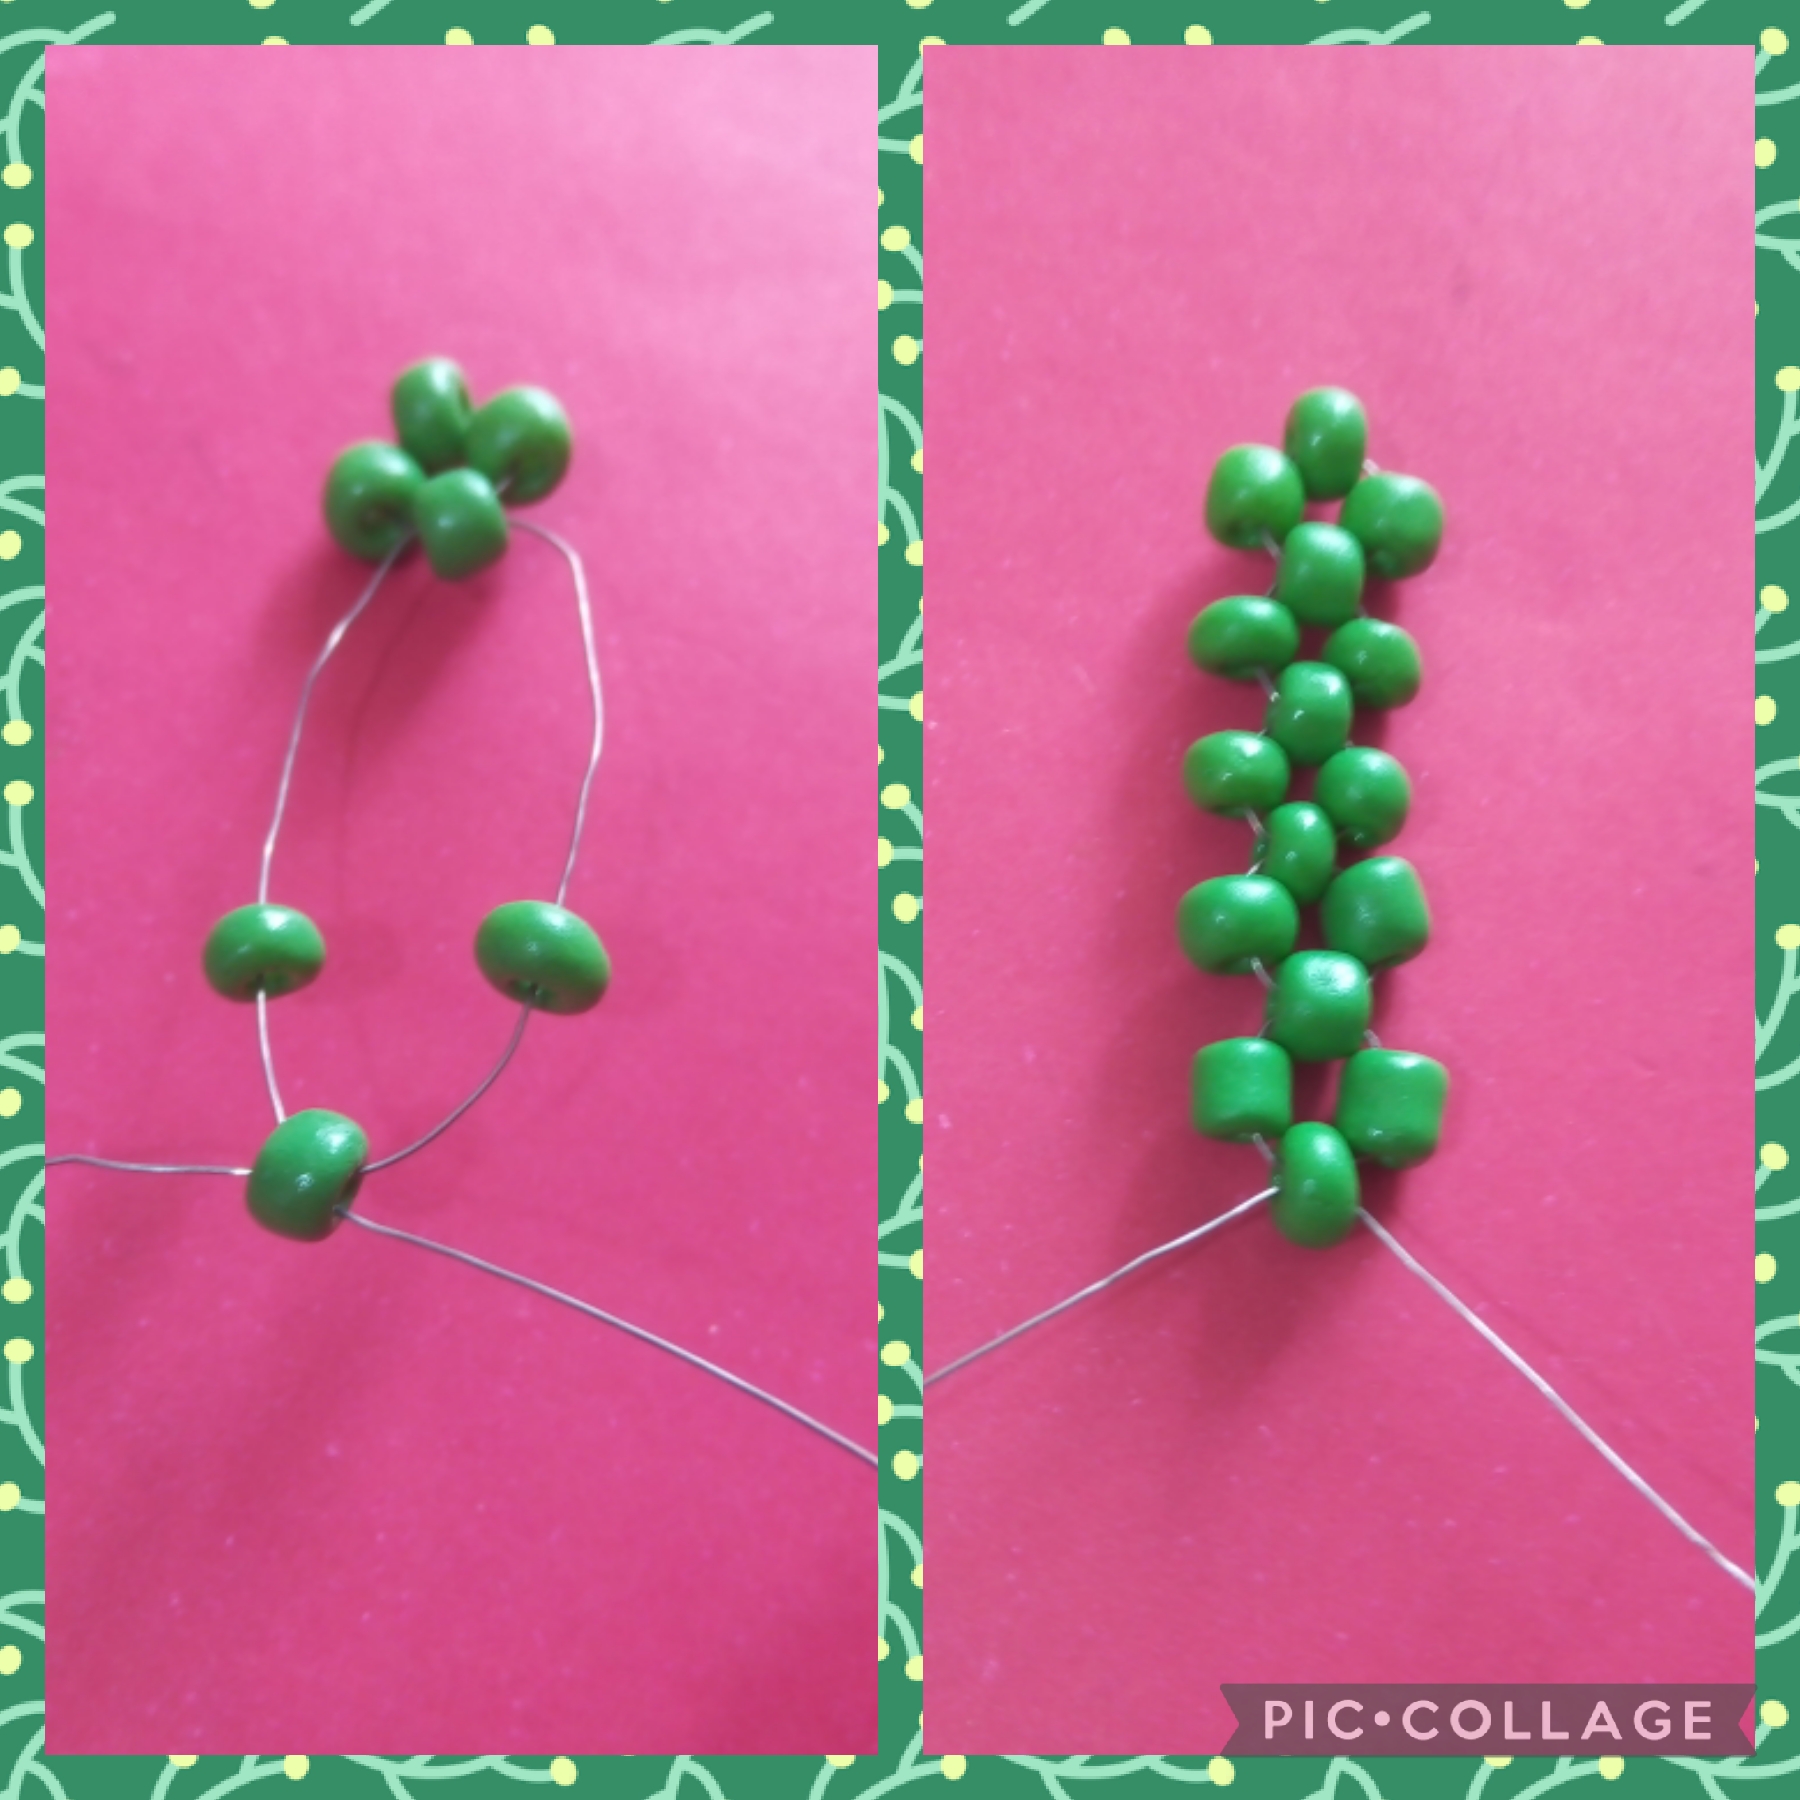
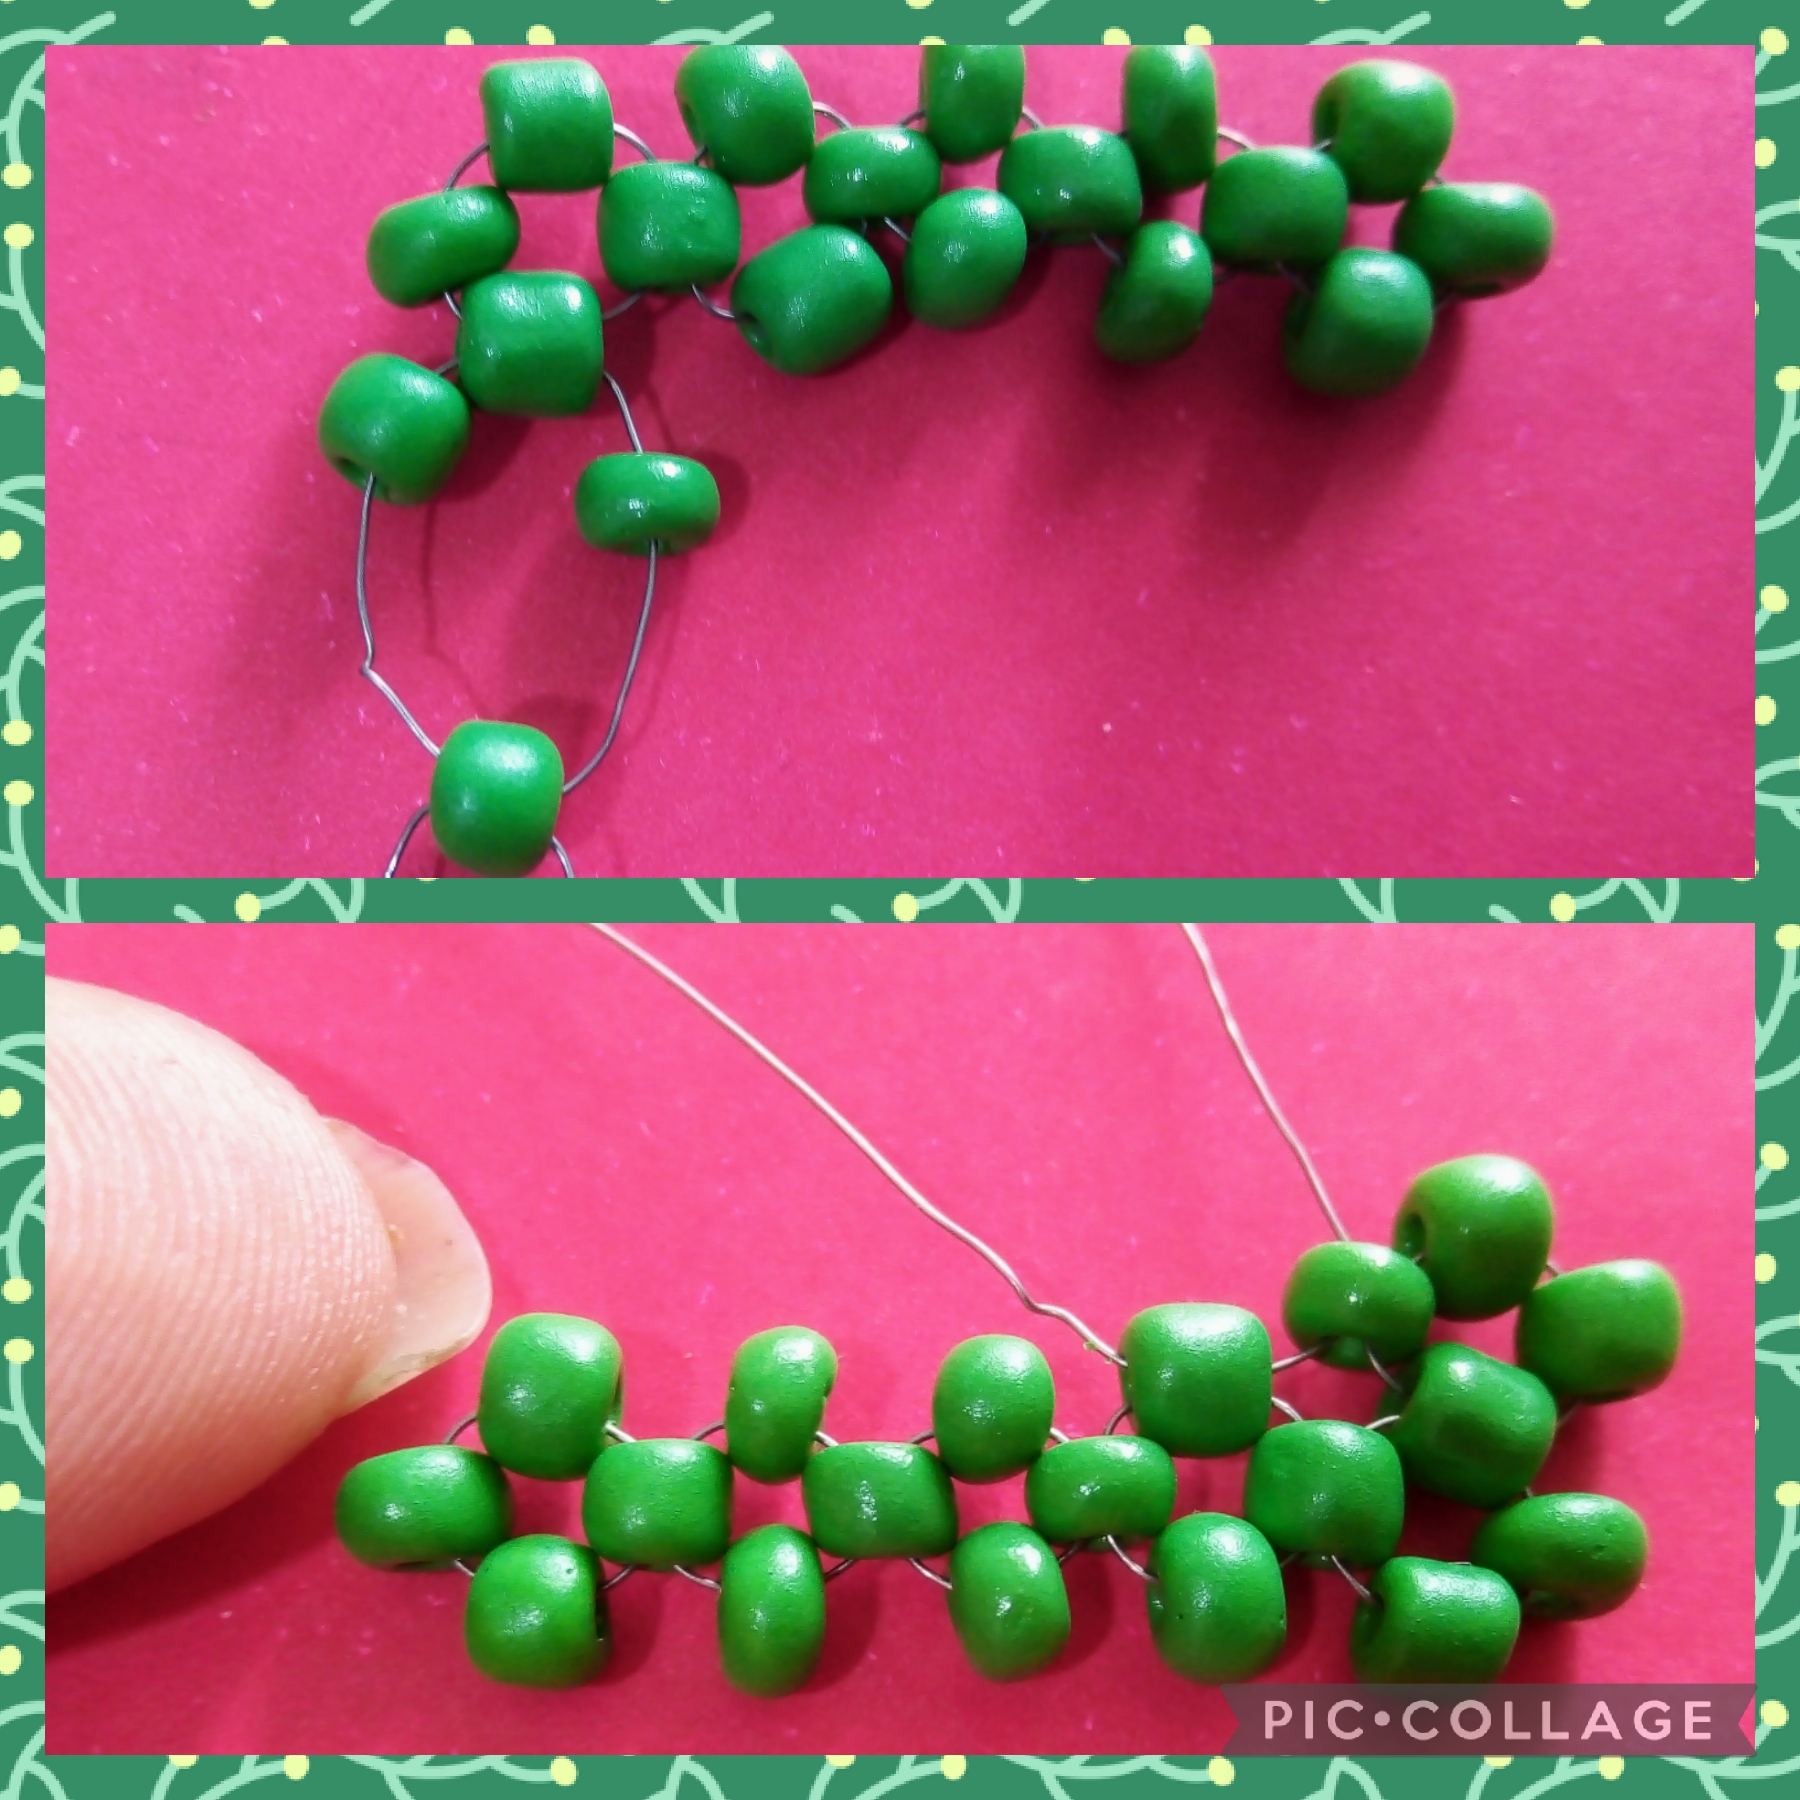
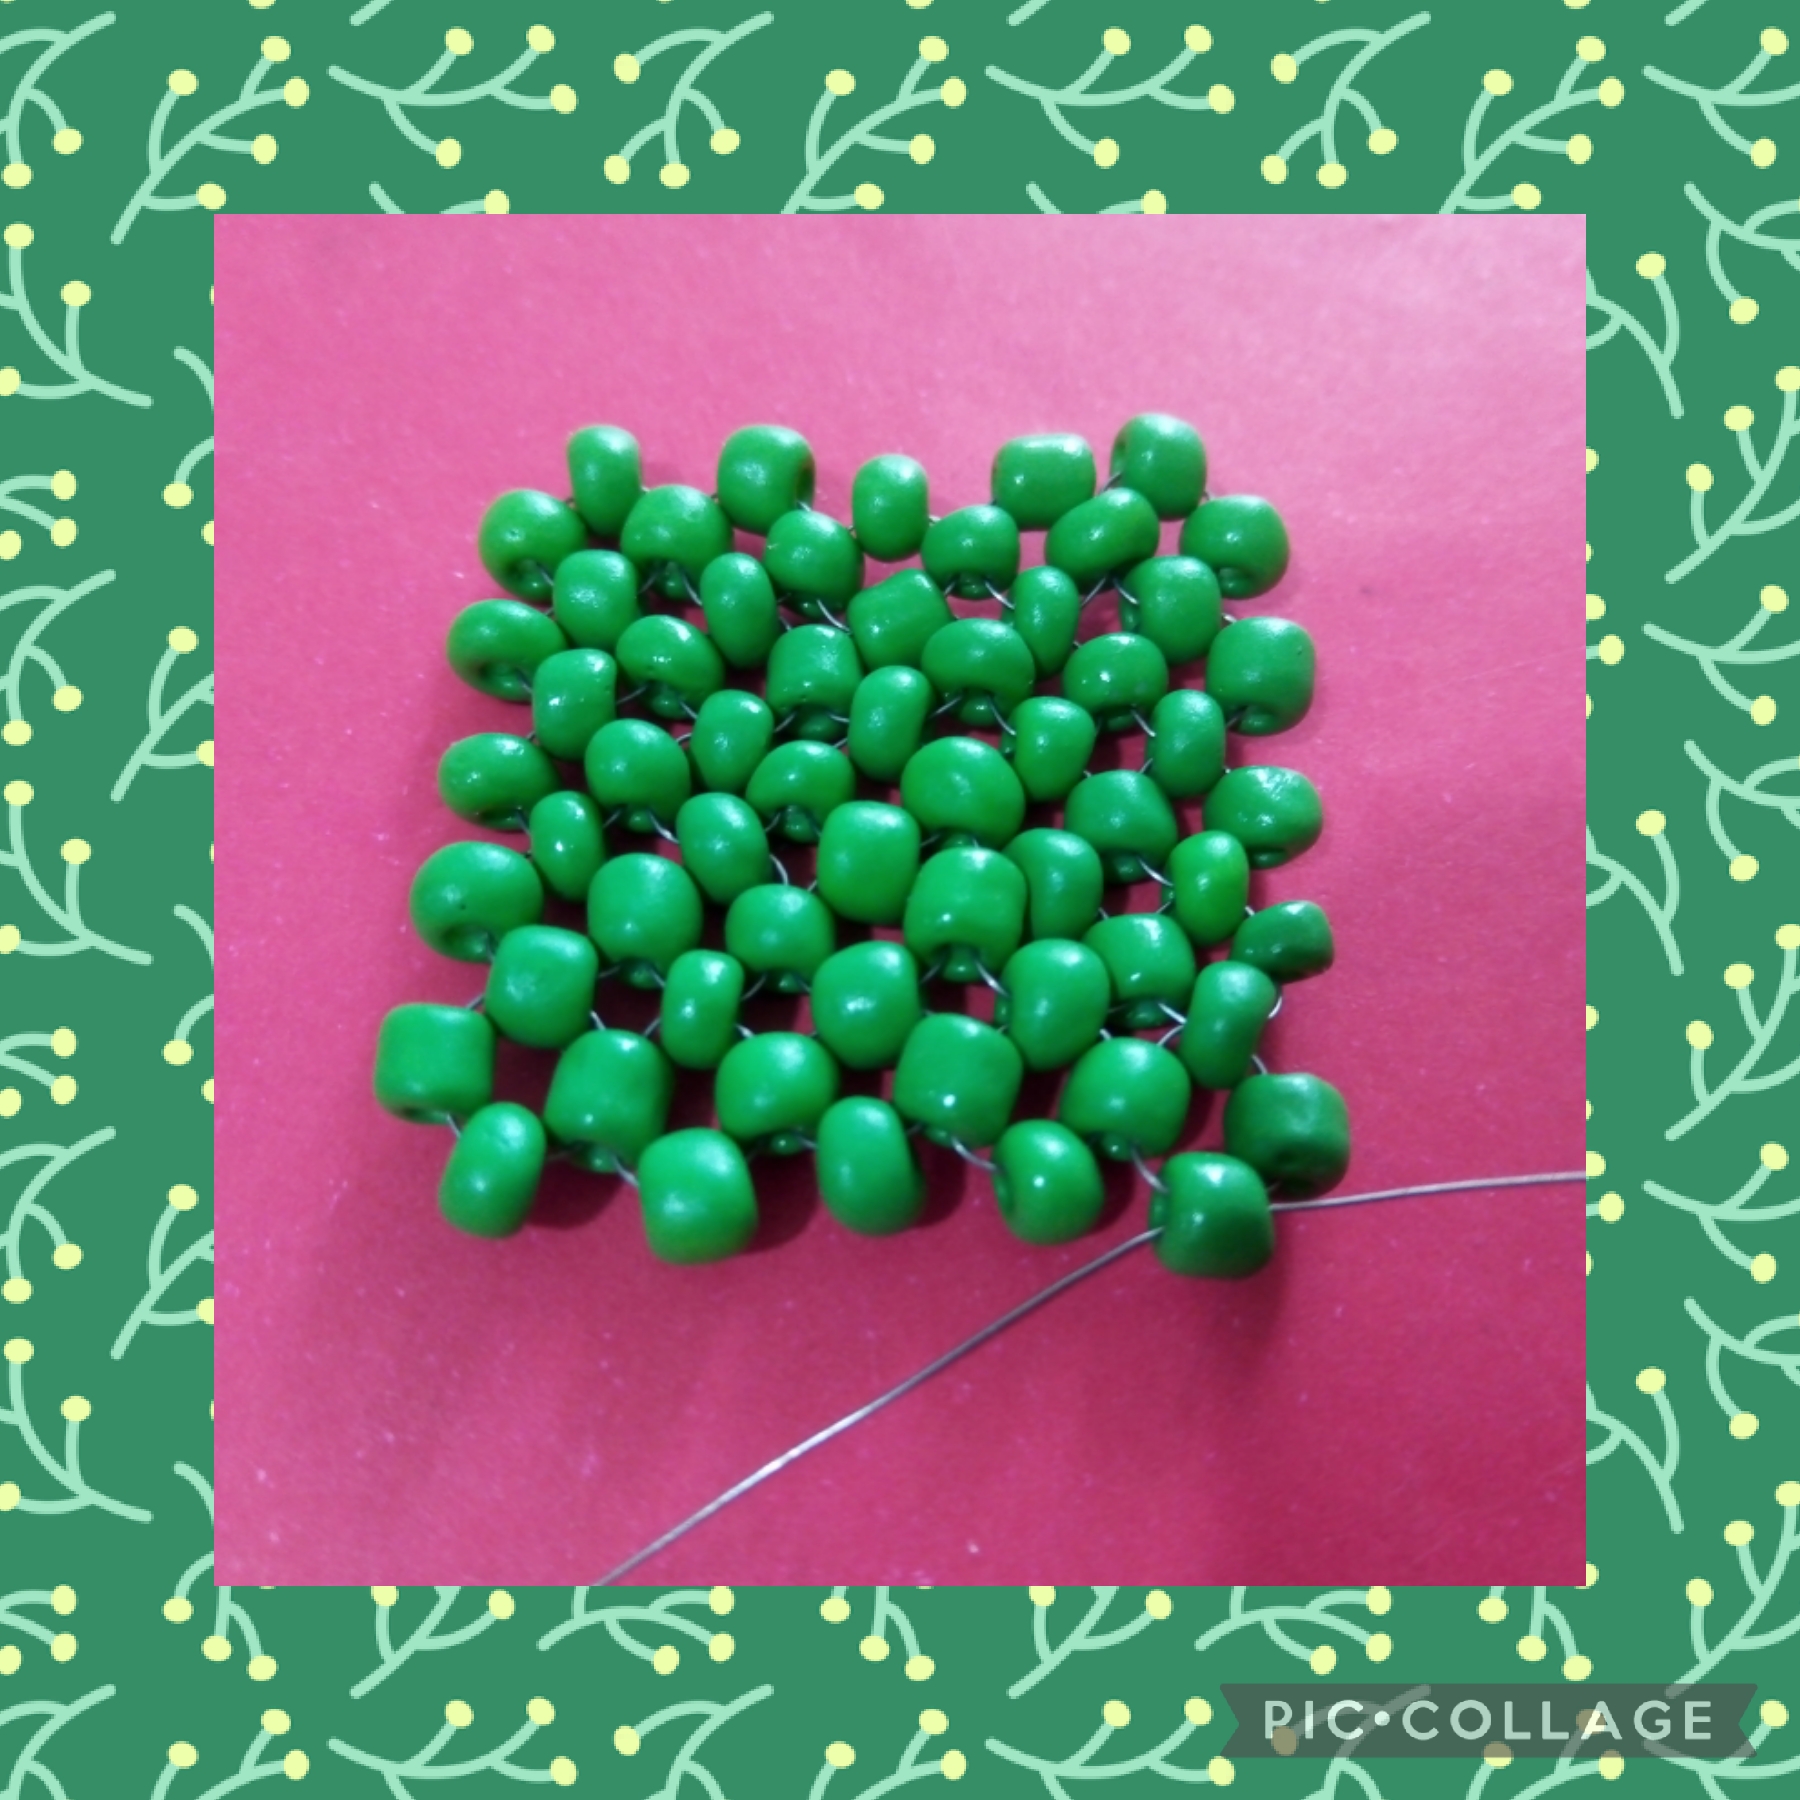
Ahora aquí voy a realizar una segunda vuelta como muestra la foto, en el primer mostacillón verde tengo las dos puntas del alambre, izquierdo y derecho inserto dos mostacillones verdes por el lado derecho y uno que cruzo por el lado izquierdo, formando el primer módulo de cuatro de la segunda vuelta, ahora inserto el alambre por el siguiente mostacillón de la primera vuelta y así tengo dos mostacillones verdes, inserto dos mas por el alambre derecho y cruzo por el último mostacillón con el alambre izquierdo para así seguir formando los módulos de cuatro así:
THIRD STEP:
Now here I am going to make a second round as shown in the photo, in the first green beads I have the two ends of the wire, left and right, I insert two green beads on the right side and one that crosses on the left side, forming the first module of four of the second round, now I insert the wire through the next beads of the first round and thus I have two green beads, I insert two more through the right wire and cross the last beads with the left wire in order to continue forming the modules of four So
CUARTO PASO:
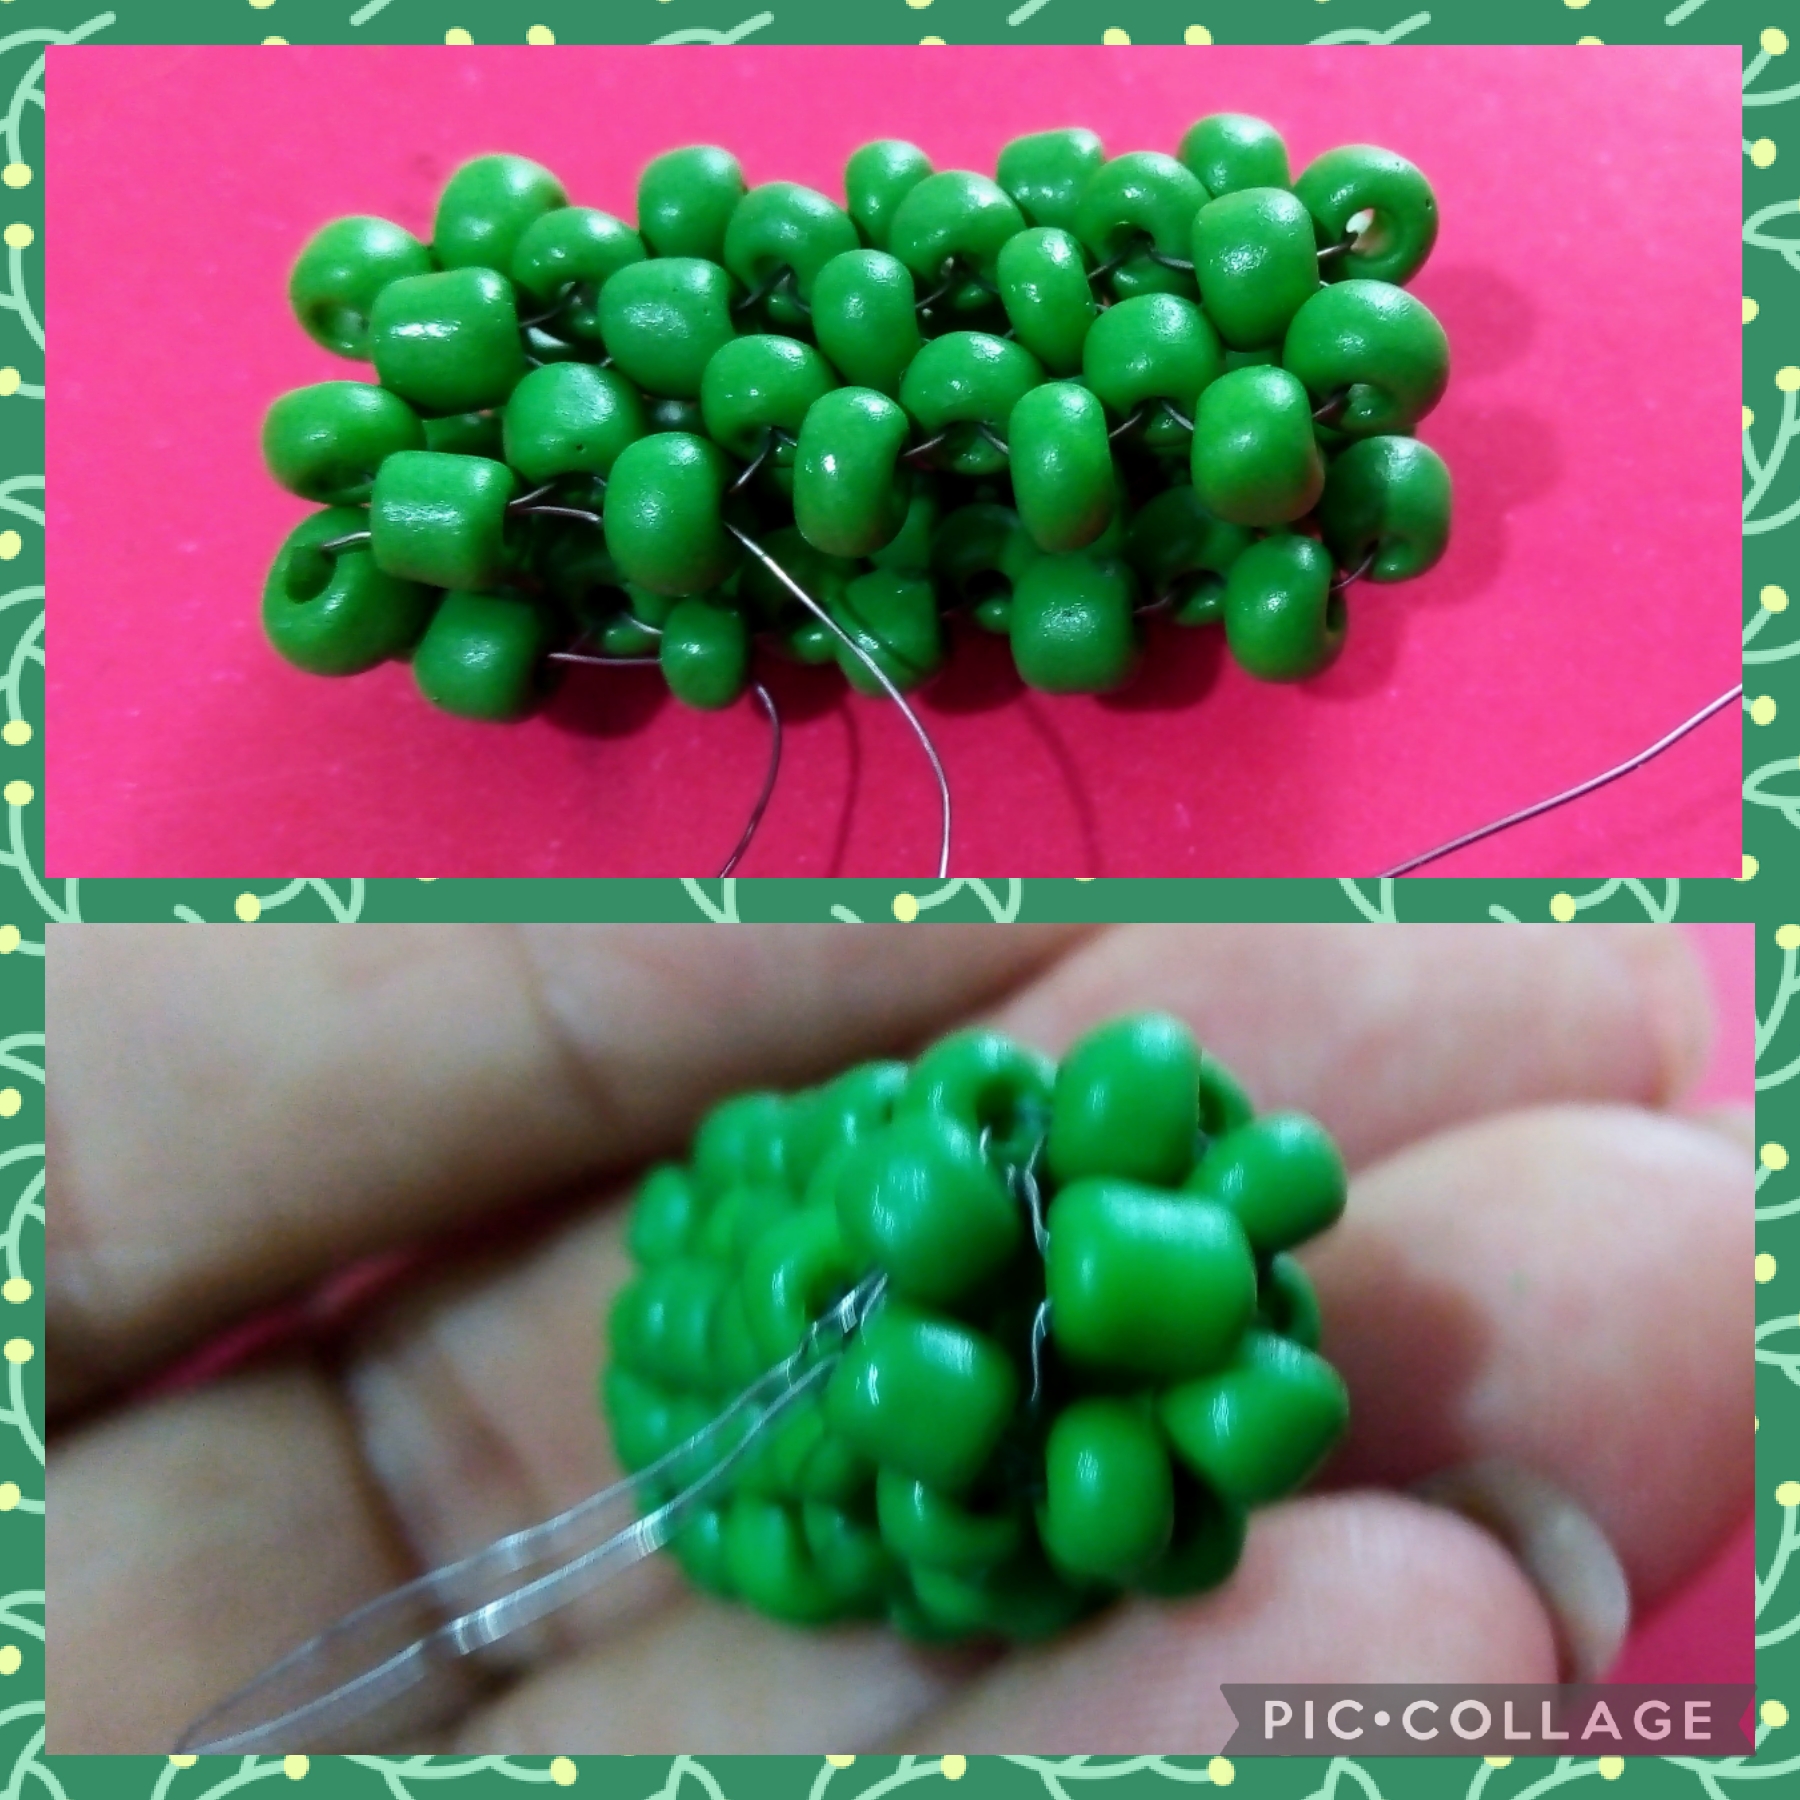
Realicé cinco vueltas de la misma manera, ahora doblo la labor inserto un mostacillón verde y paso el alambre por el primer mostacillón del lado contrario, inserto un nuevo mostacillón y lo cruzo, inserto de nuevo el alambre, cada punta por los mostacillones de cada lado, insertando un nuevo mostacillón y cruzándolo hago este procedimiento cinco veces ; al llegar a colocar el último mostacillón cruzo los alambres en este último ;paso de nuevo uno de los alambres por los cinco mostacillones, ahora uno los alambres coloco un mostacillón en los dos alambres y lo pongo en el centro, inserto los alambres cruzandolos en el quinto mostacillón para hacer una especie de flor, con la pinza corto el excedente (ver la imagen).
FOURTH STEP:
I made five turns in the same way, now I fold the piece, insert a green bead and pass the wire through the first bead on the opposite side, insert a new bead and cross it, insert the wire again, each end through the bead on each side , inserting a new bead and crossing it I do this procedure five times ; When I get to place the last mostacillion I cross the wires in this last step again one of the wires for the five mostacillions, now one of the wires I place a mostacillion in the two wires and put it in the center, I insert the wires crossing them in the fifth mostacillon to make a kind of flower, with the tweezers I cut the excess (see the image).
QUINTO PASO:
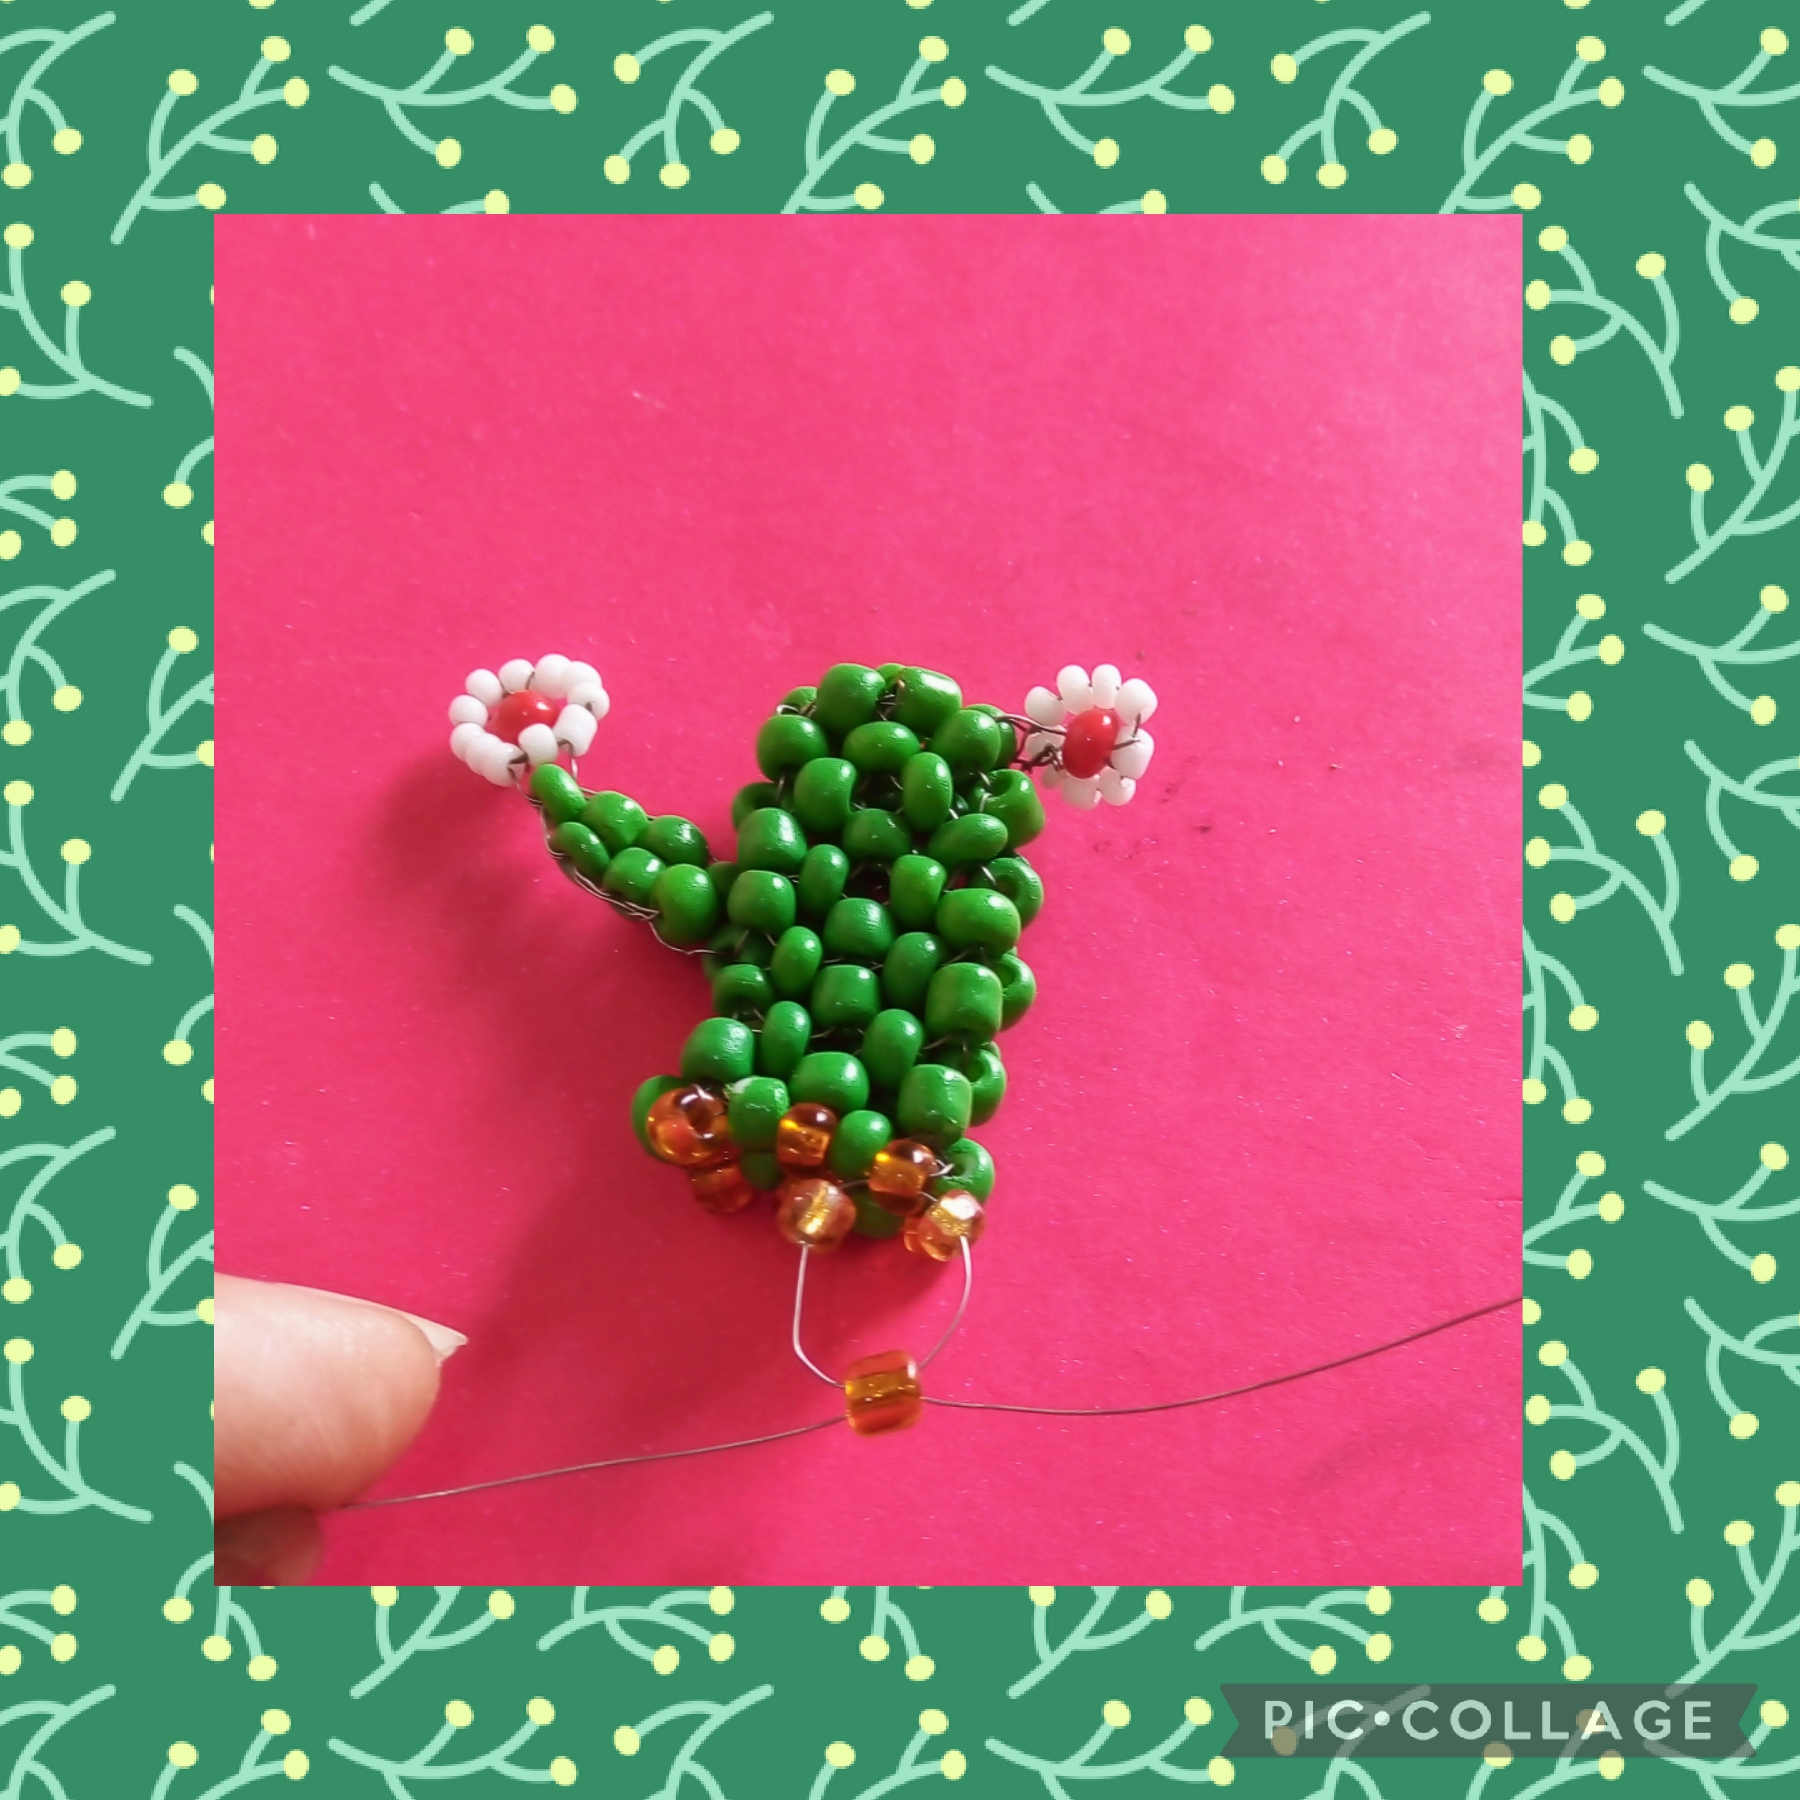
Ahora en seis centímetros de alambre, coloco un mostacillón verde lo cruzo lo llevo al medio y junto las puntas para igualar, ahora inserto dos mostacillones en una punta y los cruzo este paso lo hago tres veces; ahora hago un nudo simple y pierdo en uno de los mostacillones, corto con la pinza el excedente.
Ahora voy a elaborar las flores, inserto un alambre de seis centímetros en el primer mostacillón, pongo de cada lado seis mostacillas blancas y cruzo los alambres por las dos mostacillas de arriba, junto las puntas inserto una mostacilla roja, la bajo hasta el mostacillón verde y cruzo los alambres y así queda la flor ahora a cuatro mostacillones paso el alambre por uno de ellos y coloco lo que sería un nuevo brote con la flor del Cautus, igual realizo otra flor del otro lado y va quedando así:
FIFTH STEP:
Now in six centimeters of wire, I place a green bead, cross it, bring it to the middle and join the ends to match, now I insert two bead beads in one end and cross them this step, I do it three times; now I make a simple knot and I lose in one of the mostacillones, I cut the excess with the pliers.
Now I am going to make the flowers, I insert a six centimeter wire into the first bead, I put six white beads on each side and cross the wires through the two top beads, together the ends I insert a red bead, I lower it to the green bead and I cross the wires and this is how the flower remains now at four mostacillones I pass the wire through one of them and place what would be a new bud with the flower of the Cautus, just as I make another flower on the other side and it ends up like this:
SEXTO PASO:
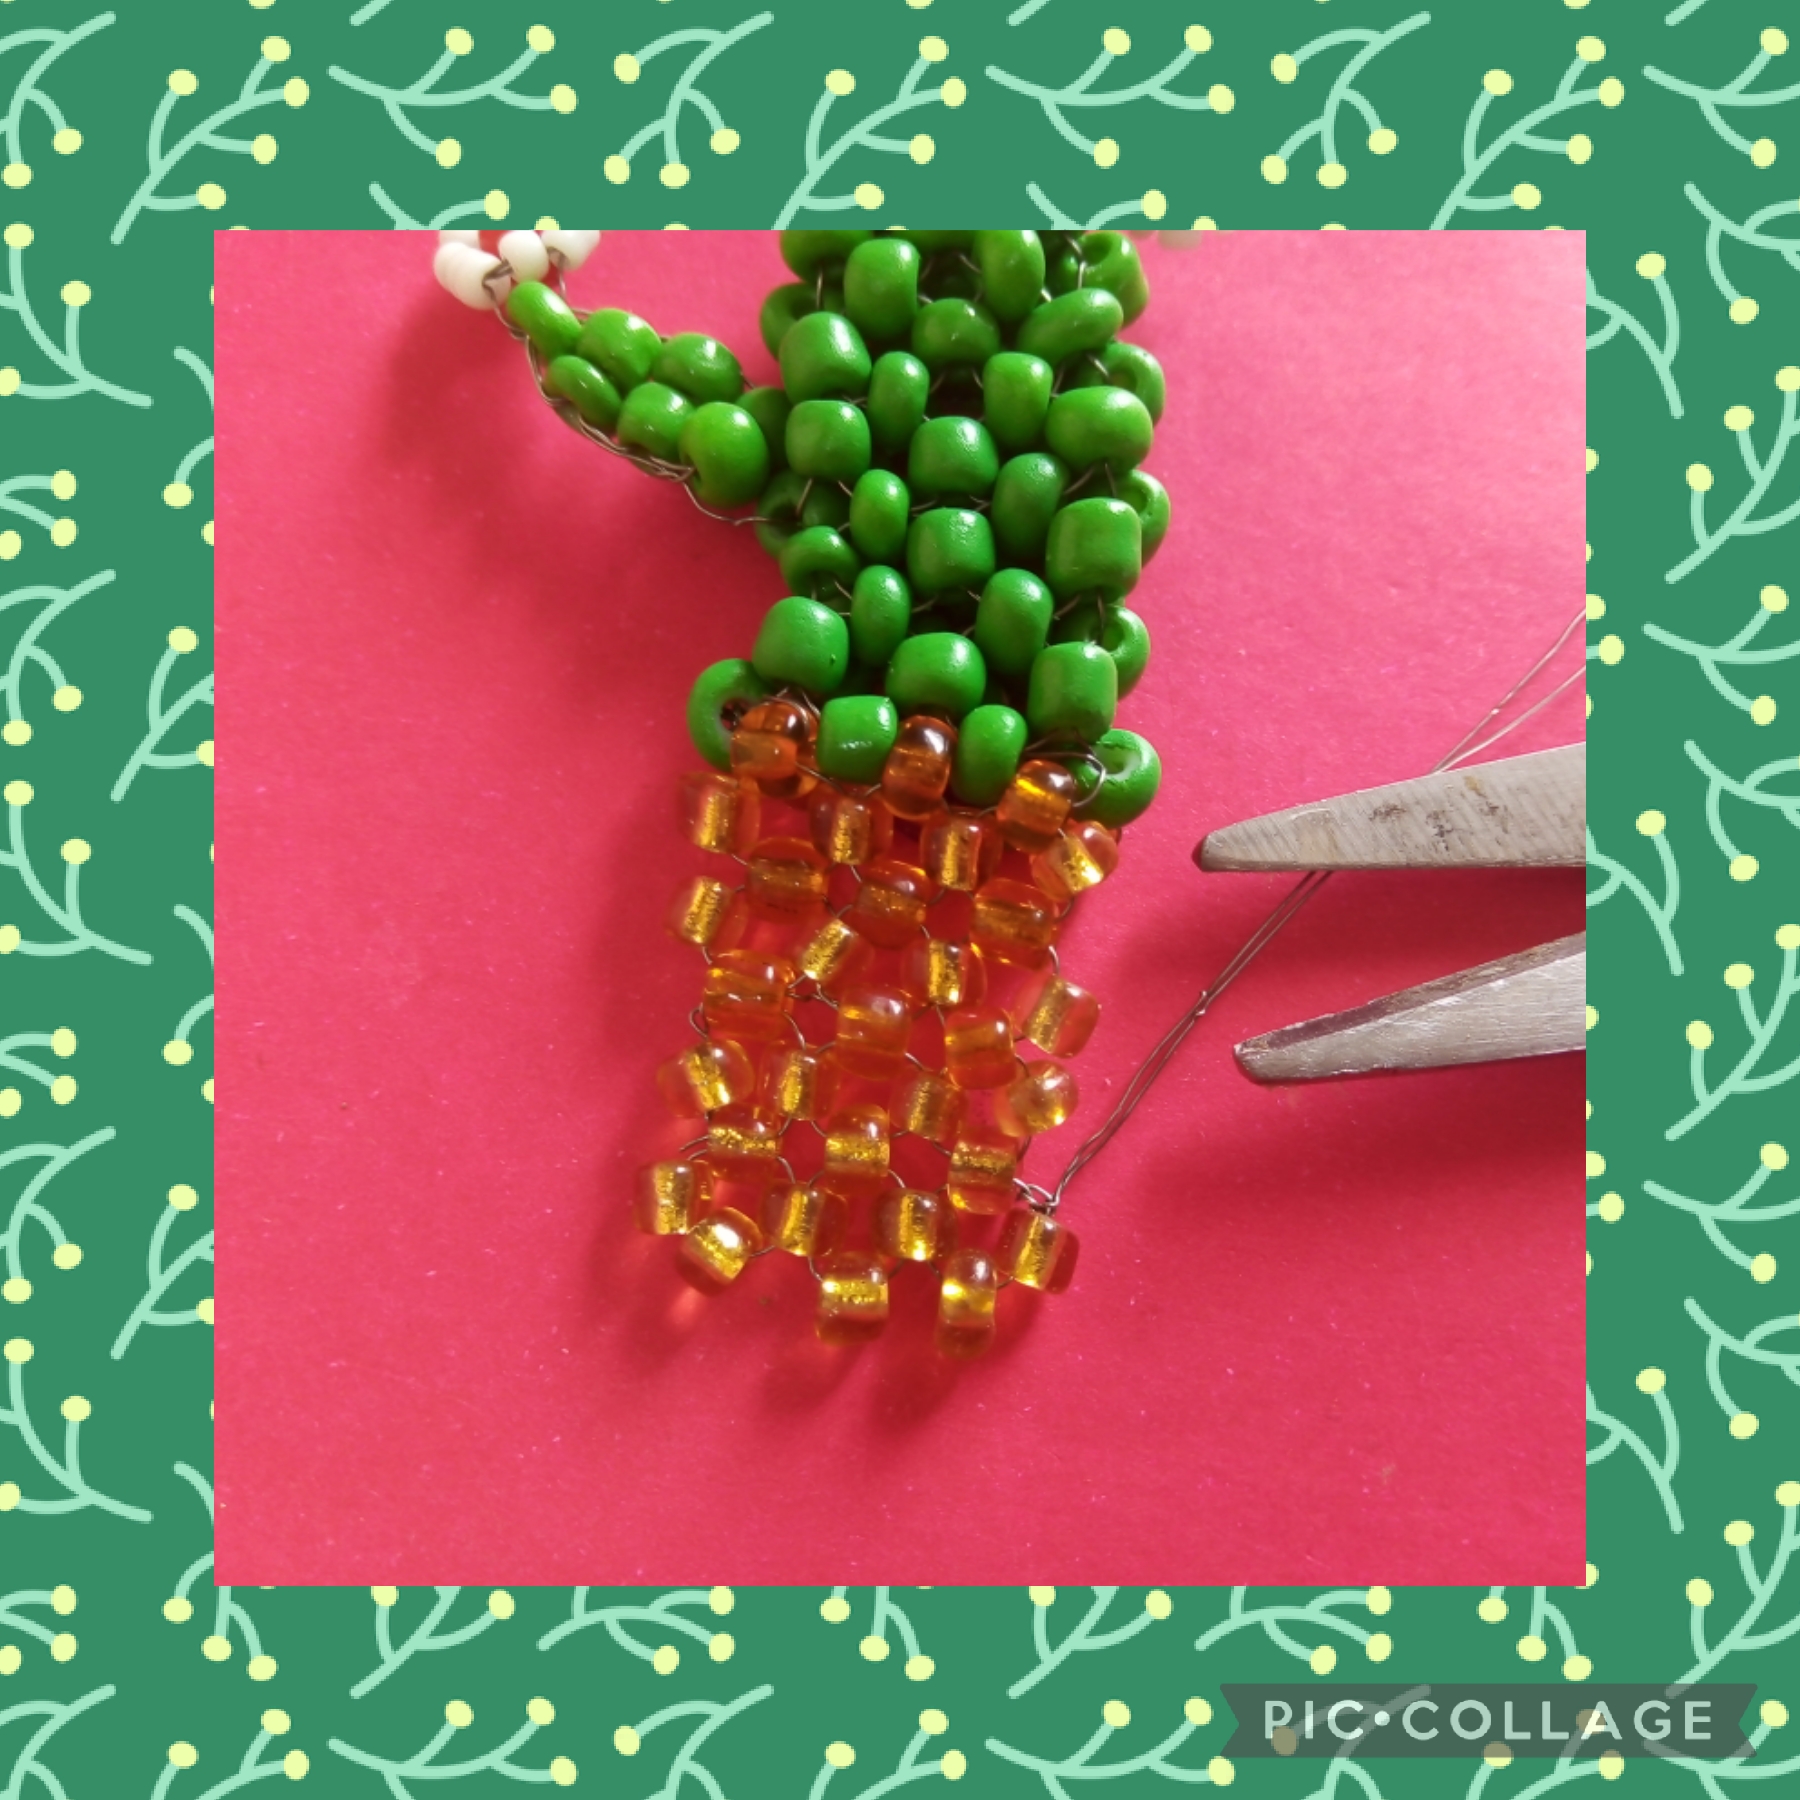
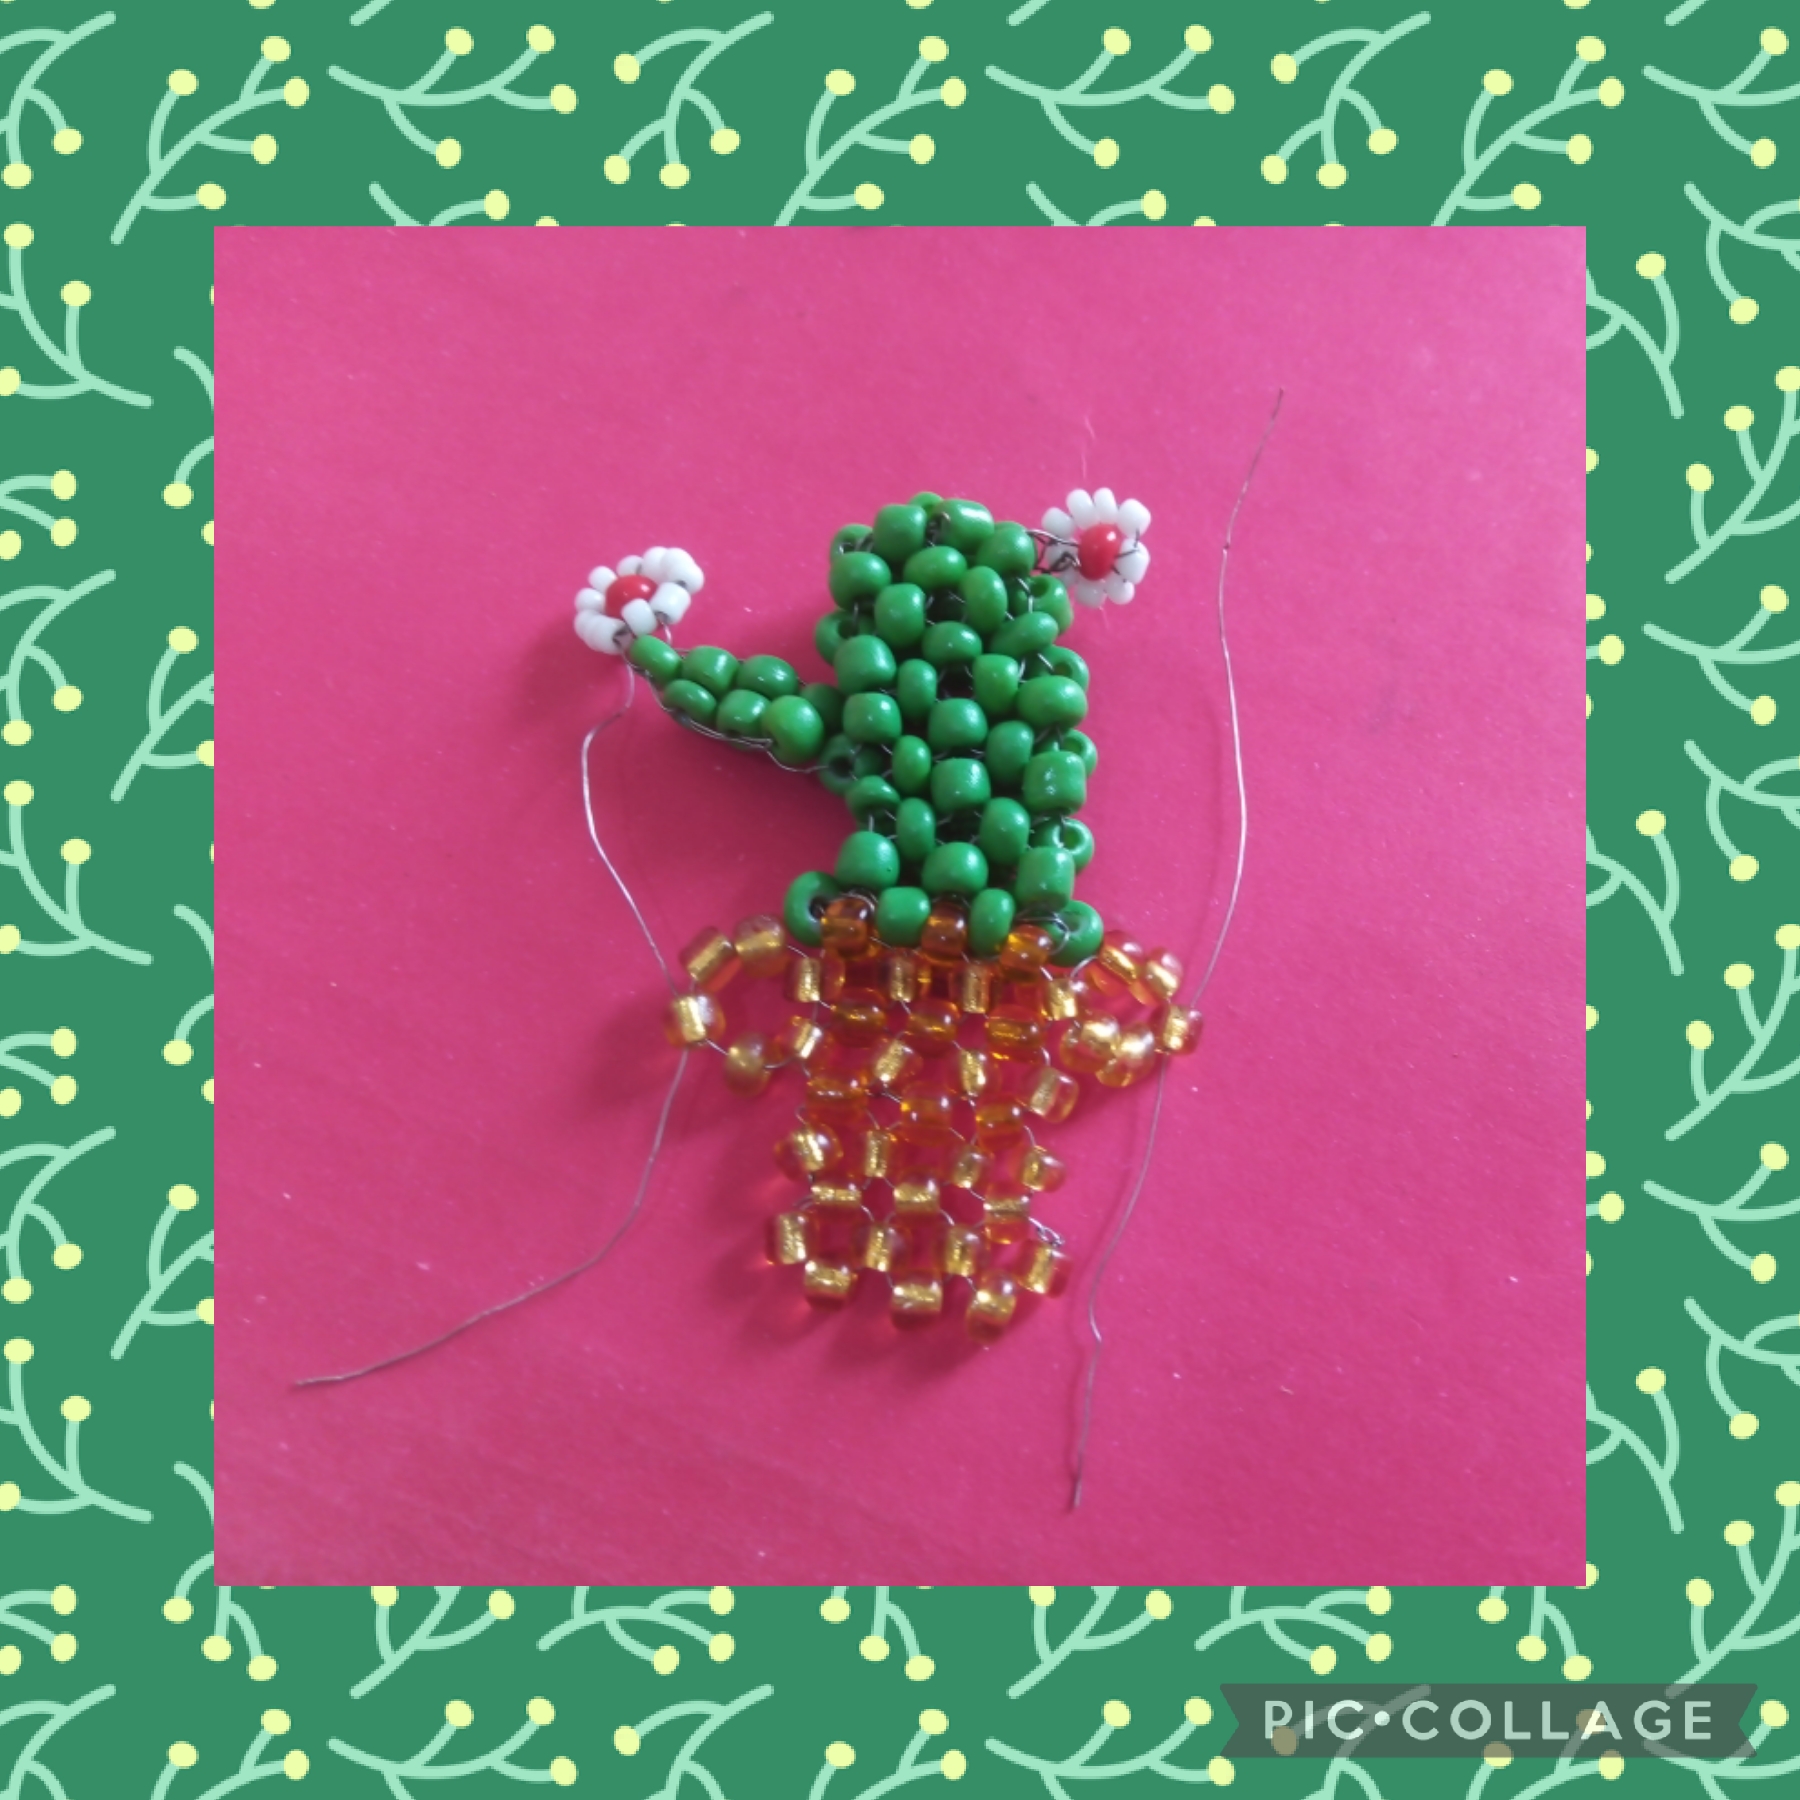
En este paso hago el Macetero así: en la parte de abajo intercalo con los mostacillones verdes seis mostacillones de color cobre, en el primer mostacillón del frente de la labor, coloco de cada lado del alambre un mostacillón dorado, luego inserto un mostacillón color cobre y lo cruzo para hacer módulo de cuatro, como muestra la foto hago cuatro vueltas, de la misma forma que explique antes como hacer módulos de cuatro; ahora inserto seis centímetros de alambre por los dos mostacillones cobre e inserto seis mostacillones dorados cierro en una especie de argolla para que parezcan como asas del Macetero como en las fotos..
SIXTH STEP:
In this step, I make the Flower Pot like this: in the lower part, I insert six copper-colored beads with the green beads, in the first bead on the front of the work, I place a gold beads on each side of the wire, then I insert a copper-colored beads and I cross it to make a module of four, as the photo shows I make four turns, in the same way that I explained before how to make modules of four; now I insert six centimeters of wire through the two copper beads and insert six golden beads and close them in a kind of ring so that they look like the handles of the Planter as in the photos.
PASO SIETE:
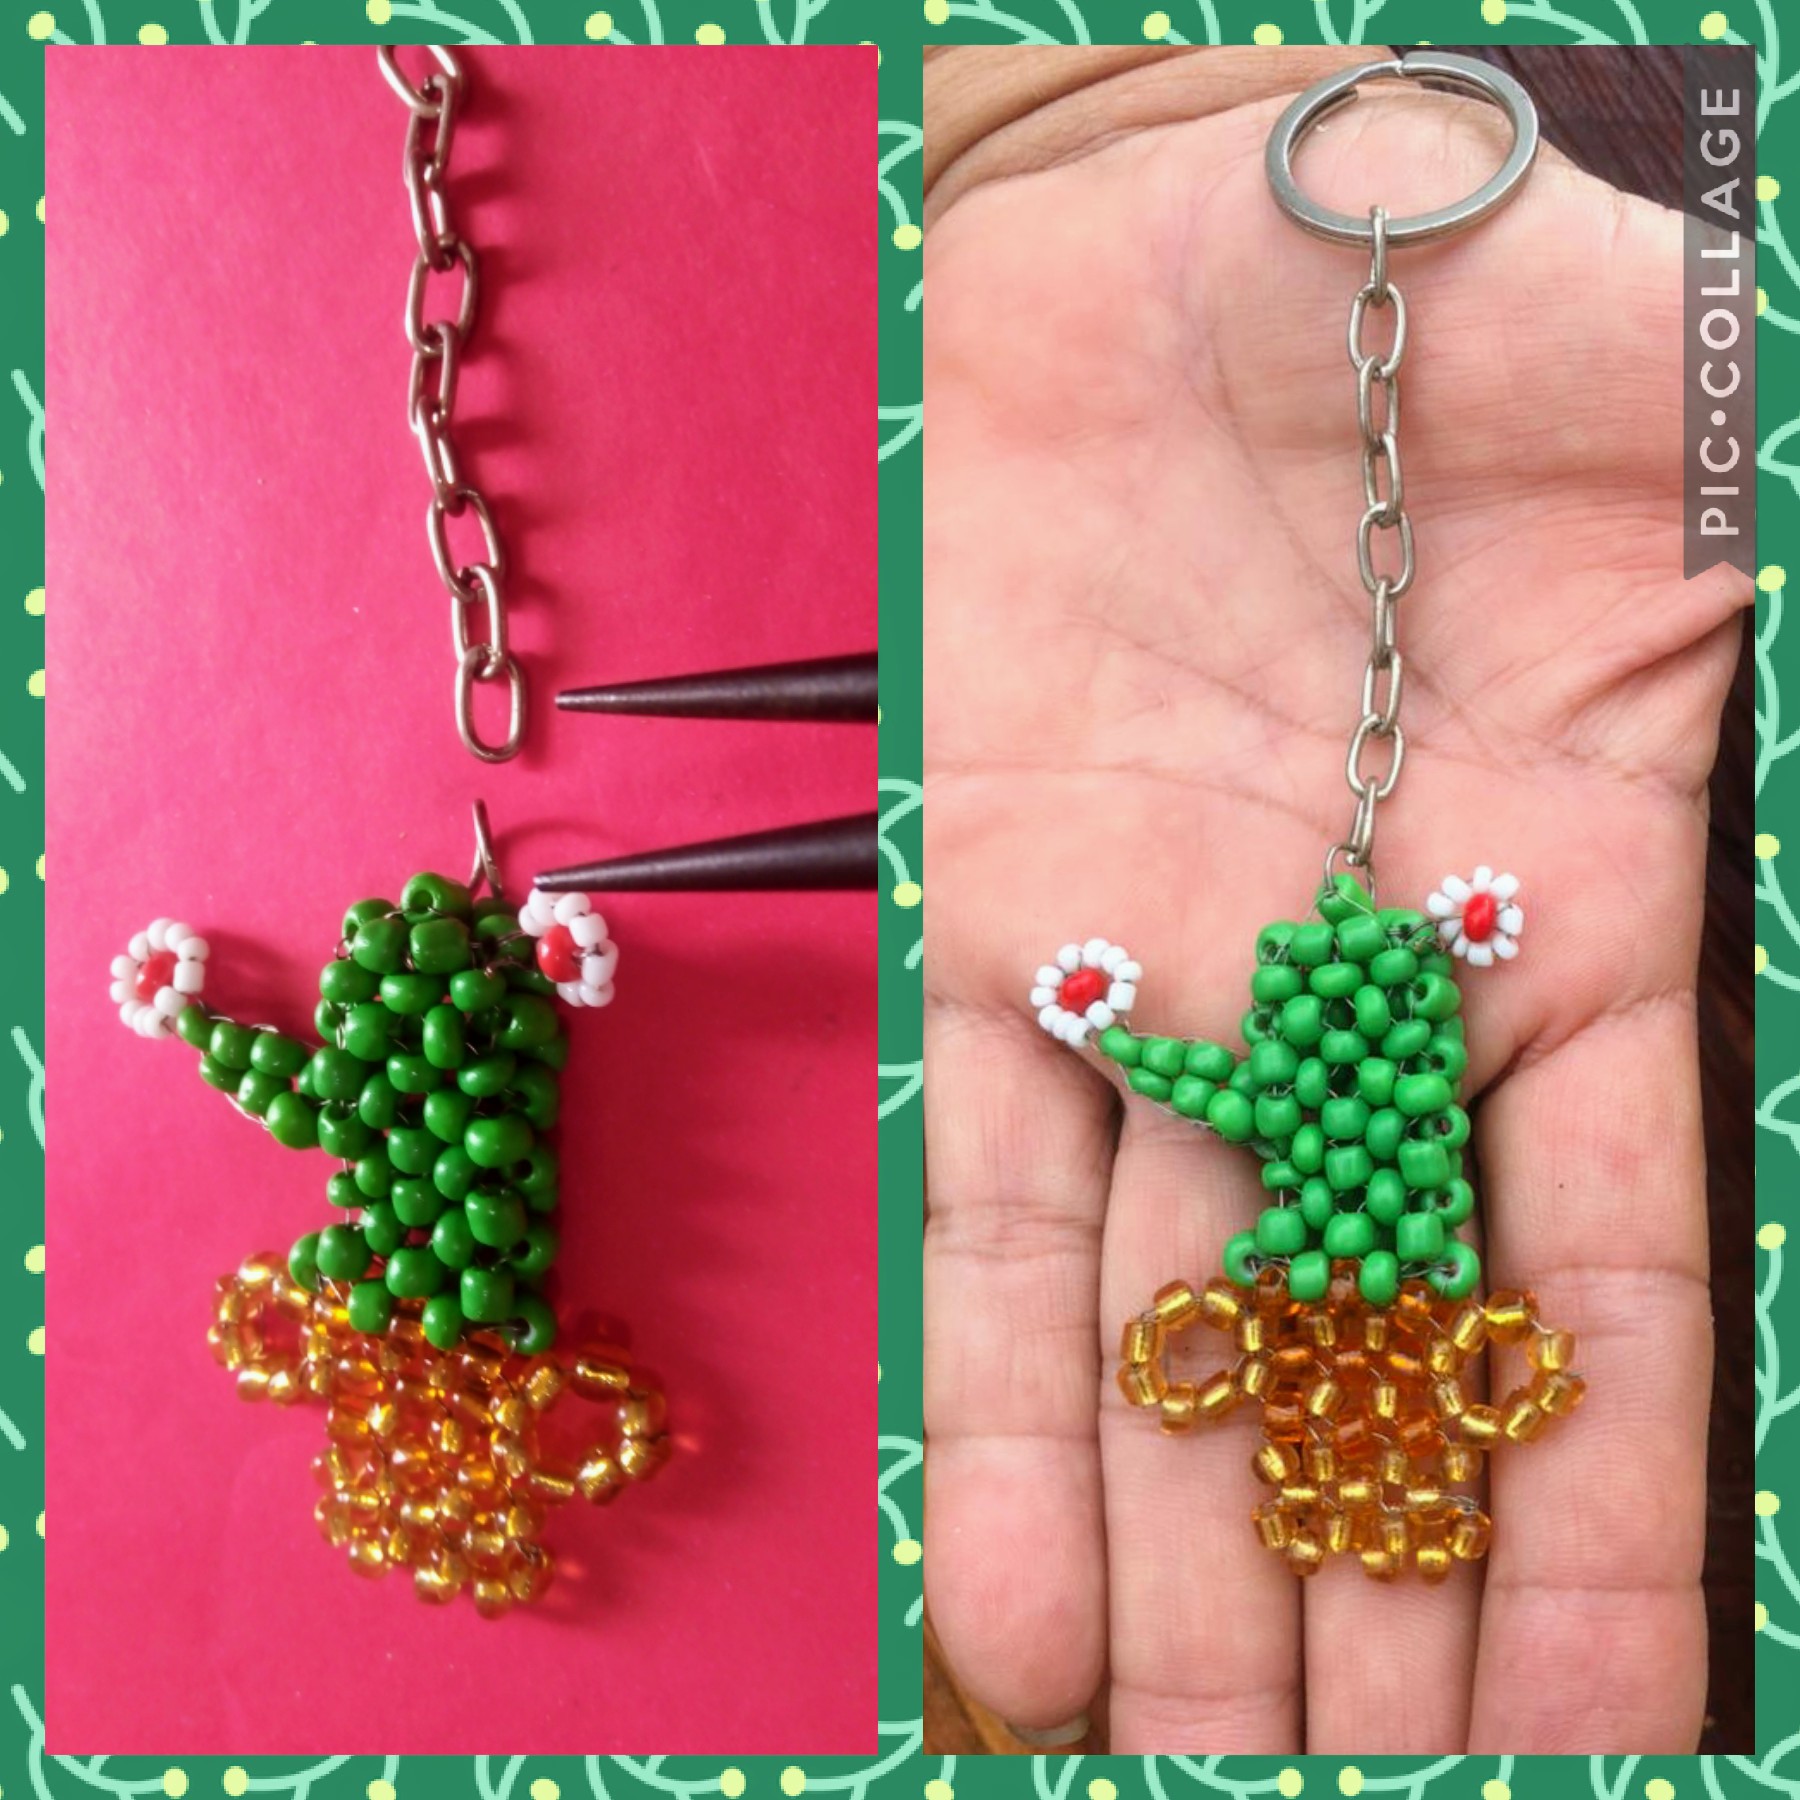
Ya para finalizar pongo en la parte superior una argolla con una cadena de eslabones pequeños y un aro para llavero y así quedó.
STEP SEVEN:
To finish, I put a ring at the top with a chain of small links and a ring for a key ring and that's how it was.
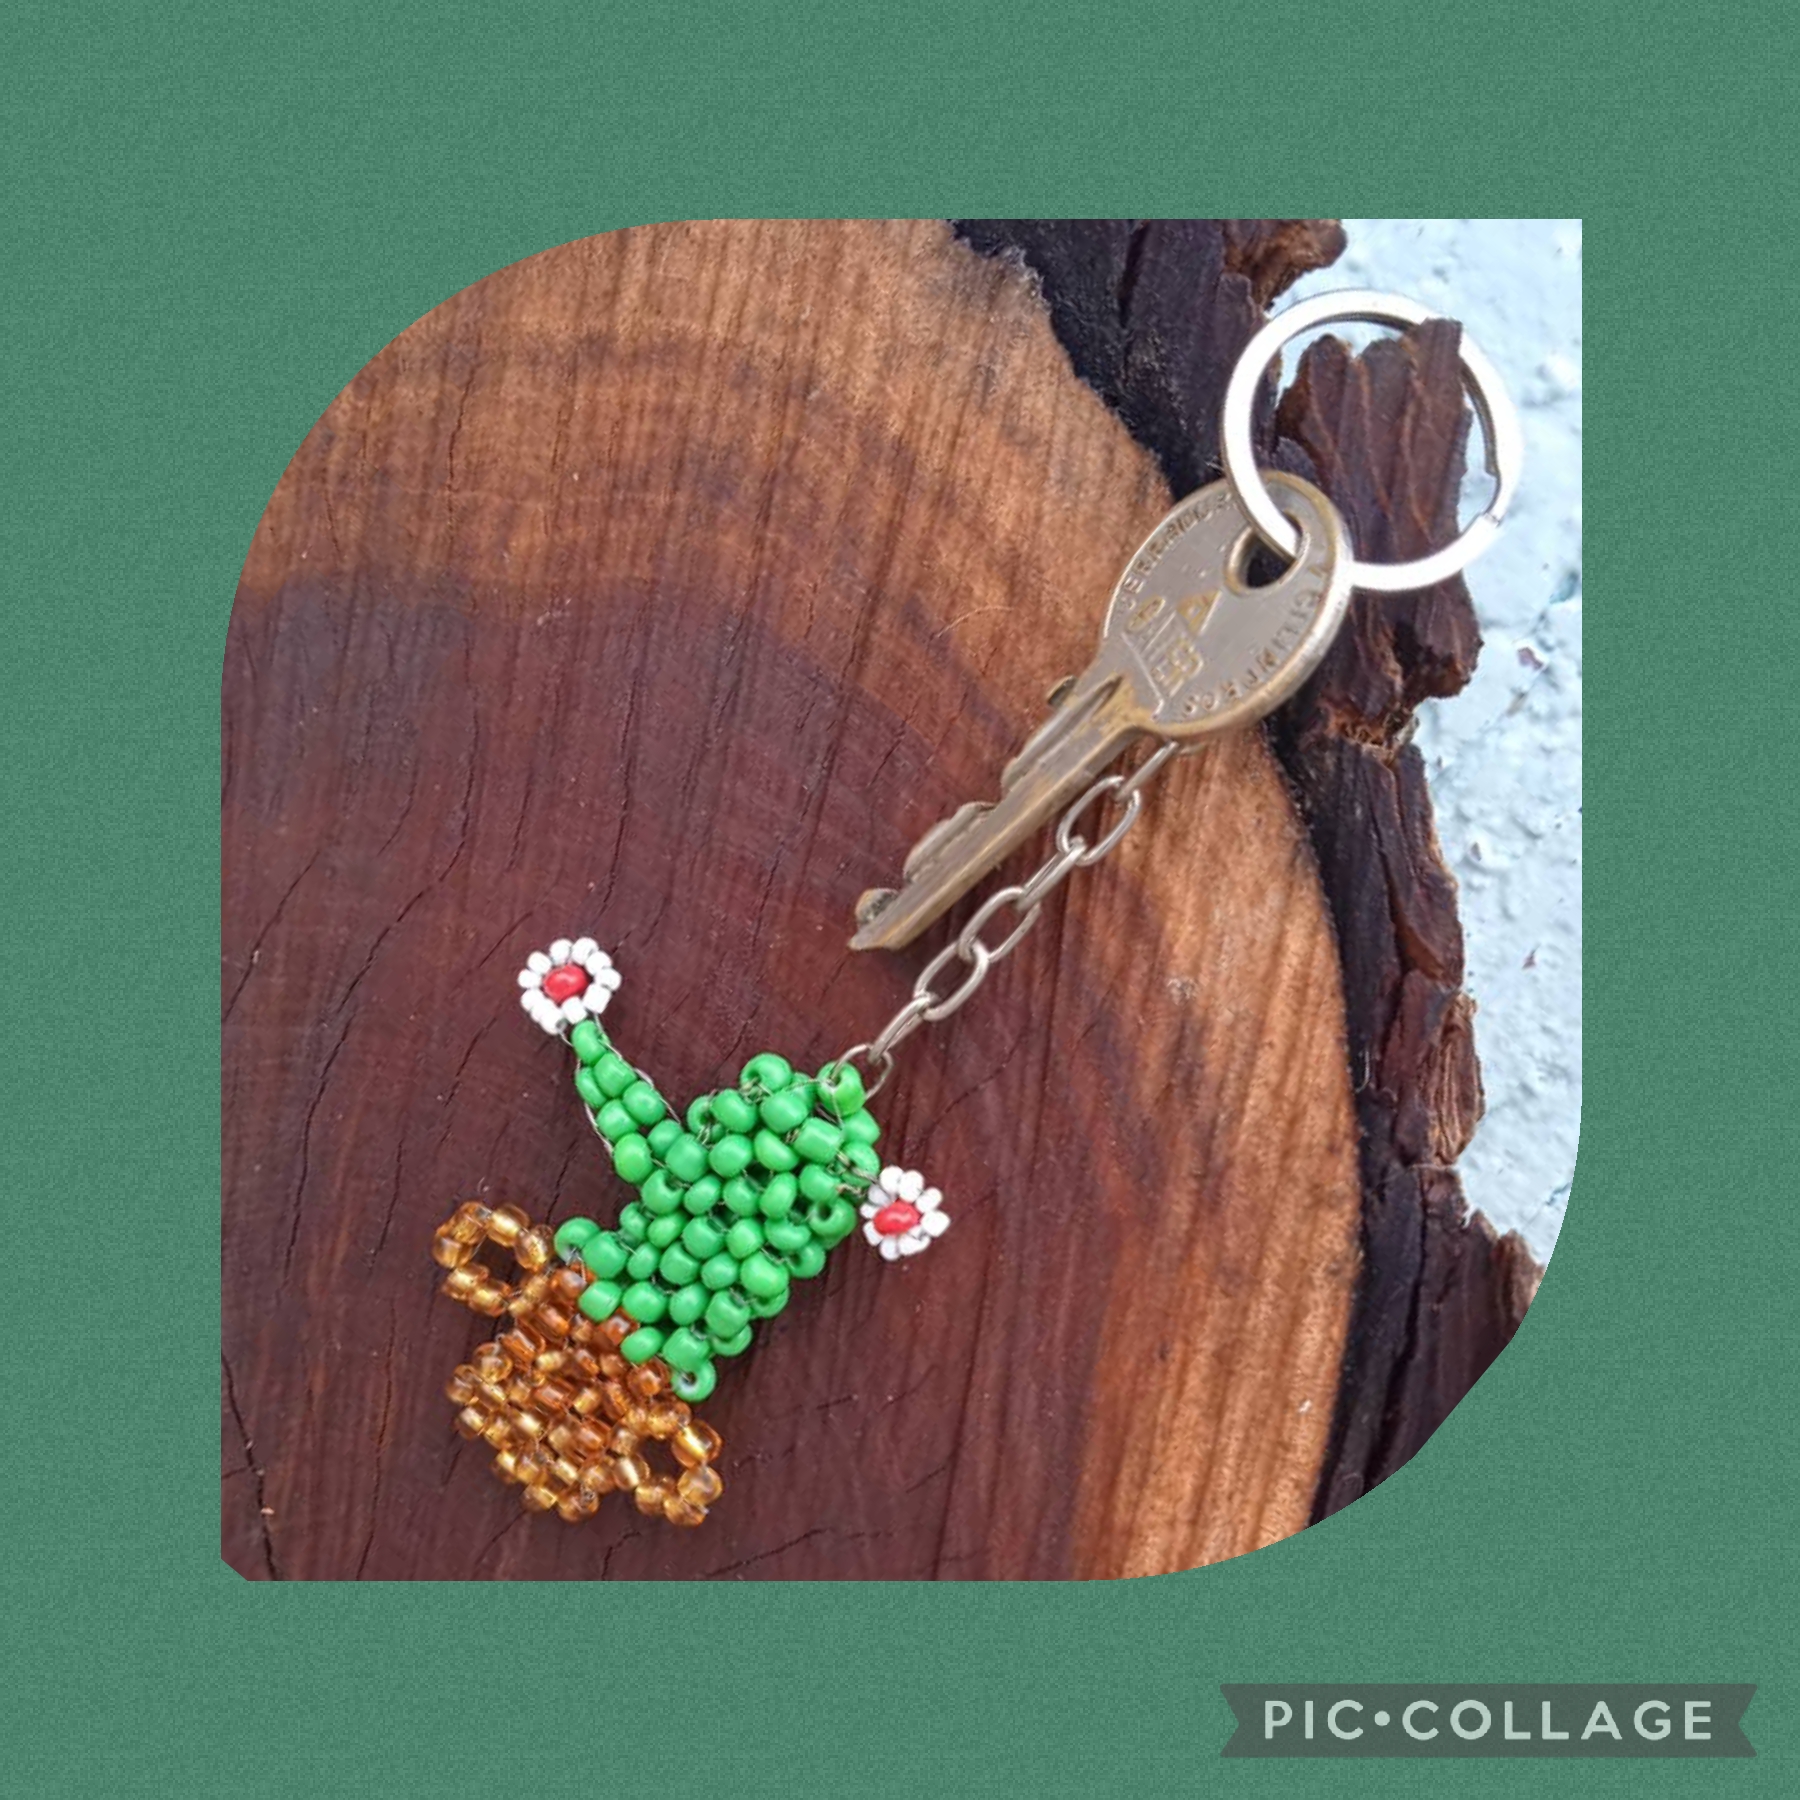
Artistas Creativos de la Joyería; este es el resultado final de mi manualidad que realice en este día, espero que les guste este singular Llavero, y que le pongan su sello personal a está idea y pronto luzcan sus llaves en uno igual, gracias por visitarme y dejar ésos comentarios tan valiosos, nos vemos en la próxima manualidad, bye bye.
Creative Jewelry Artists; This is the final result of my craft that I made on this day, I hope you like this unique Keychain, and that you put your personal stamp on this idea and soon your keys will look like one, thanks for visiting me and leaving such valuable comments , see you in the next craft, bye bye.
Las imágenes y redacción de este tutorial son de mi propiedad las fotos fueron tomadas con mi telefono celular Motorola E6 y las edite con una aplicación gratis del mismo.
Para traducir texto use Google traductor.
The images and wording of this tutorial are my property, the photos were taken with my Motorola E6 cell phone and I edited them with a free application of the same.

Hola mi hermosa amiga @nhaydu, bello le ha quedado esa plantita le ha quedado super, podría usarse incluso como dije de collar, es una gran idea. Felicidades y gracias por mostrarnos su idea. Saludos
Hola mi hermosa amiga @nhaydu, bello le ha quedado esa plantita le ha quedado super, podría usarse incluso como dije para collar, es una gran idea. Felicidades y gracias por mostrarnos su idea. Saludos
Hola, @katiuskamata, muy buenos días, muy cierta tu opinión, me encantó tu comentario, saluditos 🌹
Muy bonito tu cactus llavero. Seguro que lo vas a disfrutar muchísimo, ya que eres admiradora de estas lindas plantas. Un abrazo.
Hola lelys, se lo hice a un amigo y le gustó muchísimo, gracias por visitarme y como siempre apoyando mi contenido.un abrazo 🤗
Está divino ese cactus
Gracias amiga que tengas hermoso día 🌹
Precioso creo que trataré de capturarlo para mí y evitar que ese amigo que lo pidió se lo lleve jajaja. Tal vez mejor te hago un pedido al mayor para mí emprendimiento verde 🌿 . Abrazos 😚 @nhaydu.
GENIAL 👍 me encanta la idea, aprovecha que estoy disponible y puedo complacer tu gusto 🌵🌵😀😀😃🥰
Hermoso y original amiga me encantó cómo cada uno de sus trabajos está lleno de creativas.
!discovery 38
Y tú siempre tan gentil y consecuente @mili2801, para mí es un gusto leer esos comentarios de apoyo, saluditos 🌹
This post was shared and voted inside the discord by the curators team of discovery-it
Join our Community and follow our Curation Trail
Discovery-it is also a Witness, vote for us here
Delegate to us for passive income. Check our 80% fee-back Program
Muchísimas gracias por apoyar mí contenido, me complace enormemente 🌵
Manos creativas en acción y mucha paciencia veo en éste arte, gracias por mostrar ese paso a paso tan comprensible. Saludos
Gracias por tan halagador comentario para mí creación, que bueno que te gustó, saluditos 🤗
Llavero de captus hermoso amiga, suerte
Gracias @yanethstars, me gustó mucho tu visita y apoyo consecuente, saluditos 🤗
Que cuchitura amiga @nhaydu, como mencionas el cactus esta de moda, un trabajo realmente hermoso, adore tu trabajo.
Saludos!
Saluditos @meivys, mi amigo está feliz con su llavero, ya me dijo que le haré otro, me encantó que te gustará, un abrazo.🌵
La técnica para hacer el cactus es fascinante, lo haces parecer muy sencillo.
Gracias por compartir, te quedó precioso 🌱
Hola @anamariag, si chica es bastante fácil, el módulo es uno solo, y bien sencillo solo hay que contarlos, con paciencia pronto harás tu 🌵 flor en el desierto. 😄 Feliz noche.