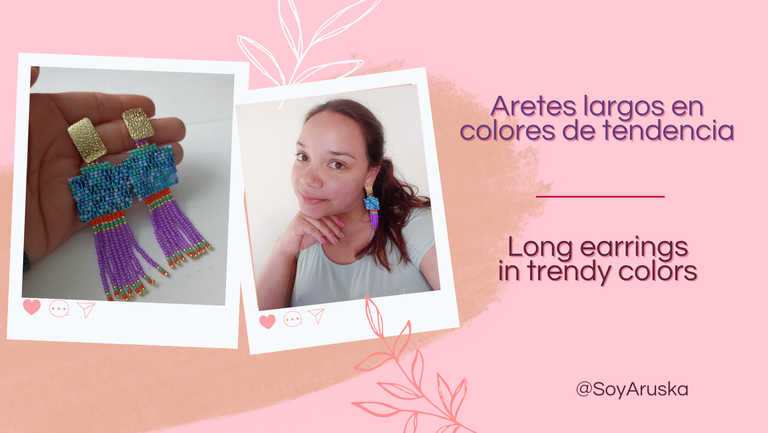
Bienvenidos a mi blog!
Hoy en otro día de creatividad, te enseñaré a hacer unos zarcillos largos con mostacillas. Utilizaré la técnica del tejido artesanal con hilo y usaremos mostacillas de colores contrastantes para crear unos aretes modernos.
Yo me dedico a la construcción de accesorios con mi emprendimiento @taru.accesorios y ahora estoy muy motivada a compartirles varios modelos paso a paso para aprender a realizarlos.
Welcome to my blog!
Today in another day of creativity, I will show you how to make long earrings with beads. I will use the technique of handmade weaving with thread and we will use contrasting colored beads to create modern earrings.
I am dedicated to the construction of accessories with my enterprise @taru.accesorioss and now I am very motivated to share with you several models step by step to learn how to make them.

Materiales:
- Mostacillas #8 (varios colores)
- hilo de costura encerado
- tijera
- topos para aretes de acero
- aguja para hilo 0.30.
Materials:
- #8 beads (various colors)
- waxed sewing thread
- scissors
- steel earring posts
- 0.30 thread needle.
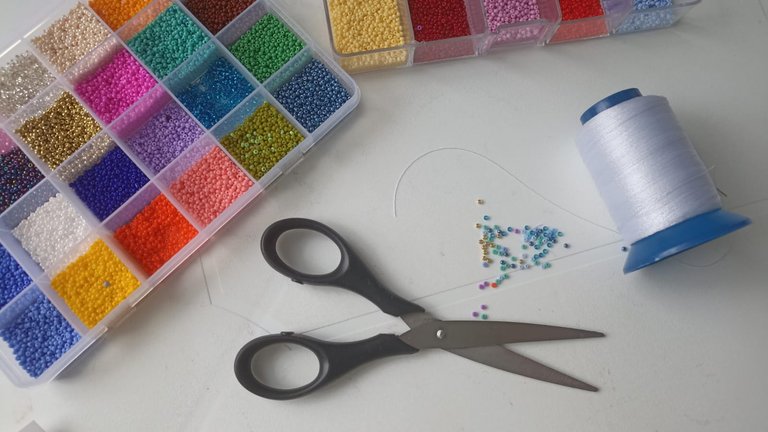
Tomaremos dos metros de hilo y lo ensartaremos en la aguja.
Yo hago estos aretes utilizando varios tonos de azul para que se vean más únicos y además hagan mayor contraste con el resto de los tonos de mostacillas.
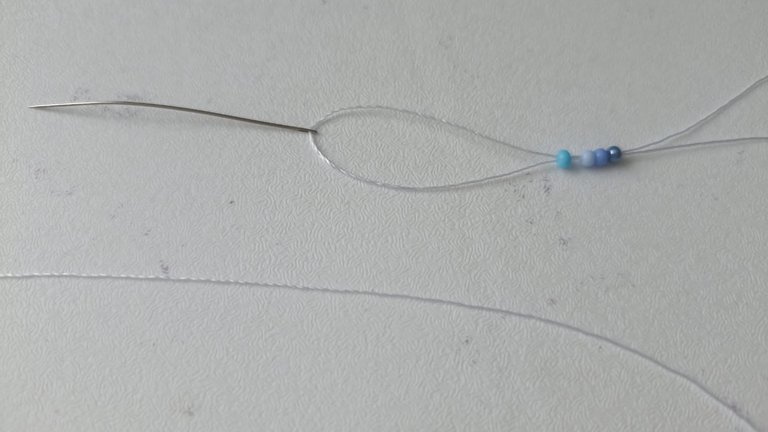
Entonces, vamos a colocar cuatro mostacillas azules en el hilo y las llevaremos hasta el final del mismo, Luego vamos a pasar la aguja por las dos mostacillas y sacaremos el hilo por la mitad formando un cuadrito.
We will take two meters of thread and thread it onto the needle.
I make these earrings using various shades of blue so that they look more unique and also make more contrast with the rest of the beads.
Then, we are going to place four blue beads on the thread and take them to the end of the thread. Then we are going to pass the needle through the two beads and pull the thread through the middle forming a little square.


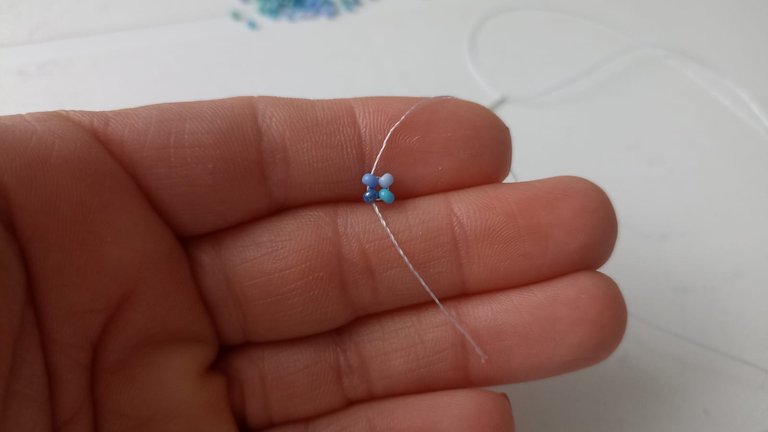
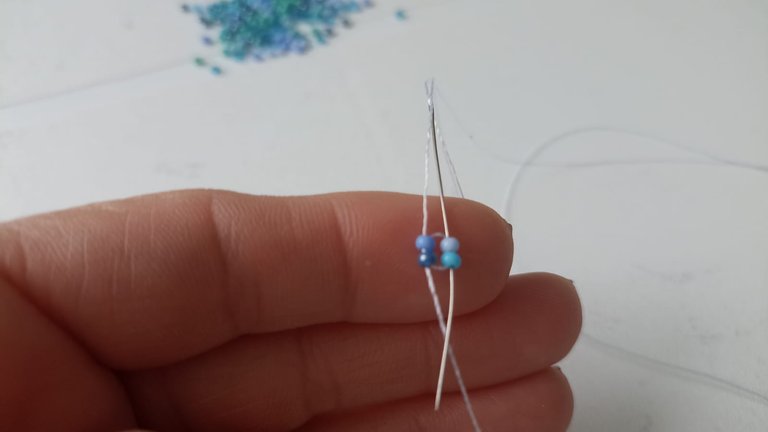

Vamos a ir cociendo de dos mostacillas, una al lado de la otra, devolviendo el hilo para que queden bien fijas.
Así construimos un cuadrito de trece filitas y siete columnas, jugando con los tonos de azul. Esto también los puedes hacer sin combinar todos, con un color sólido, en este caso me gusta el efecto que da usar varios colores.
We are going to be sewing two beads, one next to the other, returning the thread so that they are well fixed.
This way we build a little square of thirteen rows and seven columns, playing with the shades of blue. This can also be done without combining them all, with a solid color, in this case I like the effect of using several colors.
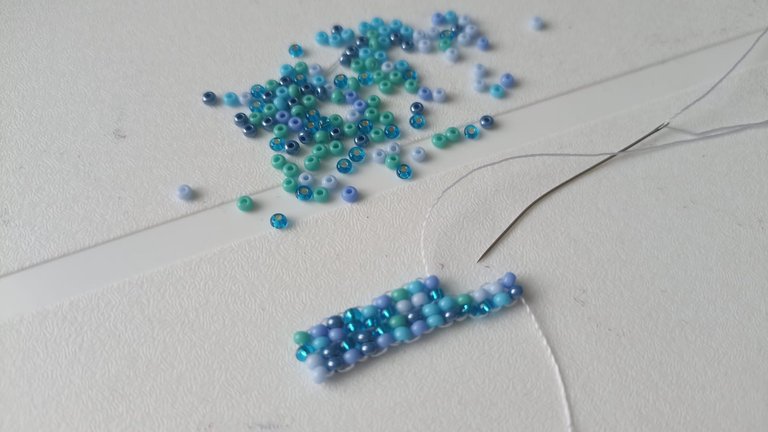
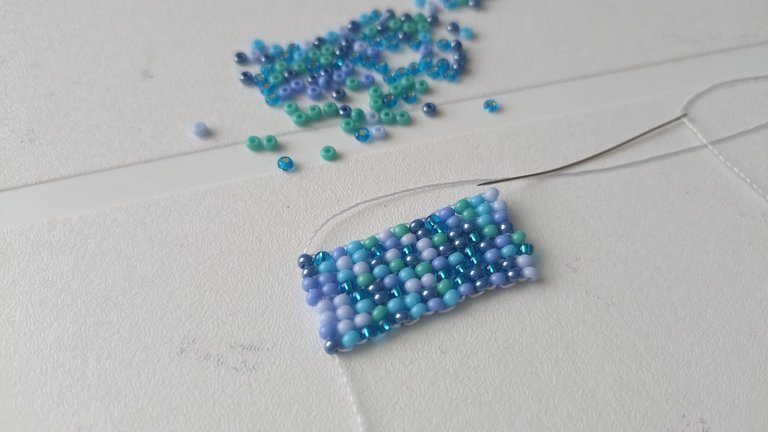

Ahora vamos a realizar un tramo de mostacillas turquesa de siete columnitas, al centro del cuadrito. Luego haremos sobre esas tres filas de color morado y dorado, donde dejaremos un huequito donde calzáremos el topo para colgar el arete.
Now we are going to make a seven-column section of turquoise beads in the center of the square. Then we will make on these three rows of purple and gold, where we will leave a little hole where we will place the mole to hang the earring.
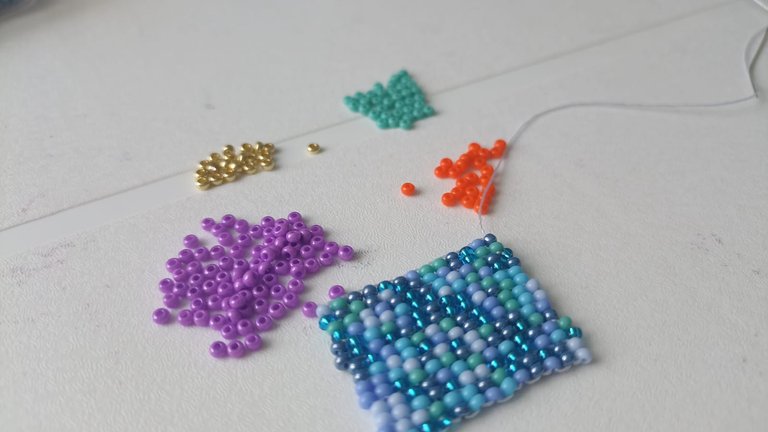

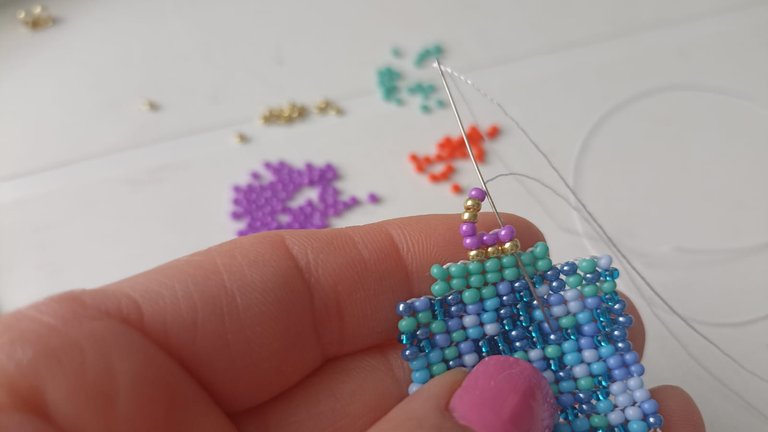

Cuando ya tenemos esta parte lista, vamos a meter el hilo hasta la parte inferior del cuadro azul, también ubicáremos el medio para empezar a tejer la parte inferior.
Buscando el centro de nuestra pieza haremos otro bloque de mostacillas naranja, de donde colocaremos nuestras mostacillas moradas para darle movimiento al zarcillo. Colocaremos ocho filitas de color naranja.
When we have this part ready, we are going to put the yarn to the bottom of the blue square, we will also place the middle to start weaving the lower part.
Looking for the center of our piece we will make another block of orange beads, from where we will place our purple beads to give movement to the tendril. We will place eight orange rows.
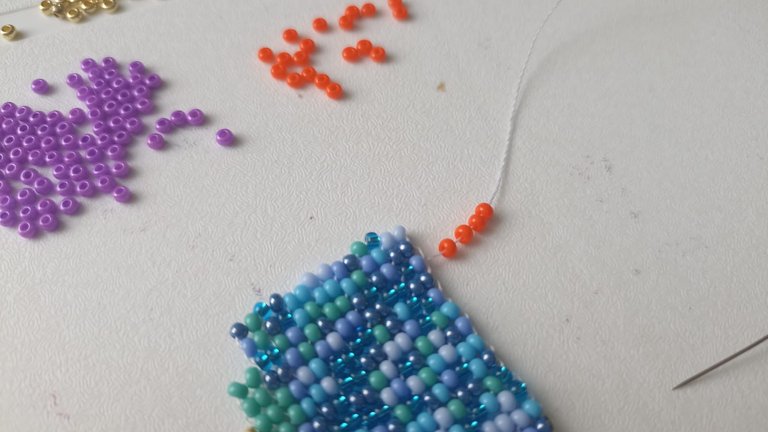

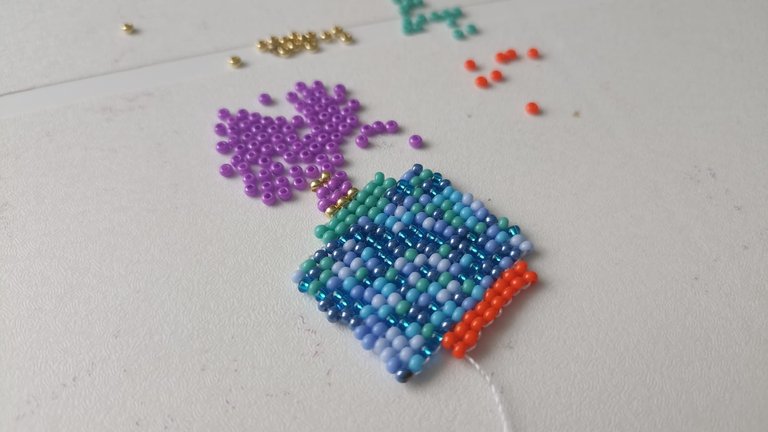
Cuando las tenemos listas, haremos los flecos. Comenzaremos con una mostacilla dorada, otra turquesa y una turquesa... luego diecinueve moradas, una dorada, una turquesa otra naranja, y finalizamos la tira con una dorada.
When we have them ready, we will make the bangs. We will start with a golden mustard, a turquoise one and a turquoise one... then nineteen purple ones, a golden one, a turquoise one and an orange one, and we will finish the strip with a golden one.

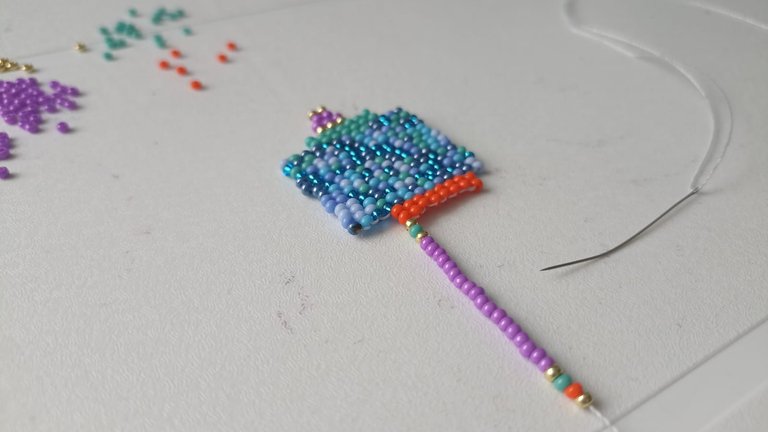
Cuando llegamos al final, nos vamos a devolver dejando la última mostacilla dorada fuera, vamos a meter la aguja e hilo hasta arriba saliendo por la primera mostacilla dorada de la fila.
When we reach the end, we are going to return leaving the last golden stitch out, we are going to put the needle and thread all the way to the top coming out through the first golden stitch of the row.
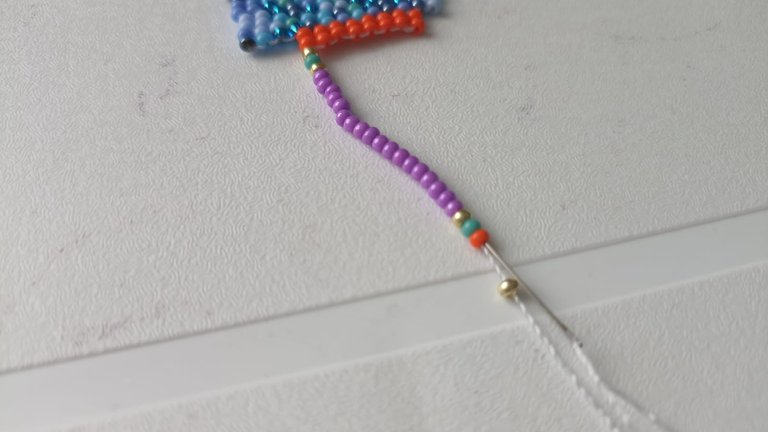
Nos devolvemos por la fila de al lado y repetimos el procedimiento hasta llenar todos los flecos.
Cuando terminamos todo, subimos el hacia la parte superior y lo cortamos.
Ya tenemos nuestro zarcillo listo, repetimos y fabricamos el siguiente.
We go back through the next row and repeat the procedure until we fill all the bangs.
When we have finished everything, we bring it up to the top and cut it.
Now we have our tendril ready, we repeat and make the next one.

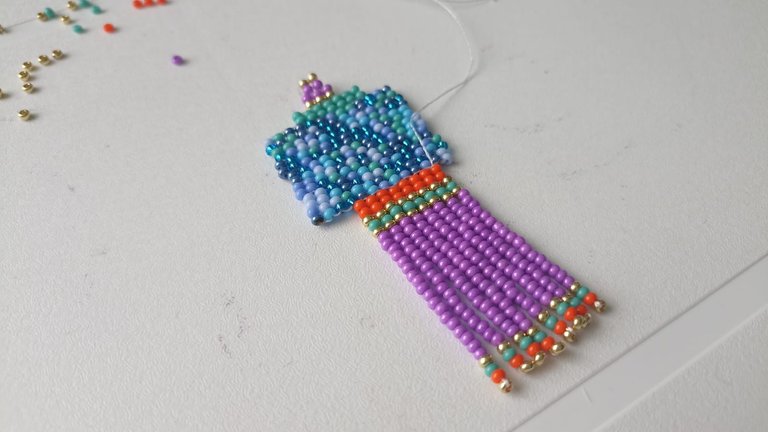

Estos procesos son lentos porque son zarcillos largos con muchos detalles de costura, por eso hay que hacerlos con mucha paciencia y dedicación,cuidando siempre que el hilo no se enrede.
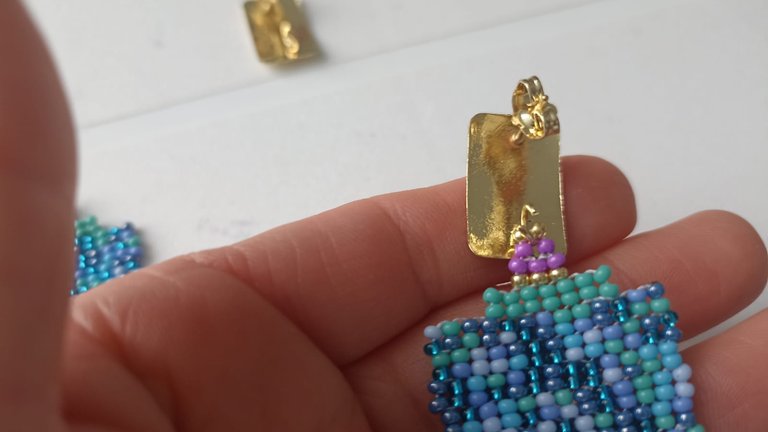
Con ambos zarcillos elaborados solo queda buscar los dos topos y en el hoyito que dejamos arriba meter el topo y cerrarlo bien con una pinza.
These processes are slow because they are long tendrils with many stitching details, so they must be done with patience and dedication, always taking care that the thread does not get tangled.
With both tendrils elaborated, it only remains to look for the two moles and in the hole that we left above to put the mole and close it well with a clamp.
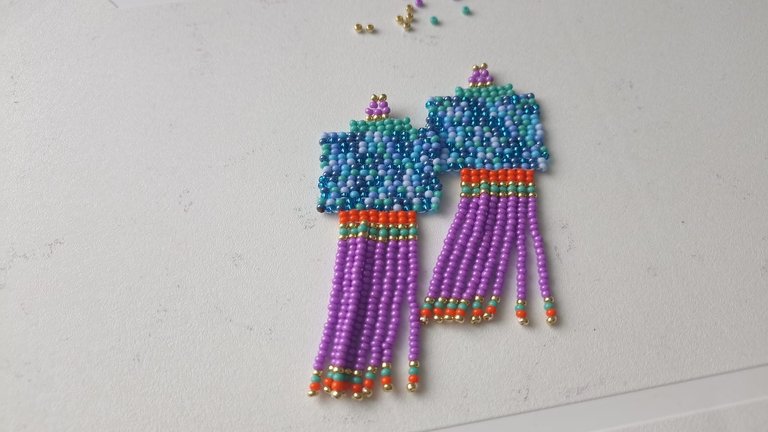


Gracias por llegar hasta aquí, espero este tutorial te sea de mucha utilidad para darle riendas sueltas a tu imaginación. Recuerda que todo lo que hacemos con nuestras manos también va cargado de mucho amor.
Thank you for coming here, I hope this tutorial will be very useful to give free rein to your imagination. Remember that everything we do with our hands is also loaded with love.


✂️✂️✂️✂️✂️✂️✂️✂️✂️✂️✂️✂️✂️✂️✂️✂️✂️✂️✂️✂️✂️✂️✂️
Todas las fotografías de mi autoría, Redmi 10
Diseños elaborados en Canva
Traducción con versión Deepl versión gratuita
All photographs by me, Redmi 10
Designs made in Canva
Translation with Deepl free version
Such a technique for a modern weaving earring is in due fine. Tiny beads gives me headache to fix.
Tal técnica para un pendiente de tejido moderno está en su debido bien. Cuentas diminutas me da dolor de cabeza para arreglar.
The earrings are very beautiful and attractive. The color and design of the earrings can attract anyone's attention. Great job!
Thanks you
Wow, estan hermosos. 💜 Te felicito por tu trabajo tan delicado.
Gracias, me alegro que te gustará.
Estupendo trabajo. Lo amé.
!LUV
(1/1) sent LUV. | connect | community | HiveWiki | NFT | <>< daily@soyaruska, @chacald.dcymt
! help(no space) to get help on Hive. InfoExcelente trabajo amiga,me encantó el tejido y lo elegante que quedaron.
Gracias, que bella! Me alegra que te parecieran elegantes. 🩵
Un trabajo hermoso excelente explicación! Está técnica o puntada se llama puntada peyote es utilizado de una manera muy versátil y amplia la trabajas de una manera excelente 🤗💖 gracias por compartir tu proceso creativo! Mucho éxito en tu emprendimiento @soyaruska estos zarcillos están hermosos.
Muchas gracias 😊
Aquí se requiere un nivel de paciencia inmenso, es decir, disfrutar el momento, que nada ni nadie te interrumpa... ¡Aunque pienso que ya con la práctica lo haces en un momentico! la selección de colores quedó genial haciendo toda una pieza de bisutería elegante y sirve para cualquier ocasión, me encantó, los veo, los compro.😘👍
Muchas gracias, tú me mensaje me motiva a seguir creando.
Esa es la idea, me alegro en verdad y espero que en algún momento podamos conocernos e incluso aprender contigo de este bello arte.
Muy hermoso trabajo amiga, bello el resultado 💖te felicito. Gracias por compartir ese paso a paso. Saludos 🤗💞