| Esp | Eng |
|---|---|
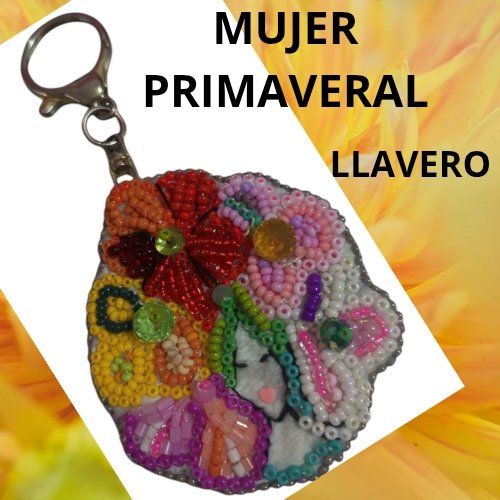
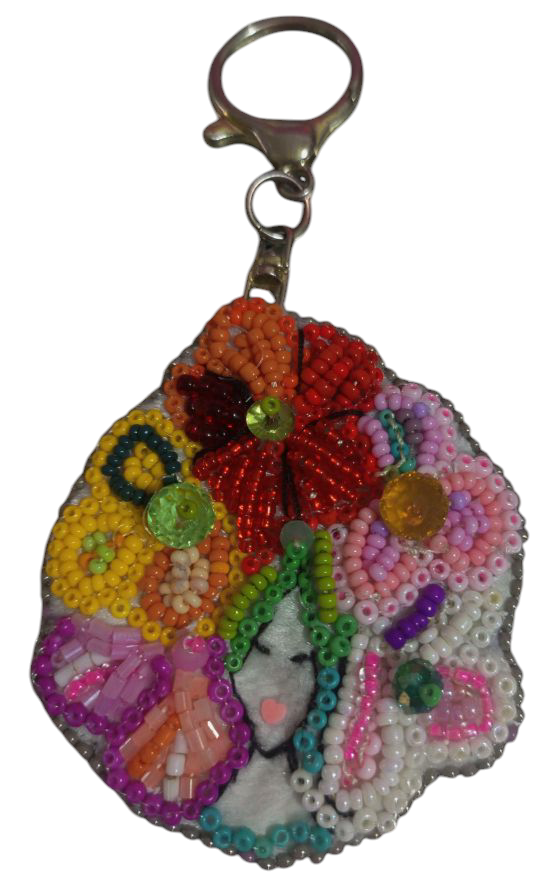
| Hola amigos creativos de nuestra Comunidad Jewelry, el día de hoy traigo para ustedes éste LLAVERO MUJER PRIMAVERAL. Realicé el dije de éste lindo llavero en mostacilla bordadas para celebrar la primavera. En mi país Venezuela sólo hay dos estaciones verano e invierno por su posición con el eje ecuatorial, pero suele celebrarse en marzo el mes de las flores y la primavera, y ya en colegios como en el que estudian mis hijos se celebra el Día de la Primavera el 20 de marzo, por eso me motive a realizar algo especial para celebrar ese mes, y lo hice con éste lindo llavero que espero les guste y disfruten mi post. A continuación lista de materiales y procedimientos. | Hello creative friends of our Jewelry Community, today I bring for you this SPRING WOMAN KEYCHAIN. I made the charm of this cute keychain in embroidered mustard to celebrate spring. In my country Venezuela there are only two seasons summer and winter because of its position with the equatorial axis, but usually celebrated in March the month of flowers and spring, and already in schools like the one where my children study is celebrated Spring Day on March 20, so I was motivated to make something special to celebrate that month, and I did it with this nice keychain that I hope you like and enjoy my post. Here is the list of materials and procedures. |

| Materiales: | Materials: |
|---|---|
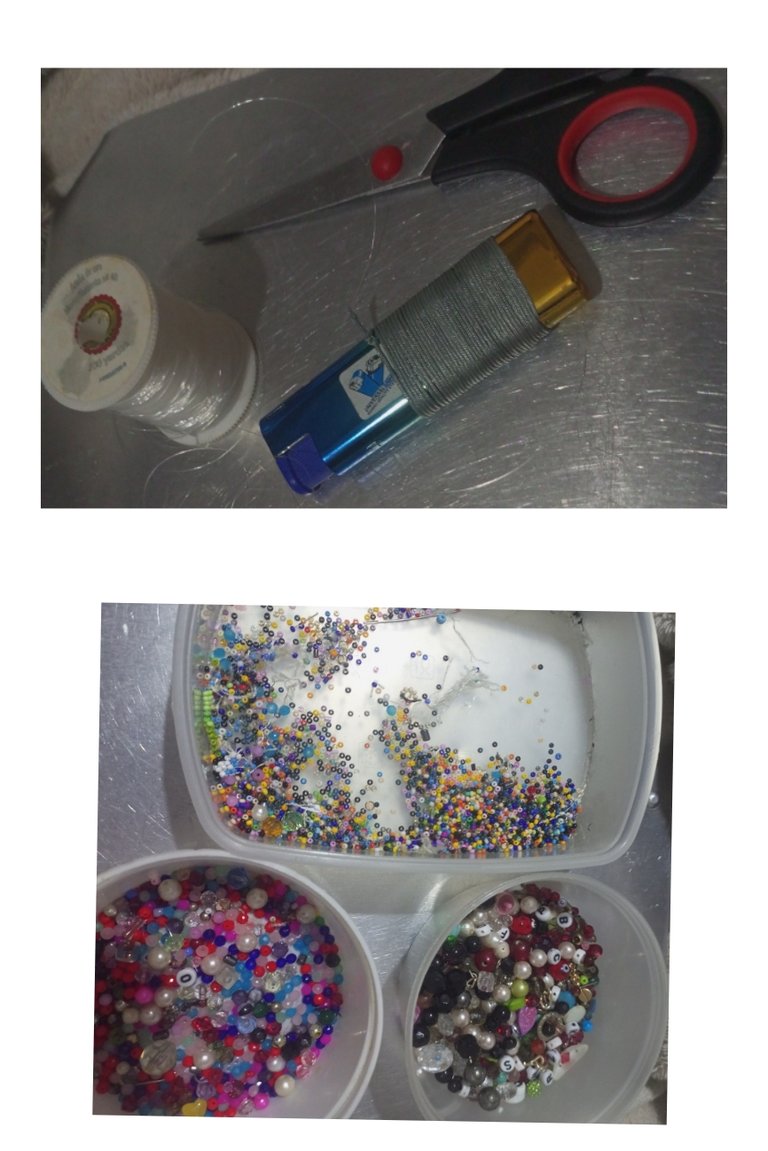
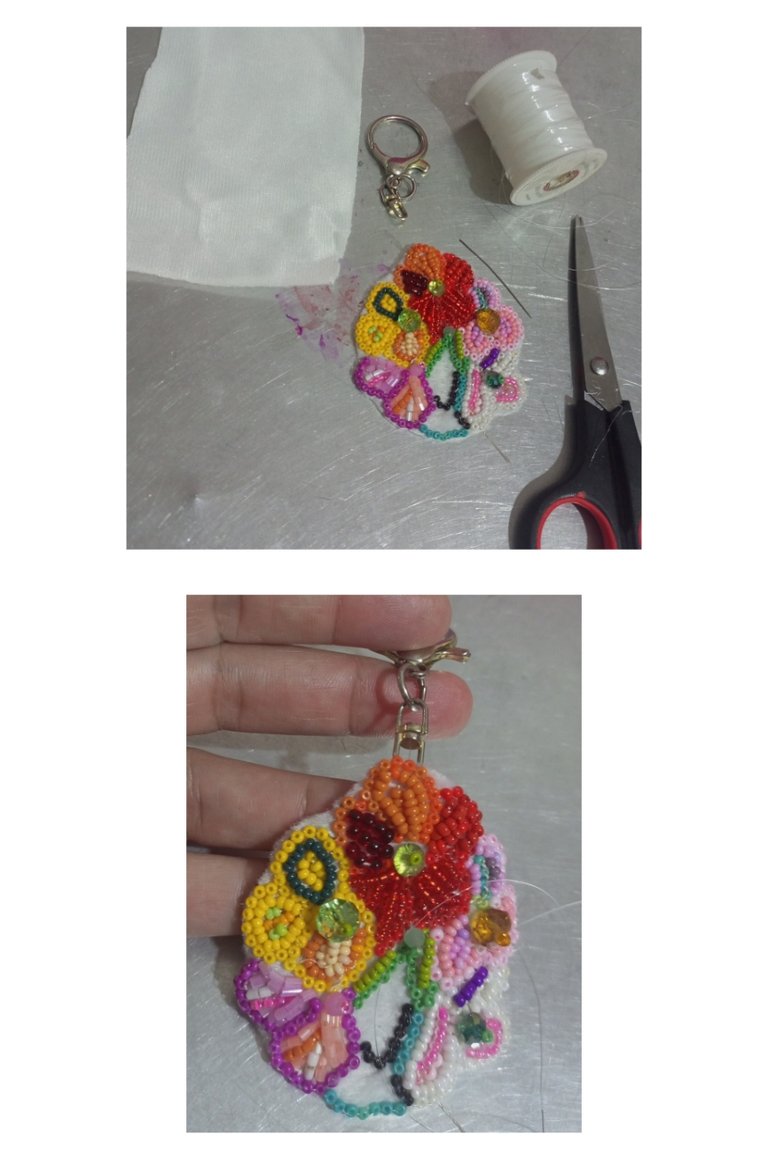
| Mostacillas: diferentes colores, canutillos diferentes colores, cristales 0,008mm, 0,006 mm, 0,004 mm, hilo de nylon 0,027 mm, hilo de cocer negro, tela blanco manto polar, silicón líquido, hilo beige para mostacillas, 1 llavero; tijeras y yesquero. | Beads: different colors, beads of different colors, crystals 0.008 mm, 0.006 mm, 0.004 mm, nylon thread 0.027 mm, black baker's twine, white fleece, liquid silicone, beige thread for beads, 1 key ring; scissors and tinder. |
| Instrucciones: | Instructions: |
|---|
| Paso 1 | Step 1 |
|---|---|
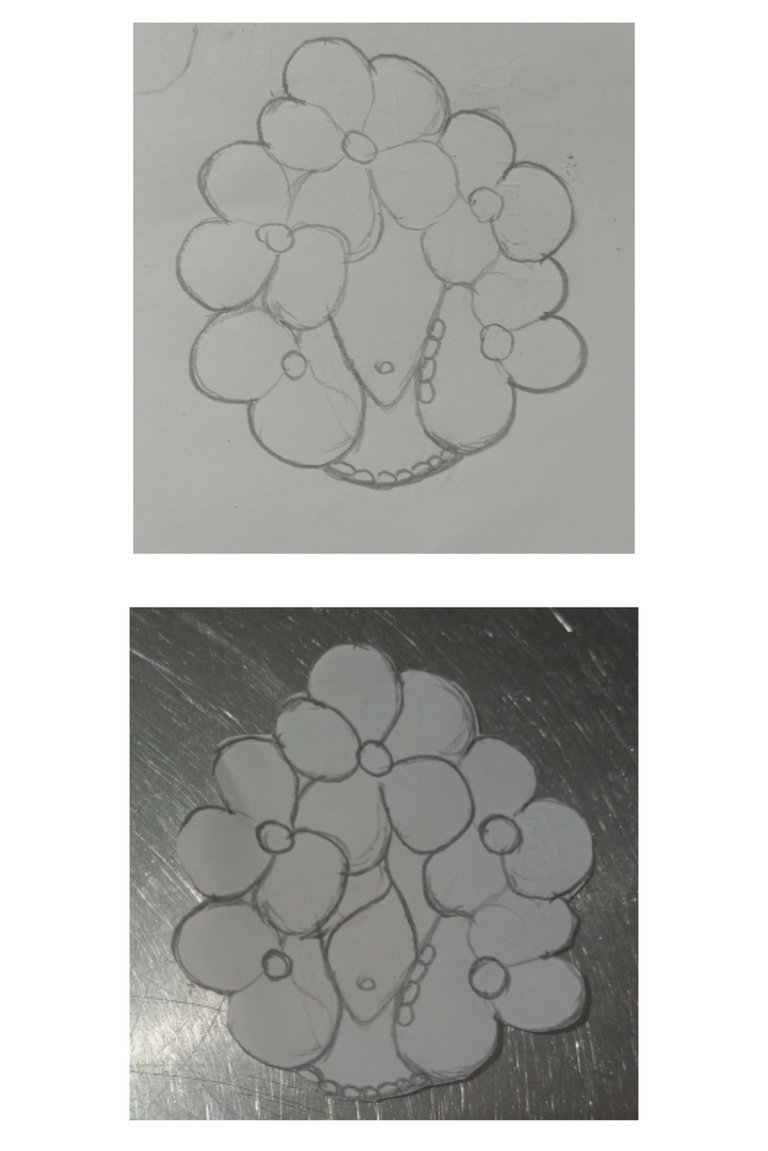
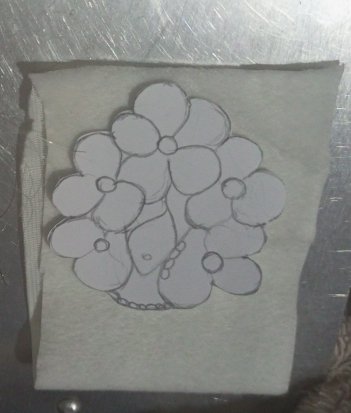
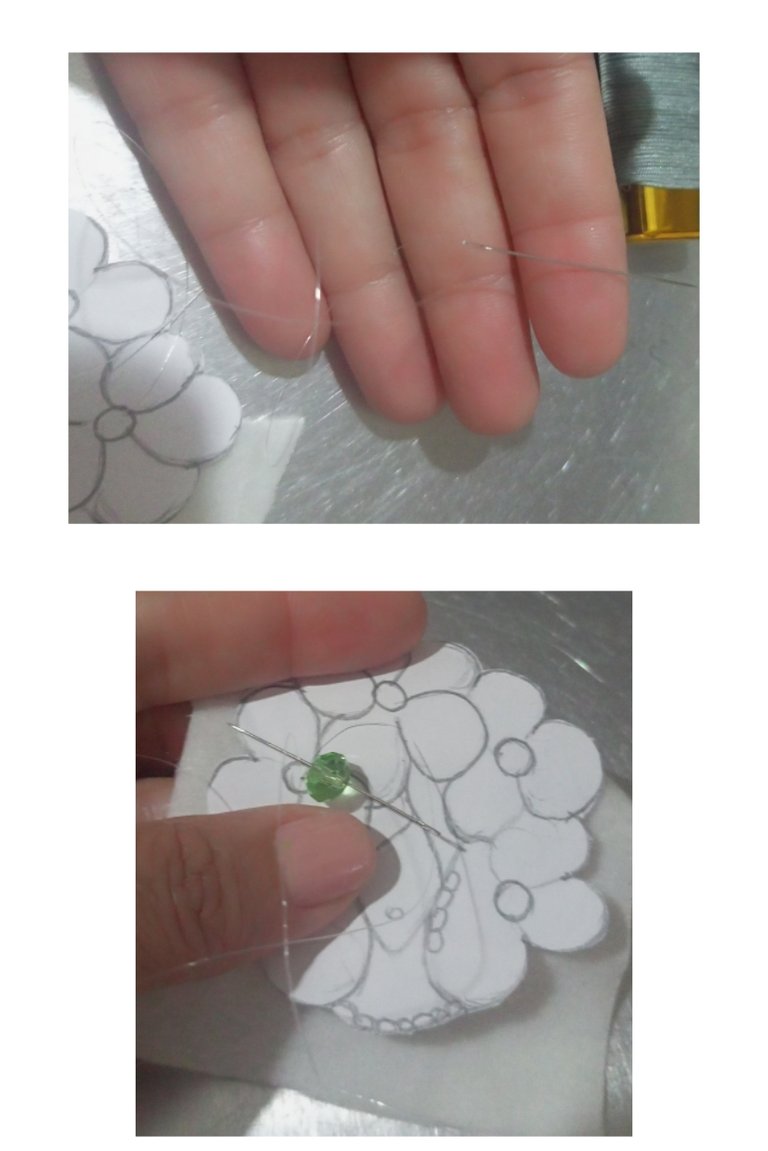
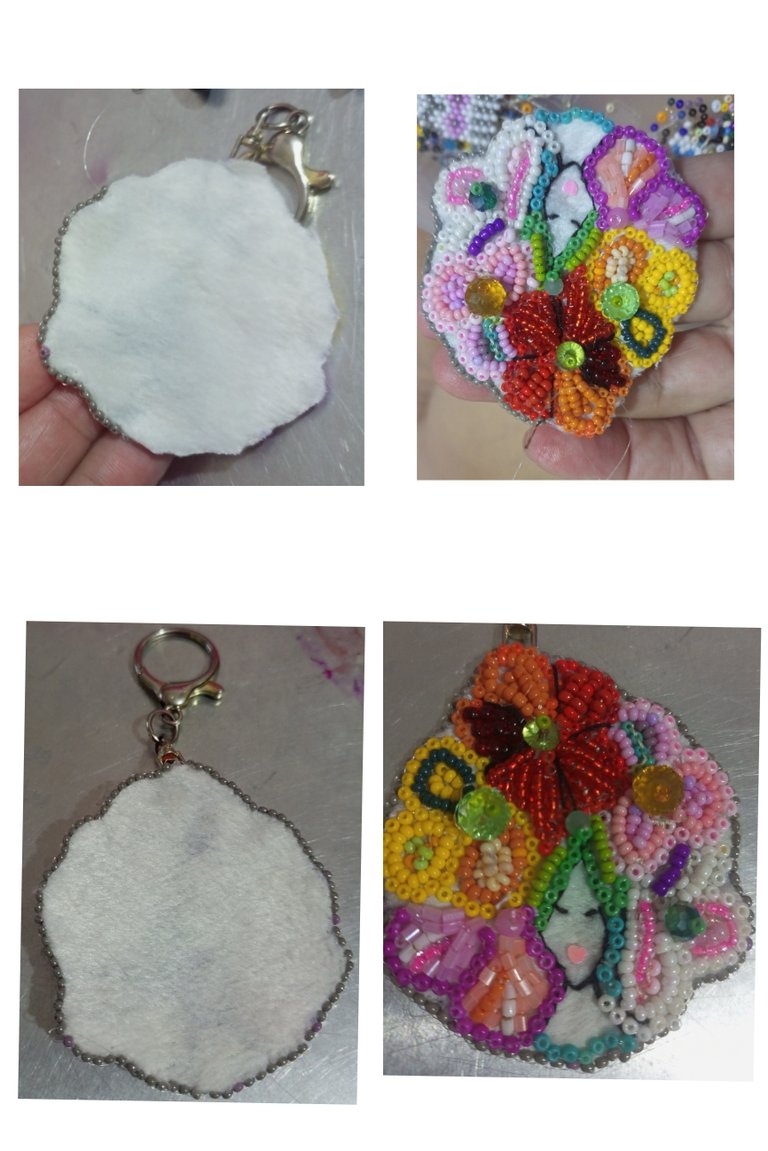
| El primer paso fué diseñar en papel Bond y recorte con tijeras. | The first step was to design on bond paper and cut out with scissors. |
| Paso 2 | Step 2 |
|---|---|
| Coloqué sobre la tela manto polar para comenzar a bordar los cristales yl mostacillas. | . |
| Paso 3 | Step 3 |
|---|---|
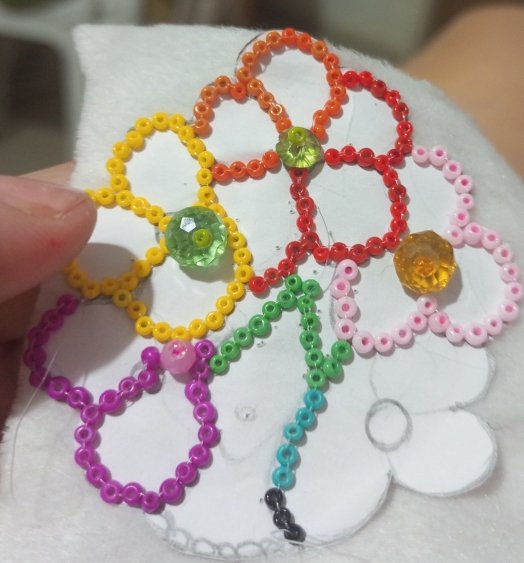
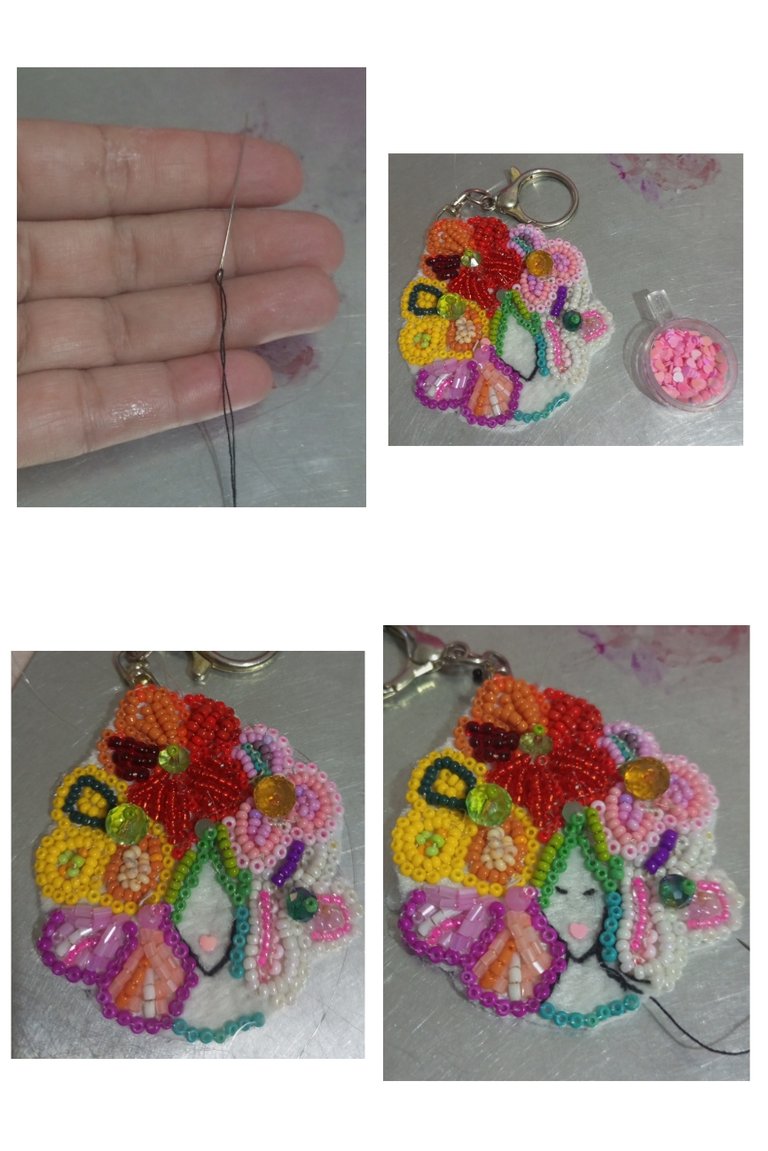
| Enhebre 1 metro de hilo de nylon en la aguja mostacillera y coloqué el primer cristal con una mostacilla para sujetar el cristal. | I threaded 1 meter of nylon thread on the needle and placed the first crystal with a bead to hold the crystal in place. |
| Paso 4 | Step 4 |
|---|---|
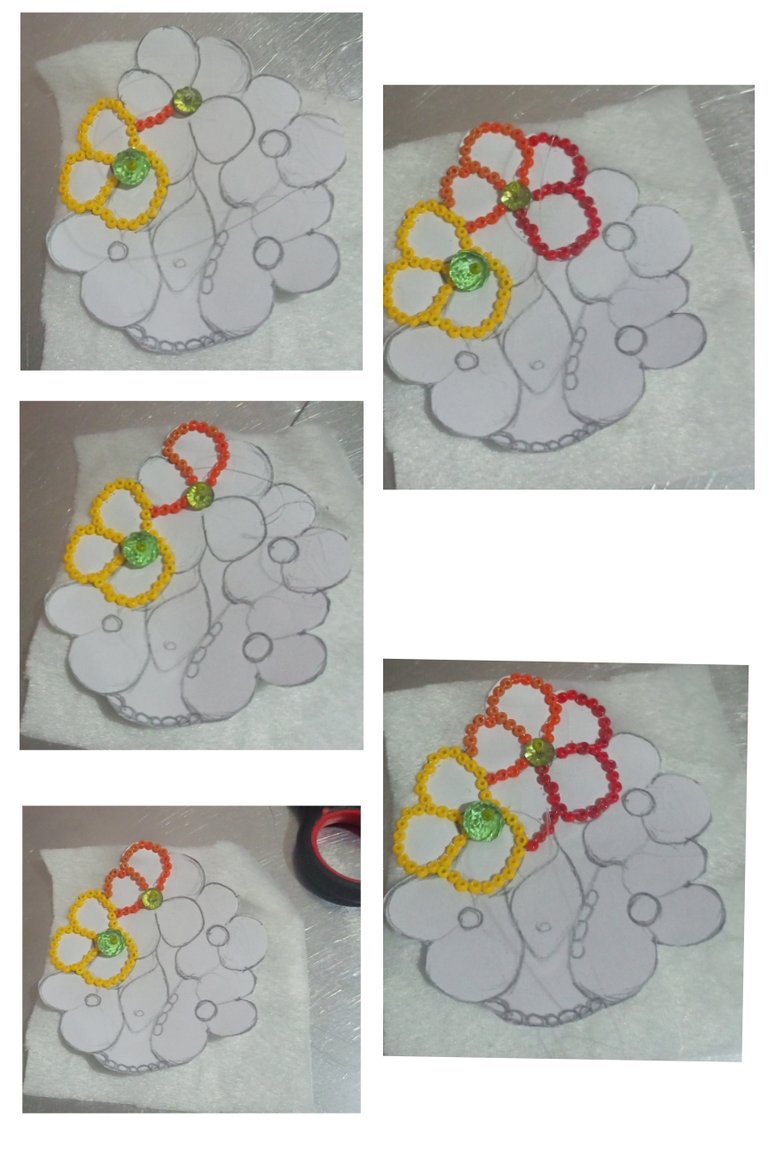
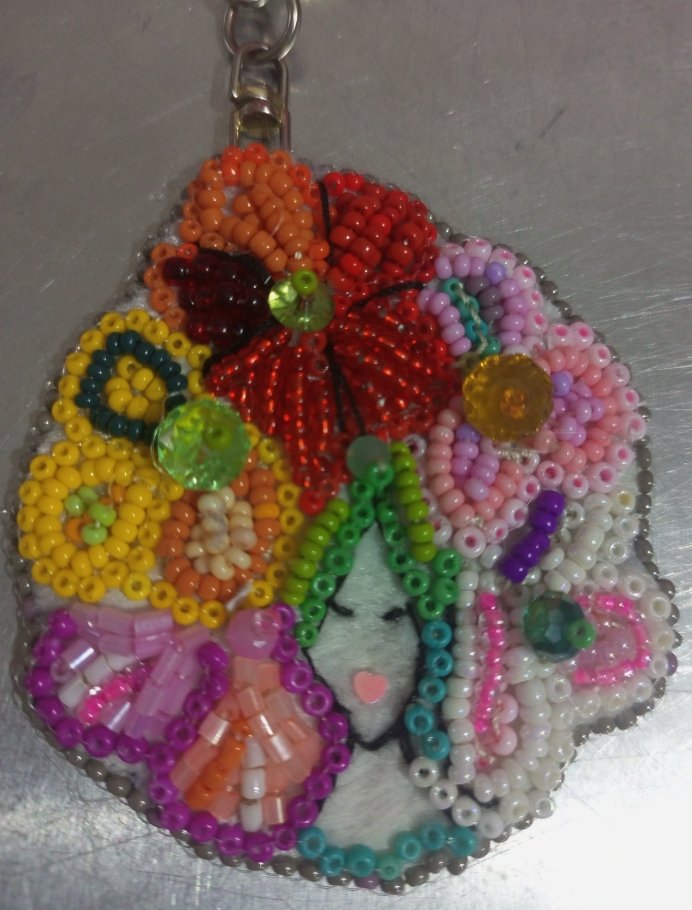
| Bordé las primeras líneas de la flor en color amarilla. | I embroidered the first lines of the flower in yellow color. |

| Paso 5 | Step 5 |
|---|---|
| Bordé las líneas de la segunda flor en color rojo y naranja. | I embroidered the lines of the second flower in red and orange. |
| Paso 6 | Step 6 |
|---|---|
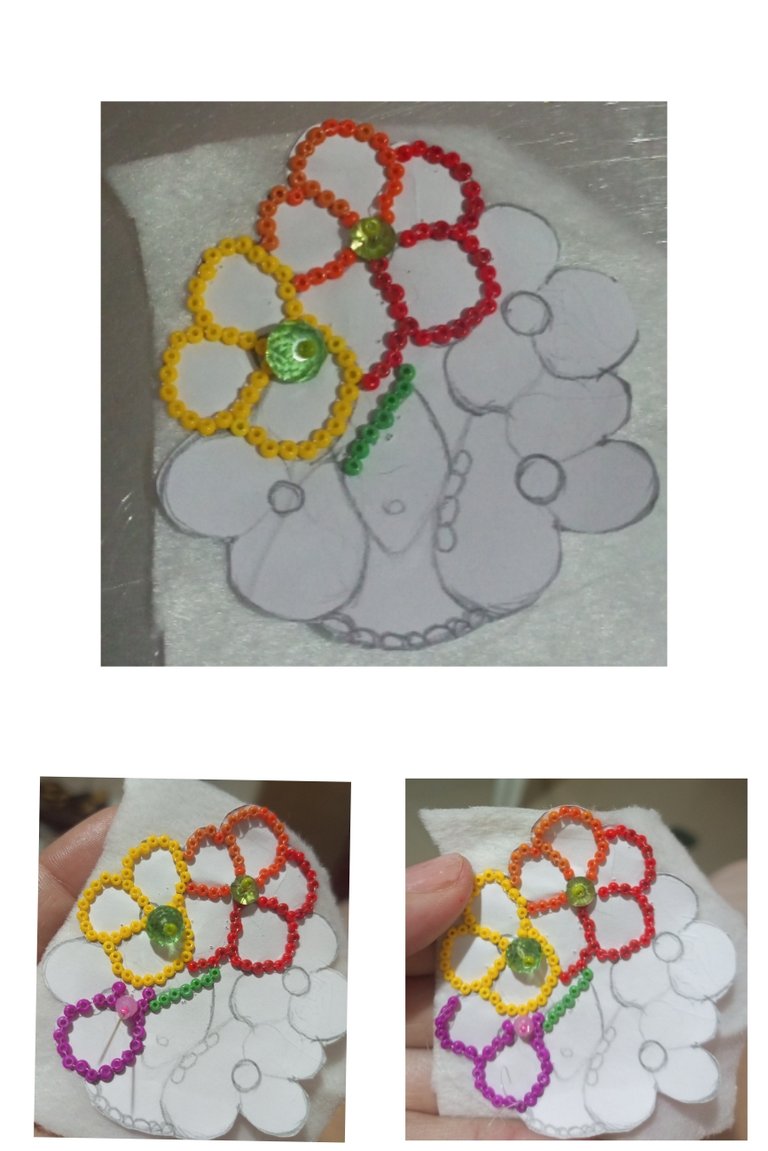
| Trabajé en la línea del cabello en color verde para simular hojas y realicé las líneas de la flor fucsia. | I worked on the hairline in green to simulate leaves and made the lines of the flower fuchsia. |
| Paso 7 | Step 7 |
|---|---|
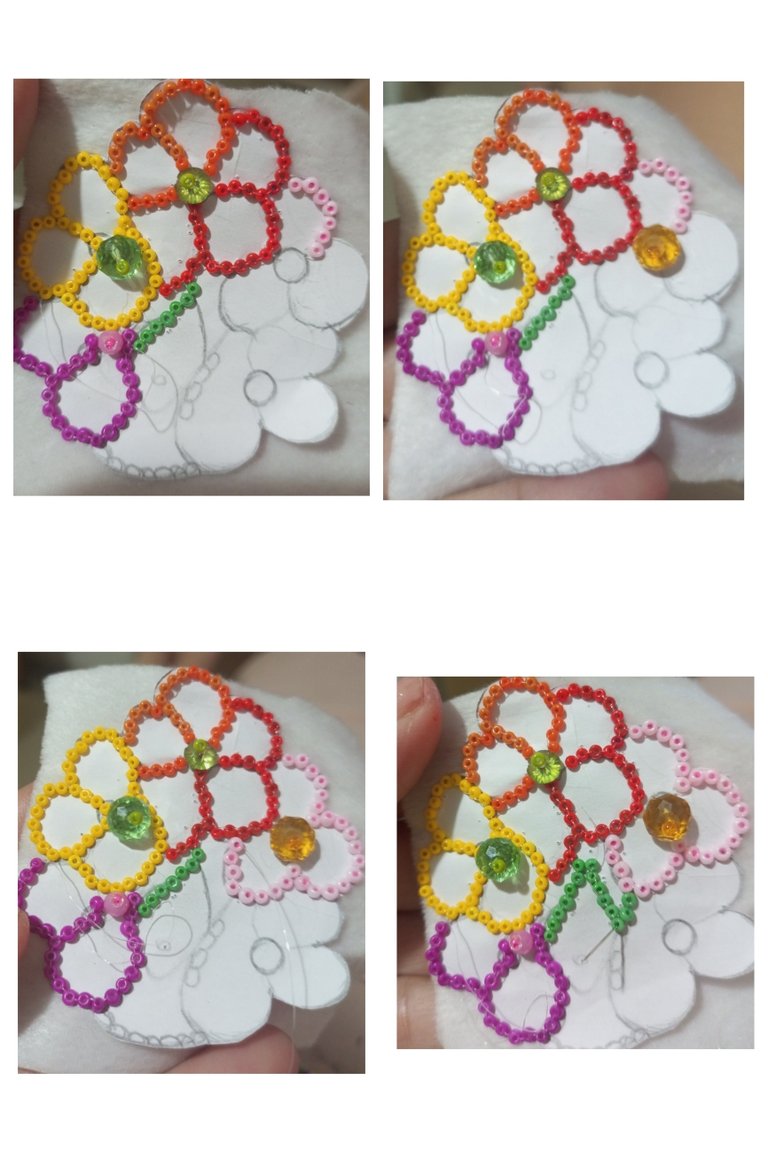
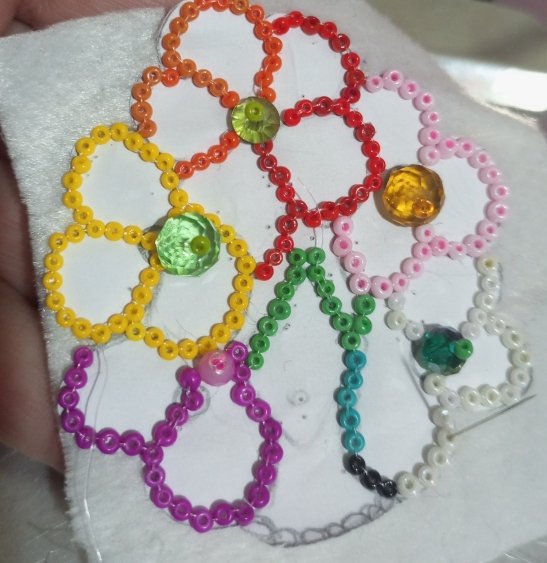
| Seguí trabajando en la cuarta flor en color rosado también coloqué el cristal en color ambar en el centro de la flor y realicé la línea del pelo. | I continued working on the fourth flower in pink color I also placed the crystal in amber color in the center of the flower and made the hairline. |
| Paso 8 | Step 8 |
|---|---|
| Seguí una línea para realizar un arete largo en color verde turquesa y seguí con la silueta del cuello de la mujer. | I followed a line to make a long earring in turquoise green and continued with the silhouette of the woman's neck. |
| Paso 9 | Step 9 |
|---|---|
| La quinta flor la realicé en color blanco. | The fifth flower I made in white color. |
| Paso 10 | Step 10 |
|---|---|
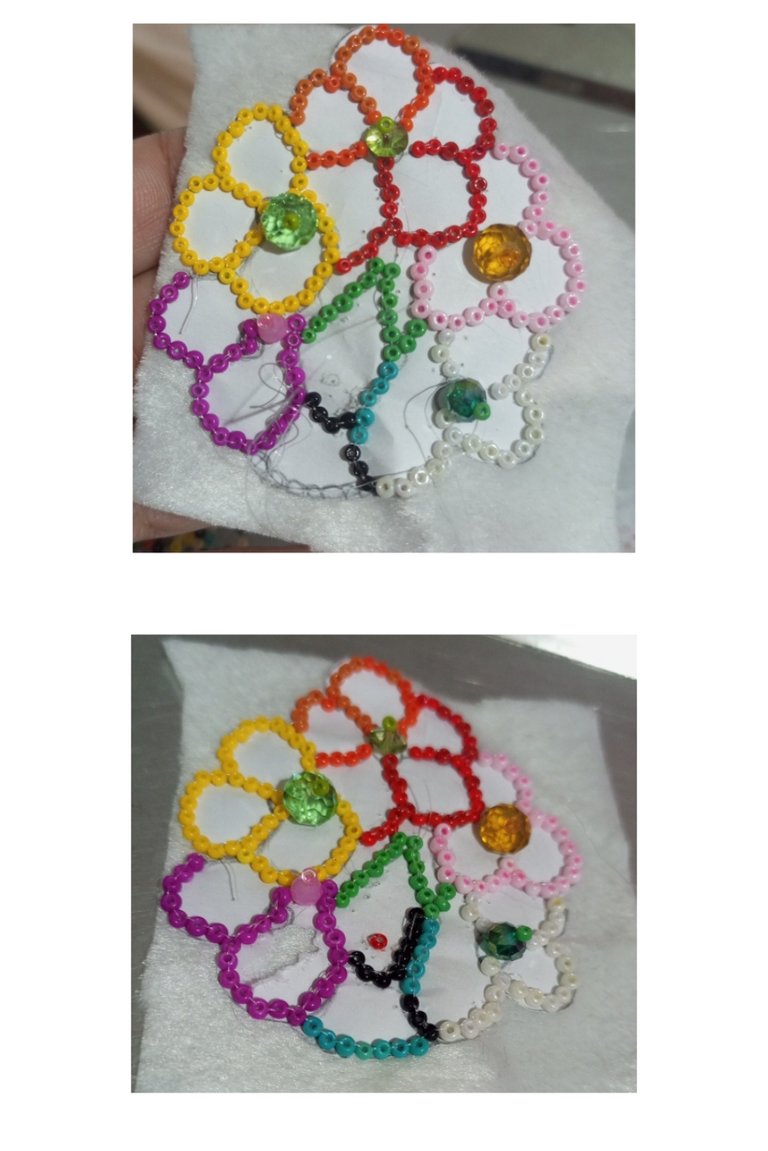
| Realicé la línea del cuello en negro y del escote en color verde turquesa. | I made the neck line in black and the neckline in turquoise green. |
| Paso 11 | Step 11 |
|---|---|
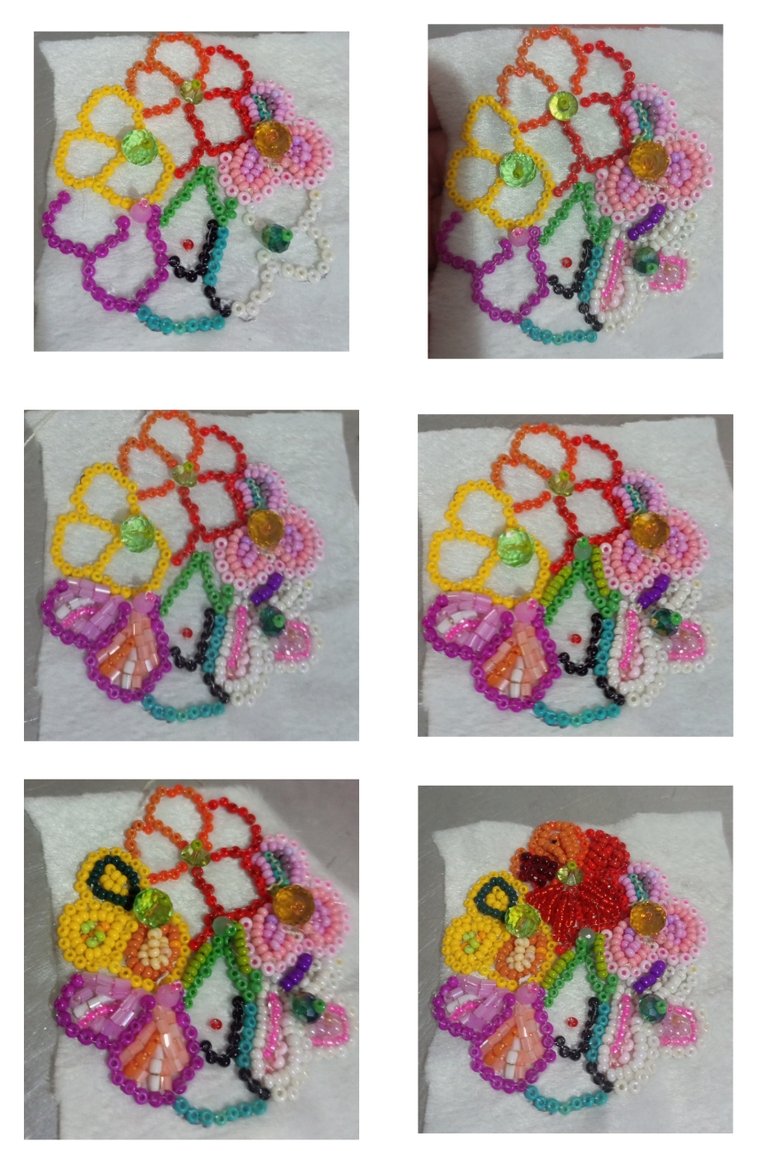
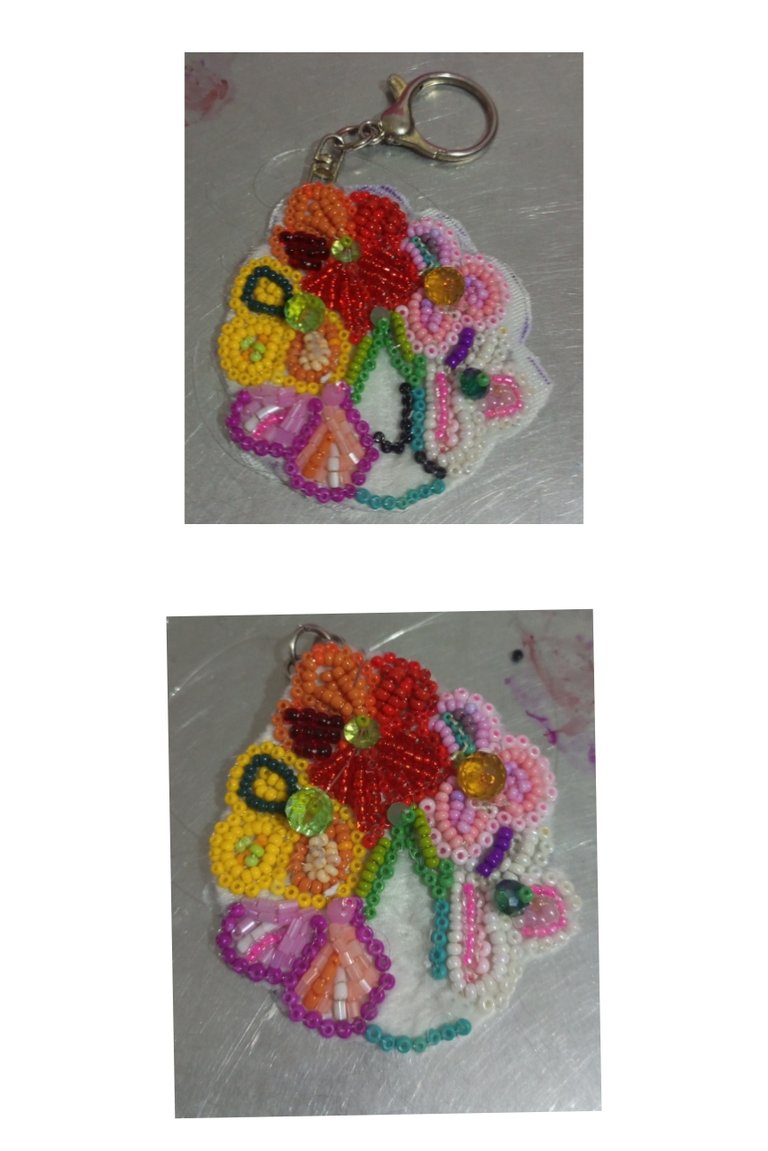
| En las siguientes imágenes observamos el bordado de las flores para eso no seguí ningún patrón en especifico en cuanto a los colores, líneas o materiales que usé, dejé un poco volar la imaginación. | In the following images we observe the embroidery of the flowers for that I did not follow any specific pattern in terms of colors, lines or materials that I used, I let my imagination fly a little bit. |
| Paso 12 | Step 12 |
|---|---|
| Coloqué el llavero cociendo con aguja e hilo nylon. | I placed the key ring by sewing it with a needle and nylon thread. |
| Paso 13 | Step 13 |
|---|---|
| Decidí realizar un cambio a última hora por lo que quité las mostacillas negras que hacían la línea de la silueta. | I decided to make a change at the last minute so I removed the black beads that made the silhouette line. |
| Paso 14 | Step 14 |
|---|---|
| Realicé la línea de la silueta en hilo negro y la boca le coloqué un stickers de corazón. | I made the silhouette line in black thread and placed a heart sticker on the mouth. |
| Paso 15 | Step 15 |
|---|---|
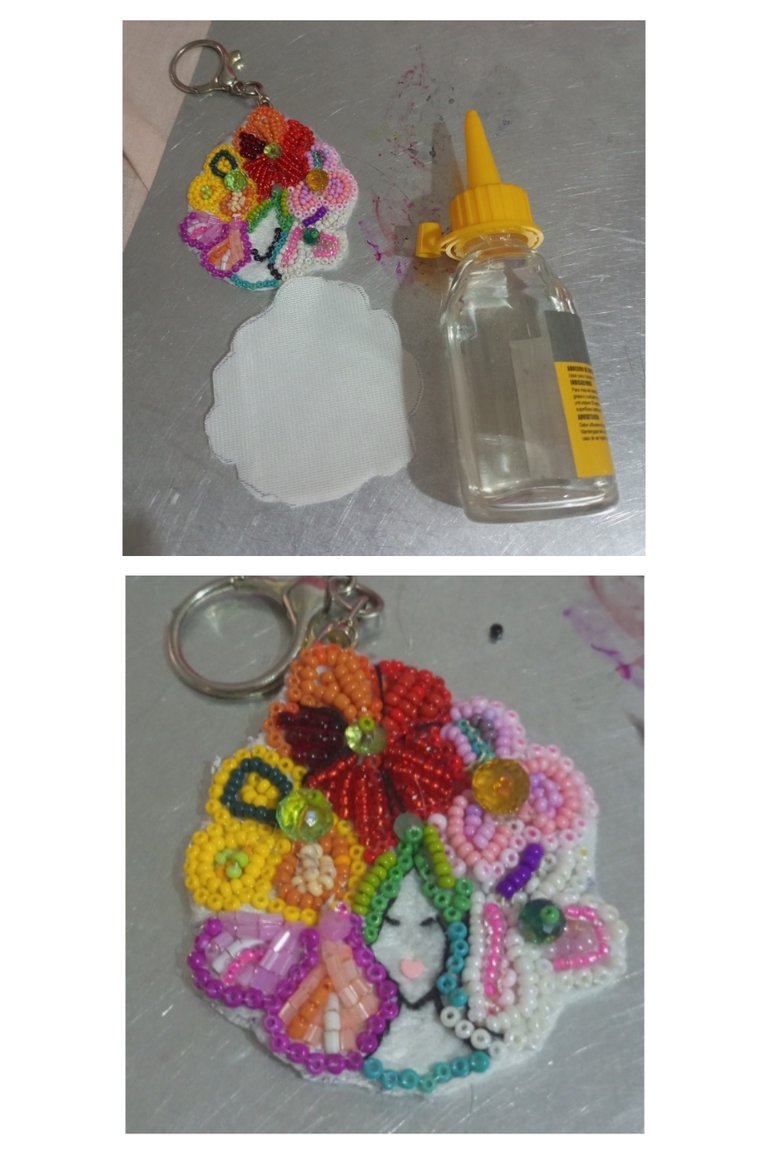
| Corté otra pieza en manta polar la cual pegué con silicón líquido. | I cut another piece of fleece which I glued with liquid silicone. |
| Paso 16 | Step 16 |
|---|---|
| Coloqué una línea de mostacillas grises en toda la línea para dar mayor precensia y quedé prolijo. | I placed a line of gray beads all along the line to give more precision and to make it neat. |
| Despedida | Farewell |
|---|---|
| Y esté es mi post para el día de hoy LLAVERO MUJER PRIMAVERAL muy contenta y agradecida con Dios por el resultado. | And this is my post for today SPRING WOMAN KEYCHAIN very happy and thankful to God for the result. |
| Créditos | Credits |
|---|---|
| Traductor: www.DeepL.com/Translator (free version). Las fotos fueron tomadas con mi Celular Tecno Sport 7T. Foto de portada editada con Canva y PhotoRoom. Banner:https://images.app.goo.gl/5N3pujMb9u2AePz87. | Translator: www.DeepL.com/Translator (free version). The photos were taken with my Tecno Sport 7T cell phone . Cover photo edited es Canva and PhotoRoom. Banner:https://images.app.goo.gl/5N3pujMb9u2AePz87. |
Está hermoso este colgante o llavero, se ve muy llamativo cada uno de los detalles que le hiciste.
Gracias por compartir siempre tu buen trabajo en nuestra comunidad 🌈🌻⭐
Gracias amiga @dayadam. Saludos 🤗
Llamativo, creativo y corrido. Creo que son las palabras que mejor pueden describir a tu creación. Se ve muy lindo la verdad.