| Esp | Eng |
|---|---|
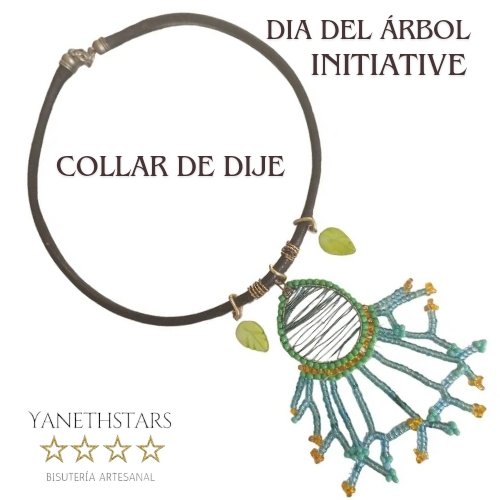
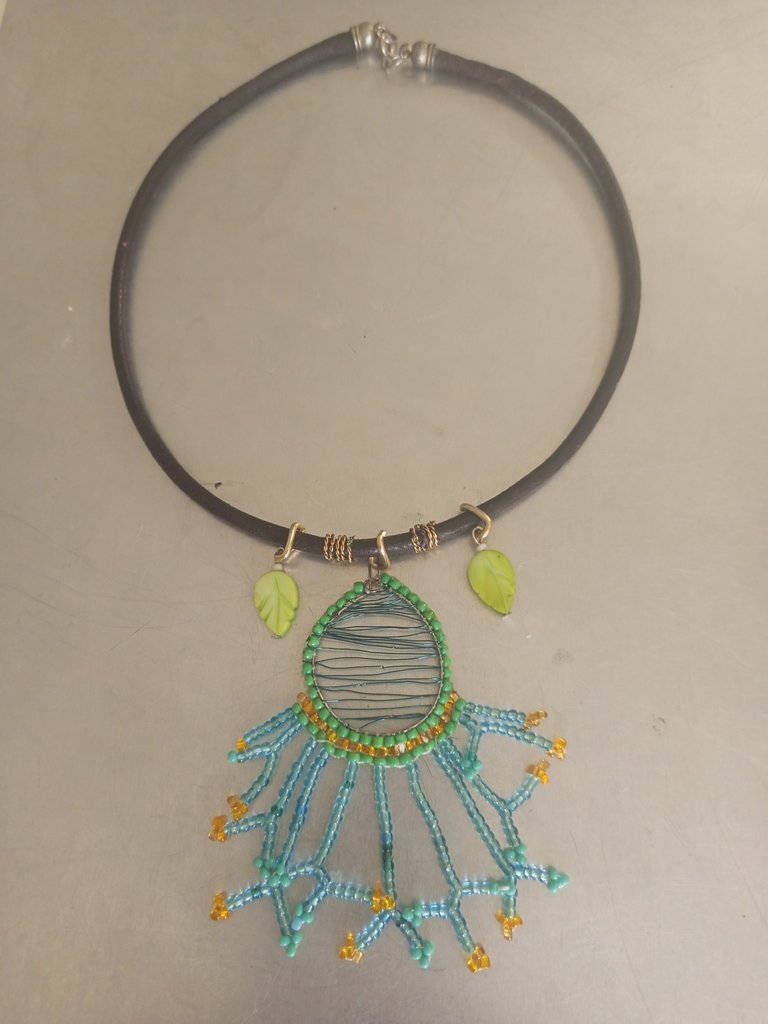
| INICIATIVA DÍA DEL ÁRBOL con éste LINDO COLLAR CON DIJE DE ÁRBOL. Un trabajo realizado con mostacillas, y un lindo collar de cuero. A continuación la lista de materiales y procedimientos.Hola amigos creativos de nuestra linda comunidad @Jewelry, hoy les traigo mi participación en | INITIATIVE TREE DAY with this NICE NECKLACE WITH TREE DIJE. A work made with beads, and a cute leather necklace. Here is the list of materials and procedures.Hello creative friends of our beautiful community @Jewelry, today I bring you my participation in |

| Materiales: | Materials: |
|---|---|
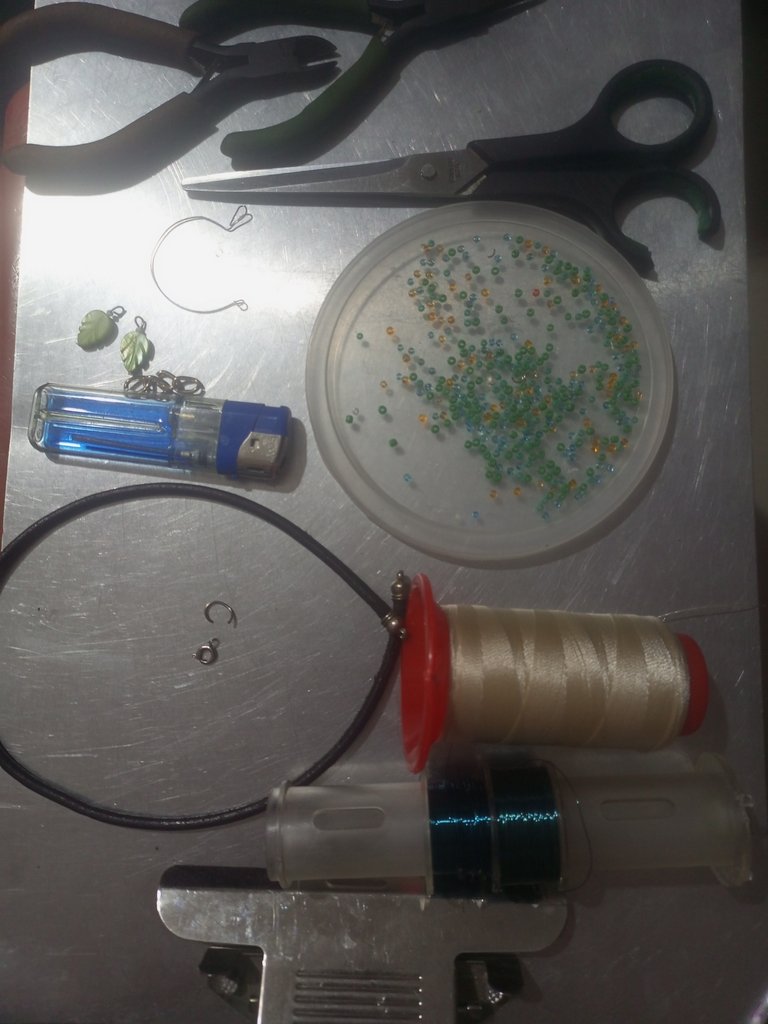
| Mostacillas verdes, aguamarinas, doradas y azul turquesa, un aro de alambre de 4 cm de diámetro, 3 eslabones de cadenas medianos, 2 hojas plásticas, alambre de bisutería, un cordón de cuero, 2 argollas, 1 trancadero, hilo para mostacilla beige, 1 aguja para mostacillas, yesquero, alambre de cobre azul, tijeras, pinzas y tenazas de bisutería. | Green, aquamarine, gold and turquoise blue beads, a 4 cm diameter wire ring, 3 medium chain links, 2 plastic sheets, jewelry wire, a leather cord, 2 rings, 1 lock ring, beige bead wire, 1 beige bead needle, 1 bead needle, tinder, blue copper wire, scissors, pliers and jewelry pliers. |
| Instrucciones: | Instructions: |
|---|---|
| Paso 1 | Step 1 |
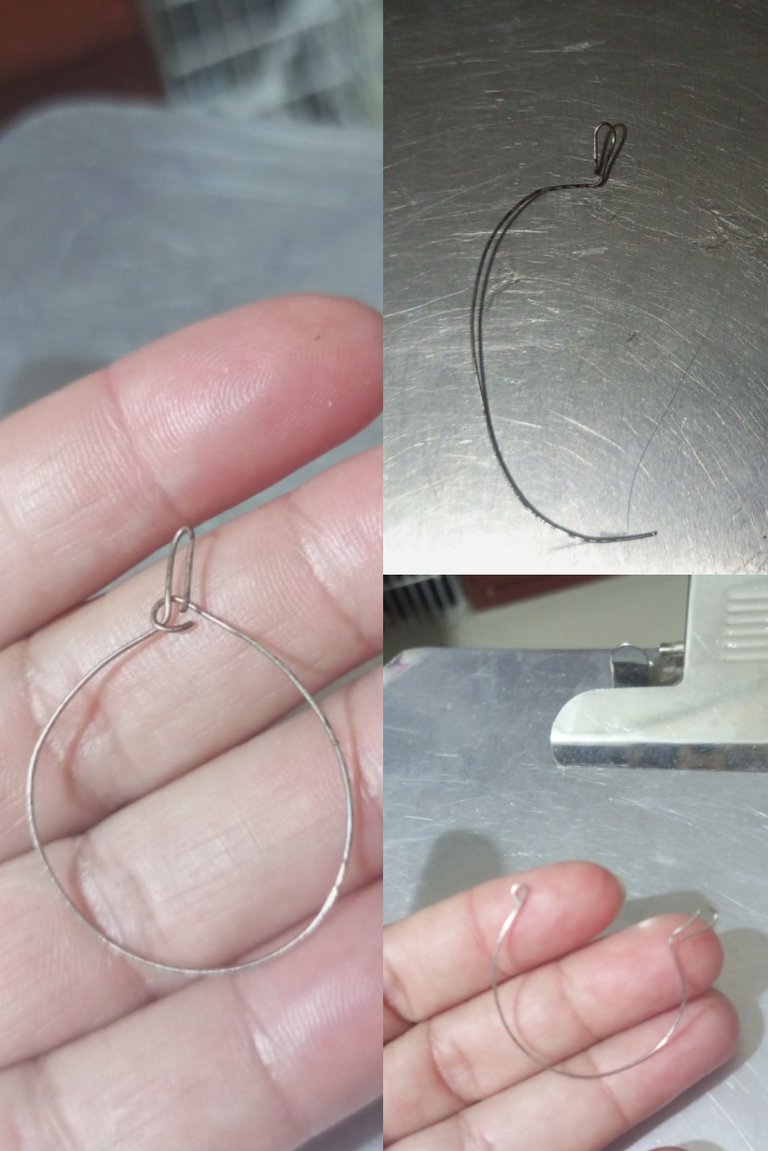
| Para el dije tomaremos un aro o con un alambre haremos uno, yo lo hice y en las puntas se deja ojal y gancho para cerrarlo. | For the pendant we will take a ring or with a wire we will make one, I did it and at the ends we will leave an eyelet and a hook to close it. |
| Paso 2 | Step 2 |
|---|---|
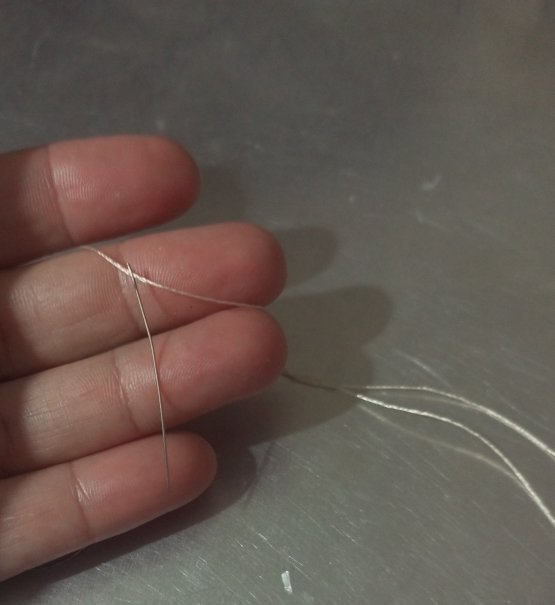
| Enhebre 1 metro de hilo para mostacillas en una aguja. | Thread 1 meter of mustard thread on a needle. |
| Paso 3 | Step 3 |
|---|---|
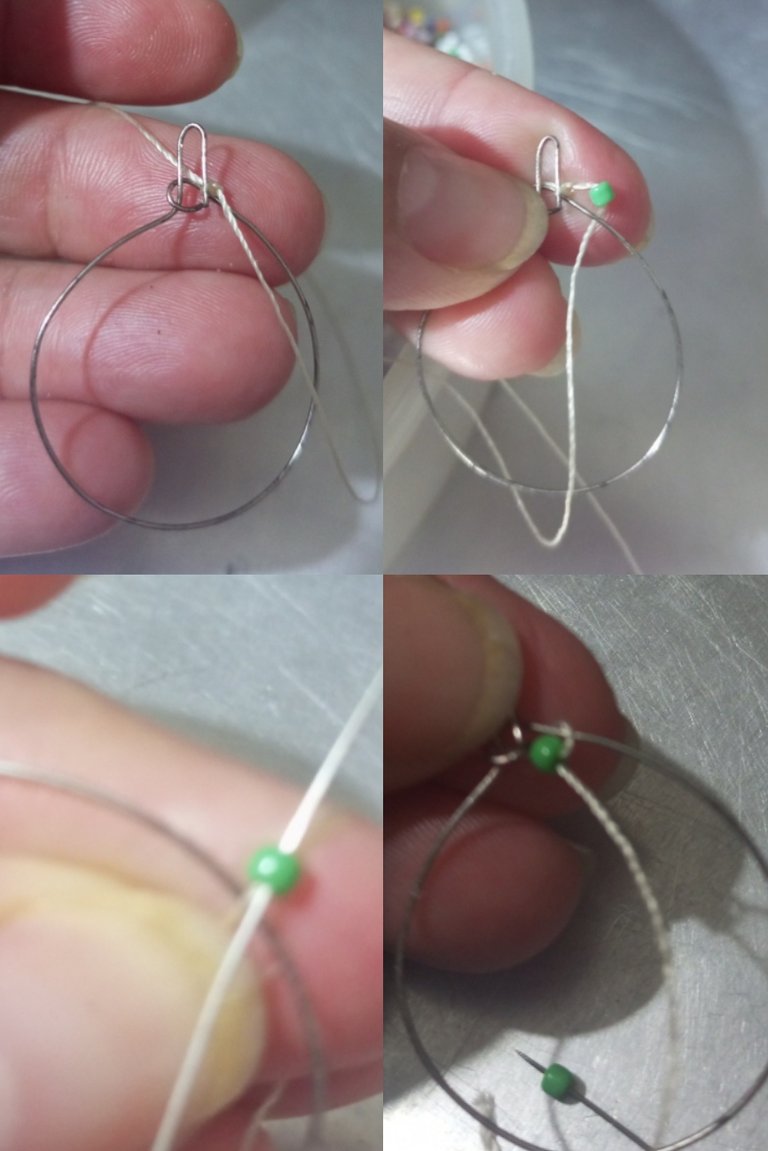
| Amarramos el hilo al alambre y comenzamos a colocar las mostacillas una a una, introducimos la aguja de abajo hacia arriba y sacamos la aguja. | Tie the thread to the wire and begin to place the beads one by one, insert the needle from the bottom to the top and remove the needle. |
| Paso 4 | Step 4 |
|---|---|
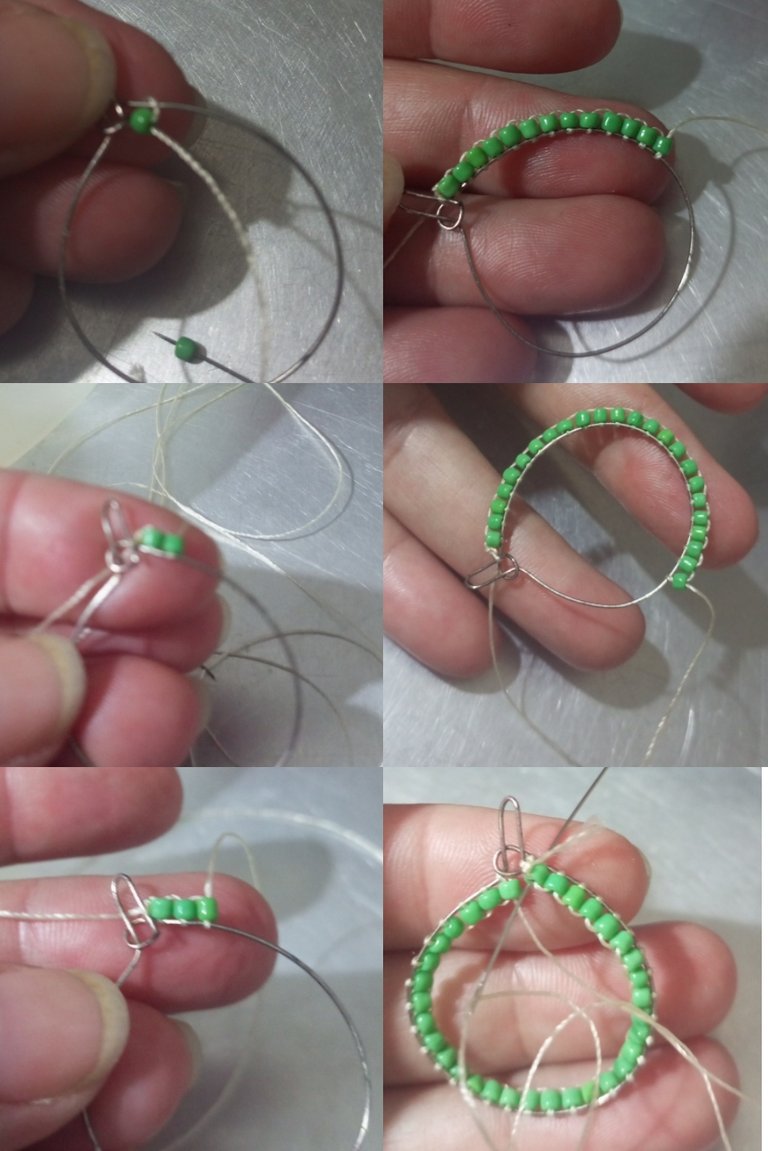
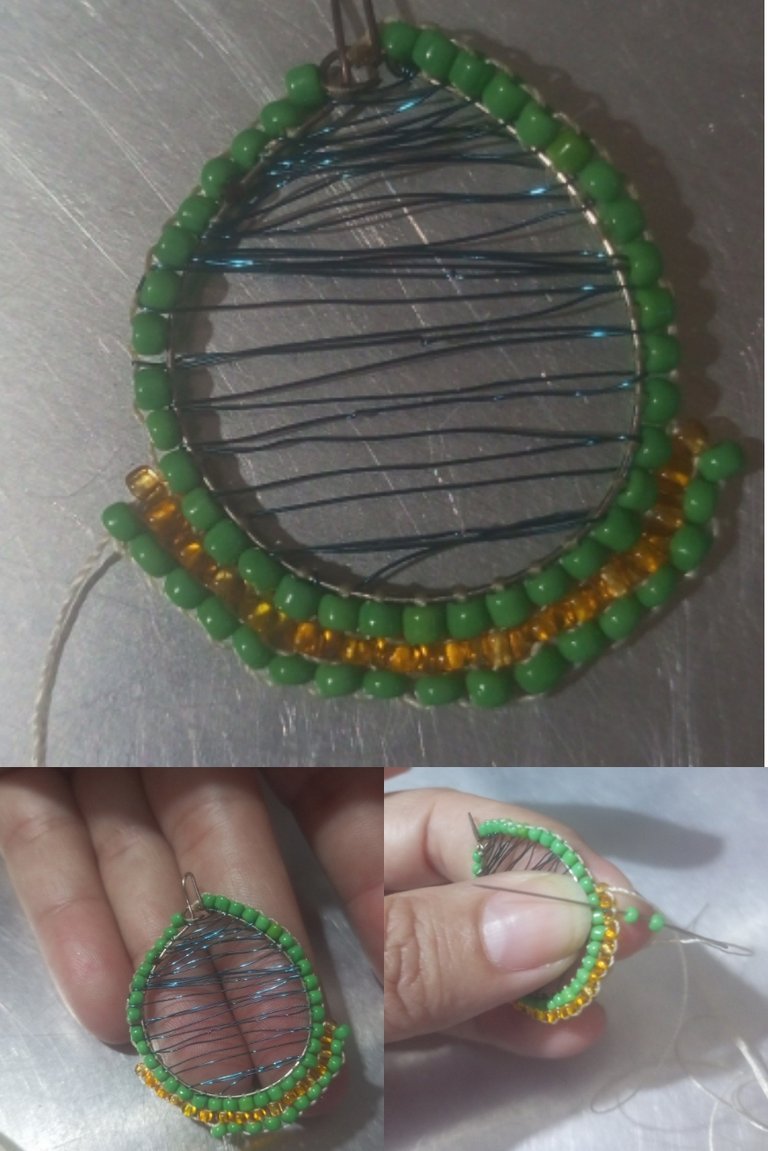
| Colocamos una a una las mostacillas hasta completar el aro. | We place the beads one by one until the ring is completed. |
| Paso 5 | Step 5 |
|---|---|
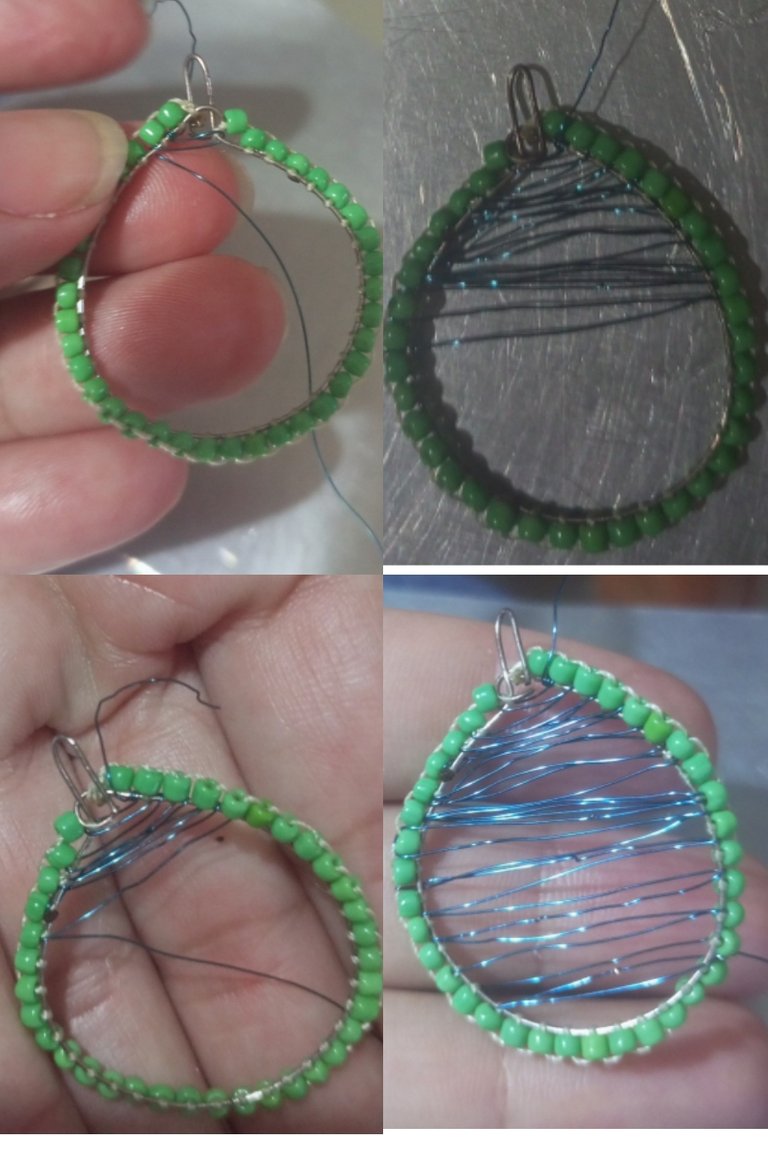
| Corté aproximado 1 metro de alambre de cobre y lo fui colocando de extremos a extremos usando los laterales del alambre del dije para cubrir todo el espacio hueco del dije. | I cut approximately 1 meter of copper wire and placed it from end to end using the sides of the wire of the pendant to cover all the hollow space of the pendant. |
| Paso 6 | Step 6 |
|---|---|
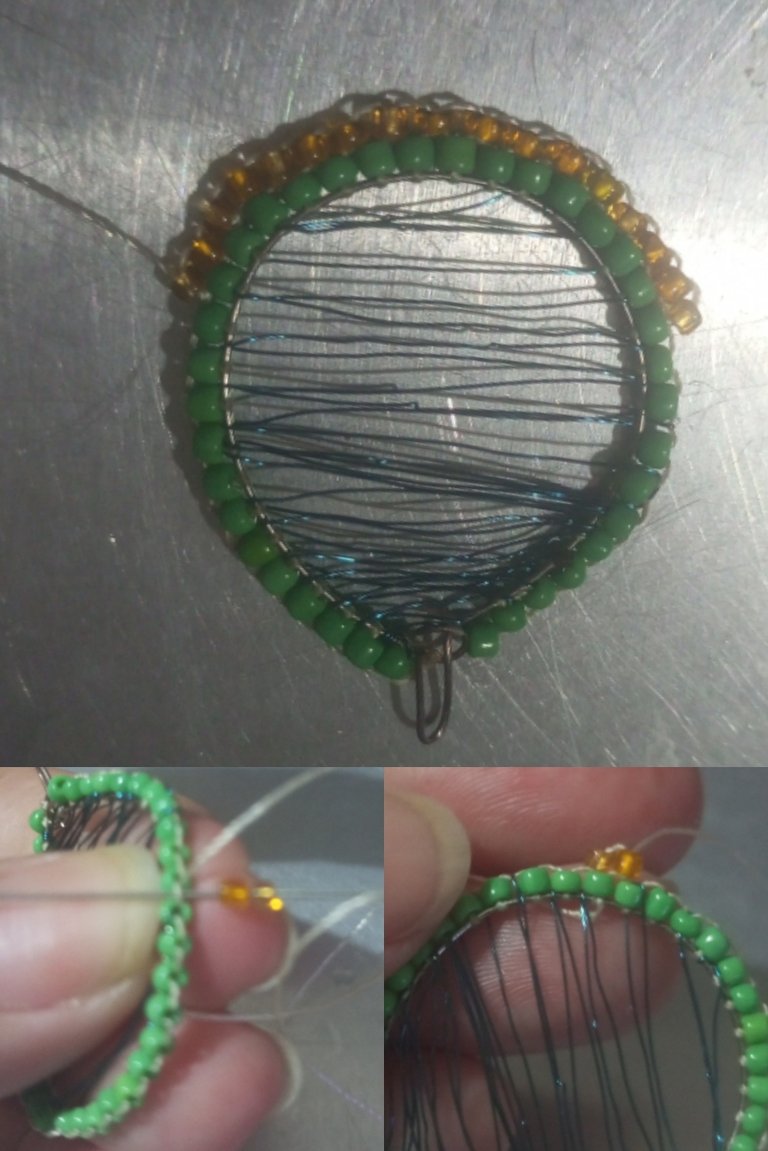
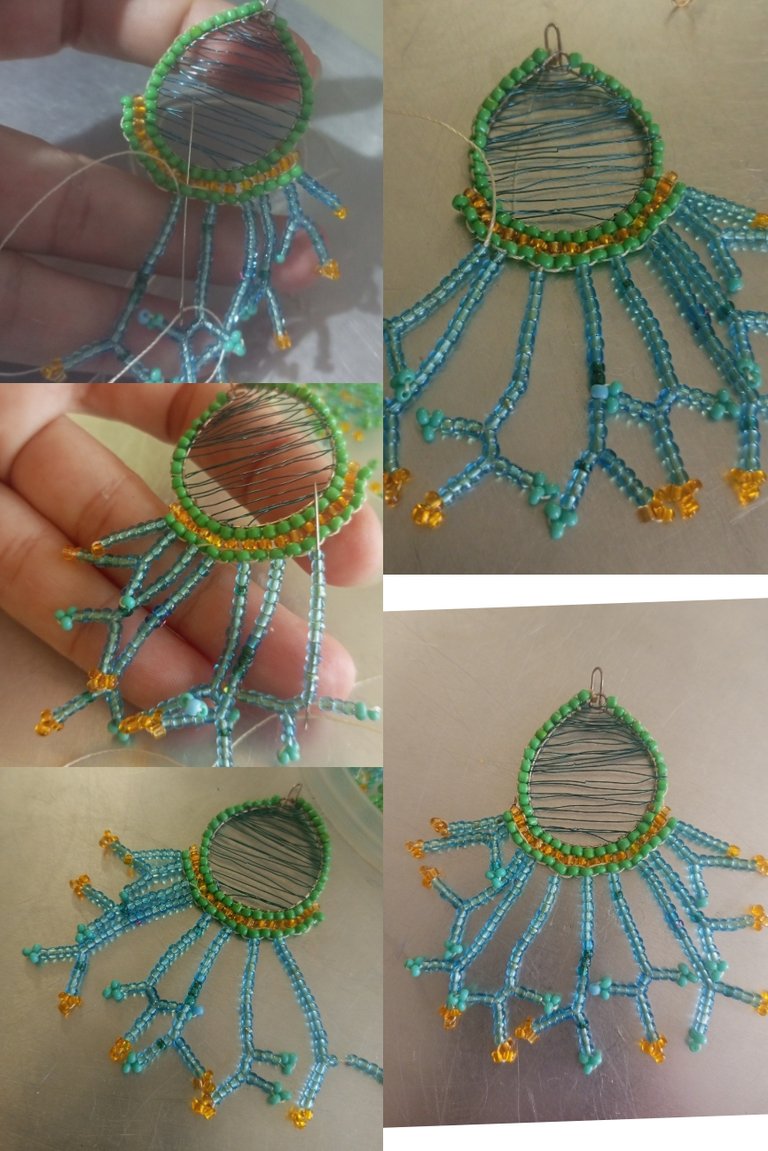
| Enhebre nuevamente hilo mostacillero beige y comencé a colocar las mostacillas doradas introduciendo la aguja en la mostacillas verdes. | I rethreaded the beige bead thread and began to place the gold beads by inserting the needle into the green beads. |
| Paso 7 | Step 7 |
|---|---|
| Coloqué una segunda línea de mostacillas verdes. | I placed a second line of green beads. |
| Paso 8 | Step 8 |
|---|---|
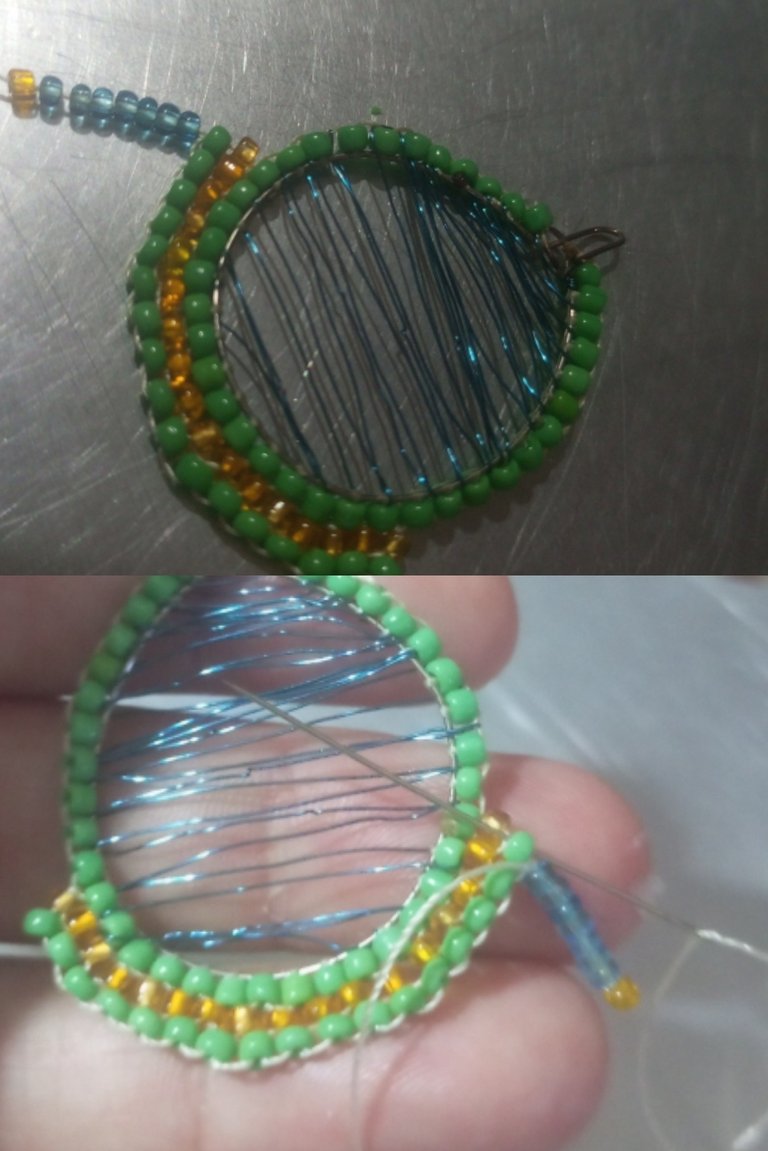
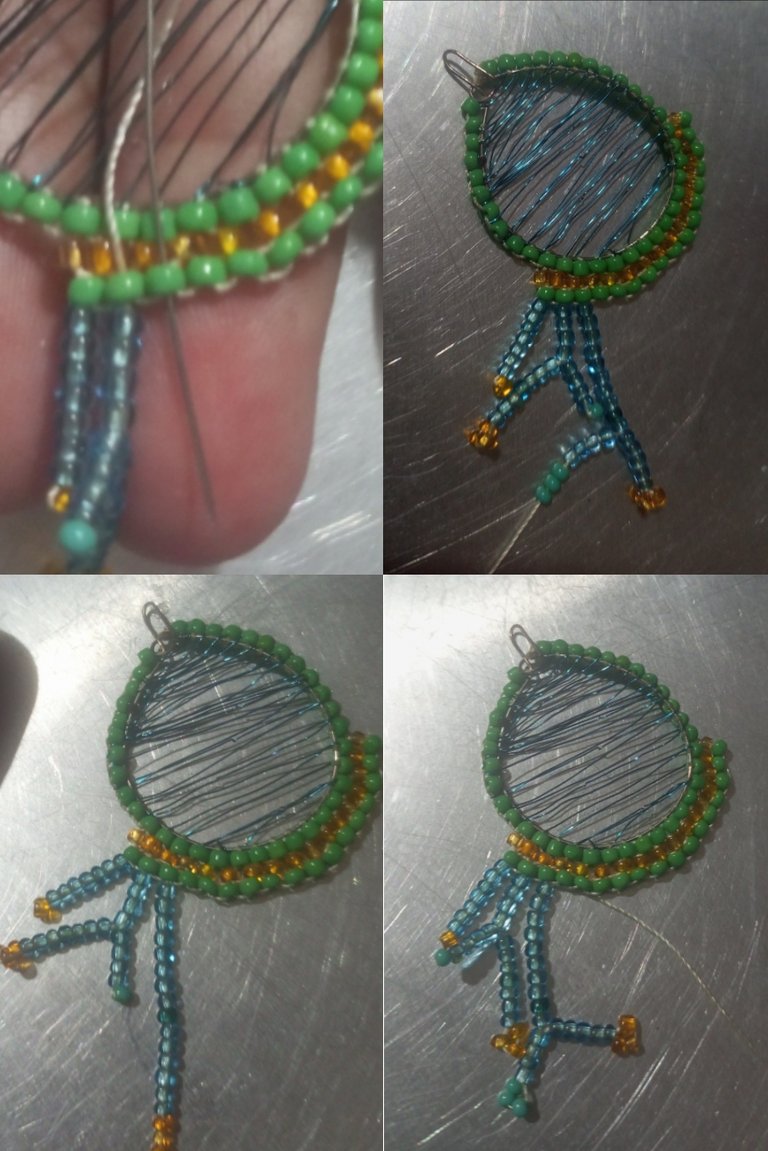
| Hice flecos de mostacillas son 11 flecos en la foto observamos el primer fleco o rama que es el más corto de 6 mostacillas azules y 1 dorada, introduzco la aguja por las mostacillas azules y sacando la aguja en la mostacilla verde. | I made bangs of beads are 11 bangs in the photo we observe the first fringe or branch that is the shortest of 6 blue beads and 1 gold, I introduce the needle through the blue beads and taking out the needle in the green bead. |
| Paso 9 | Step 9 |
|---|---|
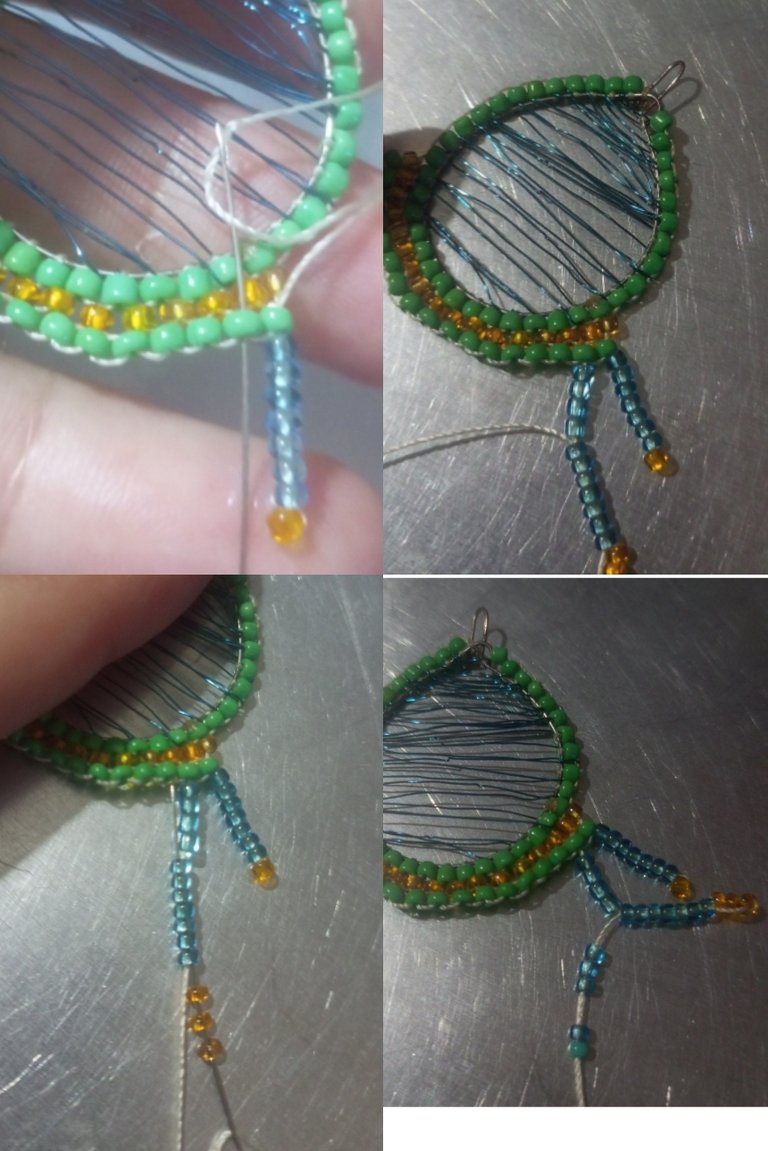
| La segunda rama la hice en la segunda mostacilla, introduje 11 mostacillas azules y 3 doradas introduje la aguja en la primera azul hacía arriba para que quedé una unión de 3 mostacillas. Luego saco la aguja en la octava mostacilla y saco la aguja para realizar una rama de cuatro mostacillas azules y en la punta una verde turquesa. | The second branch I made in the second bead, I introduced 11 blue and 3 gold beads and I introduced the needle in the first blue bead upwards to make a union of 3 beads. Then I take out the needle in the eighth bead and take out the needle to make a branch of four blue beads and at the tip a turquoise green bead. |
| Paso 10 | Step 10 |
|---|---|
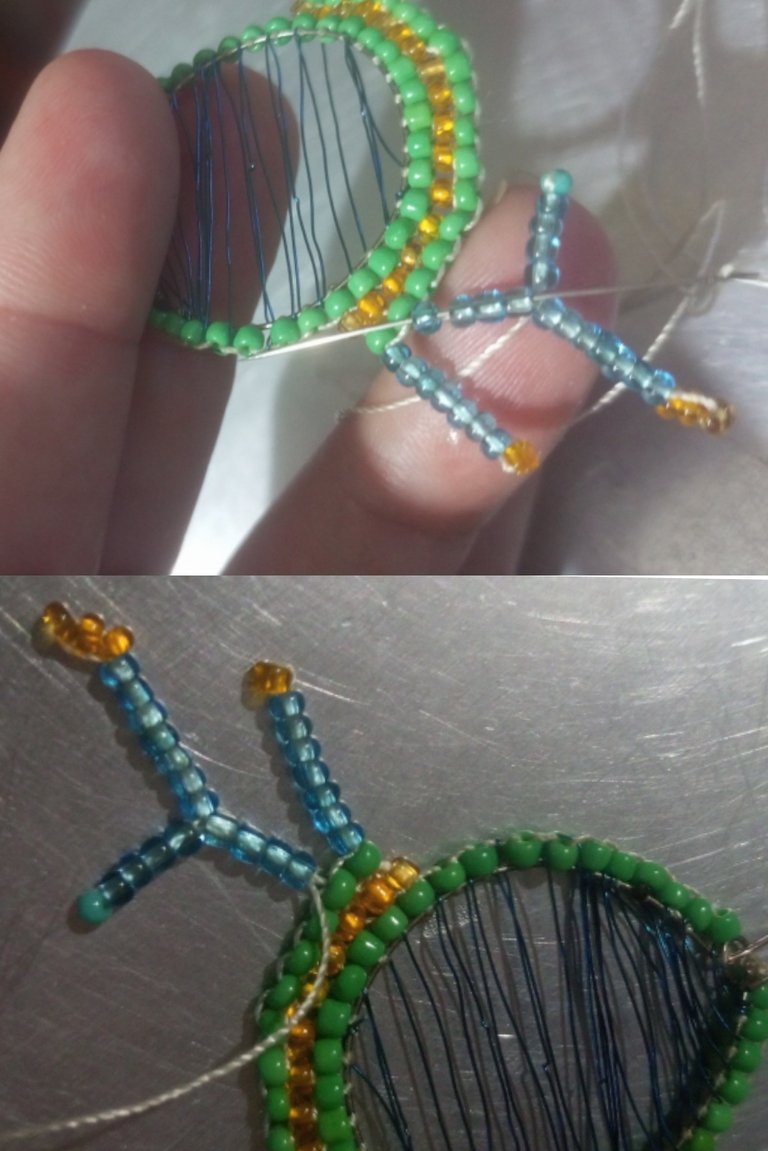
| Realizaré el tercer fleco el cual tiene dos ramitas. | I will make the third fringe which has two twigs. |
| Paso 11 | Step 11 |
|---|---|
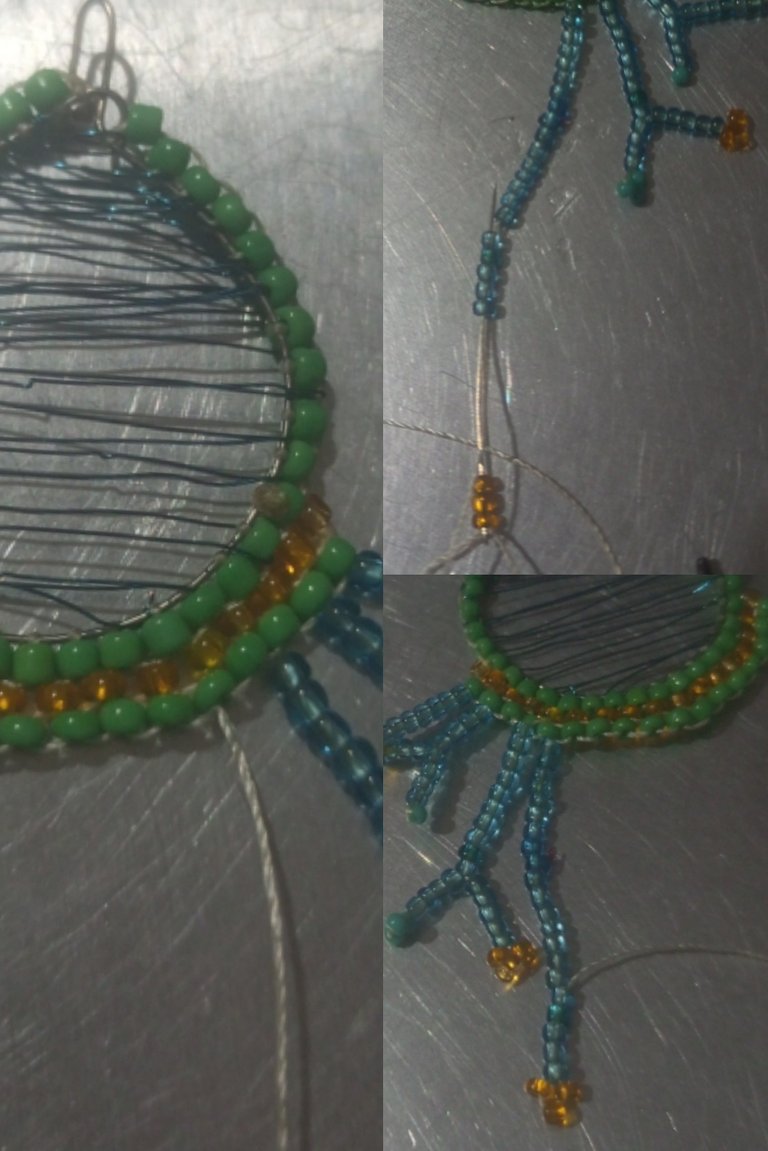
| Para el cuarto fleco realicé una rama. | For the fourth fringe I made a branch. |
| Paso 12 | Step 12 |
|---|---|
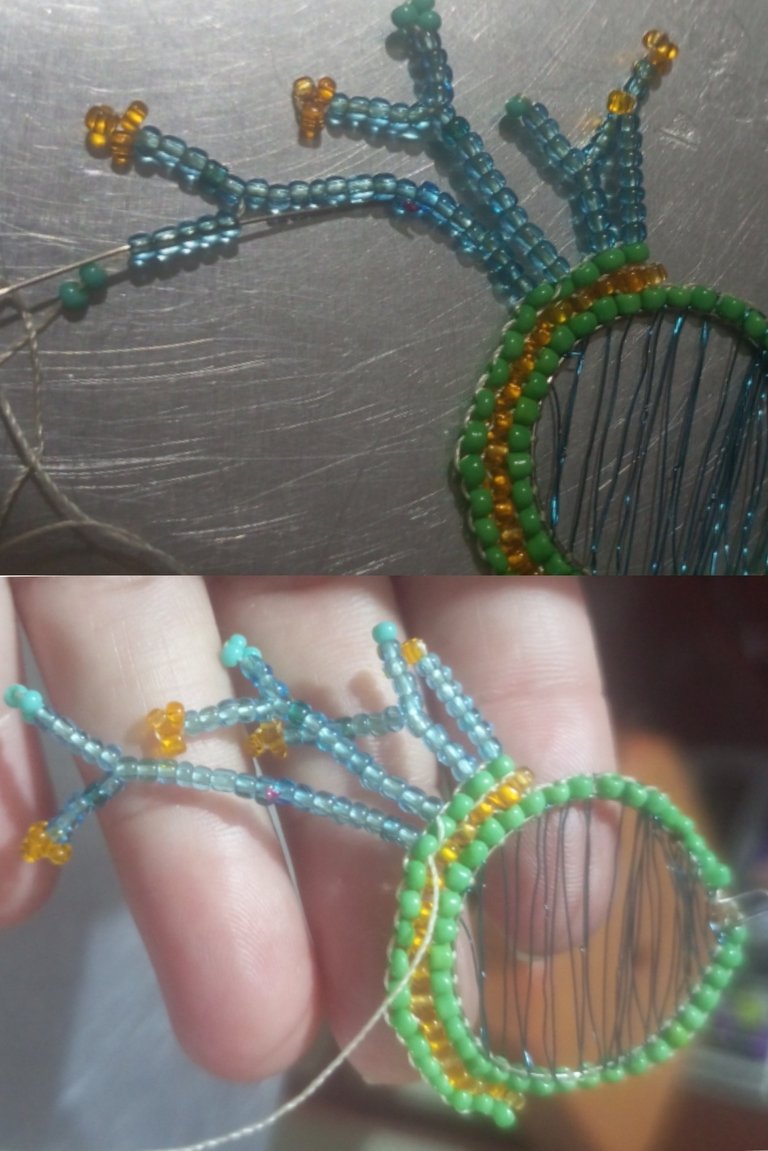
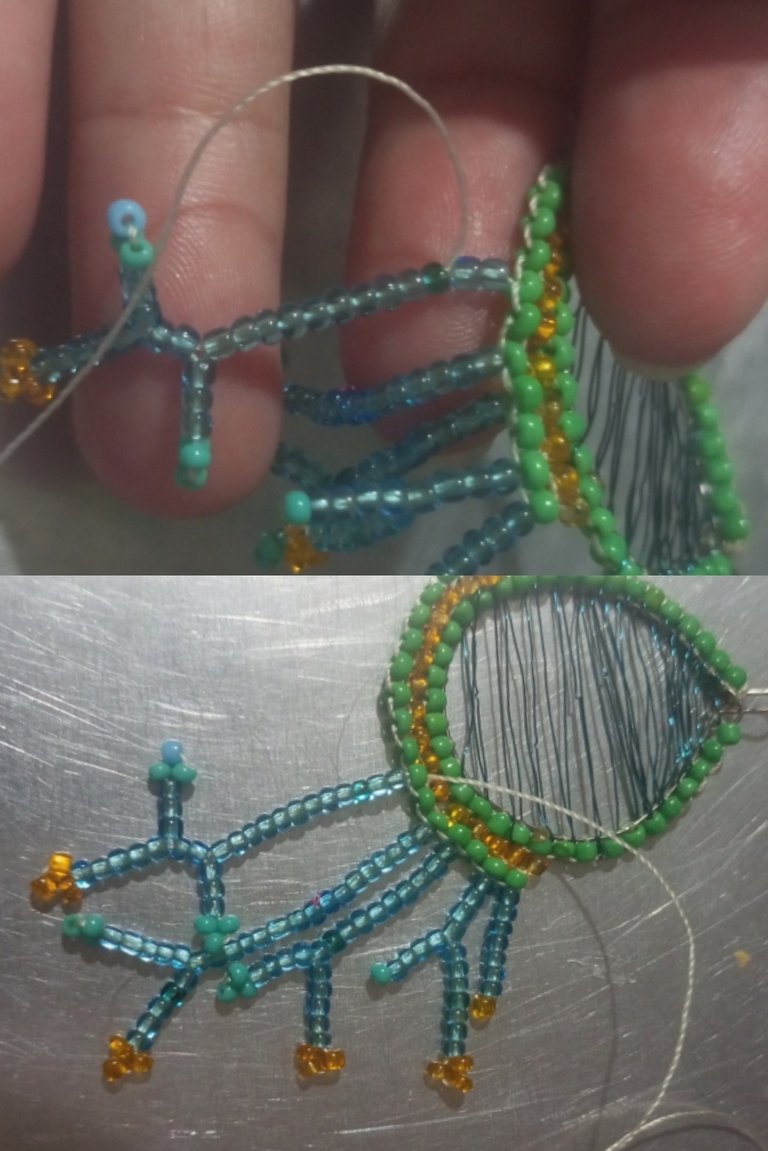
| El quinto fleco es el más largo tiene más mostacillas que los otros flecos y tiene fos ramitas. | The fifth fringe is the longest and has more beads than the other bangs and has two twigs. |
| Paso 13 | Step 13 |
|---|---|
| Los siguiente flecos que son cinco más del otro lado se realizarán repitiéndo el patrón de los primeros cinco. | The next five more bangs on the other side will be made repeating the pattern of the first five bangs. |
| Paso 14 | Step 14 |
|---|---|
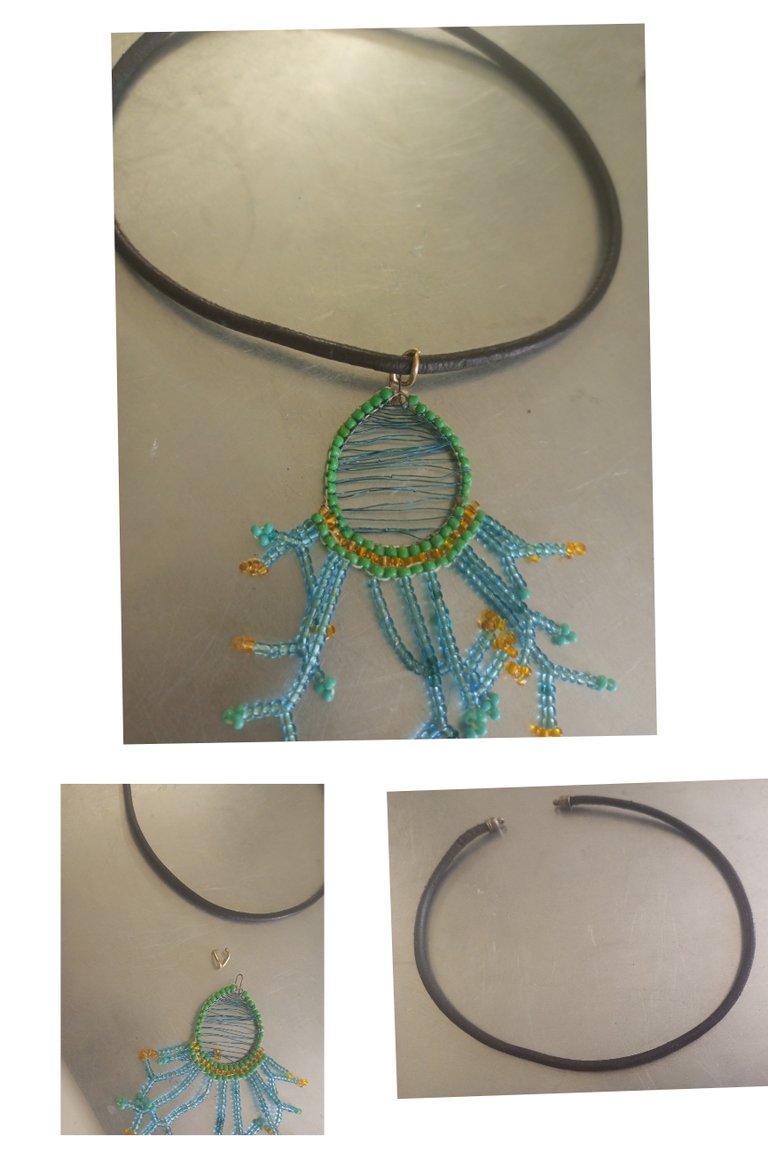
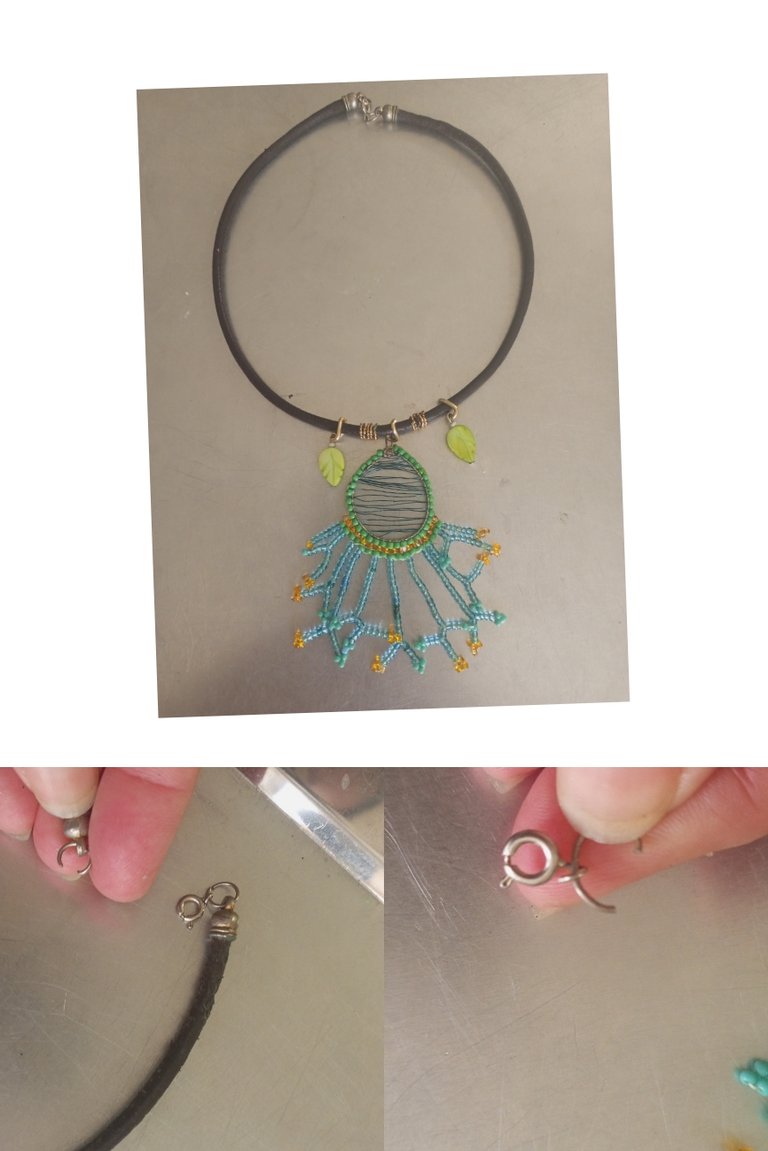
| El siguiente paso es colocar el dije con un eslabón de cadena también podemos usar argollas. | The next step is to place the pendant with a chain link or we can also use rings. |
| Paso 15 | Step 15 |
|---|---|
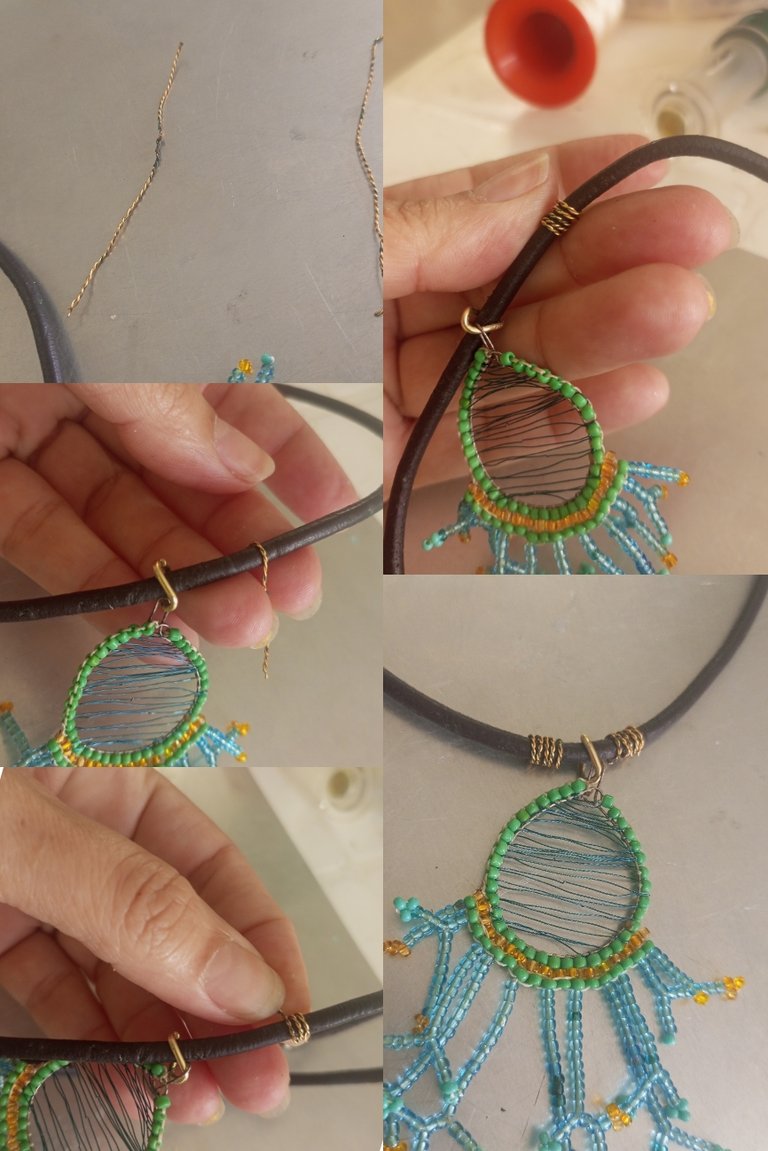
| Con los alambre hice adornos enrollando en el cordón, realice uno a cada lado. | With the wires I made ornaments by winding them around the cord, I made one on each side. |
| Paso 16 | Step 16 |
|---|---|
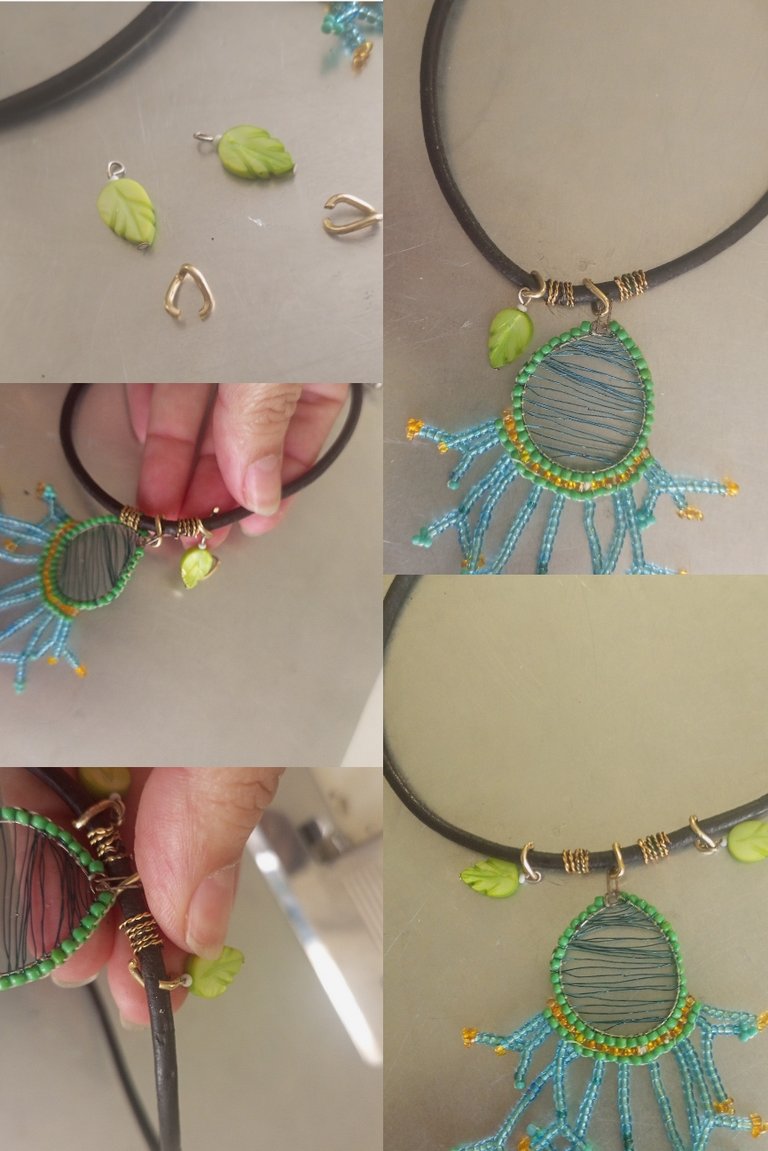
| Coloqué las hojas con los eslabones a cada lado del dije. | I placed the leaves with the links on each side of the pendant. |
| Paso 17 | Step 17 |
|---|---|
| Coloqué las argollas y trancaderos. | I set the rings and locks. |
| Despedida | Farewell |
|---|---|
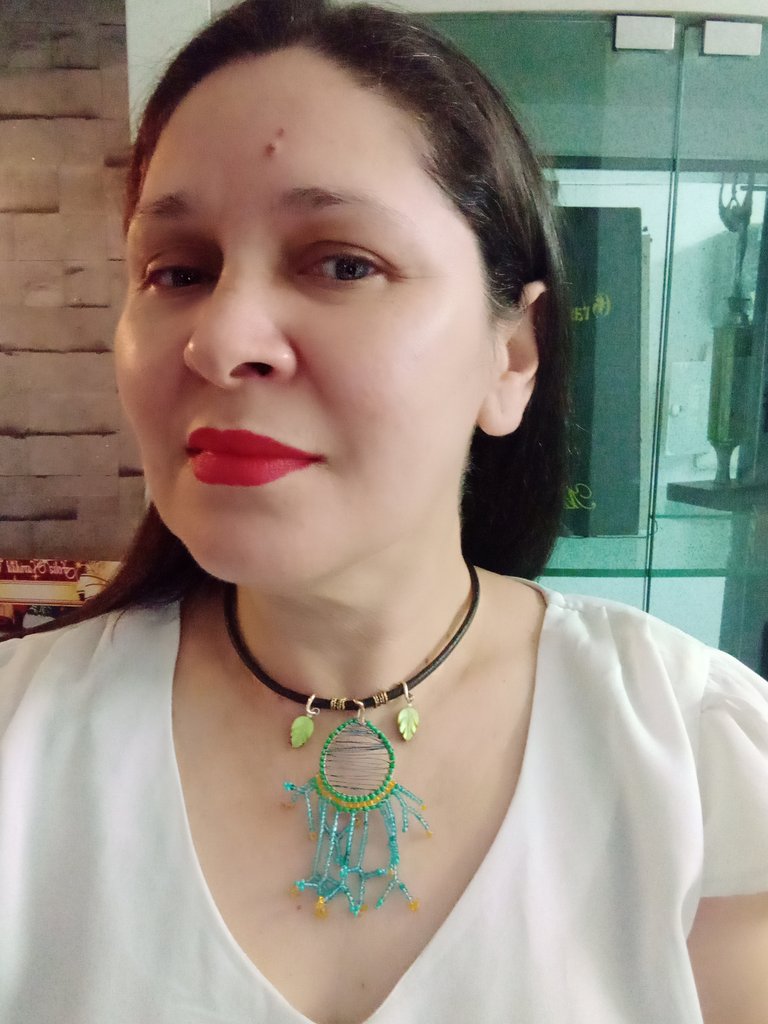
| Y está es mi participación para la INICIATIVA DÍA DEL ÁRBOL con éste LINDO COLLAR CON DIJE DE ÁRBOL. Invitando a los amigos @cargus, @flowermari y @sarayrodri se unan a nuestra comunidad y participen en está linda propuesta. Esté es un post hecho con amor, espero les guste y disfruten. | And this is my participation for the INITIATIVE ARBOR DAY with this NICE NECKLACE WITH TREE DIJE. Inviting friends @cargus, @flowermari and @sarayrodri to join our community and participate in this nice proposal. This is a post made with love, I hope you like it and enjoy it. |
,
| Créditos | Credits |
|---|---|
| Traductor: www.DeepL.com/Translator (free version).Las fotos fueron tomadas con mi Celular Tecno Sport 7T. Foto de portada editada con Canva y PhotoRoom. Banner Pixabay.com. | Translator: www.DeepL.com/Translator (free version). The photos were taken with my Tecno Sport 7T cell phone. Cover photo edited es Canva and PhotoRoom. Banner Pixabay.com. |
Interesante trabajo el que nos traes, elaborado, complejo y llamativo.
Gracias por participar en la iniciativa cariño.
!DIY
Muy llamativo y místico collar muy original amiga gracias suerte en el concurso.
You can query your personal balance by
@dayadam just sent you a DIY token as a little appreciation for your post dear @yanethstars! Feel free to multiply it by sending someone else !DIY in a comment :) You can do that x times a day depending on your balance so:!DIYSTATSCongratulations @yanethstars! You have completed the following achievement on the Hive blockchain And have been rewarded with New badge(s)
Your next target is to reach 45000 upvotes.
You can view your badges on your board and compare yourself to others in the Ranking
If you no longer want to receive notifications, reply to this comment with the word
STOPCheck out our last posts: