| Esp | Eng |
|---|---|
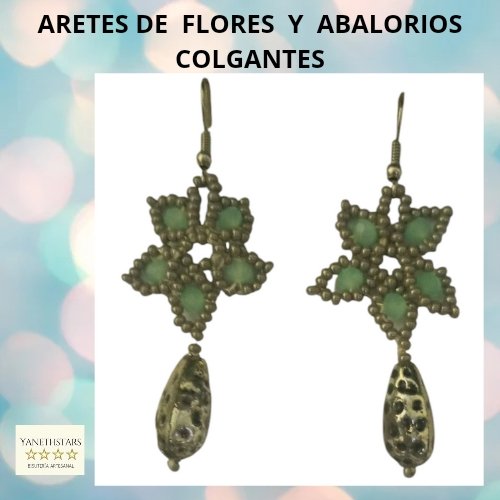
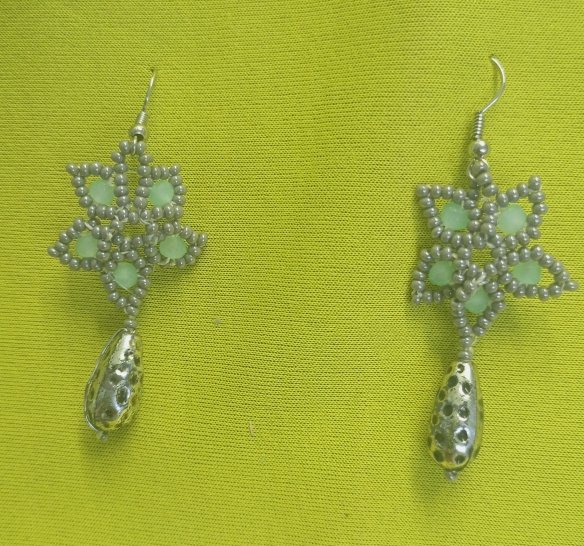
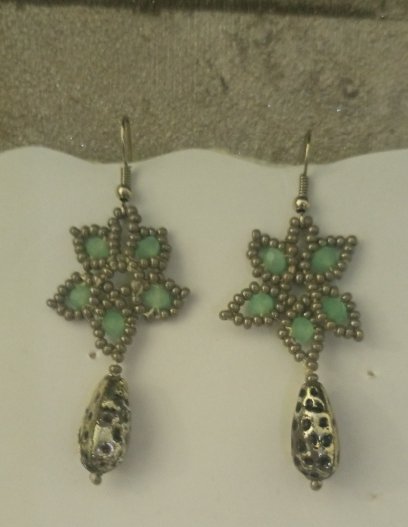
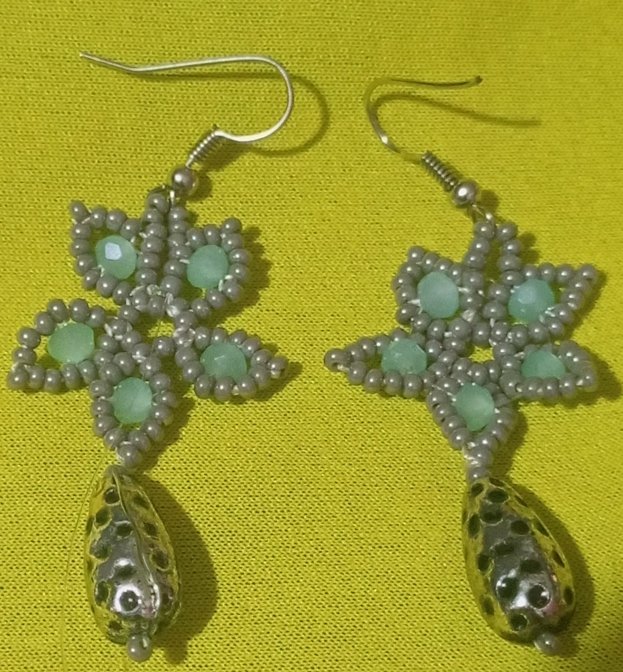
| Hola amigos creativos de nuestra Comunidad Jewelry, seguimos trabajando y creando con mucho amor, esperanza y fe, en que todas las metas que no alcanzamos el año pasado, podamos alcanzarlas esté. Para mí el año pasado fue un tiempo de pruebas, luchas, cambios y momentos difíciles, pero esos momentos también fueron momentos de crecer, expandirme, fortalecerme y creer, creer en Dios y creer en mí, en los dones y talentos que Él me dió. Por lo que amigos sigamos adelante dando lo mejor de cada uno de nosotros y haciendo las cosas como si fueran para Dios. Esté es mí post y es unos LINDOS Y ELEGANTES ARETES DE CRISTALES Y MOSTACILLAS para aportar un toque de elegancia les coloqué esos lindos Abalorios en forma de lágrima, espero les guste y disfruten. | Hello creative friends of our Jewelry Community, we continue working and creating with much love, hope and faith that all the goals that we did not reach last year, we can reach them this year. For me last year was a time of trials, struggles, changes and difficult moments, but those moments were also moments of growing, expanding, strengthening and believing, believing in God and believing in me, in the gifts and talents He gave me. So friends let's keep going forward giving the best of each one of us and doing things as if they were for God. This is my post and it is a NICE AND ELEGANT CRYSTAL AND MOSTACILLAS RINGS to add a touch of elegance I put those cute teardrop-shaped beads, I hope you like and enjoy it. |

| Materiales: | Materials: |
|---|---|
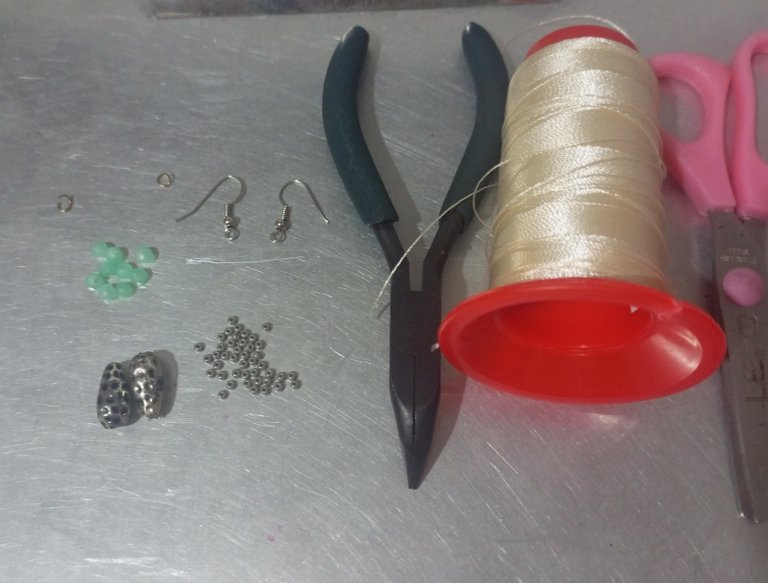
| Cristales verdes agua número 0,04 mm, mostacillas: grises, hilo para mostacillas beige, hilo nylon, 2 anzuelos, tijeras, aguja para mostacillas, 2 abalorios para colgar, yesquero. | Water green crystals number 0.04 mm, beads: gray, beige beading thread, nylon thread, 2 hooks, scissors, beading needle, 2 hanging beads, tinder. |
| Instrucciones: | Instructions: |
|---|

| Paso 1 | Step 1 |
|---|---|
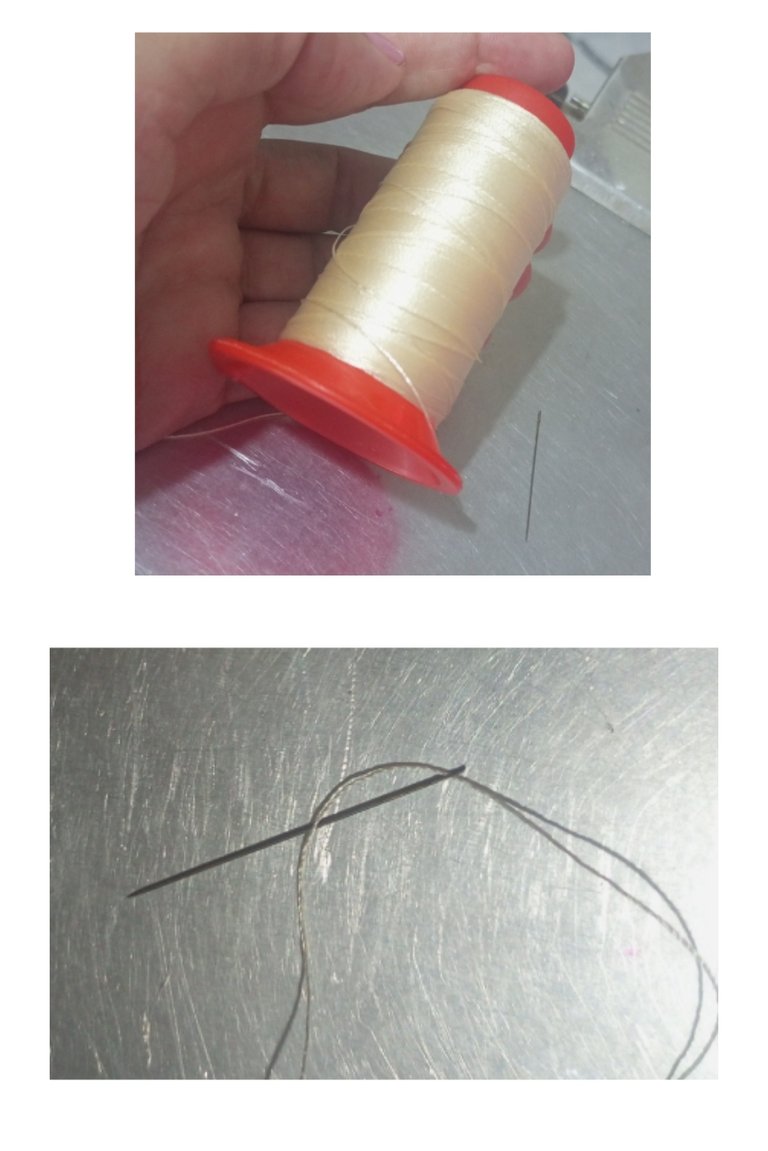
| Enhebre en la aguja 0,50 metro de hilo para mostacillas beige. | Thread 0.50 meter of beige beading thread onto the needle. |
| Paso 2 | Step 2 |
|---|---|
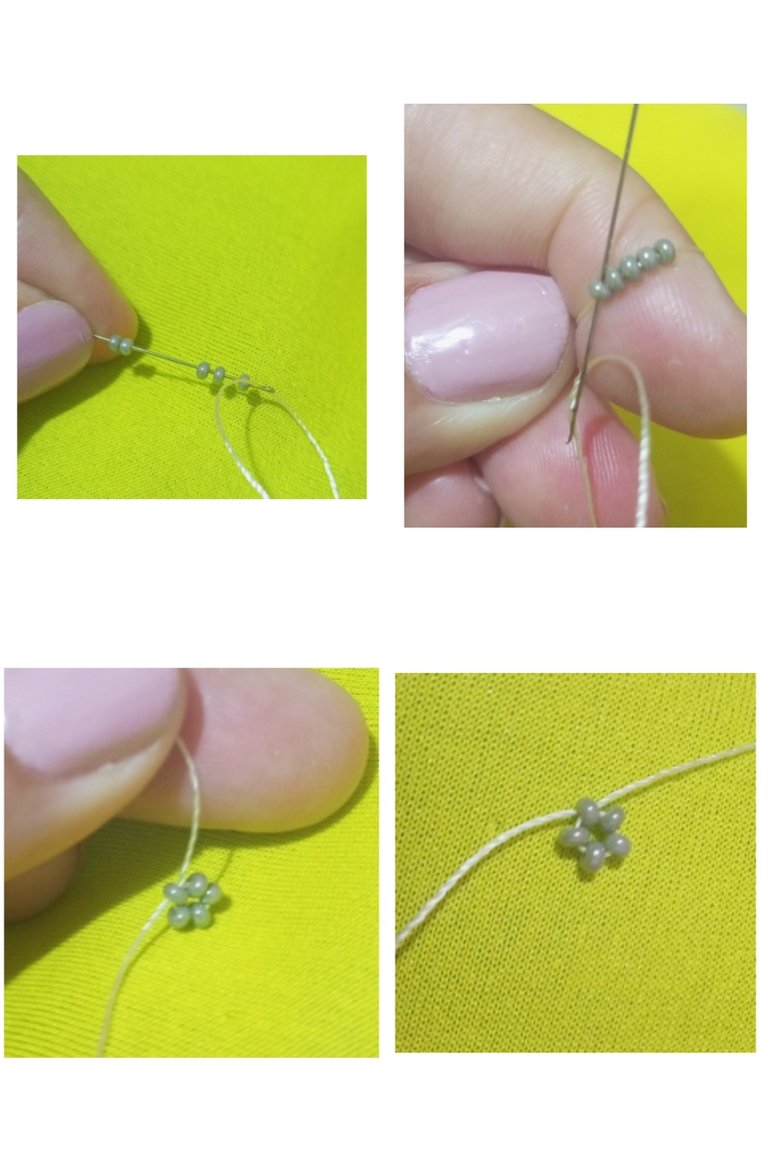
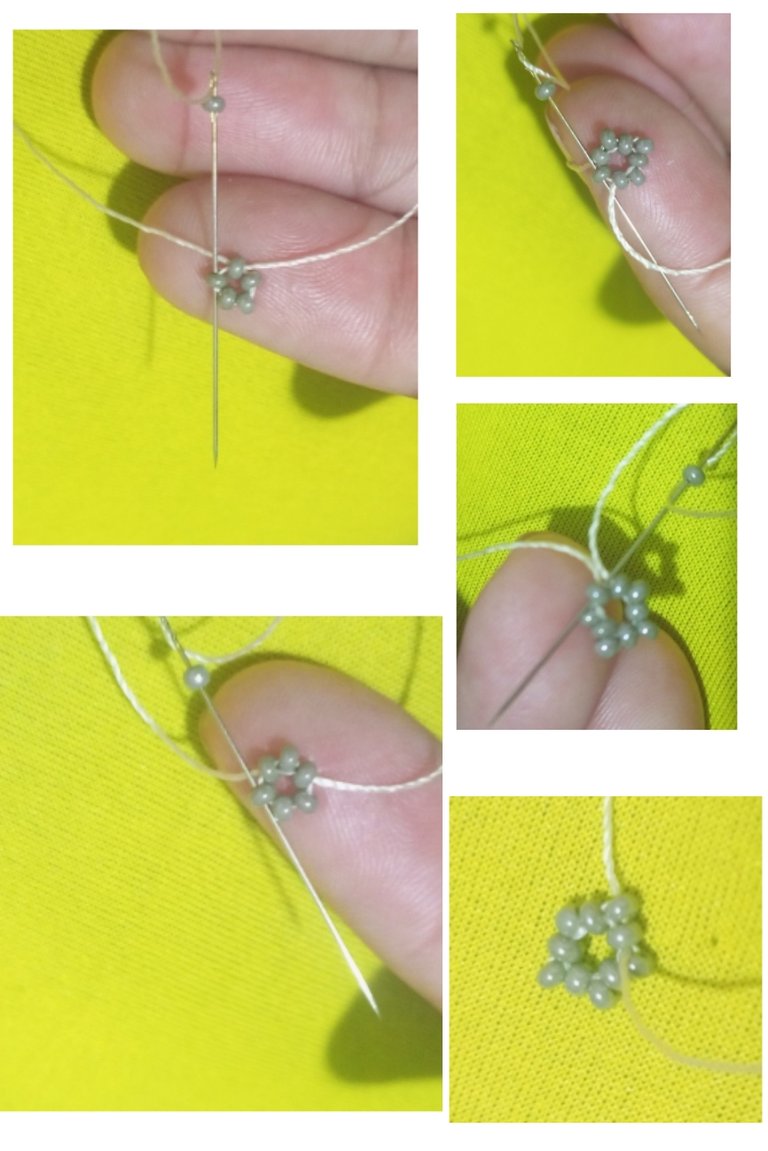
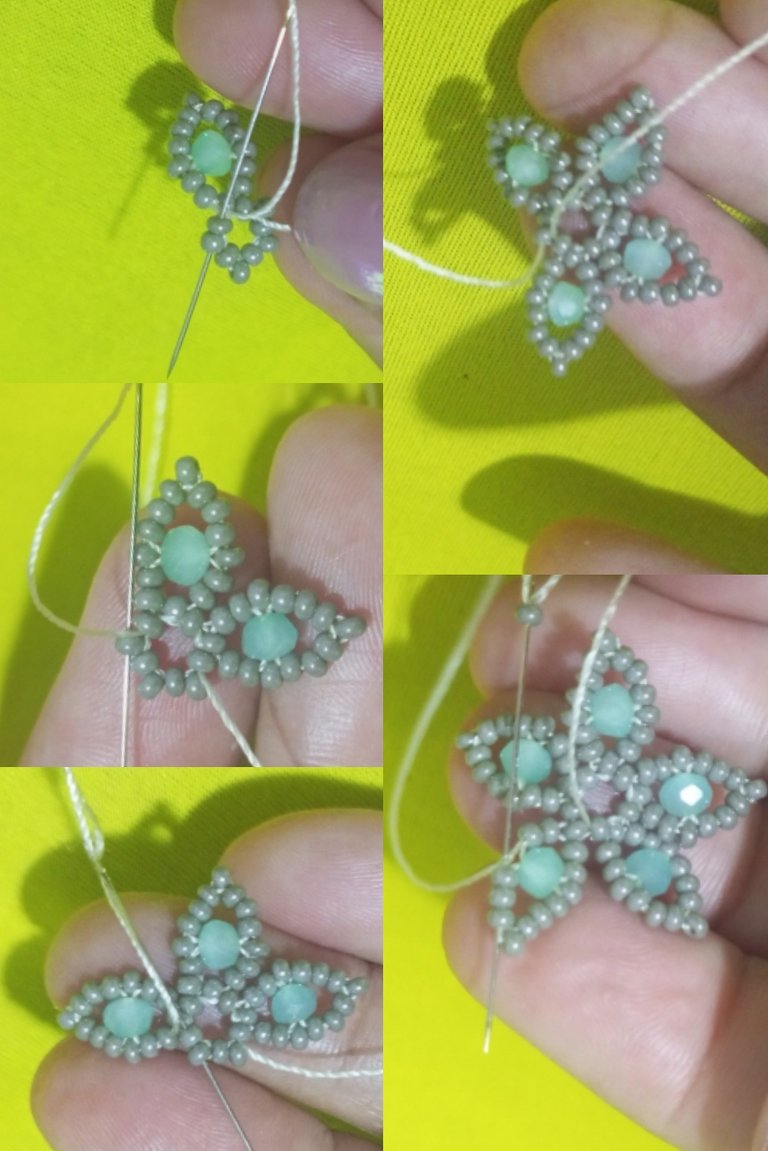
| Introduje 5 mostacillas en la aguja y en sentido de la aguja del reloj, luego introduje la aguja en la primera mostacilla, para hacer una pequeña florecita. | I inserted 5 beads into the needle in a clockwise direction, then I inserted the needle into the first bead, to make a small flower. |
| Paso 3 | Step 3 |
|---|---|
| Introduje entre cada mostacilla otra mostacilla para hacer una forma de 5 puntas. | I inserted between each bead another bead to make a 5-pointed shape. |
| Paso 4 | Step 4 |
|---|---|
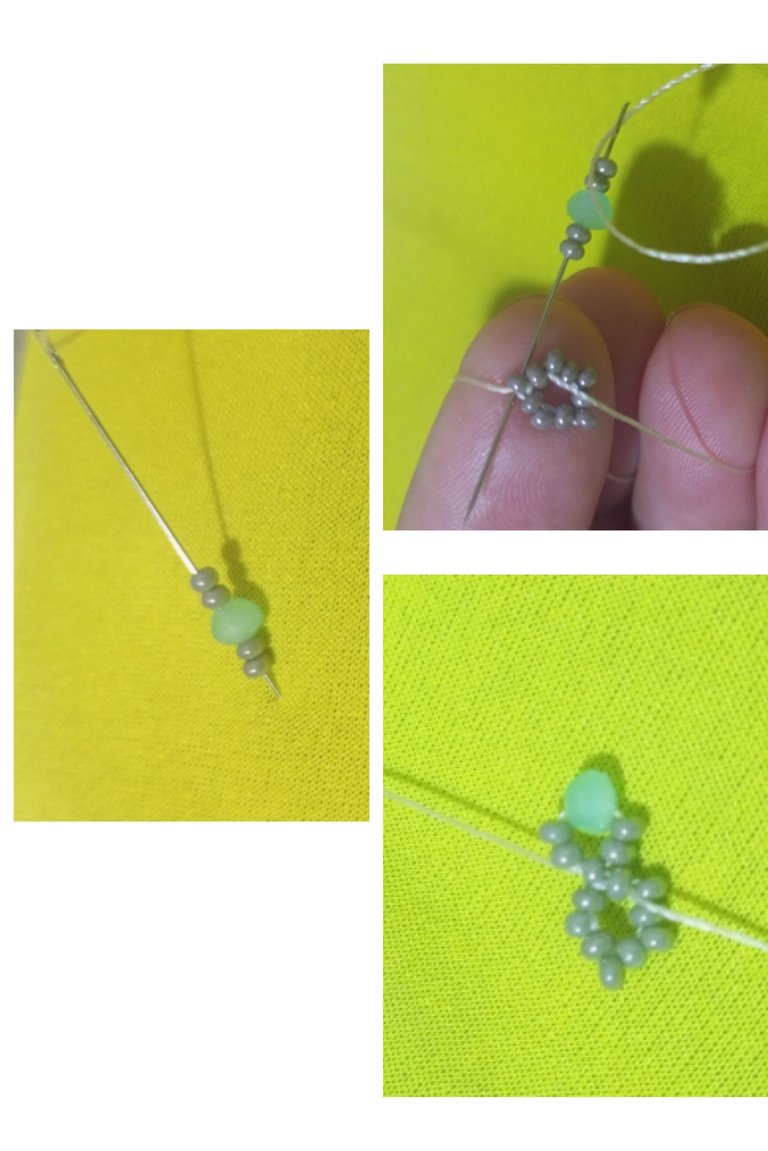
| Introduje en la aguja 2 mostacillas, 1 cristal, 2 mostacillas e introduje la aguja en la misma mostacilla en el sentido de las agujas del reloj. | I inserted in the needle 2 beads, 1 crystal, 2 beads and inserted the needle in the same bead in a clockwise direction. |
| Paso 5 | Step 5 |
|---|---|
| Introduje la aguja en las 2 mostacillas que muestran la imágen e introduje la aguja en el cristal. | I inserted the needle into the 2 beads shown in the image and inserted the needle into the crystal. |
| Paso 6 | Step 6 |
|---|---|
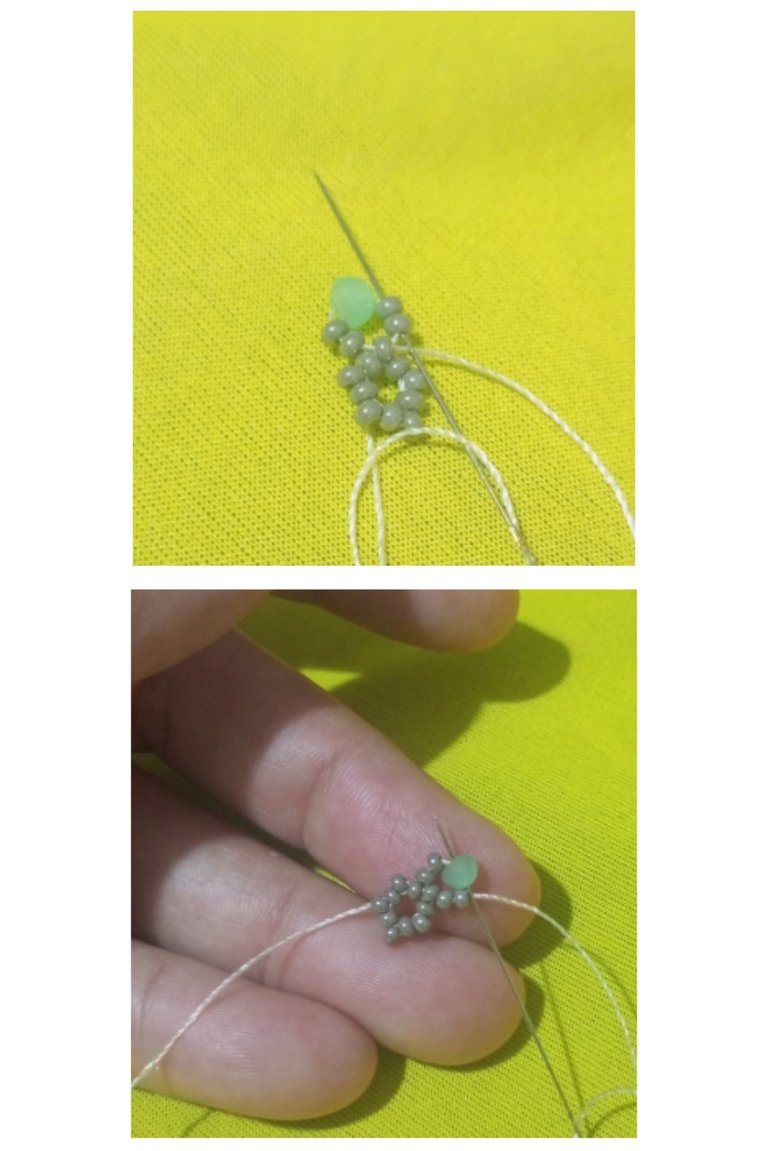
| Introduje 6 mostacillas y devolví la aguja por el cristal en el sentido de la aguja del reloj. | I inserted 6 beads and returned the needle through the crystal in a clockwise direction. |
| Paso 7 | Step 7 |
|---|---|
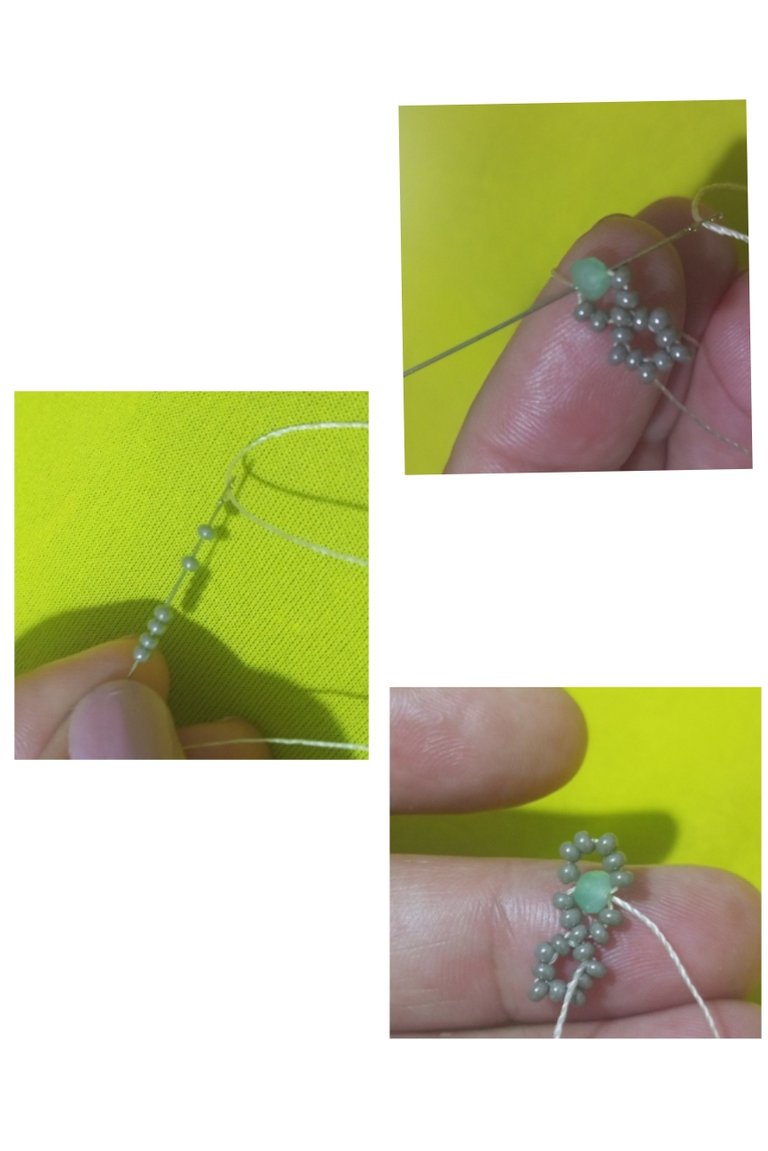
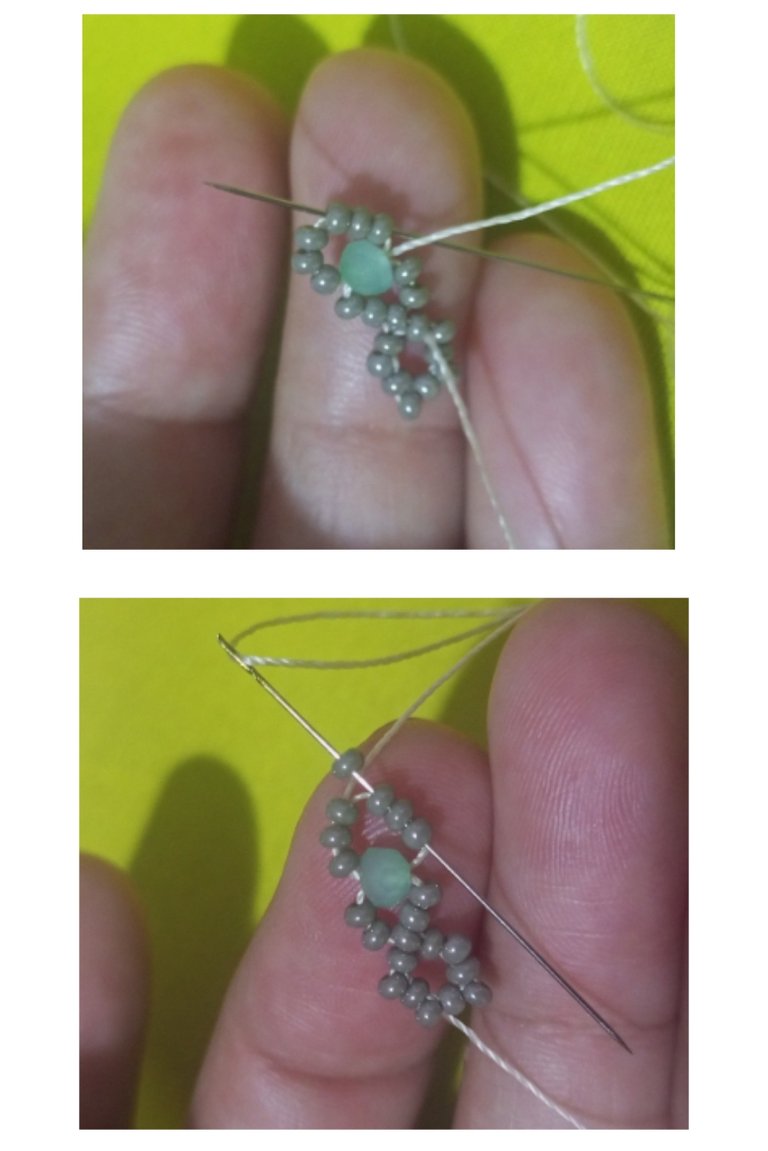
| Conduje la aguja entre las 3 mostacillas hacía arriba y tomé una mostacilla e introduje la aguja entre las mostacillas hacía abajo. | I drove the needle between the 3 beads upwards and took a bead and inserted the needle between the beads downwards. |
| Paso 8 | Step 8 |
|---|---|
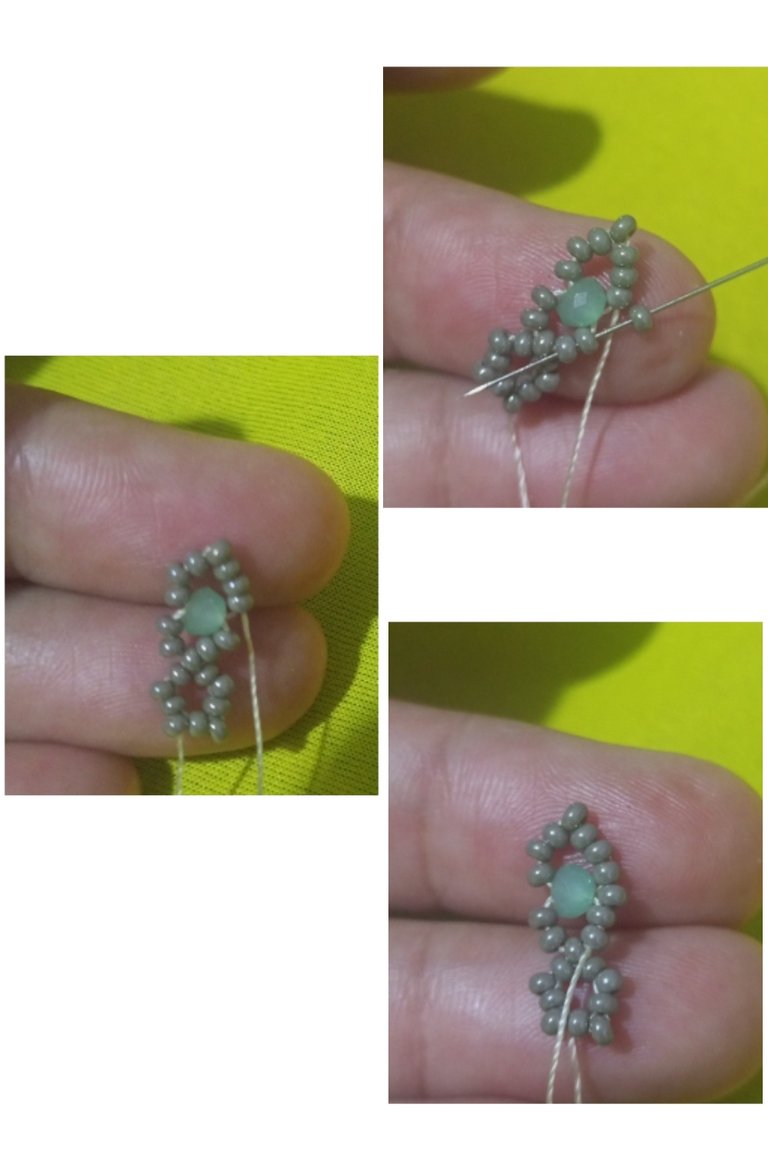
| Tomé una mostacilla e introduje la aguja hacía las dos mostacillas hacía abajo. | I took a bead and inserted the needle downwards towards the two beads. |
| Paso 9 | Step 9 |
|---|---|
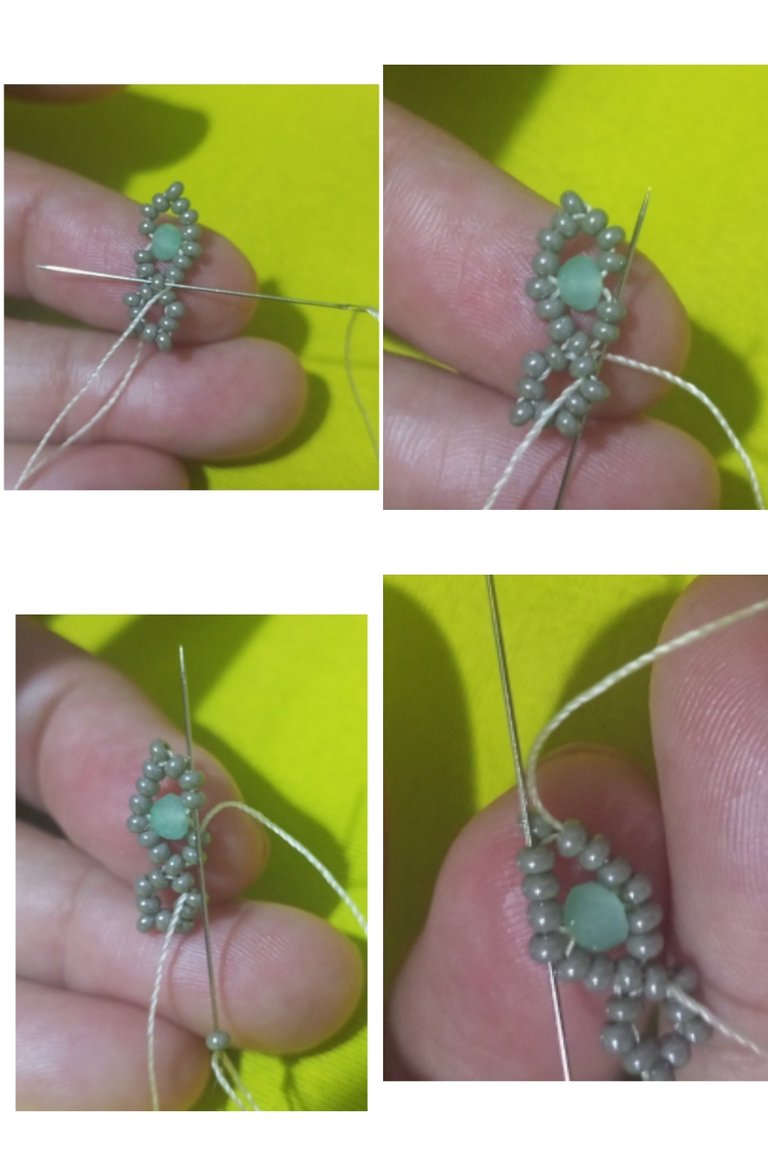
| Introduje la aguja en la mostacilla del medio como se observa en la imágen, y llevamos la aguja hacía las dos mostacillas hacía arriba, tomé una mostacilla e introduje la aguja en las tres mostacillas hacía arriba. | I introduced the needle in the middle bead as shown in the picture, and took the needle to the two beads upwards, took a bead and introduced the needle in the three beads upwards. |
| Paso 10 | Step 10 |
|---|---|
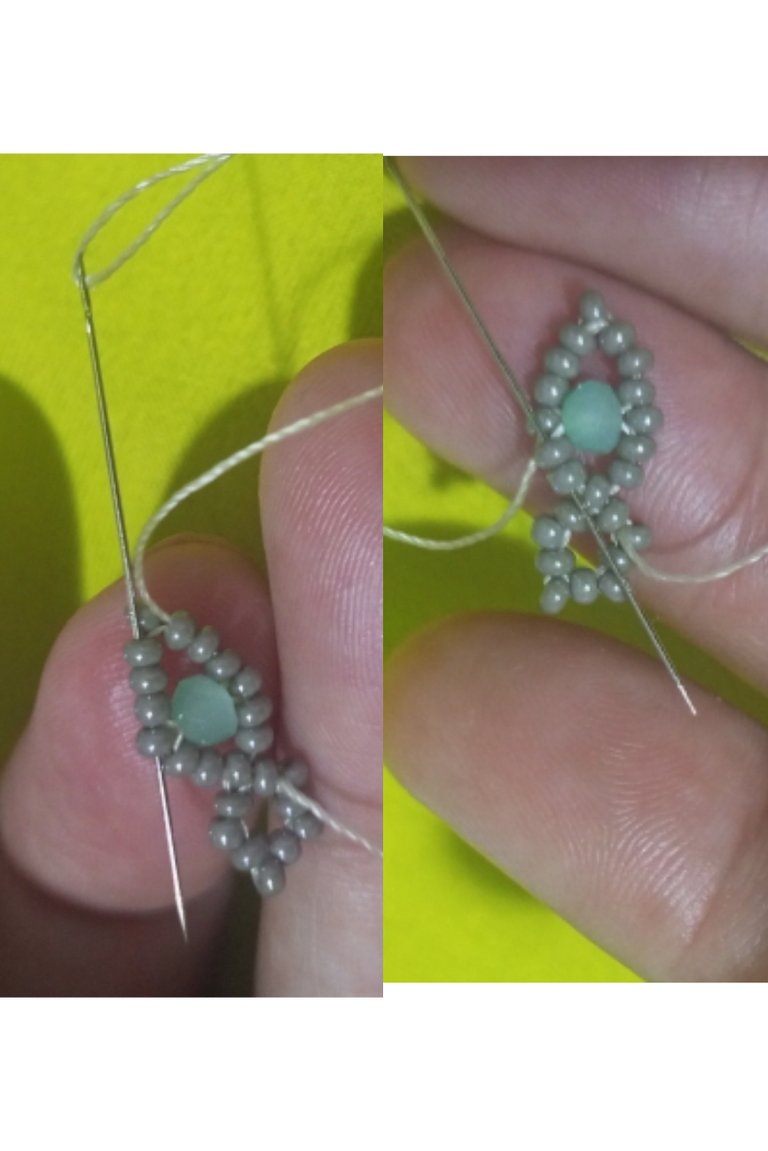
| Introduje la aguja en 6 mostacillas hacía abajo para posicionar la aguja en la próxima mostacilla y realizar el siguiente pétalo. | I inserted the needle in 6 beads downwards to position the needle in the next bead and make the next petal. |
| Paso 11 | Step 11 |
|---|---|
| En la imágen observamos la construcción de los 5 pétalos de la flor. | The image shows the construction of the 5 petals of the flower. |
| Paso 12 | Step 12 |
|---|---|
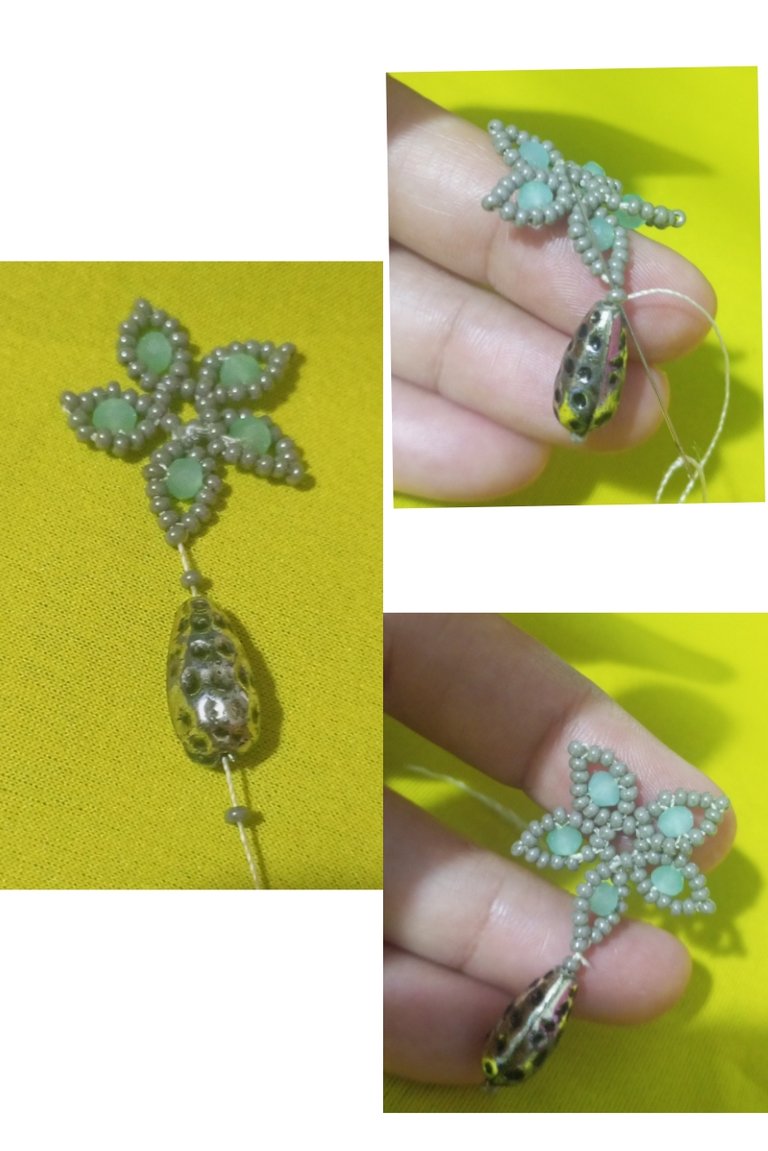
| Llevamos la aguja a la punta del pétalo, introduje 1 mostacilla, 1 abalorio, 1 mostacilla. Devolvemos la aguja no tomando la primera mostacilla, y continuamos introduciendo la aguja entre las mostacillas. | Bring the needle to the tip of the petal, insert 1 bead, 1 bead, 1 bead. We return the needle without taking the first bead, and continue inserting the needle between the beads. |
| Paso 13 | Step 13 |
|---|---|
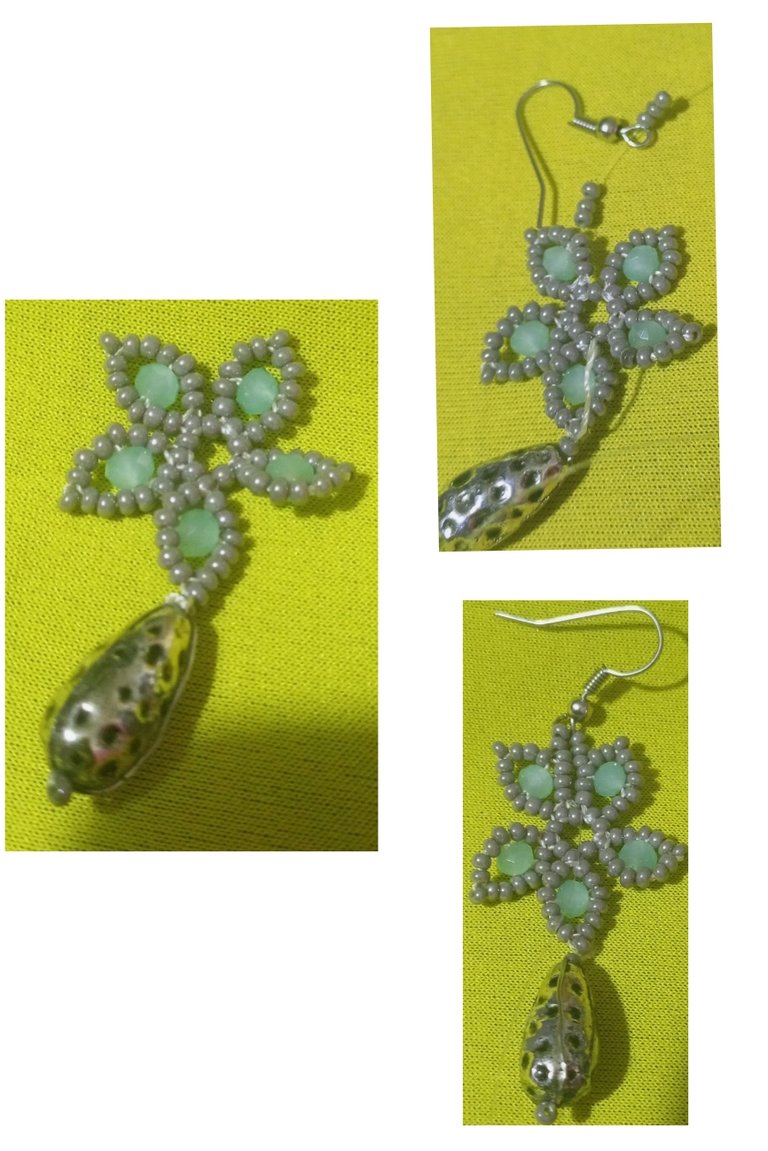
| Introduje 3 mostacillas, el anzuelo y tres mostacillas más y con el hilo de nylon unimos el anzuelo a la flor. | I inserted 3 beads, the hook and three more beads and with the nylon thread we attached the hook to the flower. |
| Paso 14 | Step 14 |
|---|---|
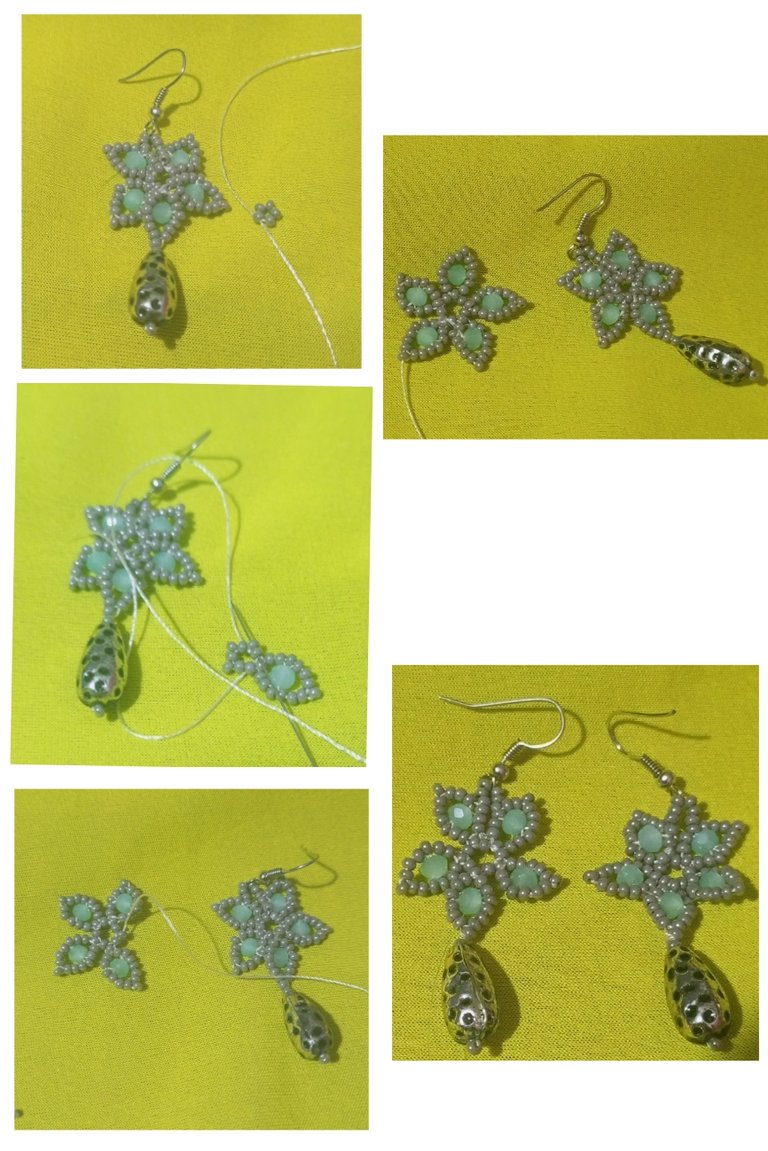
| Repetí el mismo procedimiento para el otro arete. | I repeated the same procedure for the other earring. |
| Despedida | Farewell |
|---|---|
| Y esté es mi post para el día de hoy LINDOS Y ELEGANTES ARETES DE CRISTALES Y MOSTACILLAS muy contenta y agradecida con Dios por el resultado. | And this is my post for today BEAUTIFUL AND ELEGANT EARRINGS WITH CRYSTALS AND BEADS very happy and grateful to God for the result. |

| Créditos | Credits |
|---|---|
| Traductor: www.DeepL.com/Translator (free version). Las fotos fueron tomadas con mi Celular Tecno Sport 7T. Foto de portada editada con Canva y PhotoRoom. Banner:https://images.app.goo.gl/5N3pujMb9u2AePz87. | Translator: www.DeepL.com/Translator (free version). The photos were taken with my Tecno Sport 7T cell phone . Cover photo edited es Canva and PhotoRoom. Banner:https://images.app.goo.gl/5N3pujMb9u2AePz87. |
Tu paso a paso es increíble, recuerda esas revistas que uno compraba para seguir un diseño. Todo está perfectamente explicado, y el diseño es hermoso
¡Ohhh! @yennysferm71 ☺️, gracias por tan lindo elogio. Saludos 🤗
Congratulations, you have received support from Ecency through curator @reachdreams
Thank you curator @reachdreams, I appreciate the support...greetings.
Amazing you explained every thing every point very briefly and this design is also beautiful also the colours
Thank you...best regards.
My pleasure ❤️
Que lindos @yanethstars me gustaron mucho de verdad tienes mucho arte, saluditos 🤗
Gracias amiga @nhaydu. Saludos 🤗
Nice
Saludos mi estimada , realmente admiro la dedicación y el trabajo que debe llevar hacer un post tutorial, como este felicitaciones
Gracias amigo.