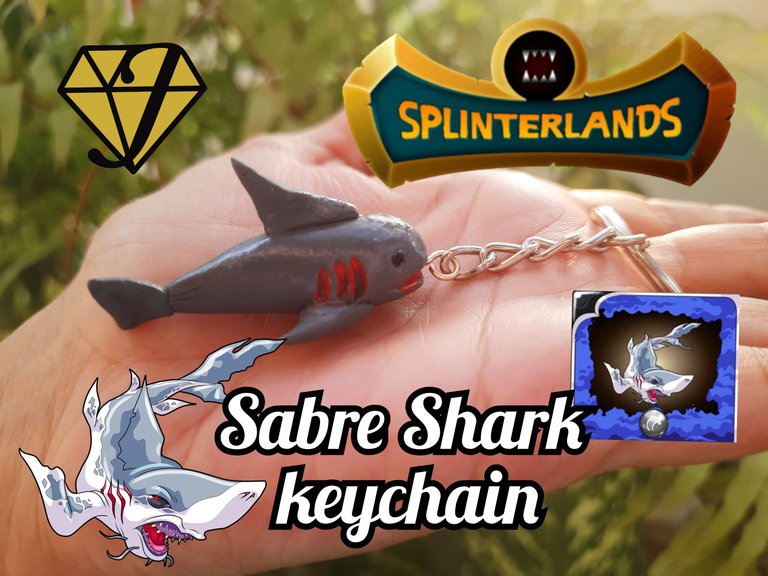

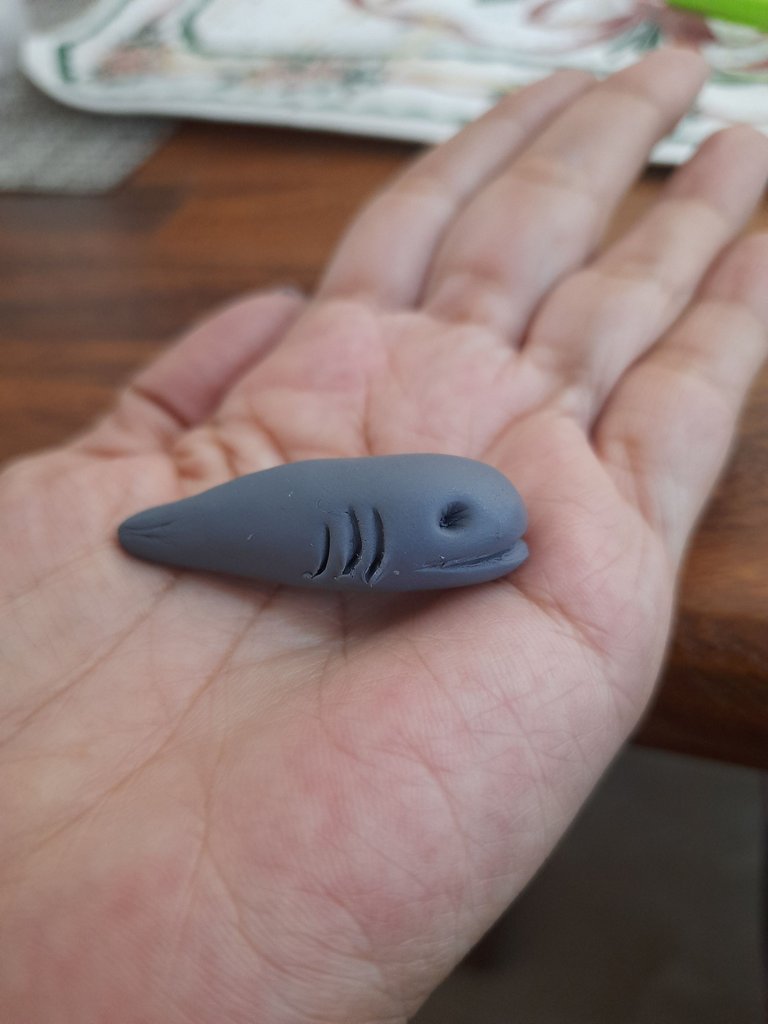
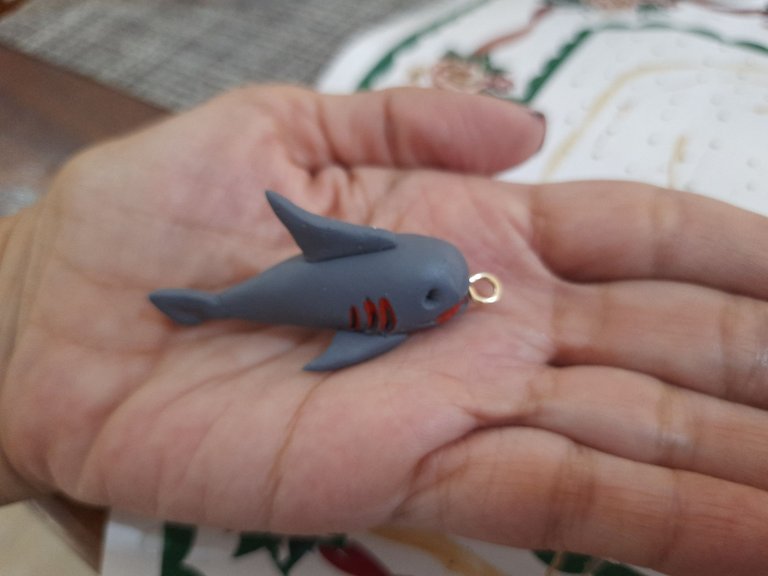
concurso #334 de Splinterlands, para ello me inspire en un fan art de estas cartas y realice un "dije para llavero de nuestra carta, inspirado en el personaje de nombre "Sabre Shark" este fan art me ha inspirado para realizar esta hermosa creación, me inspire en un pequeño Sabre Shark en su infancia, no tan aterrador como el de la carta sino que más bien quedó muy tierno.Un saludo, mi gente maravillosa de @jewelry hoy vengo a participar en el
Sabre Shark, se trata de un monstruo de ataque cuerpo a cuerpo que gracias a la habilidad SNEAK puede atacar desde cualquier posición, inicia con 1 punto de ataque y adquiere un máximo de 4 puntos en el nivel 9, la salud del monstruo aumenta desde 2 puntos hasta 5 puntos en el nivel 8, la velocidad de SABRE SHARK inicia en 3 puntos y aumenta hasta 6 puntos en el nivel 10.
Realice este fanart utilizando Masa flexible, por lo que quise formar un pequeño dije con ella para nuestro llavero, espero que les guste este pequeño paso a paso.

contest #334 of Splinterlands, for this I was inspired by a fan art of these cards and made a “charm for keychain of our card, inspired by the character named ”Sabre Shark " this fan art has inspired me to make this beautiful creation, I was inspired by a small Sabre Shark in his childhood, not as scary as the one in the card but rather it was very tender.Greetings, my wonderful people of @jewelry today I come to participate in the
Sabre Shark, it is a melee attack monster that thanks to the SNEAK ability can attack from any position, it starts with 1 attack point and acquires a maximum of 4 points at level 9, the health of the monster increases from 2 points to 5 points at level 8, the speed of SABRE SHARK starts at 3 points and increases up to 6 points at level 10.
I made this fanart using flexible dough, so I wanted to form a small pendant with it for our keychain, I hope you like this little step by step.

Materiales:
✅️ Masa flexible
✅️ 2 mostacillas negras
✅️ Llaverk
✅️ Pinturas al frío negra, blanca, roja y azul
✅️ 1 pin para poner la argolla
✅️ Estecas
Materials
✅️ Flexible dough
✅️ 2 black beads
✅️ Llaverk
✅️ Black, white, red and blue cold paints
✅️ 1 pin to put the ring
✅️ Stecas
Paso a Paso / Step by Step
 |  |
|---|
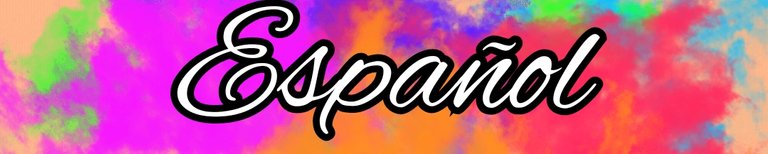
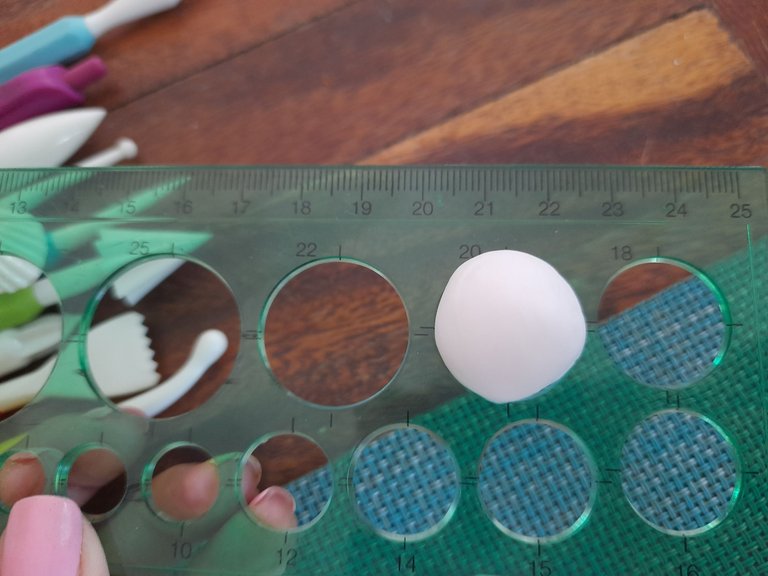
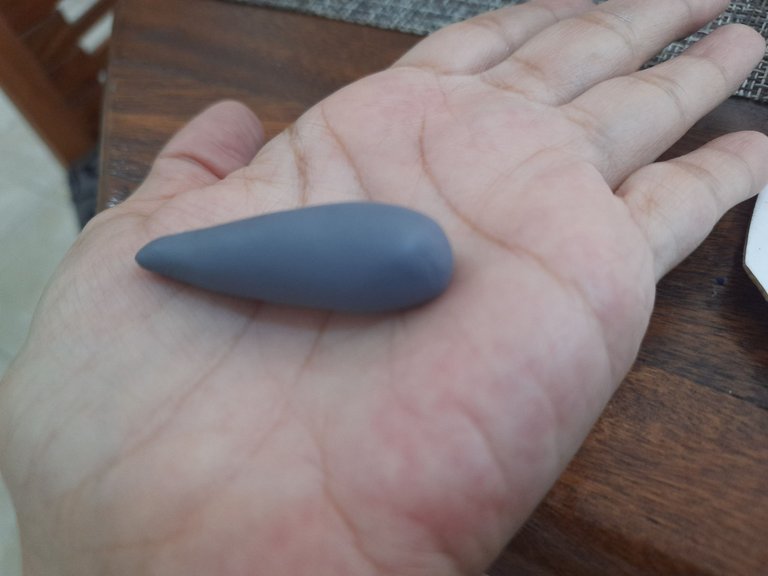
Lo primero que haremos será tomar la masa y haremos una esfera de 20 cm, la cual vamos a pintar con pintura negra, blanca, con la que haremos gris y luego le daremos unos toques con el azul hasta formar nuestra masa.
The first thing we will do is to take the dough and make a 20 cm sphere, which we will paint with black paint, white, with which we will make gray and then we will give it a few touches with blue until we form our dough.
 |  |
|---|
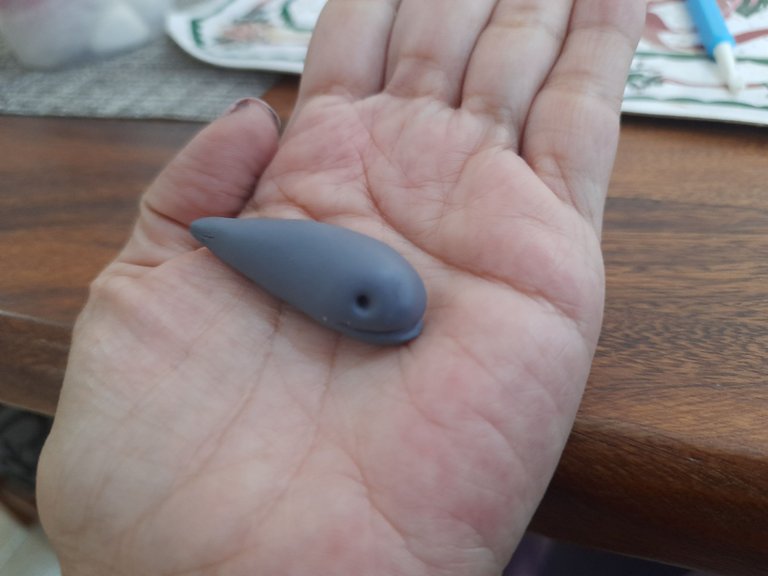
Después de amasar muy bien nuestra esfera vamos hacer una figura como un bate.
After kneading our sphere very well, we are going to make a figure like a bat.
 |  |
|---|
Aplanamos un poco lo que será nuestra cola afinandola y vamos en la parte de la cabeza darle una pequeña forma y con nuestra esteca fina vamos a dibujarle la boca de nuestro tiburón.
We flatten a little what will be our tail by sharpening it and we are going to give a small shape to the head part and with our fine stake we are going to draw the mouth of our shark.
 |  |
|---|
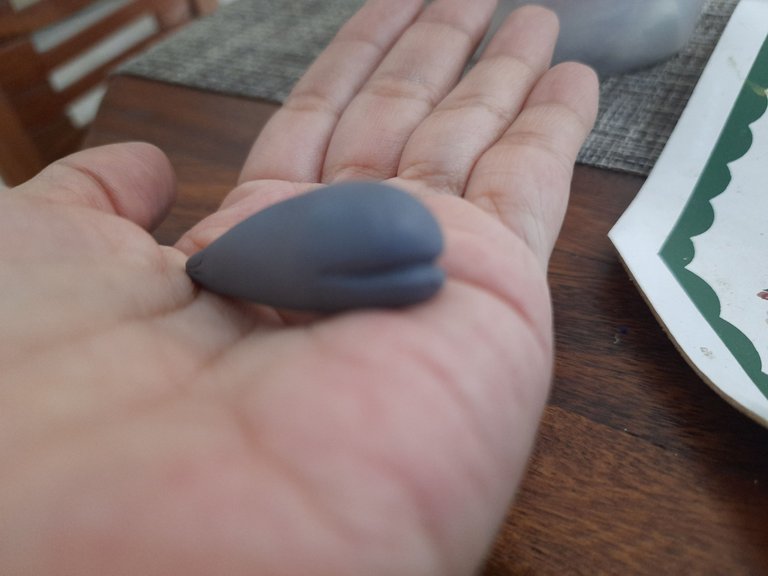
También con nuestras estecas haremos los orificios de los ojos y vamos a hacerle unas pequeñas rayitas simulando las branquias de nuestro tiburón.
Also with our stecas we will make the holes for the eyes and we will make small stripes simulating the gills of our shark.
|  |
|---|
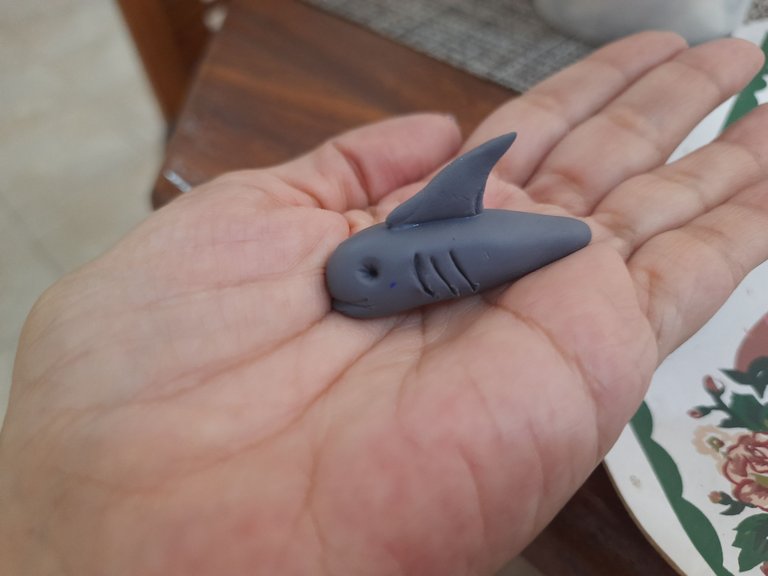
También haremos las aletas en la parte de arriba, aplanamos nuestra masa y vamos a cortar con las estecas para darle la forma de la aleta de arriba, la de la cola, y la de los lados, como una forma en v y un poco alargada, las pegamos con pega blanca.
We will also make the fins on the top, flatten our dough and we will cut with the stecas to give it the shape of the top fin, the tail, and the sides, like a v-shape and a little elongated, we glue them with white glue.
 |  |  |
|---|
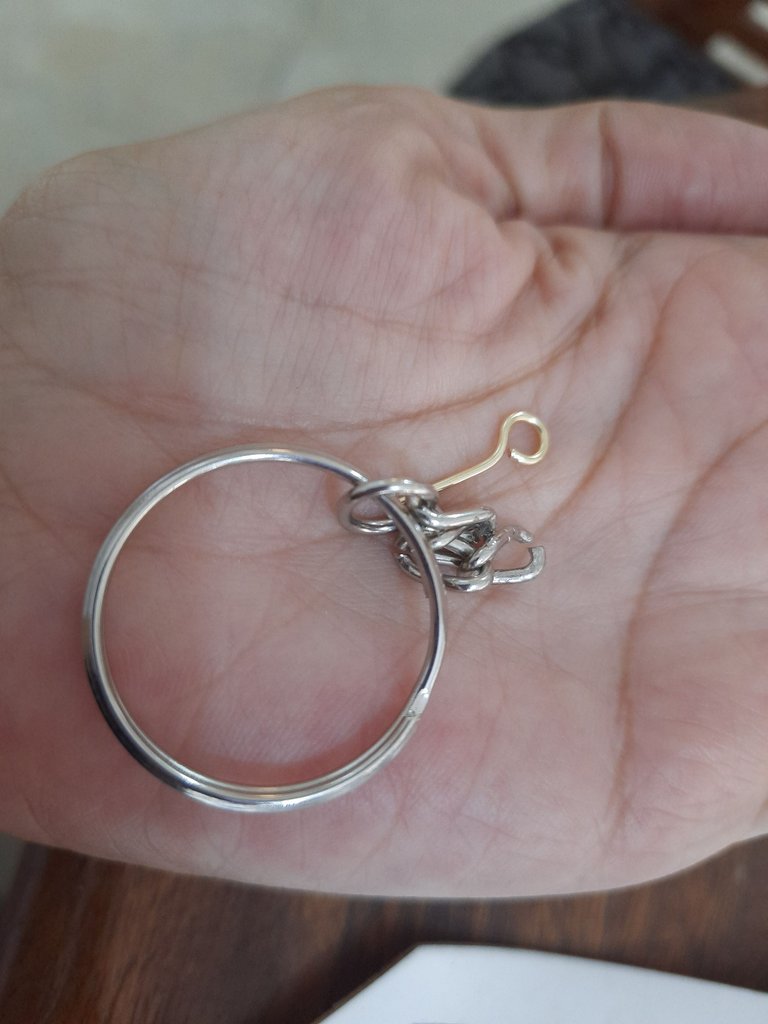
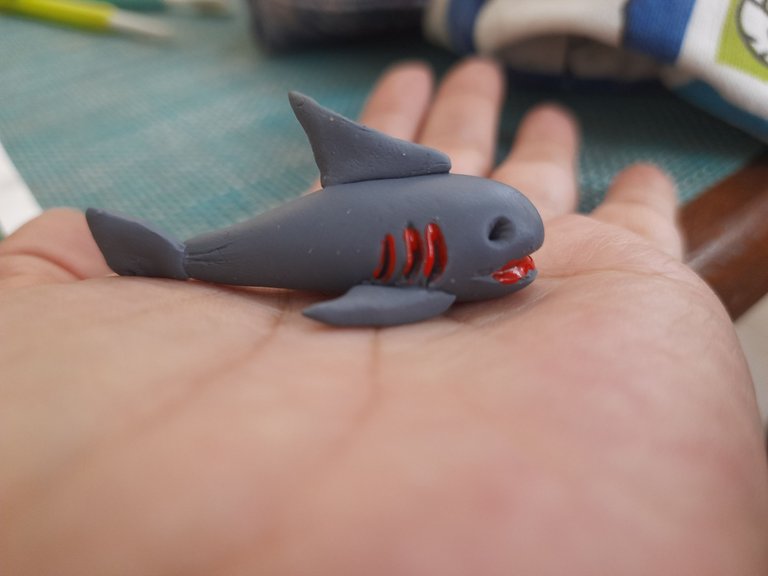
Por último vamos a tener nuestro pin de argolla para poder guindar nuestro llavero, vamos a pintar con pintura roja la parte de las branquias y la boca, después de pintar y que esté seca ka pintura un poco, colocamos el pin de la argolla en la boca de nuestro tiburón para luego proceder a colocar nuestro llavero, también procedemos a pegar las mostacillas negras en los ojos de nuestro tiburón con pega blanca, por último si quieren le pueden dar un brillo para que quede un poco más hermoso y a esperar que seque nuestra pieza.
Finally we will have our ring pin to hang our keychain, we will paint with red paint the part of the gills and mouth, after painting and that is dry ka paint a little, we place the pin of the ring in the mouth of our shark and then proceed to place our keychain, we also proceed to paste the black beads in the eyes of our shark with white glue, finally if you want you can give a shine to make it a little more beautiful and wait for our piece to dry.
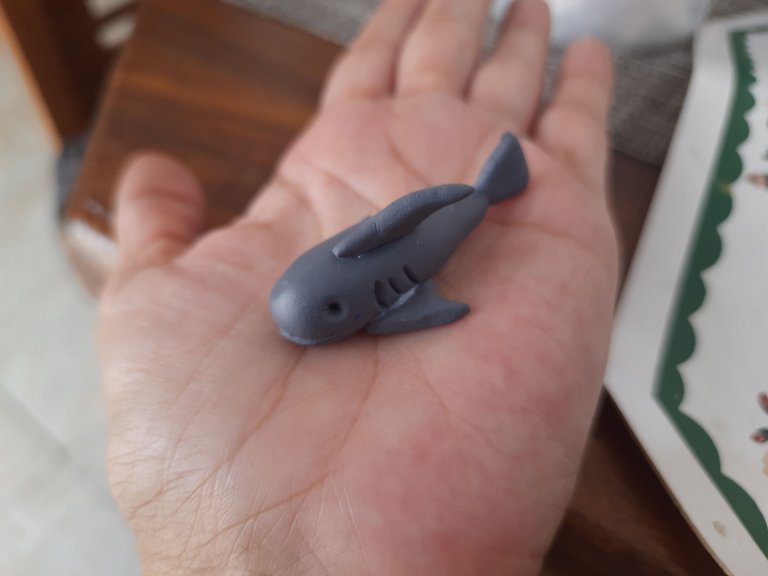
Resultado: / Result:
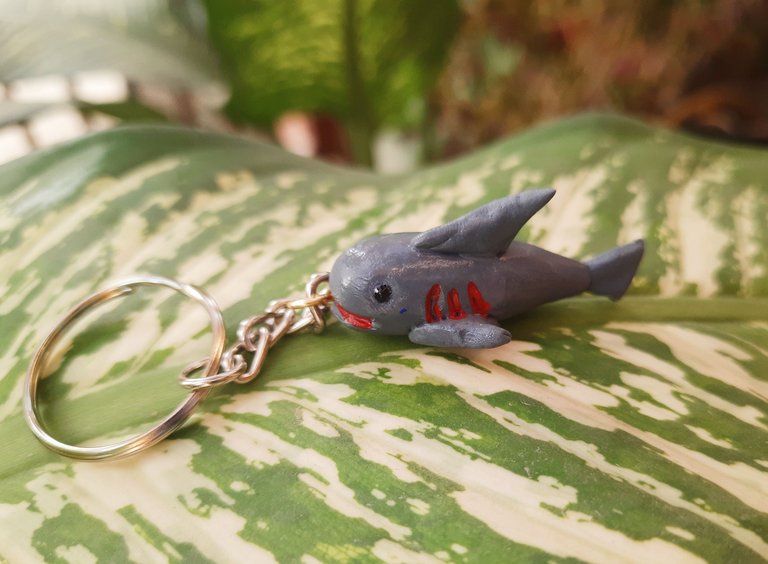
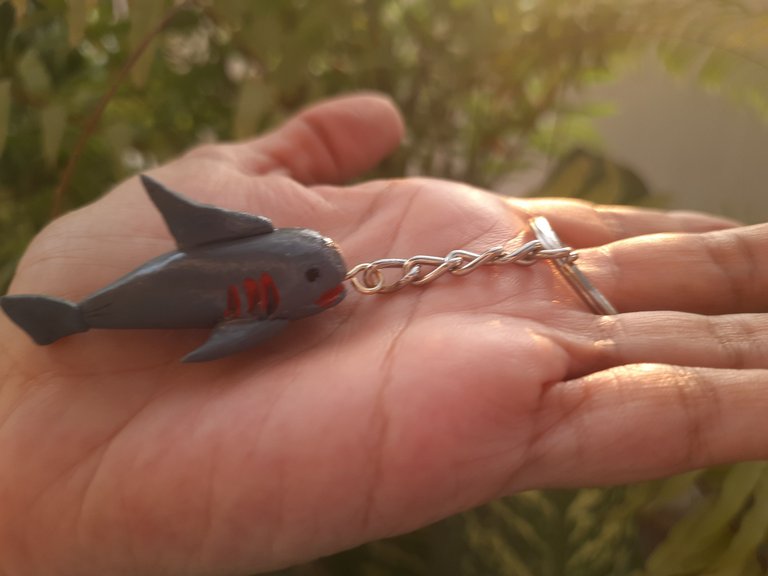
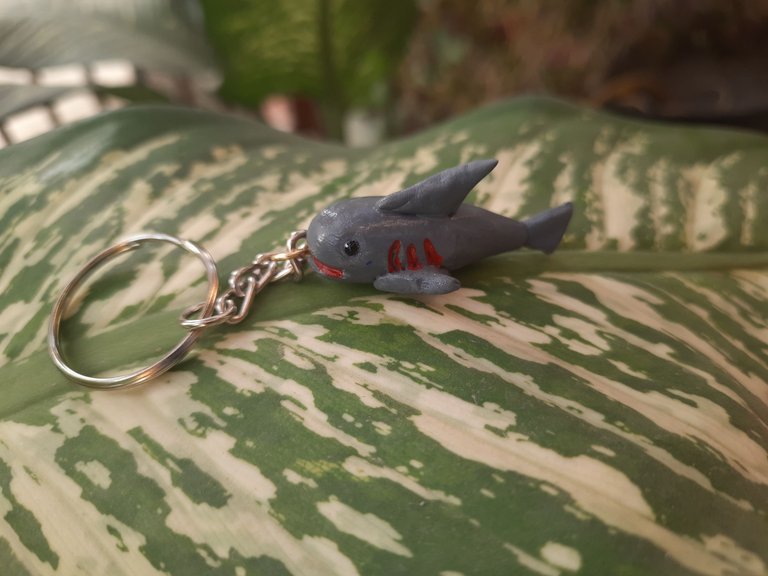
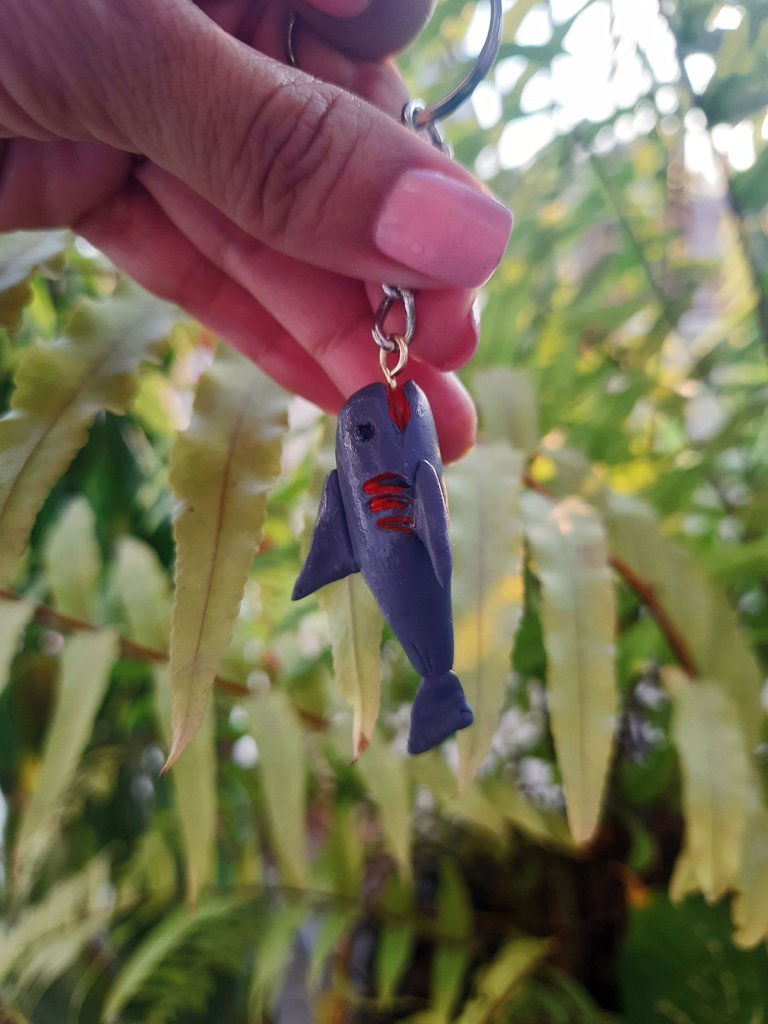
Así ha quedado listo nuestro accesorio, y nuestro sencillo tutorial, espero que sea de su agrado, tanto como me ha gustado a mi esta pequeña y hermosa creación.
Gracias por estar aquí y ser parte de mi blog y de la comunidad @jewelry 😉
So our accessory is ready, and our simple tutorial, I hope you like it as much as I liked this beautiful little creation.
Thank you for being here and being part of my blog and the @jewelry community 😉.
Les invito a suscribirse a la comunidad de @Jewelry y poder así mostrar todas sus creaciones de accesorios, tanto de adultos como de niños; nos encanta ver y apoyar a todos los artesanos, manualistas y orfebres, puedes crear accesorios para damas, caballeros y niños, así que tu creatividad es el límite 😉
I invite you to subscribe to the @Jewelry community to showcase all your accessory creations for both adults and children; we love to see and support all the artisans, crafters and goldsmiths, you can create accessories for ladies, gents and kids, so your creativity is the limit 😉.
"Los accesorios tienen el poder de hacer sentir a la mujer única y especial"
Accessories have the power to make a woman feel unique and special"
Fotos principal editada con Canva.
Separadores de mi Autoría
Fotos de mi Autoría derechos reservados
Cámara: Samsung M31
Traducido con www.DeepL.com/Translator (versión gratuita)
Photos edited with Canva
Separators by me
Photos by me Author's rights reserved
Camera: Samsung M31
Translated with www.DeepL.com/Translator (free version)


Que lindo, luce muy tierno jeje. Saludos!
Gracias amiga jejejej, me quedo tierno en vez de terrorífico, gracias por pasarte 😉
¿ᴺᵉᶜᵉˢᶦᵗᵃˢ ᴴᴮᴰ? ᵀᵉ ˡᵒ ᵖʳᵉˢᵗᵃᵐᵒˢ ᶜᵒⁿ
Gracias por su apoyo ❤
Qué belleza tu participación de esta semana amiga, un llavero muy tierno y cuchi hiciste de esta carta.
Mucha suerte en el concurso 💕
Gracias amiga me alegra muchonque te guste 😊 a mi me gusto mucho el resultado, gracias por pasar 🤗
wow, that's great
Thank you I'm glad you like it
Yes you're welcome.
Que lindo llavero amiga 🥰
It's really creative and beautiful.
Thanks for sharing with us.
Thank you 😊
You have explained it in a very easy way. I will try it.
Thanks for sharing this with us.
Thank you, it is good to know that it was understandable, best regards.
This keychain looks really cute.
Thanks for sharing.