A while ago, I repurposed an old mattress to make two floor cushions. While the cushions have been great, placing them directly on the floor has made moving them around and cleaning a bit of a hassle. I thought about adding legs to make them easier to handle for a long time.
At first, I thought about attaching legs to a board and placing the cushions on top. But then I had a new idea: why not use casters instead? This way, I could move them easily. So, I decided to make a board with casters. I found a specialty store for casters online (that's DIY Germany!) and ordered the casters.
I was planning to buy the board at a local DIY shop, but since I didn’t have much time, I decided to order it online as well. The shipping was 5 euros. Given the hot weather and the fact that it’s hard to find a shared car during the summer holidays, I thought it was a good investment.
When both the casters and the board finally arrived, I was ready to put everything together—except the screws I had at home didn’t fit. I stopped by a local hardware store on my way visiting a friend and bought the right-sized screws.
At last, all the parts were ready. I attached the casters to the board, and the base for the floor cushions was complete!


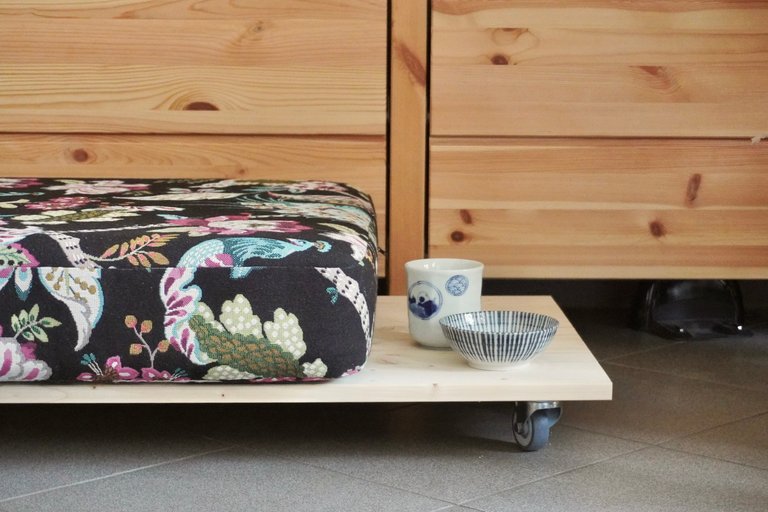
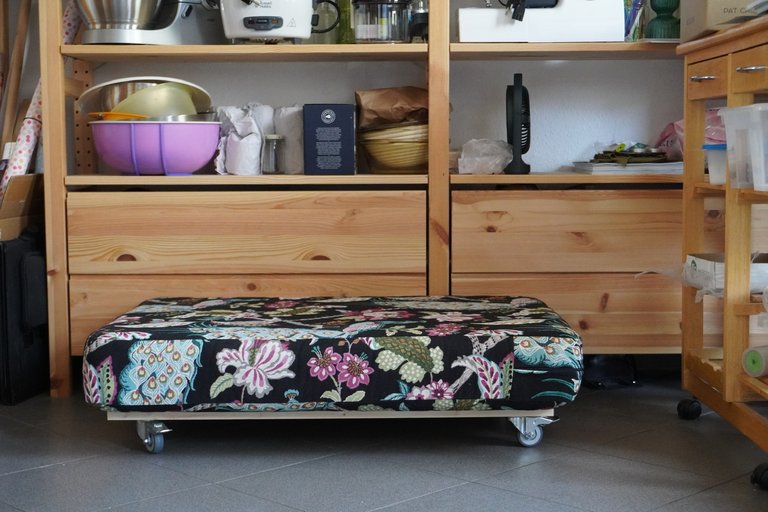
I usually keep the cushions in front of drawers, and now that they’re on casters, I can easily move them whenever I need to open the drawers 🥳 Cleaning around them has also become much easier.
With a large cushion on top, it makes a wide seat. When I place a smaller cushion and leave part of the board exposed, I can use it as a spot to put drinks or snacks. If I stack the cushions, it creates a slightly higher place to sit.
If you’re thinking about adding legs to something, and it doesn’t need to be very high, casters could be a great option to consider.
By the way, my daughter has been excitedly calling the setup "Auto (car)" and is running around the house with it 😅
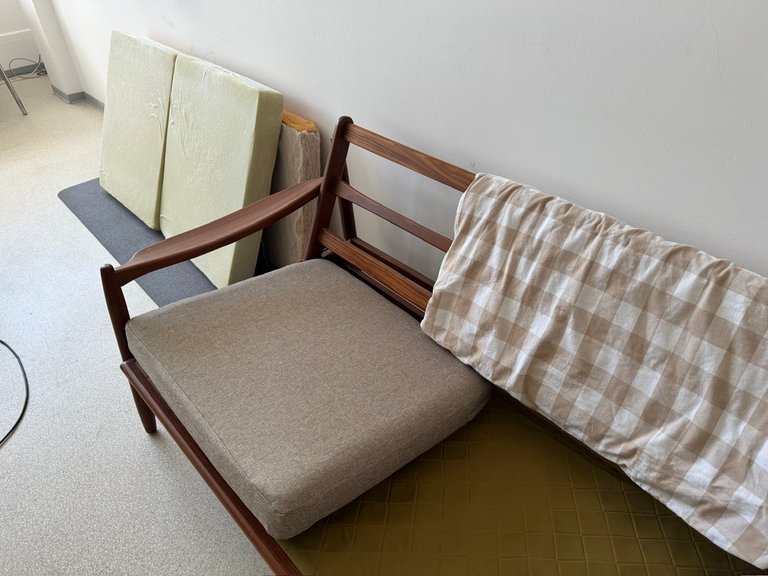
That's one of my recent DIY projects. Another one is ... upholstering a sofa, like I did six years ago.

Nice to find the old post about the project. It was a lot to do but was well worth doing. I'm proud on upholstering the sofa still after six years. It was my first and last biggest project.
Reupholstering an IKEA sofa / IKEAソファーを張り替えました
.png)
That's it! Happy DIY, everyone 😉

以前、寝室の古くなったマットレスのきれいな部分を使って二つルームクッションを作りました。床に直に置いておくと、移動や掃除に若干手間がかかるので、足をつけたいと長らく考えていました。
当初は板に足をつけてその上に置こうと考えていたのですが、ふと滑車を使っただろうだろうと思い立ち、滑車付きの板を作ることにしました。滑車はネットで専門店を見つけて(ドイツ!)注文しました。板はDIYショップに買いに行こうと思っていたのですが、なかなか時間がなく、こちらもネットで注文しました。送料5ユーロ。暑い日が続いて、夏休みでなかなかシェアカーを見つけられない中いい投資だったと思います。
滑車と板が届いていざ組み立てようとしたら、自宅にあるネジに大きさが合うものがありませんでした。小さなものなので、友人宅に遊びに行くついでに、小さな工務店でサイズの合うものを購入しました。ようやく部品がそろったので、あとは作るのみ。

結構硬い板だったので、ドリルで下穴を開けてからネジで滑車を板に固定しました。無事完成。

このフロアクッションは引き出しの前に置いていることが多く、滑車がついたことで引き出しの開け閉めの際に移動しやすくなりました。掃除をしやすいのも◎
大きなクッションを乗せると大きな座面になります。個人的に気に入っているのは小さなクッションで、トップの写真のように端に板を出しておくとお茶やお菓子を置けます。大小亀のように重ねるとちょっと高めの座る場所になります。

何かに足をつけようと思っている人は、低めのものであれば滑車を検討してみてはいかがでしょうか。
子供は「Auto(車)」とはしゃいで家を走っています😅
DIYプロジェクトといえば、またソファーの張り替えをしています。今回張り替えているオフィスのソファはフレームは木で、張り替えるのはクッション6つだけなので前回よりも気楽です。

6年前のプロジェクトが懐かしいです。こういうの、大好きなんですよね。手を使ってできた!という感じというか、私にも作れる感じというか。
Reupholstering an IKEA sofa / IKEAソファーを張り替えました
それではみなさん楽しいDIYライフを!
The casters look like they do a way better job. Looking nice
Thanks @diyhub! They work well 😁