Hello, dear readers!
It’s woodworking time!
Buen día, estimados lectores.
¡Es hora de trabajar!

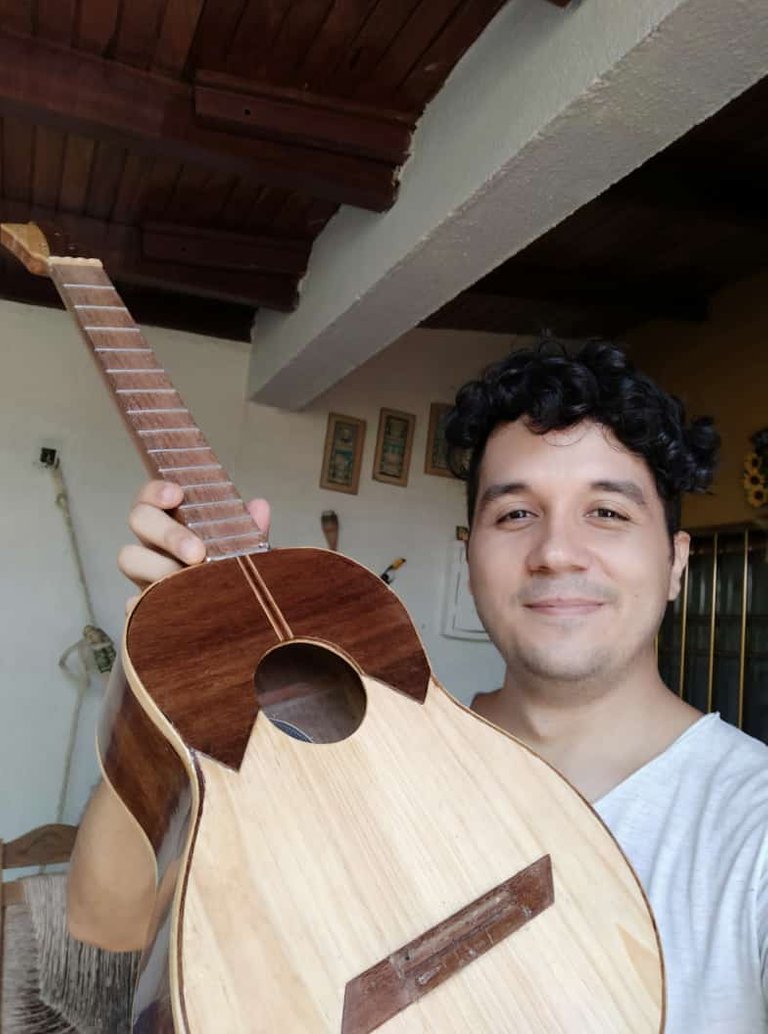
A happy boy because this cuatro is ready!
This is the closing post about this project. Each instrument is a new learning experience. Needless to say I'm grateful for the another opportunity to put my skills to the test. My third cuatro will be international at some point in the feature. Hopefully, it will help me get more sales. But for now, I'll settle with the results
Este es el último post de este proyecto. Cada instrumento es una experiencia de aprendizaje. No hay necesidad de decir que estoy agradecido por tener otra oportunidad para poner a prueba mis habilidades. Mi tercer cuatro es la plataforma internacional (pero eso será en un futuro no tan cercano). Espero también que me de más ventas. Pero por ahora, quedo satisfecho con los resultados.
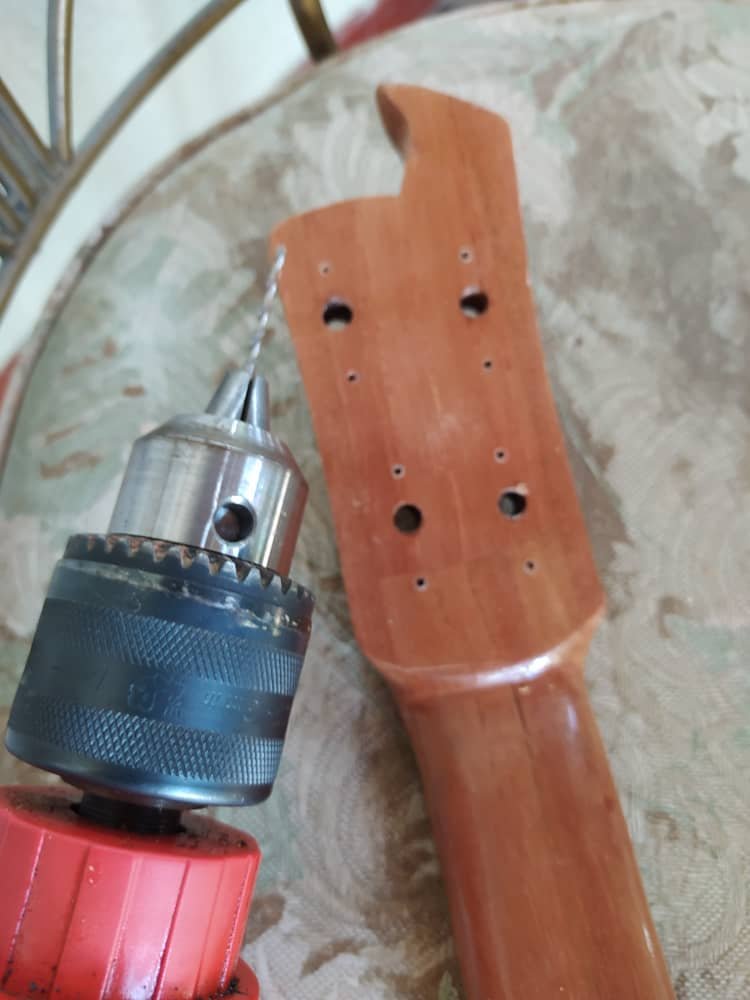
There were few missing points in the craft. The bridge needed to be finished and glued; tuning pegs, fixed in place; and give it a final polish. Let's take a look of how this unfolded beginning with the former.
Había pocas cosas que terminar en este proyecto. Se terminó de labrar el puente y se pegó; las clavijas se fijaron; y se dio un pulido a toda la pieza. ¡Veamos como avanzó esto desde el comiento!
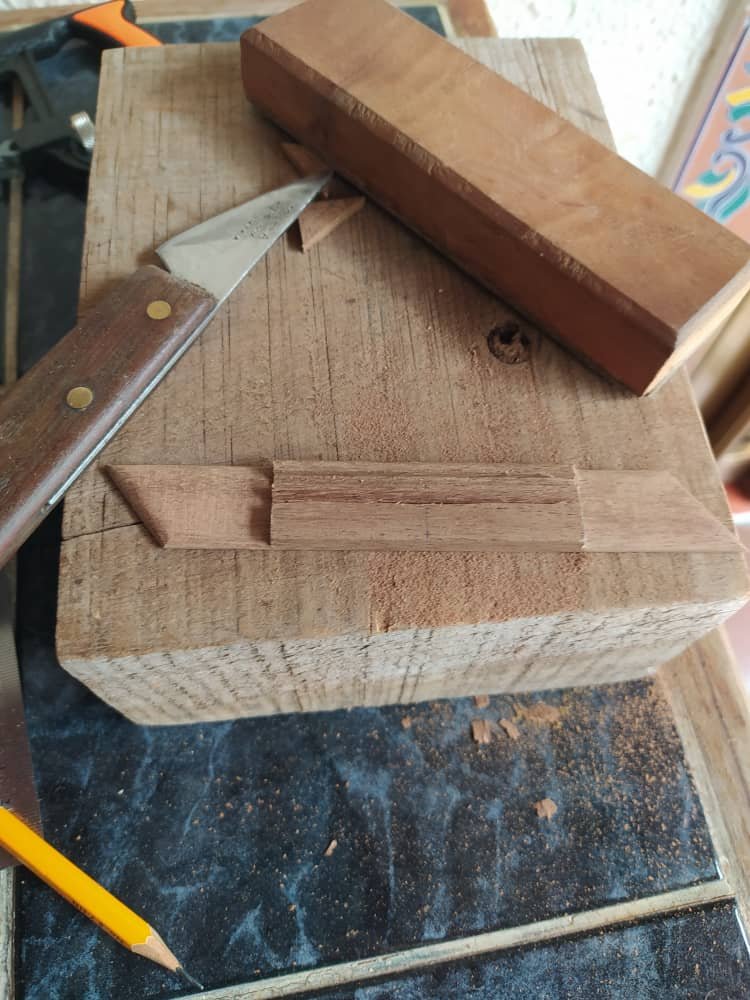
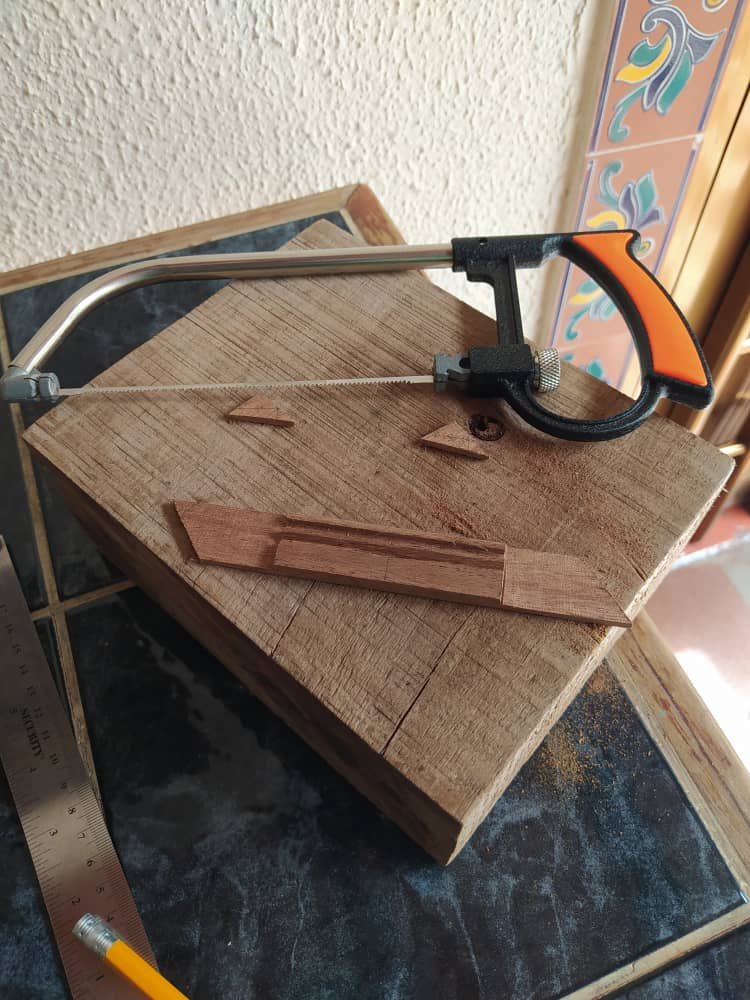
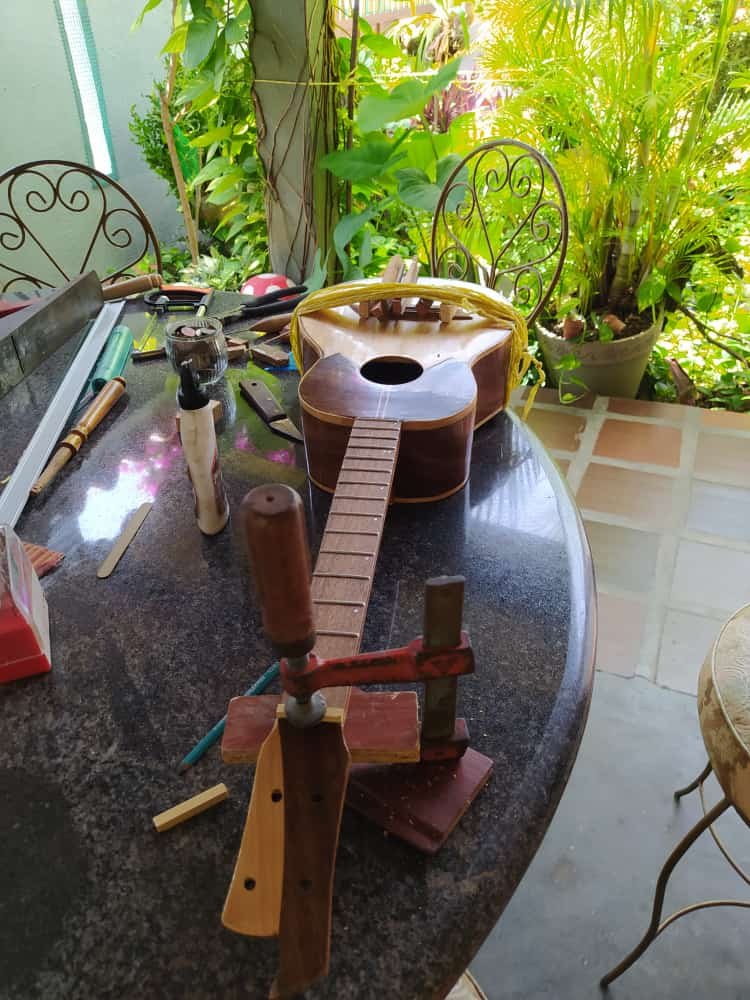
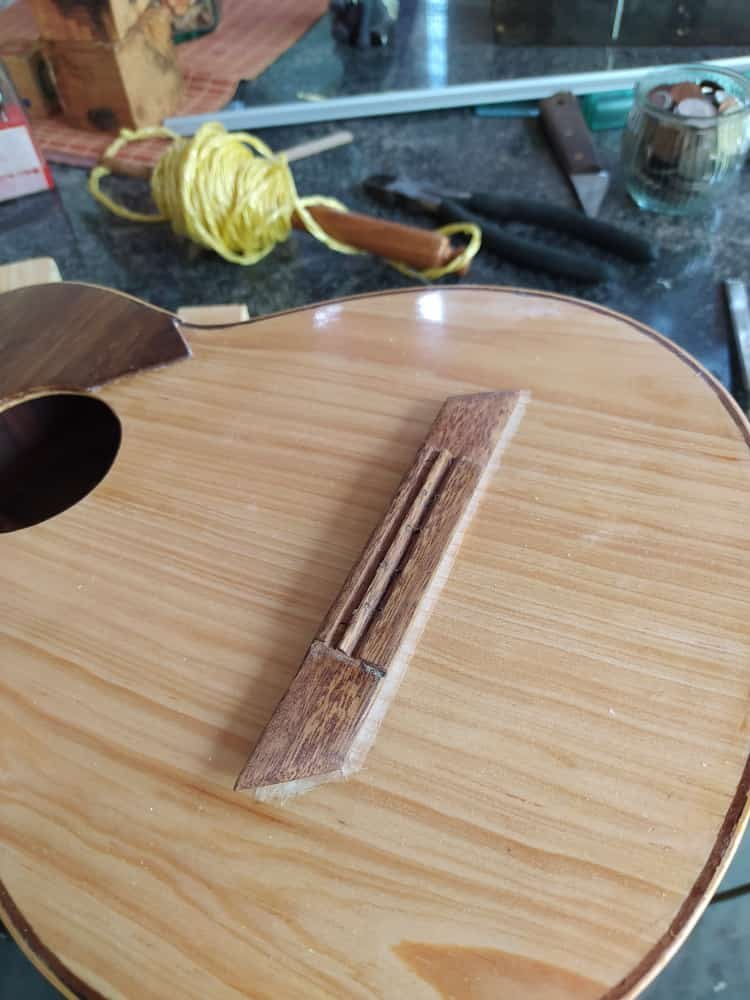
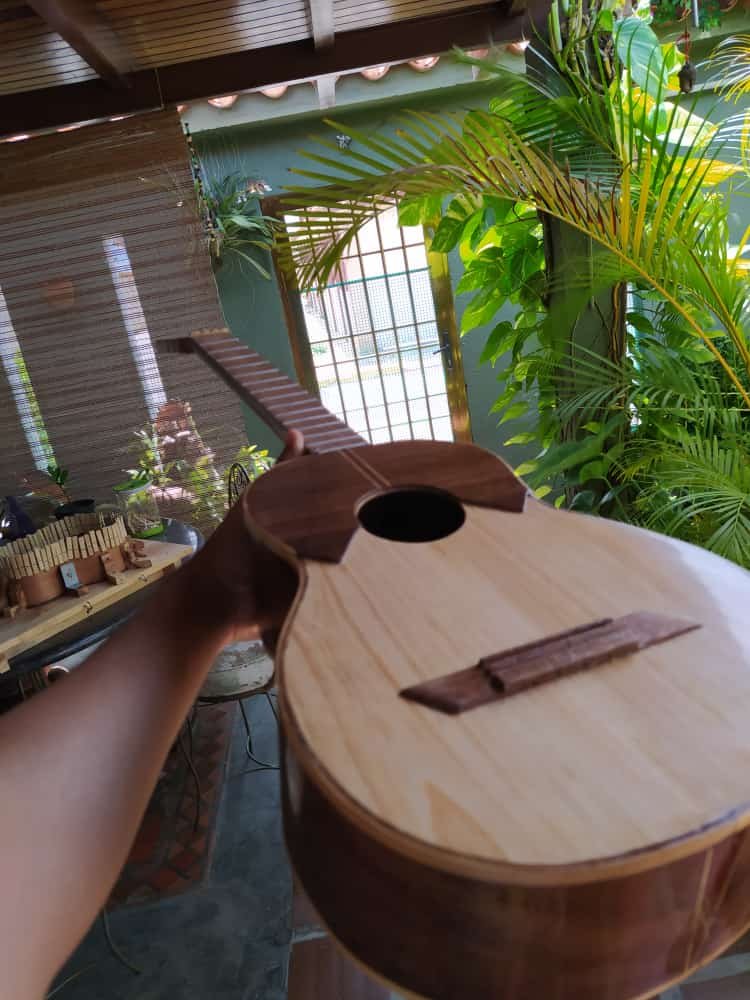
The final shape of this piece was achieve cutting some and sanding it all. After the holes were opened on this bridge it was time to put it on he cuatro. For this, we remove the varnish from the a section of the sound board. This is calculated by using the same distance from the nut to the 12th fret. After it is centered to make sure the strings go on top of the fretboard, apply glue and fix it in place. This process is one of the slowest in construction. A bridge requires 24 hours of ongoing pressure to make sure it doesn't come off from the tension of the strings.
Con un cuchillo y papel de lija se le dio la forma final a esta pieza. Después de abrir los hoyos de las cuerdas, se procedió a colocarlo en su lugar. Para esto, se remueve el barniz de una sección de la tapa armónica. La misma se calcula usando la misma distancia de la cejuela al traste 12. Se centra esto para asegurarnos de que las cuerdas descansen por encima del diapasón. Luego, se aplica el pegamento y se deja bajo presión. Este es uno de los procesos más lentos de la constucción. Un puente requiere 24 horas de presión continua para evitar que se despegue por la tensión de las cuerdas.
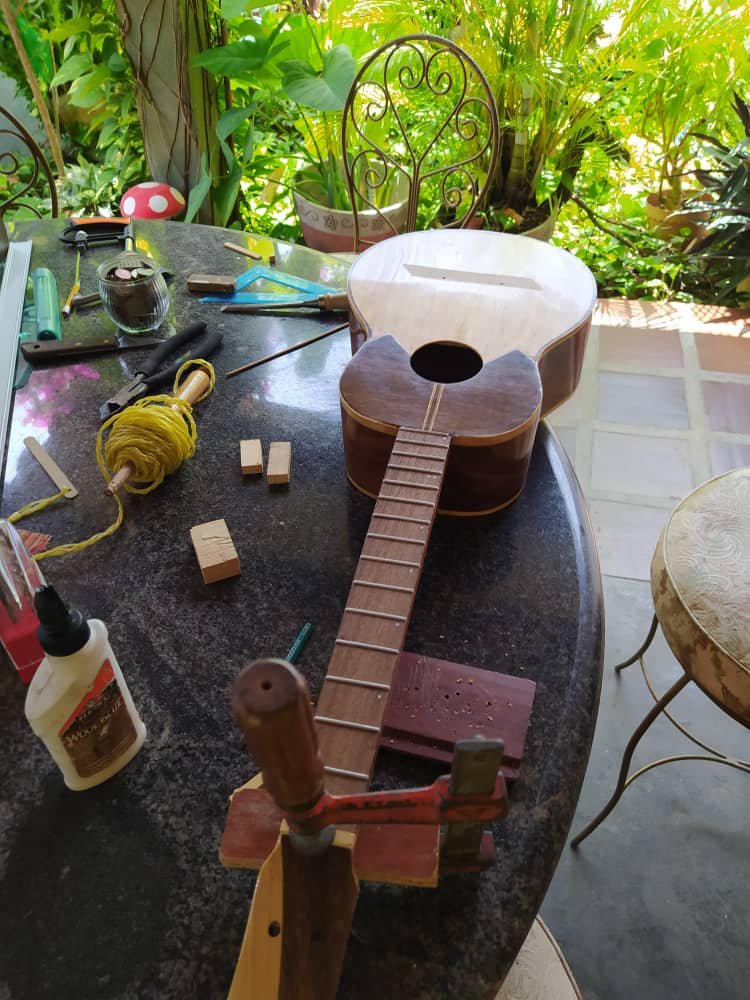
We go on with polishing and tuning pegs. Polish brings me back to watching Karate Kid. It's basically the same thing, apply wax and polish. So you need 2 pieces of cloth: one to apply wax; another, to polish the surface. You can apply as many layers as you please, but remember this kind of wax is abrasive. Therefore, the more you apply the more you are damaging the finish. For me 3 layers does it. You'll see the results in a short video. For the tuning pegs, it's just making the holes for the screws and setting them up. After this, it's strings and an instrument ready to sound.
Procedemos al pulido y las clavijas. Pulir es una acción que me remonta a la película Karate Kid. Es básicamente eso: encerar y pulir. Necesitas dos trozos de tela: uno para aplicar la cera y otro para pulir. Se pueden aplicar las capas que se deseen. Solo hay que tener en cuenta que este producto es abrasivo. Entre más capas se apliquen más se daña el acabado del instrumento. Para mí, 3 capas son suficientes. Para colocar las clavijas, solo hace falta abrir los hoyos para los tornillos y colocarlas en su lugar. Después de esto, a poner las cuerdas e instrumento a sonar.
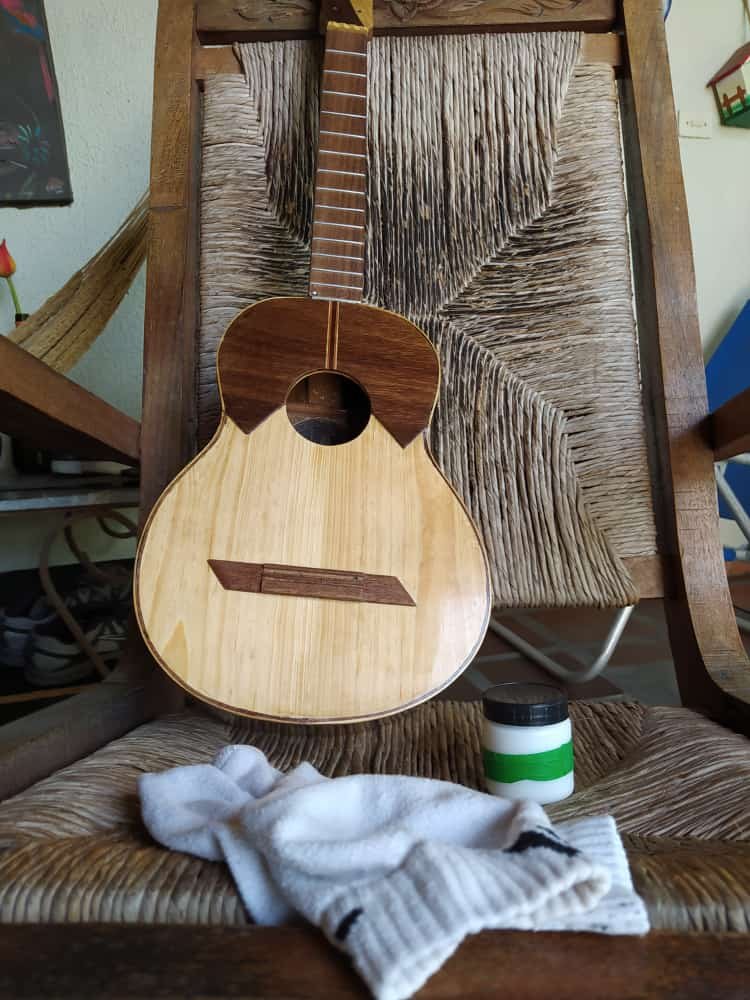
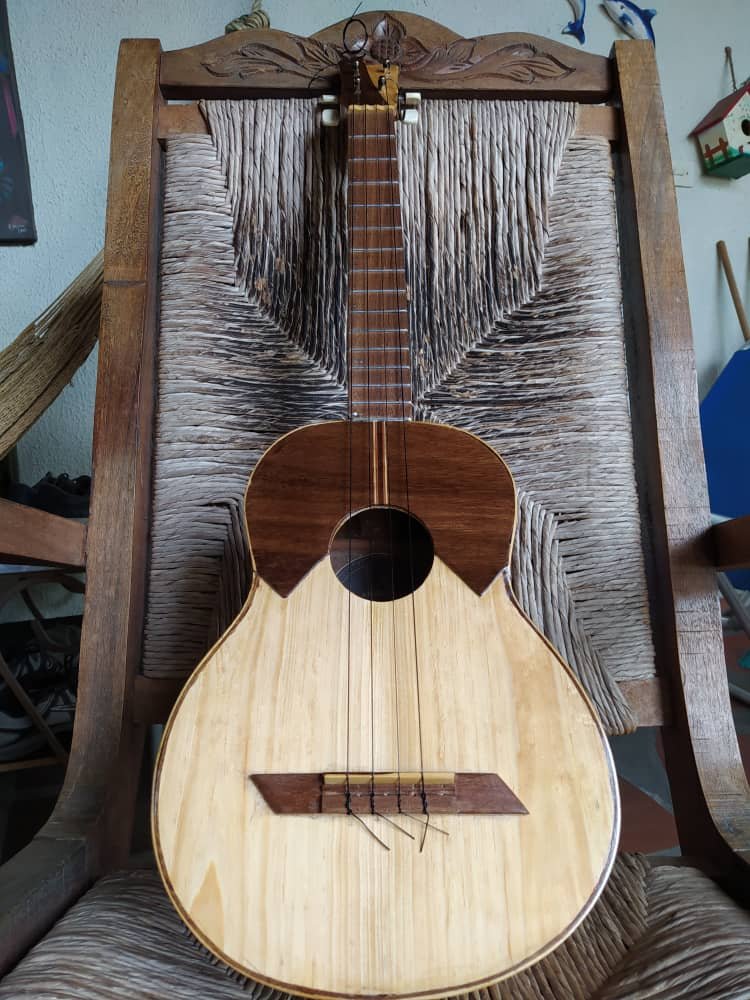
Results of all this hard work!
I didn't take any pictures of the process of making the nut and saddle. Basically, these are two pieces that hold he strings. The nut is the division between fretboard and head stock. The saddle determines the action of the strings, i.e. the height from the fret board. This is the thing people could complain about. A high action means strings that are harder to push. This is the result of a lot of hours of work. I'm curious about your comments. Let me know what you think about this build.
No tomé ninguna foto del proceso de hacer la cejilla y cejuela. En resumen, estas son piezas que sujetan las cuerdas. La cejuela es la división entre el diapasón y el clavijero. La cejilla es la que determina la altura de las cuerdas. Tener cuerdas muy altas implica que se necesita más fuerza para pisarlas. Este es el resultado de muchas horas de trabajo. Tengo curiosidad por saber su opinión. Dejen sus comentarios en el post.
And of course, I can't leave this series without showing a sample of the sound of this cuatro. Here's a little piece of Carnaval (one of the many fixed harmonies of Joropo Llanero).
Y por supuesto, no podía terminar esto sin dar una pequeña prueba de sonido. Esto es un fragmento del Carnaval (uno de los muchos golpes del Joropo Llanero)
That is all for this entry. Thanks a lot for reading. See you in the next chapter.
Eso es todo por esta ocasión. Gracias por leer. Nos vemos en el próximo post.
All the pictures used in these post were taken with my phone.
Todas las fotos en este post fueron tomadas con mi teléfono.
Congratulations @bertrayo! You have completed the following achievement on the Hive blockchain and have been rewarded with new badge(s) :
Your next target is to reach 250 posts.
You can view your badges on your board and compare yourself to others in the Ranking
If you no longer want to receive notifications, reply to this comment with the word
STOPYour content has been voted as a part of Encouragement program. Keep up the good work!
Use Ecency daily to boost your growth on platform!
Support Ecency
Vote for Proposal
Delegate HP and earn more
Thanks a lot!
An excruciating process, but very rewarding. It looks beautiful. 😍 we've Being on it for a while now and its come out perfect.
It needs a lot of work, but the results are satisfying!
Even for me😌
I'm just missing the awesome photo-skills!
I bestow it on you bud😁
If only it were so easy. Ha, ha, ha. Let's see how it works next time I take pictures!
Don't fail to tag me. 😉
Thank you for sharing this amazing post on HIVE!
non-profit curation initiative!Your content got selected by our fellow curator @stevenson7 & you just received a little thank you via an upvote from our
You will be featured in one of our recurring curation compilations and on our pinterest boards! Both are aiming to offer you a stage to widen your audience within and outside of the DIY scene of hive.
Join the official DIYHub community on HIVE and show us more of your amazing work and feel free to connect with us and other DIYers via our discord server: https://discord.gg/mY5uCfQ !
If you want to support our goal to motivate other DIY/art/music/homesteading/... creators just delegate to us and earn 100% of your curation rewards!
Stay creative & hive on!
Thanks a lot!
Nuestras coordenadas: