Hello, dear readers
It’s woodworking time!
Buen día, estimados lectores.
¡Es hora de trabajar!

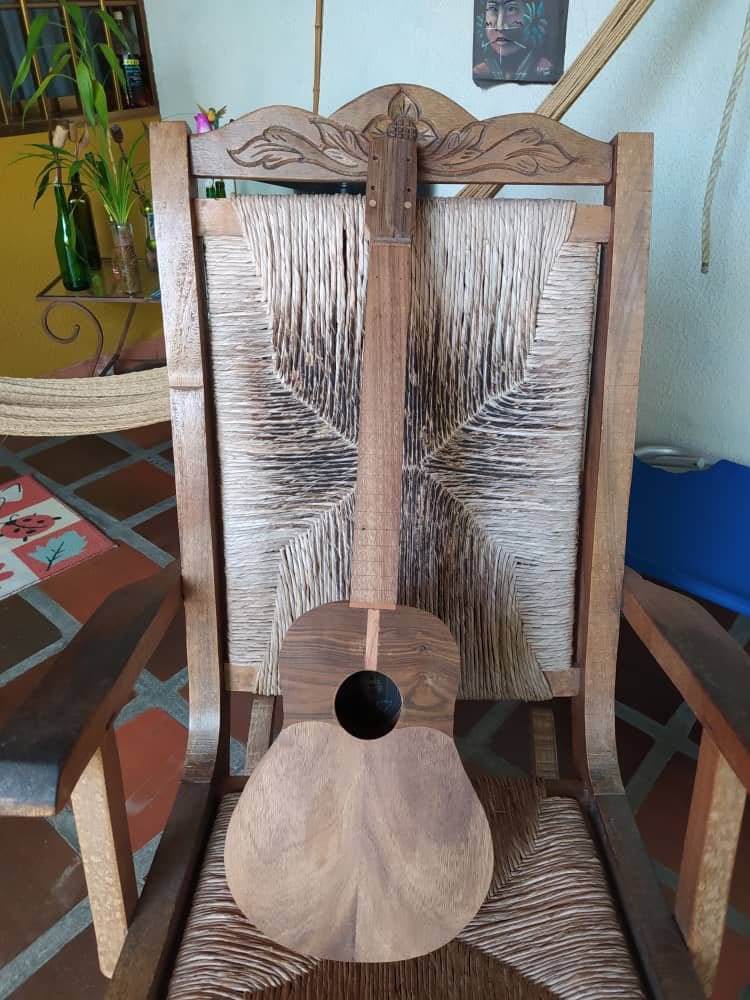
This experiment is in shape now. Let's have a look at some of the steps taken in order seal this instrument!
El experimento tiene forma. ¡Veamos algunos de los pasos a seguir para cerrar este instrumento
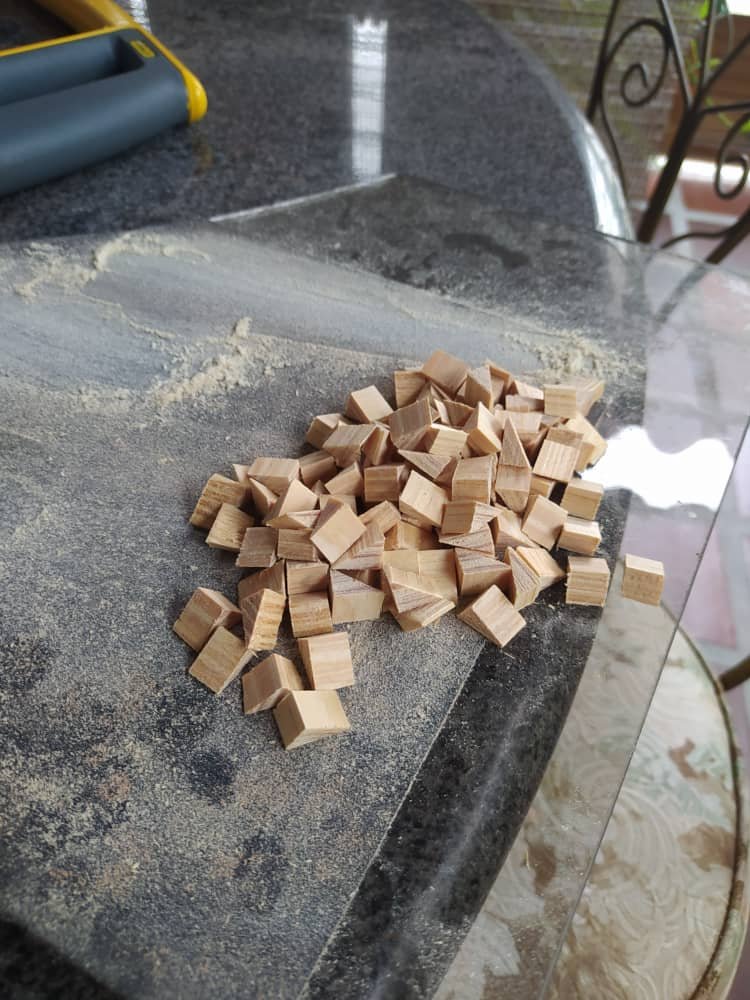
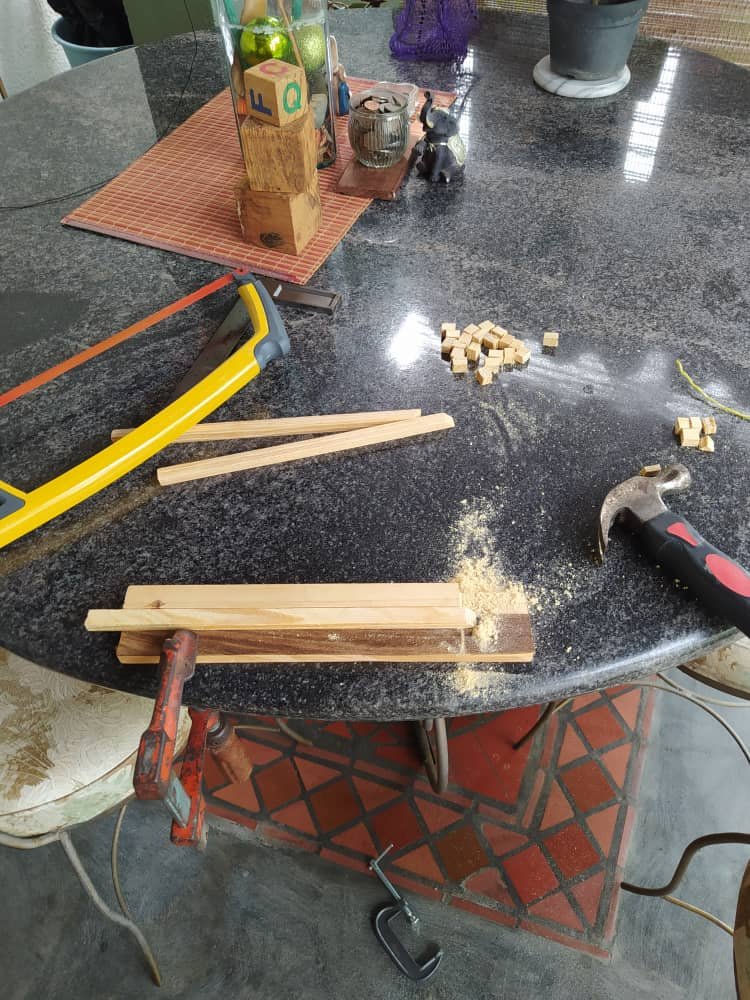
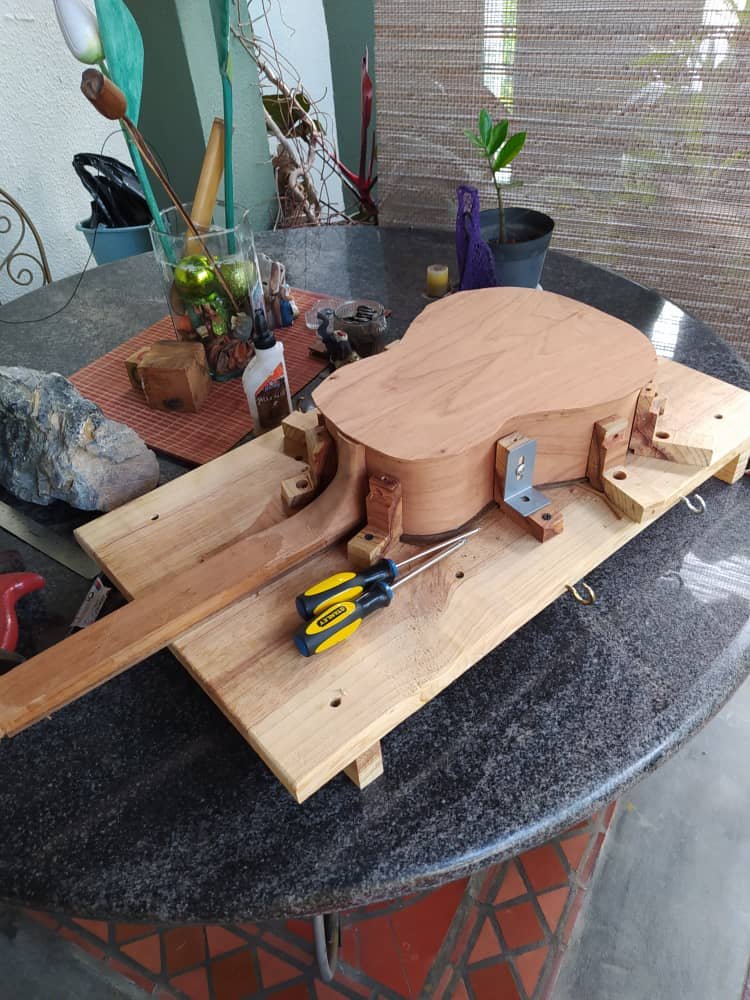
We start off by making these wedges to reinforce the union between sides and sound board. First, you cut cubes and then make the pieces by dividing these in half. Any uneven surface is sanded off and they are ready to be placed.
Comenzamos por los peones para reforzar la unión de la tapa armónica y los aros. Primero, cortamos cubos y después los dividimos a la mitad, Cualquier irregularidad en la superficie de estos, se empareja con lija.
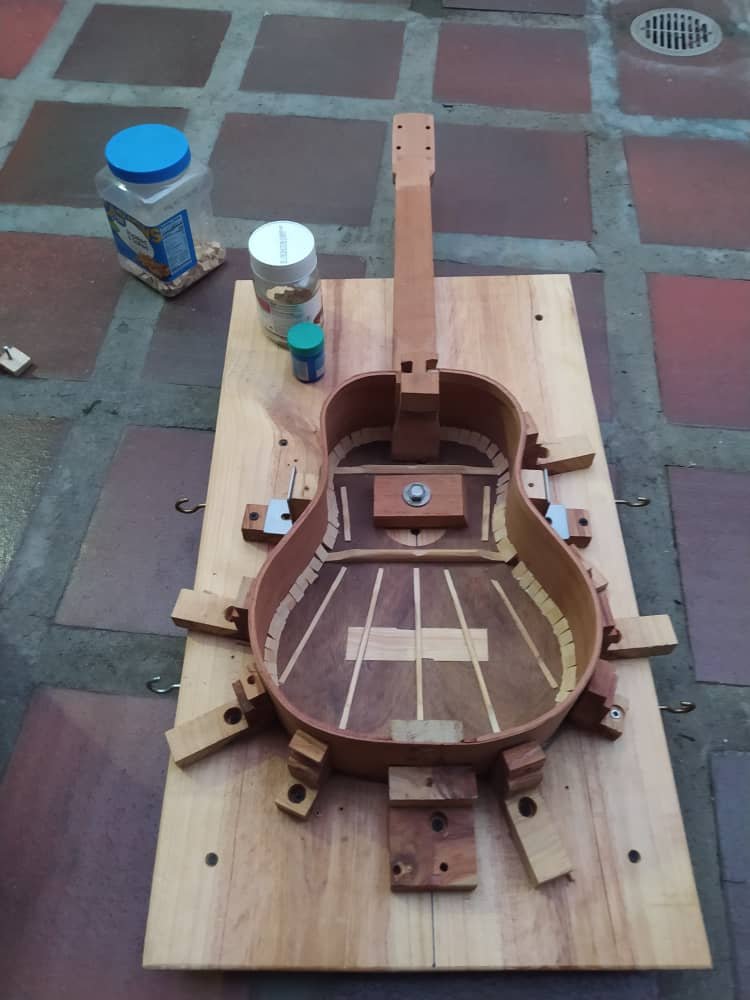
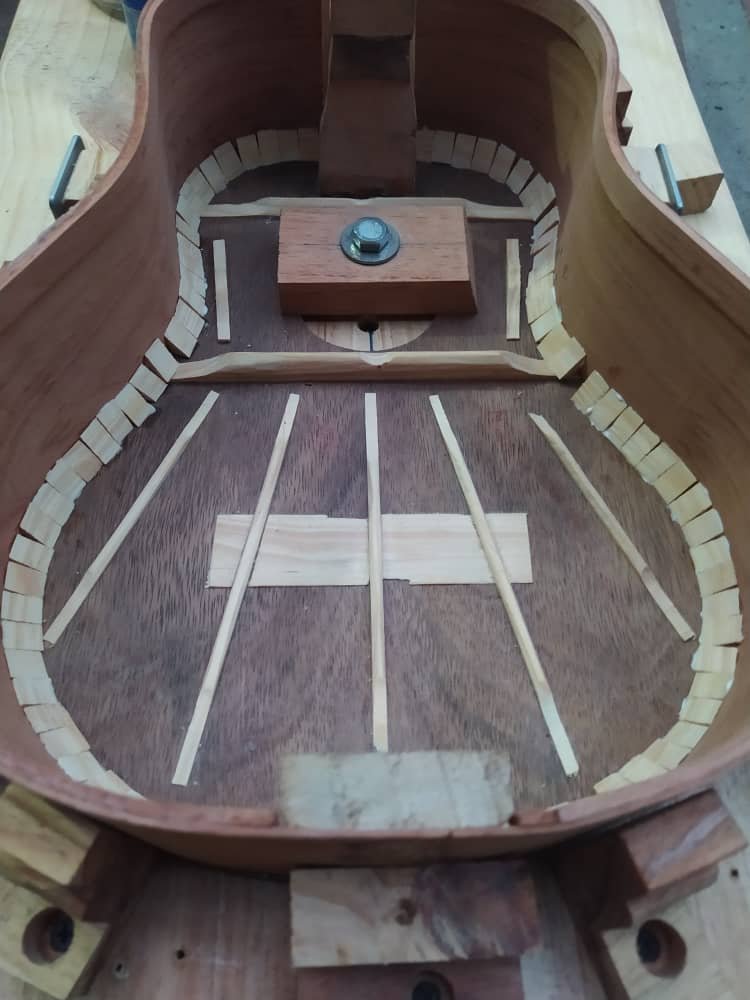
Here is when we have to decide whether this instrument is going to have bindings. If so, we need to use as many wedges as we can fit. This is to ensure the binding will have a firm surface to rest on.
Aquí es donde debemos decidir si el instrumento llevará decoraciones de filetería. De ser así, tenemos que colocar tantos peones como puedan caber. Esto nos asegura que los filetes tendrán una superficie estable donde reposar.

Before closing off the instrument, we need to reinforce the sides and flatten any uneven surface. This will give us a tight seal and a strong instrument.
Antes de cerrar el instrumento, tenemos que reforzar los aros y emparejar las superficies irregulares. Esto nos asegura un instrumento resistente y un buen sellado.
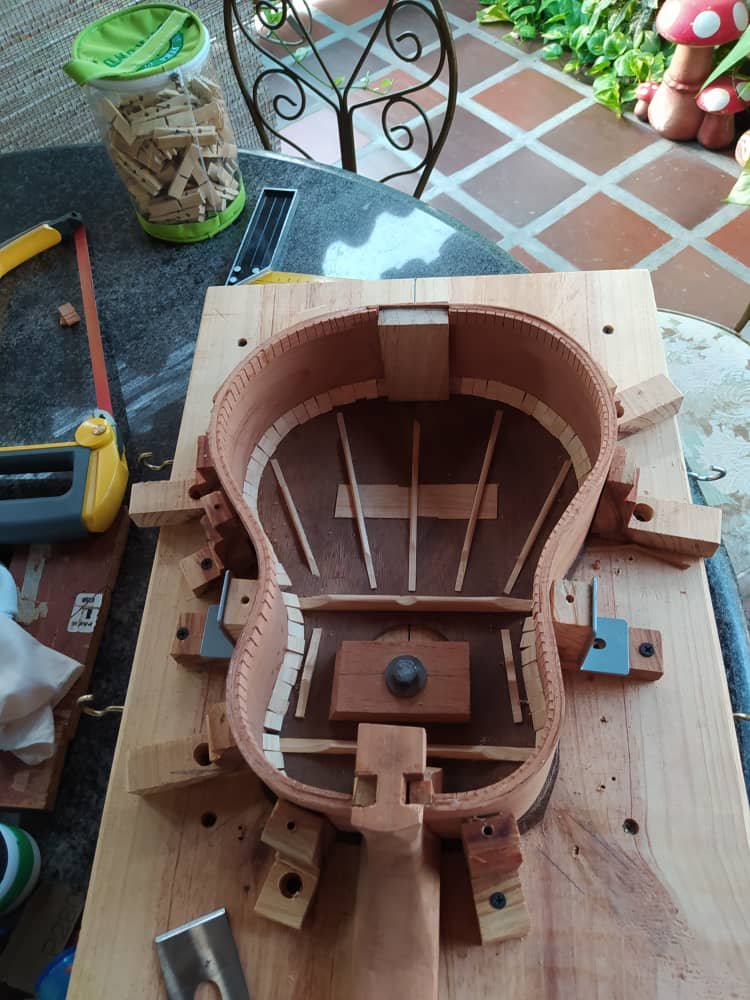
This is the final look at the pieces before having all of them together. It gives us the chance to correct any mistakes. Last minute checks are important to ensure a smooth process in any king of DIY project.
Este será la última vez que veremos las piezas por separado. Es la oportunidad de rectificar cualquier problema que pueda haber. Una revisión de último momento es importante en cualquier tipo de proyecto. <br
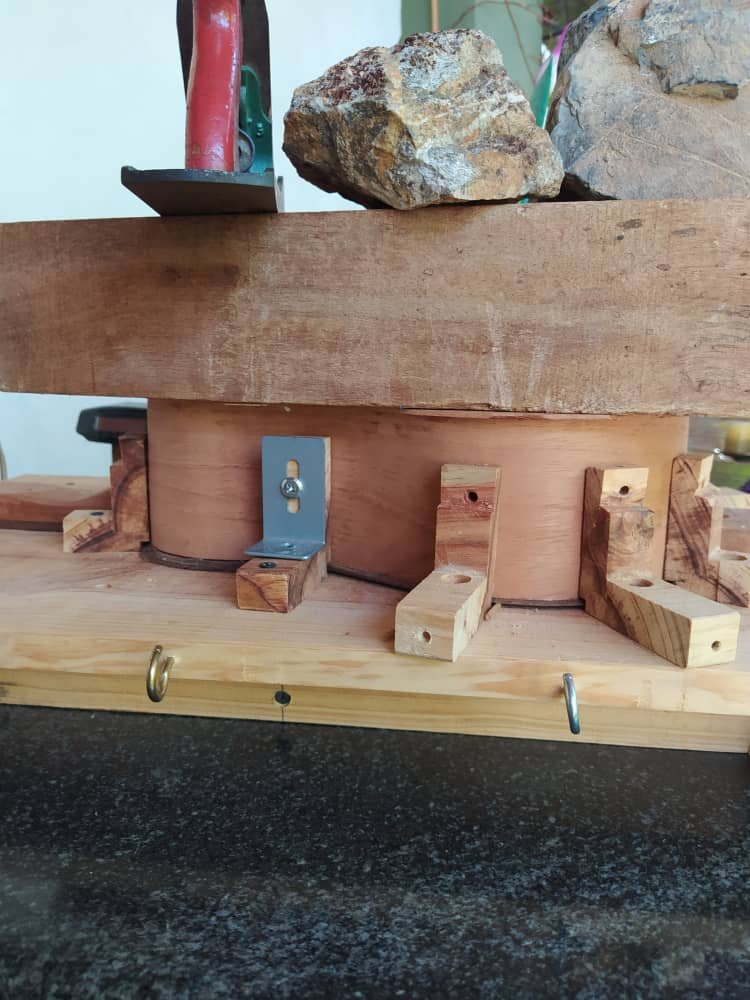
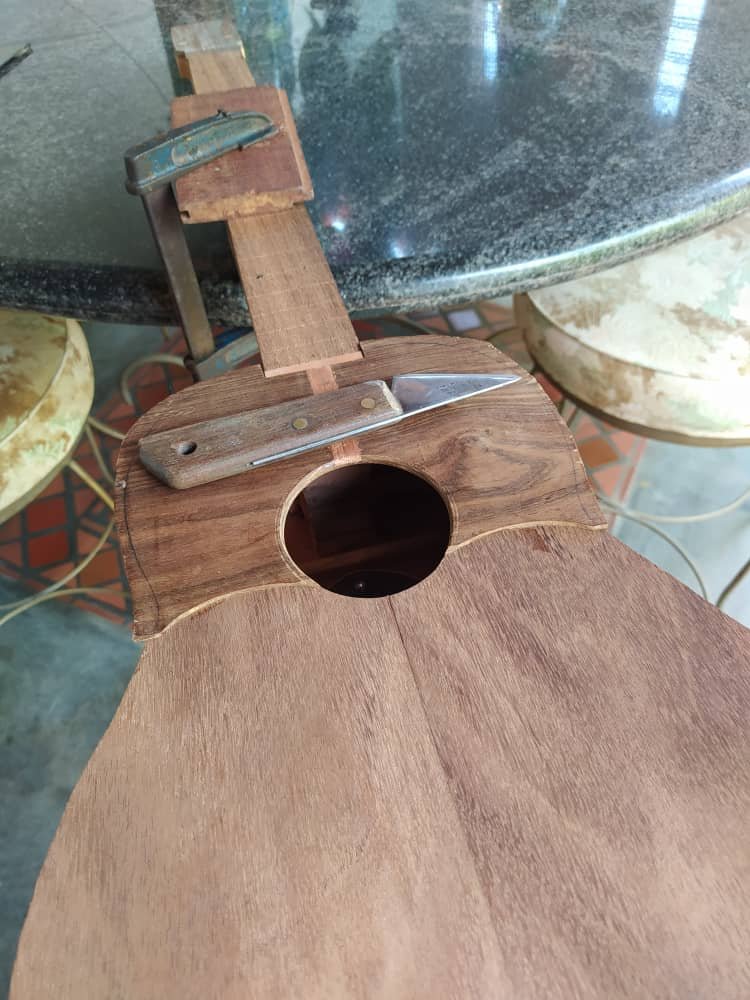
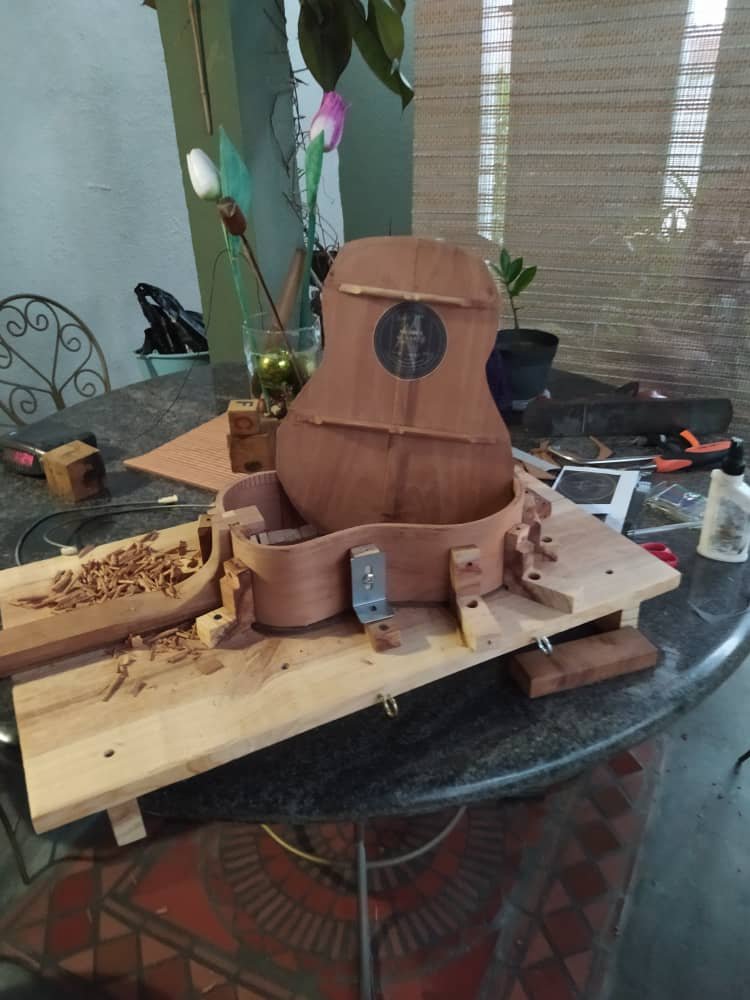
We apply glue to the back and put is in place. Then, we use weights to keep it pressed to the rest of the instrument. We give this as much time as needed. Leaving it at night and checking in the morning is a good option. After this is done, we proceed to take it out of the mold and remove the excess material. Thus, giving the cuatro its well-known shape.
Aplicamos pegamento al fondo y lo colocamos en su lugar. Luego, utilizamos algunos esos para mantenerlo presionado. Le damos el tiempo necesario. Dejarlo pegando toda la noche en una buena idea. Después de esto, procedemos a sacarlo de la solera y remover el exceso en los bordes. Dándole la forma característica del instrumento.
That is all for this entry. Thanks a lot for reading. See you in the next chapter.
Eso es todo por esta ocasión. Gracias por leer. Nos vemos en el próximo post.
All the pictures used in these post were taken with my phone.
Todas las fotos en este post fueron tomadas con mi teléfono.
Your content has been voted as a part of Encouragement program. Keep up the good work!
Use Ecency daily to boost your growth on platform!
Support Ecency
Vote for Proposal
Delegate HP and earn more
Great Way to Make this
Thanks a lot!
Nuestras coordenadas:
Congratulations @bertrayo! You received a personal badge!
Wait until the end of Power Up Day to find out the size of your Power-Bee.
May the Hive Power be with you!
You can view your badges on your board and compare yourself to others in the Ranking
Check out the last post from @hivebuzz:
Congratulations @bertrayo! You received a personal badge!
Participate in the next Power Up Day and try to power-up more HIVE to get a bigger Power-Bee.
May the Hive Power be with you!
You can view your badges on your board and compare yourself to others in the Ranking
Check out the last post from @hivebuzz: