

Hi, friends!
Today I want to tell you the story of how I helped my friend and at the same time show you how to make a polymer clay stamp and earrings using it.
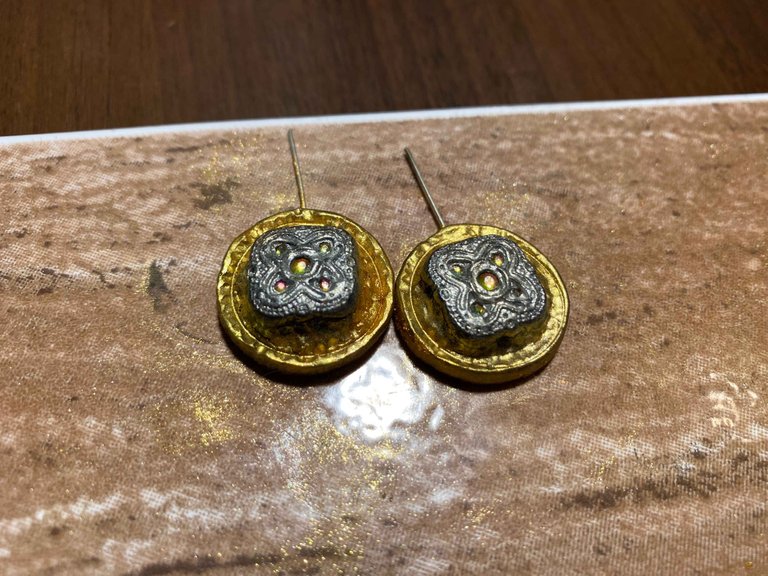
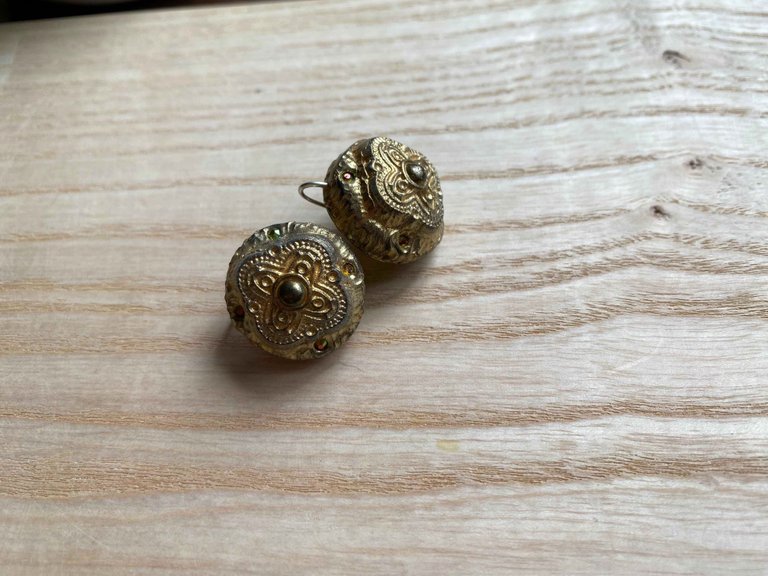
I was approached by my friend. She said that one of the earrings, which was given to her by her mom and which she treasures very much, was lost. And asked if there was anything I could think of to use the remaining earring. I told her that I would try to make earrings out of polymer clay similar to her earring, and that I would make a pendant out of the original earring.

I would like to note that polymer clay products using stamps (homemade or purchased) are not difficult to create. There are a lot of different ways to use this technique. If you look closely around, it is very easy to make a beautiful stamp yourself - you can imprint any pattern or texture. It can be napkins, jewelry, convex patterns on some jars and so on.
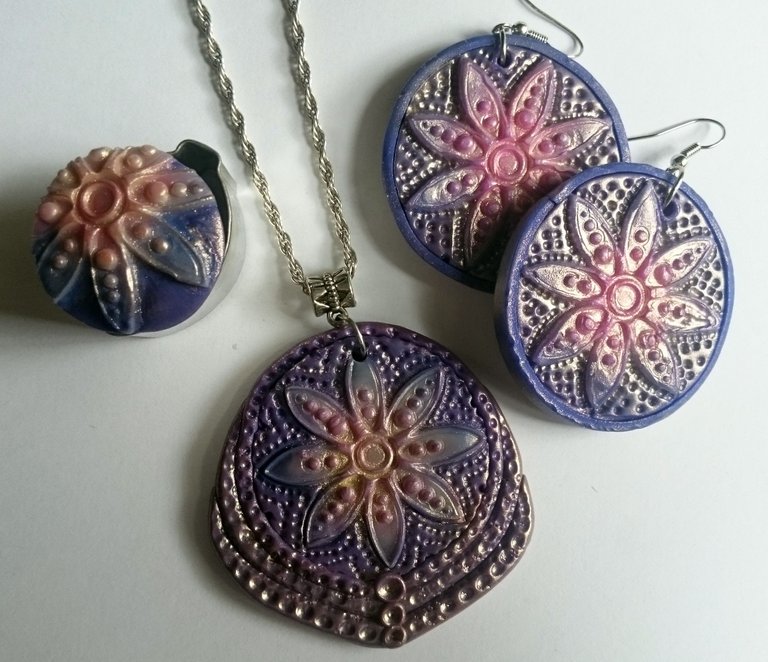
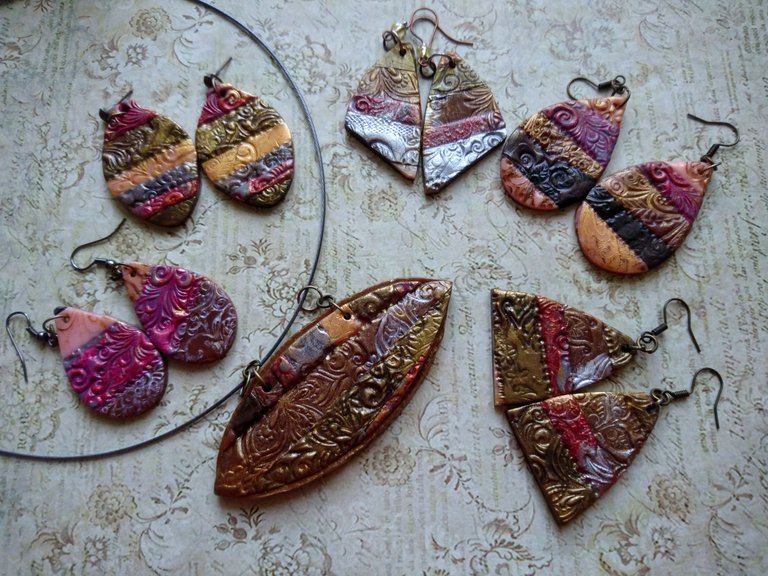
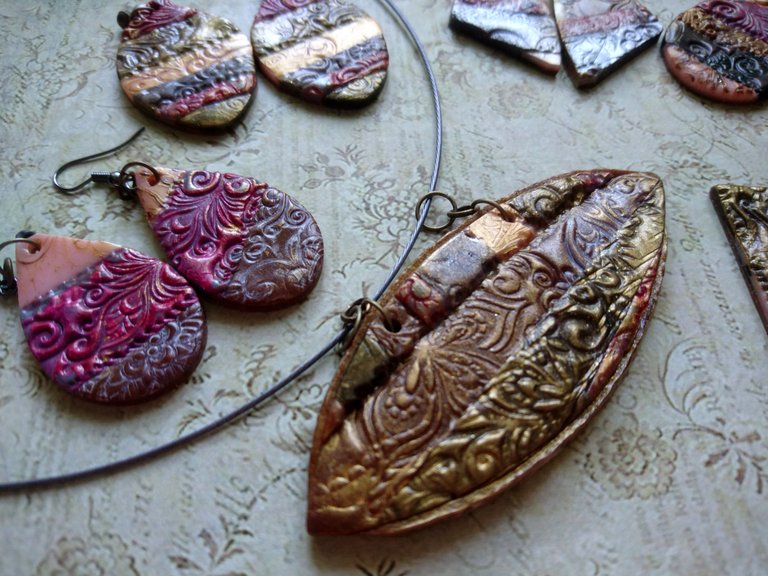
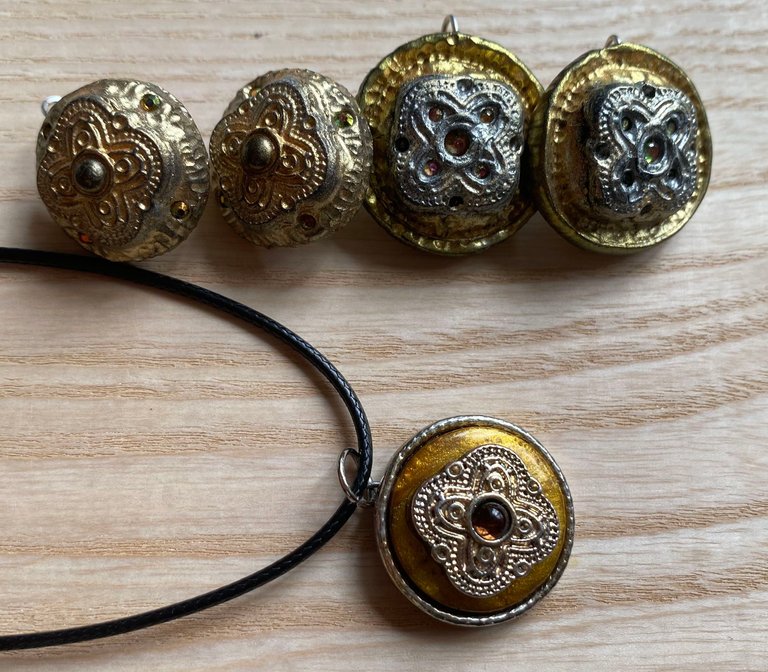
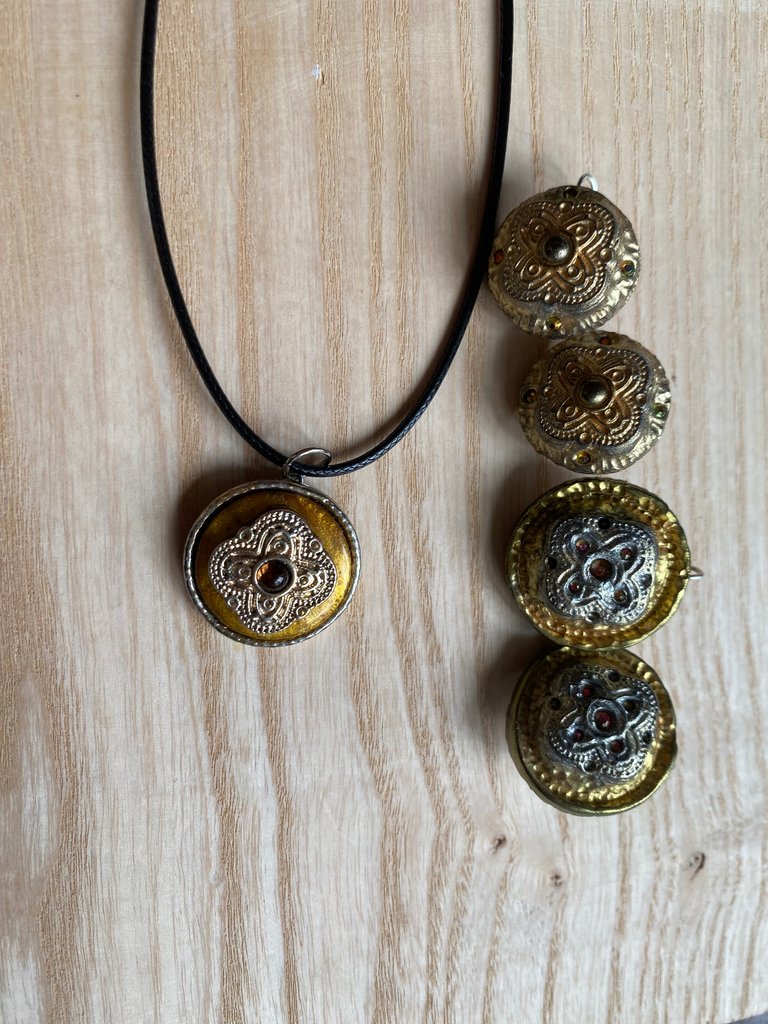
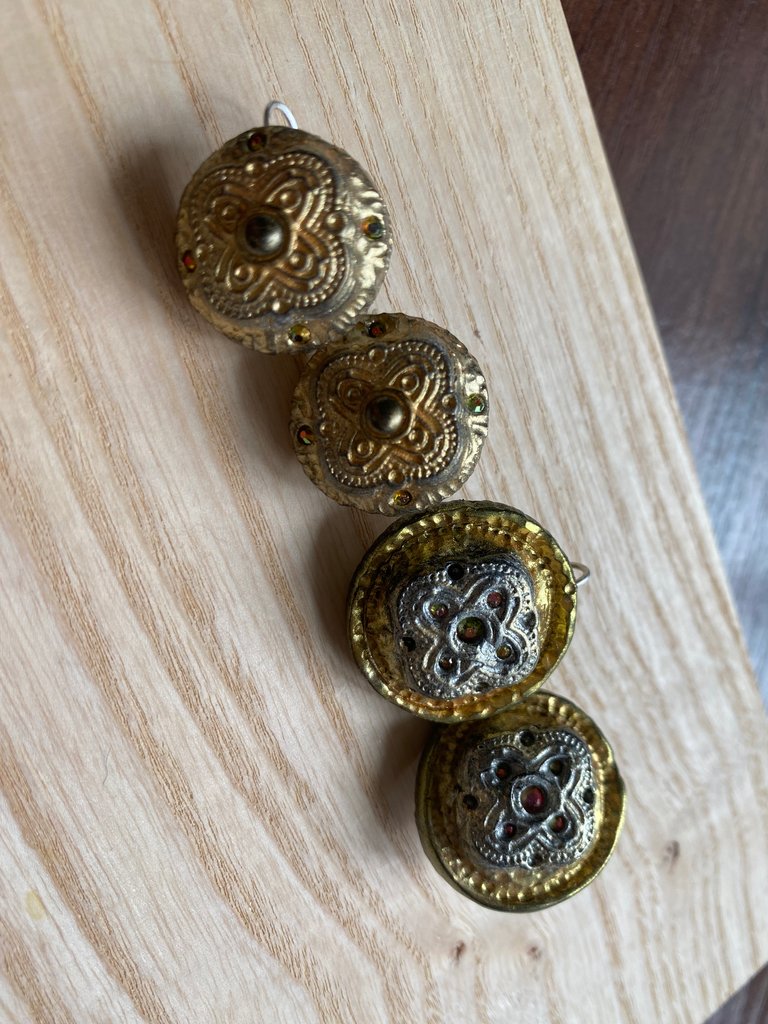
I'll show you some embellishments that I also made using stamps and textures:
Required Tools and Materials
- polymer clay
- work surface (preferably glass or tile)
- talcum powder
- brushes
- stationery knife or blade
- dots or other molding tool (can be replaced by a toothpick)
- rhinestones
- gold or silver dry pigment
- metal hardware (earring pins)
- oven (preferably electric with temperature control and convection)
Difficulty level: light.
Working time: 1,5-2 hours.
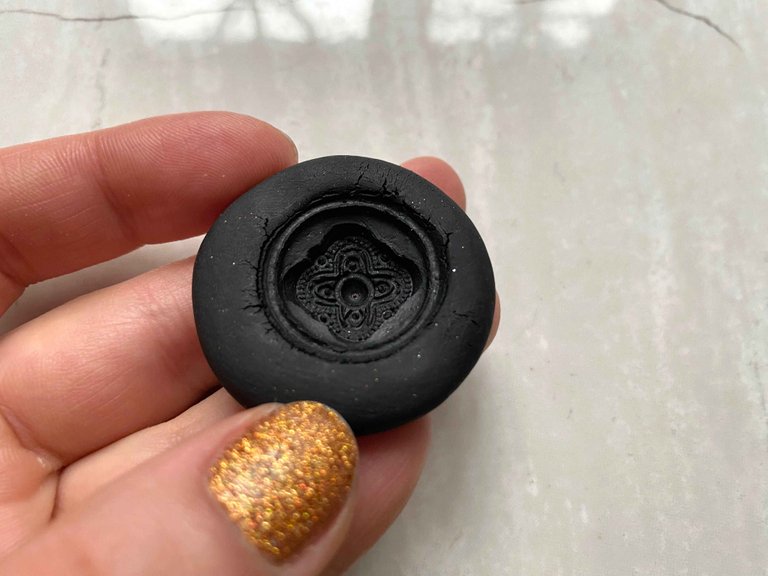
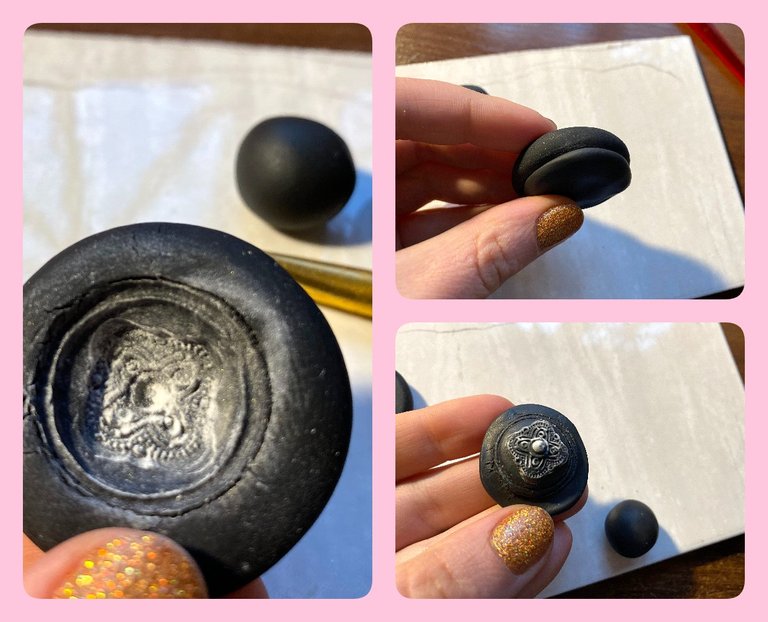
Step 1
To make earrings with the same pattern as the original, I created a polymer clay stamp. The photo shows the sequence of actions:
1- I kneaded a piece of black polymer clay
2- moistened it with water
3- well and evenly pressed the original earring into the polymer clay.
4- carefully pulled out the earring so as not to damage the imprinted pattern.

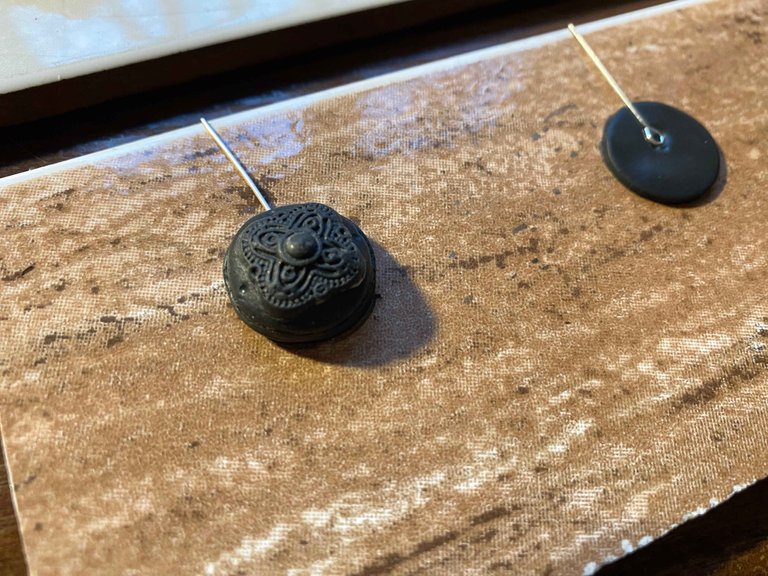
Step 2
The resulting stamp should be baked in the oven.
It is always necessary to bake polymer clay products, clearly observe the temperature and time of baking, which are indicated on the package of polymer clay.
The baked stamp can be used many, many times, and it is very cool).
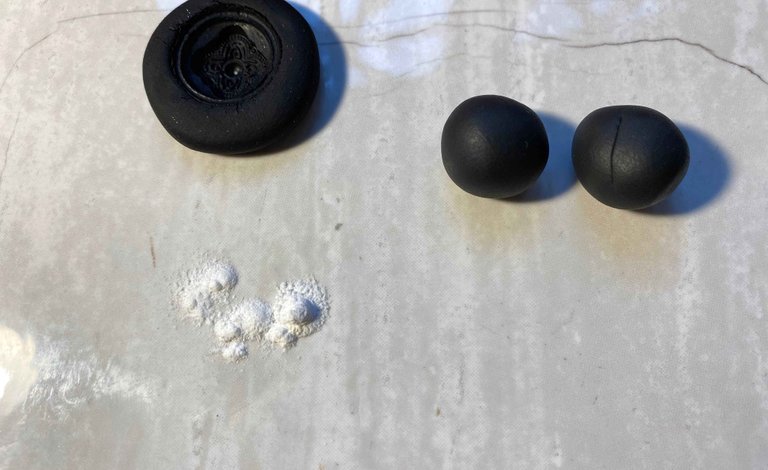
Step 3
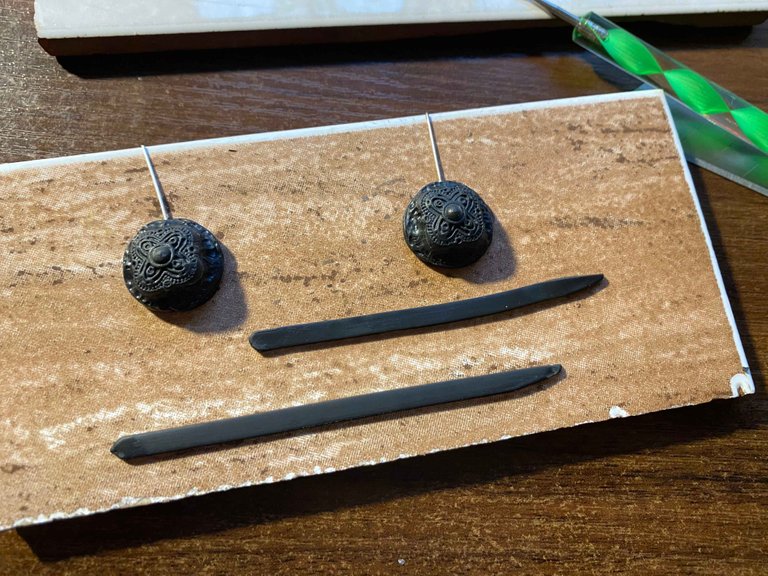
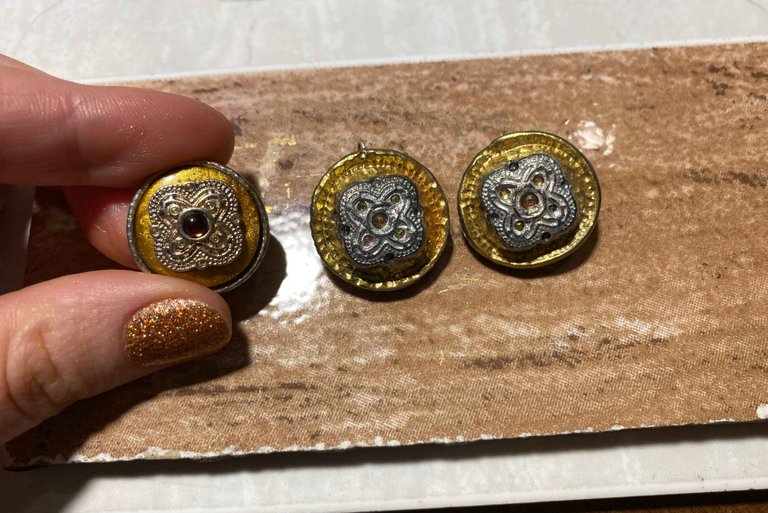
I take two identical pieces of polymer clay.
I brush a layer of talcum powder onto the stamp. Do this every time you want to make a stamp so that the polymer clay does not stick. You can also use water, but water can soften some brands of polymer clay, so talcum powder is more reliable.
After that, imprint the two blanks.
Step 4
Making earrings.
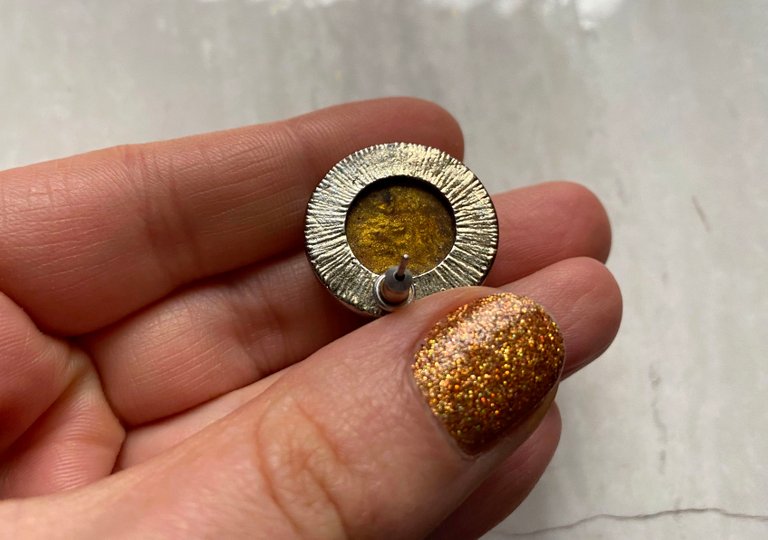
First, I make blanks from two circles of polymer clay, into which I press pins. These will be hooks, which are inserted into the ears.
Then I transfer the prints to these flat bases. And make edging from a thin strip of polymer clay.

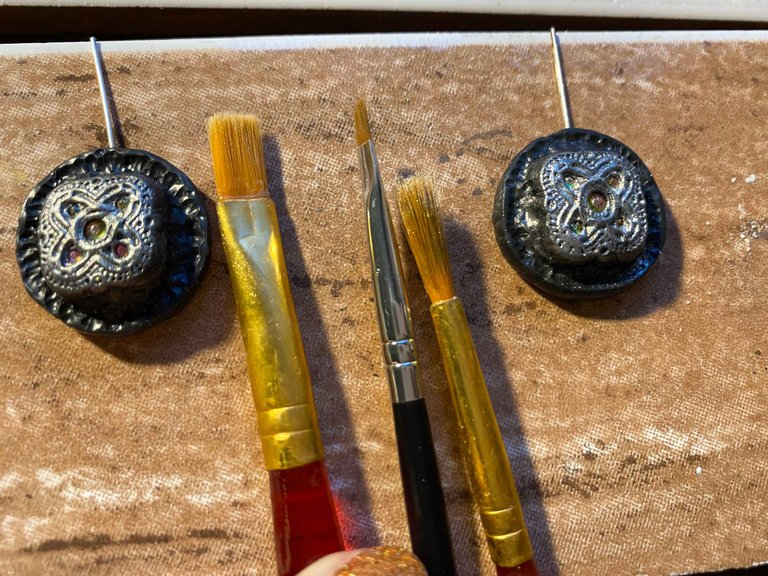
Step 5
I wanted to rhinestone these earrings, so I used small manicure rhinestones, which I transferred to polymer clay using a wax crayon (you can also use a small bar of soap).

Tinted dry pigment gold and silver.
Tinting should be done BEFORE BAKING! It is important! This way the pigment will be baked to the polymer clay.
Step 6
I bake the earrings in the oven and then bend the pins so that I can wear the earrings.
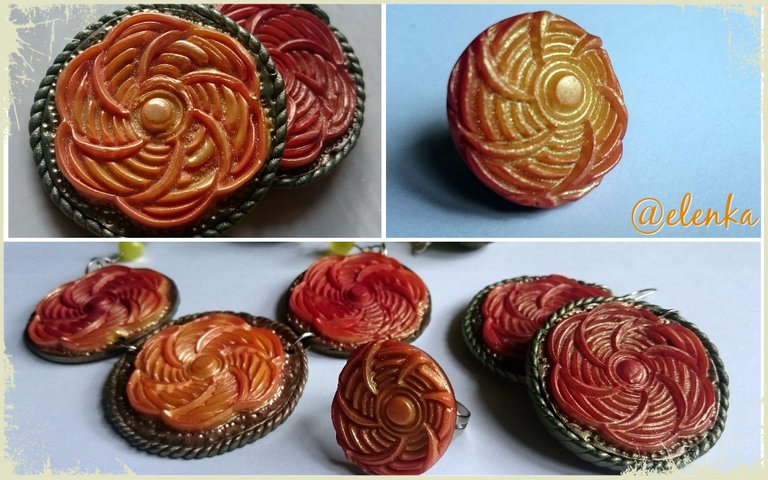
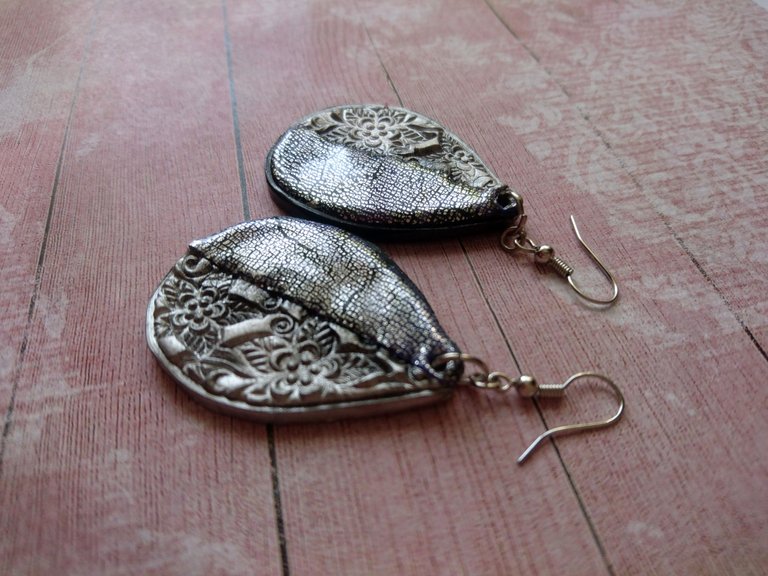
The first version of earrings is ready!

Step 7
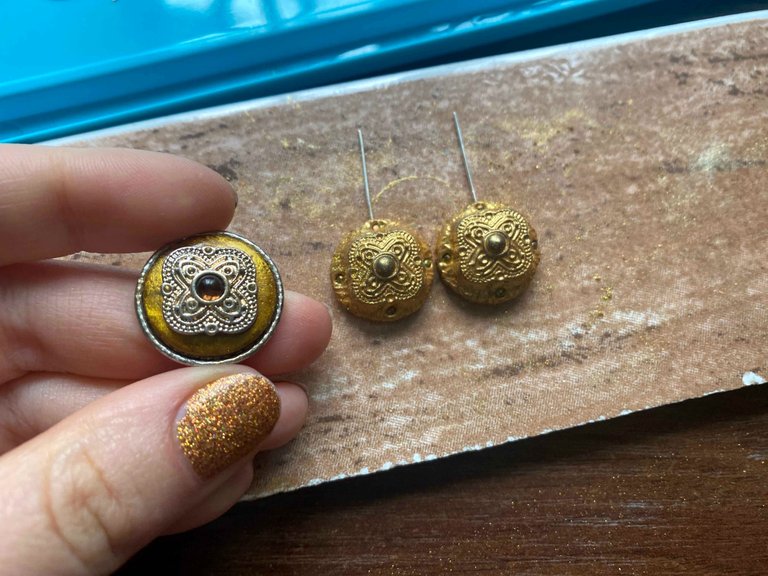
I am making the second version of earrings.
This pair I decided to make without rhinestones and tinted only with gold pigment. I do everything the same way as with the first pair of earrings.
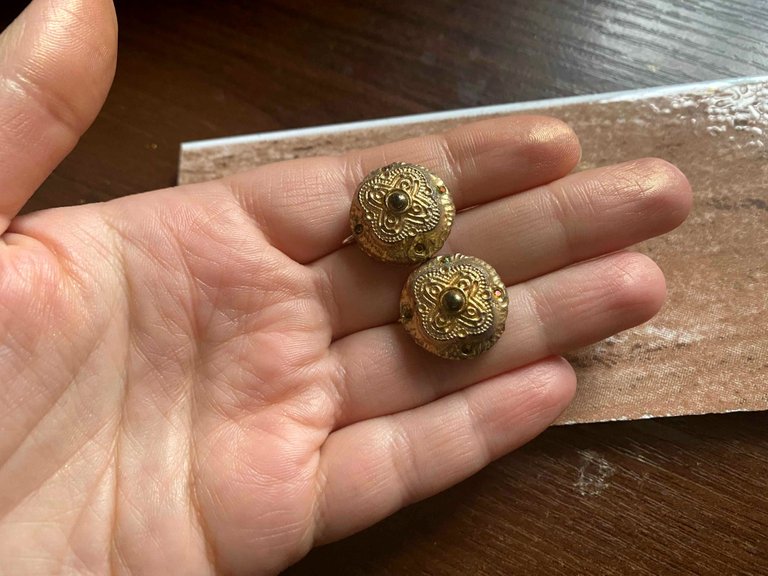
This is the result I got in the end.
My friend was very pleased with it.
Such great earring designs. Knew your friend would love them.
Thanks a lot!❤️ I'm glad you appreciate my work!
You can query your personal balance by
@stevenson7 just sent you a DIY token as a little appreciation for your post dear @elenka! Feel free to multiply it by sending someone else !DIY in a comment :) You can do that x times a day depending on your balance so:!DIYSTATS🙏 Thanks!