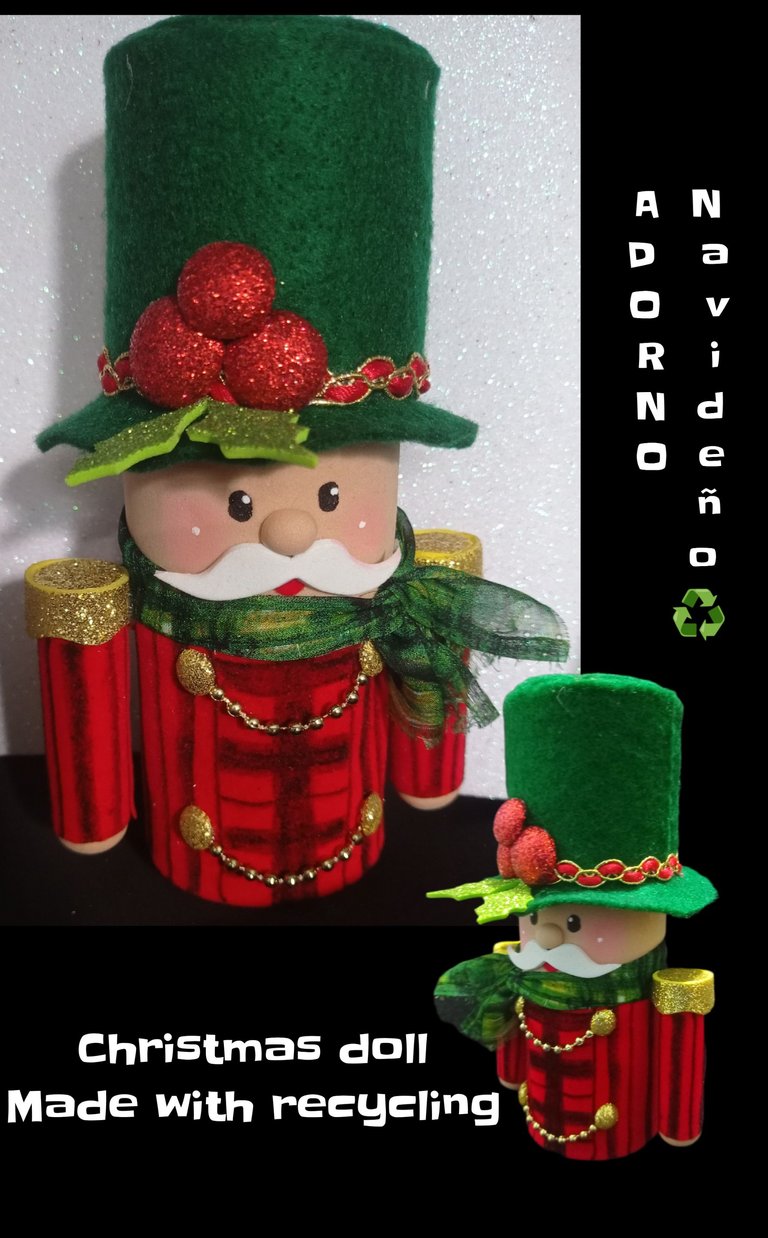
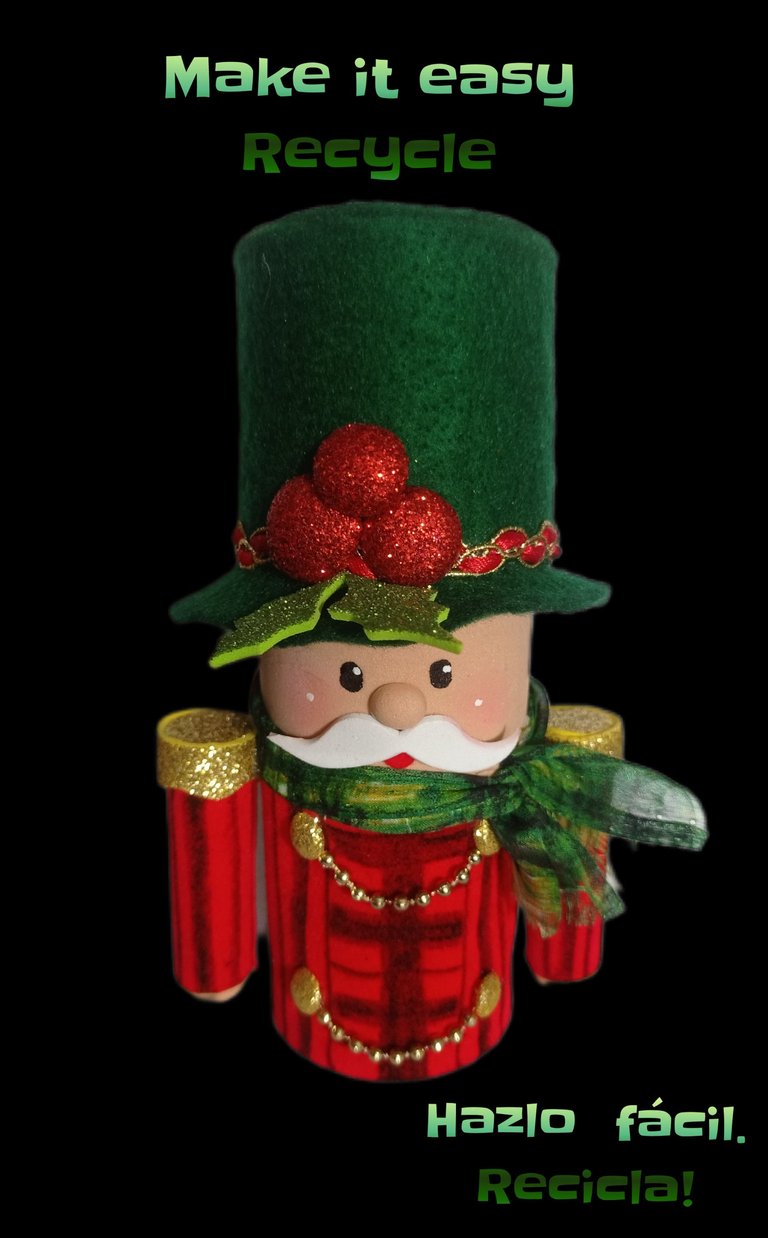
Saludos mis creadores y amigos que compartimos en esta hermosa comunidad.
Feliz martes!
Así que comencemos con los materiales:
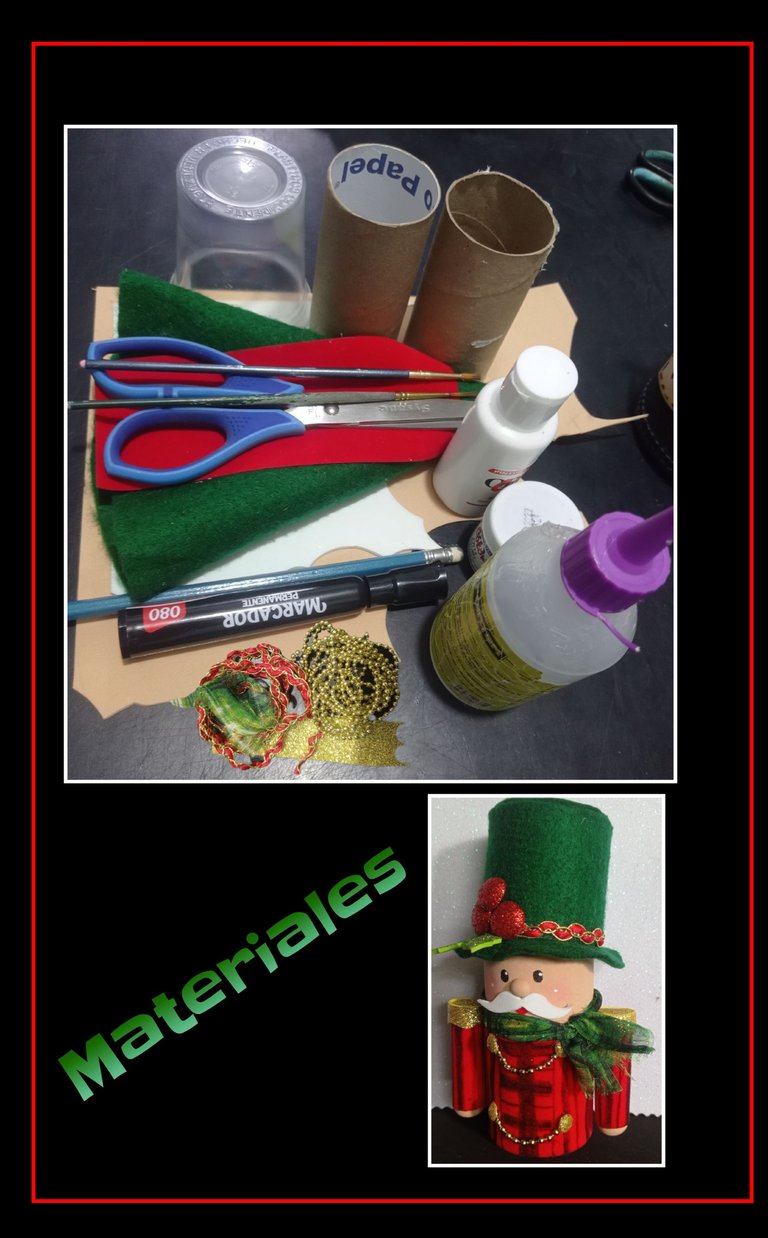
| Tubos de papel higiénico | Fieltro y cinta de gamuza |
|---|---|
| Foami mate y escarchado | Adornos dorados |
| Pinturas y pinceles | Tijera |
| Lápiz y marcador | Vaso plástico |
| Plancha eléctrica | Silicón |
Comencemos!
Paso 1:
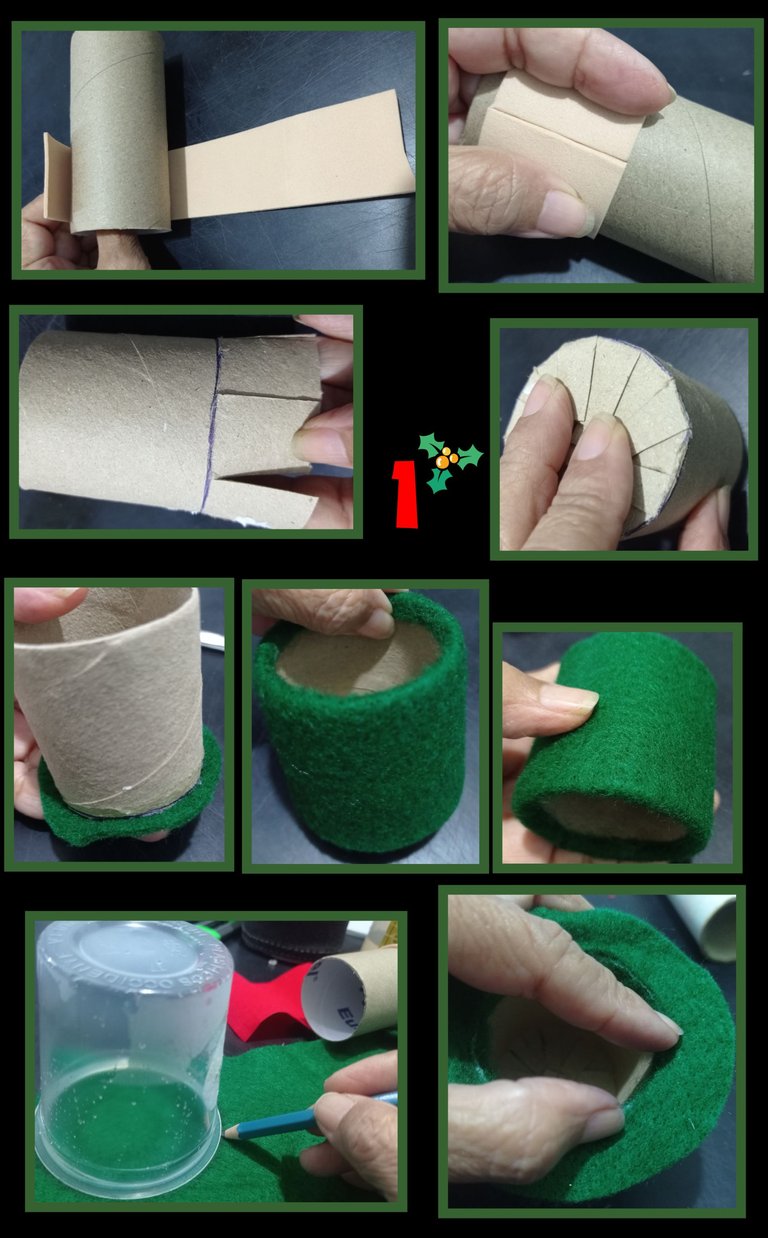
- Recorta una tira de foami de 3 o 4cm en color piel, luego aplica silicón y forra el tubo.
- Para el sombrero usa otro tubo de cartón, marca al tamaño deseado y recorta tiras o triángulos, aplica silicón y pega unos con otros como muestra la foto.
- Ahora pega en la base un círculo de fieltro verde y pega en la base, recorta en fieltro verde una tira y pega por todo el contorno del tubo hasta forrar todo.
- Luego marca sobre el fieltro un círculo grande y recorta por la orilla y luego el centro para pegar en el borde (Ver Foto)
Paso 2:
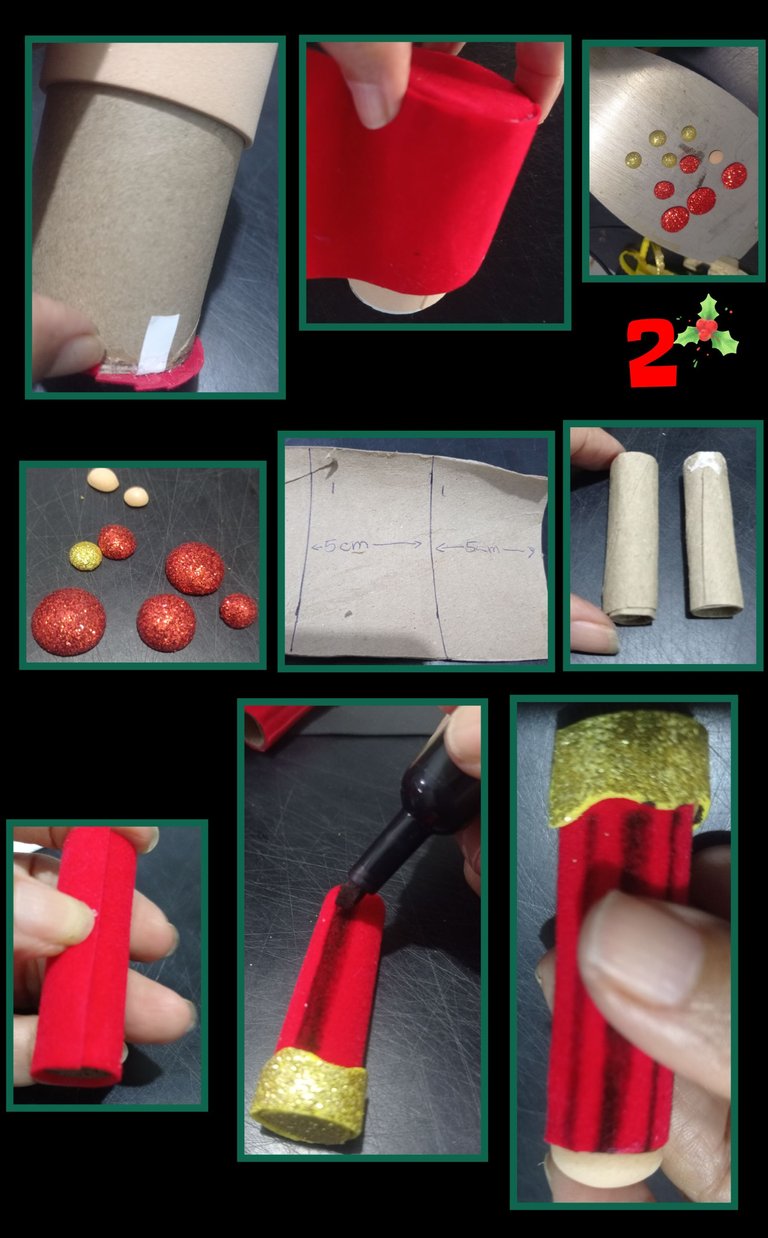
- Recorta un círculo en cinta de gamuza y pega a la base del tubo o cilindro y forra, luego aplica silicón por todo el contorno y forra el tubo.
- Aparte calienta la plancha y termoforma círculos dorados, piel y rojos.
- Luego marca en otro tubo los brazos que midan 5cms de alto, aplica silicón y forma los brazos.
- Luego forra con cinta roja y con marcador haz líneas en los brazos y luego pega tira de cinta de foami dorado y pega en uno de los extremos, luego pega en la parte de abajo las manitas.
Paso 3:
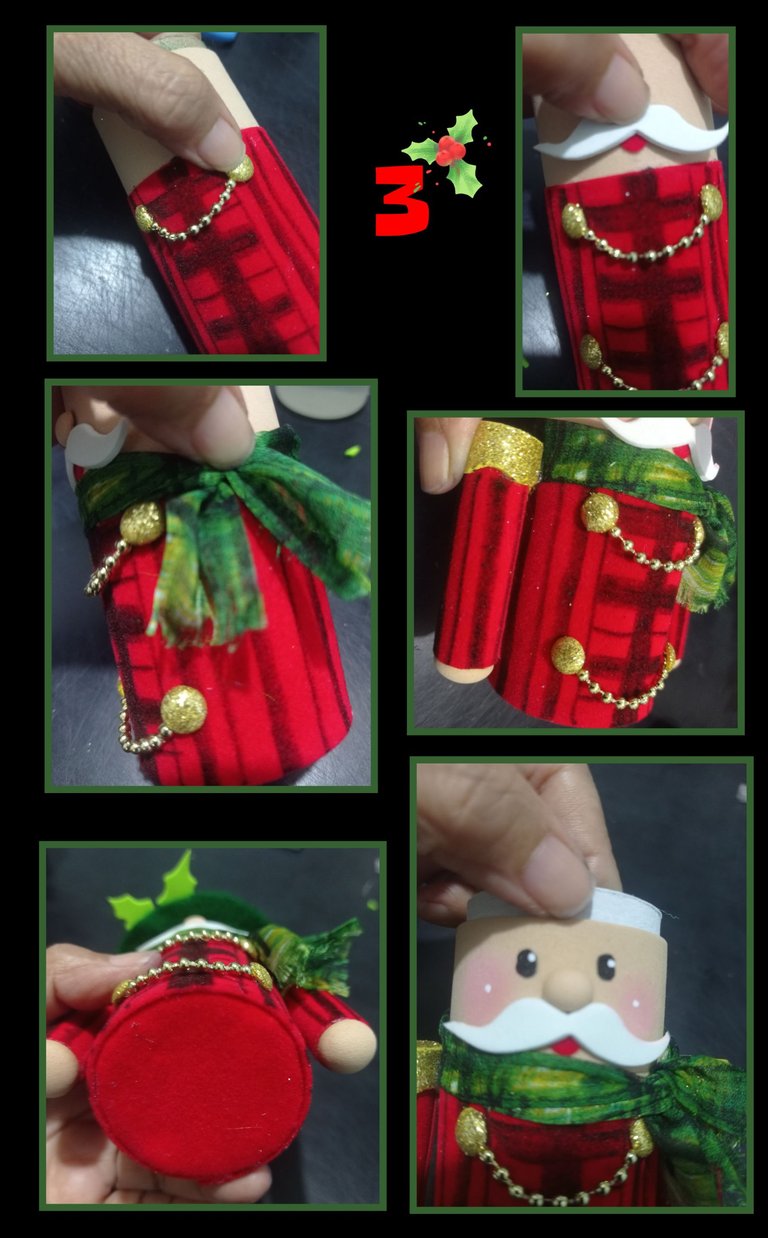
- Haz trazos con marcador sobre la cinta roja y luego adorna con perlitas doradas y pega a cada extremo botones de foami dorado.
- Recorta en foami blanco bigotes y una boquita y pega en la carita.
- Recorta una tira en tela y anuda a un lado haciendo una bufanda.
- Pega con silicón los brazos a cada lado.
- Revisa que todo vaya quedando con un buen acabado.
- Por último pega la nariz, pon un poco de color en las mejillas, pinta los ojos con la parte trasera de un pincel y pon unos puntos de luz en ojos y mejillas.
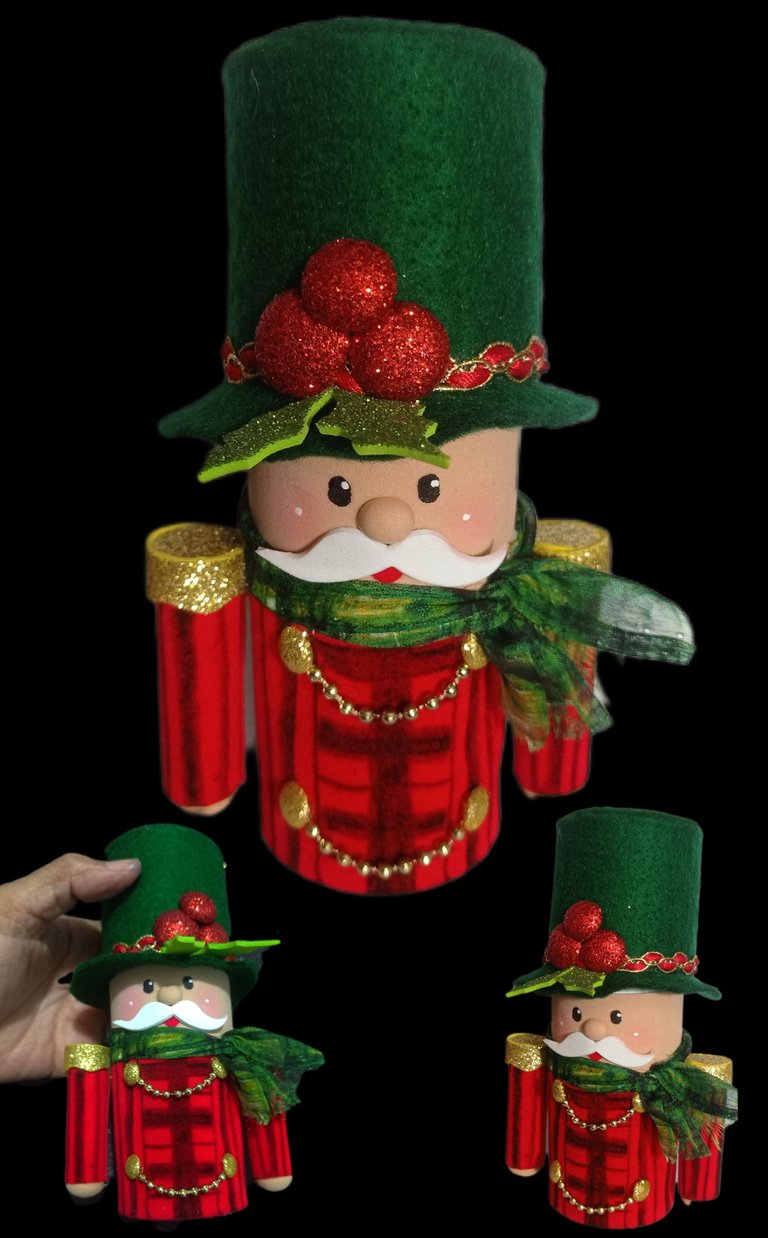
Este Lindo Adorno te puede servir para rellenar con lo que quieras!
Mi publicación esta traducida con DeepL
Las fotos las tomé con mi Redmi Note 9 y las edité con GridArt.
Ahora te mostraré otras fotos de mi trabajo, espero te gusten y te animes a realizarlo, claro está poniendo tu creatividad y usando los materiales que tengas a mano si son de reciclaje mejor!


Muchas gracias por tu apoyo.
Hasta mi próximo tutorial, saludos.


Greetings my creators and friends we share in this beautiful community.
Happy Tuesday!
So let's get started with the materials:

| Toilet paper tubes | Felt and chamois tape |
|---|---|
| Matte and frosted Foami | Gold embellishments |
| Paints and paintbrushes | Scissors |
| Pencil and marker | Plastic cup |
| Electric iron | Silicone |
Let's get started!
Step 1:

- Cut a 3 or 4cm strip of foami in skin color, then apply silicone and line the tube.
- For the hat use another cardboard tube, mark the desired size and cut out strips or triangles, apply silicone and glue them together as shown in the photo.
- Now glue a circle of green felt on the base and glue on the base, cut out a strip of green felt and glue all around the tube until the whole tube is covered.
- Then mark a large circle on the felt and cut out the edge and then the center to glue on the edge (see photo).
Step 2

- Cut out a circle in chamois tape and glue to the base of the tube or cylinder and line, then apply silicone all around and line the tube.
- Then heat the iron and thermoform gold, leather and red circles.
- Then mark on another tube the arms measuring 5 cm high, apply silicone and form the arms.
- Then cover with red tape and with marker make lines on the arms and then glue a strip of gold foami tape and glue on one of the ends, then glue the little hands on the bottom.
Step 3.

- Draw lines with marker on the red ribbon and then decorate with gold beads and glue gold foami buttons at each end.
- Cut out whiskers and a little mouth out of white foami and glue on the face.
- Cut a strip of fabric and tie a knot on one side to make a scarf.
- Silicone glue the arms on each side.
- Check that everything has a good finish.
- Finally glue the nose, put some color on the cheeks, paint the eyes with the back of a brush and put some light spots on the eyes and cheeks.

This Cute Ornament can be used to fill with whatever you want!
My post is translated with DeepL
I took the pictures with my Redmi Note 9 and edited them with GridArt.
Now I'll show you other photos of my work, I hope you like them and I encourage you to make it, of course putting your creativity and using the materials you have on hand if they are recycled better!


Thank you very much for your support.
Until my next tutorial, greetings.
Quedó muy lindo, podría llenarse de caramelos o chocolates y ser un hermosos detalle para regalar en navidad 🎄 👏🏻👏🏻
Hola amiga! gracias por comentar y sí, se presta para muchos usos y entre esos el que mencionas me encanta.
Saludos.
WOW! It looks great. It is incredible to see how you made this. It shows your talent. Great work! Thanks!
Muchas gracias @diyhub por tu apoyo y comentario.
Hermoso quedo ese muñeco cascanueces me encanta los colores
Muchas gracias amiga.
Me alegra te haya gustado.
Quedó precioso, me encantó 🥰🤶🏽
Muchas gracias amiga y que bueno que te gustó.
Hermosísimo!! Yo los he hecho con los envases de Springles, ese de papas. Quedan muy bonitos. Gracias por compartir idea. Saludos 🌹💐🌻🌷💐🌹
Buen día Antonia, muchas gracias por comentar y me alegra mucho que te gustó.
Y sí, esos cilindros sirven para hacer muchas manualidades.
Saludos y feliz miércoles.