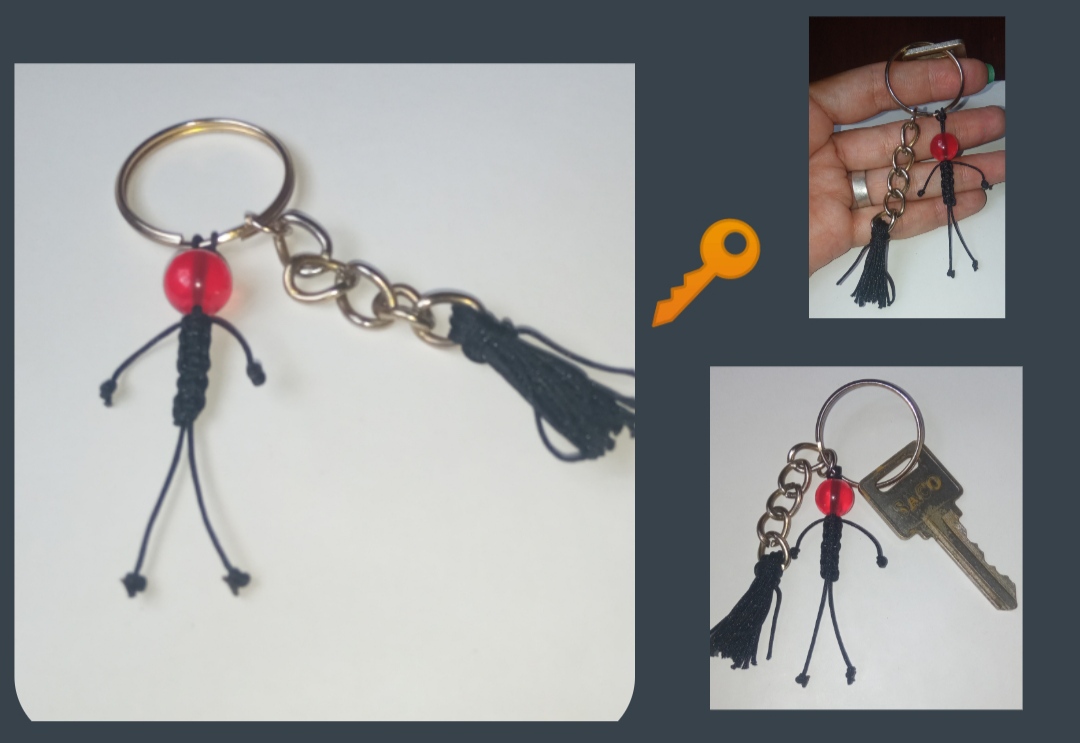
Feliz y bendecida para todos ustedes, es un gran gusto pasar por acá está noche para compartir con ustedes una idea muy fácil y Creativa de elaborar un hermoso llavero en casa, siempre tratamos de colocarles a nuestras llaves algún llavero para evitar perderlas fácilmente y para mantenerlas todas juntaas así que si desea una linda idea para elaborar tu propio llavero sin muchos gastos y a tu gusto y estilo está es una muy buena opción. Acá les comparto un Muy sencillo tutorial para que juntos Elaboremos este sencillo llavero.
Happy and blessed for all of you, it is a great pleasure to be here tonight to share with you a very easy and creative idea to make a beautiful keyring at home, we always try to attach a keyring to our keys to avoid losing them easily and to keep them all together, so if you want a nice idea to make your own keyring without much expense and to your liking and style, this is a very good option.
Here I share a very simple tutorial so that together we can make this simple keychain.
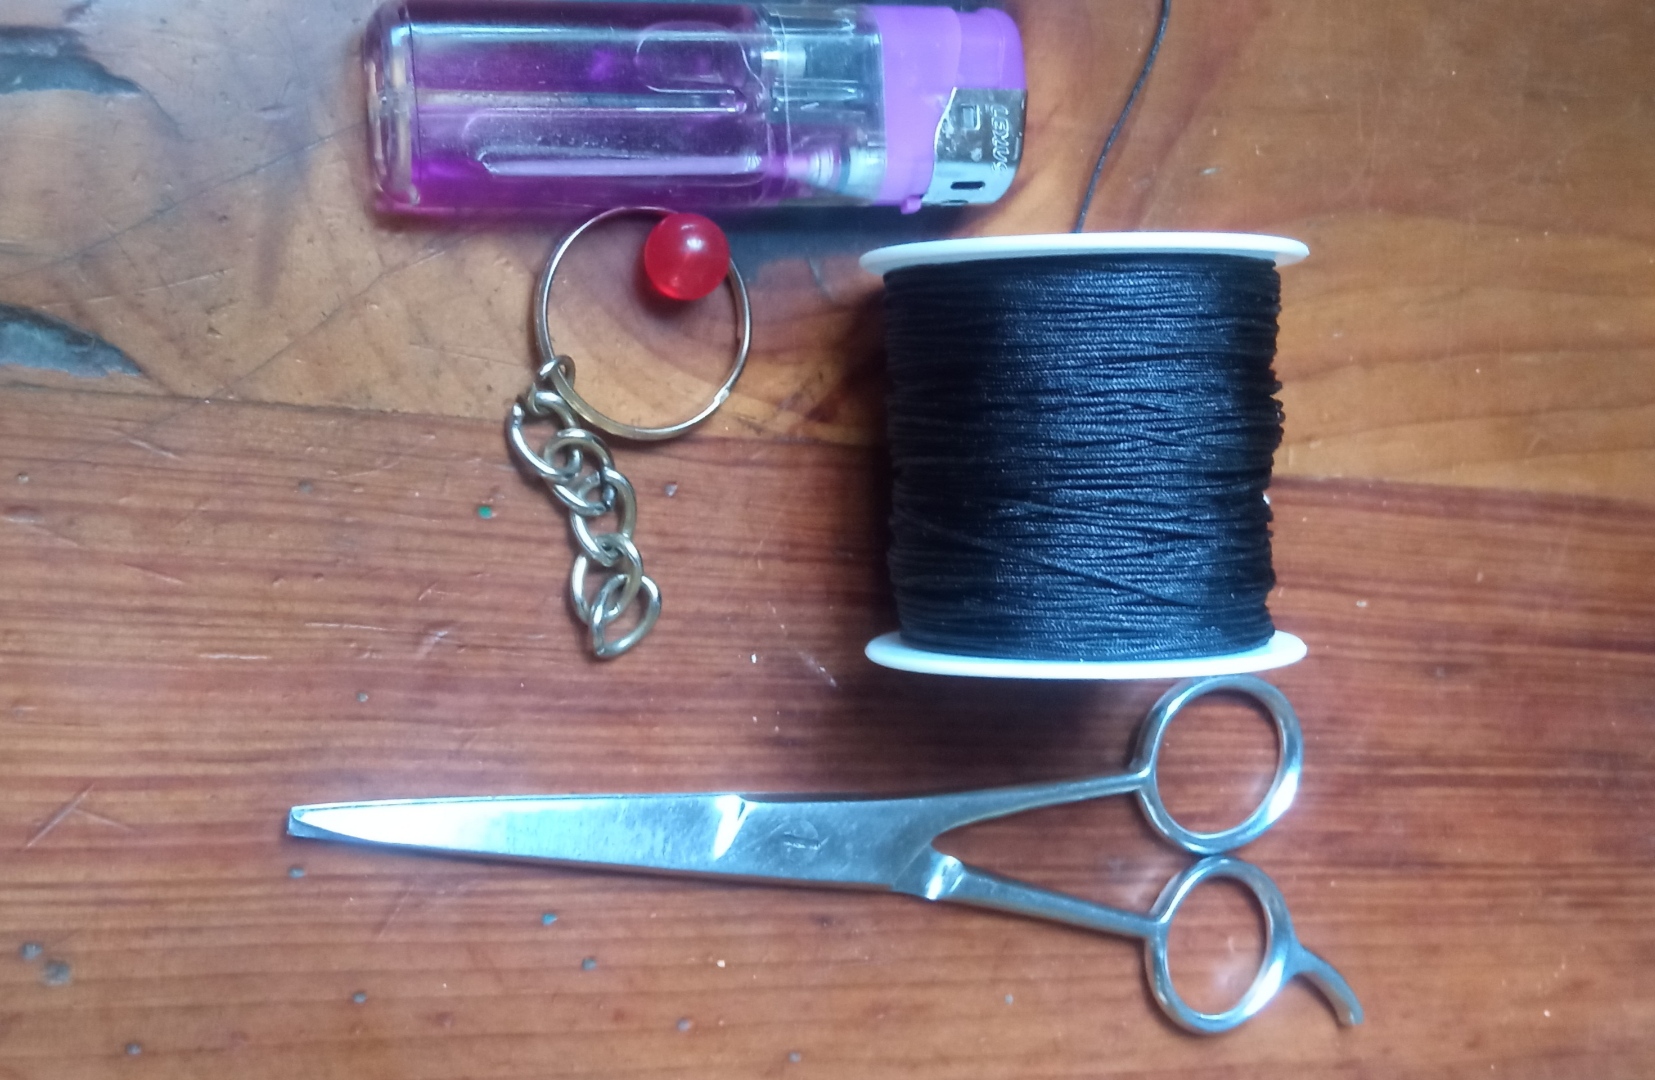
- Hilo chino color negro.
- piedra de bisutería redonda
- argolla de llavero.
- tijera.
- yesquero.
- Black Chinese thread.
- round jewelery stone
- key ring.
- scissors.
- tinderbox
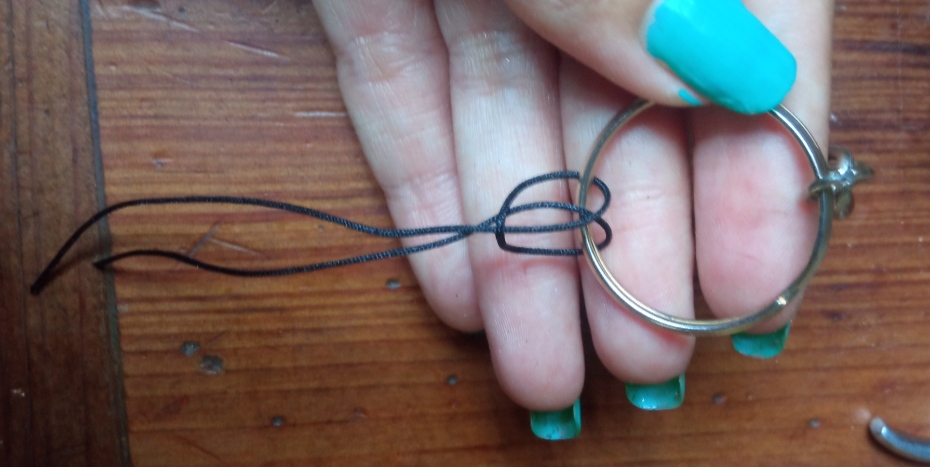
✴️ Paso 1: para iniciar esta elaboración primeramente tomamos el hilo chino y cortaremos un pedazo de 16cm aproximadamente, el cual doblaremos a la mitad y sujetaremos a la base es decir la argolla de llavero para ello realizamos un nudo sencillo Introduciendo las dos puntas del hilo por el dobles del mismo y jalando las puntas para sujetarlo bien a la base.
✴️ Step 1: to start this elaboration, we first take the Chinese thread and cut a piece of approximately 16cm, which we will fold in half and fasten to the base, that is, the key ring, for this we make a simple knot, introducing the two ends of the thread through the double ends of it and pulling the ends to hold it well to the base.
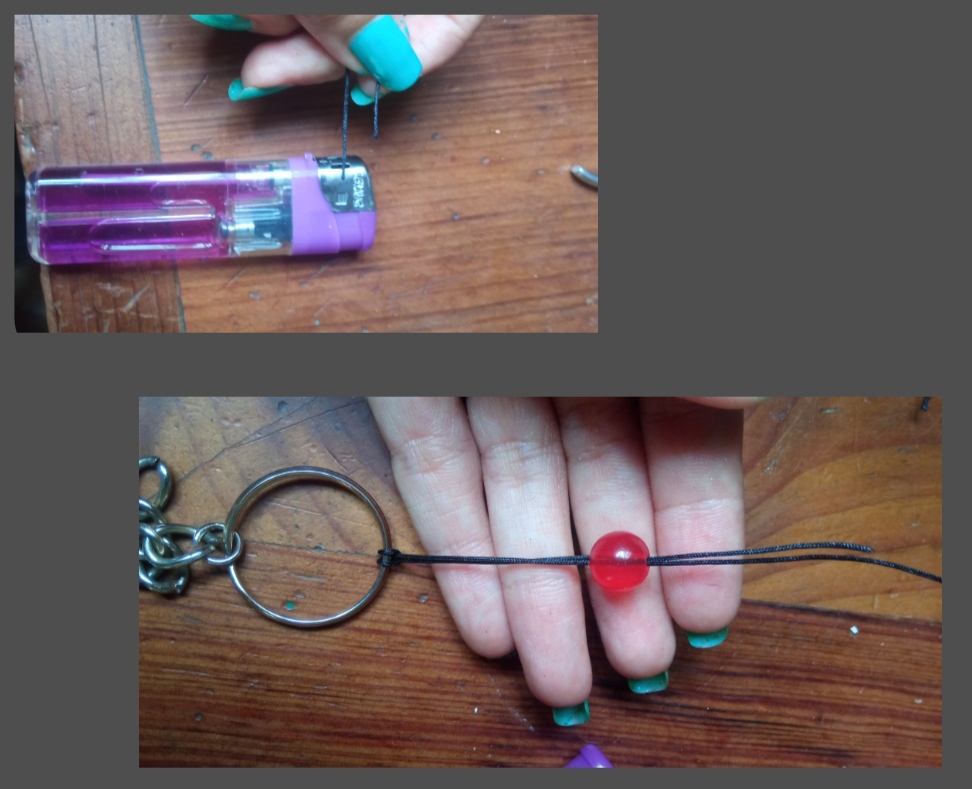
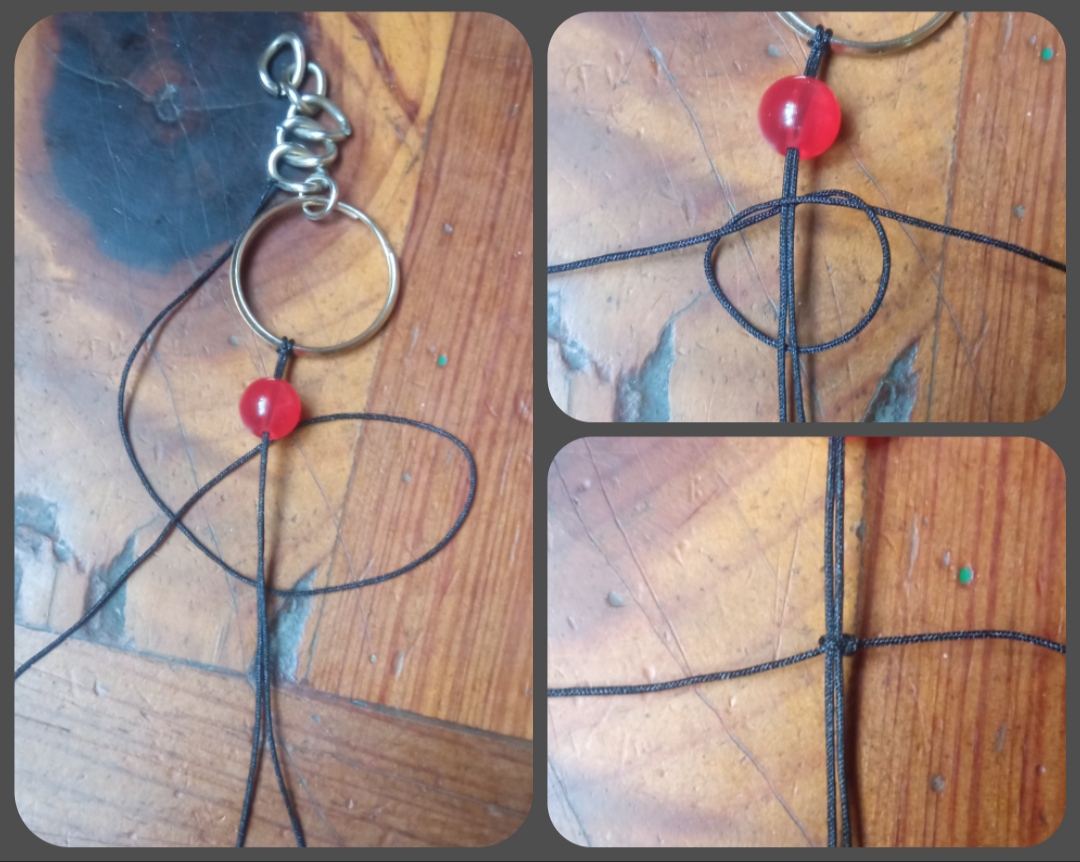
✴️ Paso 2: Seguidamente con el yesquero quemamos un poco las puntas del hilo e Introducimos por ambas la piedra de bisutería y la llevamos a la parte superior del hilo, hasta pegar de la base.
Luego cortaremos otro pedazo de hilo chino y realizaremos un tejido con el mismo, colocamos el hilo que cortamos cruzando sus extremos elaborando una forma circular y encima colocaremos la parte de las dos tiras colgadas de la base, tomaremos el hilo que nos queda apuntando hacia arriba y lo pasamos por encima de las dos tiras largas u la Introducimos en el círculo y ahora jalamos poco a poco las dos puntas hasta que quede bien apretadito.
Esto trataremos de trealizarlo a la mitad del largo del hilo base.
✴️ Step 2: Then with the tinderbox we burn the ends of the thread a little and introduce the jewelry stone through both and bring it to the top of the thread, until it hits the base.
Then we will cut another piece of Chinese thread and weave with it, we place the thread that we cut crossing its ends, making a circular shape and on top we will place the part of the two strips hanging from the base, we will take the thread that remains pointing upwards and we pass it over the two long strips or we introduce it in the circle and now we pull the two ends little by little until it is very tight.
We will try to do this at half the length of the base thread.
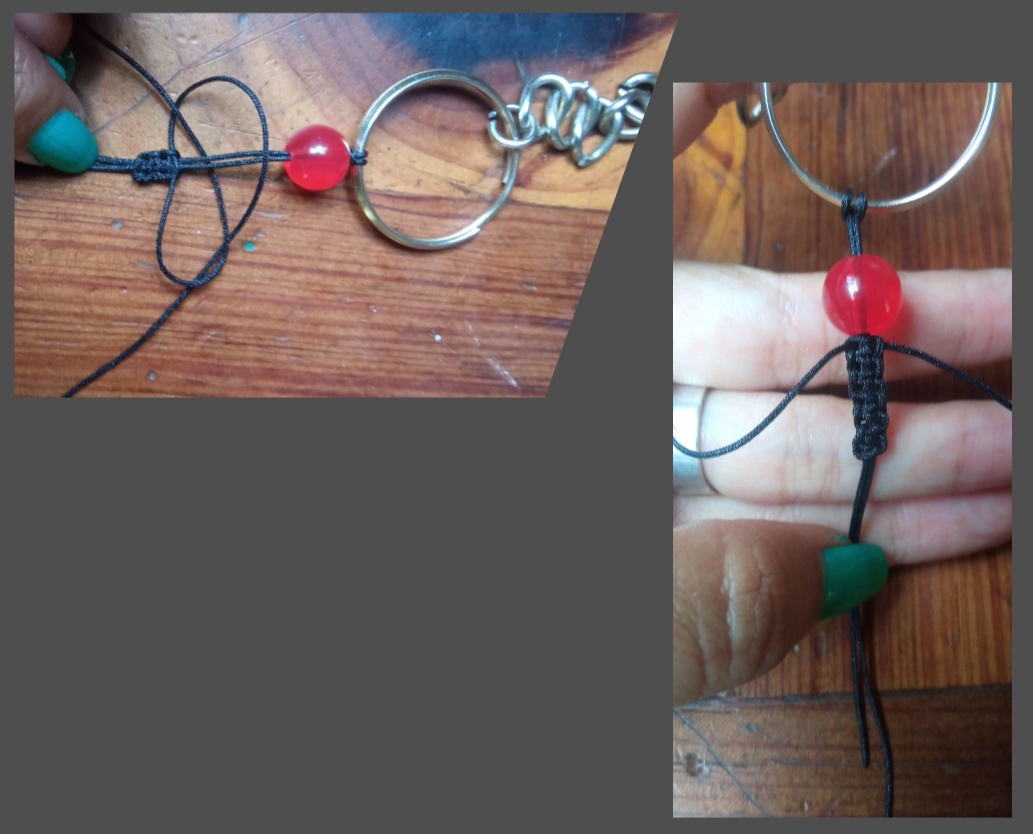
✴️ Paso 3: continuamos este proceso de tejido de abajo hacia arriba a a dónde está la piedra, en tejido será de unos 3 o 4 cm dependiendo del tamaño de nuestro pequeño muñequito y dejaremos las puntas largas pues está serán los brazos de nuestro pequeño hombrecito.
✴️ Step 3: we continue this weaving process from the bottom up to where the stone is, in weaving it will be about 3 or 4 cm depending on the size of our little doll and we will leave the long ends because these will be the arms of our little man.
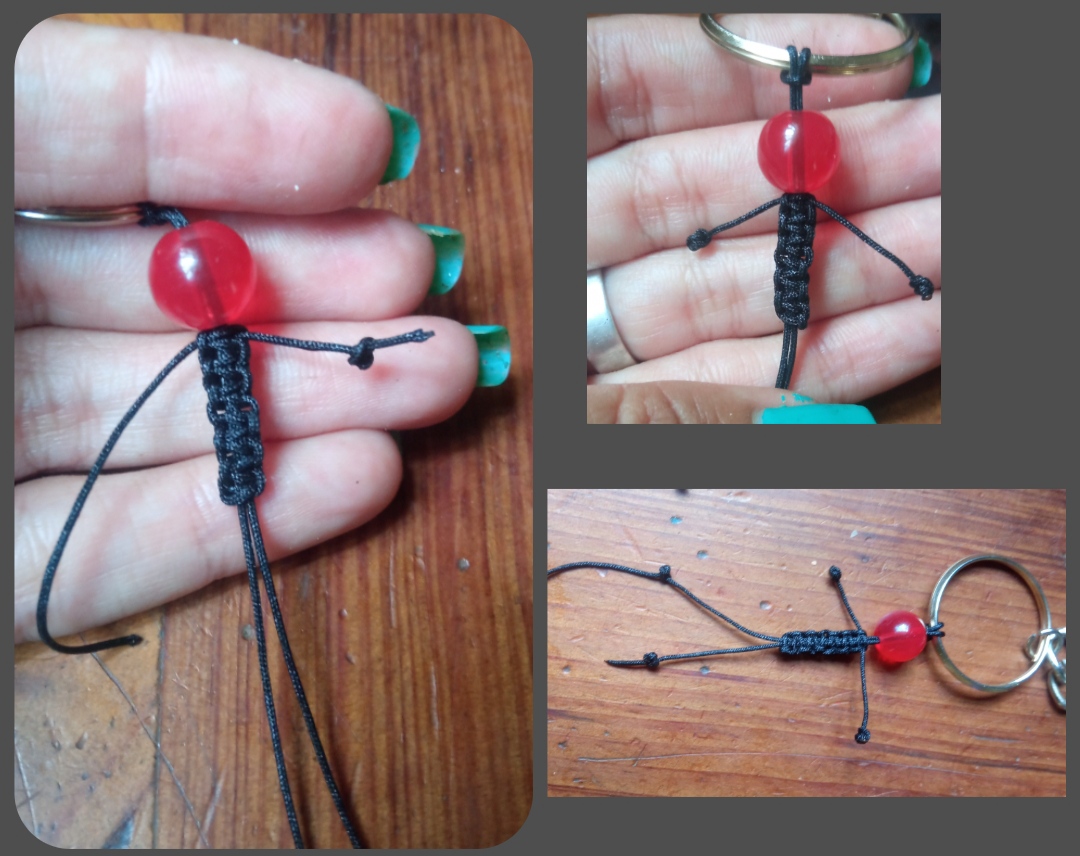
✴️ Paso 4: Luego medimos y elaboraremos un par de nudos, uno encima del otro en cada punta de estás tiras, cortamos el exceso y quemamos las puntas. Esto mismo lo elaboraremos en la parte de abajo en las dos tiras colgantes realizaremos un par de nudos en cada punta y allí tenemos un pequeño muñequito.
✴️ Step 4: Then we measure and make a couple of knots, one on top of the other at each end of these strips, we cut the excess and burn the ends.
We will make this same thing in the lower part in the two hanging strips we will make a couple of knots at each end and there we have a small doll.
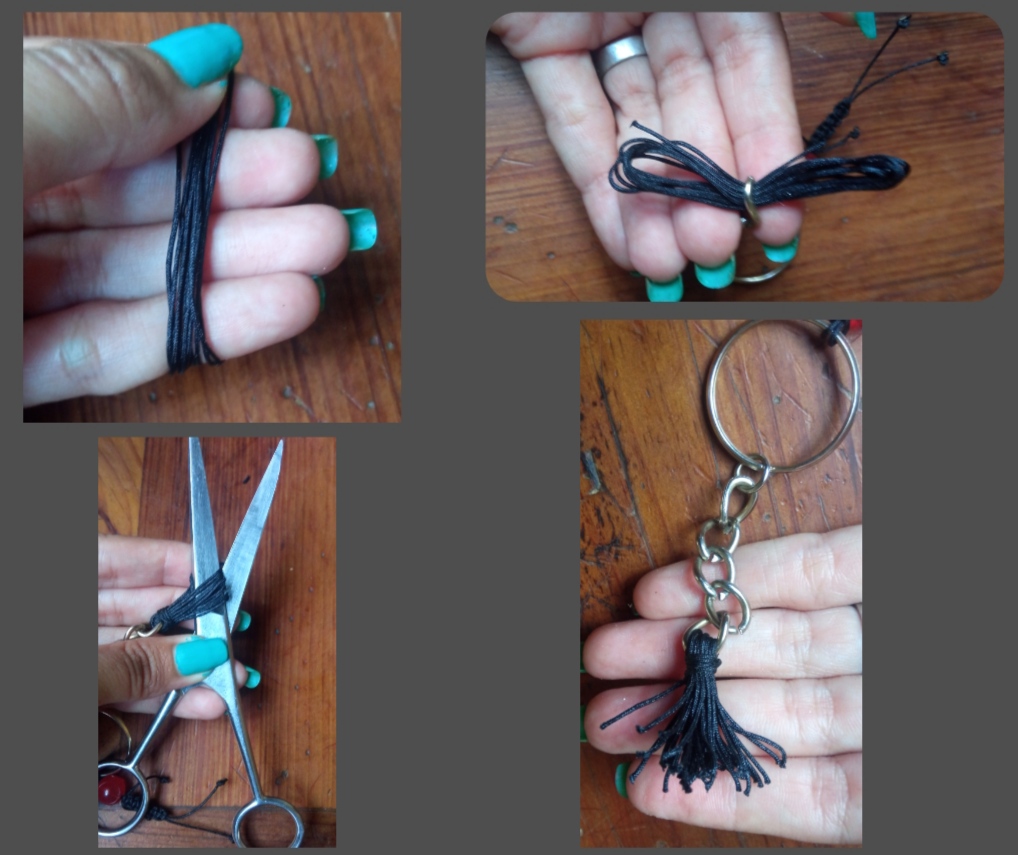
✴️ Paso 5:como último paso elaboraremos un pequeño pomponcito de hilo chino, por ello tomé en hilo chino y me lo enrrollare alrededor de tres de mis dedos al dar 15 vueltas cortamos. Ahora sacamos la forma la Introducimos en por la última argolla de la cadenita en el llavero y con un pedacito de hilo enrrollamos par sujetar los hilos unidosy realizamos par de nudos y ahora cortamos los dobles realizando puras puntas en los hilos y así nos quedó e pequeño pomponcito.
✴️ Step 5: as the last step we will make a small Chinese thread pom-pom, so
I took Chinese thread and I will wrap it around three of my fingers by cutting 15 turns.
Now we take out the shape We introduce it into the last ring of the chain on the key chain and with a little piece of thread we wind up to hold the threads together and we make a couple of knots and now we cut the double ones making pure ends in the threads and that is how we have the little pompom.
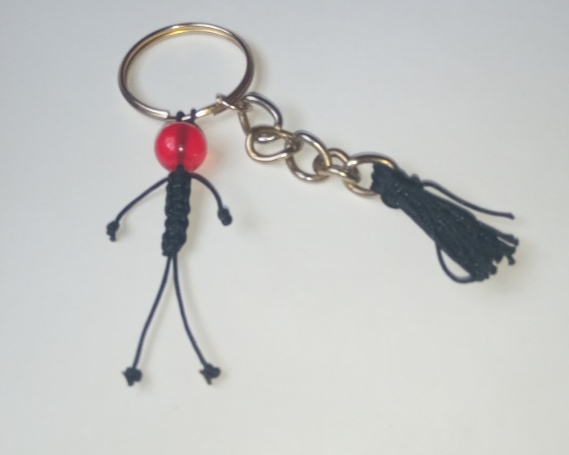
Todas las Fotos son de mi autoría y fueron tomadas con mi Celular Redmi 9And so we made a very creative and eye-catching keychain, I invite you to imagine and create, without fear.
Dear friends, I hope that this idea is to the liking of all of you, I say goodbye until a new opportunity.
Greetings and blessings.
All Photos are my authorship and were taken with my Redmi 9 Cellphone
Me encantó ese llavero, es un detalle muy bonito y práctico de hacer. Parece que fuera un hombrecito andando. Se ve cuchi 🤗 saludos @emmaris
Gracias me alegra que te haya gustado 😊
That's a stickman keychain, xd. Nice look
Thank you very much, I'm glad you like it.