Hello friends, I hope you are well, a few days ago I shared a short video where I explained the process to make a Tripod that can be used for photography, lighting and also for art, but in the video I only explained how to make it. the tripod but I did not explain how to make the head, which is very important, since if I had done it the video would have been longer. So on this occasion I want to share the step by step in a very easy way how I made this important instrument that is now part of my life to be able to make my creations. Let's get started.
Hola amigos, espero que se encuentren muy bien, hace días atrás compartí un video en forma de corto donde explicaba el proceso para hacer un Trípode que se puede utilizar para fotografía, para iluminación y también para arte, pero ene se video solo expliqué como hacer el trípode pero no expliqué como hacer el cabezal, que es muy importante, ya que si lo hubiera hecho el video me hubiera quedado más extenso. Así que en esta oportunidad quiero compartir el paso a paso de una manera muy fácil como hice este importante instrumento que ahora forma parte de mi vida para poder hacer mis creaciones. Comencemos.

|  | |
|---|---|---|
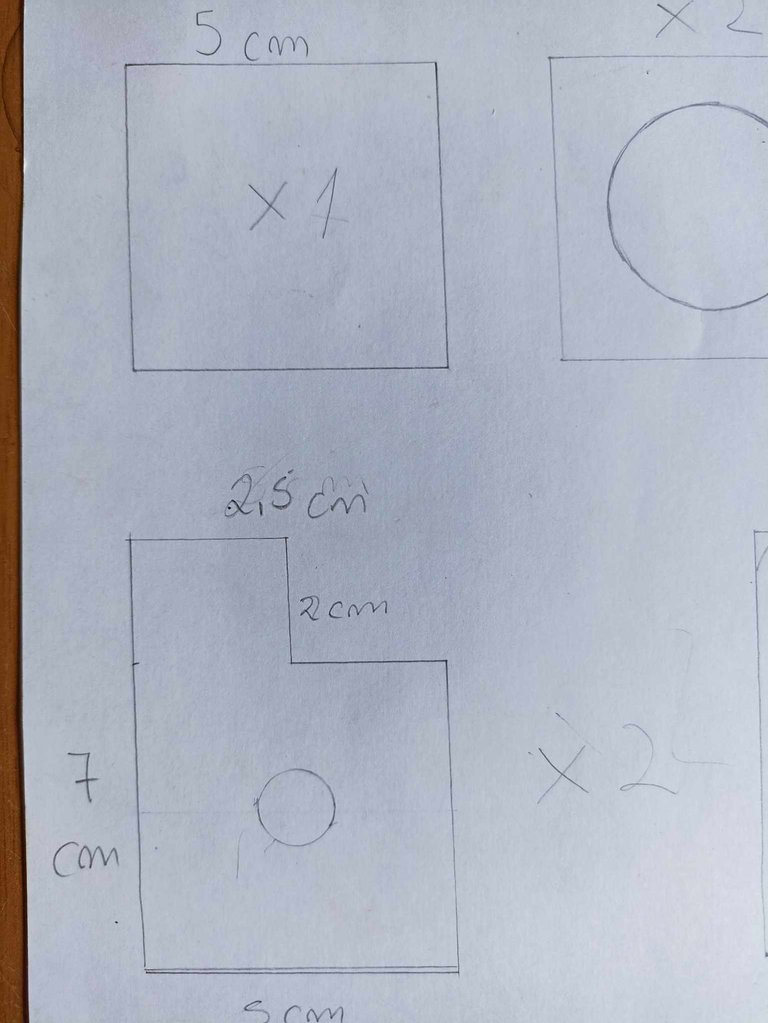 | 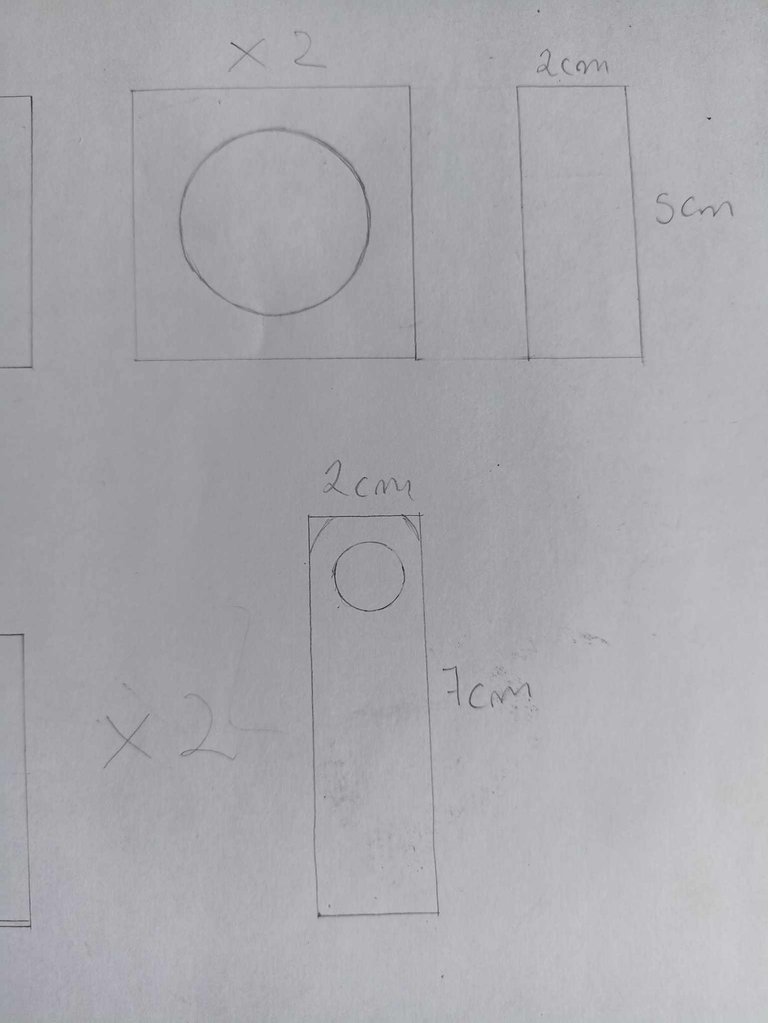 |
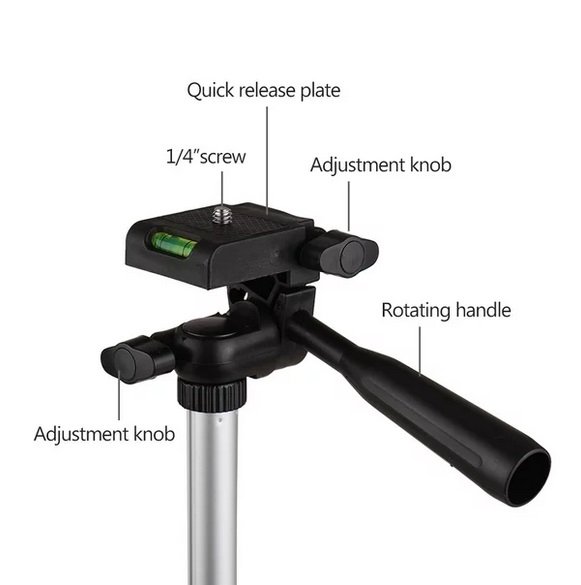
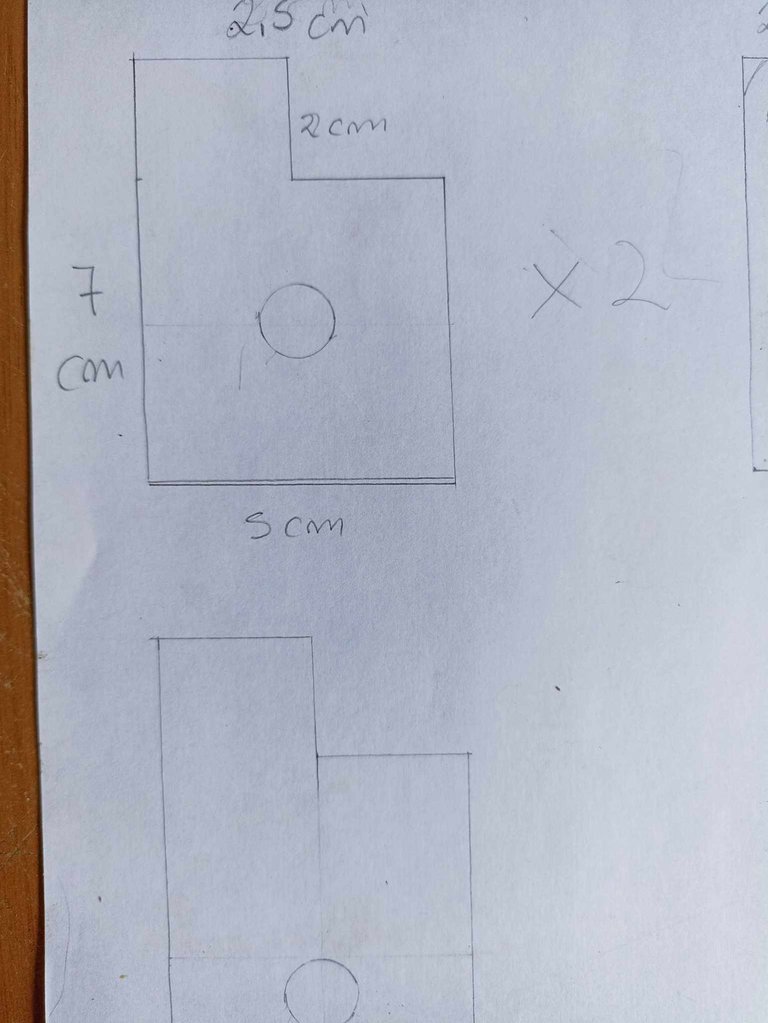
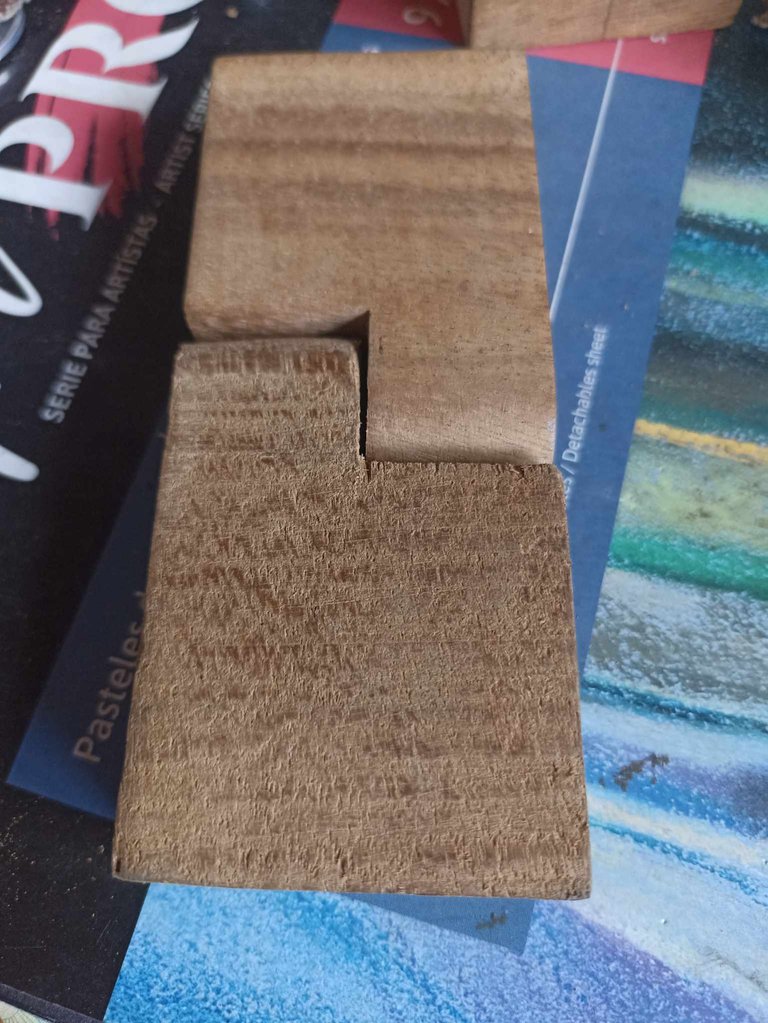
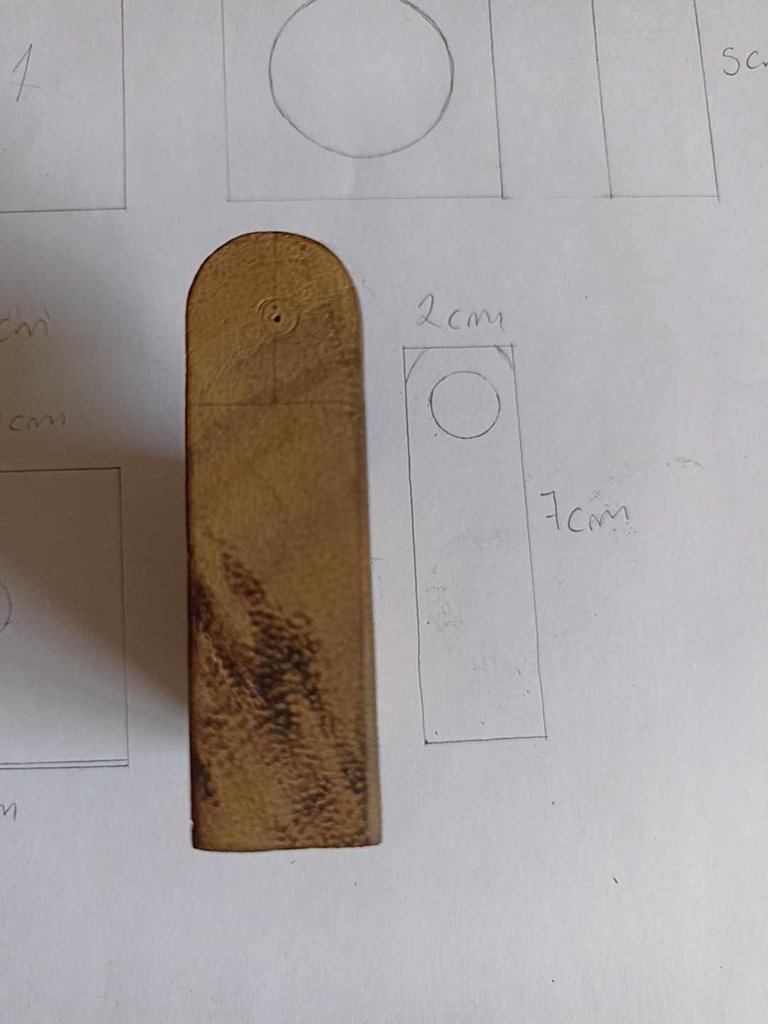
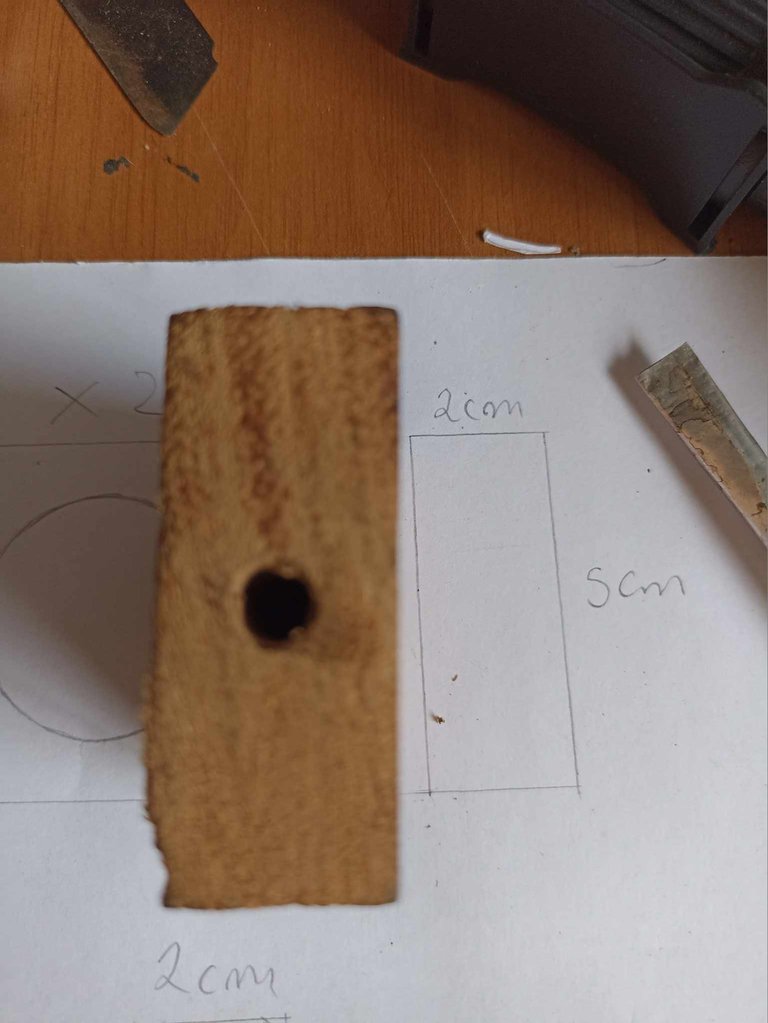
To make the wooden head I took as a reference a Chinese brand head model 3110, which is a model for cell phones, but can be used for cameras, and if the dimensions are increased it can be used for an art easel, which was what which I ultimately did. Having the reference I made the plans that consist of five parts: 3 wooden squares that measure 5 centimeters on all four sides and are 2 centimeters thick. The other two pieces measure 7 centimeters long by 5 centimeters wide, and also 2 centimeters thick. I will make 2.5 centimeters short cuts on the last two pieces, that is, in half, since I will turn them into hinges that can be moderated, and in the middle of those cuts there will be two holes. I will make some holes in the 3 5 centimeter pieces, one 2.5 centimeters to be able to insert the central tube of the tripod, while the other will not have a hole, as we will see below.
Para hacer el cabezal de madera tomé como referencia un cabezal de marca china modelo 3110, que es un modelo para celular, pero que puede ser usado para cámaras, y si se le aumentan las dimensiones puede usarse para un caballete de arte, que fue lo que hice en última instancia. Al tener la referencia hice los planos que constan de cinco partes: 3 cuadros de madera que miden 5 centímetros por sus cuatro lados y de 2 centímetros de grosor. Las otras dos pieza miden 7 centímetros de largo por 5 centímetros de ancho, y también con un grosor de 2 centímetros. A dos últimas piezas les haré unos cortos de 2,5 centímetros, es decir a la mitad, ya que las convertiré un unas bisagras que se puedan mover, y en medio de esos cortes irán dos agujeros. A las 3 piezas de 5 centímetros les haré unos hoyos, uno de 2,5 centímetros para poder introducir el tubo central del trípode, mientras que la otra no tendrá agujero, como veremos a continuación.
 |  |  |
|---|---|---|
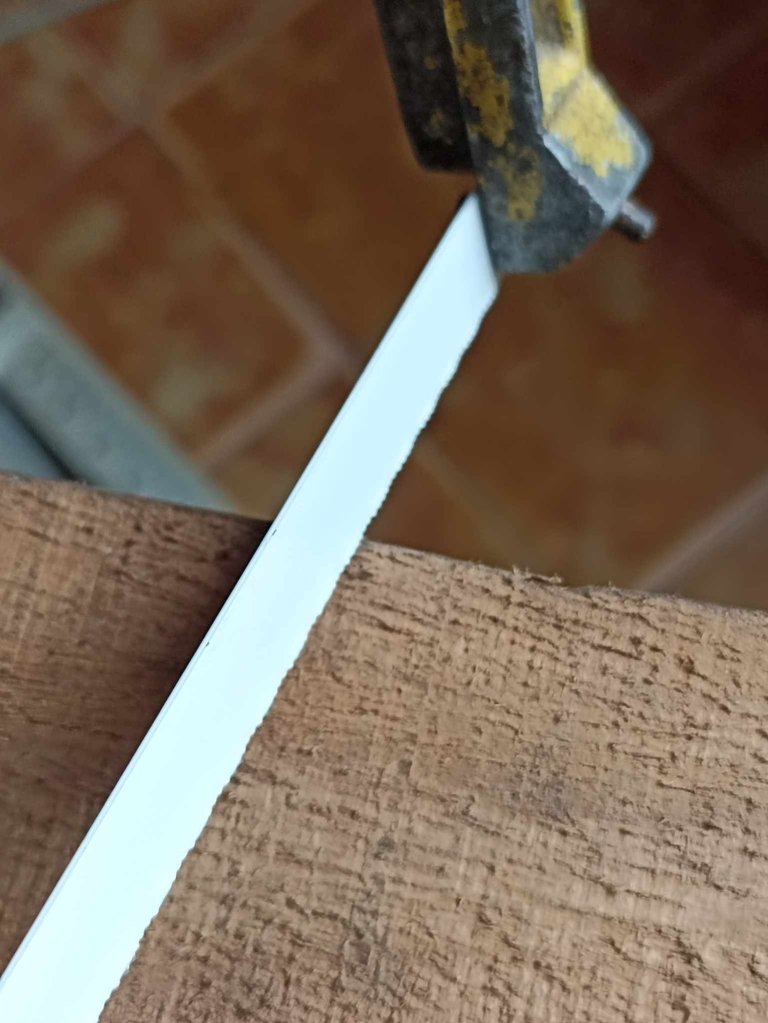 |  |  |
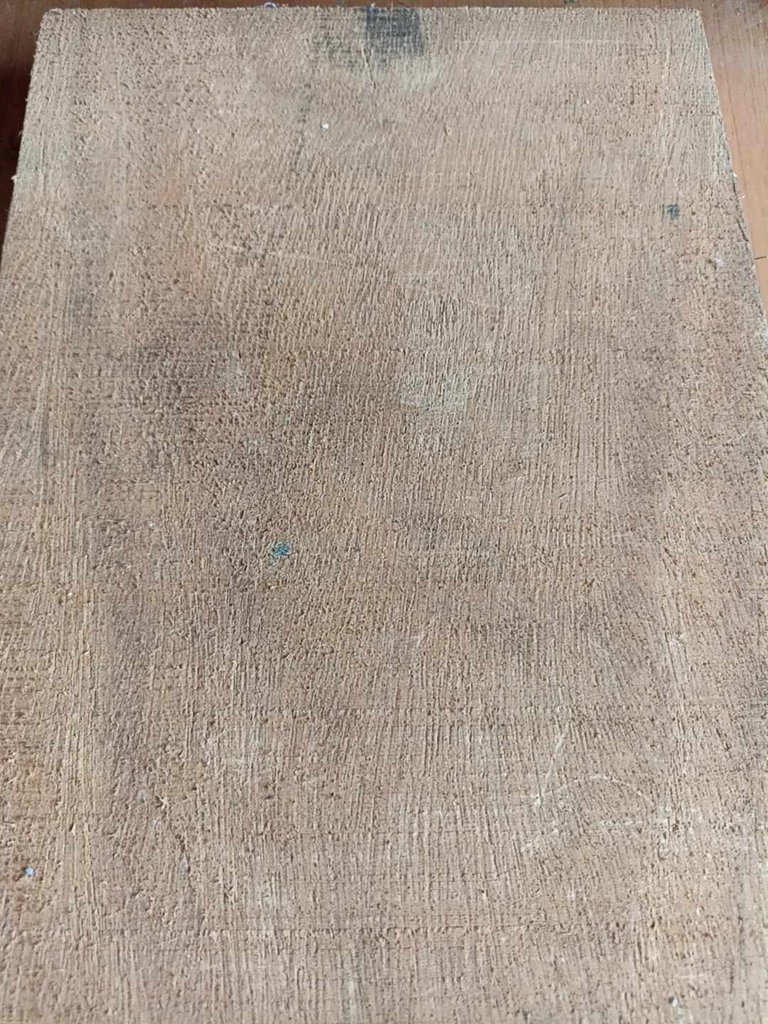
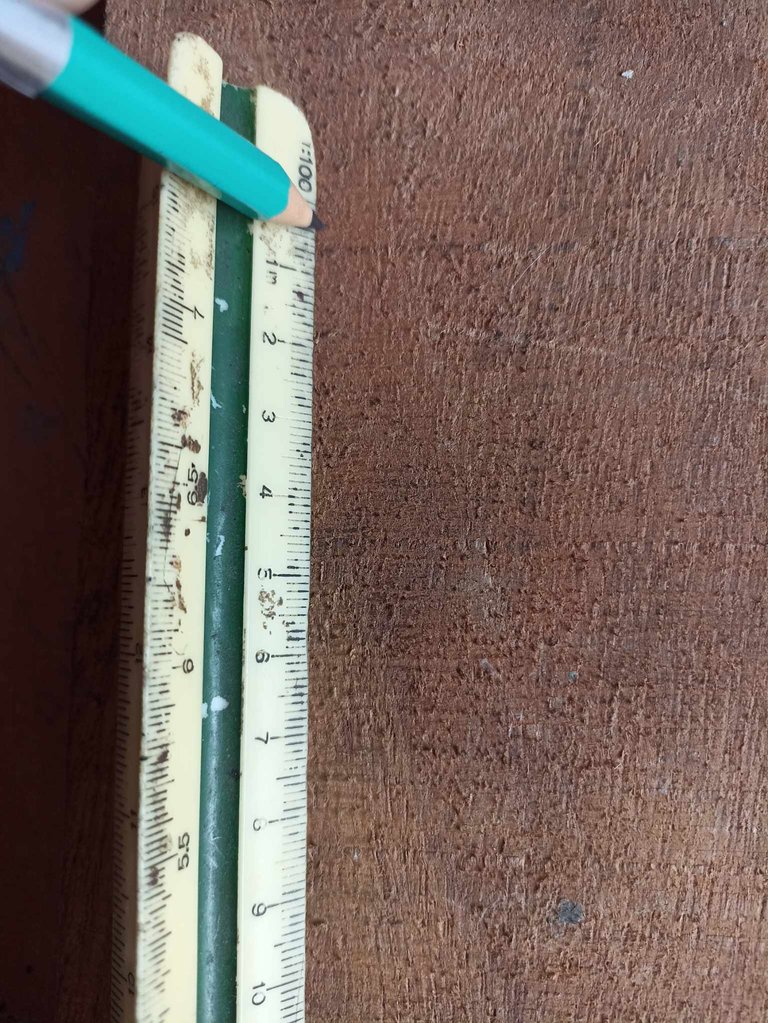
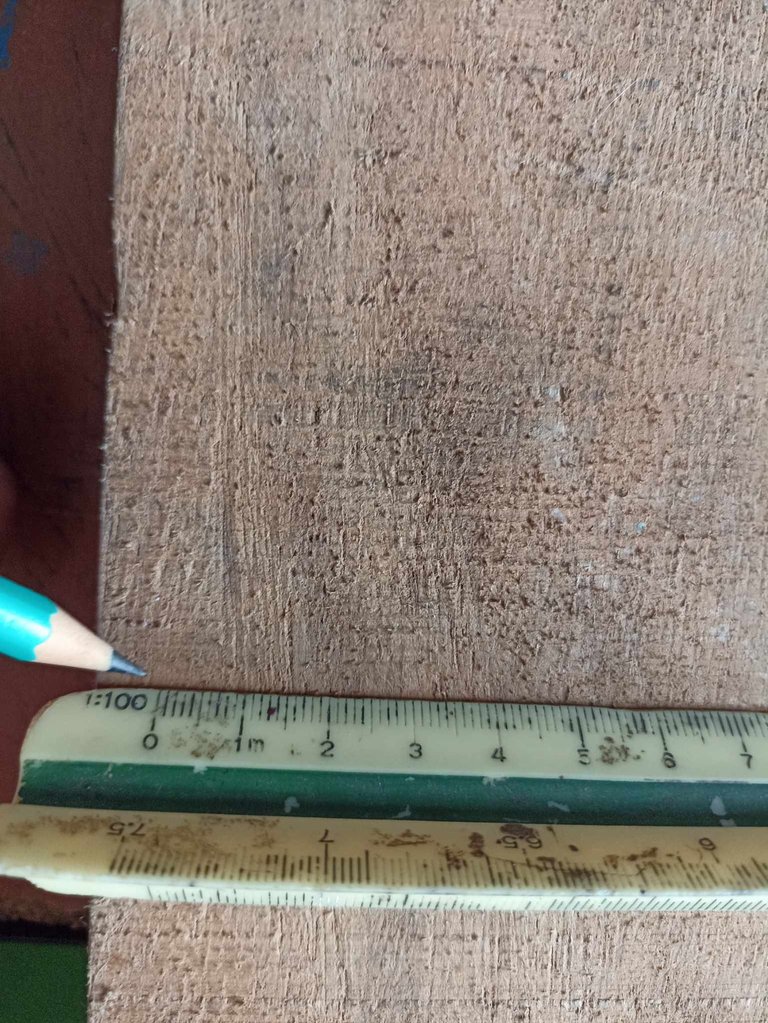
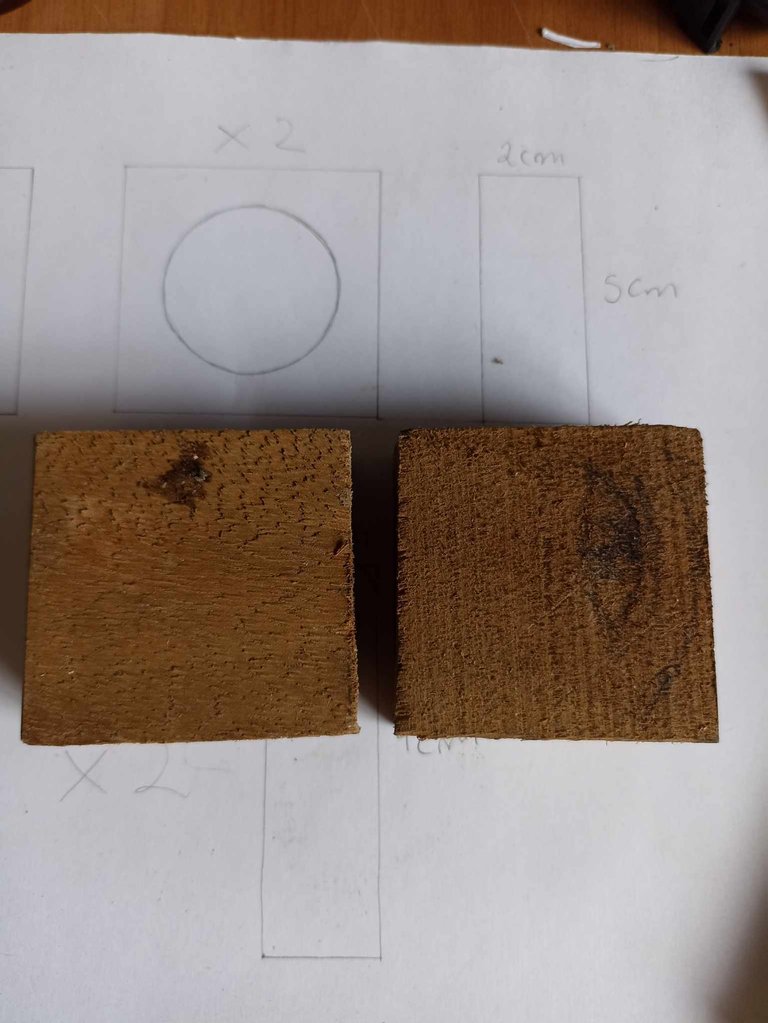
I found a piece of wood that was in very good condition, I made the measurements according to the plans I drew and began to cut each piece one by one. Using a saw I took out each and every one of the 5 pieces to use, then I began to sand them and mark the places where I was going to drill to make the holes.
Me encontré un retazo de madera que estaba en muy buen estado, hice las medidas segun los planos que dibujé y comencé a cortar una por una cada pieza. Utilizando una sierra fui sacando todas y cada una de las 5 piezas a utilizar, luego las comencé a lijar y a marcar los lugares onde iba a perforar para hacer los agujeros.
 |  | |
|---|---|---|
 |  |
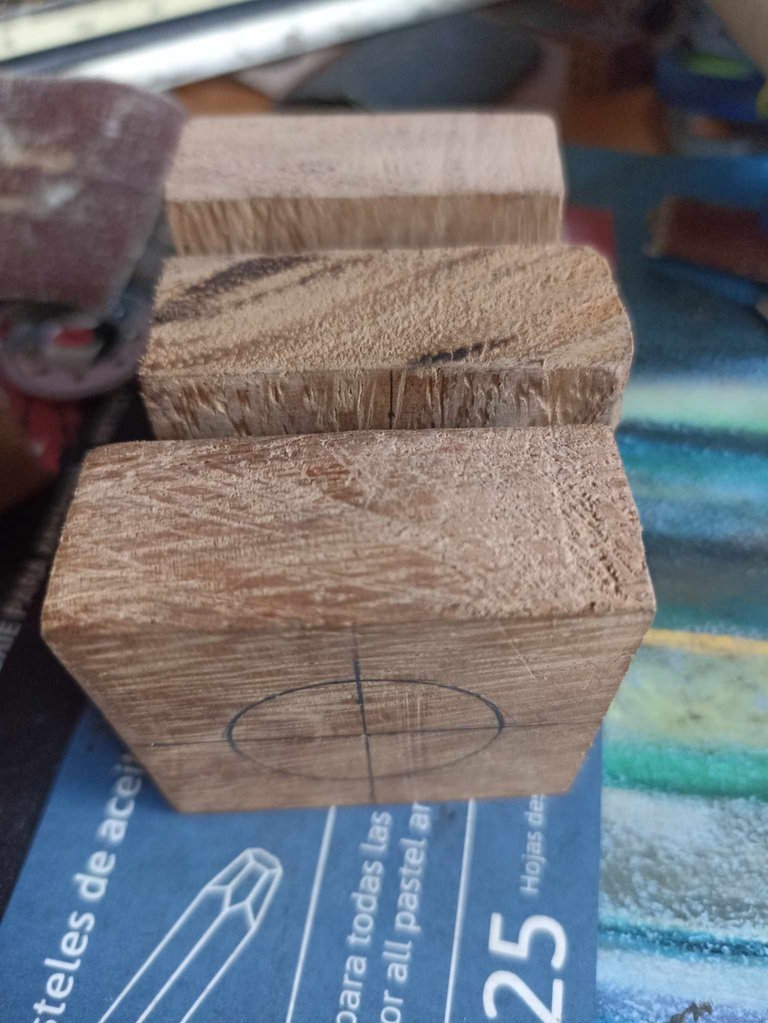
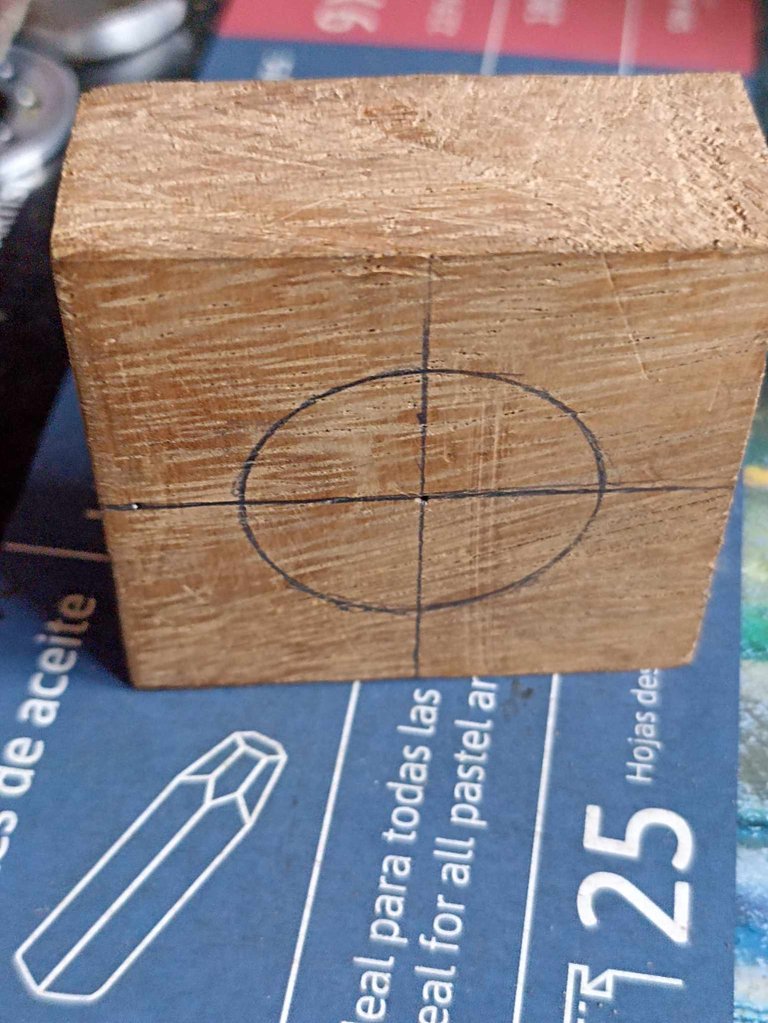
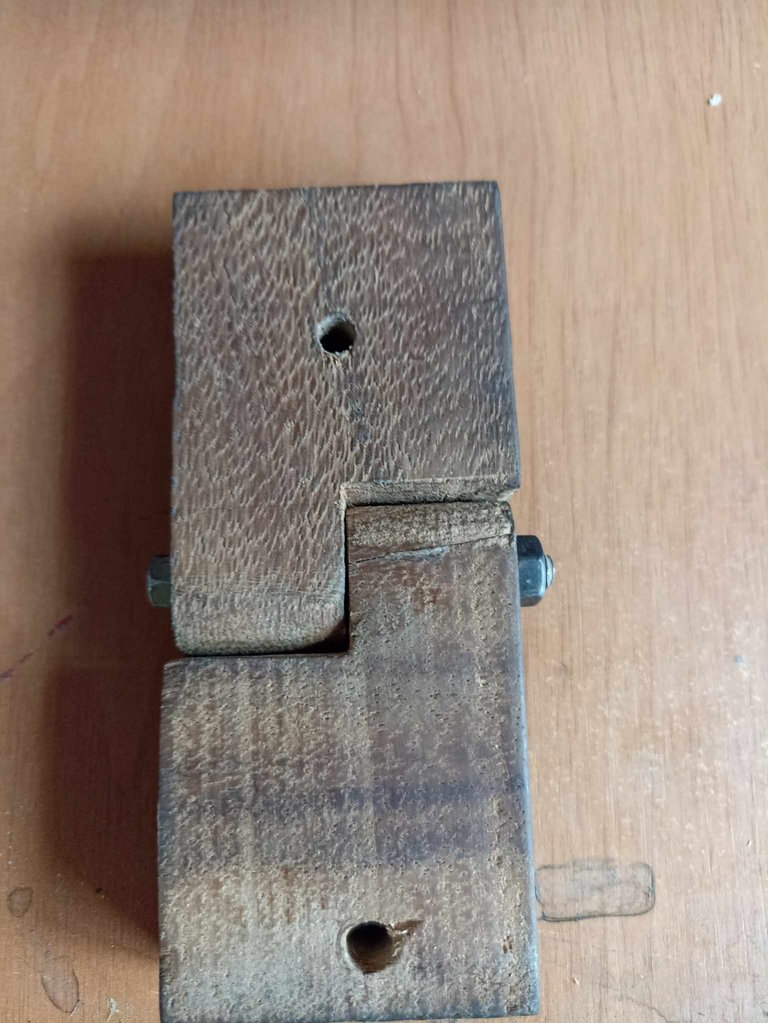
As I mentioned before, I made a mark on each piece, and then drilled and made the holes where the retaining screws will go that will allow the head to move. I made each hole so that the 1/4 diameter screws could fit in, which is the standard measurement used.
Como mencioné anteriormente, a cada pieza le hice una marca, para luego perforar y hacer los agujeros donde irán los tornillos sujetadores que permitirán el movimiento del cabezal. Cada agujero lo hice para que pudiera entrar los tornillos de 1/4 de diámetro, que es la medida standar que se utiliza.
 |  |  |
|---|---|---|
 | 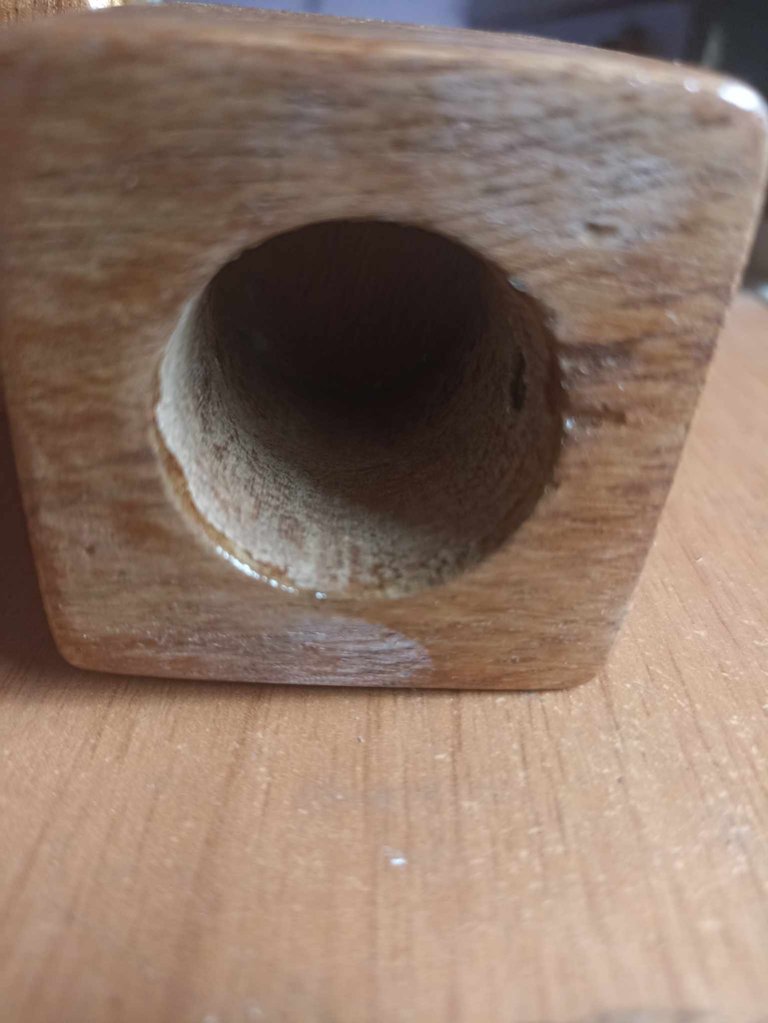 |  |
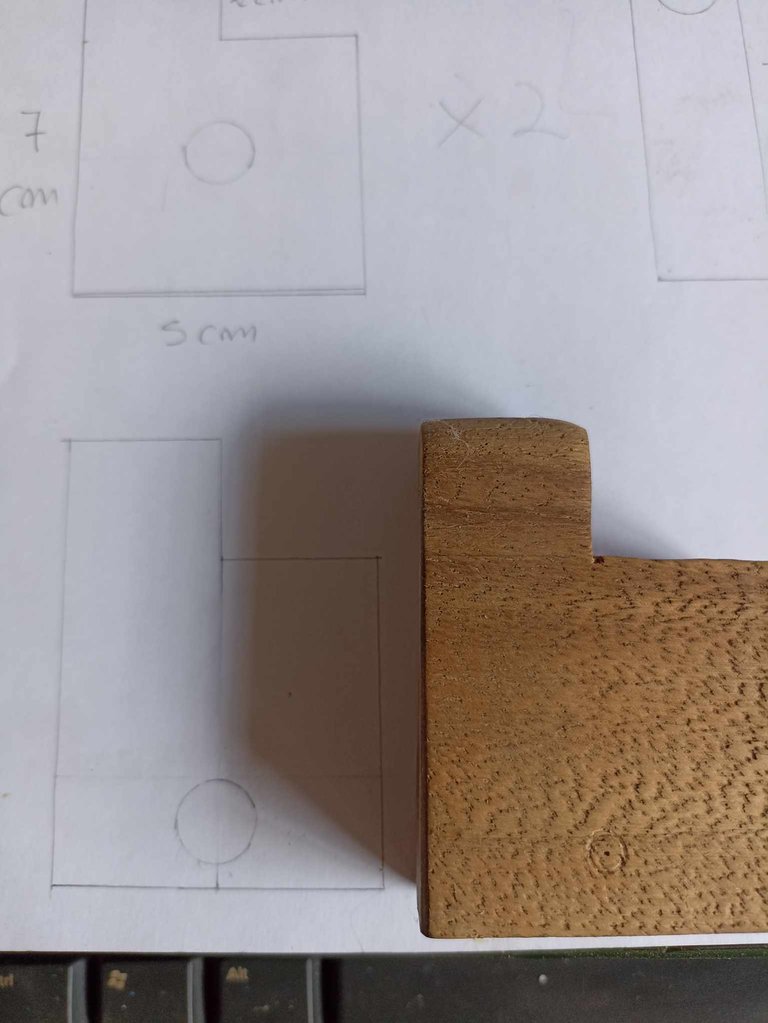
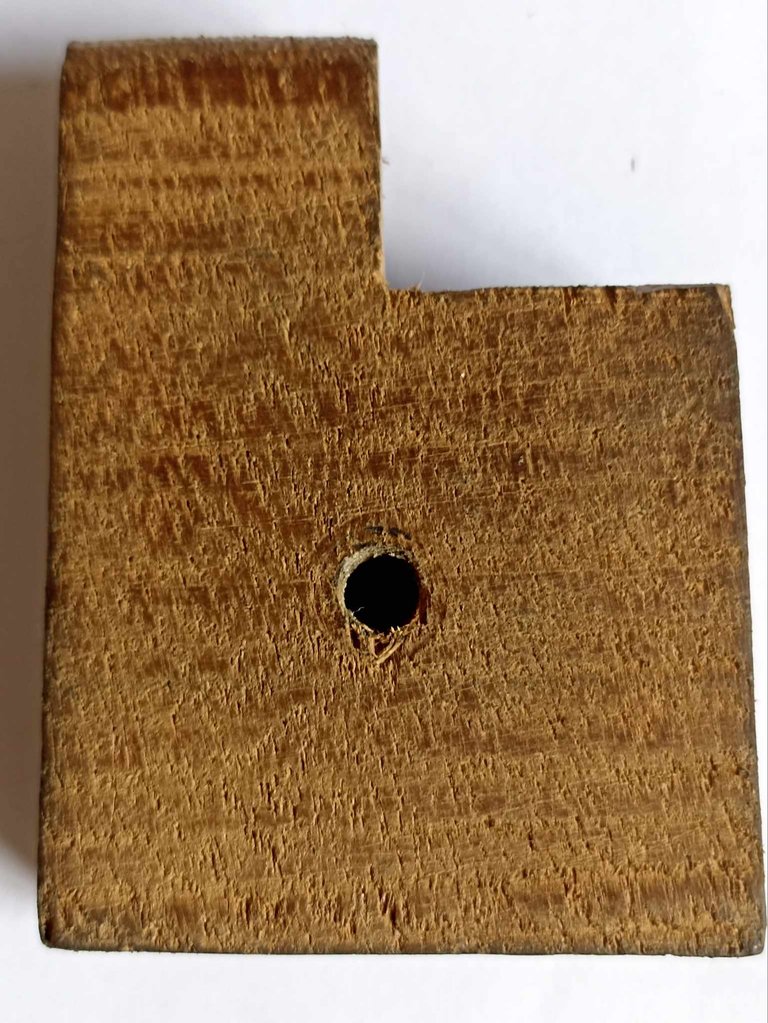
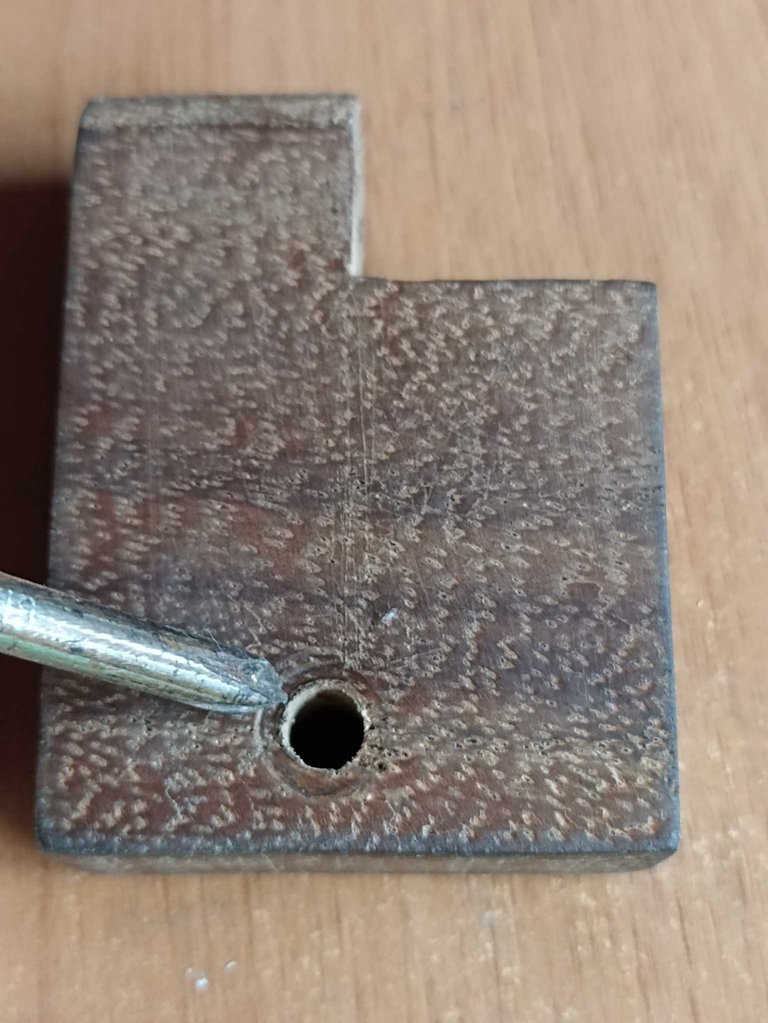
Using a drill, which I used very carefully because I don't have much experience, however they were well centered. I made each hole in the indicated place, but I went to a carpentry shop for the large holes so they could do it since another larger drill bit was needed. It should be noted that this large hole is made in two 5-centimeter squares, the other one is not. because it remains as the base of the head.
Utilizando un taladro, el cual usé con mucho cuidado porque no tengo mucha experiencia, sin embargo me quedaron bien centrados. Hice cada agujero en el lugar indicado, pero los agujeros grandes fui a una carpintería para que pudieran hacerlo ya que se necesitaba otra punta de taladro más grande, cabe aclarar que este hoyo grande dolo se hace en dos cuadros de 5 centímetros, el otro no porque queda como la base del cabezal.
 |  |  |
|---|---|---|
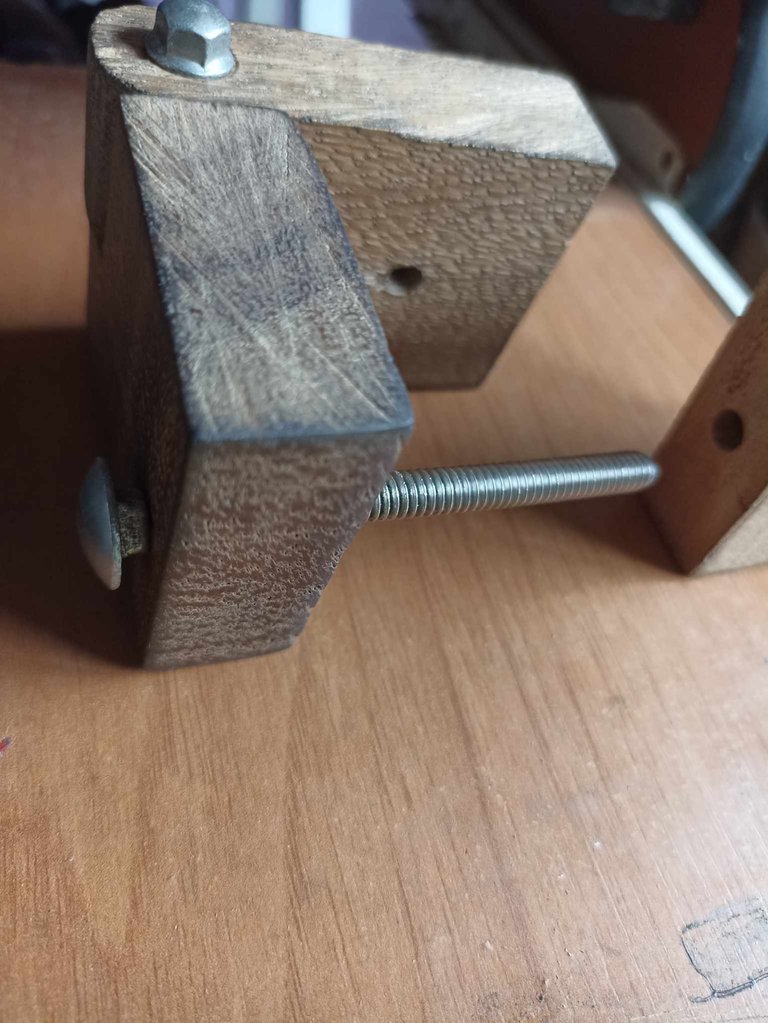 |  |  |
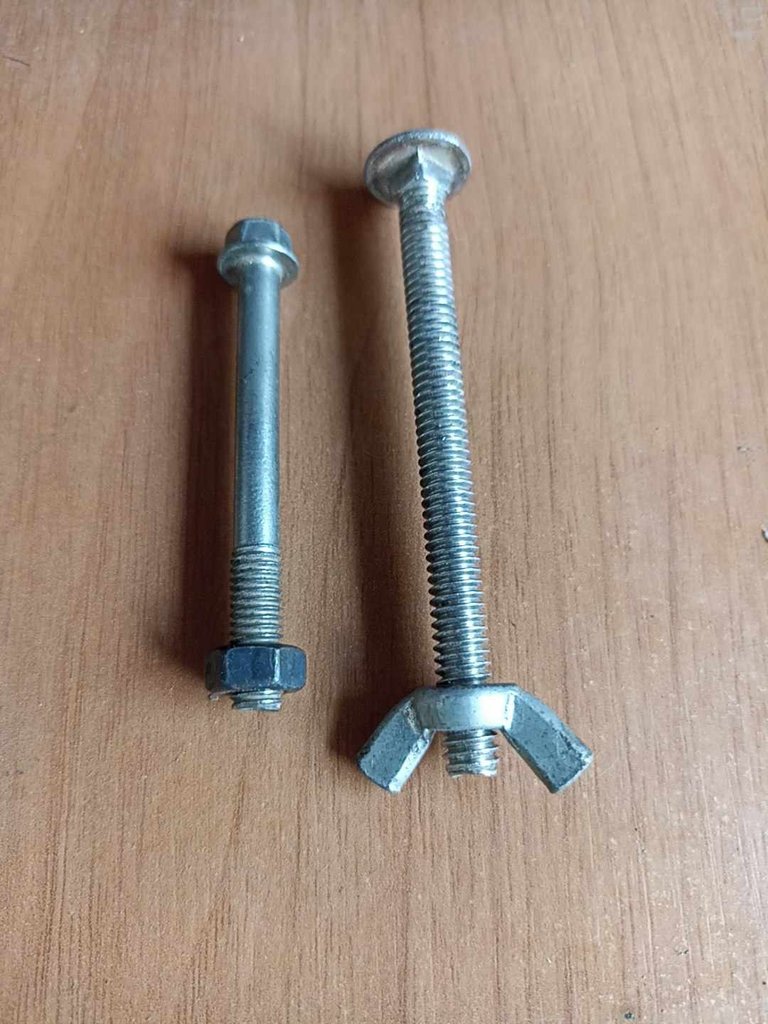
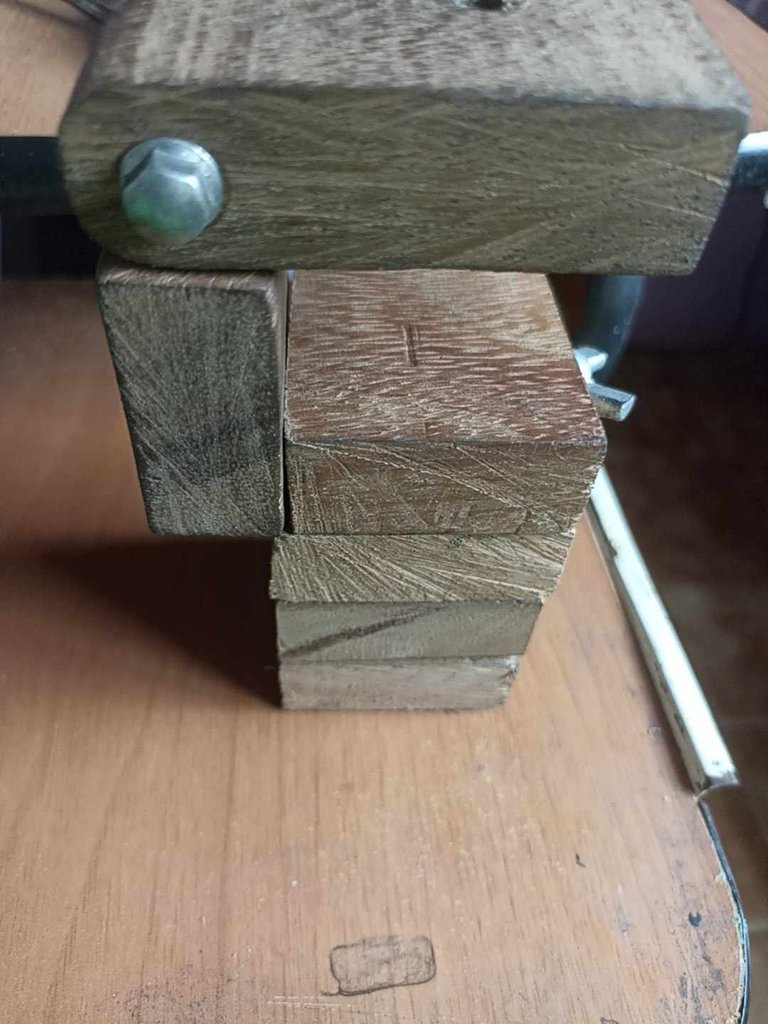
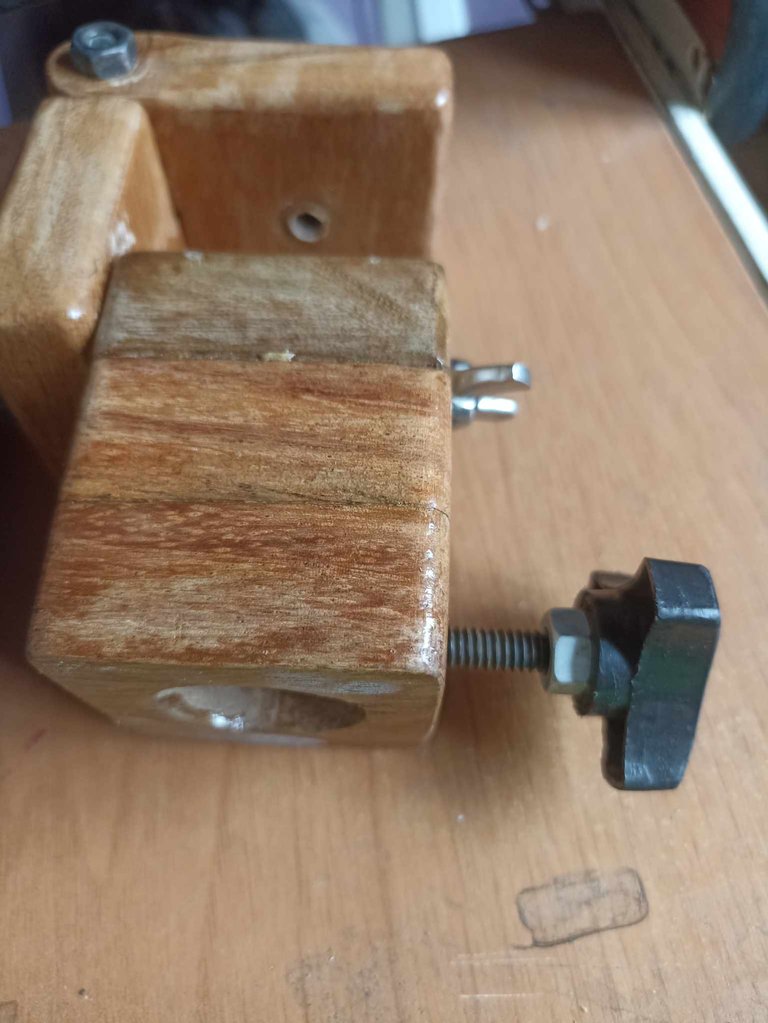
I use two screws, one of them is 2.25 inches long by 1/4 in diameter, with a adjusting nut, the other screw is 2 inches by 1/4 in diameter. First, I join the largest pieces since these will be in the shape of a hinge, and for that I use the small normal nut screw. Then I use the 5 centimeter piece that is drilled in the middle and there I insert the longest screw with an adjustment nut.
Utilizo dos tornillos, uno de ellos es de 2,25 pulgadas de largo por 1/4 de diametro, con una tuerca de juste, el otro tornillo es de 2 pulgadas por 1/4 de diámetro. En primero lugar uno las piezas más grandes ya que estas irán en forma de bisagra, y para eso utilizo el tornillo pequeño de tuerca normal. despues utilizo la pieza de 5 centímetros que esta perforada a la mitad y por ahí introduzco el tornillo más largo con tuerca de ajuste.
 |  |  |
|---|---|---|
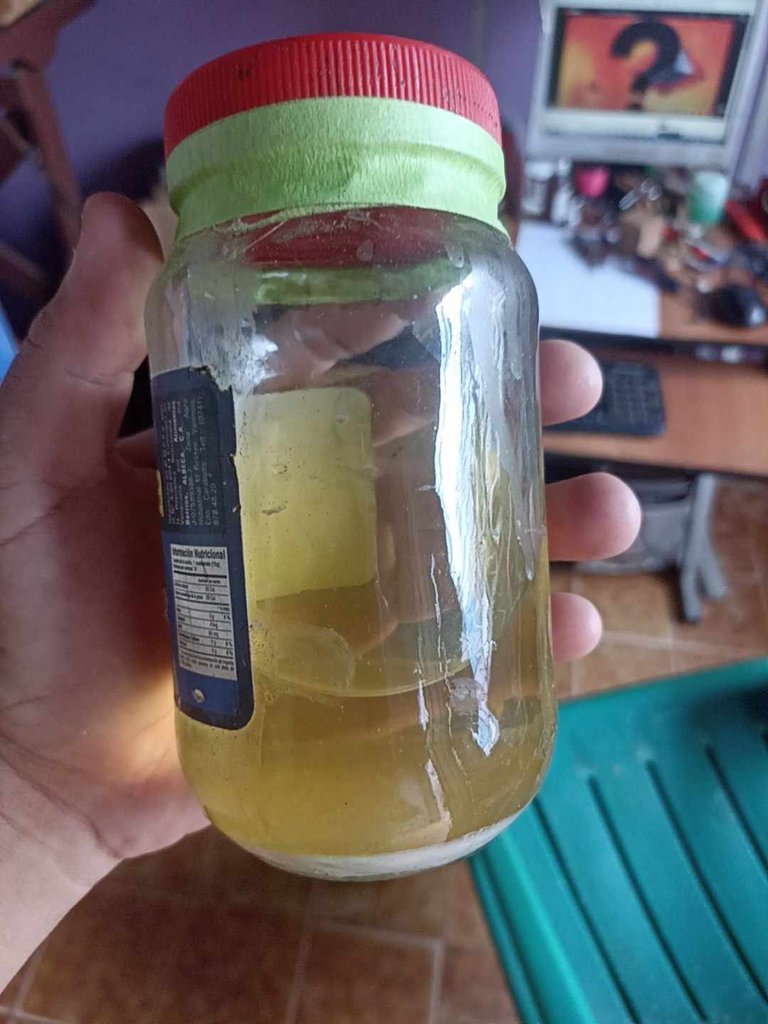 | 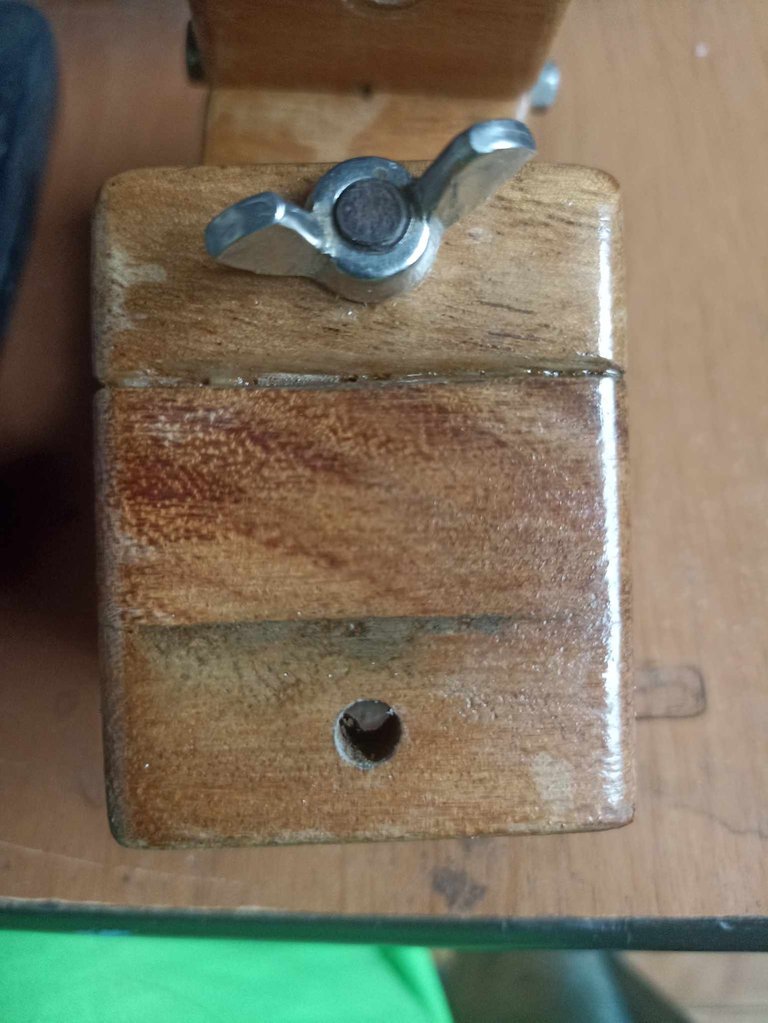 |  |
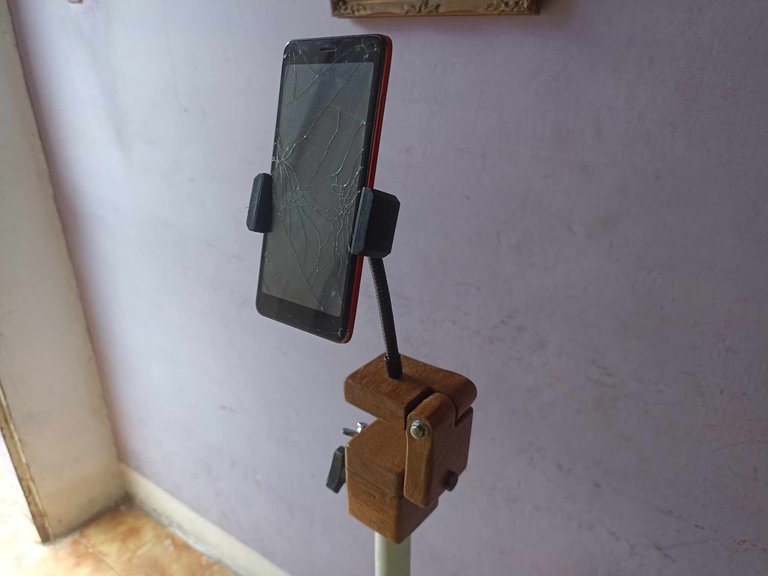
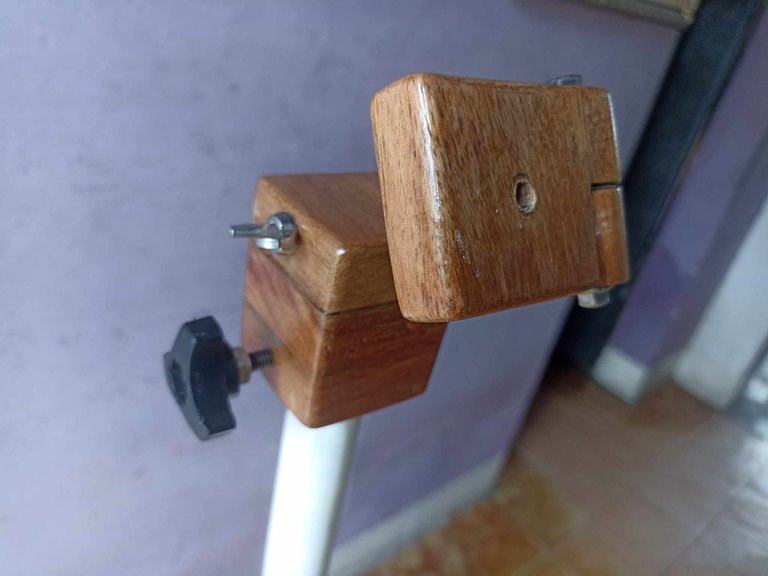
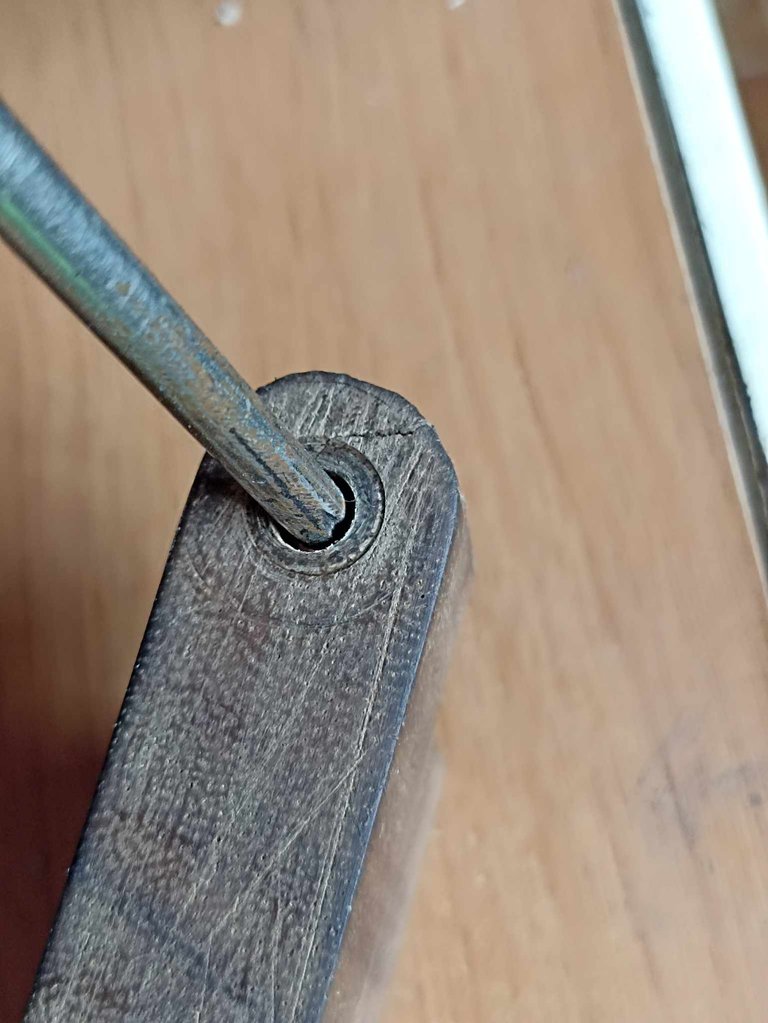
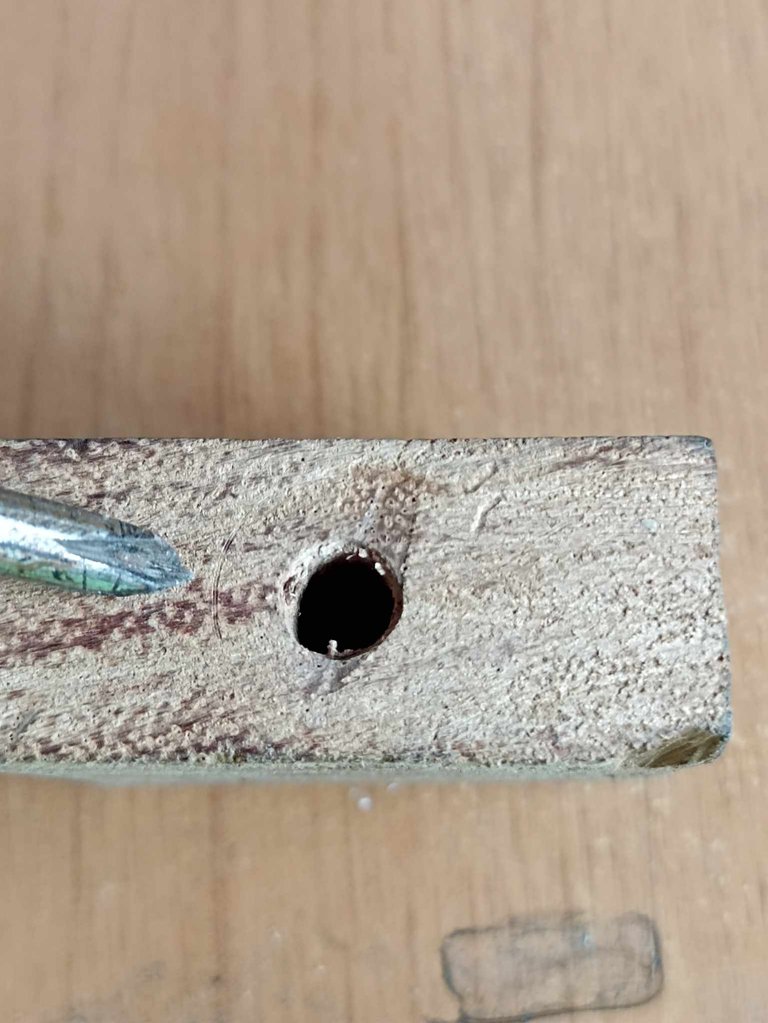
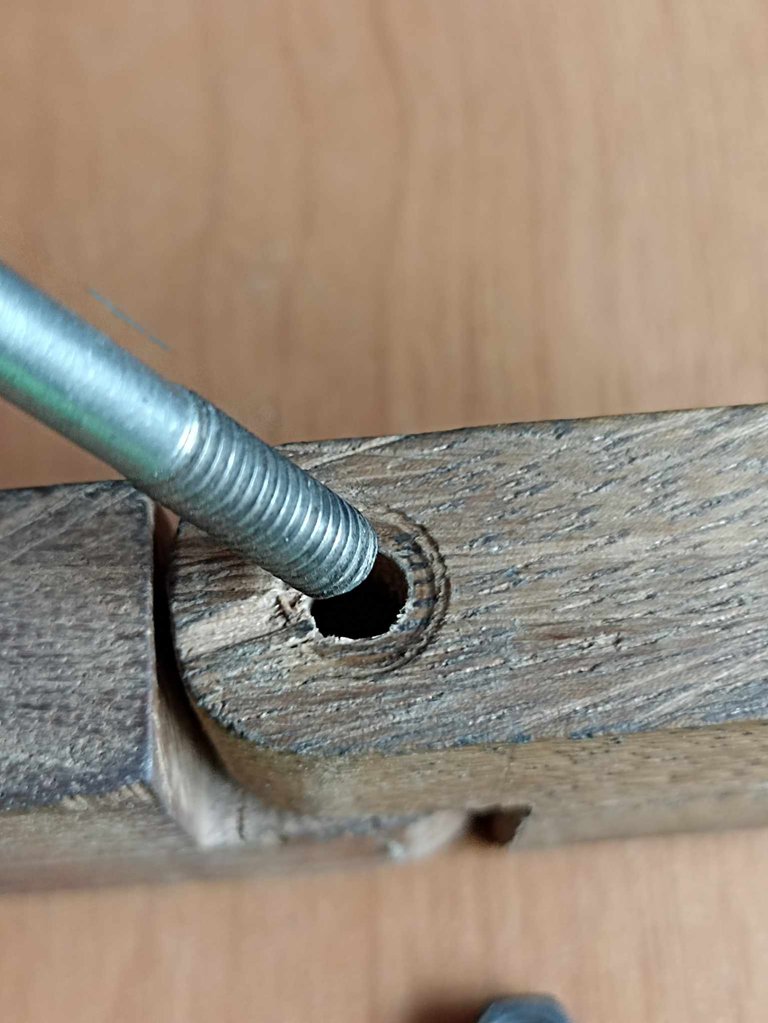
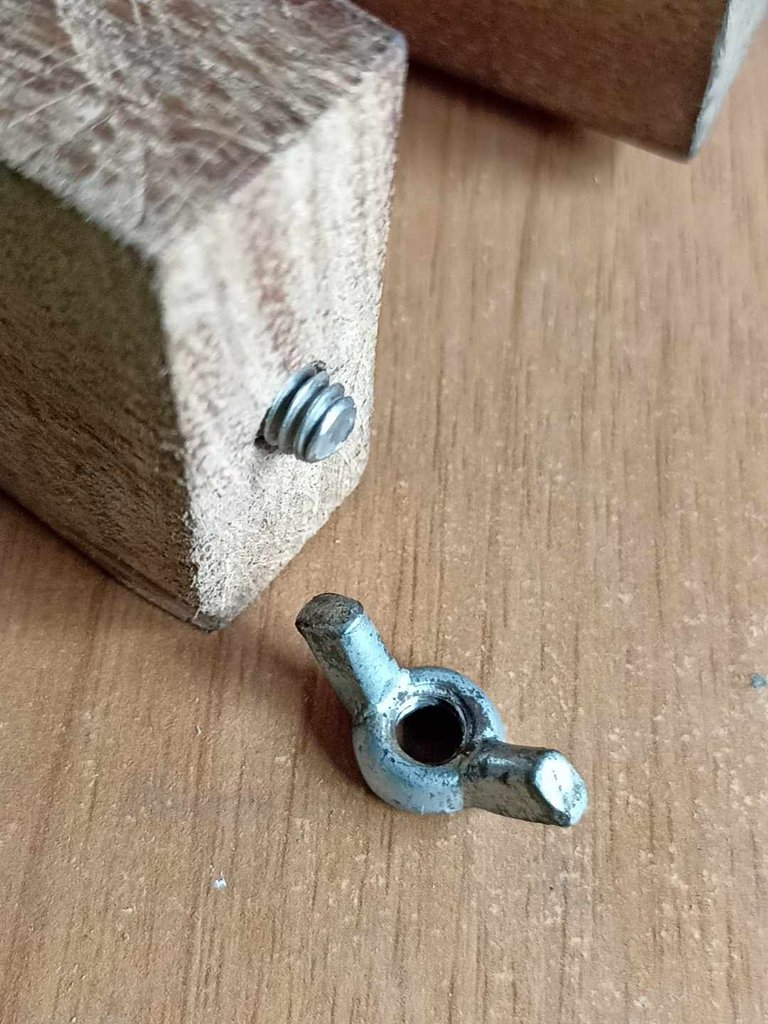
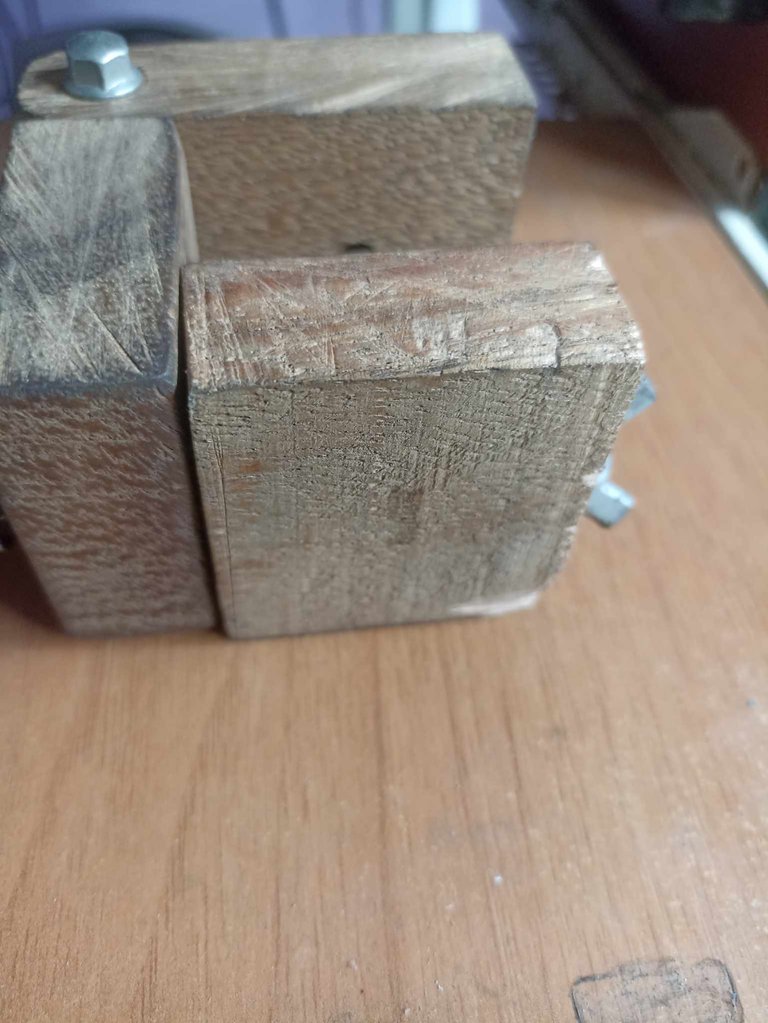
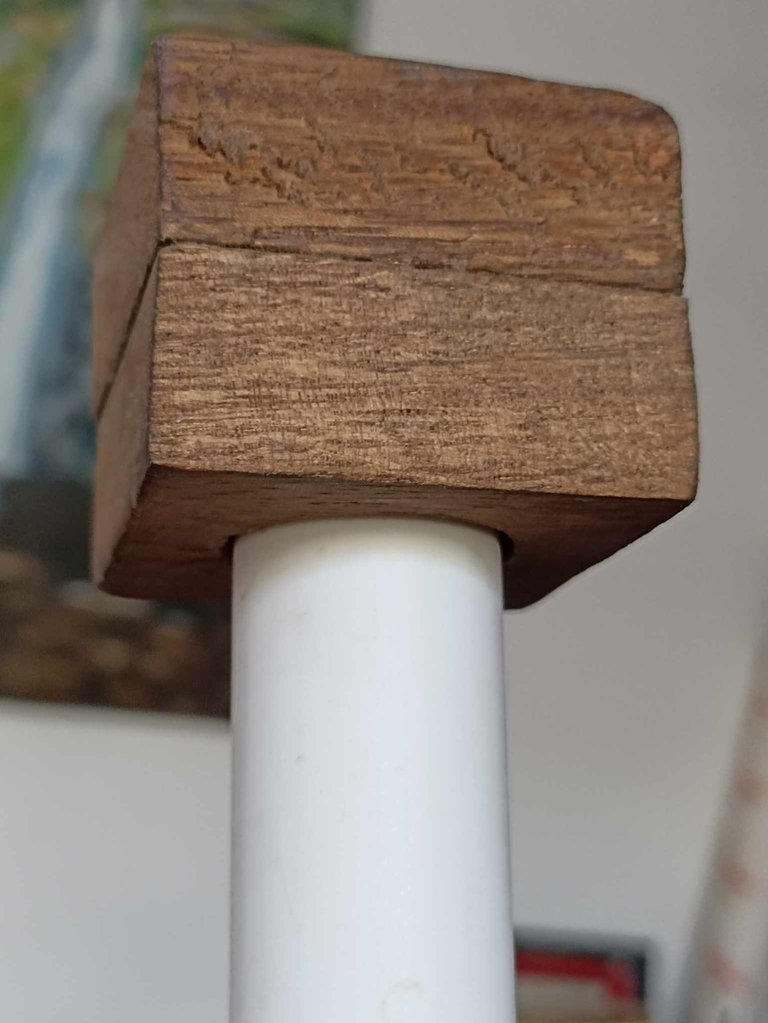
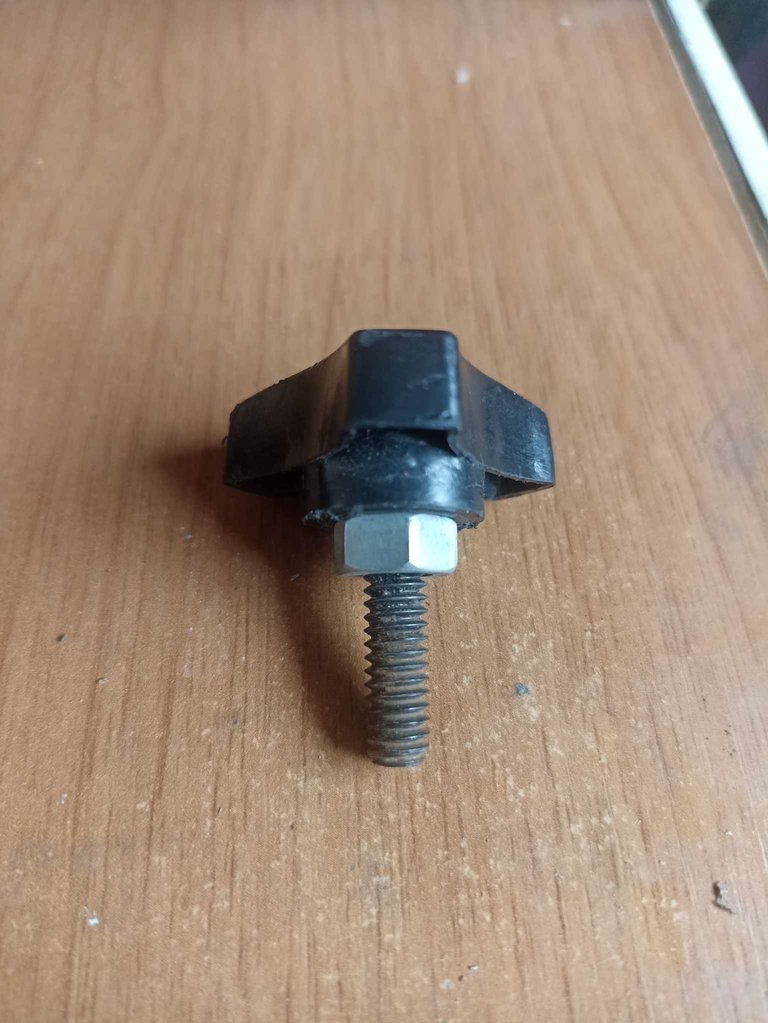
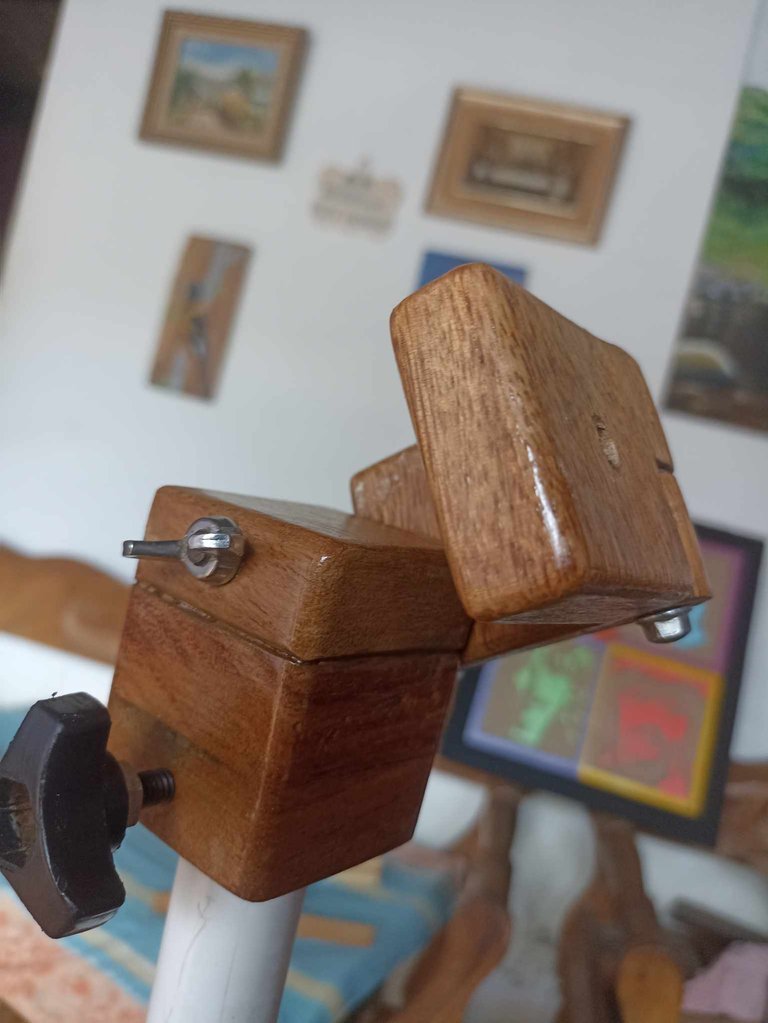
Before joining the pieces completely, I check that the pieces that will be the base fit completely on the tube, after that I join them with wood glue, which is very strong. Then, when joining all the pieces, I apply a protective varnish, but not before sanding all the pieces very well. Finally I open a hole to insert a knob that can serve as an adjustment when inserting the head into the tube and thus it can have a 360 degree movement. In this way it has been completed.
Antes de unir las piezas completamente compruebo que las piezas que serán la base calcen completamente en el tubo, después de eso las uno con pegamento para madera que es muy fuerte. Luego al unir todas las piezas les aplico un barniz protector no sin antes lijar muy muy bien todas las piezas. Por último abro un agujero para introducir una perilla que pueda servir como ajuste al meter el cabezal en el tubo y así pueda tener un movimiento de 360 grados. De esta manera ha quedado finalizado.
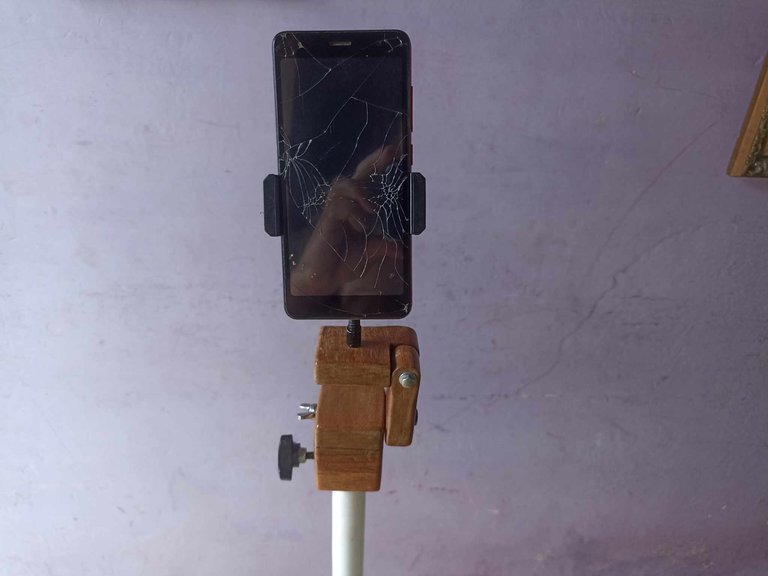
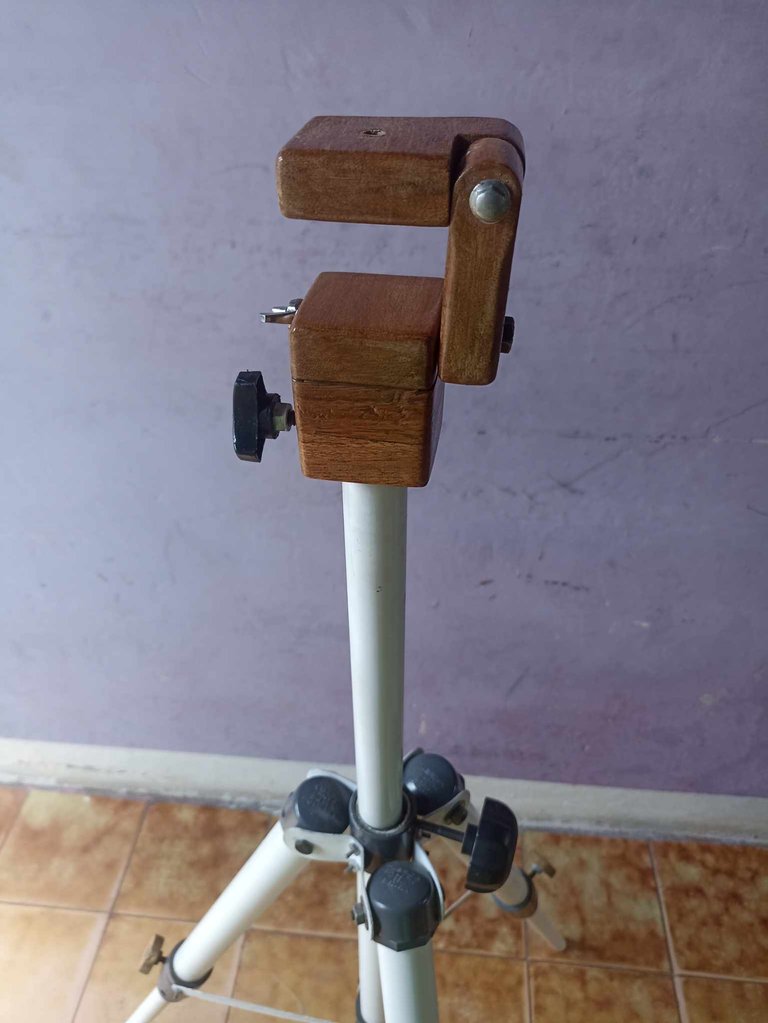

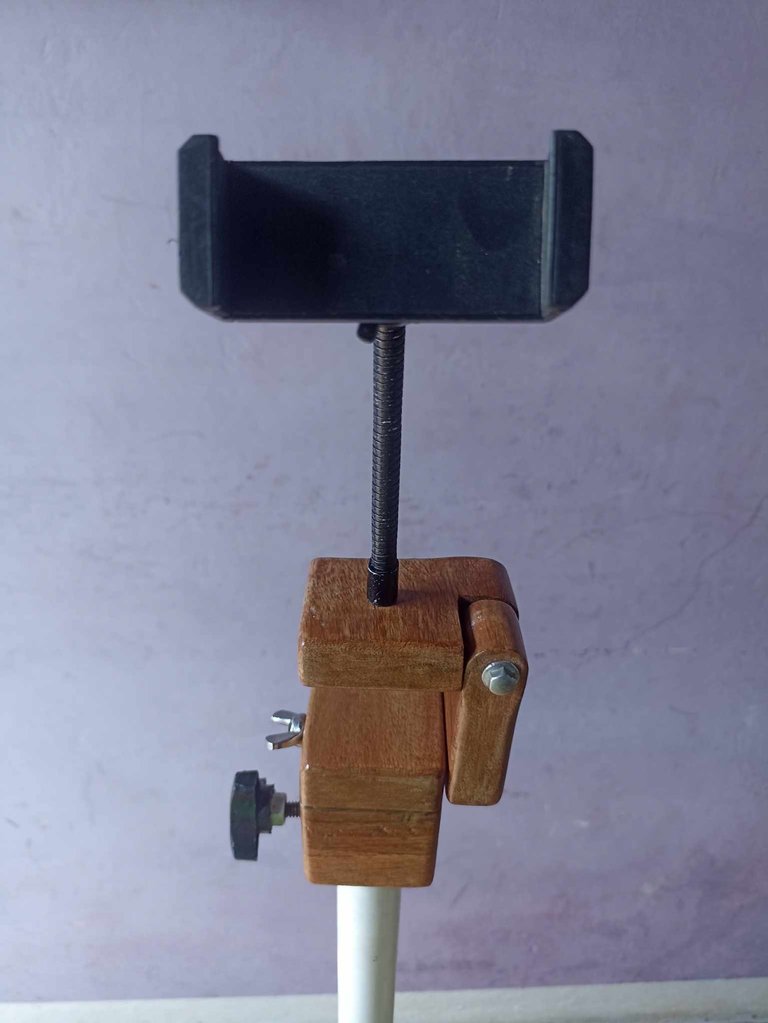
This is how this work turned out, as part of the tripod that I made, it was something where I put all my effort and concentration to achieve a higher level of creativity, I really wanted to have this tool, I did not buy Chinese parts because they are of poor quality, also as I need it to make my art paintings, those tripods can't be moved much because they get damaged. So, since this piece is made of wood, I know that it will last a long time, as you could see it is easy to make and it doesn't cost much, only on the screws you don't spend more than $1, so it is worth doing it with our own. hands. I hope you liked it and that it is useful to all those who dedicate themselves to creating quality content. I say goodbye until I have a new opportunity
Así quedó este trabajo, como parte del trípode que hice fue algo donde puse todo mi empeño y concentración para lograr un mayor nivel de creativida, realmente deseaba tener esta herramienta, no compré piezas chinas porque son de mala calidad, además como lo necesito para hacer mis cuadros de arte, esos tripodes no se pueden mover mucho porque se dañan. De manera que esta pieza al ser de madera sé que va a durar bastante, como podieron ver es facil de hacer y no se gasta mucho, solo en los tornillos que no se gasta más de $1, así que vale la pena hacerlo con nuestras propias manos. Espero que les haya gustado y que les sirva a todos aquellos que se dedican a crear contenido de calidad. Me despido hasta tener una nueva oportunidad
Se ve espectacular un gran trabajo que durará toda la vida
Muchas gracias, lo hice para que sea bien resistente
Un gran trabajo! Súper resistente y a prueba de todo! Gracias por compartir!
Cure muy bien la madera para que tenga una larga duración, además corte otros retazos para tener repuestos.. muchas gracias por pasar
Ohhh que maravilla, una grandiosa explicación. Es que eres un artista por todos los medios.
Saludos amigo @fixie ✨
!DIY
Gracias mi querida y adorada amiga, es algo sencillo pero muuuuy útil
Excelente cabezal de celulares, ha quedado fantástico 👍
Y también se puede utilizar para cámaras. Es súper útil. Muchas gracias por pasar
It's impressive to see how you made this tripod head out of wood. Great work, keep it up.
Thanks for the support ✌️🤘
Congratulations, your post has been upvoted by @dsc-r2cornell, which is the curating account for @R2cornell's Discord Community. Enhorabuena, su "post" ha sido "up-voted" por @dsc-r2cornell, que es la "cuenta curating" de la Comunidad de la Discordia de @R2cornell.
thank you very much for supporting me
You can query your personal balance by
@dayadam just sent you a DIY token as a little appreciation for your post dear @fixie! Feel free to multiply it by sending someone else !DIY in a comment :) You can do that x times a day depending on your balance so:!DIYSTATSYou did great!