Hello! ¡Hola!
March contest Theme Glacier Preservation
Here is a beaded fish as part of the water creature that needs to be preserved and protected due to its importance to our water ecosystem.It's World Water Month, marked March 22, to create awareness of how we can protect the water ecosystem, I present to you my participation in the #DIY
Materials used:To make a beaded fish, I used seed beads, a beading needle, 0.3 fishline, and scissors.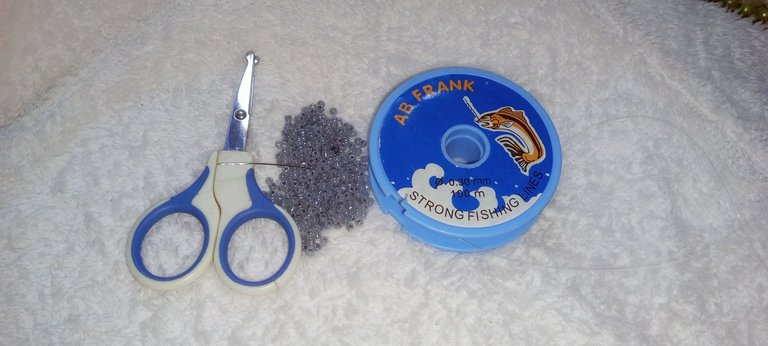
Production Time: Between one to two days.
Step-by-step process:
Walk with me and let me show you all the steps.
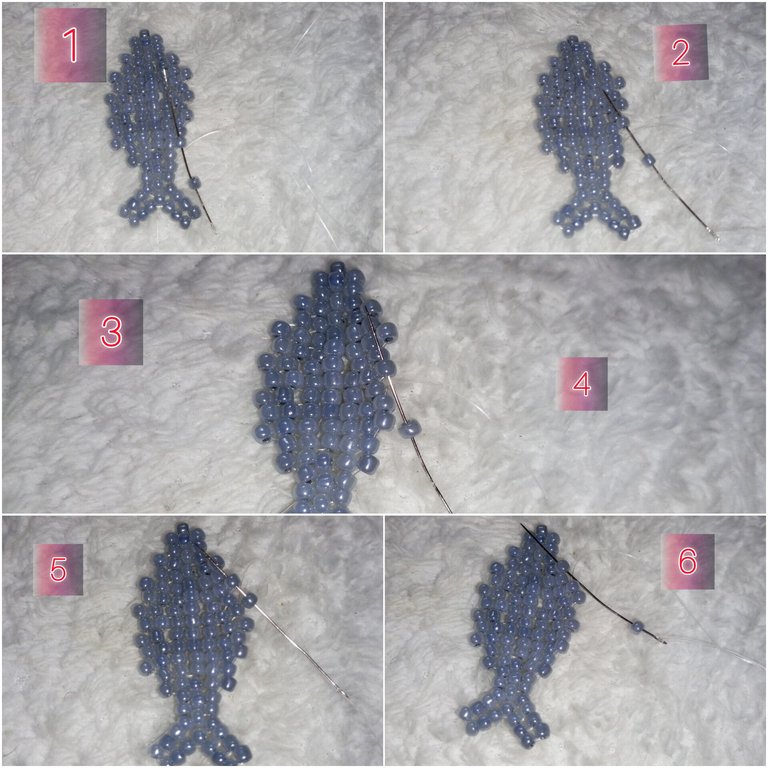
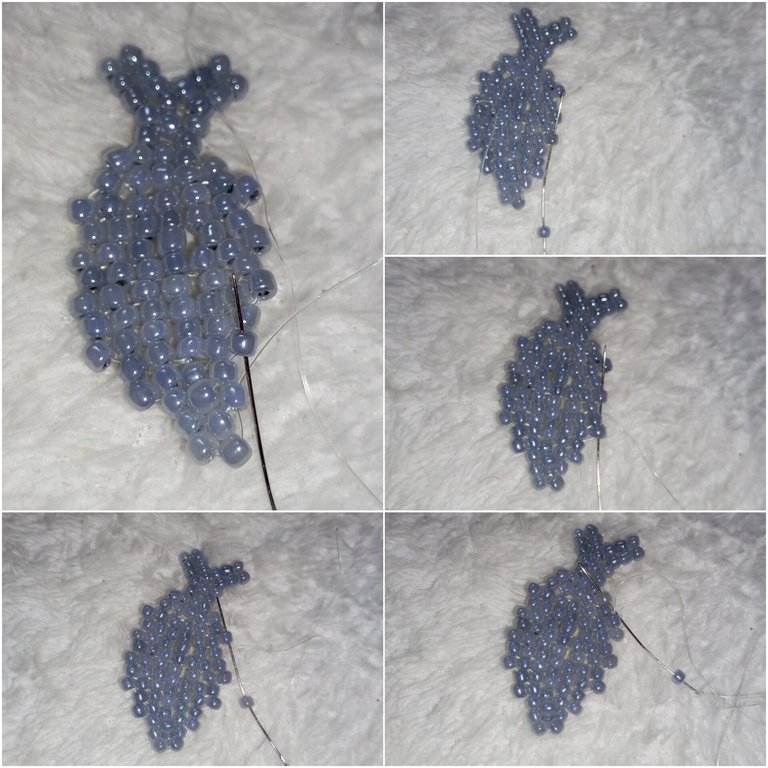
Step 1:
I put 8 beads on a 30 cm threaded needle, put on another 8 beads, and then passed my needle through the first 8 beads.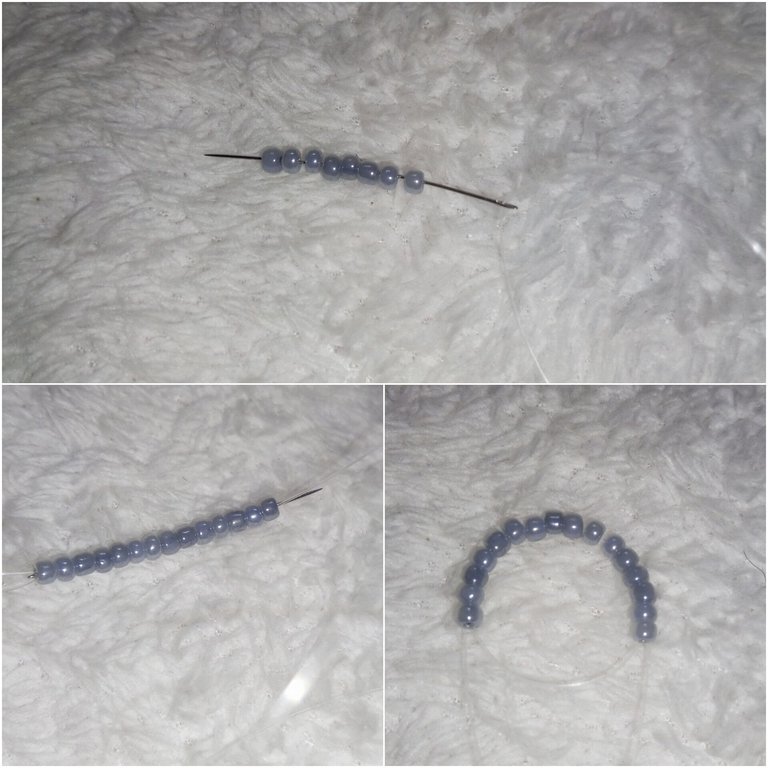
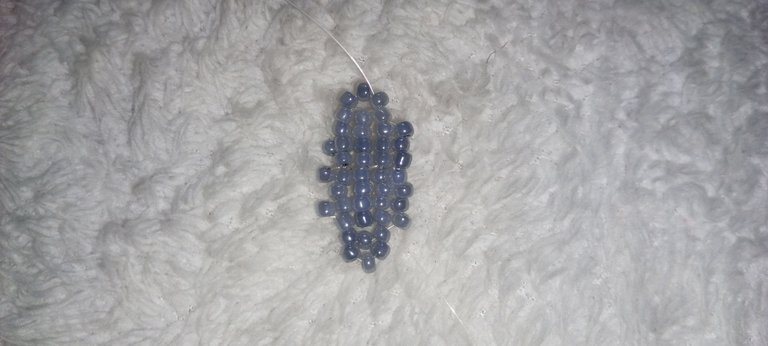
Step 2:
With my needle, I sewed 4 beads on each side.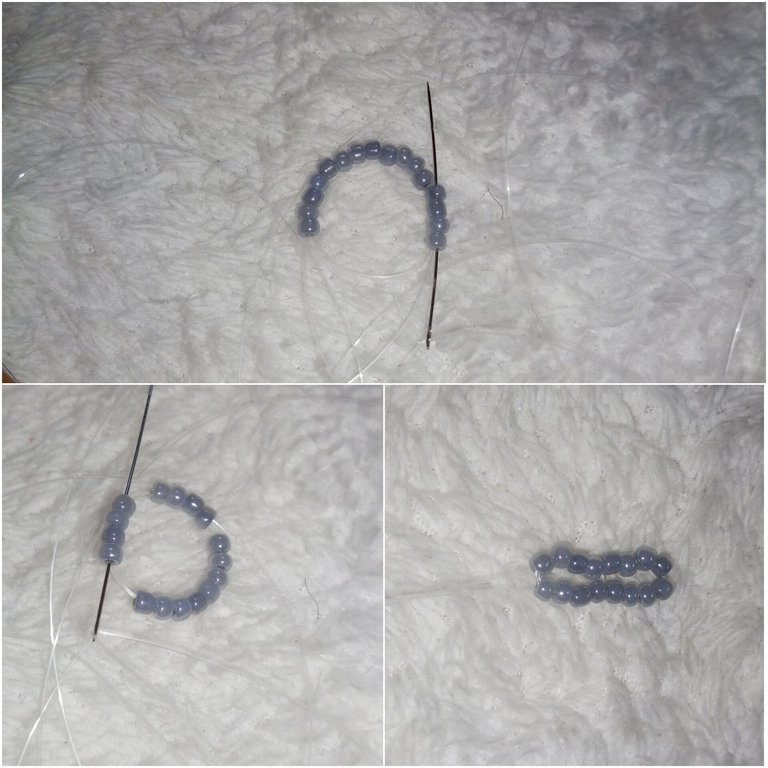
Step 3:
I put 4 beads on my needle and passed it through the four beads at the top and then did the same for the bottom to form a new line of 8 beads.
Step 4:
I put 3 beads on my needle and passed it through the first bead of the third line.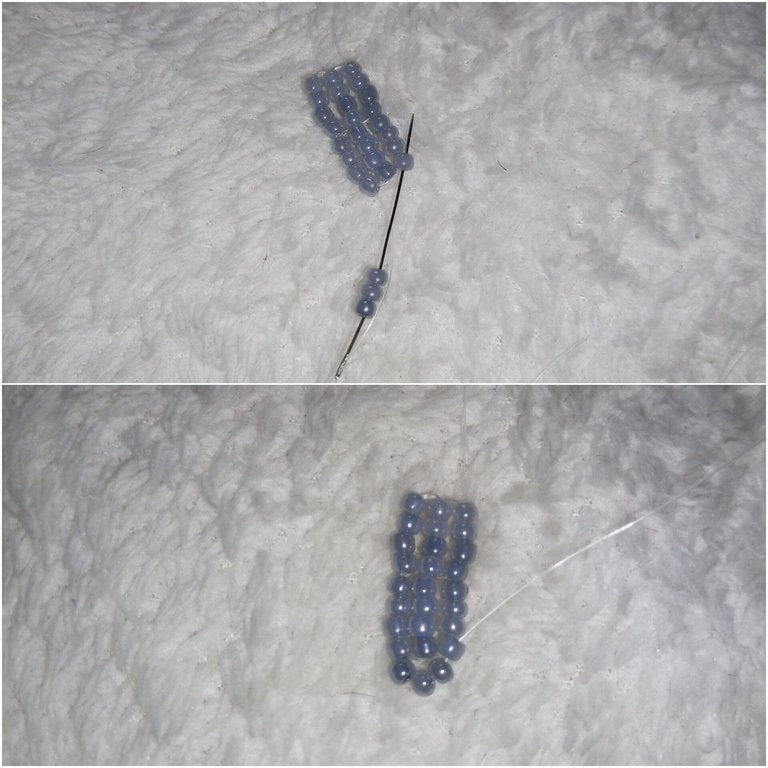
Step 5:
I put one bead on my needle, ignored one bead, and let it come out on the next bead.
Step 6:
I put one bead on my needle, ignored one bead, and let it come out on the next bead.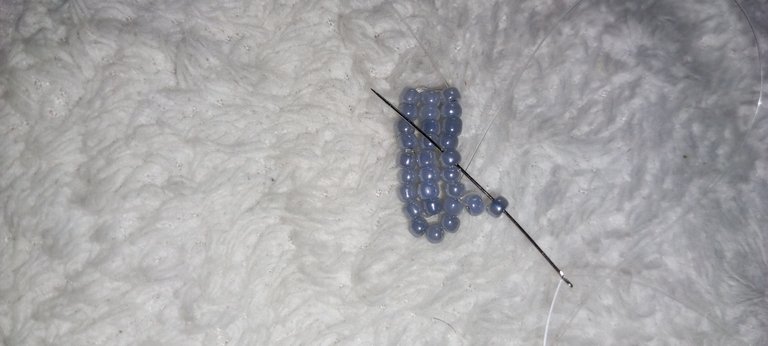
Step 7:
I put one bead on my needle, ignored one bead, and let it come out on the next bead.
Step 8:
I put 3 beads on my needle and let it come out on the first two beads of the third line, as you can see below.
Step 9:
I put one bead on my needle, ignored one bead, and let it come out on the next bead.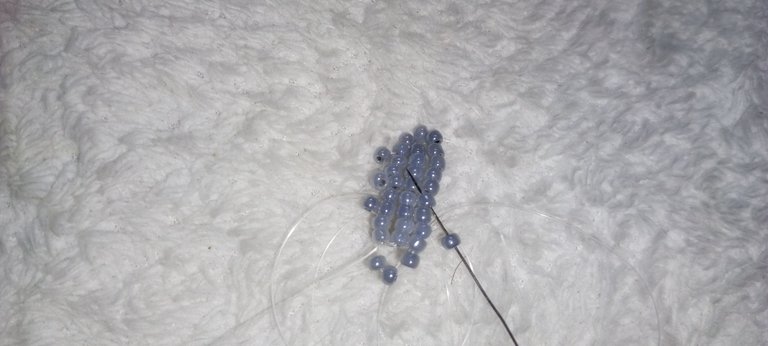 Step 10:I put one bead on my needle, ignored one bead, and let it come on the next bead.
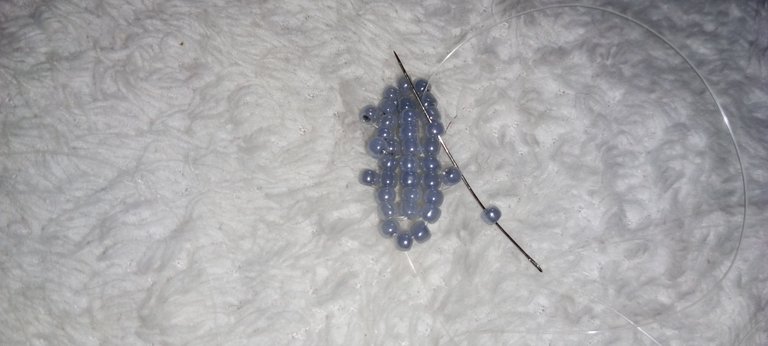
Step 11:
I put one bead on my needle, ignored one bead, and let it come out on the last two beads.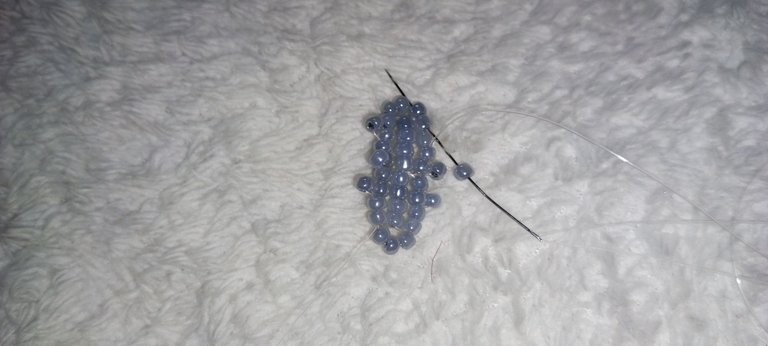
Step 12:
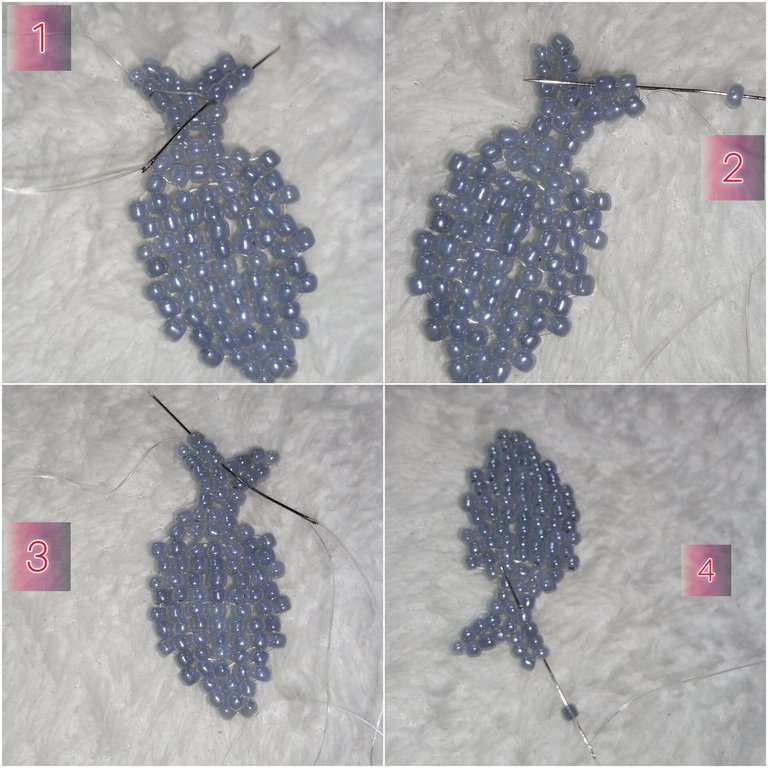
To start a new line, I slipped over the fish, put 3 beads on my needle, ignored the next bead, and passed the needle through the next two beads.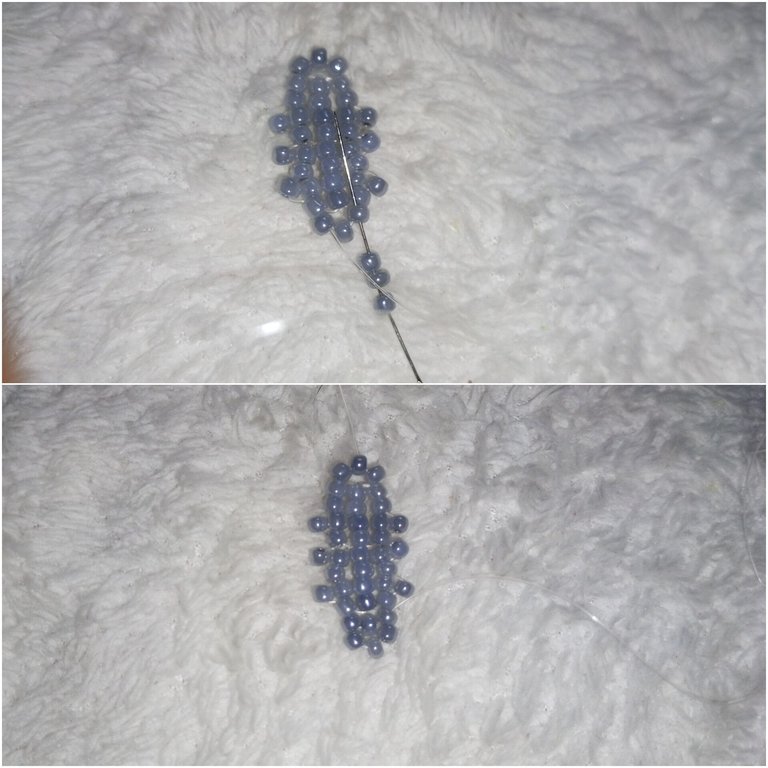
Step 13:
I put one bead on my needle, ignored one bead, and let it come out on the next bead.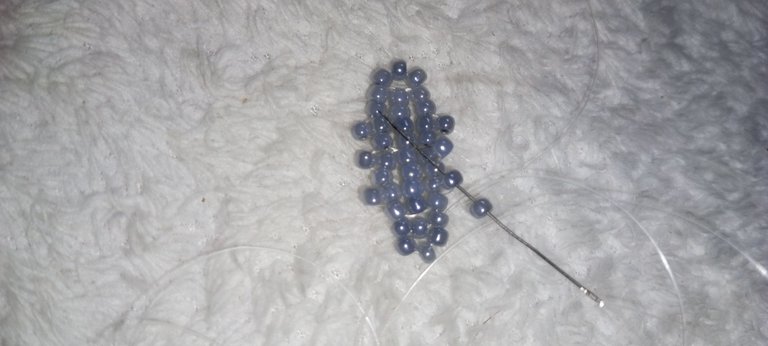
Step 14:
I put one bead on my needle, ignored one bead, and let it come out on the next bead.
Step 15:
I put one bead on my needle, ignored one bead, and let it come out on the next bead.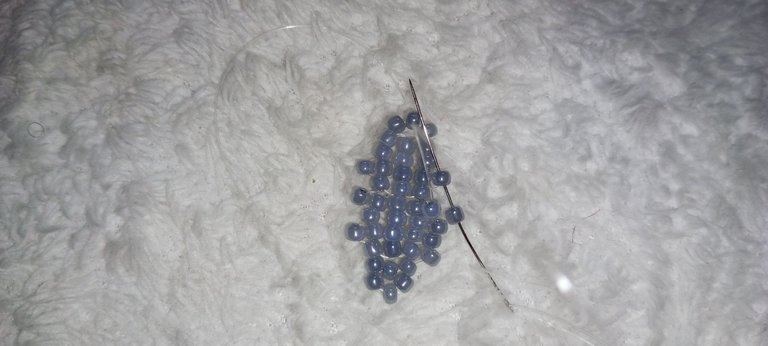
Step 16:
I put one bead on my needle, ignored one bead, and let it come out on the next two beads.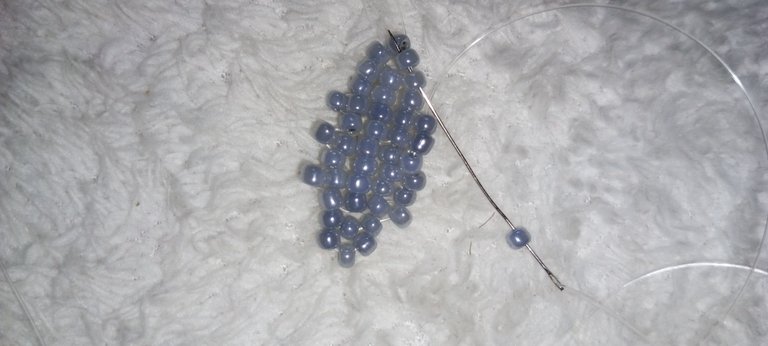
Step 17:
I put three beads on my needle, ignored the next bead, and let the needle come out through the next two beads.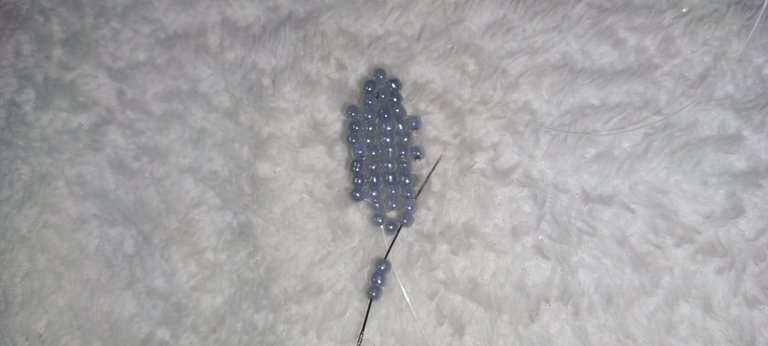
Step 18:
I put one bead on my needle, ignored one bead, and let it come out on the next bead.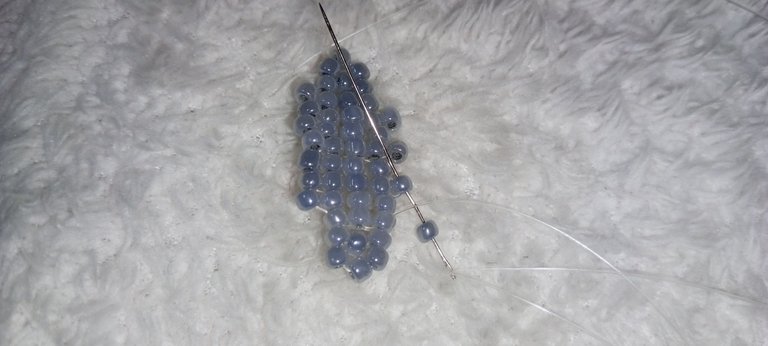
Step 19:
I put one bead on my needle, ignored one bead, and let it come out on the next bead.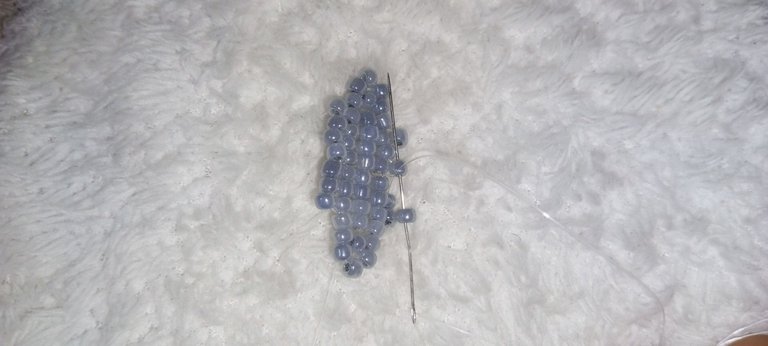
Step 20:
I put one bead on my needle, ignored one bead, and let it come out on the next bead.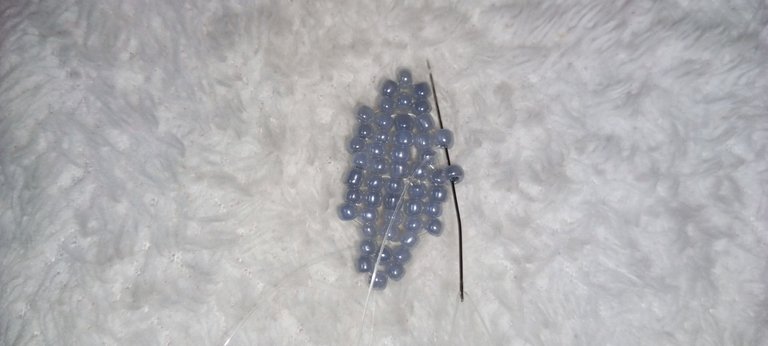
Step 21:
I put one bead on my needle, ignored one bead, and let it come out on the next two beads.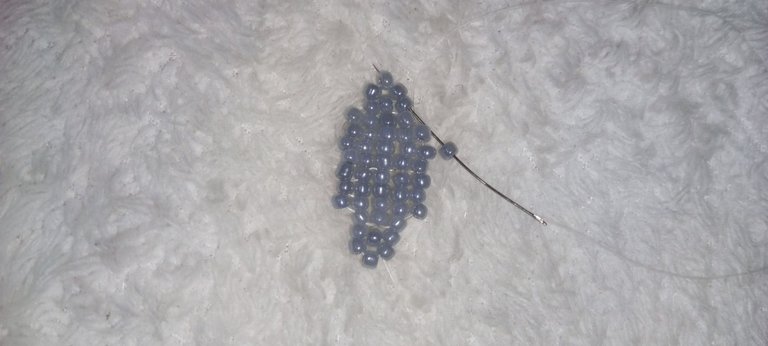
Step 22:
I put three beads on my needle, ignored the next bead, and let the needle come out of the next two beads.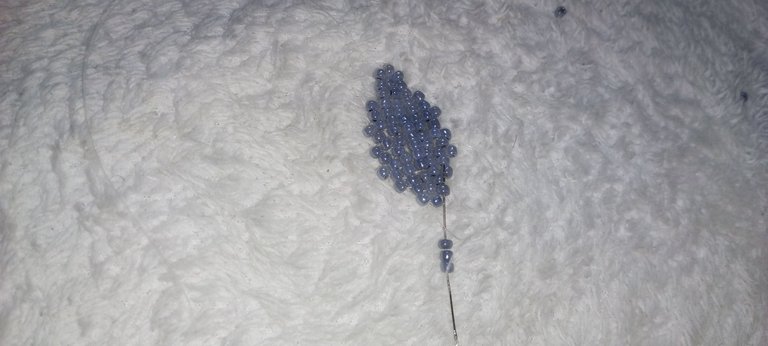
Step 23:
I put one bead on my needle, ignored one bead, and let it come out on the next bead.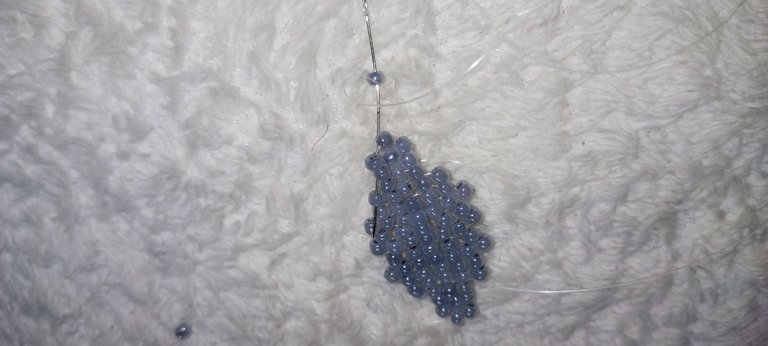 Step
Step
24:
I put one bead on my needle, ignored one bead, and let it come out on the next bead.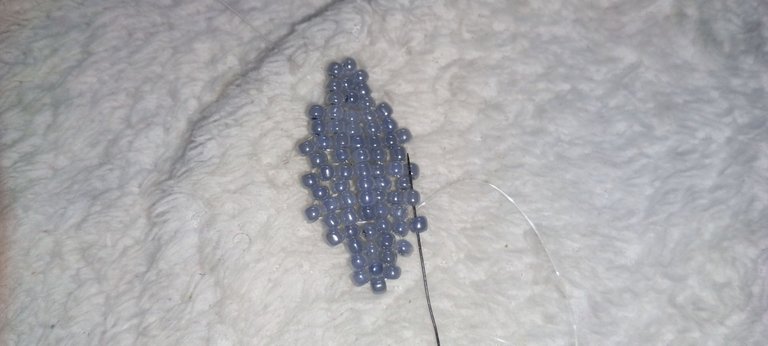
Step 25:
I put one bead on my needle, ignored one bead, and let it come out on the next bead.
Step 26:
I put one bead on my needle, ignored one bead, and let it come out on the next bead.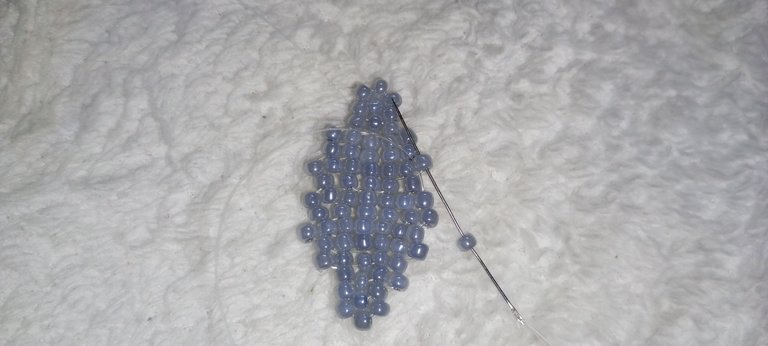
Step 27:
I put one bead on my needle, ignored one bead, and let it come out on the next two beads.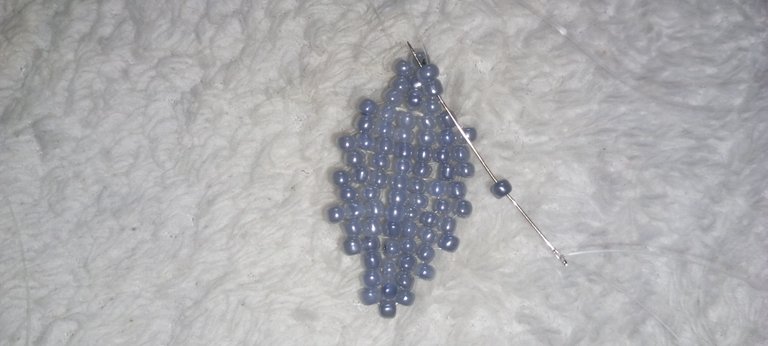
Step 28:
I put 3 beads on my needle, ignored the next bead, and it came out on the next bead.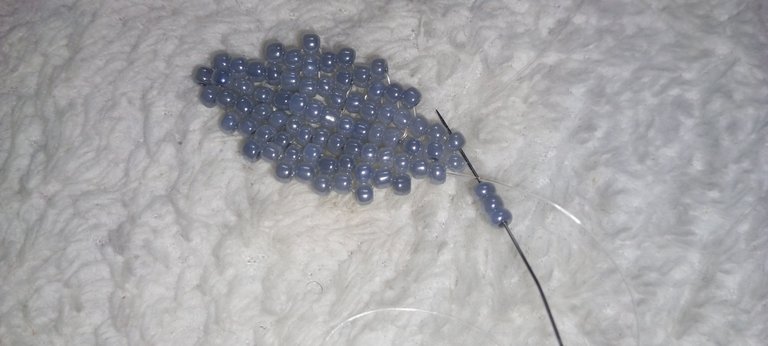
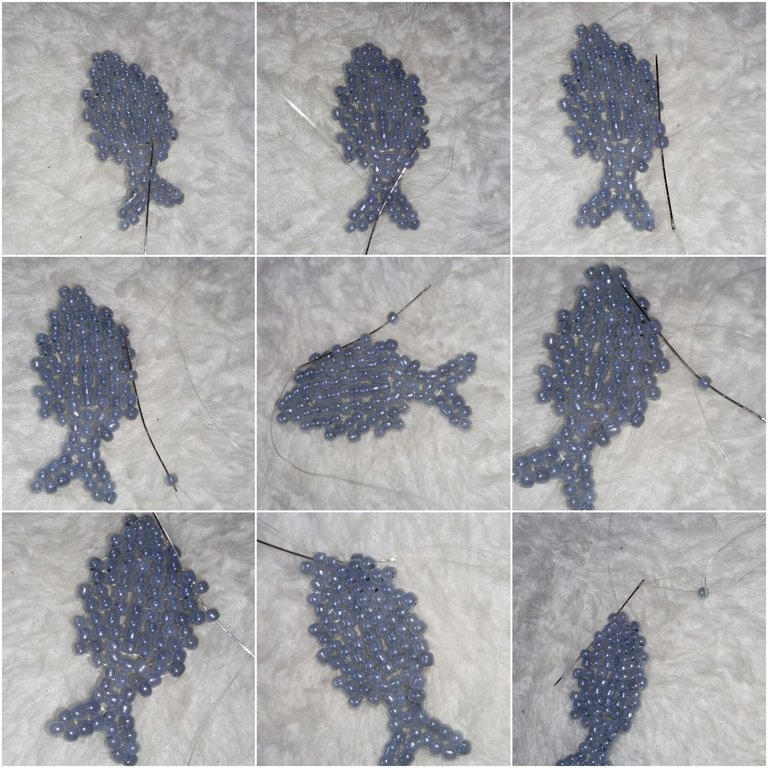
Step 29:
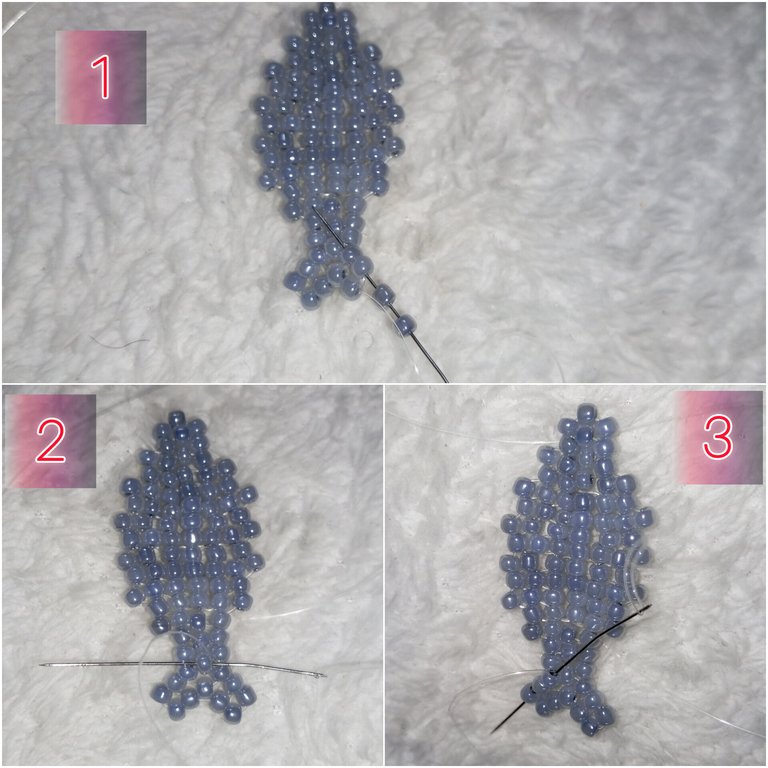
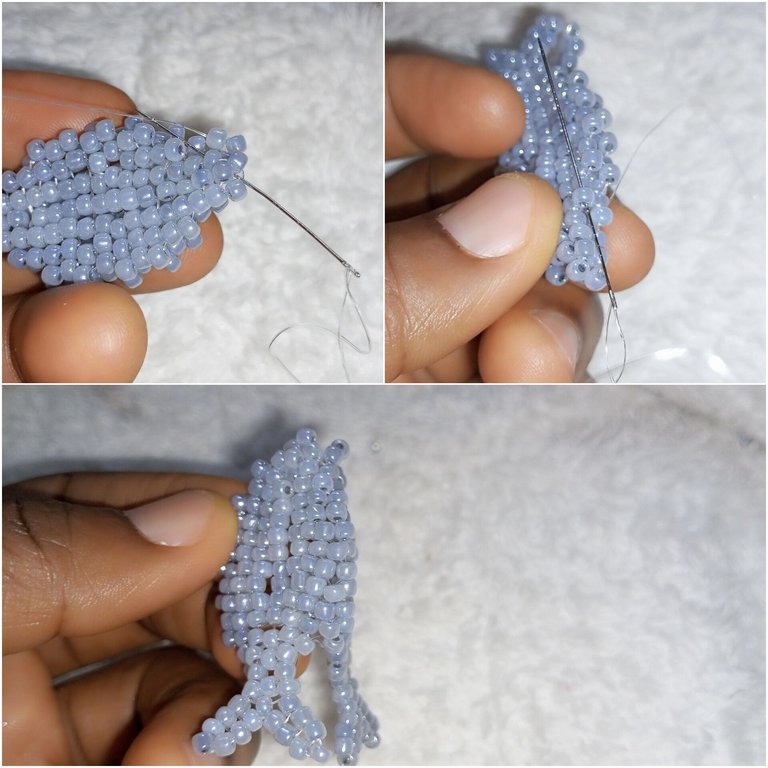
I let my needle come out of the bead at the middle of the tail and again passed it through the next two beads on the tail.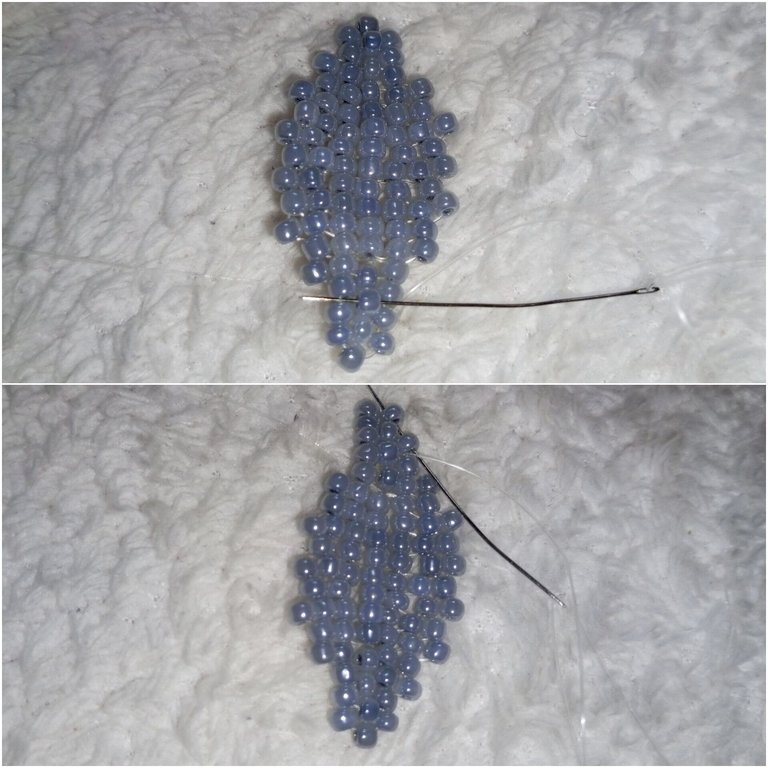
Step 30:
I put two beads on my needle and passed it through the next bead. I then repeated step 29 above to add to the other side of the tail.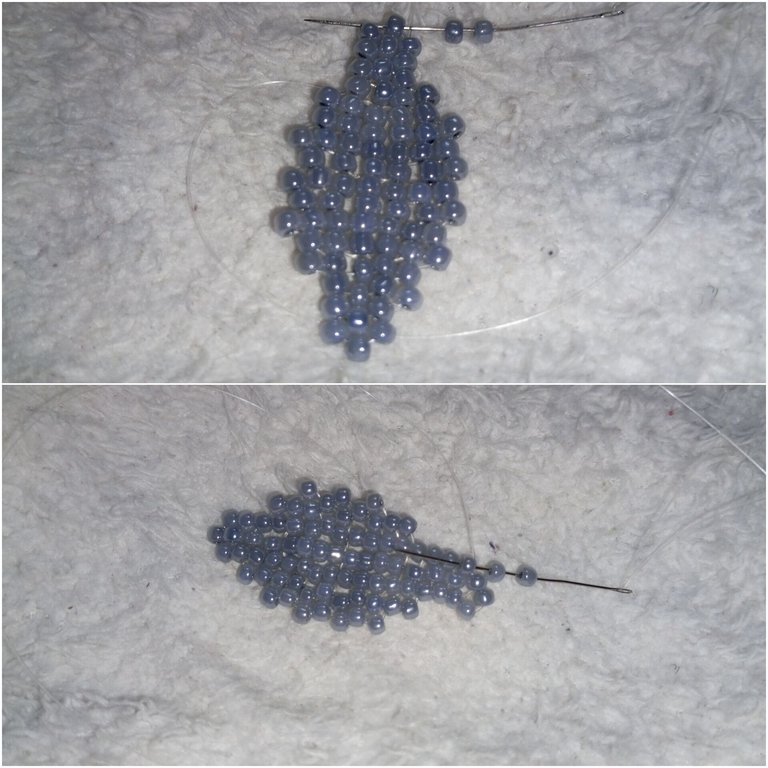
Step 31:
I repeated step 39 and step 39 above to add to the tail.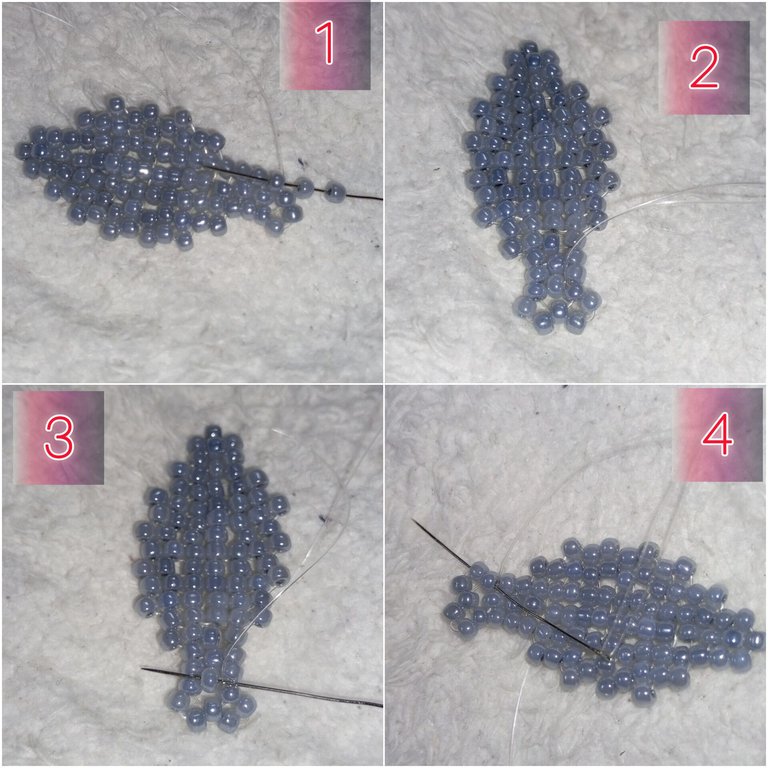
Step 32:
I put two beads on my needle and let it come out of the two pointed beads on the tail.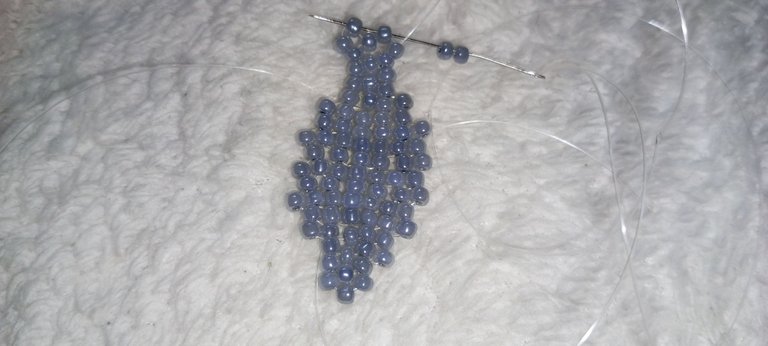
Step 33:
I let my needle out of the last two beads of the tail.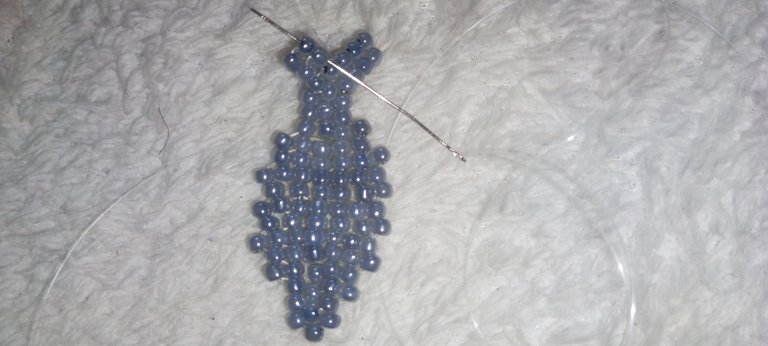
Step 34:
I continue building on the tail
Step 35:
Here I completed building the tail.
Step 36:
I simply continue to add one bead around the fish.
Step 37:
Here, I finished adding one bead around the fish.
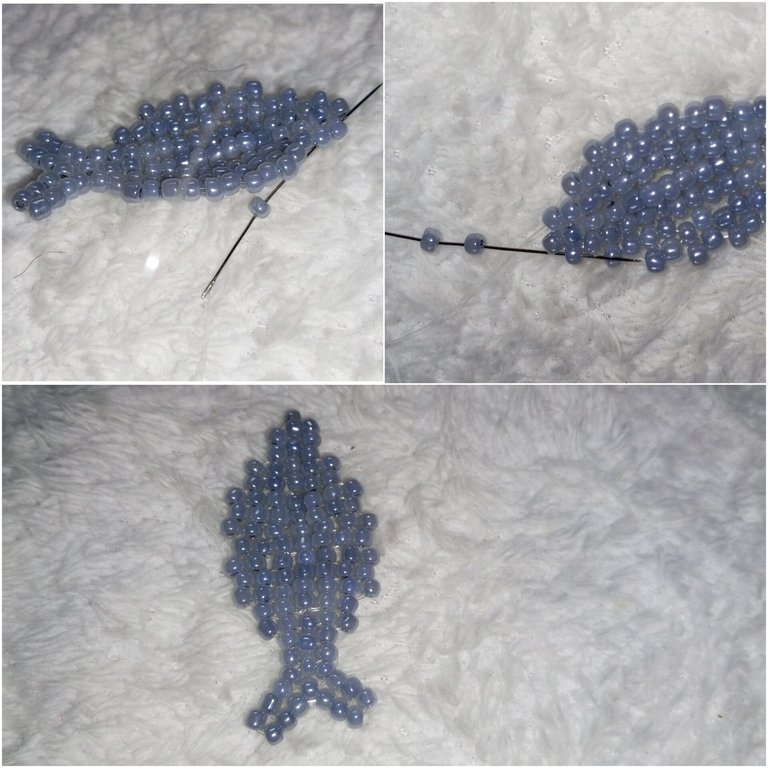
And we have half of the fish made.
I followed all the steps above to make the other half.
Step 38:
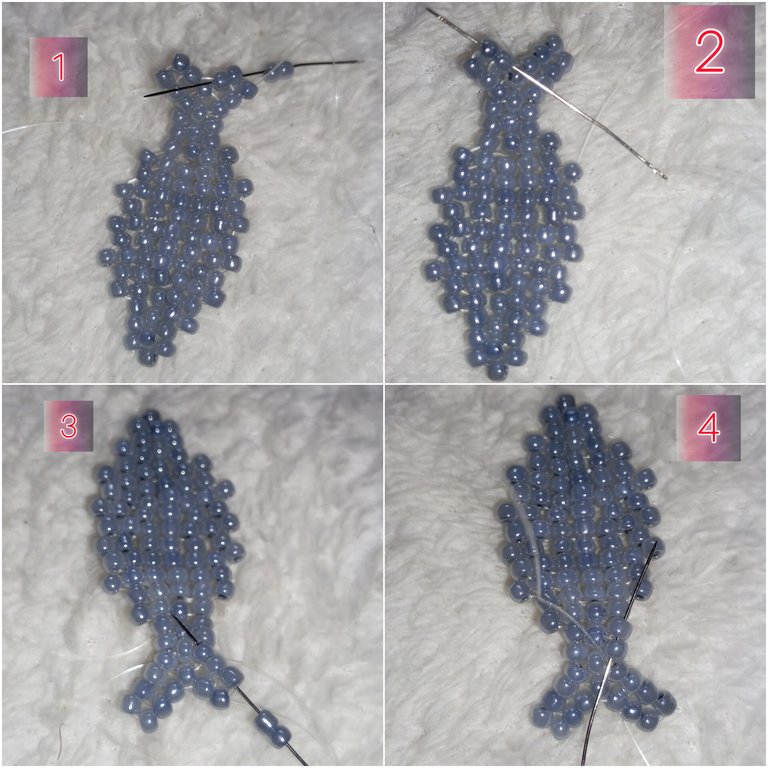
I picked one of the two halves and started to add one around the edge. By putting one bead on my needle, ignoring the next bead, and letting it come out of the next bead.
Step 39:
To add to the tail, I let my needle through the last three beads on the tail, then put one bead on my needle and passed it through the next three beads. And did the same for the other tail.
Step 40:
I continue to add one bead until I get to the mouth of the fish.
Step 41:
Here I completed building the sides.
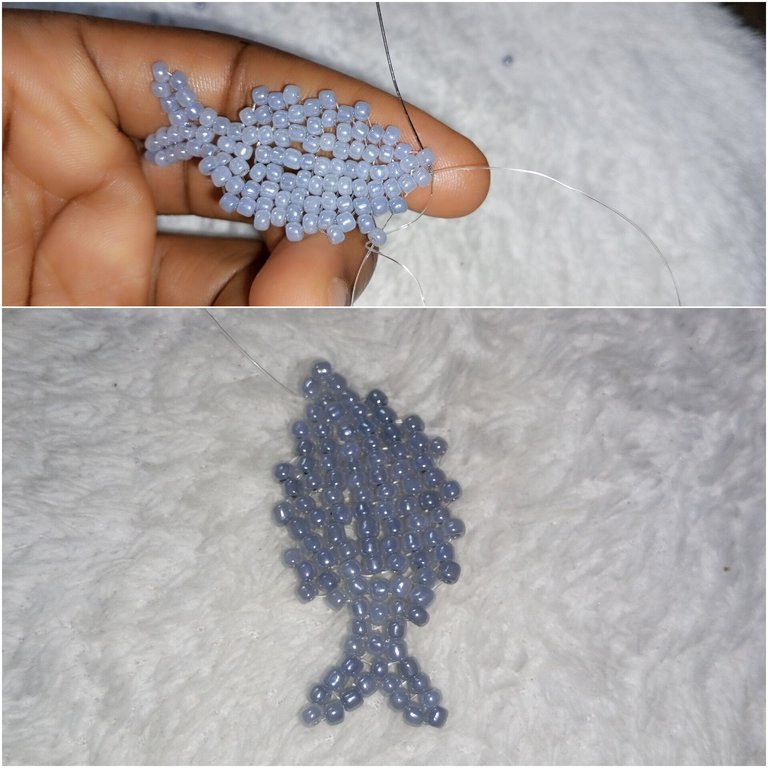
I brought the bigger side of the fish to the bottom and placed the smaller side on top.

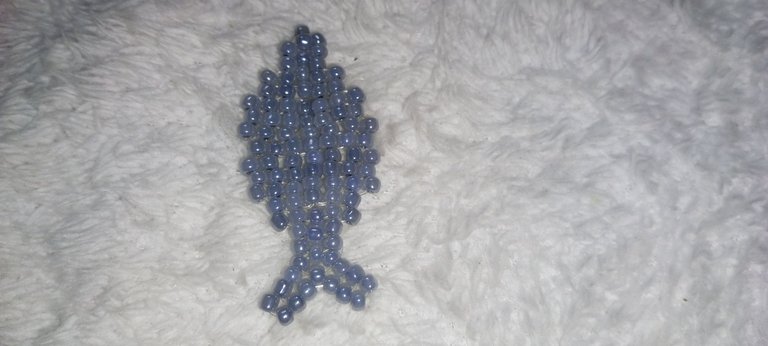
Step 42:
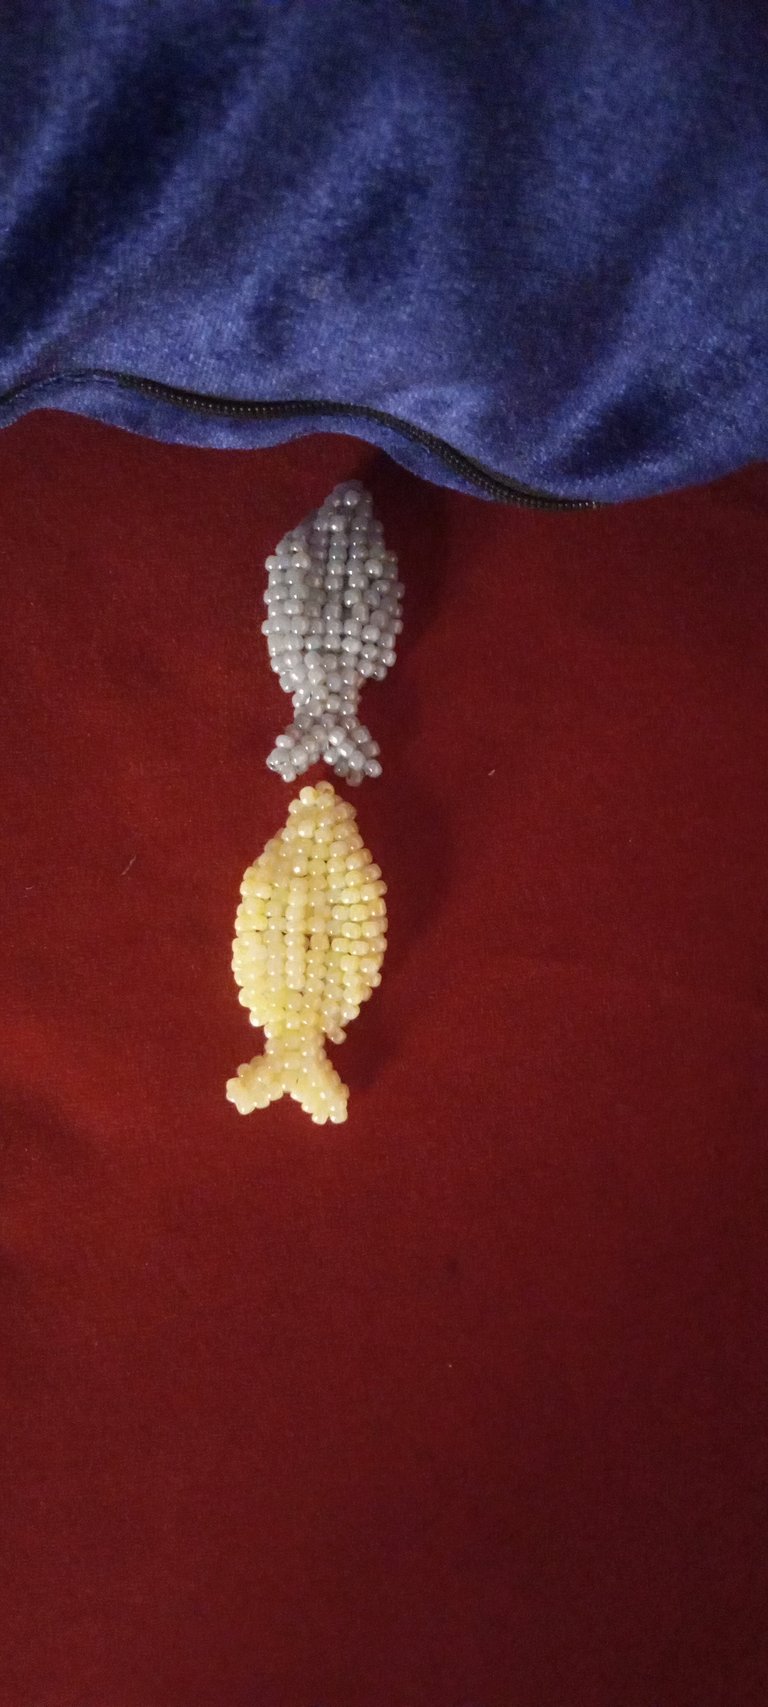
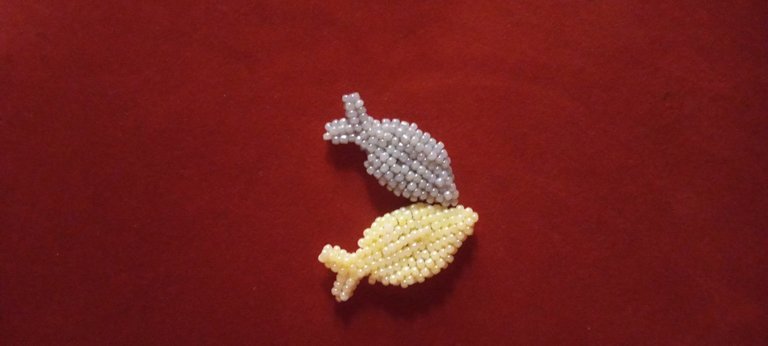
I began to sew both together with my needle in a zigzag form. After that, I passed my fishline around to secure the work, tied the knots, and trimmed the excess fishlines.
Here is the final look, I went ahead to make two, one for my son and the other one for my God's daughter who lost her fish pet a while ago.

The End, dear friends, thank you very much for your attention and support. Have a great weekend.😊
All images are mine@funshee😊🙏
Thank you very much 🥰
The goldfish is perfect.
Hahah, thank you @neblomax !LUV
(2/5) sent you LUV. | tools | discord | community | HiveWiki | <>< daily@neblomax, @funshee
The beaded fish looks great. The detail and color choices make it really stand out. amazing work.
Thank you very much; it was fun, as usual.
Estoy encantada con tu trabajo.. quedó espectacular 👌
Gracias 🙏😊 Mi Amiga
It's so cute...nice and beautiful ❤❤
Thank you very much Kachy🥰🙏
What a great job
Thank you very much 🙏🥰 !LUV
(3/5) sent you LUV. | tools | discord | community | HiveWiki | <>< daily@confident1, @funshee
You are always welcome dearest
Your work is fine,I see hard work and nice finishing
Thank you dear @praiselove 🙏😊
This is so cute 🥰
Thank you, Sweet Sis😊🙏
que bonitos, te quedo excelente!
how beautiful, you look great!
Gracias 🙏🥰
The final result is just amazing
I love that you share the photos of the process to make it
Have a good weekend
Thank you a lot; I'm happy to share, and I'm glad you like it.
!PIZZA
🙏
https://bsky.app/profile/did:plc:rag2mftdy2alo7rtmyttmpk4/post/3lkvuuyrr4w2v
The rewards earned on this comment will go to the author of the blog post.https://bsky.app/profile/did:plc:rag2mftdy2alo7rtmyttmpk4/post/3lkvuuyrr4w2v
Beautiful work !!!!
Thank you very much 🙏🥰
Thanks to You
$PIZZA slices delivered:
(1/15) @oadissin tipped @funshee
Congratulations @funshee! You have completed the following achievement on the Hive blockchain And have been rewarded with New badge(s)
Your next target is to reach 61000 upvotes.
You can view your badges on your board and compare yourself to others in the Ranking
If you no longer want to receive notifications, reply to this comment with the word
STOP@funshee, I paid out 0.168 HIVE and 0.040 HBD to reward 10 comments in this discussion thread.