
Saludos hivers lectores, complacida de volver una vez más a esta comunidad donde podemos compartir todo lo relacionado con las manualidades y es que el mundo de las manualidades es tan extenso que podemos encontrar técnicas que ni imaginamos que existen y con las que se pueden crear bellezas a través de nuestras manos. Por mi parte he trabajado muchas técnicas, pero bien dicen por allí que el buen hijo vuelve a casa y mis inicios fue con agujas e hilos, así que enfocada en tejer estoy últimamente y lo que les comparto ahora es una creación muy linda que sé, a todas les encanta porque la mayoría de las amas de casa quieren una temática en la cocina así que mi idea les va a encantar.
Greetings hivers readers, pleased to return once again to this community where we can share everything related to crafts and is that the world of crafts is so vast that we can find techniques that we do not even imagine that they exist and with which you can create beauties through our hands. For my part I have worked with many techniques, but they say that the good son comes home and my beginnings were with needles and threads, so I am focused on knitting lately and what I share with you now is a very nice creation that I know, everyone loves because most of the housewives want a theme in the kitchen so you will love my idea.
🐔🐔🐔🐔🐔🐔🐔🐔
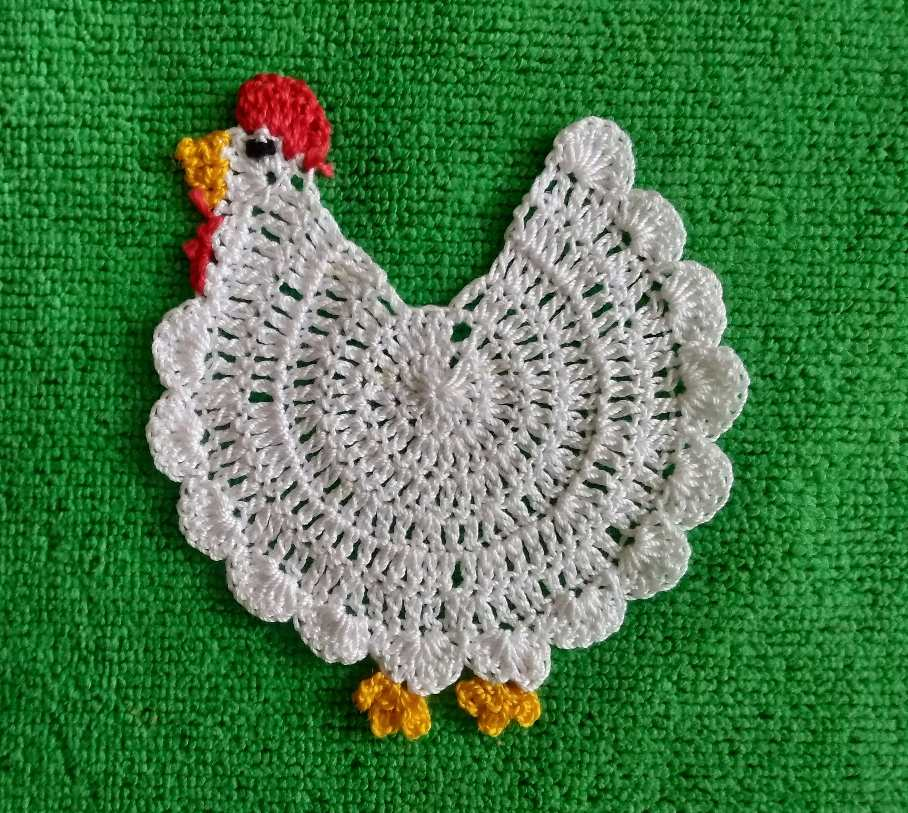
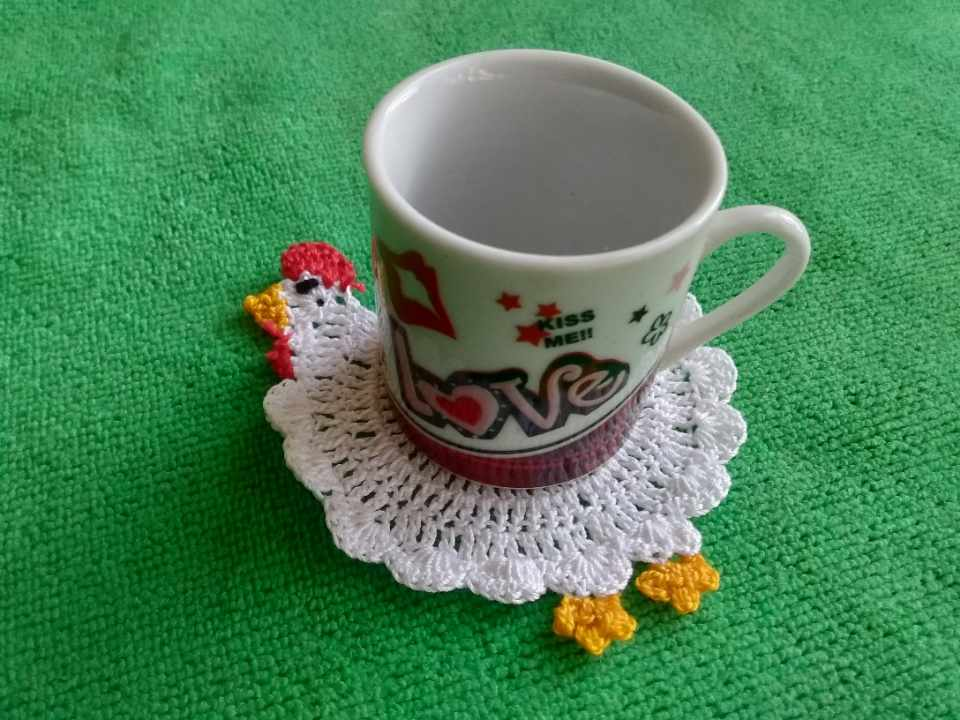
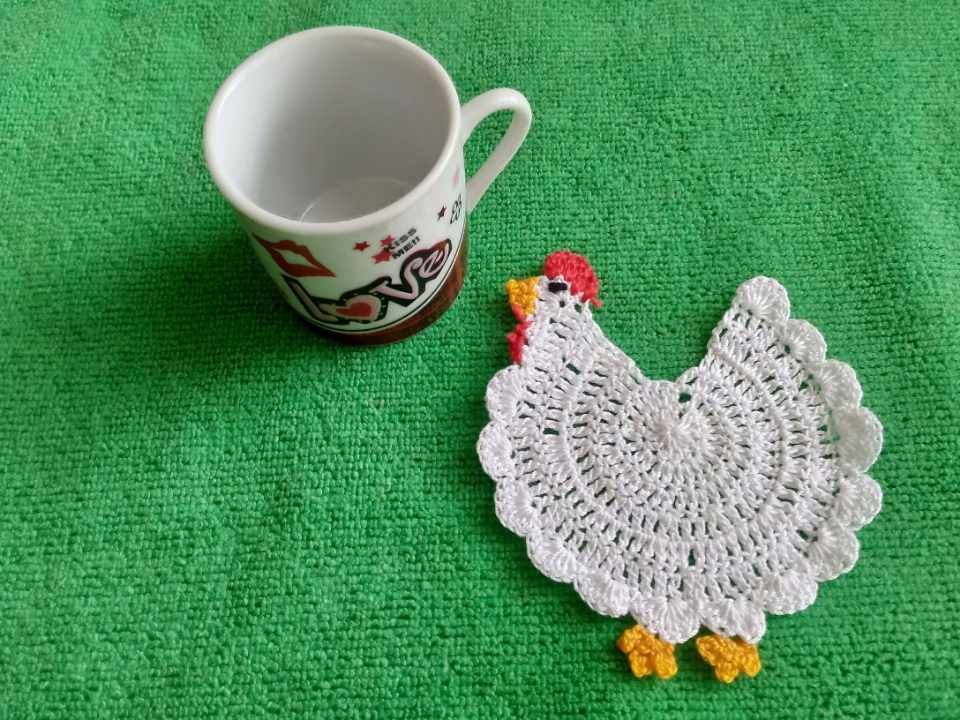
El crochet es una técnica que da para crear muchas cosas como todas sabemos, así que se me ocurrió crear esta cuchitura porque en realidad soy fan del café y pues siempre necesitamos una base para las tazas y que mejor que una gallina posa taza en crochet que queda muy bien, decora la cocina y resalta el momento del té o café.
Crochet is a technique that gives to create many things as we all know, so I came up with the idea of creating this spoon because I'm really a fan of coffee and we always need a base for the cups and what better than a hen posing crochet cup that looks great, decorates the kitchen and highlights the time of tea or coffee.
Materiales
Hilo de crochet color blanco, rojo, amarillo y negro
Aguja para crochet
Tijera
Materials
White, red, yellow, yellow and black crochet thread
Crochet needle
Scissors
Paso a paso/Step by step
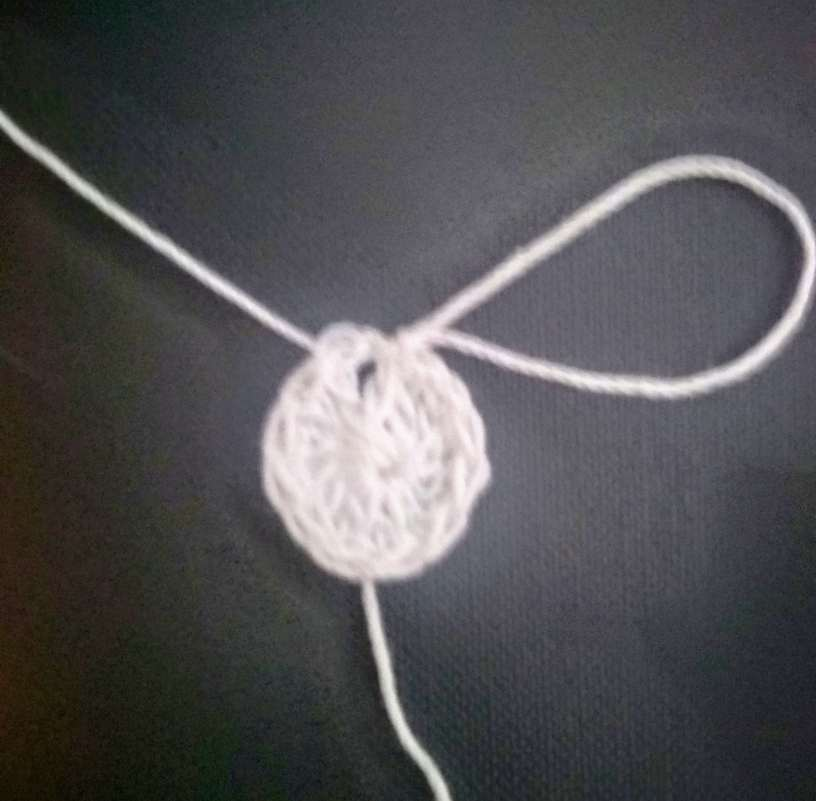
Comenzamos a trabajar con el hilo de color blanco, con el que hacemos un anillo mágico y en él, levantamos 3 cadenetas para realizar 11 puntos altos y cerramos con punto deslizado.
We start working with the white yarn, with which we make a magic ring and on it, we raise 3 chains to make 11 high stitches and close with slipped stitch.
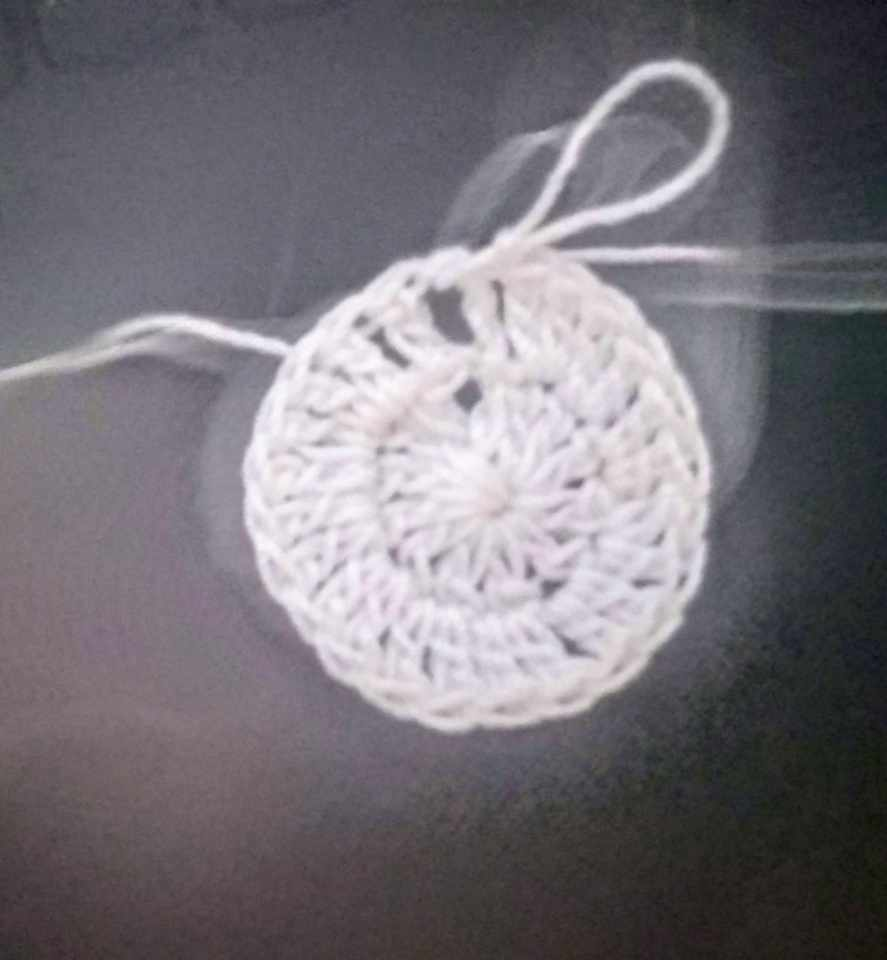
En la segunda vuelta levantamos nuevamente 3 cadenetas, luego un punto alto y seguidamente un aumento, así toda la vuelta hasta obtener 24 puntos, tomando en cuenta que antes de llegar al final es necesario dejar 3 puntos libres para darle forma a la gallina.
In the second round we again raise 3 chains, then a single crochet and then a double crochet, and so on until we obtain 24 stitches, taking into account that before reaching the end it is necessary to leave 3 stitches free to give shape to the hen.

Acá continuamos con otra vuelta en la que levantamos nuevamente 3 cadenetas, 2 puntos altos más un aumento; esto en toda la vuelta, logrando 31 puntos altos.
Here we continue with another row in which we again pick up 3 chains, 2 double crochet stitches plus an increase; this in the whole row, achieving 31 double crochet stitches.
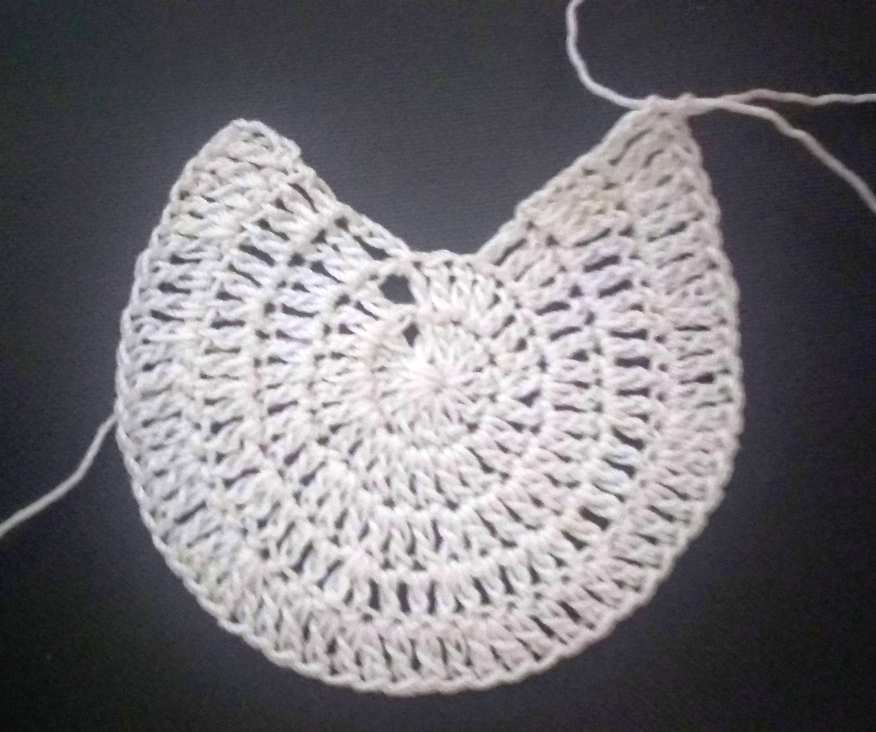
En la siguiente vuelta será, levantar 3 cadenetas, 4 puntos altos más el aumento y en la última vuelta 3 cadenetas, 5 puntos altos más el aumento.
In the next row it will be, pick up 3 chain stitches, 4 double crochet plus increase and in the last row 3 chain stitches, 5 double crochet plus increase.
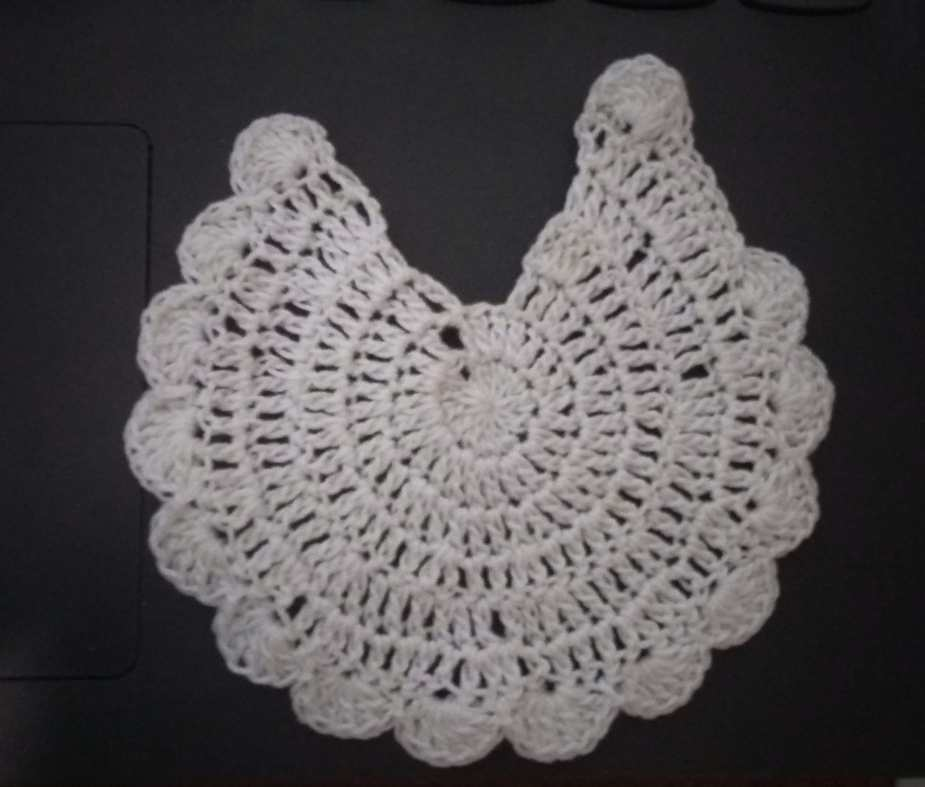
En esta vuelta vamos a crear abanicos los cuales asemejan el plumaje de la gallina, así que iniciamos haciendo una cadeneta, dejamos un espacio libre y en el próximo punto vamos a tejer 6 puntos altos juntos que son los que van a crear la forma del abanico, dejamos nuevamente un espacio libre y en el siguiente punto entramos haciendo punto deslizado; saltamos otro espacio y en el siguiente a ese hacemos otro abanico con 6 puntos altos y con esa secuencia llegamos a completar 14 abanicos, luego de ello tejemos 5 puntos bajos, en el siguiente punto entramos haciendo los 6 puntos altos para crear el último abanico terminando en el siguiente punto con punto deslizado, rematamos y cortamos el hilo.
In this round we are going to create fans which resemble the plumage of the hen, so we start making a chain stitch, we leave a free space and in the next stitch we are going to knit 6 high stitches together which will create the shape of the fan, we leave again a free space and in the next stitch we enter making slipped stitch; we skip another space and in the next stitch we make another fan with 6 high stitches and with that sequence we complete 14 fans, after that we knit 5 low stitches, in the next stitch we enter making the 6 high stitches to create the last fan finishing in the next stitch with slipped stitch, we finish and cut the yarn.
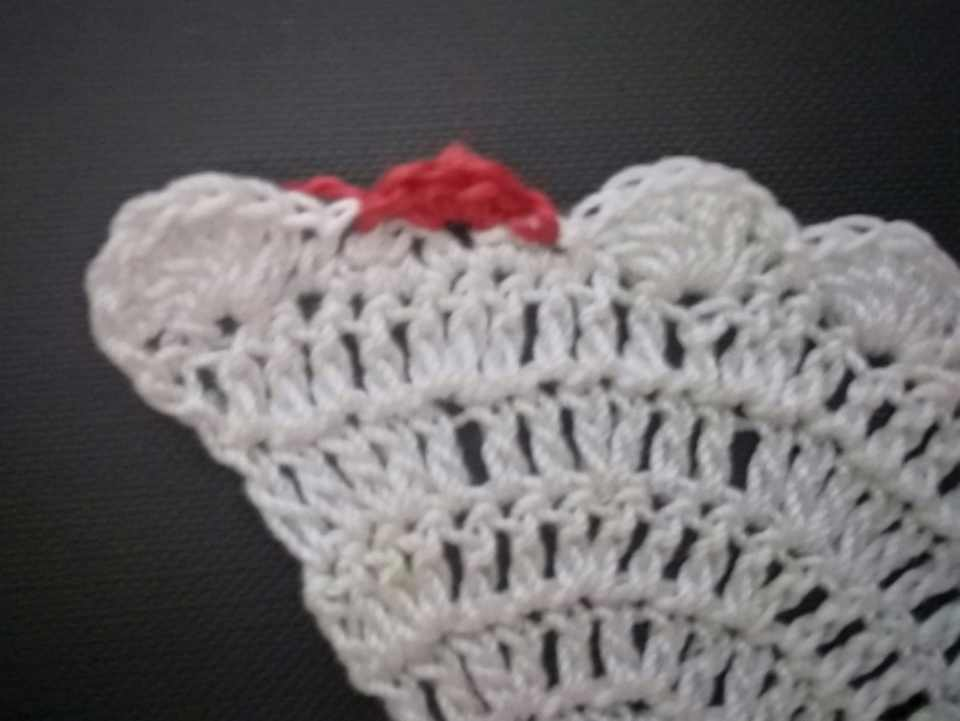
Vamos a trabajar con el hilo de color rojo así vamos a trabajar en los 5 puntos bajos que hicimos anteriormente y entrando en el primero hacemos una cadeneta, saltamos un espacio y en el siguiente punto hacemos 3 puntos bajos juntos, saltamos nuevamente un punto y en el siguiente terminamos con punto deslizado, rematamos y cortamos el hilo. Aquí creamos lo que comúnmente conocemos como barbilla.
We are going to work with the red yarn so we are going to work in the 5 single crochet stitches that we did before and entering the first one we make a chain stitch, we skip a space and in the next stitch we make 3 single crochet stitches together, we skip again a stitch and in the next one we finish with slip stitch, we finish off and cut the yarn. Here we create what is commonly known as chin.
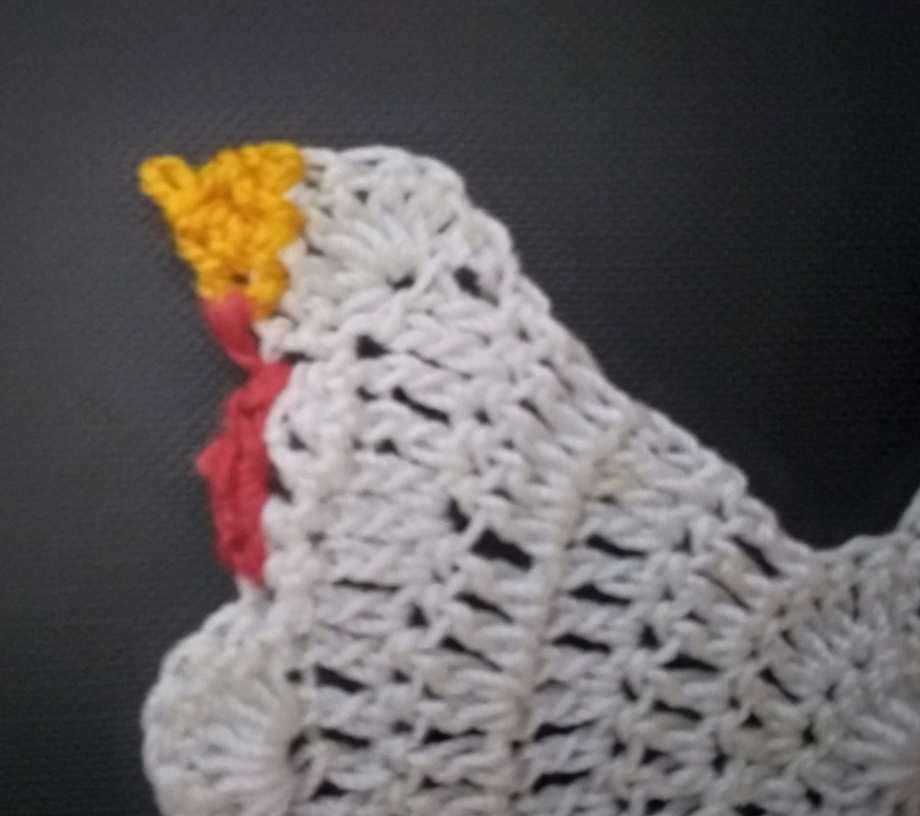
Ahora vamos a trabajar con el color amarillo en el abanico entrando en el primer punto con una cadeneta y en los siguientes 2 puntos hacemos puntos bajos, girar el tejido para continuar sobre los puntos que recién tejimos así que el primer punto lo dejamos libre e insertamos aguja en los siguientes 2 puntos tomando lazada para cerrar juntos de manera de hacer disminución, terminando con una cadeneta y punto deslizado, cortar el hilo. Y aquí hicimos el pico de la gallina.
Now we are going to work with the yellow color in the fan entering in the first stitch with a chain stitch and in the following 2 stitches we make single crochet, turn the fabric to continue over the stitches we just knitted so we leave the first stitch free and insert needle in the following 2 stitches taking loop to close together in order to make decrease, finishing with a chain stitch and slipped stitch, cut the yarn. And here we made the hen's beak.
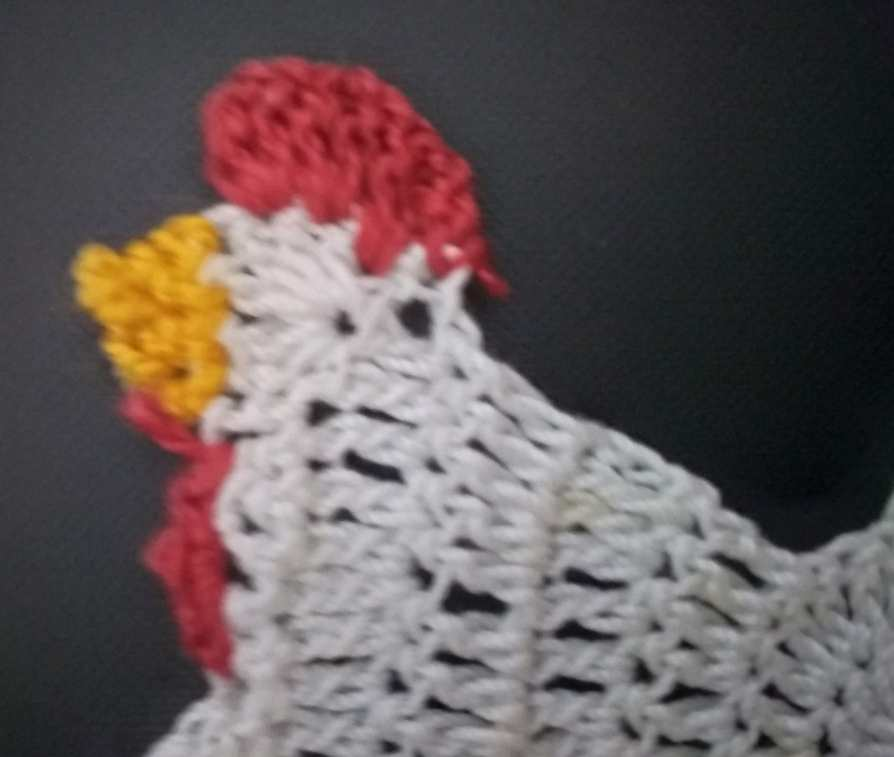
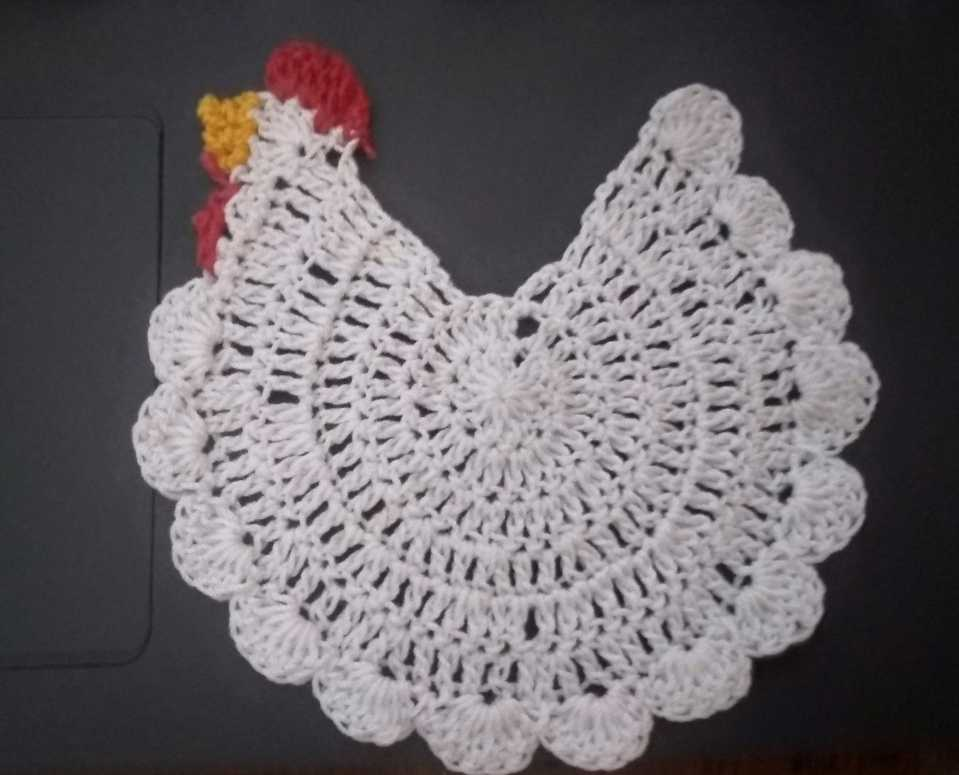
Continuamos y ahora vamos a trabajar en los tres puntos restantes del abanico, así que entramos en ese siguiente punto con hilo de color rojo haciendo una cadeneta para sujetar, en ese mismo espacio tejemos un punto alto una cadeneta y otro punto alto, lo mismo hacemos en los siguientes 2 puntos, terminamos con punto deslizado, rematamos y cortamos hilo. En esta parte creamos la cresta de la gallina.
We continue and now we are going to work in the three remaining stitches of the fan, so we enter in that next stitch with red yarn making a chain stitch to hold, in that same space we knit a single crochet and another single crochet, we do the same in the following 2 stitches, we finish with slip stitch, we finish off and cut yarn. In this part we create the crest of the hen.
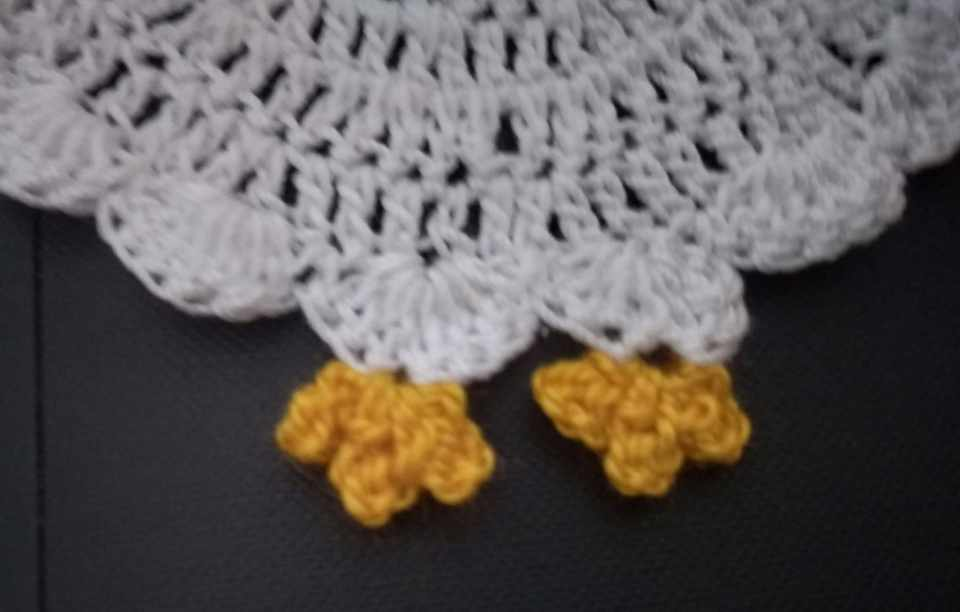

Continuamos con las patas de la gallina que van en color amarillo y para ello nos vamos al abanico número 6 después de la barbilla y en el centro de este entramos levantando 4 cadenetas, entramos nuevamente al punto y hacemos punto deslizado, repetimos 2 veces más en el mismo espacio; terminamos con punto deslizado y cortamos hilo. Luego, en el abanico número 7 hacemos la otra pata de la misma manera que hicimos la primera.
We continue with the legs of the hen that go in yellow color and for this we go to the fan number 6 after the chin and in the center of this we enter raising 4 chains, we enter again to the stitch and make slip stitch, we repeat 2 more times in the same space; we finish with slip stitch and cut yarn. Then, in the fan number 7 we make the other leg in the same way we did the first one.
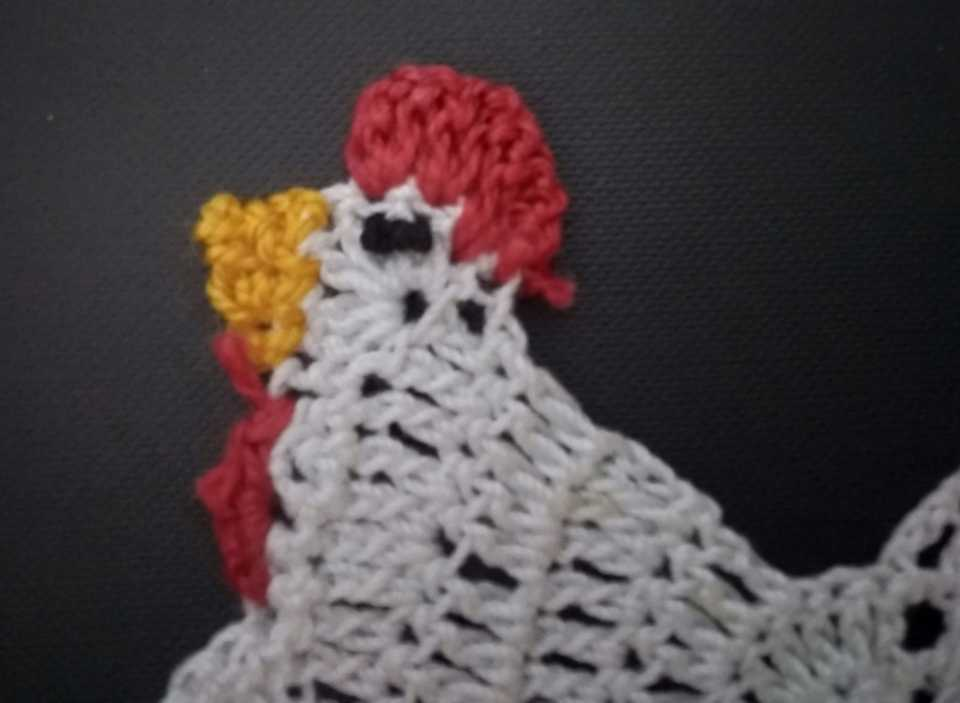
Por último, tomamos hilo de color negro y debajo de la cresta, en la parte de color blanco colocamos el hilo y lo atamos por la parte de atrás, formando así el ojo de la gallina y obtenemos el resultado final.
Finally, we take black thread and under the crest, in the white part we place the thread and tie it at the back, thus forming the eye of the hen and we obtain the final result.
🐔🐔🐔🐔🐔🐔🐔🐔

That's really cute, haha. Your posing hen looks cool and is a great multi purpose material. Well done
Preciosa 🥰
lindo y creativo, un trabajo bien hecho!
nice and creative, a job well done!
Bravo, such an excellent work and it's neatly done. Am impressed and well done
Muy creativa la idea de realizar un portavasos con esta figura que muchos tienen en sus cocinas. Bueno trabajo. Saludos
!DIY
You can query your personal balance by
@lisbethseijas just sent you a DIY token as a little appreciation for your post dear @giocondina! Feel free to multiply it by sending someone else !DIY in a comment :) You can do that x times a day depending on your balance so:!DIYSTATSUn trabajo muy bonito, y bien realizado, gracias por compartir tu manualidad en la comunidad, saludos.