Hello again, dear friends in the DIY community! After being away for a while due to travel, I’m thrilled to be back and continue working on my RC robot project. Here’s a detailed update on what I’ve accomplished so far and some challenges I faced along the way.
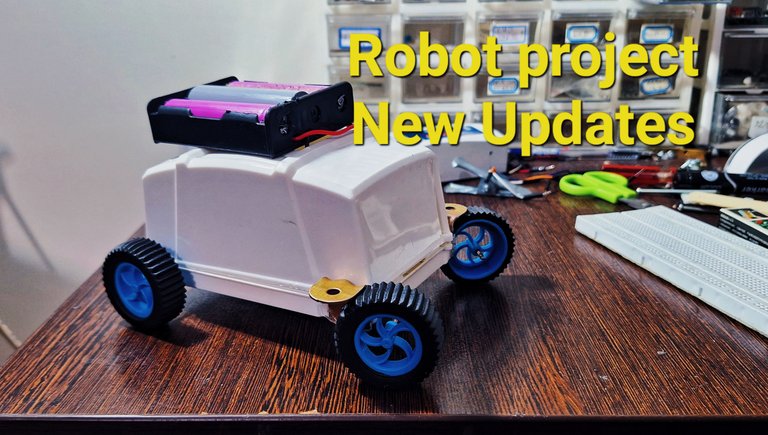
Progress on the RC Robot Project
1. Joystick Control Challenges
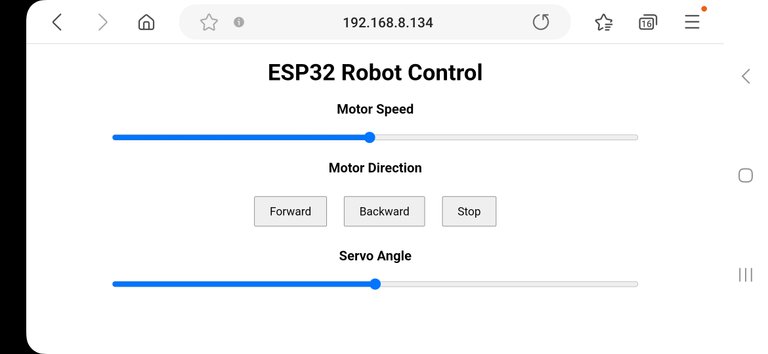
In the previous stage of my project, I successfully utilized PS2 joystick modules to control the robot's motor. However, these joysticks turned out to be unreliable, breaking down after a short time. To overcome this, I temporarily shifted to using a simple web server hosted on the ESP32 mounted on the robot. By connecting to the modem and accessing the ESP32’s IP address, I was able to control the robot remotely.
Here is another video of how it works with the web interface:
Web Control Setup:
I utilized the esp_http_server.h library to create a basic UI for controlling:
- Motor speed
- Direction (forward or backward)
- Servo motor for steering (front wheels)
Here is the code for this part:
#include <WiFi.h>
#include <esp_http_server.h>
#include <ESP32Servo.h>

// Replace with your WiFi credentials
const char* ssid = "Your-SSID";
const char* password = "Your-Password";

// Motor pins
const int in1Pin = 4;    // Motor direction 1
const int in2Pin = 32;   // Motor direction 2
const int enablePin = 12; // Motor PWM

// Servo pin
const int servoPin = 15;
Servo servo;

// HTML page for control interface
const char* htmlPage = R"rawliteral(
<!DOCTYPE html>
<html>
<head>
  <title>ESP32 Robot Control</title>
  <style>
    body { font-family: Arial, sans-serif; text-align: center; }
    .control { margin: 20px; }
    .slider { width: 80%; }
    .button { padding: 10px 20px; margin: 10px; font-size: 16px; cursor: pointer; }
  </style>
  <script>
    function sendMotorSpeed(value) {
      fetch(`/motorSpeed?value=${value}`);
    }
    function sendMotorDirection(direction) {
      fetch(`/motorDirection?direction=${direction}`);
    }
    function sendServoAngle(angle) {
      fetch(`/servoAngle?angle=${angle}`);
    }
  </script>
</head>
<body>
  <h1>ESP32 Robot Control</h1>
  <div class="control">
    <h3>Motor Speed</h3>
    <input type="range" min="0" max="1023" value="500" class="slider"
           oninput="sendMotorSpeed(this.value)" />
  </div>
  <div class="control">
    <h3>Motor Direction</h3>
    <button class="button" onclick="sendMotorDirection('forward')">Forward</button>
    <button class="button" onclick="sendMotorDirection('backward')">Backward</button>
    <button class="button" onclick="sendMotorDirection('stop')">Stop</button>
  </div>
  <div class="control">
    <h3>Servo Angle</h3>
    <input type="range" min="0" max="180" value="90" class="slider"
           oninput="sendServoAngle(this.value)" />
  </div>
</body>
</html>
)rawliteral";

// Function to control the motor speed
void setMotorSpeed(int speed) {
    ledcWrite(enablePin, speed); // Channel 0 is used for PWM
}

// Function to control motor direction
void setMotorDirection(const char* direction) {
    if (strcmp(direction, "forward") == 0) {
        digitalWrite(in1Pin, HIGH);
        digitalWrite(in2Pin, LOW);
    } else if (strcmp(direction, "backward") == 0) {
        digitalWrite(in1Pin, LOW);
        digitalWrite(in2Pin, HIGH);
    } else if (strcmp(direction, "stop") == 0) {
        digitalWrite(in1Pin, LOW);
        digitalWrite(in2Pin, LOW);
    }
}

// HTTP Handlers
esp_err_t handle_root(httpd_req_t* req) {
    httpd_resp_set_type(req, "text/html");
    httpd_resp_send(req, htmlPage, HTTPD_RESP_USE_STRLEN);
    return ESP_OK;
}

esp_err_t handle_motor_speed(httpd_req_t* req) {
    char param[32];
    if (httpd_req_get_url_query_str(req, param, sizeof(param)) == ESP_OK) {
        char value[8];
        if (httpd_query_key_value(param, "value", value, sizeof(value)) == ESP_OK) {
            int speed = atoi(value);
            setMotorSpeed(speed);
            Serial.printf("Motor speed set to %d\n", speed);
        }
    }
    httpd_resp_send(req, "OK", HTTPD_RESP_USE_STRLEN);
    return ESP_OK;
}

esp_err_t handle_motor_direction(httpd_req_t* req) {
    char param[32];
    if (httpd_req_get_url_query_str(req, param, sizeof(param)) == ESP_OK) {
        char direction[16];
        if (httpd_query_key_value(param, "direction", direction, sizeof(direction)) == ESP_OK) {
            setMotorDirection(direction);
            Serial.printf("Motor direction set to %s\n", direction);
        }
    }
    httpd_resp_send(req, "OK", HTTPD_RESP_USE_STRLEN);
    return ESP_OK;
}

esp_err_t handle_servo_angle(httpd_req_t* req) {
    char param[32];
    if (httpd_req_get_url_query_str(req, param, sizeof(param)) == ESP_OK) {
        char angle[8];
        if (httpd_query_key_value(param, "angle", angle, sizeof(angle)) == ESP_OK) {
            int angleValue = atoi(angle);
            servo.write(angleValue);
            Serial.printf("Servo angle set to %d\n", angleValue);
        }
    }
    httpd_resp_send(req, "OK", HTTPD_RESP_USE_STRLEN);
    return ESP_OK;
}

void start_web_server() {
    httpd_config_t config = HTTPD_DEFAULT_CONFIG();
    httpd_handle_t server = NULL;

    if (httpd_start(&server, &config) == ESP_OK) {
        httpd_uri_t root = { .uri = "/", .method = HTTP_GET, .handler = handle_root };
        httpd_uri_t motor_speed = { .uri = "/motorSpeed", .method = HTTP_GET, .handler = handle_motor_speed };
        httpd_uri_t motor_direction = { .uri = "/motorDirection", .method = HTTP_GET, .handler = handle_motor_direction };
        httpd_uri_t servo_angle = { .uri = "/servoAngle", .method = HTTP_GET, .handler = handle_servo_angle };

        httpd_register_uri_handler(server, &root);
        httpd_register_uri_handler(server, &motor_speed);
        httpd_register_uri_handler(server, &motor_direction);
        httpd_register_uri_handler(server, &servo_angle);
    }
}

void setup() {
    Serial.begin(115200);

    // Connect to Wi-Fi
    WiFi.begin(ssid, password);
    while (WiFi.status() != WL_CONNECTED) {
        delay(1000);
        Serial.println("Connecting to WiFi...");
    }
    Serial.println("Connected to WiFi");
    Serial.println(WiFi.localIP());

    // Motor setup
    pinMode(in1Pin, OUTPUT);
    pinMode(in2Pin, OUTPUT);
    ledcAttach(enablePin, 5000, 8);

    // Servo setup
    servo.attach(servoPin);
    servo.write(90); // Start at 90 degrees (neutral position)

    // Start the web server
    start_web_server();
}

void loop() {
    // Nothing to do here
}
2. Chassis Upgrade
The old chassis I was using was unsuitable for this project, so I decided to upgrade to a larger and sturdier chassis. The new setup provides better support for the components and improves overall stability.
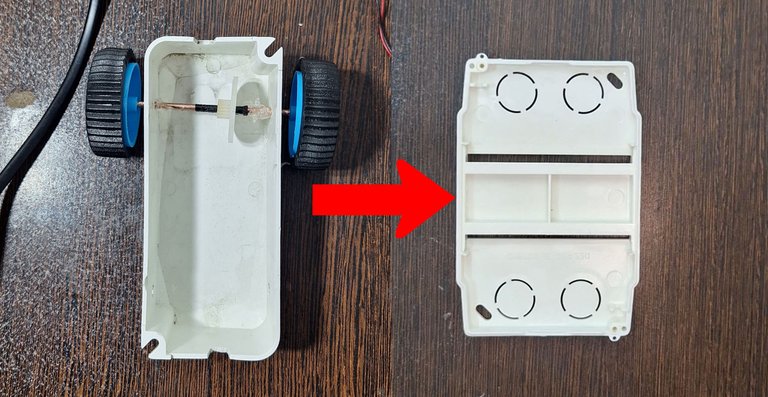
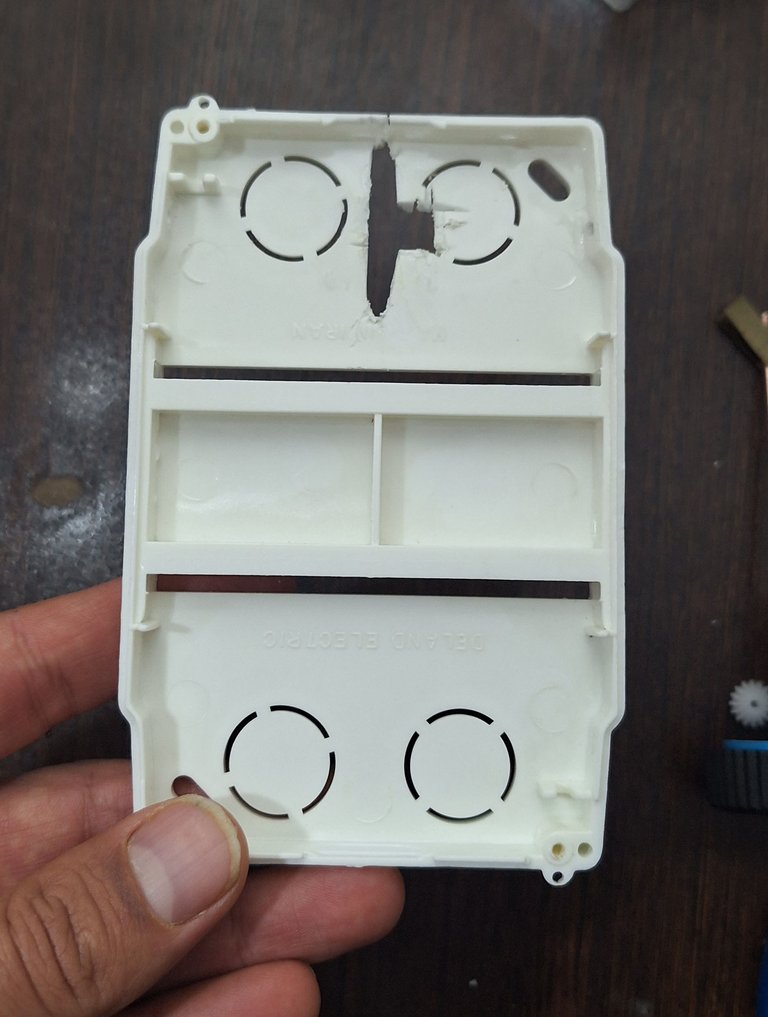
Then I made a whole in the middle for the gear to move smoothly and also 2 wholes was drilled for the rear axis:

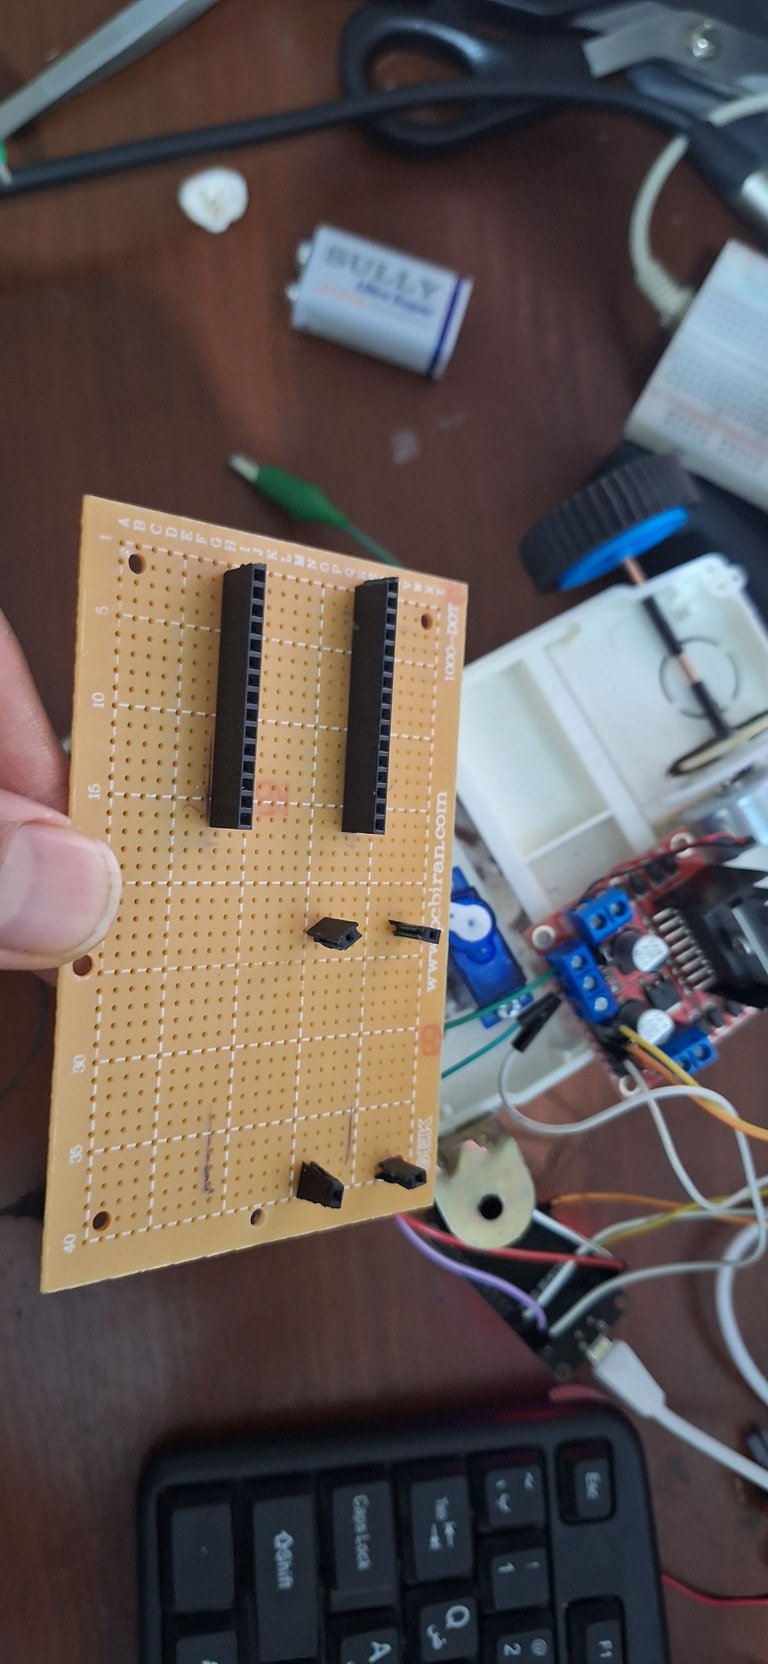
3. Modular Design
To make the entire system modular, I used a perforated board (perfboard) and soldered appropriate sockets for the ESP32 and other modules. Here's what I did:
Mounted the L298N motor driver onto the board and drilled holes for screws to securely fix it in place.
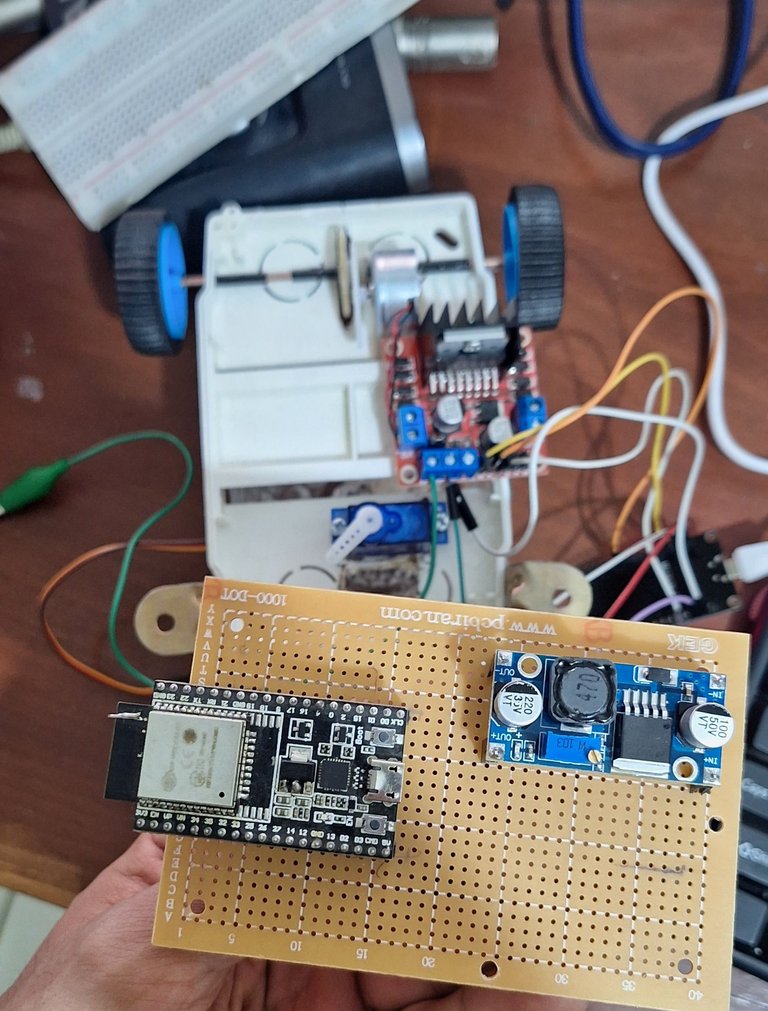
For the rear motor installation, I repurposed two gears salvaged from an old DVD player. While they’re not ideal for this application, they’re what I had available at the time. I plan to replace them with a better setup later.
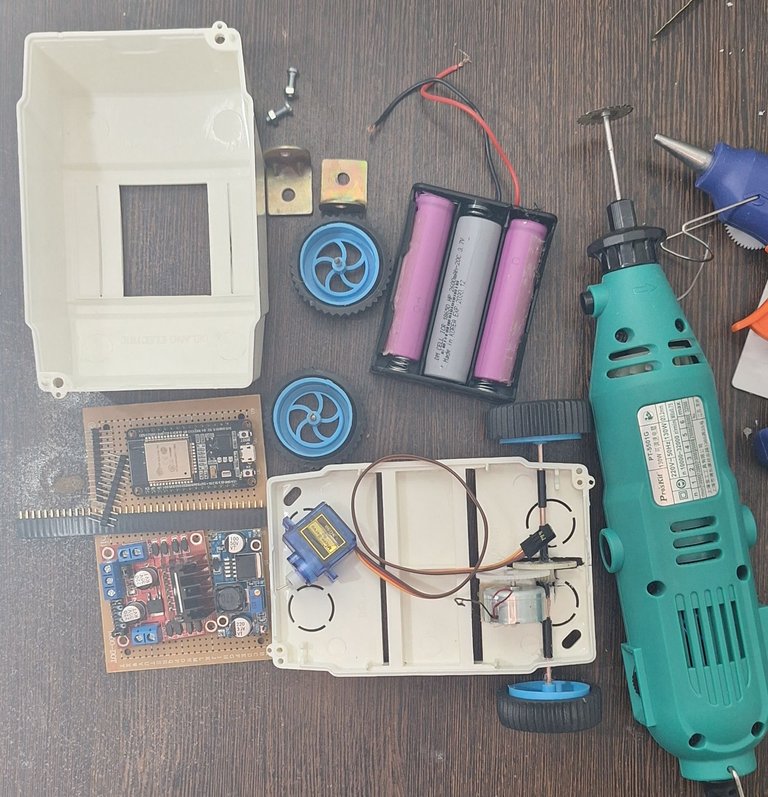
4. Body and Battery Housing
I used a plastic box as the robot’s body and:
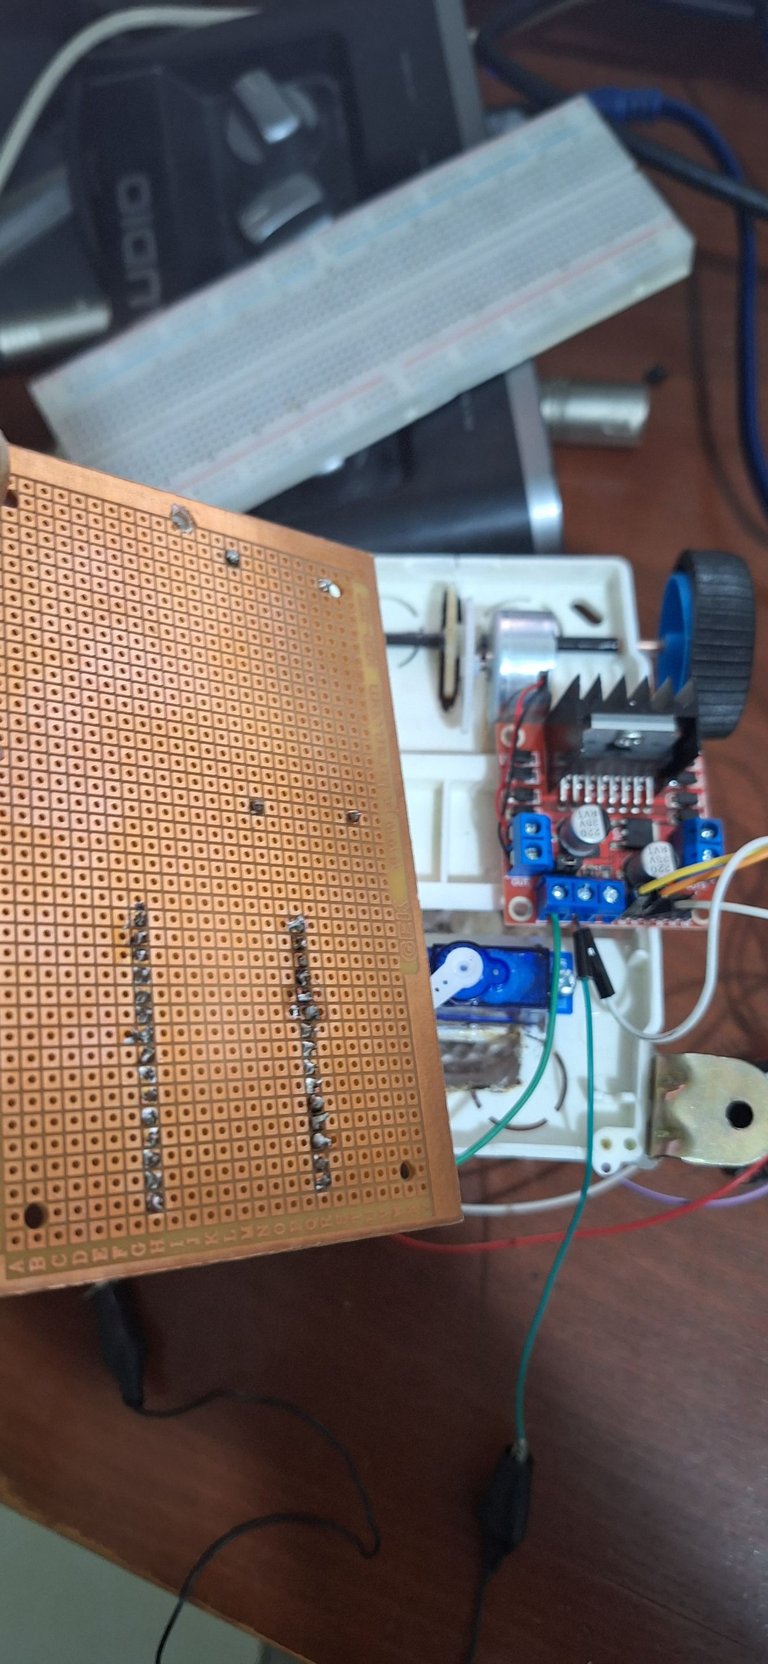
Drilled two holes on the top for securely attaching the perfboard.
Ensured the motors could be easily mounted underneath.
Allocated an external compartment for the batteries to save space inside the chassis.
5. Improved Front Axle
For the front axle, I used stronger materials to improve durability. I creatively repurposed metal curtain brackets, which I’ll finalize and refine in the next update.
Next Steps
The robot is almost ready to move! In my next post, I’ll share how the upgraded front axle is completed and how the robot performs in action. This project has been a learning experience as I’m relatively new to robotics, but I’m excited to tackle future projects with more speed and confidence.
Follow Me for More!
If you’ve enjoyed this update, stay tuned for my next projects! Your support motivates me to keep improving and sharing my DIY adventures.
Wishing you a great day and happy tinkering! 🚀
que genial, que interesante
how cool, how interesting
Thank you yasmarit, I am glad you find it interesting 🙏
Congratulations @hadif66! You have completed the following achievement on the Hive blockchain And have been rewarded with New badge(s)
Your next target is to reach 2250 upvotes.
You can view your badges on your board and compare yourself to others in the Ranking
If you no longer want to receive notifications, reply to this comment with the word
STOPCheck out our last posts:
That's awesome thank you
Go for it, @hadif66! Set your sights on that new target and keep pushing forward. Remember, every small step brings you closer to your goal.
BTW, our NEW proposal needs your support to continue bringing gamification and entertainment to Hive. Please consider supporting it and helping us out.
Thank you!
Wow wow .
Excellent work my friend!
Thank for the support, your supports helps me stay focused and motivated to go on with this journey
!LUV
(4/5) sent you LUV. | tools | discord | community | HiveWiki | <>< daily@hadif66, @happyphoenix
Thanks for the LUV and I am glad that you liked my content 🙏