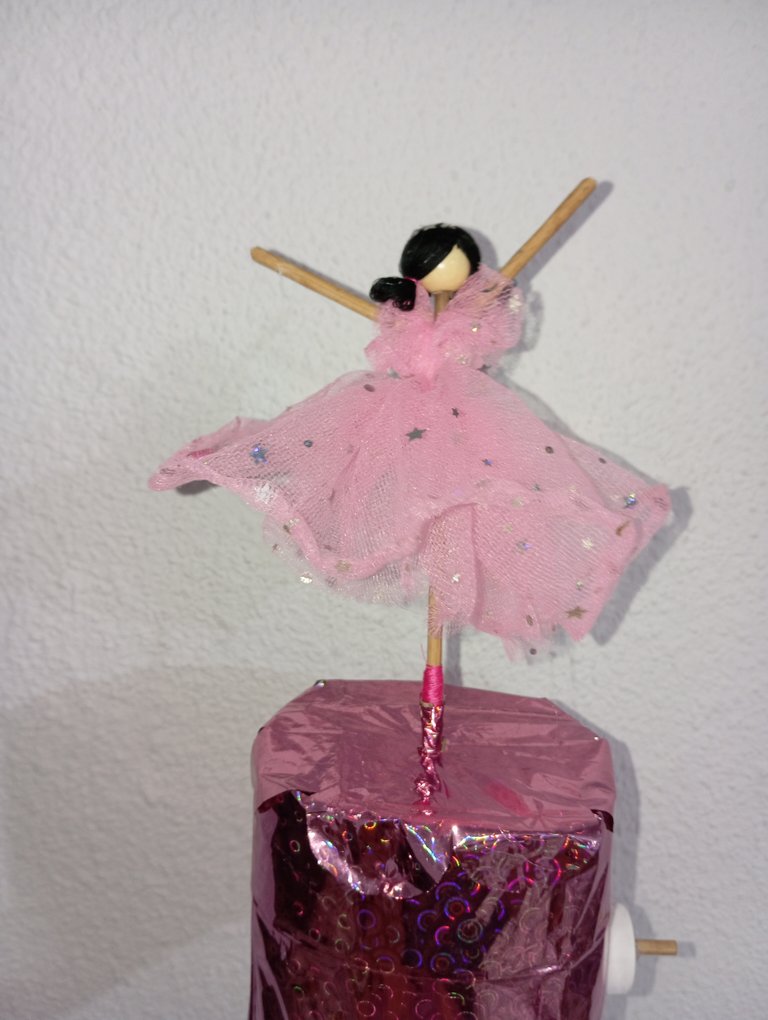
Hello creators hivers have an excellent and blessed day. Today I want to share with you how to make a cute ballerina with mechanism to move, with my baby was a very quiet day so I had the time to make this project. Although it had some details that could be improved, I think it was very nice, but I will leave you the observations in the steps so that it looks great for you.
Hola creadores hivers tengan un excelente y bendecido día. Hoy quiero compartir con ustedes cómo hacer una linda bailarina con mecanismo para moverse, con mi bebé fue un día muy tranquilo por lo cual me dió el tiempo para realizar este proyecto. Aunque tuvo uno detalles que se pueden mejorar me parece que quedó muy linda, de igual forma les dejaré las observaciones en los pasos para que a ustedes les quede de maravillas.
Without further ado, let's start with the tutorial.
Sin más preámbulo, comencemos con el tutorial.
Materials:
Cardboard.
Plastic lids.
Fabric and plastic scissors.
Sticks for height and skewers.
Decorative paper.
Wire cutting pliers (I used this one to cut the sticks).
Cautin.
Tulle and piece of unicolor fabric (both pink).
Black and pink thread.
Sewing needle (manual).
Hot glue.
Wooden bead.
Toilet paper rolls.
Materiales:
Cartón.
Tapas de plástico.
Tijeras para tela y plástico.
Palitos de altura y de pinchos.
Papel decorativo.
Pinzas de cortar alambre. (Esta la usé para cortar los palitos)
Cautín.
Tul y retazo de tela unicolor (ambos rosa).
Hilos negro y rosa.
Aguja de coser (manual).
Silicón caliente.
Cuenta de madera.
Rollos de papel higiénico.
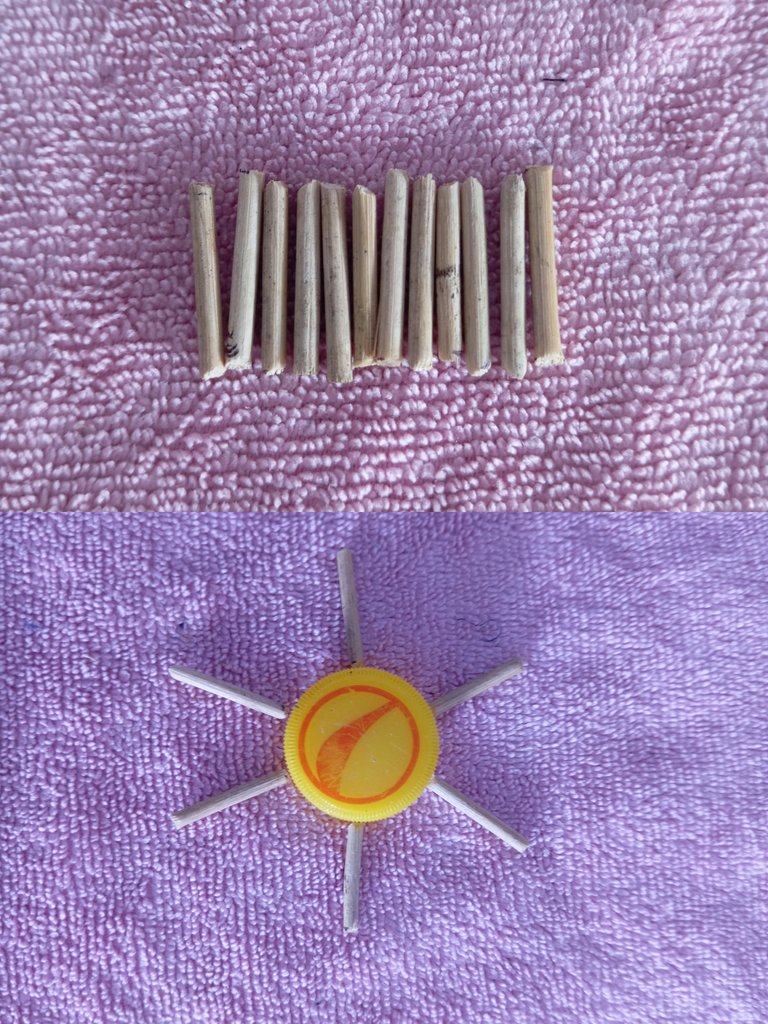
Step 1:
Cut with the tweezers 12 sticks of 1cm, these will be to place as shown in the photo.
Paso 1:
Cortar con la pinza 12 palitos de 1cm, estos serán para colocar tal cual como se ven en la foto.
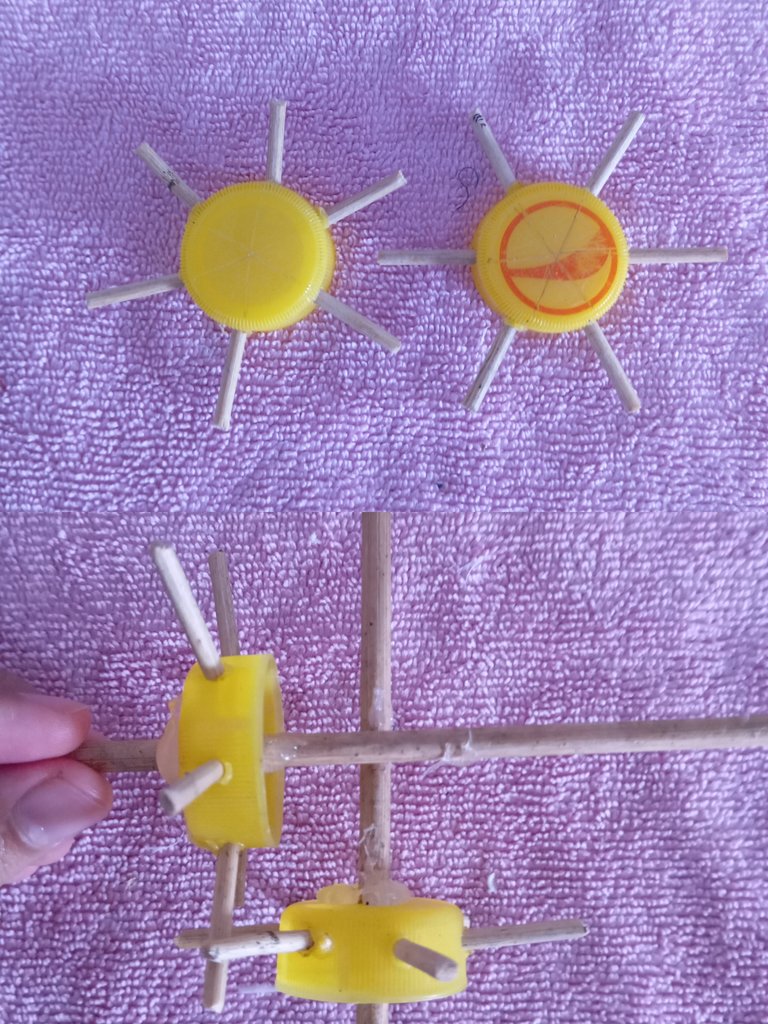
Step 2:
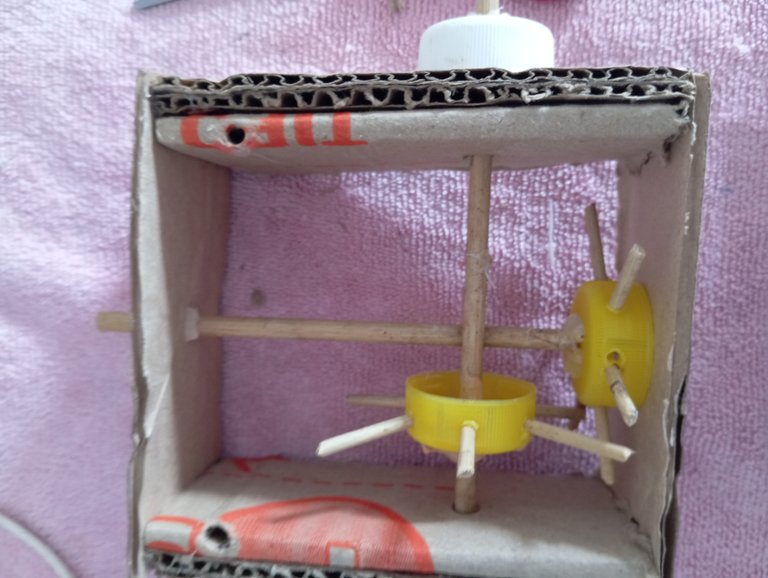
With the help of the soldering iron make 6 holes in 2 lids and insert the sticks, make a hole in the center of each lid and place a skewer stick, you must put hot silicone where the holes are so that the two pieces are joined together. This will be to make the mechanism that will make the dancer turn.
Note: This mechanism is better if instead of placing 6 sticks, we place 8. It will rotate more smoothly and not as I did 🫢.
Paso 2:
Con ayuda del cautín hacer los 6 orificios en 2 tapas e insertar los palitos, hacer un orificio en el centro de cada tapa y colocarles un palito de pincho, a estás se les debe echar silicón caliente en donde quedan los orificios para que queden unidas ambas piezas. Esto será para hacer el mecanismo que hará girar a la bailarina.
Observación: Este mecanismo queda mejor si en vez de colocar 6 palitos, le colocamos 8. Girará más suave y no como me quedó a mi 🫢
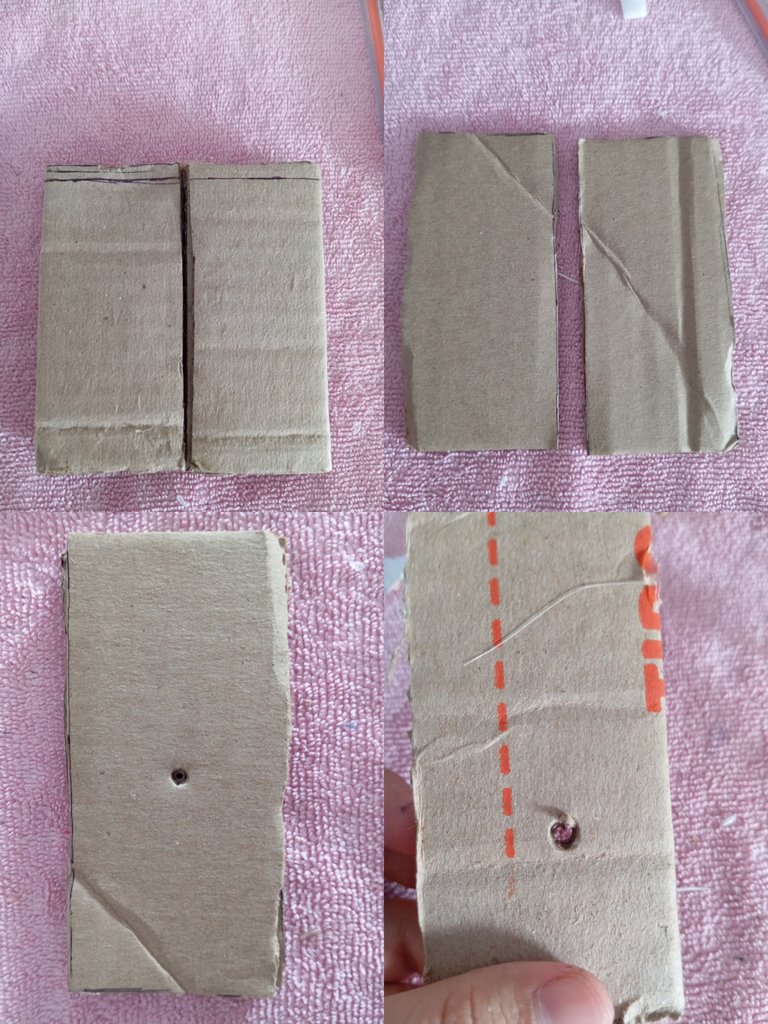
Step 3:
Make with cardboard the pieces for the base of the mechanism. This should be measured by placing the aforementioned in the center, this way you will see that when you turn the pieces will not be locked and can move well.
Note: It will look better if you make the pieces with 2 layers of cardboard, and give a wide shape to be able to decorate more easily.
Paso 3:
Hacer con cartón las piezas para la base del mecanismo. Está se debe medir colocando el antes mencionado en el centro, de esta manera verás que al girar las piezas no quedarán trabadas se podrán mover bien.
Observación: Quedará mejor si las piezas las haces con 2 capas de cartón, y dar una forma amplia para poder decorar con más facilidad.
Step 4:
Insert the pieces in the cardboard bases and glue with hot silicone. With another lid place on the protruding part of the base, this will serve for the mechanism inside, so that each gear remains in its place.
Paso 4:
Insertar las piezas en las bases de cartón y pegar con el silicón caliente. Con otra tapa colocar en lo que sobresale de la base está servirá para que el mecanismo por dentro, quede cada engranaje en su lugar.
Step 5:
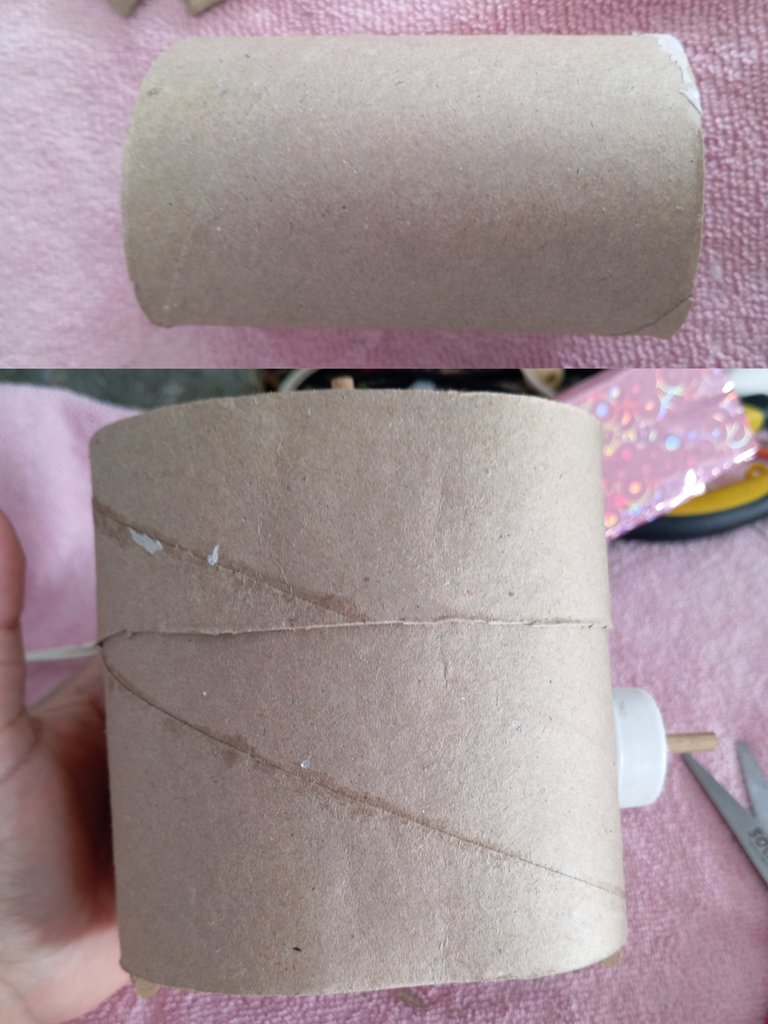
Cut the toilet paper rolls in the center and open to cover the cardboard base.
Paso 5:
Cortar los rollos de papel higiénico en el centro y abrir para cubrir la base de cartón.
Step 6:
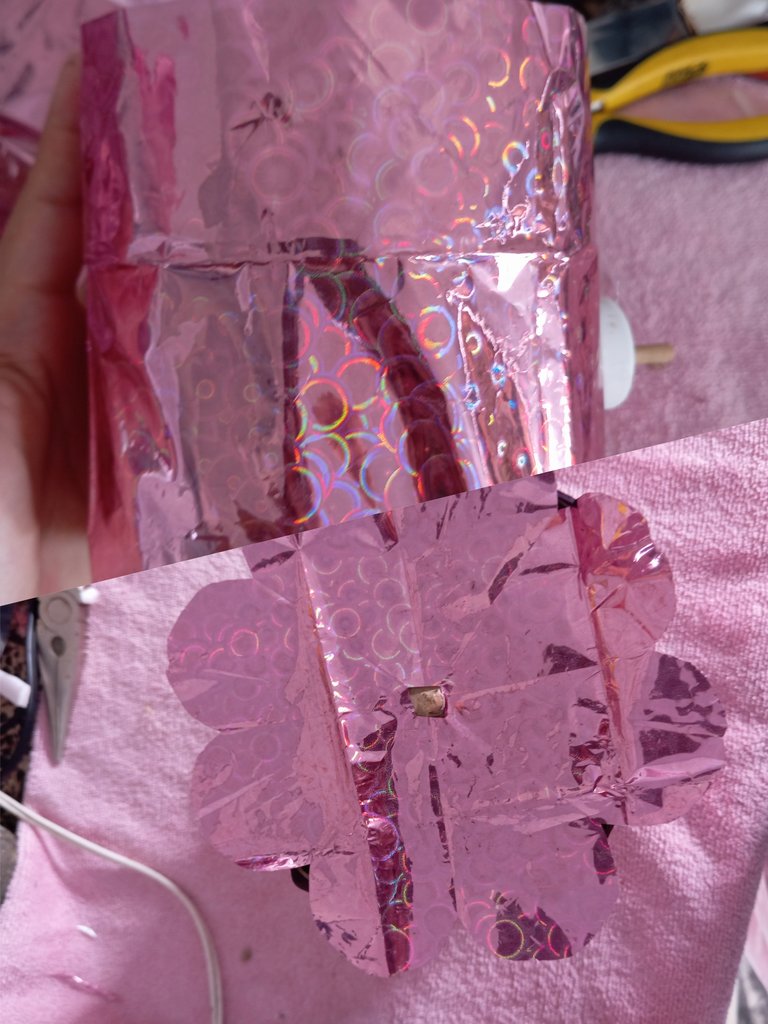
Use the decorative paper to line the cardboard base.
Paso 6:
Con el papel decorativo forrar la base.
Step 7:
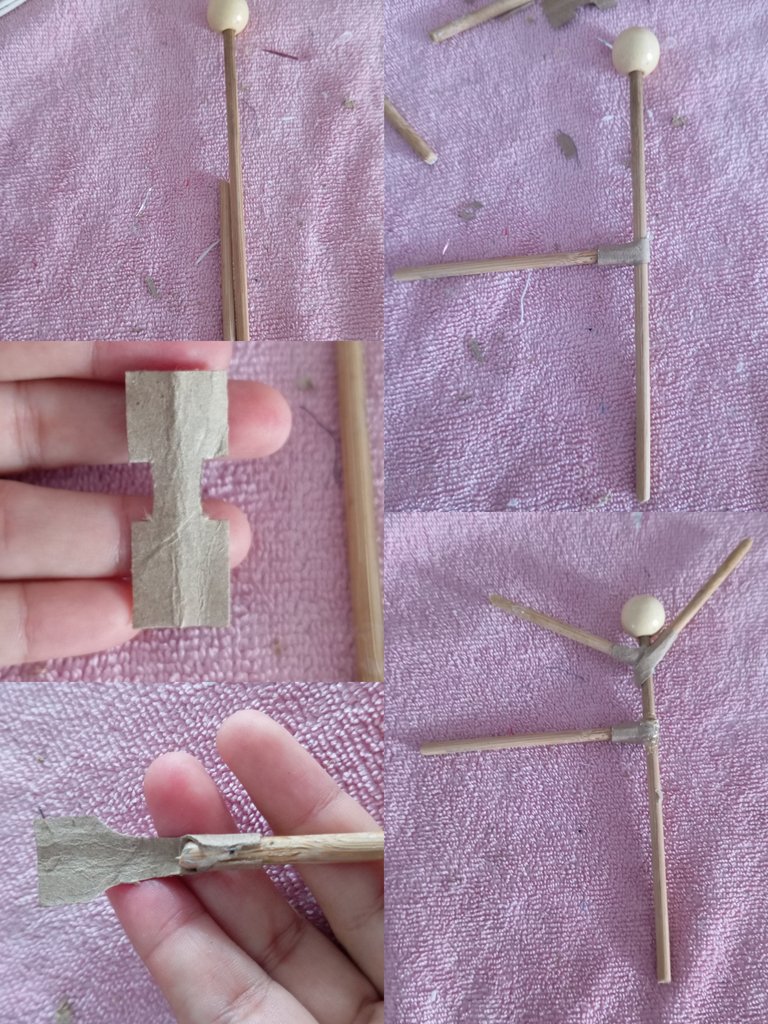
To make the ballerina I cut 3 sticks, 2 for the arms and one for the leg that will be elevated, I used a longer one for the body and this one will be the support leg. I tore off a piece of cardboard and removed a layer of it to make the joints, as shown in the pictures. Glue the wooden bead to the tip, this will be the head.
Note: So that the dancer does not lose stability as it happened to me, I advise you that when making the piece where the central gear that will make it rotate goes, leave that stick long enough to make the dancer out of it without having to make a joint.
Paso 7:
Para hacer la bailarina corté 3 palitos 2 para los brazos y una para la pierna que irá elevada, usé uno más largo para el cuerpo y este mismo hará la pierna de soporte. Arranqué un trozo de cartón y quite una capa de este para hacer las uniones, tal cual como se aprecia en las fotos. Pegar la cuenta de madera a la punta, está será la cabeza.
Observación: Para que la bailarina no pierda estabilidad como me sucedió a mi, les aconsejo que al hacer la pieza donde va el engranaje central que la hará girar, dejar ese palito lo suficientemente largo para que hagan de este mismo la bailarina sin tener que hacer una unión.
Step 8:
Gather the tulle with the needle and thread, also the decorative border for the arms and shoulders. Cover the torso with the piece of unicolor fabric and proceed to glue the skirt and the border.

Paso 8:
Fruncir el tul con la aguja e hilo, también el borde decorativo para los brazos y hombros. Cubrir el torso con el retazo de tela unicolor y proceder a pegar la falda y el borde.
Step 9:
On a small cardboard square roll enough black thread to make the hair, tie in the center and glue to the head covering the back.
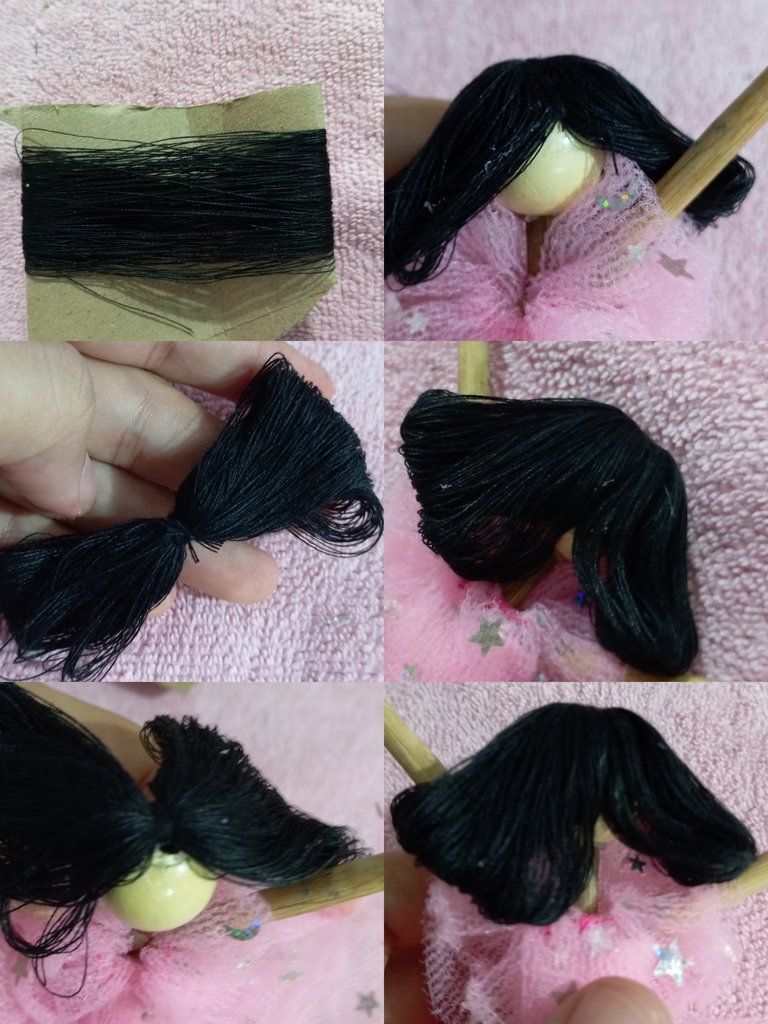
Paso 9:
En un cuadro de cartón pequeño enrollar suficiente hilo negro para hacer el cabello, amarrar en el centro y pegar a la cabeza cubriendo la parte de atrás.
Step 10:
Make the bows for the ballerina and decorate her hair, I used stars that I peeled off pieces of the leftover tulle.
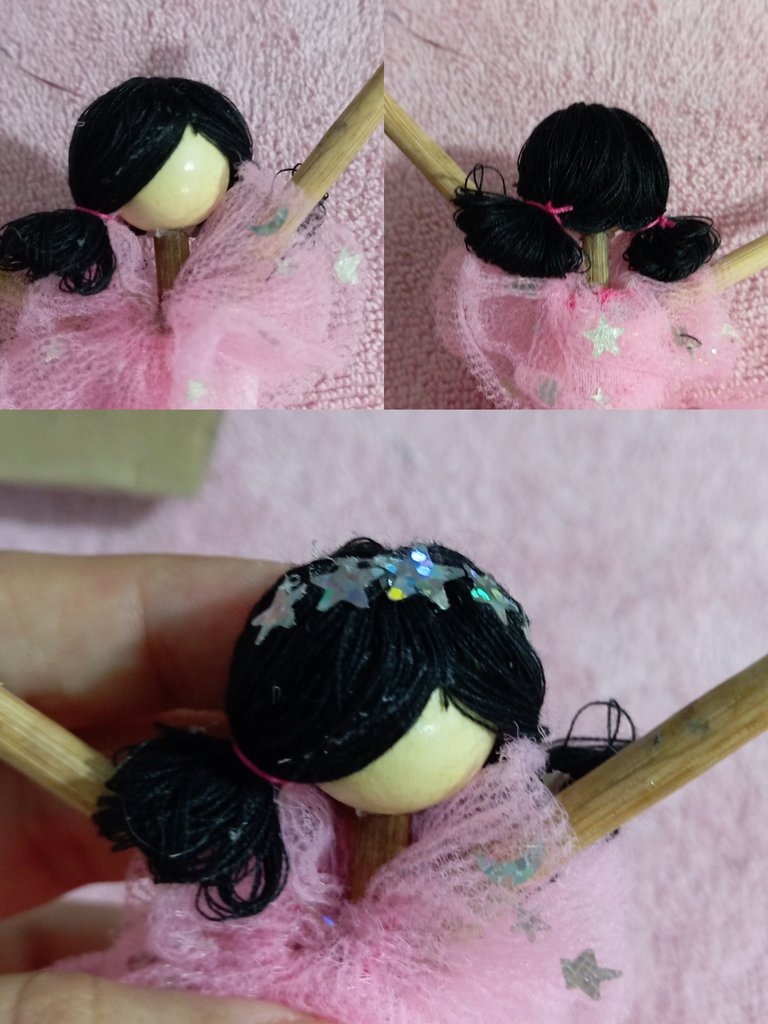
Paso 10:
Hacer los moños a la bailarina y decorar su cabello, yo usé estrellas que despegué de retazos del tul sobrante.
*** Step 11:***
With the pink thread make the slippers and with a small piece of cardboard attach them to the mechanism that will make them spin.
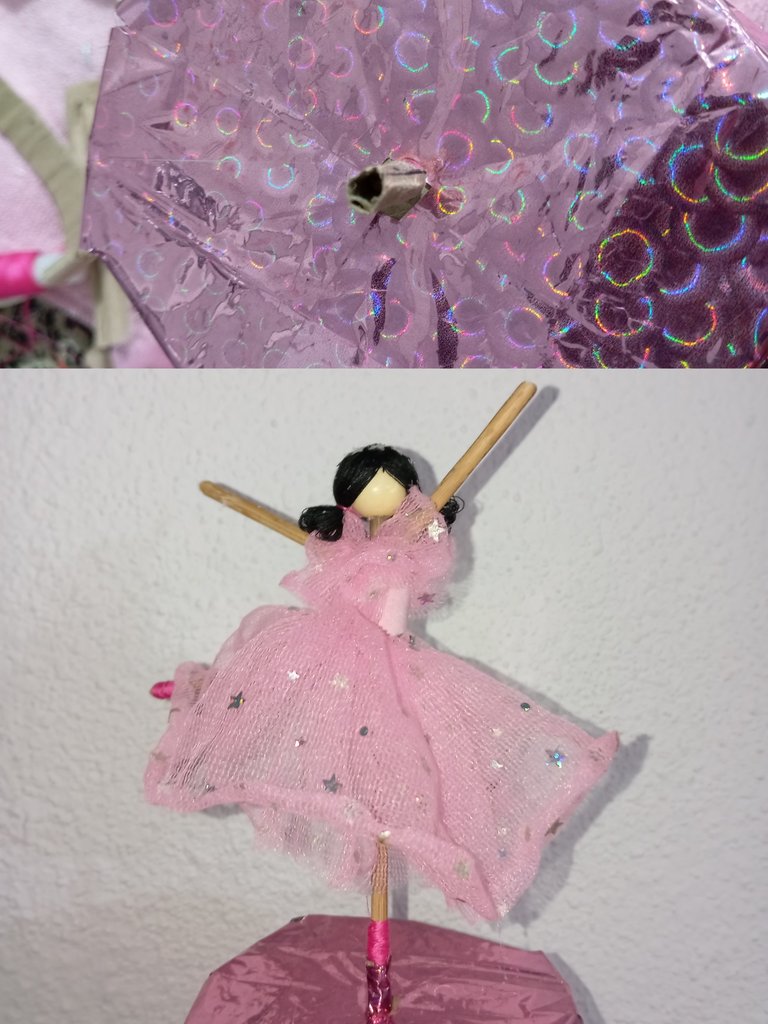
Paso 11:
Con el hilo rosa hacer las zapatillas y con un trocito de cartón unir al mecanismo que la hará girar.
As I mentioned before, my ballerina was poorly made. For a moment I thought about fixing it but that would mean having to disassemble the whole base, practically starting from scratch and even though I had told you that I had time, I had already used most of it and I didn't want to leave my daughter playing alone. As you know, it's not only about making the project but also writing it and this takes more time so I hope you understand me. But I think you could do it much better and I hope you like this content and can take advantage of it.
Como había mencionado anteriormente mi bailarina quedó mal realizada. Por un momento pensé en arreglarla pero eso significaría tener que desarmar toda la base, prácticamente empezar de cero y pues a pesar de que les había dicho que tuve tiempo pues ya había utilizado la mayor parte y no quería seguir dejando a mi hija jugando sola. Como ya saben no es solo realizar el proyecto sino redactarlo también y pues esto toma más tiempo así que espero me entiendan. Pero creo que ustedes podrían hacerla mucho mejor espero les guste este contenido y puedan sacarle provecho.

Translation with DeepL
Photos taken with Redmi 12
Editing done in Canva
Traducción con DeepL
Fotos tomadas con Redmi 12
Edición realizada en Canva
Congratulations @hayleysv! You have completed the following achievement on the Hive blockchain And have been rewarded with New badge(s)
Your next target is to reach 900 upvotes.
You can view your badges on your board and compare yourself to others in the Ranking
If you no longer want to receive notifications, reply to this comment with the word
STOPCheck out our last posts:
It doesn't look bad at all. The ballerina and spinning box came out good.
Thank you very much 🫂.
Muy dinámica y divertida bailarina se ve original y su vestido rosa brillante es fantástico .
Me alegra que le haya gustado, gracias. Saludos ☺️🥰
Bien creativo tu trabajo.
You have got a lovely creative skills