Hello, fellow crafters. I hope you are having a blessed and healthy day. Today, thanks to God, the energies have been very nice and my baby girl is feeling much better. This has encouraged me to make a tutorial that will be a top in fabric scraps that I had from previous works. As a seamstress I must say that it is very hard for me to throw away fabric scraps, I always try to give them a use or save them to stuff cushions or dolls with them. This time I want to show you a wonderful idea to take advantage of those little scraps of fabric that we have lying around or you can even use a shirt that you no longer use but is in perfect condition. It is very easy and simple to do, it could also be done by hand, it is quite comfortable and beautiful so, I hope you like it and if you like to do it at home.
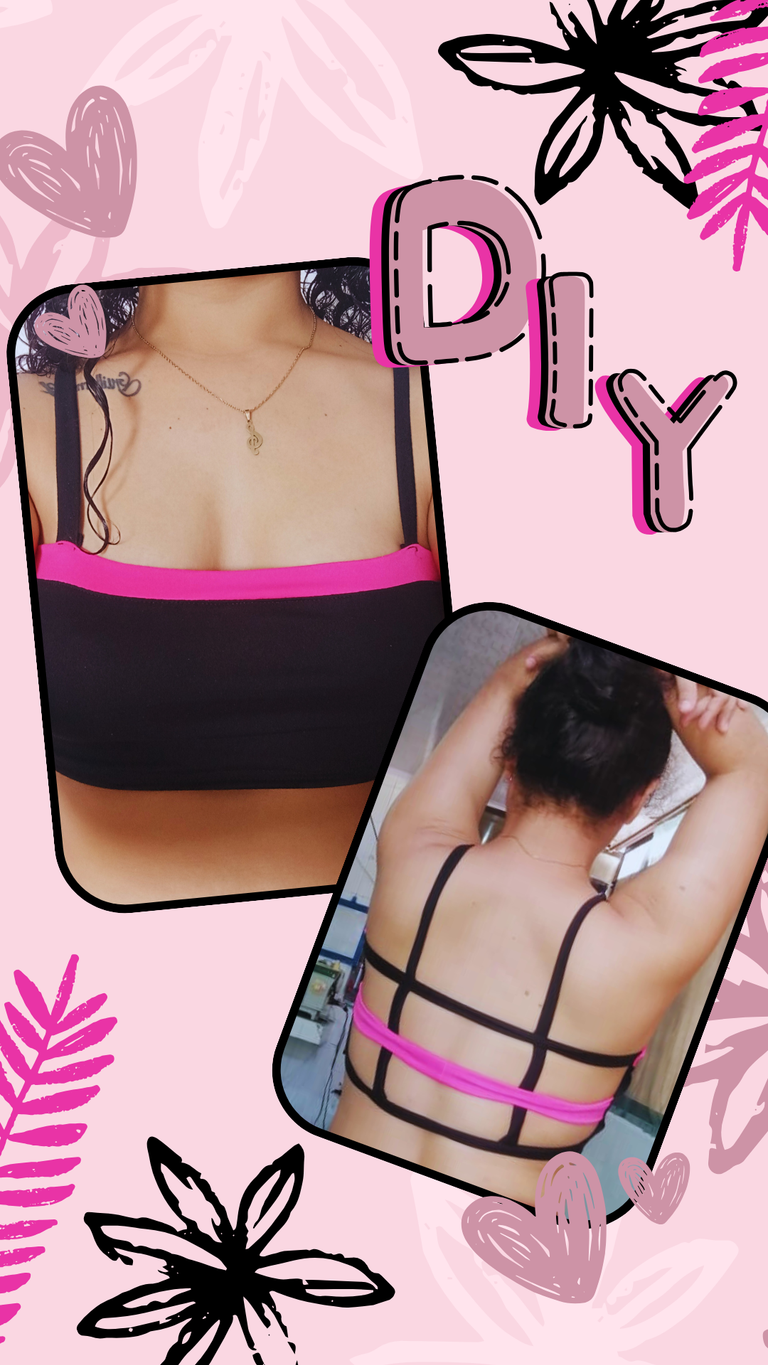
Hola, amigos artesanos. Espero estén teniendo un hermoso bendecido día y sobretodo lleno de salud . Hoy por acá gracias a Dios las energías han amanecido muy bonitas y mi bebita ya está bastante mejor. Esto me ha dado animos para hacer un tutorial que será un top en retazos de tela que tenía de los trabajos anteriores. Como costurera debo decir que me cuesta mucho tirar los recortes de tela, siempre trato de darle un uso o guardarlos para rellenar cojines o muñecos con ellos. En esta oportunidad quiero de mostrarles una idea maravillosa para aprovechar esos pequeños retazos de tela que tenemos por ahí guardados o incluso pueden usar una camisa que ya no usen pero esté en perfecto estado. Es muy fácil y sencillo de hacer, también se pudiera hacer a mano, es bastante cómodo y bonito así que, espero que les guste y si es su gusto realizarlo en casa.
Without further ado, let's go with the tutorial.
Sin más preámbulo vamos con el tutorial.
Material:
Sample top.
Fabric scraps.
Scissors.
Sewing machine.
Thread.
Pins.
Material:
Top de muestra.
Retazos de tela.
Tijera.
Máquina de coser.
Hilo.
Alfileres.
Step 1:
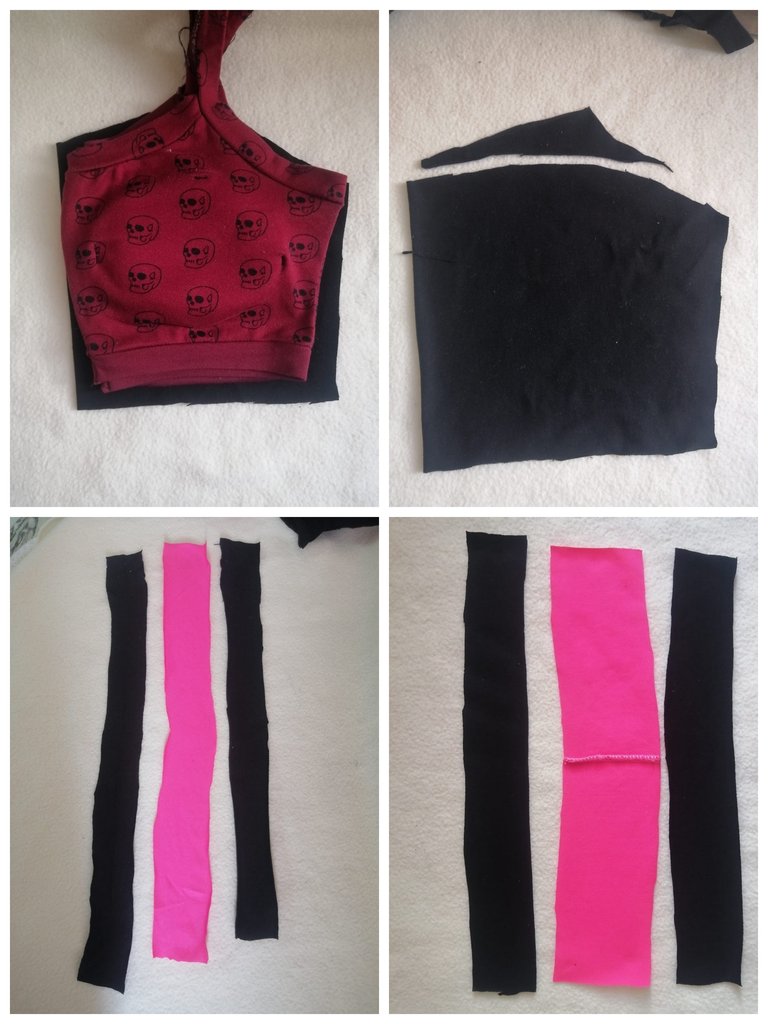
Place the sample top on top of the fabric to remove the front side by cutting out the oval neckline of the top, we will also cut three strips for the back neckline, three thinner and longer strips for the straps and the border.
Paso 1:
Colocar el top de muestra encima de la tela para sacar la cara de enfrente recortando ovalado el escote de la del top, también cortaremos tres tiras para el escote de la espalda , tres tiras más delgadas y largas para los tirantes y el borde.
Step 2:
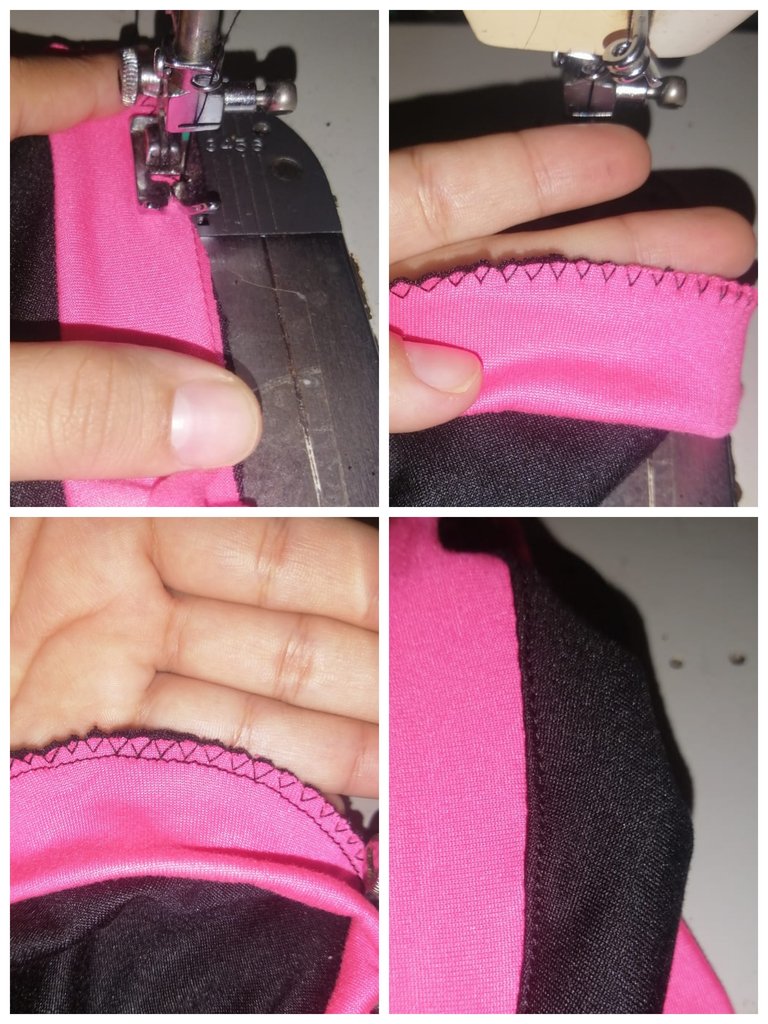
Sew one of the long strips to the edge by passing a zigzag stitch and then a straight stitch and finally we will stitch a backstitch.
Paso 2:
Coser una de las tiras largas al borde pasando una una puntada zigzag y luego una recta finalmente le haremos un pespunte.
Step 3:
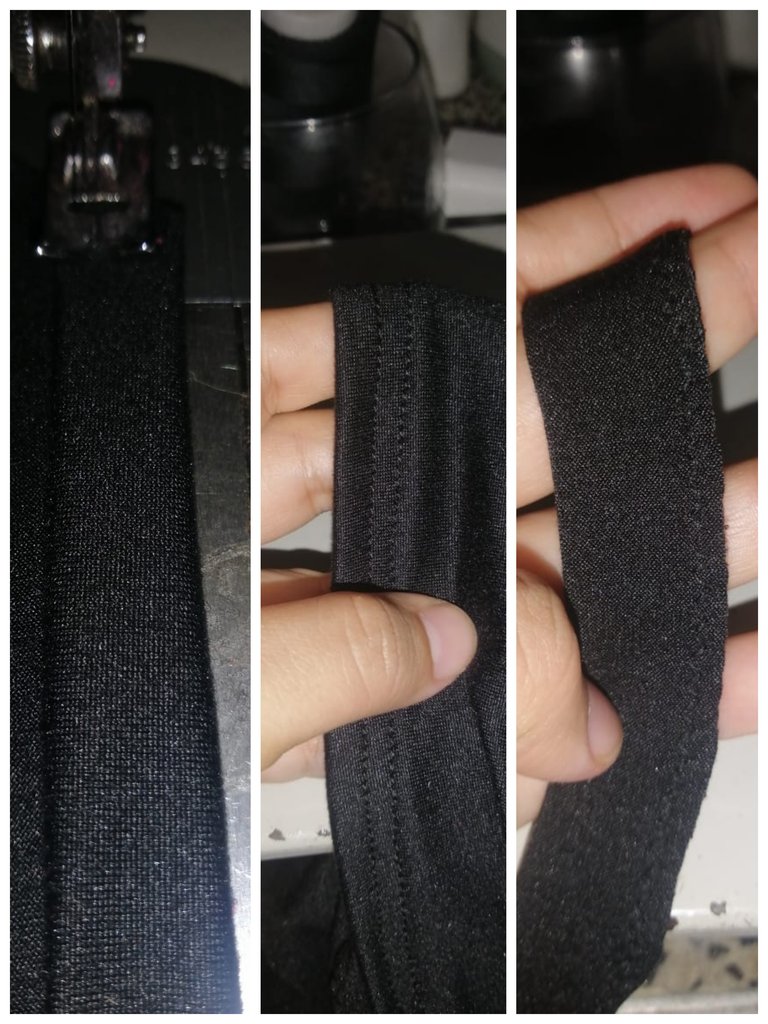
Make the edge of the top by passing two lines in a straight stitch and stretching the fabric a little in this way the top will have a better finish. Also sew all the strips using the zigzag stitch passing twice so that it is resistant when stretching.
Paso 3:
Hacer la orilla del top pasando dos líneas en puntada recta y estirando un poco la tela de esta manera el top quedará con mejor acabado. También coser todas las tiras usando la puntada de zigzag pasando dos veces para que quede resistente al momento de estirar.
Step 4:
Place the three strips of the back neckline and over the straps, I placed them centered but that will depend on the taste of each one, you can even add more strips to the neckline if you prefer, it will still look very nice. I helped myself with the pins so that they were exactly where I wanted and then sewed with straight stitch finishing the seam well.
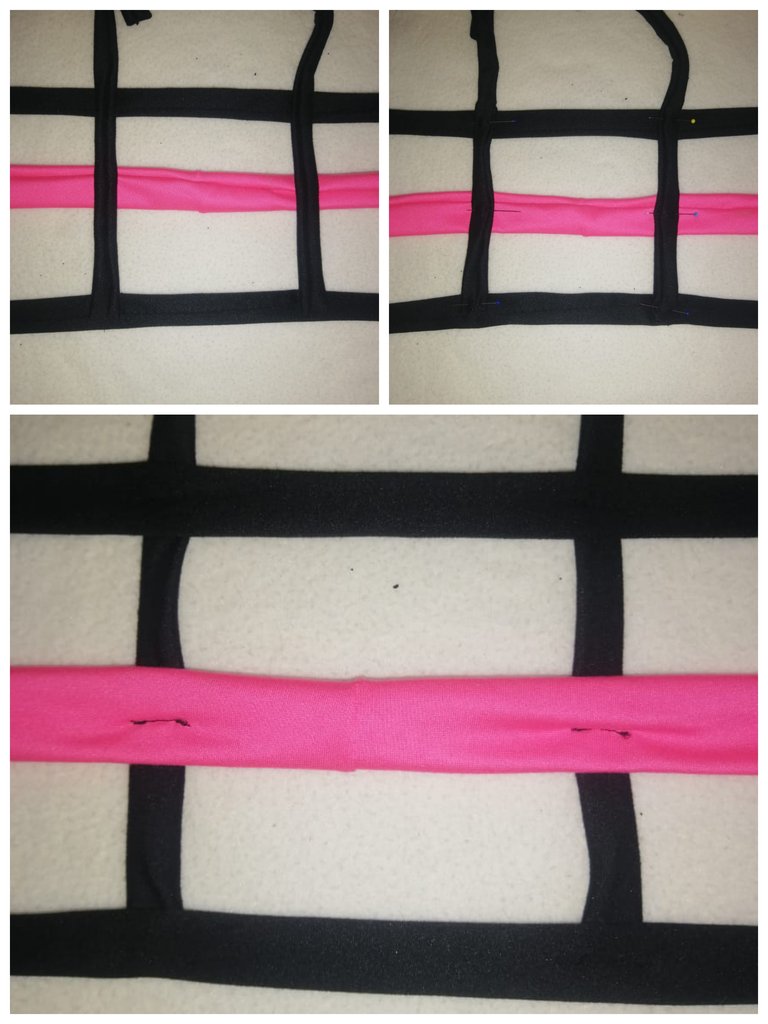
Paso 4:
Colocar las tres tiras del escote de la espalda y encima los tirantes, yo los coloqué centrados pero eso dependerá del gusto de cada uno, incluso puedes agregar más tiras al escote si así prefieres igual quedará muy bonito. Yo me ayudé con los alfileres para que quedaran exactamente en el lugar que deseaba y luego cosí con puntada recta rematando bien la costura.
Step 5:
Finally we will join the two pieces placing the straps as shown in the photo and pass double line in straight stitch so that the straps are well fixed. we will also place the straps on the front and repeat the same process only this time we will only pass a line in straight stitch.
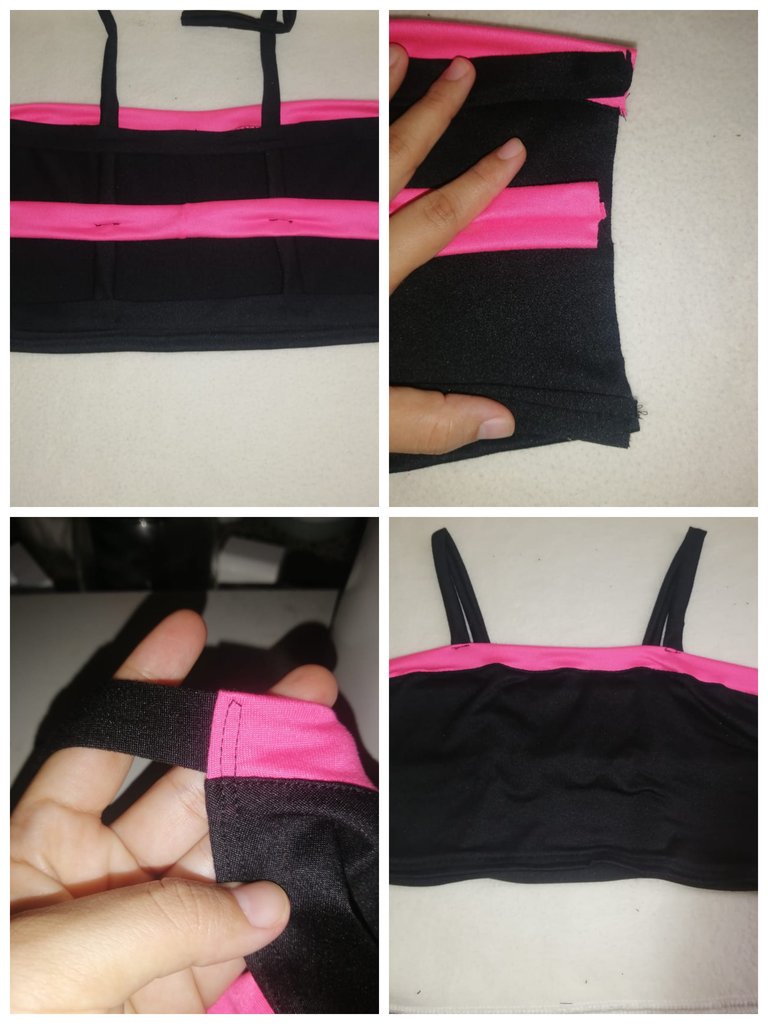
Paso 5:
Finalmente uniremos las dos piezas ubicando los tirantes tal cual como se aprecia en la foto y pasamos doble línea en puntada recta para que queden bien fijadas las tiras. también ubicaremos los tirantes en la parte del frente y repetiremos el mismo proceso solo que esta vez solamente pasaremos una línea en puntada recta.
With this our patchwork top is finished. I have memories of when I started in the world of sewing, I was 15 years old and I started doing this kind of projects but before I did not look as good as I wanted. I hope you liked it and you can take advantage of this tutorial.

Con esto ya queda terminado nuestro top de retazos. Tengo recuerdos de cuando comencé en el mundo de la costura, tenía 15 años y empecé fue haciendo este tipo de proyectos solo que antes no me quedaban tan bien como quería. Espero haya sido de su agrado y puedan sacarle provecho a este tutorial.
A hug from afar and take care guys, it's always a pleasure to share with you a little of what I've learned.
Un abrazo desde la distancia y cuídense mucho chicos siempre es un placer compartir con ustedes un poco de lo que he aprendido.

Translation with DeepL
Photos taken with Redmi 12
Editing done in Canva
Traducción con DeepL
Fotos tomadas con Redmi 12
Edición realizada en Canva
Congratulations @hayleysv! You have completed the following achievement on the Hive blockchain And have been rewarded with New badge(s)
Your next target is to reach 4000 upvotes.
You can view your badges on your board and compare yourself to others in the Ranking
If you no longer want to receive notifications, reply to this comment with the word
STOP