Good afternoon my friends, here I bring you a new creativity, so that you can do it at home.
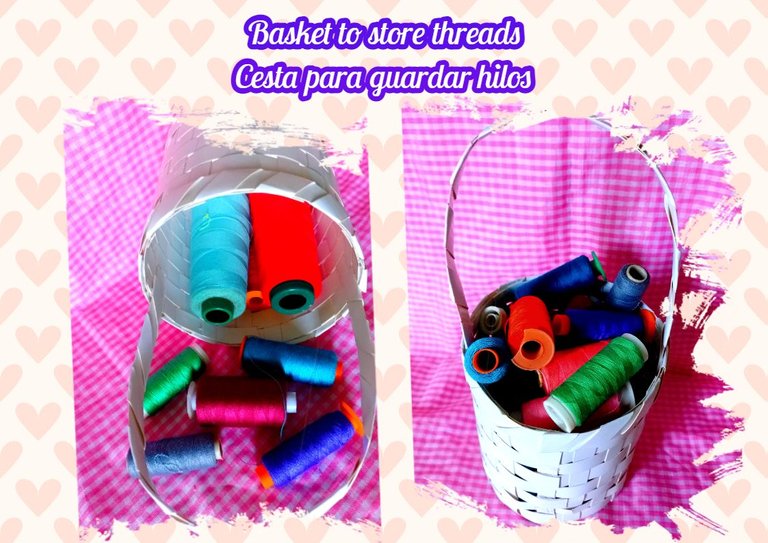
Cardboard is a material that we can find in our homes, or in stationery stores, or supermarkets, which we can use to create great decorations. In this case, I am going to use it to make a basket, these baskets fulfill many functions, we can place it as an organizer, for those little things that we have scattered around the room. In this way, the function that the basket will fulfill is to store the sewing threads.
Buenas tardes mis amigos, aquí le traigo una nueva creatividad, para que así ustedes puedan hacerla en casa.
La cartulina es un material que lo podemos encontrar en nuestras casas, o dentro de las tiendas de papelería, o supermercado, la cual lo podemos utilizar para crear grandes decoraciones. En este caso lo voy a usar para hacer una cesta, estas cestas cumplen muchas funciones, lo podemos colocar como un organizador, para aquellas cositas que tenemos regadas en la habitación. De esta manera, la función que cumplirá la cesta, es para guardar los hilos de coser.
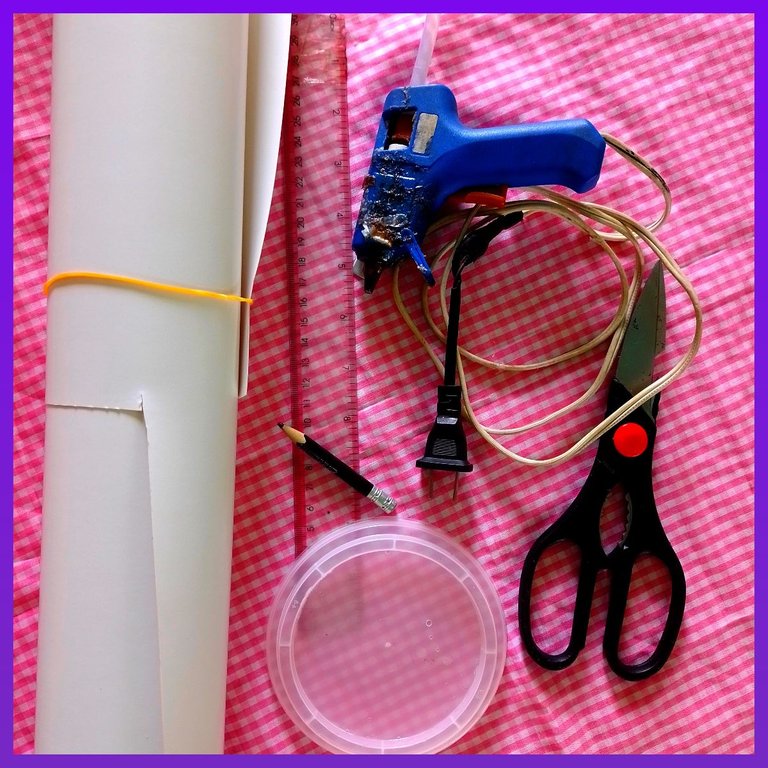
In this way, to make this cardboard basket. Various materials will be needed such as:
√ Double white fax cardboard.
√ Plastic lid.
√ Rule.
√ Scissors.
√ Pencil.
√ Silicone gun.
De esta manera, para hacer esta cesta de cartulina. Se necesitarán varios materiales como:
√ Cartulina doble fax blanca.
√ Tapa plástica.
√ Regla.
√ Tijera.
√ Lápiz.
√ Pistola de silicona.
Step 1:
With the help of a plastic lid, mark 2 circles on the cardboard and cut out, these circles will form part of the base of the basket.
Paso 1:
Con la ayuda de una tapa plástica, marque 2 círculos en el cartón y recorte, estos círculos van a formar parte de la base de la cesta.
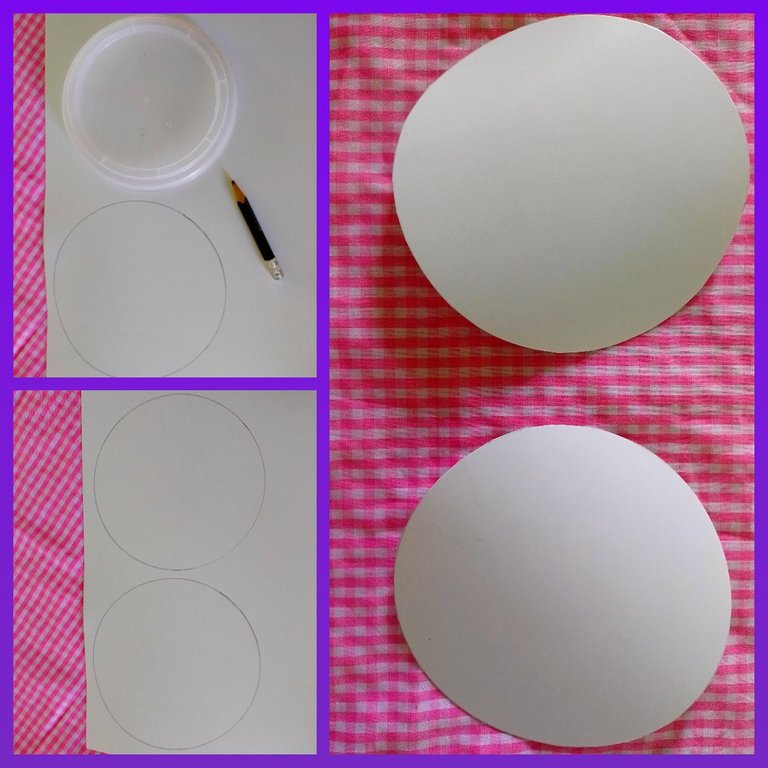
Then with the ruler I made several strips, cutting them all the same size.
Luego con la regla hice varias tiras, cortándolas todas del mismo tamaño.

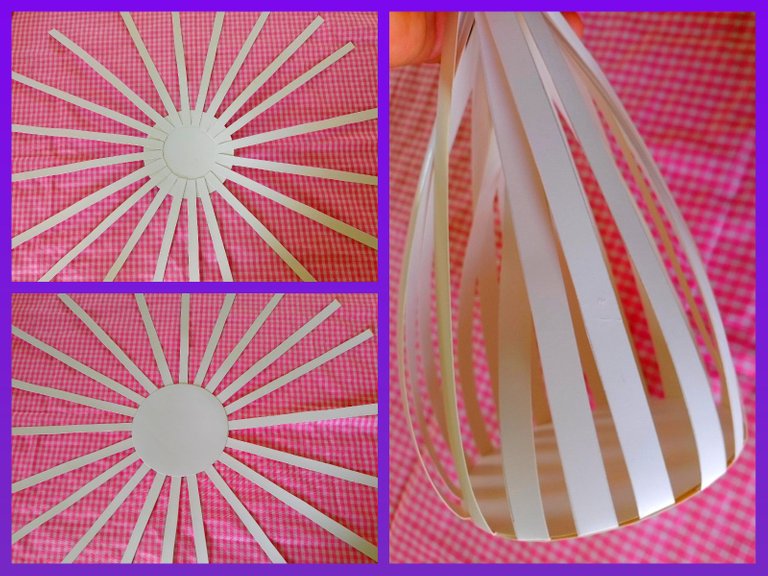
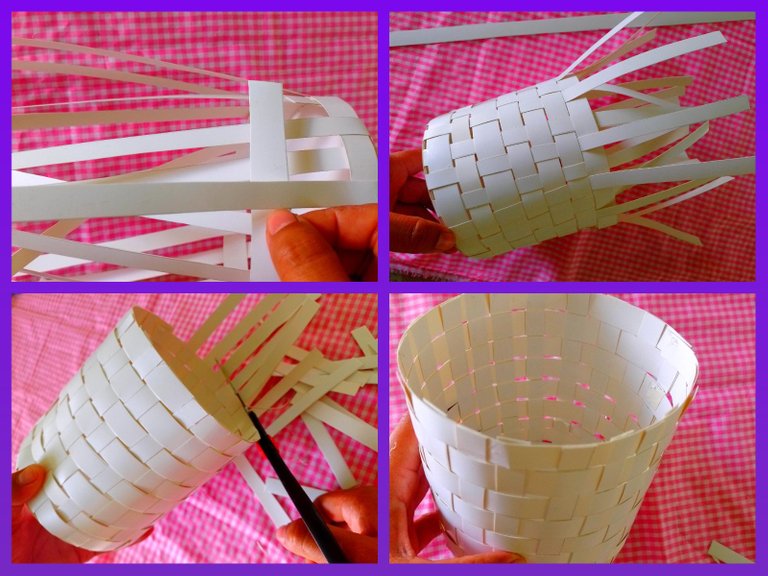
Step 2:
In this part I started with the assembly, I took one of the circles, I was adding the silicone to glue each one of the strips, forming a sun style.
Once ready, glue the other cardboard circle on top of the strips, and fold the strips up.
Paso 2:
En esta parte comencé con el armado, tome unos de los círculos, iba agregando la silicona para pegar cada una de las tiras, formando estilo sol.
Una vez ya listo, pegue encima de las tiras el otro círculo de cartón, y doble las tiras hacia arriba.
Step 4:
In this step, what I did was a braid, passing the rest of the strips horizontally around the circle. To form the pattern of the basket, pass the strip first over a vertical strip and behind the next, repeating this procedure several times, then when finished cut the excess, ending in this way.
Paso 4:
En este paso lo que hice fue un trenzado, pasando el restante de las tiras horizontalmente alrededor del círculo. Para que se forme el patrón de la cesta, pase la tira primero por encima de una tira vertical y por atrás de la siguiente, repitiendo ente procedimiento varias veces, luego al culminar corte el excedente, finalizando de esta manera.
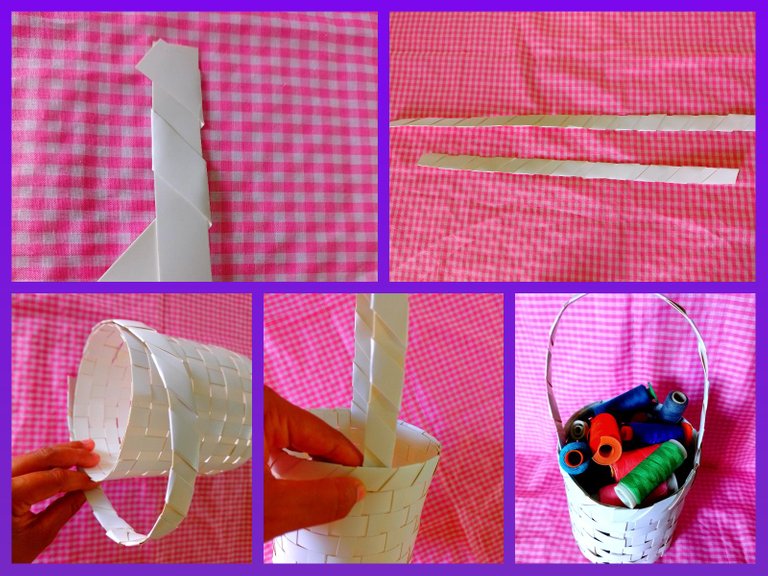
Step 5:
To finish, I took a strip of cardboard, and I covered it with another, to place it stronger, doing the same to obtain 2. I glued the longest strip around the top of the basket and the other on the inside in the form of an arc, remaining in this way. You can see that she looks lovely with her threads.
Until here I say goodbye my friends until the next day. You have a happy afternoon.
Paso 5:
Para terminar, tome una tira de cartón, y la cubrí con otra, para colocarla más fuerte, haciendo lo mismo para obtener 2. La tira más larga la pegué alrededor en la parte de arriba de la cesta y la otra por la parte de adentro en forma de arco, quedando de esta manera. Pueden observar que se ve encantadora con sus hilos.
Hasta aquí me despido mis amigos hasta un próximo día. Que tengas una feliz tarde.
Collage making program: Fotojet Link
Translated from google translator Link
Photo editing program: PhotoFiltre 7
Las fotos fueron tomadas desde un Xiaomi Mi A2.
Programa para hacer el collage: Fotojet Enlace
Traducido del traductor de Google Enlace
Programa para editar fotos: PhotoFiltre 7
I say goodbye until another opportunity.
Thanks for your support.
Me despido hasta otra oportunidad.
Gracias por su apoyo.
Copyright @imargasa. All rights reserved.
Hola @imargasa linda reseña me encanto la cesta muy útil para guardar no solamente hilos, lapices. clip. hasta caramelos para una fiesta.
That's a pretty basket.
!discovery 25
!diy
This post was shared and voted inside the discord by the curators team of discovery-it
Join our Community and follow our Curation Trail
Discovery-it is also a Witness, vote for us here
Delegate to us for passive income. Check our 80% fee-back Program
that's a wonderful creation. One could store a number of things in it.
Nicely done.
Me gusta mucho esta cesta ,mis hilos siempre están regados por todos lados, gracias por compartir.
bueno amiga, la invito a que realice una, así no tendrá mas sus hilos regados, ademas es muy fácil de hacer. saludos.
Buena idea para aplicar proximamente😃
gracias por comentar, saludos.