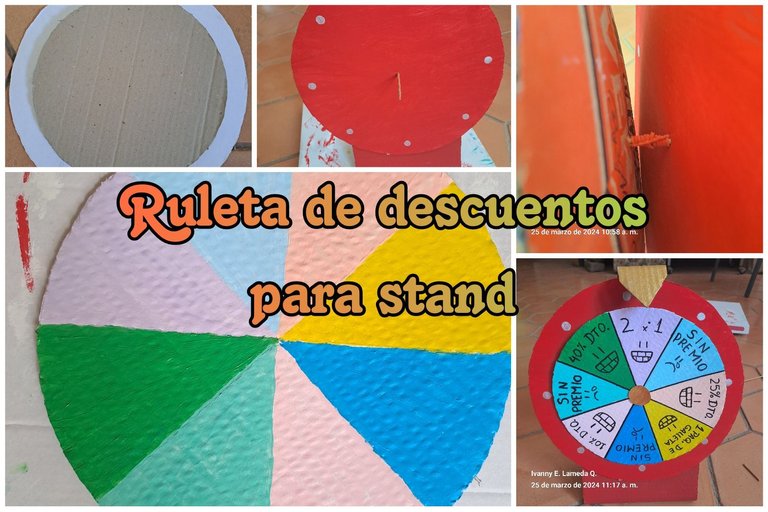

Greetings, beautiful and creative people of #DIYHub. I'm here after a few weeks of absence, because between study and work I didn't have time. That's why I'm so excited to share this project, which is about a Discount Roulette, made from scrap material. The material used is 100% recycled cardboard. This roulette was made with the purpose of using it in a university activity, which would be part of a stand decoration, for the promotion of an edible product.
Saludos, gente linda y creativa de #DIYHub. Estoy aquí después de unas semanas de ausencia, porque entre el estudio y trabajo no me daba tiempo. Por esa razón estoy tan emocionada de compartir este proyecto, la cual trata de una Ruleta de descuento, realizada de material de provecho. El material usado es 100% cartón reciclado. Esta ruleta fue realizada con el fin de utilizarla en una actividad universitaria, la cual esta sería parte de una decoración de un stand, para la promoción de un producto comestible.
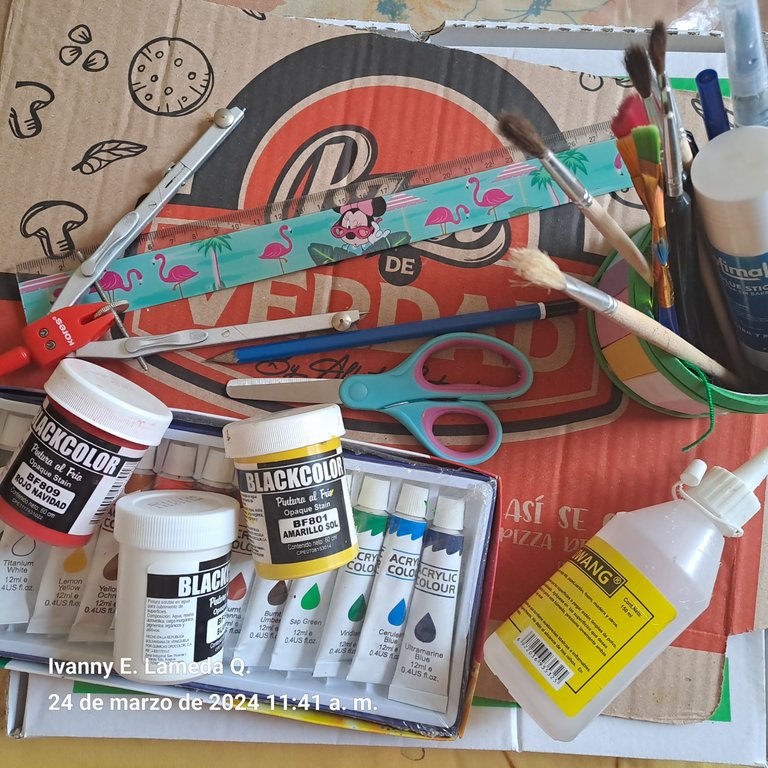
✨️ MATERIAL USED/MATERIAL USADO ✨️:
- Compass.
- Pencil and eraser.
- 1 bamboo stick.
- Ruler.
- 2 rubber bands.
- Scissors.
- Cold paints, tempera and acrylic paints.
- Brushes.
- Pizza boxes.
- Liquid silicone.
- Compás.
- Lápiz y borra.
- 1 palito de bambú.
- Regla.
- 2 ligas.
- Tijeras.
- Pinturas al frío, temperas y pinturas acrílicas.
- Pinceles.
- Cajas de pizza.
- Silicona líquida.
✨️ PROCESS/PROCESO ✨️:
Roulette/Ruleta
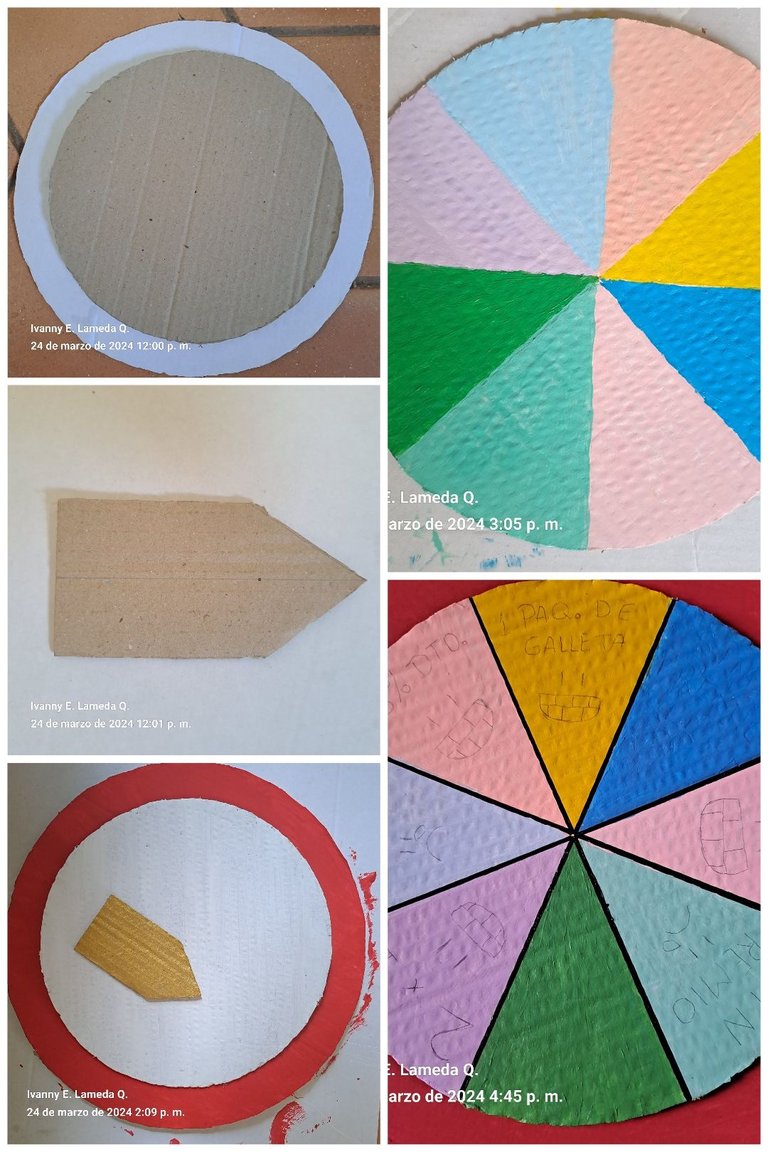
We take the cardboard of a pizza box that is not too full of grease or oil, we draw two circles, one of 28 cm in diameter (14 cm radius) and one of 22 cm in diameter (11 cm radius), then we cut them.
The larger circle is painted red, and the smaller one is painted white so that when we paint it with the other colors they paint more intensely, and we don't have to apply several layers of paint.
We cut a cardboard arrow about 10 cm long, and then we paint it with gold paint.
We divide the small circle into 8 parts, and then we paint each one with the colors we want. Each portion, we divide it using an acrylic marker, and we place the prizes we want.
Tomamos el cartón de una caja de pizza que no esté muy lleno de grasa o aceite, dibujamos dos círculos, uno de 28 cm de diámetro (14 cm de radio) y uno de 22 cm de diámetro (11 cm de radio), luego los cortamos.
La cicunferencia más grande lo pintamos de color rojo, y el más pequeño lo pintamos de blanco para que al pintarlo con los otros colores estos pinten con más intensidad y no tengamos que echarle varias capas de pintura.
Cortamos una flecha de cartón de unos 10 cm de largo, y luego lo pintamos con pintura dorada.
El círculo pequeño lo dividimos en 8 partes y luego cada una la pintamos con los colores que deseemos. Cada porción la dividimos usando un marcador acrílico, y le colocamos los premios que deseemos.
Roulette support/Soporte de la ruleta
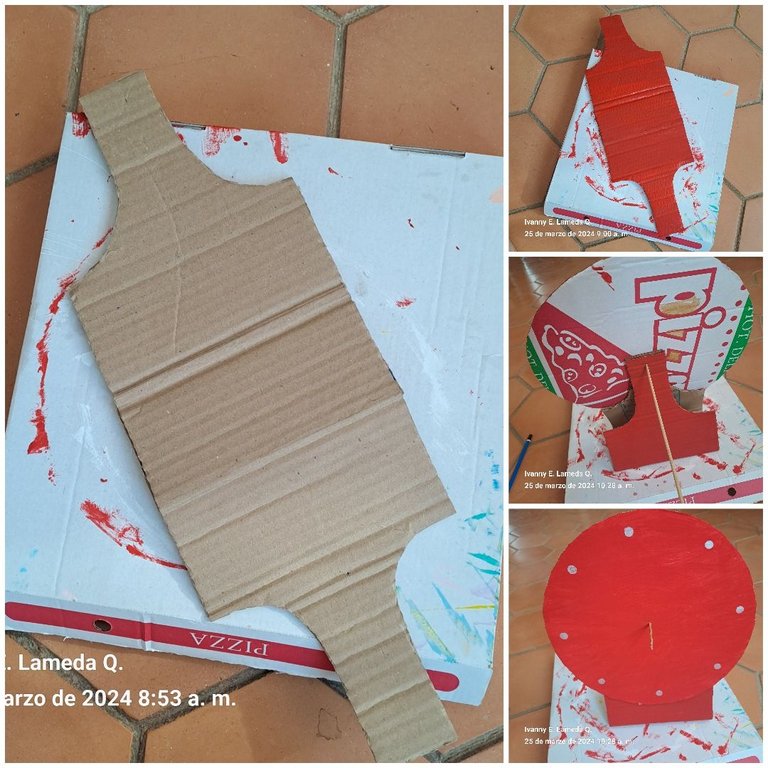
We draw and cut out a rectangle of 17cmx48cm, at its ends we draw a kind of funnel of a height of approximately 12 cm and cut it out, then in the center of the piece we draw a rectangle of 8 cm in height and that part we will fold it to give it the shape of the support. We paint this piece red.
We glue each end of the support and in the center we insert a skewer stick and in the center we place and glue the big circle.
To the large circle already glued, we draw 8 dots with gold marker.
Dibujamos y recortamos un rectángulo de 17cmx48cm, en sus extremos dibujamos una especie de embudo de una altura de aproximadamente 12 cm y la recortamos, luego en el centro de la pieza dibujamos un rectángulo de 8 cm de altura y esa parte la doblaremos para así darle la forma del soporte. Esta pieza la pintamos de rojo.
Pegamos cada extremo del soporte y en el centro le insertamos un palito de brochetas y en el centro colocamos y pegamos el círculo grande.
Al círculo grande ya pegado, le dibujamos 8 puntos con marcador dorado.
Insert the smallest circle, already with each prize, into the skewer stick and separate them with a rubber band.
Cut out a small circle, paint it gold and glue it to the skewer.
On the back of the support, we place another rubber band, and cut the excess of the skewer stick.
Cut out another larger arrow, paint it gold and glue it to the large circle.
Insertamos en el palo de brochetas el círculo más pequeño, ya con cada premio, y los separamos con una liga.
Recortamos un círculo pequeño, lo pintamos de dorado y lo pegamos a la brocheta.
En la parte de atrás del soporte, colocamos otra liga, y cortamos el excedente del palo de brochetas.
Cortamos otra flecha más grande, la pintamos de dorado y la pegamos en el círculo grande.
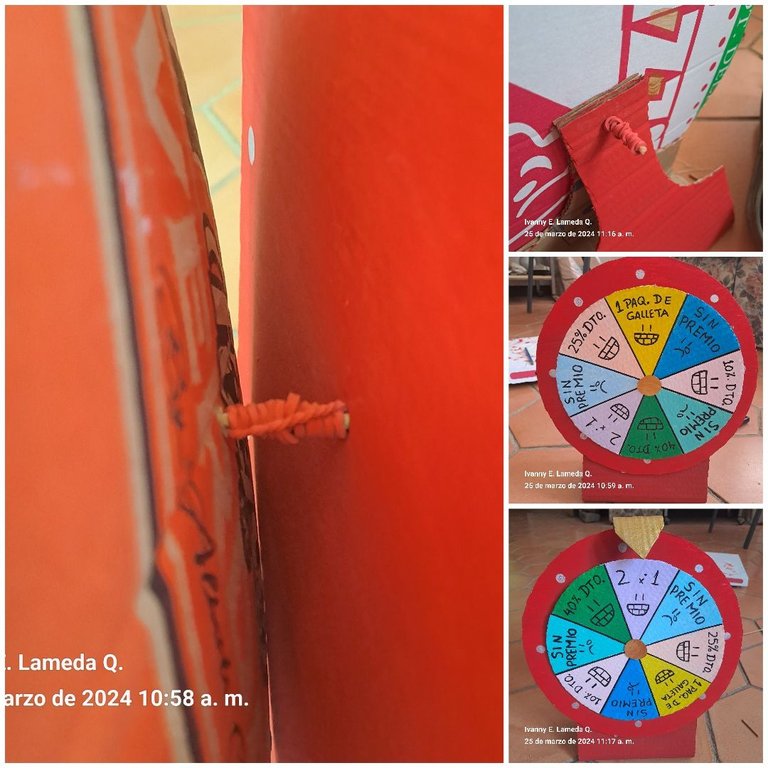
And that's it, we have our discount roulette, perfect for a food stand or any other product.
Y listo, ya tenemos nuestra ruleta de descuentos, perfecta para un stand de comida o de cualquier otro producto.

This roulette was used and achieved a great impact among the attendees at the presentation of the project. Especially the teachers enjoyed and had a lot of fun, because when it spun, some won more prizes than others, then they made fun of each other ha,ha,ha,ha.
This idea was born from some tips that I read for the realization of the stand of the project that I was going to develop.
Making this roulette was very exciting, because I used the (02) pizza boxes that were accumulated, I used rulers, compass, scissors, brushes and several acrylic and cold paints, and I used my imagination in the distribution of these and to make the mechanism of operation with some rubber bands.
I was very happy because the roulette is really functional, and through this tutorial you can make them to entertain the children in your home, and they will enjoy a lot, you can place the prize depending on the occasion. It can be used for home entertainment as well as for children's parties or school work.
Well, I say goodbye, hoping that if you manage to make it let me know, I hope you enjoy it.
Esta ruleta fue utilizada y logró un gran impacto entre los asistentes a la presentación del proyecto. Sobre todo los profesores gozaron y se divirtieron mucho, ya que cuando giraba, unos ganaban mas premios que otros, entonces se burlaban unos a otros ja,ja,ja.
Esta idea nació de unos tips, que leí para la realización del stand del proyecto que iba a desarrollar.
Hacer esta ruleta fue muy emocionante, porque usé las (02) cajas de pizzas que estaban acumuladas, usé reglas, compás, tijera, pinceles y varias pinturas acrílicas y al frío, y utilicé mi imaginación en la distribución de estos y de hacer el mecanismo de funcionamiento con unas ligas.
Quedé muy feliz porque realmente la ruleta está funcional, y a través de este tutorial podrán hacerlos para entretener a los niños de sus casas, y gozarán un montón, ustedes podrán colocar el premio dependiendo de la ocasión. Sirve de entretenimiento en el hogar como para fiestas infantiles o trabajo escolar.
Bueno, me despido, esperando que si logran hacerla me lo hagan saber, espero que la disfruten.
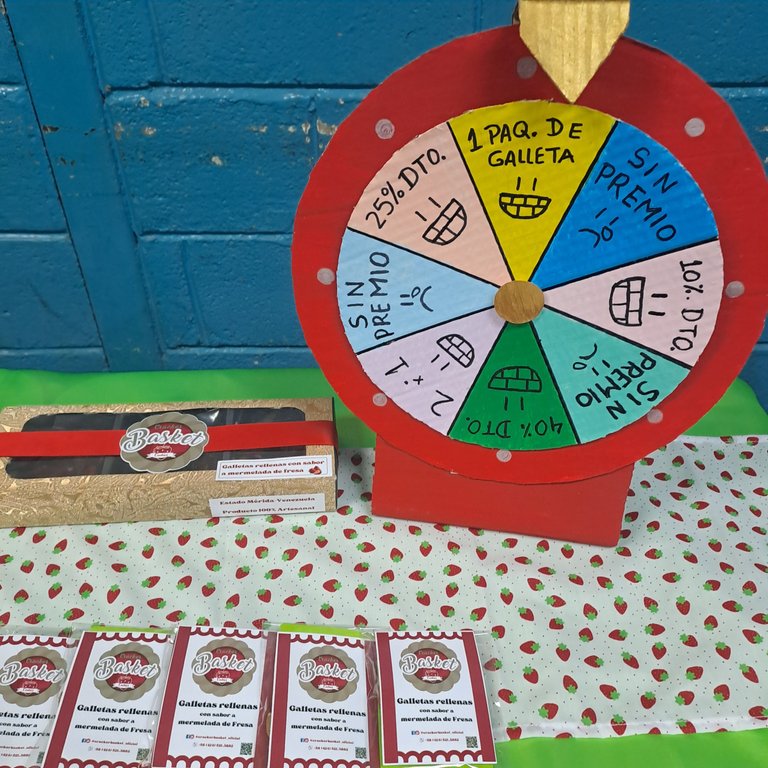
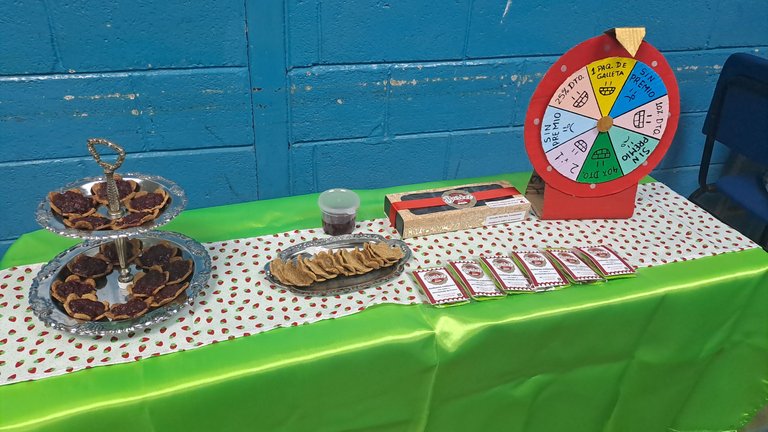
You have reached the end of my post. Thanks for reading me❤️ Have a nice day 😊❤️ If you need help do not hesitate to write me on my Discord Ivycrafts#0396.❤️
Has llegado al final de mi publicación. Gracias por leerme❤️ Ten un lindo día 😊❤️ Si necesitas ayuda no dudes en escribirme a mi Discord Ivycrafts#0396.❤️
Text and photos are my authorship. Text translated with DeepL. Photos taken with my Xiaomi Redmi 8. Text separator created with Canva Pro.
Texto y fotos son de mi autoría. Texto traducido con DeepL. Fotos sacadas con mi Xiaomi Redmi 8. Separador de texto creado con Canva Pro.


that looks interesting. thanks for sharing.
Me encantó esta idea de verdad, gracias por compartir, y me parece una muy buena idea para llevar a una feria sin importar el tipo de emprendimiento.
Congratulations @ivycrafts! You have completed the following achievement on the Hive blockchain And have been rewarded with New badge(s)
Your next target is to reach 105000 upvotes.
You can view your badges on your board and compare yourself to others in the Ranking
If you no longer want to receive notifications, reply to this comment with the word
STOP