Good morning hivers trust you all are doing well?
It's a great day, beautiful morning and new week.
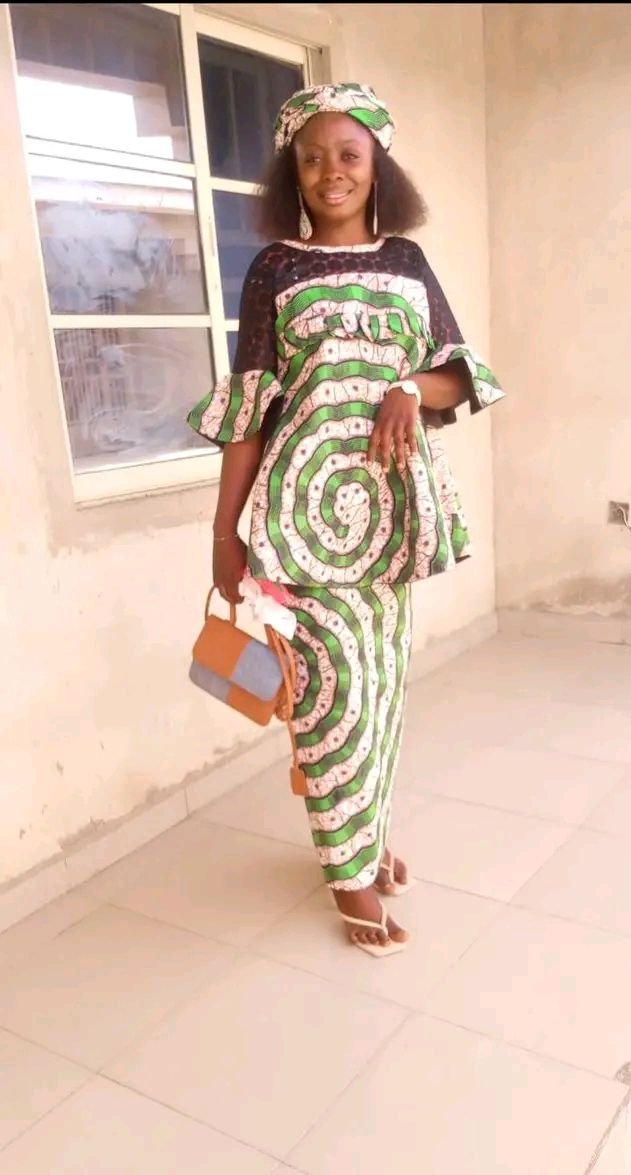
Today I will show you how I made this beautiful fley blouse and straight skirt.
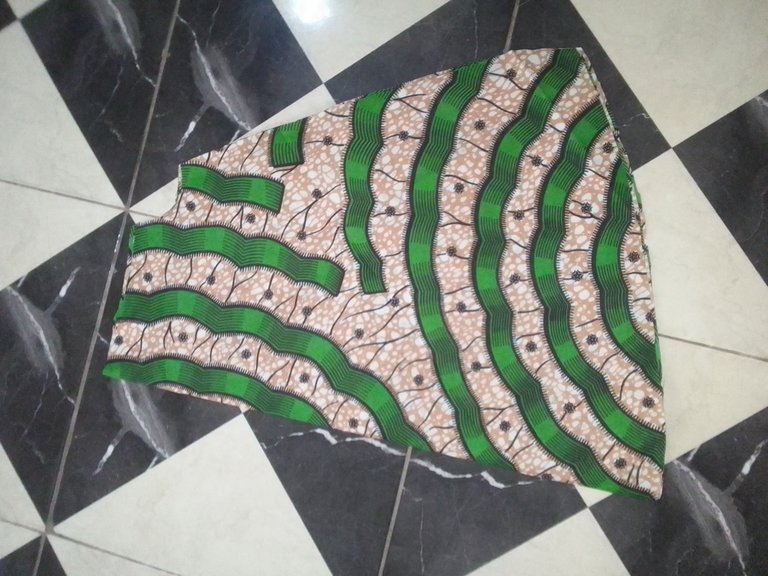
Let me start with the skirt, firstly I fold my material by two measure out the length, hip and waist then I cut it out that's for the front part, and to cut the back,I still fold my material by two and place the front part on it and give out a two inches allowance for my zip and slitting at the back of the skirt.

Now I proceed to the blouse, I cut out this blouse in a fley shape,by folding my material in a triangle shape, measure out my shoulder by seven inches, and I remove six inches from the main length of the gown, cause I will be putting in my baby lace at the top, and I cut out my hand pit by two inches cause by the time I add up my baby lace it will give me the initial eight inches for the hand pit.
After that I still fold the material and place the first part I cut in other to cut out the other side, and it's going to be a same shape and size cause there's no going to be zip in the blouse.
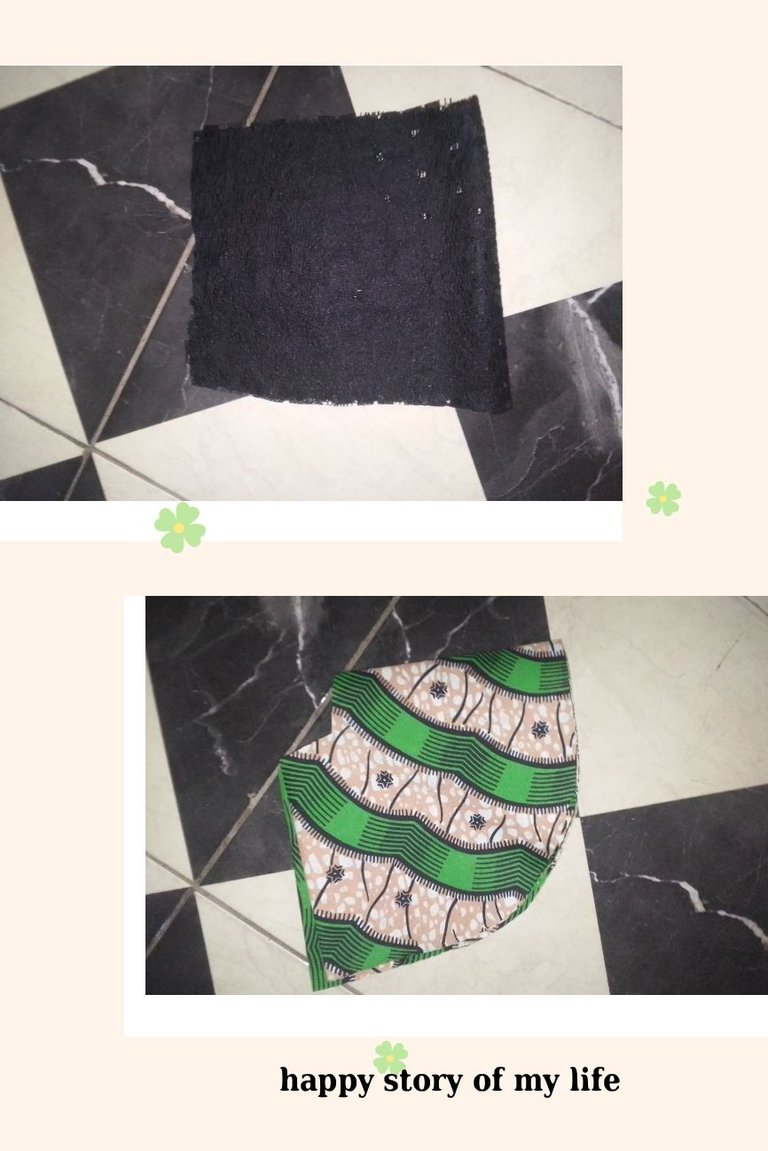
After cutting everything for the skirt and blouse I now cut out my lining for each part of it.
Then I proceeded to cut out my hand using the baby lace of which the length of the hand is by eight inches and I used my Ankara to cut out the fley I will attach to the hand by six inches.
Now I proceeded to fix my lining for each part of the dress both the skirt and blouse.
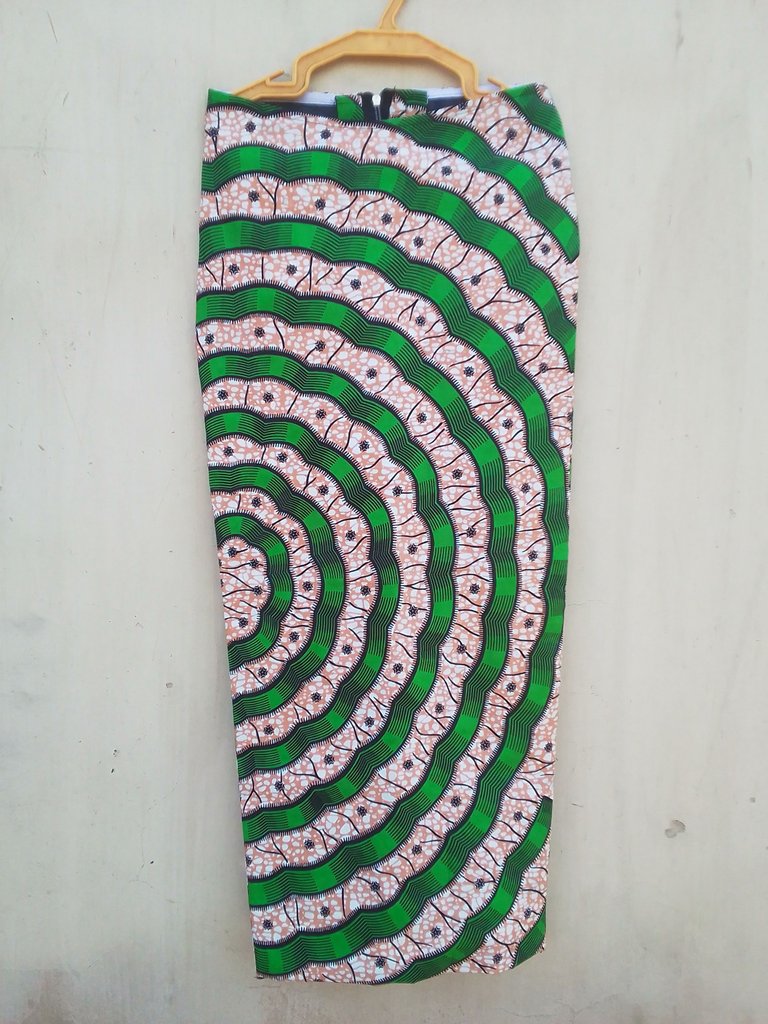
After that I proceed to iron everything together before joining it.
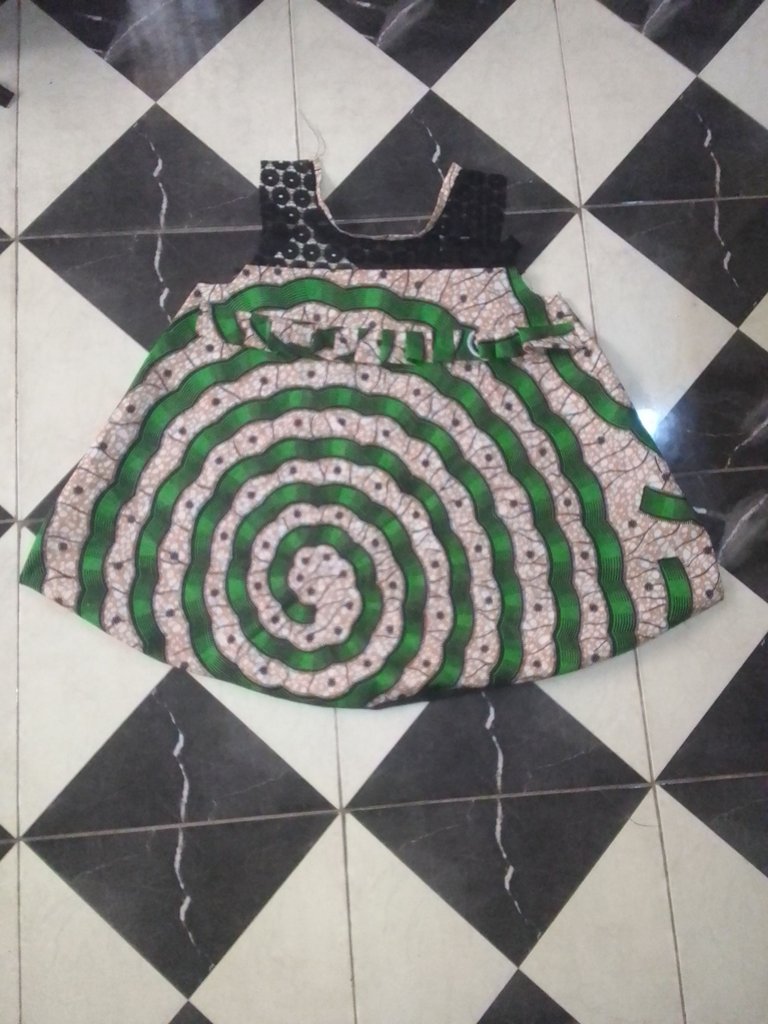
And this is the skirt.
And now looking at the front of the skirt, I know someone will be wondering why it has a curve shape at the front, it because if you try to bend down to pick up something the zip will not open and the back of the skirt will not raise.
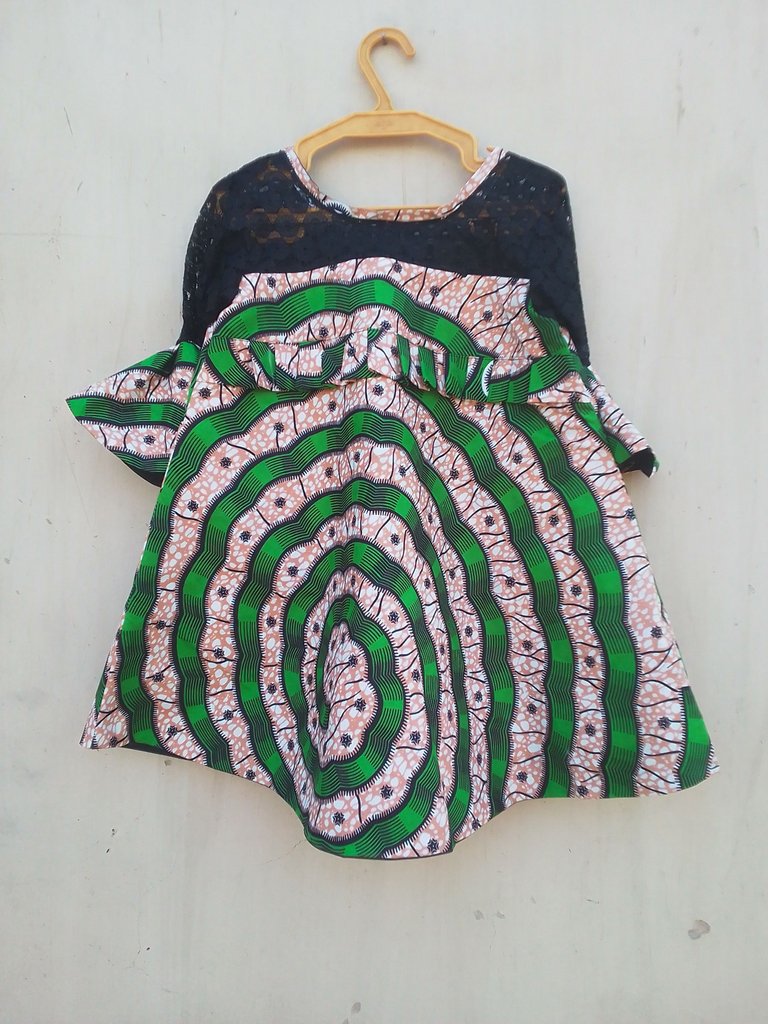
Here the shirt after ironing I fixed the baby lace both for the back and front side, so I make it a little different in other to show difference between the front and back, so I cut out my Ankara material by two inches and I make a plinting at the front.
After that I proceed to fix my hand and join everything together and this is how it looks.
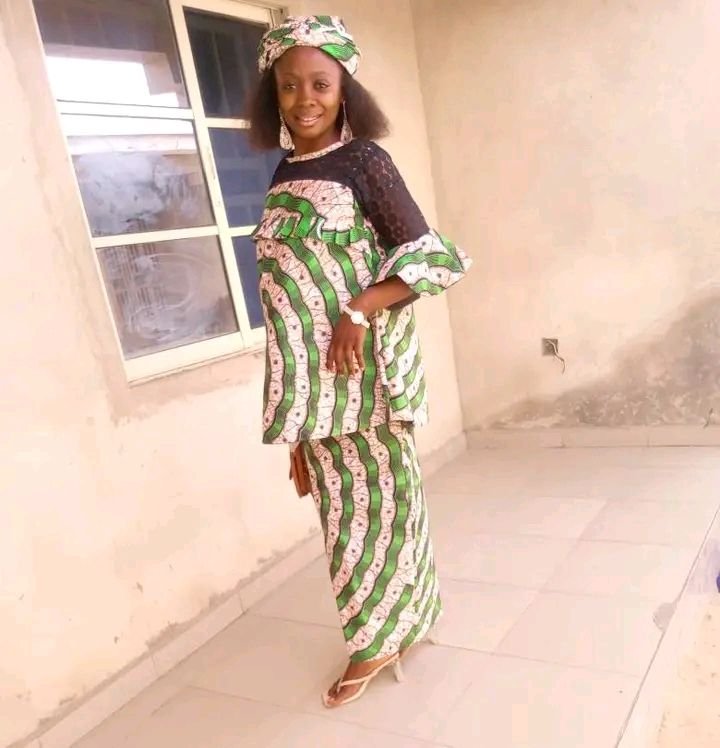
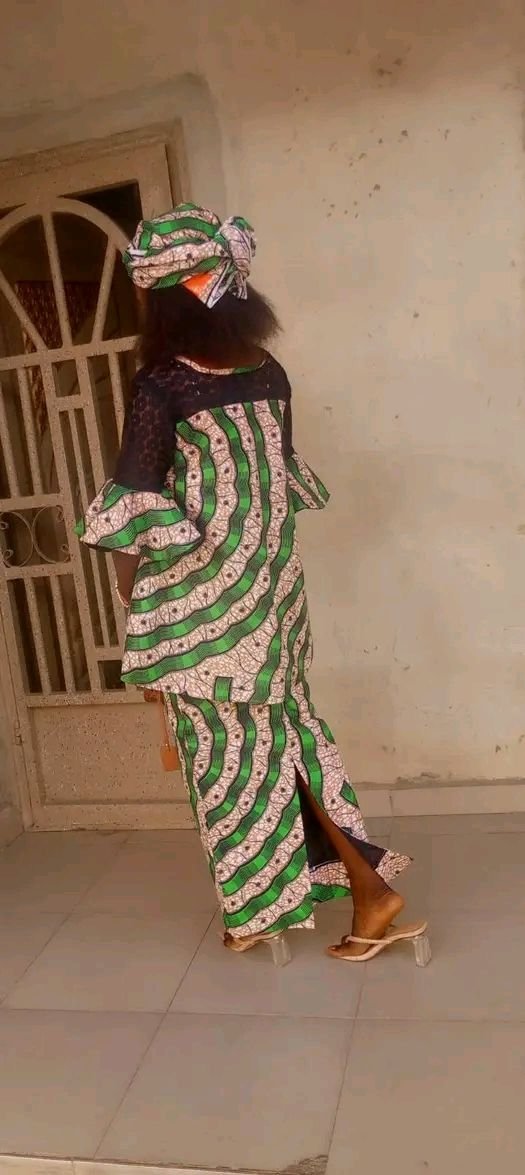
And this how it looks on her.
Thank you for the patience to stop by and check on my post.
Do have a lovely week ahead
My, that looks fabulous! Must be fun to make your own wardrobe. I am so jealous, wish I have the skills and talent 😻😻
Nice outfitGood job @jonathanjediel
Thank you boss,
Beautiful work
This is nice and beautiful.
Well done.
Thank you sir @daverick I'm glad you like it
Congratulations @jonathanjediel! You have completed the following achievement on the Hive blockchain And have been rewarded with New badge(s)
Your next target is to reach 6000 upvotes.
You can view your badges on your board and compare yourself to others in the Ranking
If you no longer want to receive notifications, reply to this comment with the word
STOPCheck out our last posts:
Beautifully made
Thank you so much ma'am 🙏
What a beautiful dress you have designed, it looks beautiful and just amazing. Well done and good job 👍
Thank you so sir @eberechi01 I'm glad you like, u can give it a try