Hola buenas noches tengan todos mis amigos, espero que se encuentren bien, llenos de mucha salud , hoy les quiero compartir una bolsa de regalo que realicé con materiales de provecho para obsequiar a una persona en especial, para festejar el 14 de febrero, al mismo tiempo participar en el nuevo concurso del mes , cómo siempre excelente las iniciativas, antes de continuar invito a mis amigas que participen @rameuris @lorennis
Hello good evening to all my friends, I hope you are well, full of good health, today I want to share a gift bag that I made with useful materials to give to a special person, to celebrate February 14, at the same time participate in the new contest of the month, as always excellent initiatives, before continuing I invite my friends to participate @rameuris @lorennis
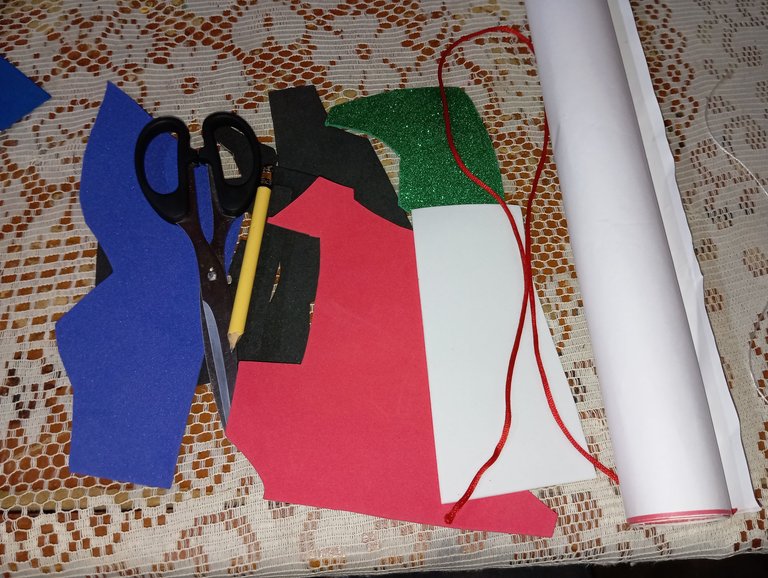
Materiales qué utilice :
-Hoja blanca
-Foamis
-Tijera
-Silicon
-Cola de ratón
Materials I used :
-White sheet
-Foamis
-Scissors
-Silicon
-Mouse glue
A continuación los pasos a seguir:
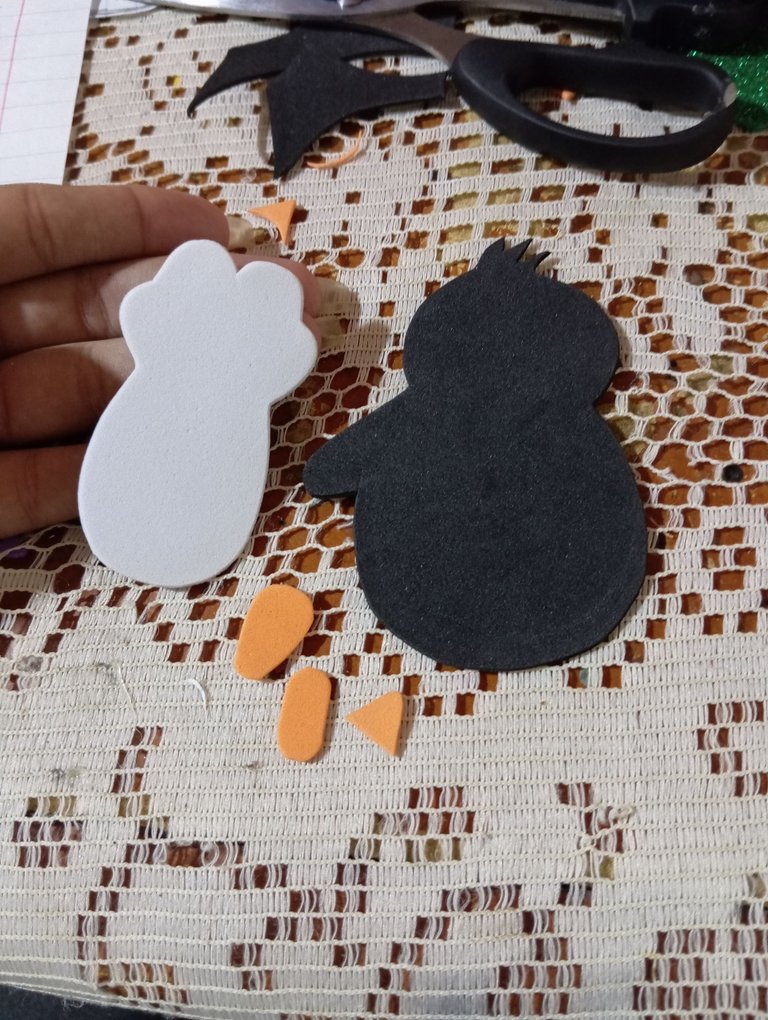
Iniciaremos primeramente tomando cualquier recorte de papel y dibujaremos en nuestro patrón con la temática a trabajar, en este caso dibujaremos un pingüino como diseño frontal de nuestra bolsa de regalo
Here are the steps to follow:
We will start by first taking any paper cutout and draw on our pattern with the theme to work with, in this case we will draw a penguin as the front design of our gift bag.
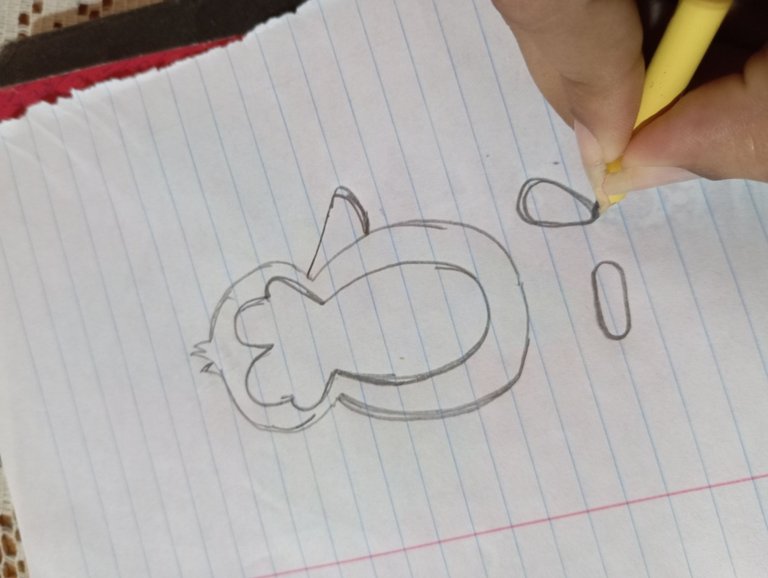
Una vez que tengamos nuestro patrón listo vamos a continuar marcando en los foamis nuestras piezas
Once we have our pattern ready we will continue marking on the foamis our pieces.
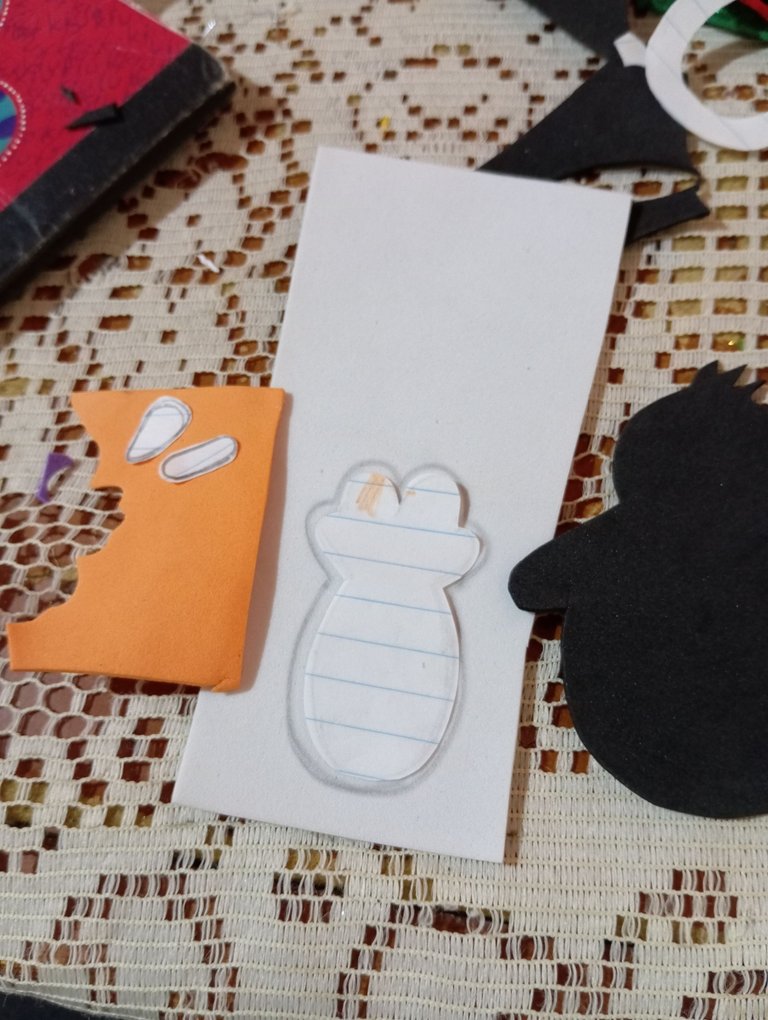
Seguidamente vamos a proceder tomando nuestra tijera y recortando al mismo tiempo las piezas que marcamos en el paso anterior
Then we are going to proceed by taking our scissors and cutting out the pieces we marked in the previous step.
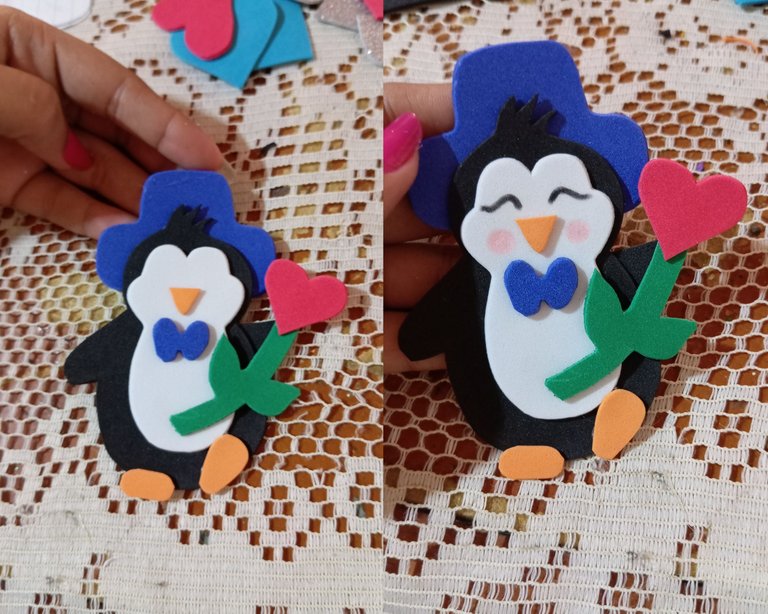
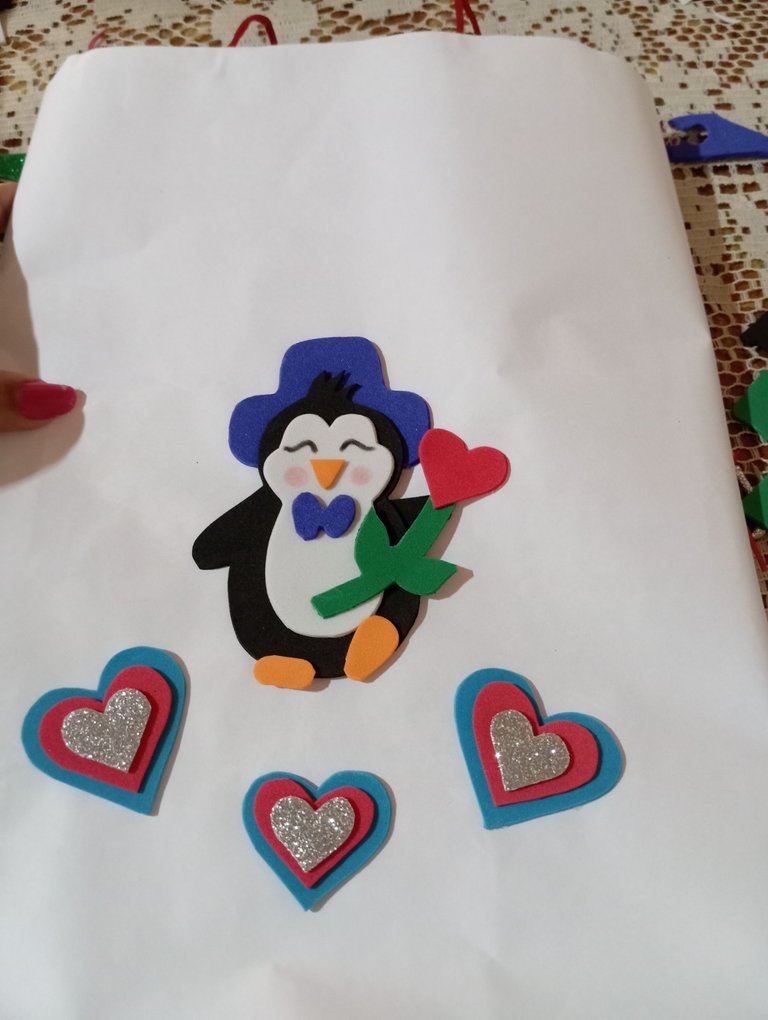
A continuación procederemos pegando y formando nuestro adorable pingüino, iniciamos pegando la parte blanca de su piel , sus patas y su pico naranja , un sombrero y lazo azul, en una esquina esperemos una rosa en forma de corazon, luego continuaremos realizando su rostro, dibujaremos la silueta de sus ojos cerrados y sus mejillas coloradas
Next we will proceed by gluing and forming our adorable penguin, we start by gluing the white part of his skin, his legs and his orange beak, a hat and blue ribbon, in a corner we will wait for a rose in the shape of a heart, then we will continue making his face, we will draw the silhouette of his closed eyes and his colored cheeks.
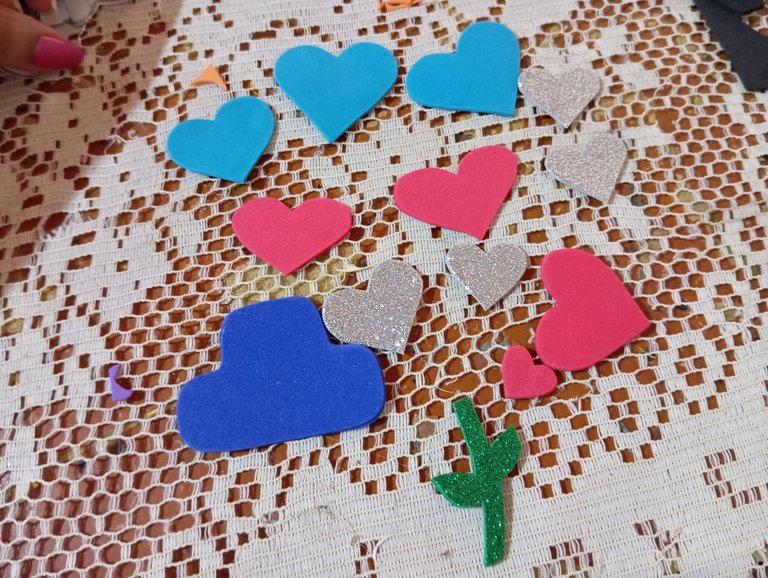
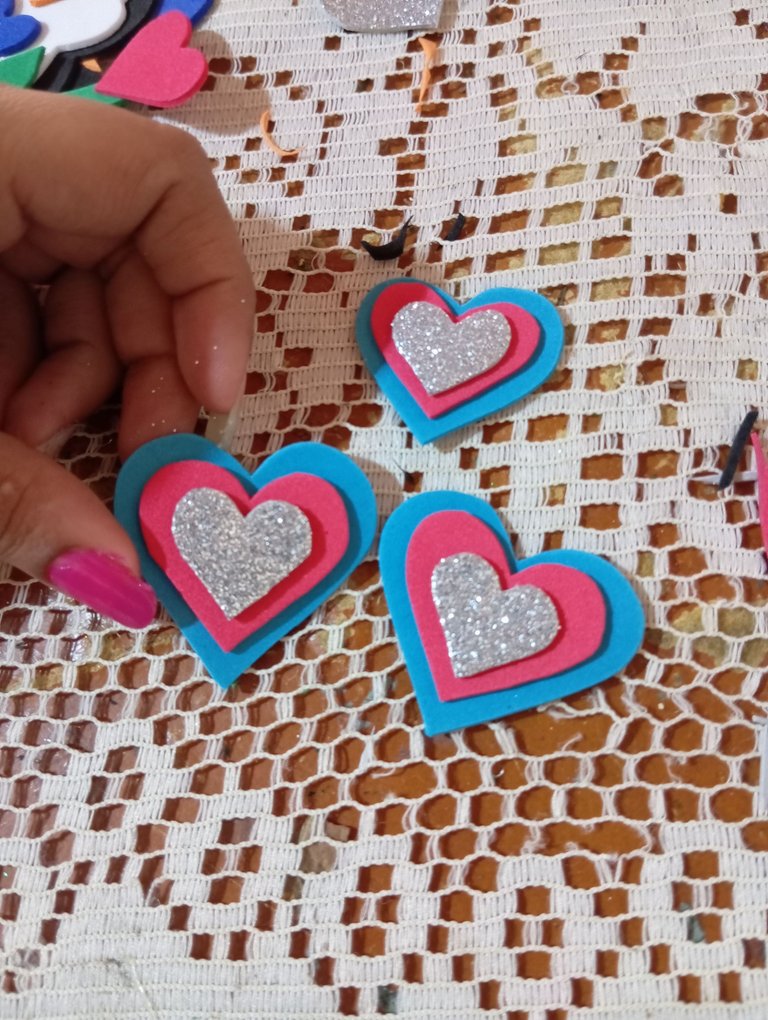
Seguidamente vamos a continuar tomando nuestros corazones , de tres tonos diferentes, y pegaremos de mayor a menor, es decir vamos a pegar en la parte de arriba del corazón azul , el rojo , en la parte de arriba el plateado escarchado para que hagan juego ambos tonos
Next we will continue taking our hearts, in three different tones, and we will glue them from bigger to smaller, that is to say, we will glue the red on the top of the blue heart, and the silver frost on the top so that both tones match.
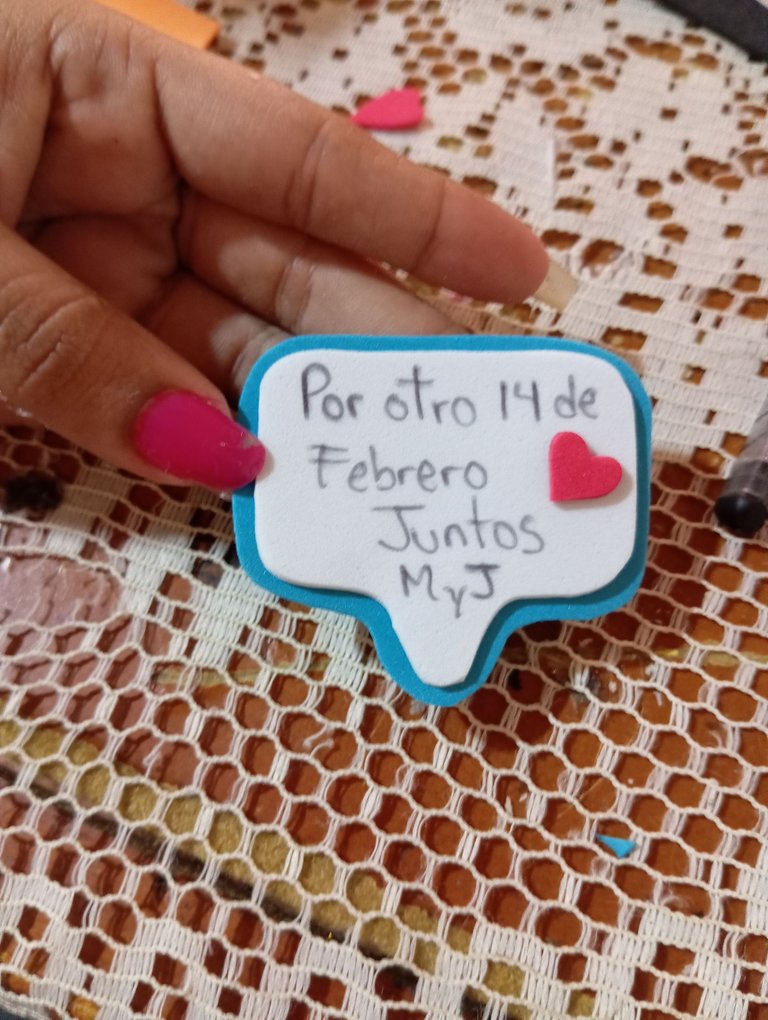
Luego continuaremos realizando un pequeño aviso con unas palabras de amor , para demostrar a esa persona lo especial que es
Then we will continue making a small notice with a few words of love, to show that person how special he/she is.
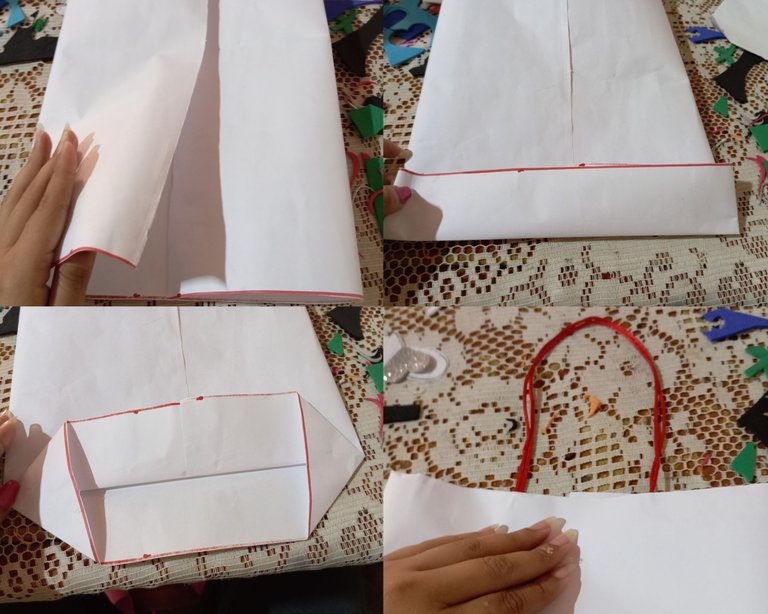
A continuación vamos a tomar nuestra hoja blanca, doblaremos ambos bordes hacia el centro como pueden apreciar, luego continuaremos pegando ambos bordes , realizaremos un doble en la parte de abajo hacia arriba de 5 centímetros, luego abriremos ese doble , agregamos silicón y pegamos borde con borde para formar así la base de la bolsa de regalo y se pueda introducir los obsequios , seguidamente tomaremos la cola de ratón y la pegaremos en ambos lados en la parte del medio como pueden apreciar, finalizando nuestra bolsa de obsequio
Next we will take our white sheet, we will fold both edges towards the center as you can see, then we will continue gluing both edges, we will make a double at the bottom upwards of 5 centimeters, then we will open that double, add silicone and glue edge to edge to form the base of the gift bag and you can enter the gifts, then we will take the mouse glue and paste it on both sides in the middle as you can see, finishing our gift bag.
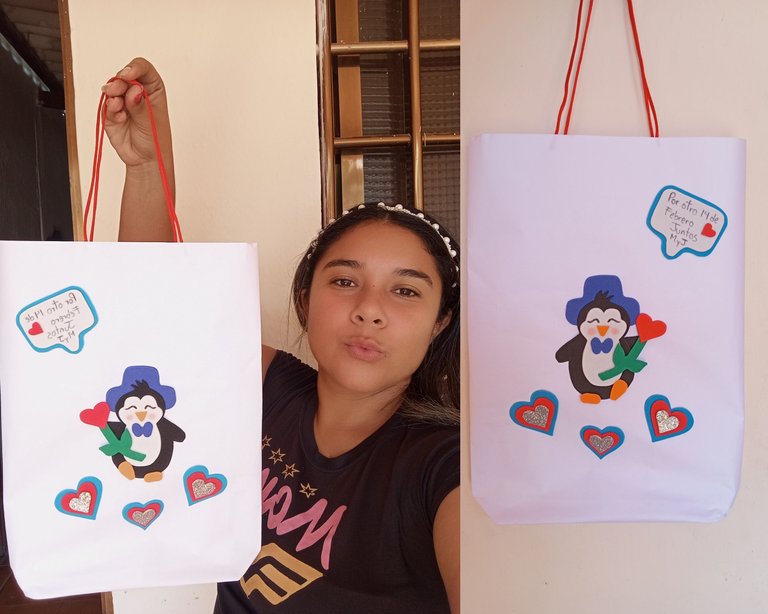
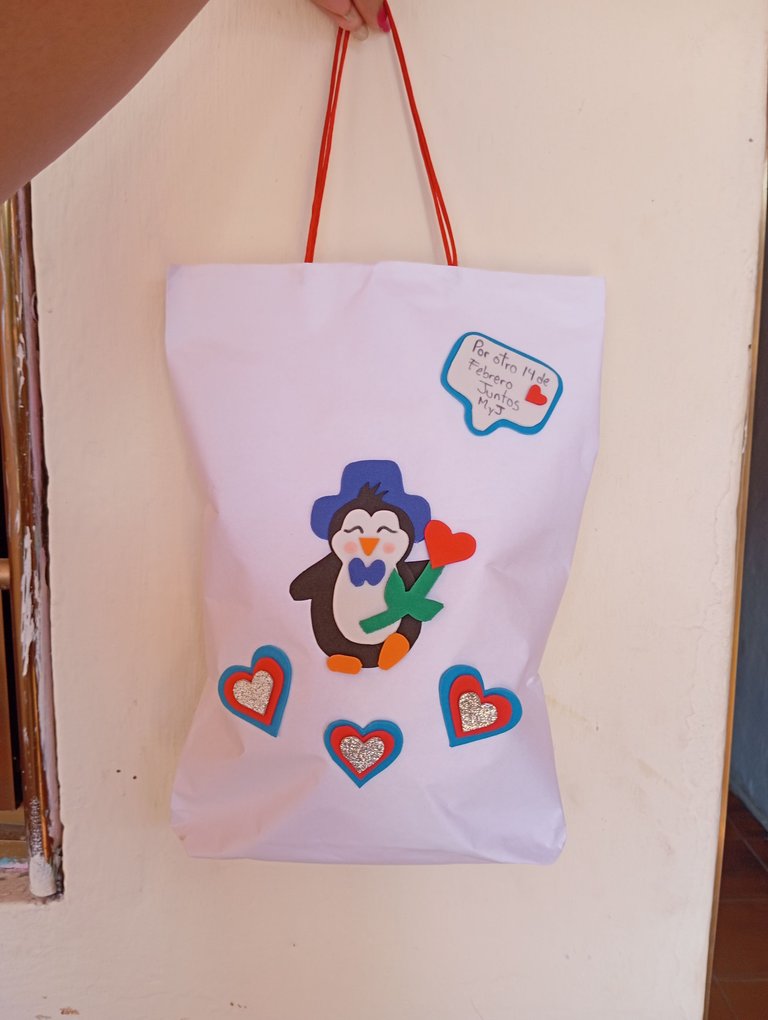
Una vez lista la bolsa de obsequio , tomamos los diseños con la que vamos a decorar nuestra bolsa y lo pegaremos en todo el centro, para finalizar nuestra manualidad
Once the gift bag is ready, we take the designs with which we are going to decorate our bag and we glue them in the center, to finish our craft.
Así fue como realicé mi hermosa bolsa para los días del amor y la amistad, espero les gusten y puedan realizarlo desde sus hogares, buenas noches
This is how I made my beautiful bag for the days of love and friendship, I hope you like it and you can make it at home, good night.
The final result is awesome. It is so charming and beautiful. Love it. You did a wonderful job! Thanks! Keep it up!