¡Bienvenido a mi blog!
Dios nos ayude siempre y nos conceda todas las peticiones de nuestro corazón.Buenas noches a todos mis amigos de esta contagiosa comunidad #Diyhub, felíz Jueves , ya casi se acerca mi mes favorito , Septiembre, mes de cumplir años con el favor de Dios y también de terminar las vacaciones escolares.
Me he perdido muchos concursos en esta comunidad, pero esta vez , dije: no más, este mes si aprovecho de participar, en este hermoso concurso , ya que cada tercer Sábado del mes de Agosto se celebra el día mundial de las Abejas.
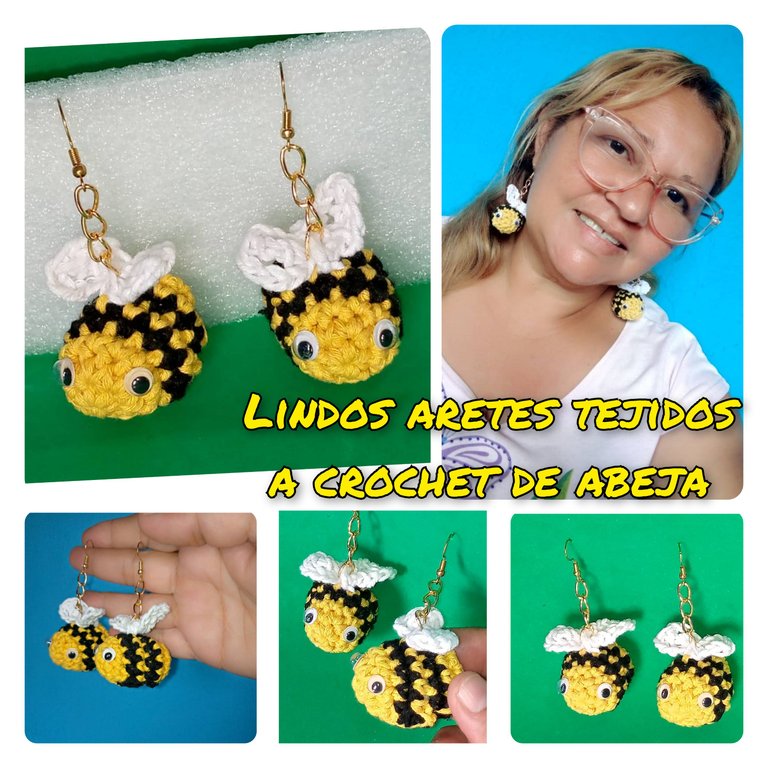
Hoy quiero mostrar a través de un tutorial , como realizar unos lindos aretes tejidos a crochet con forma de abejas
Espero que sea de su agrado, los tejí con todo el amor del mundo.
Estos aretes sirven para regalar a su persona favorita.
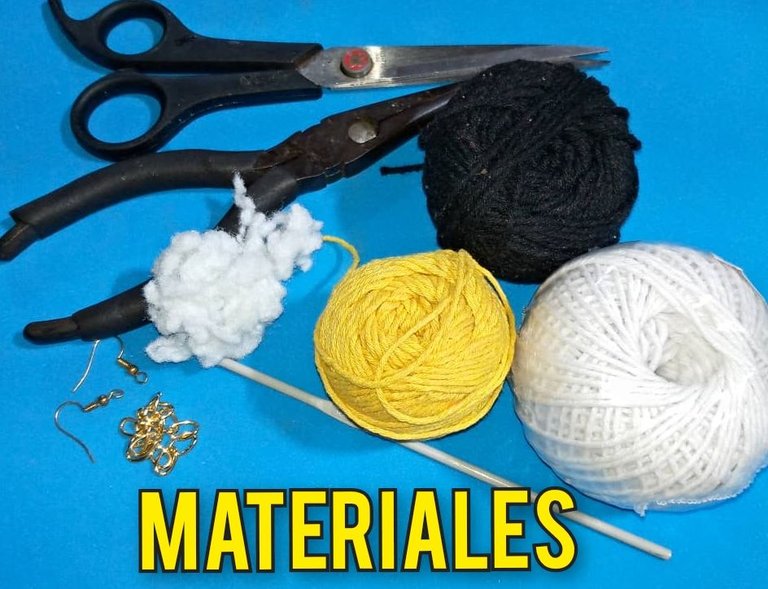
Los materiales que se utilizan , son los siguiente:
- Hilo de tejer, colores: Amarillo, blanco y negro.
- Relleno.
- Aguja de tejer, número 3 .
- Pinza.
- Tijera.
- Anzuelos.
- Cadena continua, color dorado.
- 2 aros.
- 2 ojitos móviles..
Pasos para la realización:
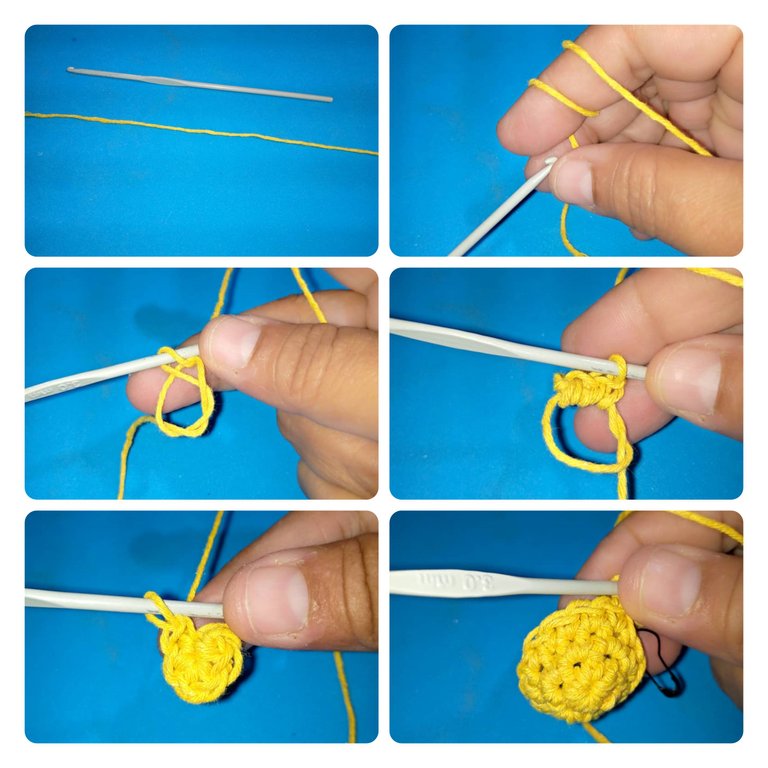
- Lo primero que hacemos es tomar el hilo amarillo con la aguja, hacer un anillo mágico, dentro del anillo hacer 6 puntos bajos. Esta sería la primera vuelta.
- Segunda vuelta:hacer un aumento de puntos bajos en cada punto , para un total de 12 puntos bajos. cuando se comienza cada vuelta , colocar un marcador.
- 3 vuelta: tejer 12 puntos bajos , un punto en cada punto.Cortar el hilo amarillo con la tijera.
- Para la vuelta 4 cambiamos de hilo, color negro, meter el hilo dentro del punto bajo, que terminó la vuelta , tejer un punto bajo sobre cada punto, para un total de 12 puntos, termino la vuelta y recorto el hilo con la tijera.
- Vuelta 5 , coloco el hilo amarillo nuevamente y tejo 12 puntos bajos en cada punto.
- Vuelta 6 : cambio de color,coloco el negro y repito 12 puntos bajos , sobre cada punto.
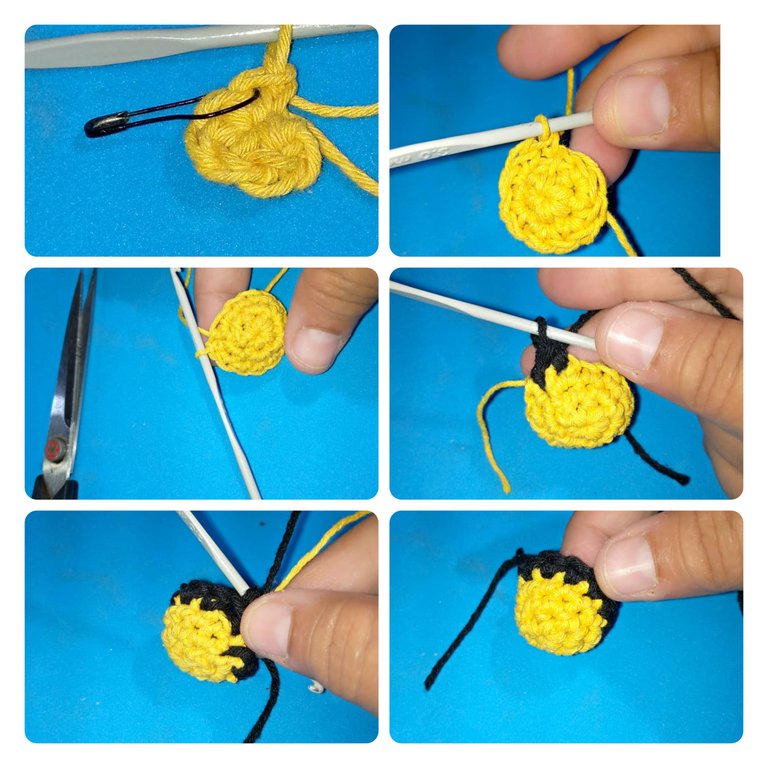
- Vuelta 7 : cambio de color y pongo el amarillo, hago 12 puntos bajos en cada punto.
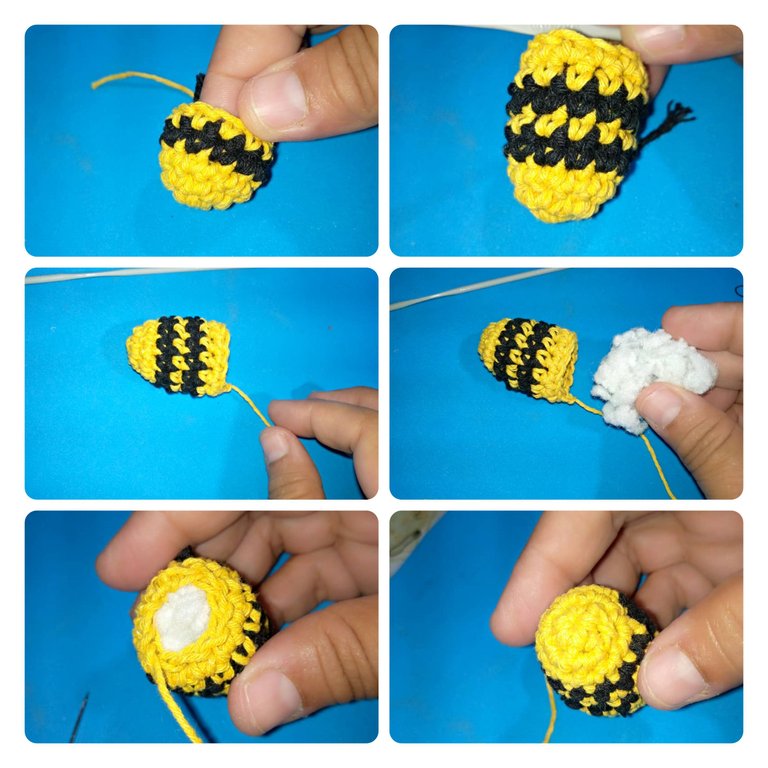
Vuelta 8 y 9 : cambio de color de hilo (amarillo) y hago dos vueltas de 12 puntos bajos cada una. - Coloco el relleno dentro del motivo y con una aguja lanera voy cerrando.
Así mismo tejo el otro arete.
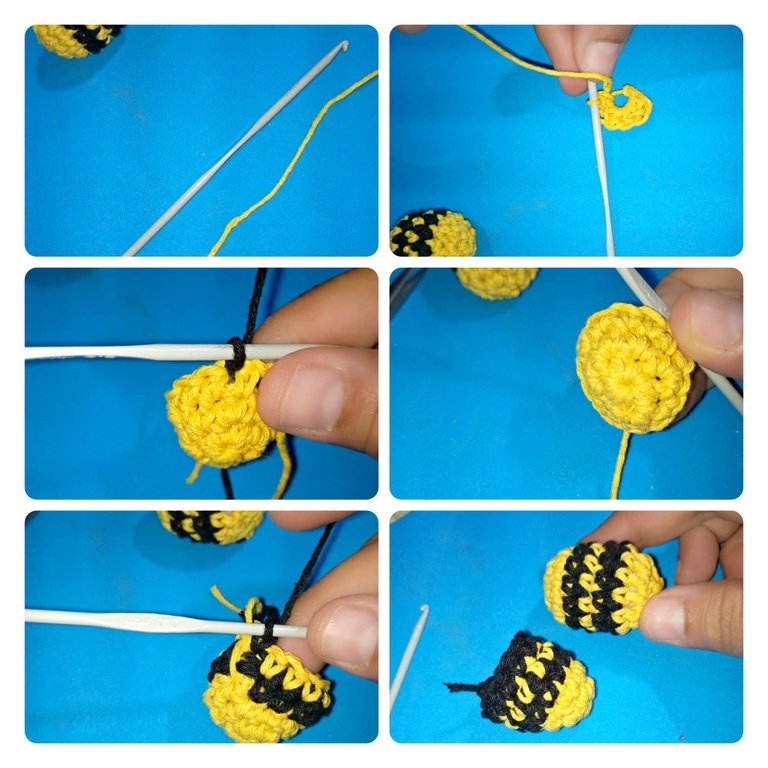
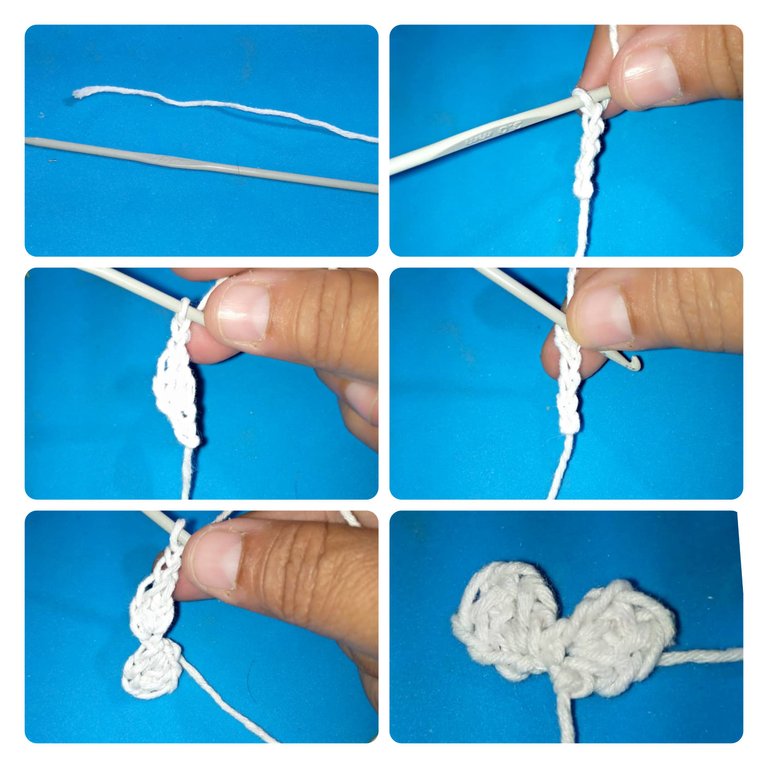
Para tejer las alas: Hacemos un nudo corredizo, levantamos tres cadenas, en la primera cadena hacer un punto alto, luego hacer dos cadenetas y cerrar en el mismo punto con punto deslizado.
- Levantar tres cadenas y en la primera cadena hacer un punto alto , luego dos cadenas y cerrar en el mismo punto con un punto deslizado. De la misma forma se hace la otra ala.
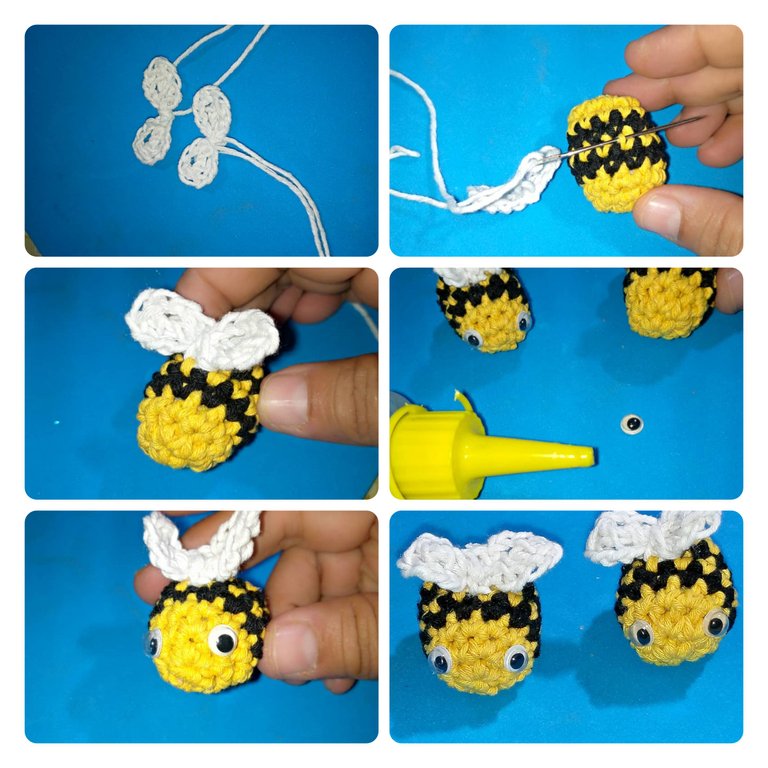
- Pegar las alas con la aguja lanera y los ojos con silicona líquida.
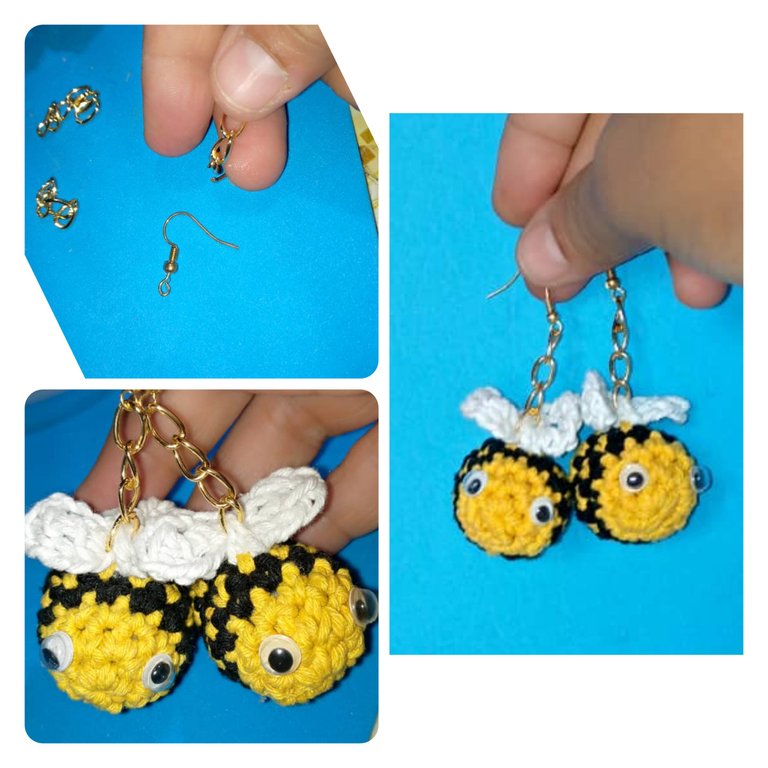
- Picar la cadena continua en 5 aros , colocar con la ayuda de la pinza el anzuelo para guindar los aretes y ya están listos.
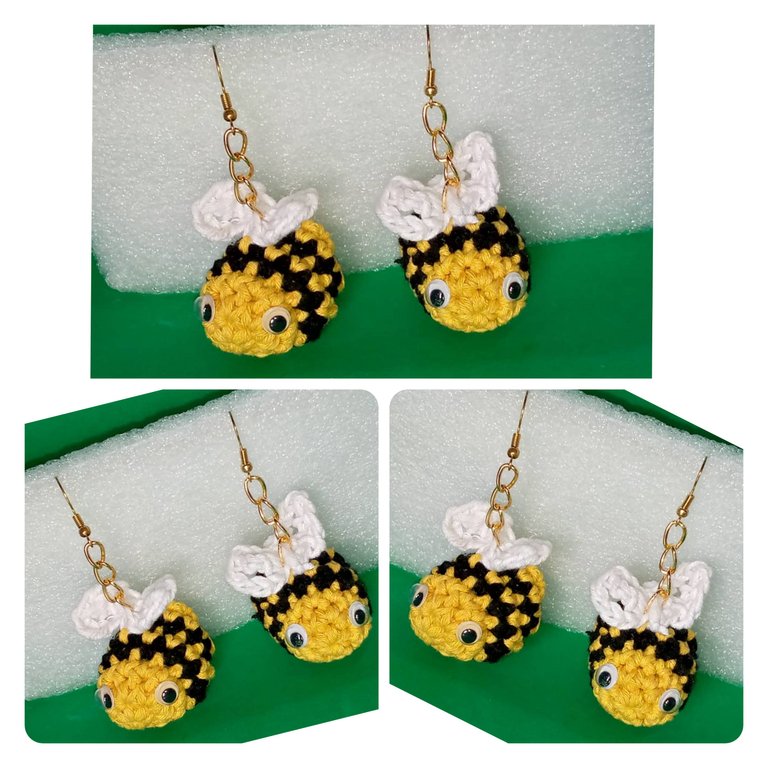
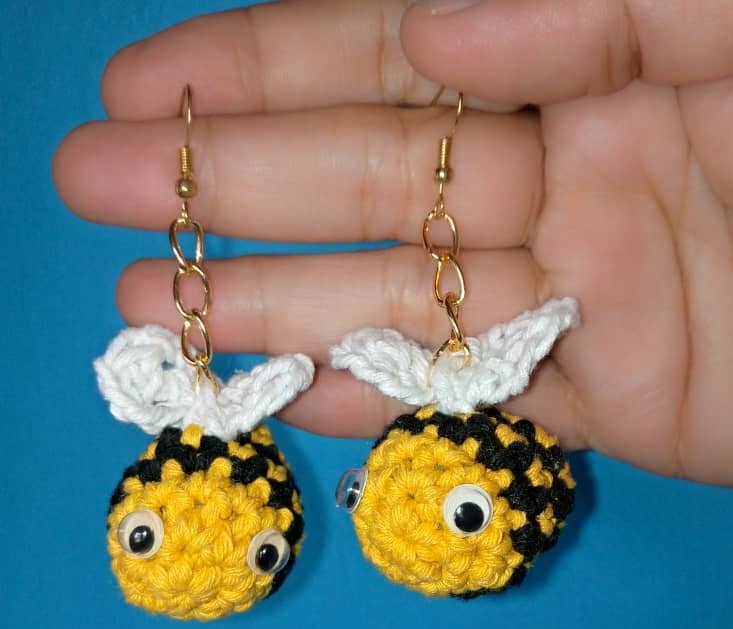
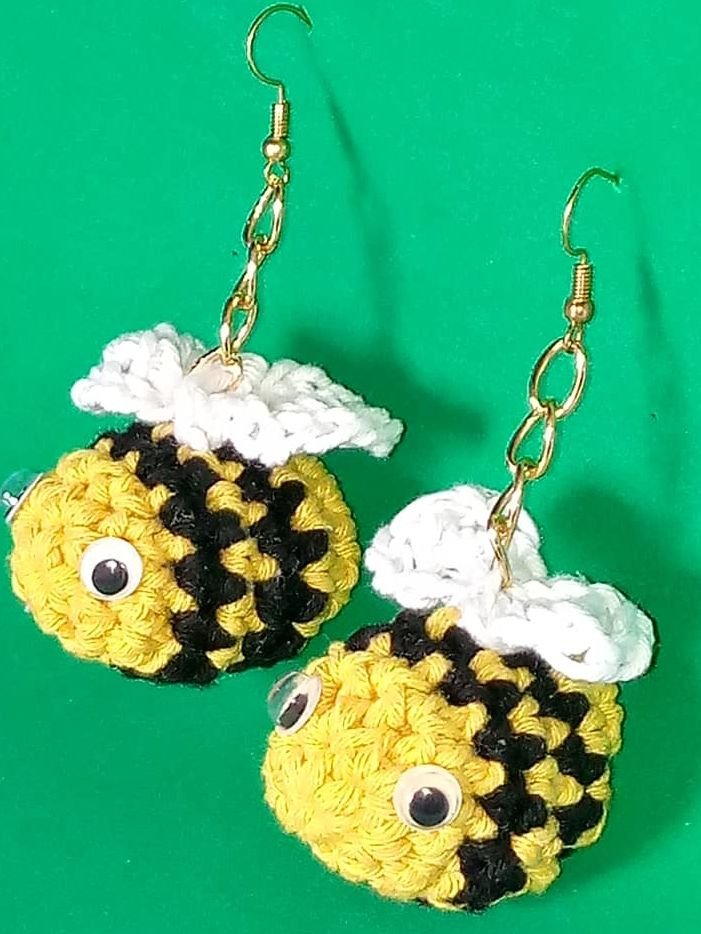
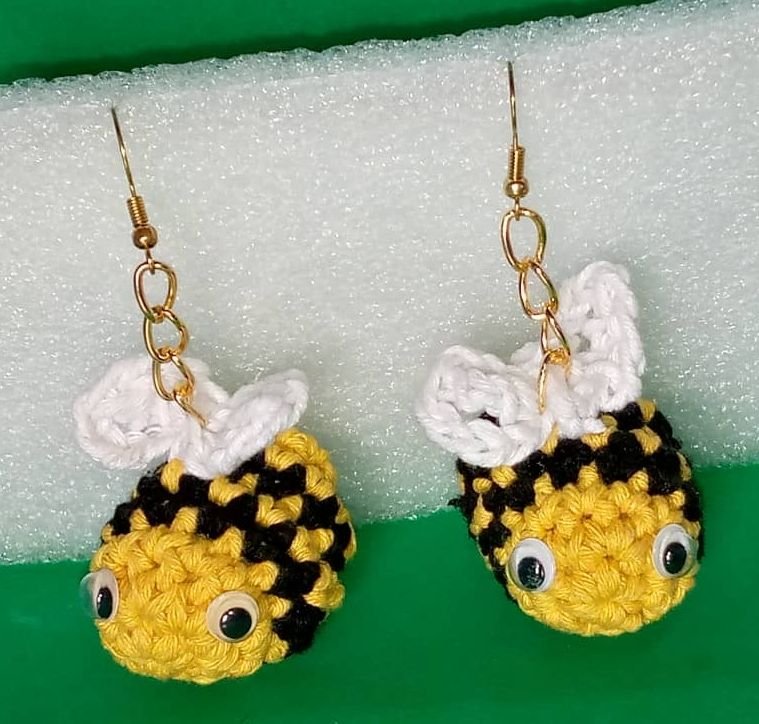
Aquí el resultado final de los hermosos aretes tejidos de abejas.

Gracias por leer, apoyar y comentar mi post, muchas bendiciones , hasta la próxima.
Las fotos son mías , tomadas con teléfono Infinix, editado con incollage y traducidos con DEEPL.


VERSIÓN INGLESA
Welcome to my blog!
God help us always and grant us all the requests of our heart.Good evening to all my friends of this contagious community #Diyhub, happy Thursday, my favorite month is almost approaching, September, month of having a birthday with God's favor and also to finish the school vacations.
I have missed many contests in this community, but this time, I said: no more, this month if I take the opportunity to participate in this beautiful contest, since every third Saturday of the month of August is celebrated World Bee Day.
Today I want to show through a tutorial, how to make some beautiful earrings crocheted in the shape of bees.
I hope you like it, I knitted them with all the love in the world.
These earrings serve to give as a gift to your favorite person.
The materials used , are as follows:
- Knitting yarn, colors: yellow, white and black.
- Filling.
- Knitting needle, number 3 .
- Tweezers.
- Scissors.
- Hooks.
- Continuous chain, golden color.
- 2 rings.
- 2 movable eyes.
Steps for realization:
- The first thing we do is take the yellow yarn with the needle, make a magic ring, inside the ring make 6 low stitches. This would be the first round.
- Second row: make an increase of single crochet in each stitch, for a total of 12 single crochet stitches. when you start each row, place a marker.
- 3 round: knit 12 single crochet , one stitch in each stitch.Cut the yellow yarn with the scissors.
- For round 4 change yarn, color black, tuck the yarn inside the single crochet, which finished the round, knit a single crochet over each stitch, for a total of 12 stitches, finish the round and trim the yarn with the scissors.
- Turn 5 , I place the yellow yarn again and knit 12 single crochet stitches in each stitch.
- Turn 6 : I change color, place the black yarn and repeat 12 single crochet stitches, over each stitch.
- Row 7 : change color and cast on yellow, cast on 12 single crochet stitches in each row.
Turn 8 and 9 : I change the yarn color (yellow) and make two rows of 12 single crochet stitches each. - I place the filling inside the motif and with a knitting needle I close it.
In the same way I knit the other earring.
To knit the wings: We make a slip knot, pick up three chains, in the first chain make a high stitch, then make two chain stitches and close in the same stitch with slip stitch.
- Pick up three chains and in the first chain make a single crochet, then two chains and close in the same stitch with a slip stitch. In the same way make the other wing.
- Glue the wings with the wool needle and the eyes with liquid silicone.
- Chop the continuous chain in 5 rings , place with the help of the tweezers the hook to hang the earrings and they are ready.
Here the final result of the beautiful woven bee earrings.
Thank you for reading , supporting and commenting on my post , many blessings , until next time .
The photos are mine , taken with Infinix phone , edited with incollage and translated with DEEPL.
Que dulce y linda idea amiga, muchos éxitos con tu entrada... gracias por compartir ☺️
Gracias a ti amiga @katiuskamata por comentar mi post. Bendiciones.🤗
This is so lovely, you did an amazing job. Who would have thought that a bee themed earrings would be this cute, to top it all they look super nice on you 😊
Gracias @ibbtammy , saludos.
Wow, pero qué exóticos aretes de abejas amiga, se ven tan coquetas, que enamoran a primera vista 😚 te quedaron lindísimas. Mis mejores deseos.
Ay , que palabras más lindas amiga @lauracraft , gracias ,muchas bendiciones. Saludos 🤗
😊 amen, gracias a ti también querida.
Gracias por el apoyo @rutablockchain . Saludos.
Awwww such beautiful earrings and it looks so good on you. Nice interpretation of the contest, good job!!
Gracias por el apoyo @diyhub ,muchas bendiciones. Saludos🤗🤗
!discovery 30
This post was shared and voted inside the discord by the curators team of discovery-it
Join our Community and follow our Curation Trail
Discovery-it is also a Witness, vote for us here
Delegate to us for passive income. Check our 80% fee-back Program
Gracias por el apoyo @discovery-it , bendiciones.
Están muy hermosos 👍
Te quedaron hermosos felicidades
This is just too cute!! It looks really good on you too. You did an amazing job 👏👏