¡Bienvenido a mi blog!
Dios les bendiga.
Yo en lo que me gusta y me apasiona, realizando mis proyectos.
En la area de conocimiento de G.H.C. ( Geografía, historia y ciudadanía)le mandaron a mi hijo a realizar una actividad, sobre como los indígenas midel tiempo y que escogieran uno de ellos. Por lo que se escogió , cómo hacer un reloj solar.
Siempre lo ayudo en sus actividades ,aunque termina él haciéndolas, ya que solo lo oriento y luego mí hijo la realiza.
Por lo tanto manos a la obra para realizar el lindo reloj solar.Buenas noches , feliz Sábado a todos los miembros de esta comunidad #diyhub , espero que la estén pasando bien, juntos en familia.
Welcome to my blog!
God bless you.
Me in what I like and what I am passionate about, realizing my projects.
In the area of knowledge of G.H.C. (Geography, history and citizenship) they sent my son to do an activity on how indigenous people measure time and to choose one of them. So he chose how to make a sundial.
I always help him in his activities, although he ends up doing them, since I only guide him and then my son does it.
So let's get to work to make the beautiful sundial.Good evening , happy Saturday to all the members of this #diyhub community , hope you are having a great time, together as a family.
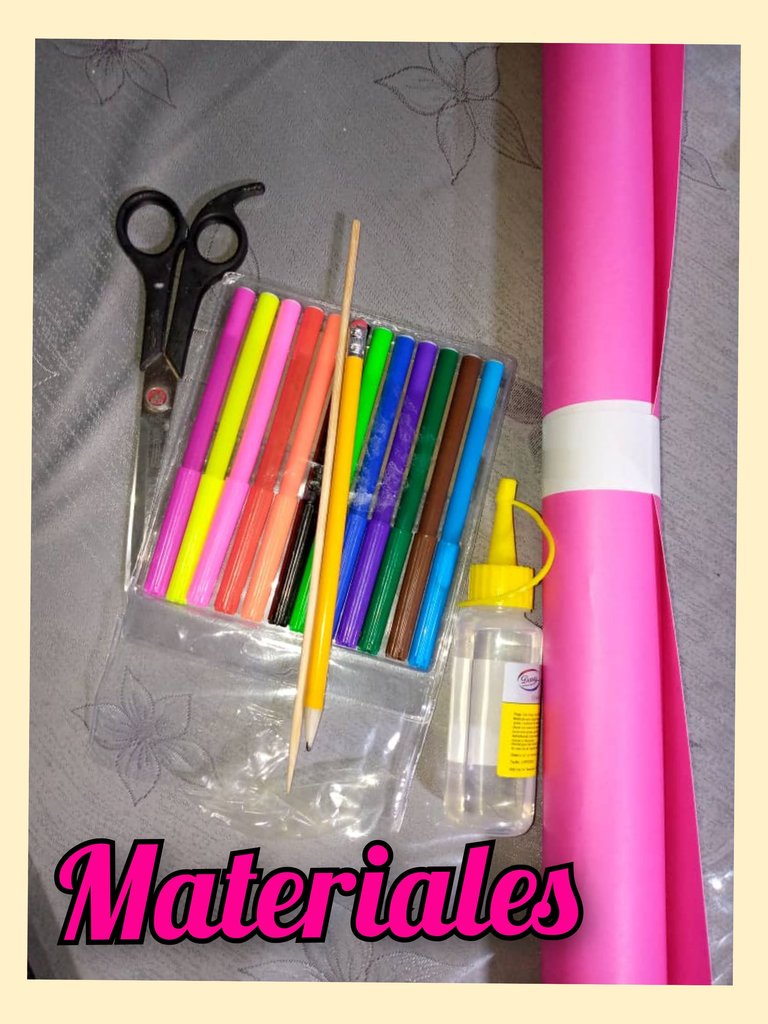
Materiales para la realización del reloj solar :
- Cartulina de color rojo
- Tijera
- Silicona líquida.
- Un palo de altura.
- Colores.
- Regla.
- Marcadores
- Transportador
- Lápiz.
Materials for the realization of the sundial:
- Red cardboard
- Scissors
- Liquid silicone.
- A height stick.
- Colors.
- Ruler.
- Markers.
- Protractor
- Pencil.
####Paso a paso para la realizacion del reloj solar:
- Después de haber buscado sobre que tipo de actividades íbamos a realizar, lo que necesitaba para escoger .
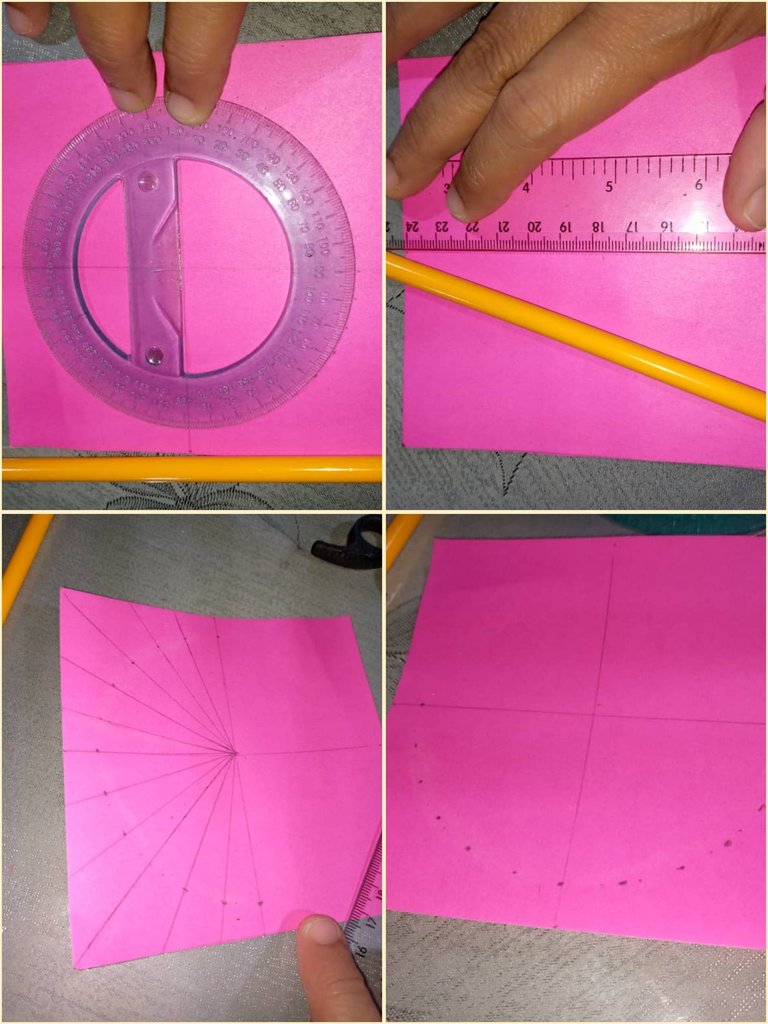
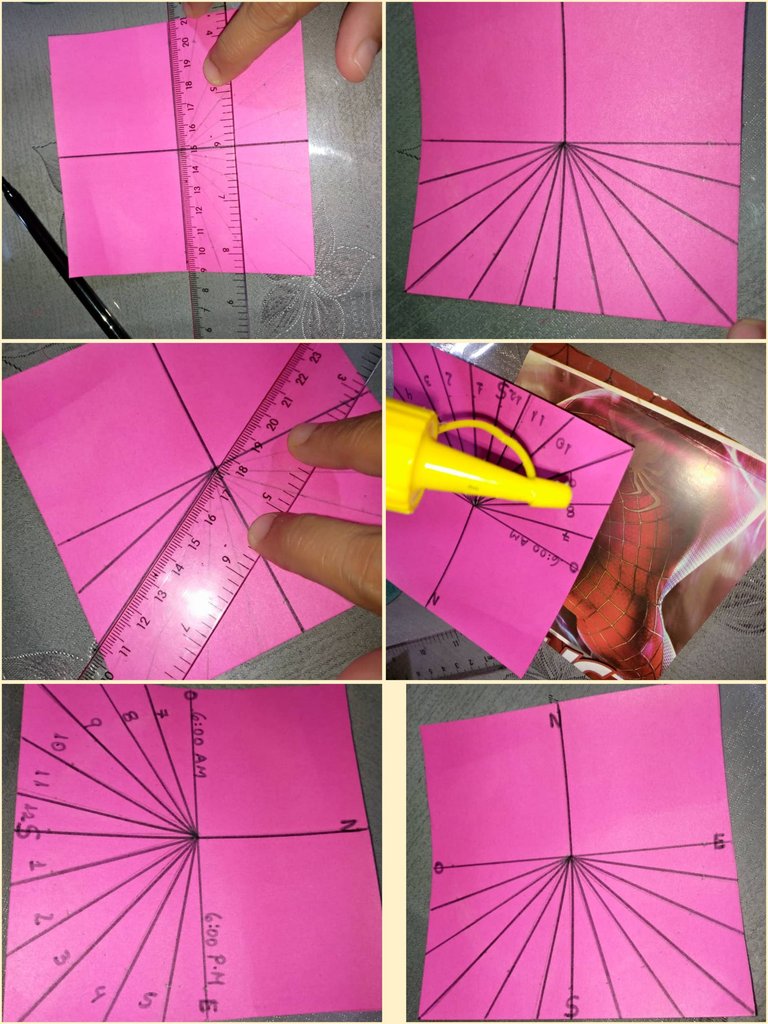
- Luego tomamos la cartulina y con la regla y un lápiz, comenzamos a marcar junto con la regla, hacer un cuadrado de 12 x 12 centimetros y dos pedazos de 6 x 12 centímetros.
- Recortar xon las tijeras.
- Tomamos el pedazo de 12 x 12 centímetros, con la regla marcamos la mitad .Con el transportador , lo colocamos en todo el centro de la linea recta. La mitad de esa línea.
Y con el transportador vamos marcando 1.5 centímetros, se deben marcar doce puntos. - Ahora colocar los números de la hora . Comenzar por las seis de la mañana, 7, 8,9,10,11,12, 1 de la tarde, 2,3,4,5 y 6 de la tarde.
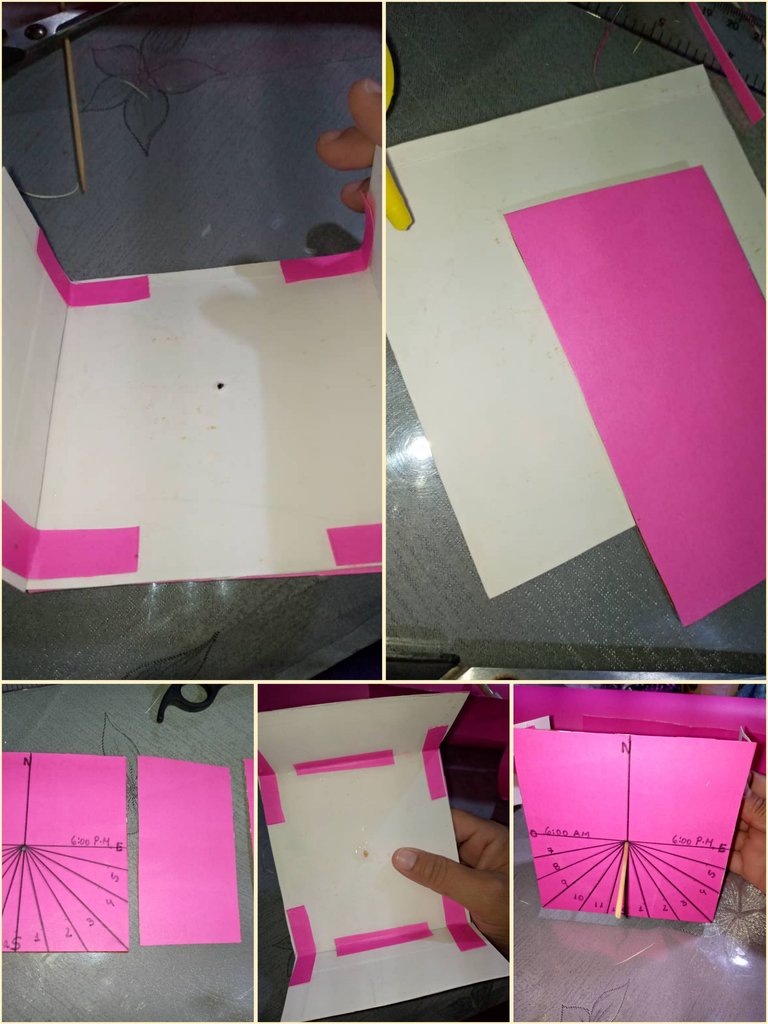
- Continuamos colocando el palo de altura en todo el centro en donde se unen las cuatro líneas. Agregar silicona líquida para poder pegar el palo de altura que va a simular la aguja de reloj.
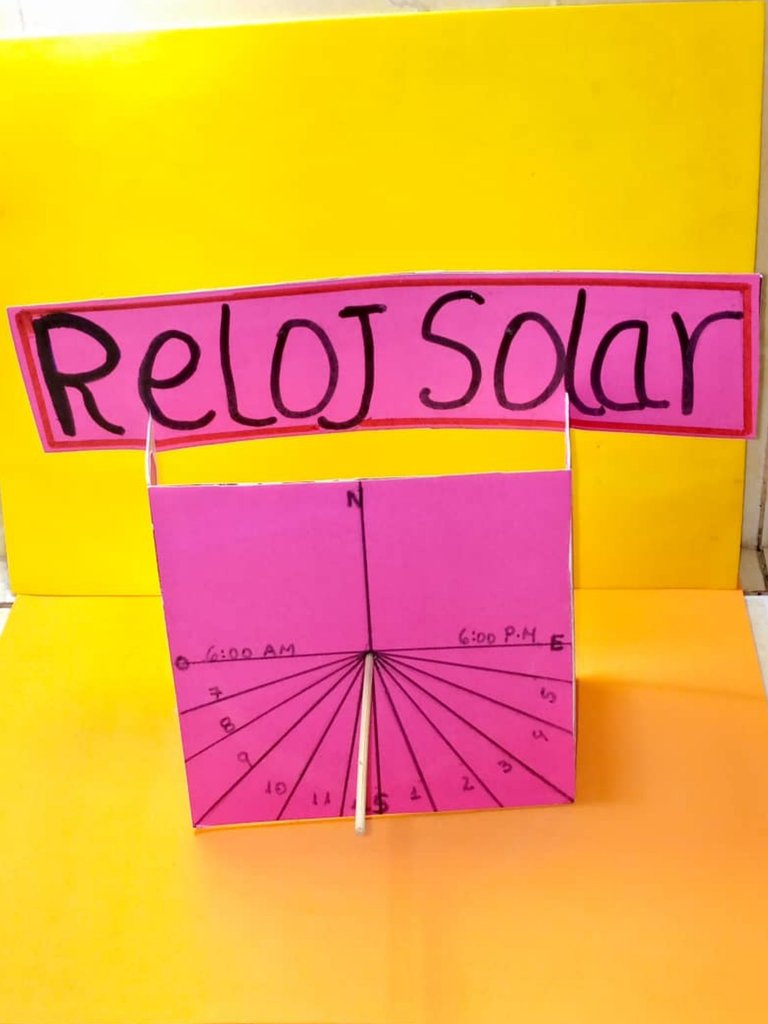
- Ahora se pegan las partes del reloj , pueden guiarse por la imagen.
- Se deben colocar los puntos cardinales: norte , sur ,este y oeste.
- Se coloca la aguja hacia la dirección del norte, colocar la punta de la aguja o palo de altura en el frente del norte . El este es donde sale el sol. Desde allí se comienza a ver. La sombra es la que determina la hora. De esta manera median el tiempo los indígenas.
####Step by step for the realization of the sundial:
- After having searched about what kind of activities we were going to do, what we needed to choose .
- Then we took the cardboard and with the ruler and a pencil, we began to mark together with the ruler, make a square of 12 x 12 centimeters and two pieces of 6 x 12 centimeters.
- Cut out with the scissors.
- We take the piece of 12 x 12 centimeters, with the ruler we mark half of it, with the protractor, we place it in the center of the straight line. Half of that line.
And with the protractor we mark 1.5 centimeters, twelve points should be marked.- Now place the numbers of the hour. Start with six o'clock in the morning, 7, 8, 9, 10, 11, 12, 1 in the afternoon, 2, 3, 4, 5 and 6 in the evening.
- Continue by placing the height stick in the center where the four lines meet. Add liquid silicone to be able to glue the height stick that will simulate the clock hand.
- Now glue the parts of the clock, you can be guided by the image.
- Place the cardinal points: north, south, east and west.
- Place the needle towards the direction of north, place the tip of the needle or height stick in front of the north. The east is where the sun rises. From there you start to see. The shadow is what determines the time. This is how the Indians measure the time.

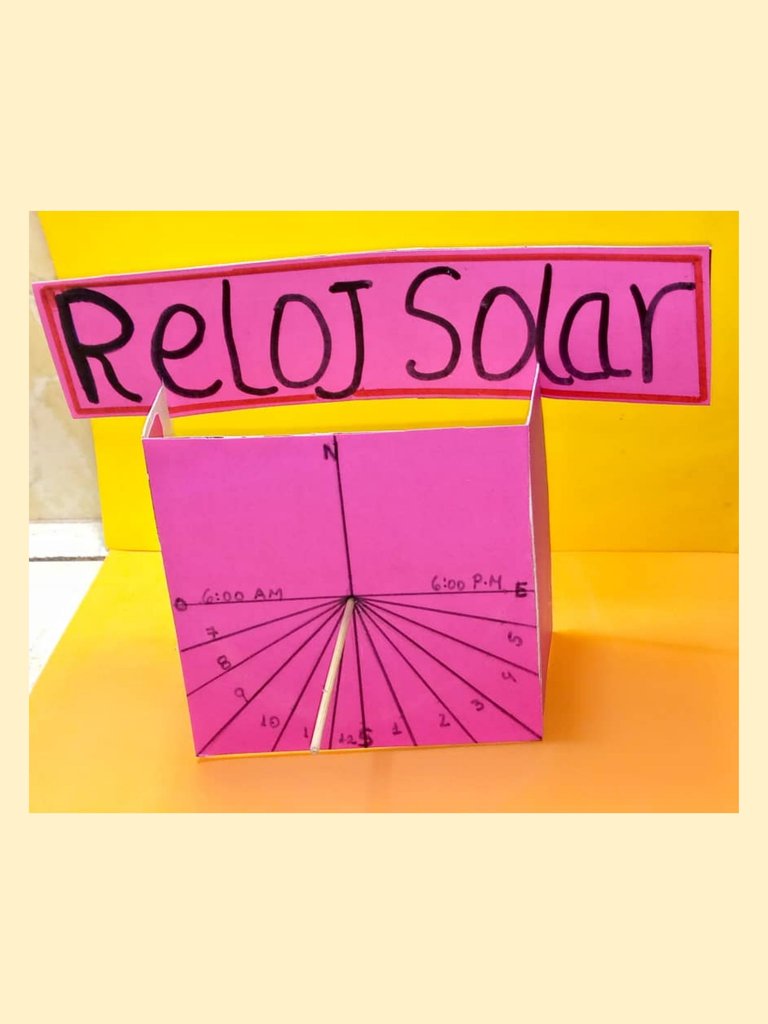
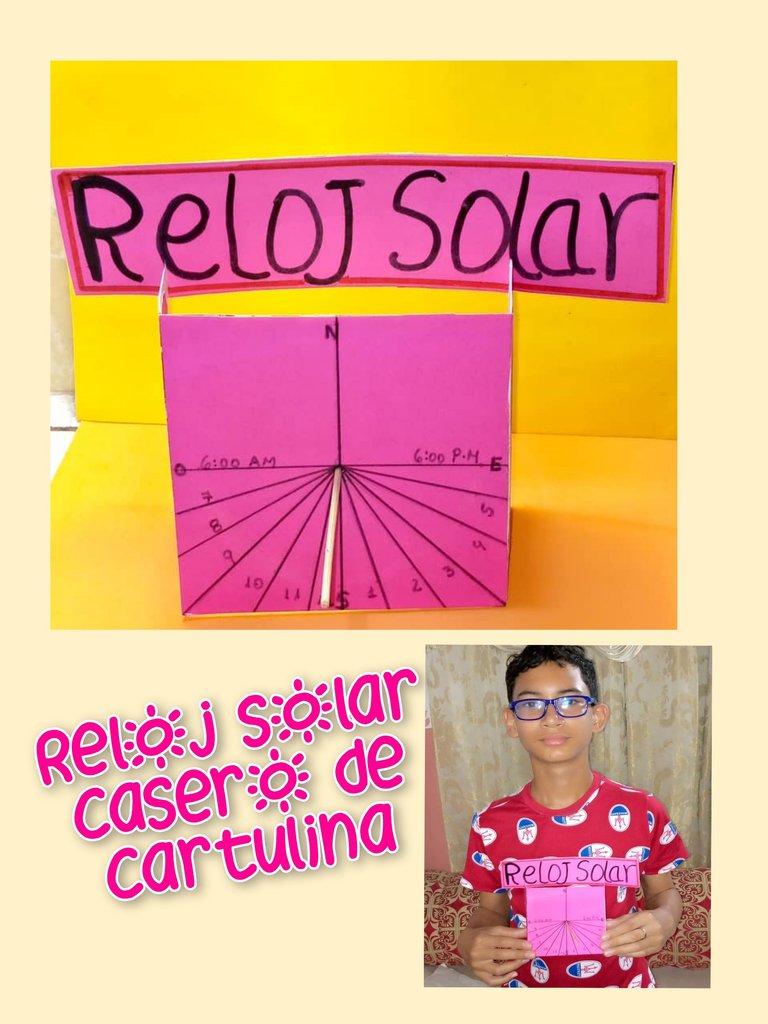
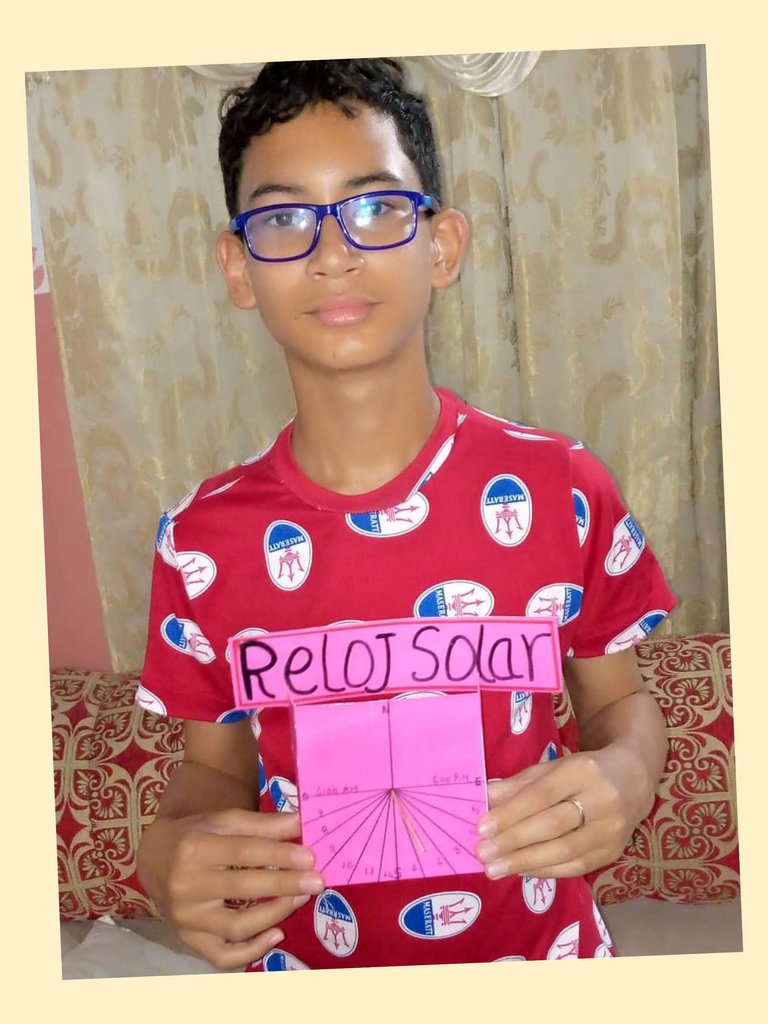
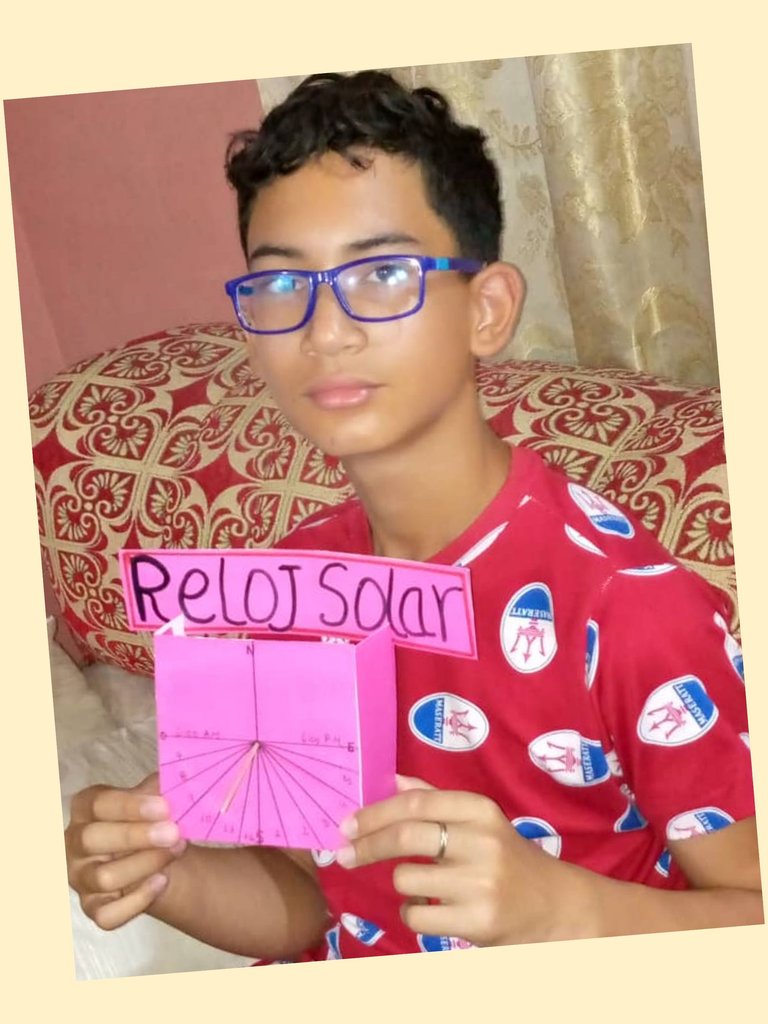
@### Aquí el resultado final del hermoso reloj casero . Muchas bendiciones.
Here is the final result of the beautiful homemade clock. Many blessings.
Gracias por leer y comentar mi post, espero sea de su agrado. Dios les bendiga. Las fotos son mías , tomadas con teléfono Infinix, editado con incollage y traducidos por Deepl.
Thank you for reading and commenting on my post, I hope you like it. God bless you. The photos are mine, taken with Infinix phone, edited with incollage and translated by Deepl.

It looks pretty cool. Good to see how you made this with the paper. It shows your skills. Nice work! Thanks!
Gracias a ti @diyhub , muchas bendiciones. Saludos
You did a great job with this, thanks for sharing.
Gracias a ti @bimpcy por leer y comentar mi post, muchas bendiciones.Saludos.
Hola ese reloj no lo había visto está bien fino