
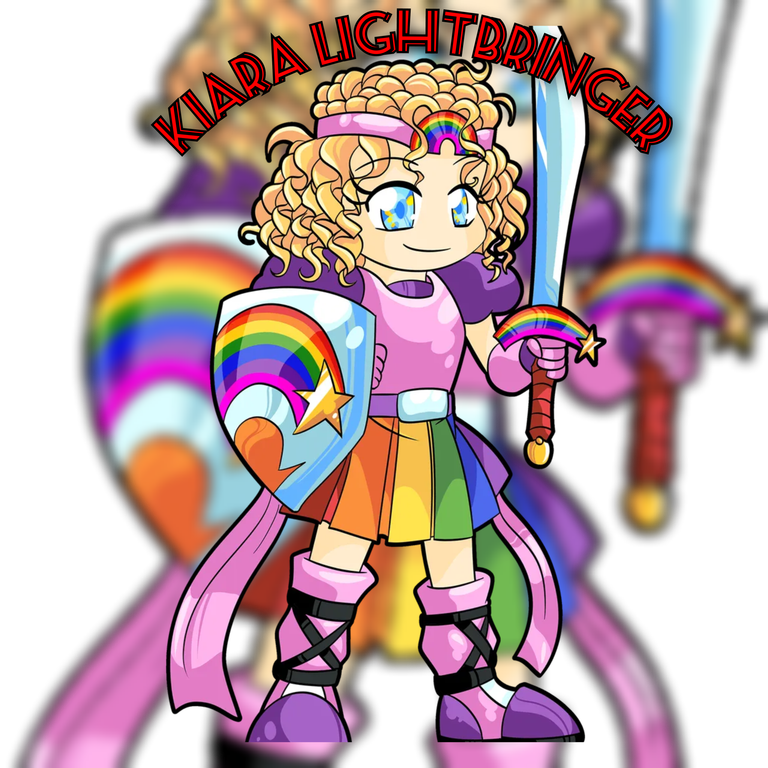
Today I'd love to share with you my latest textile project, for my entry to the weekly contest (#Splinterlands.)
I hope you like it....Good afternoon friends of @diyhub, lovers of arts and crafts. I wish you a beautiful day, always full of pure positive vibes, beautiful things and prosperity in each of your projects. Grateful to be able to continue sharing and inspiring me in such a creative community. It fills me with a lot of joy to enjoy all the projects that each one of its members create day by day.
El dia de hoy me encantaria compartirles mi último proyecto textil, para mi entrada al concurso de cada semana (#Splinterlands.)
Espero y sea de su agrado...Muy buenas tardes amigos de @diyhub!, amantes de las manualidades y artesanías. Les deseo un dia hermoso, lleno siempre de pura vibra positiva, cosas lindas y prosperidad en cada uno de sus proyectos. Agradecida por poder seguir compartiendo e inspirandome en tan creativa comunidad. Me llena de mucho gozo poder disfrutar de todos los proyectos que plasman dia a dia, cada uno de sus integrantes.
✨✨✨Refence /Referencia✨✨✨
For the elaboration of this beautiful garment to surprise my little girl, I took several fabric scraps left over from old works, and as I always say: "every little piece, no matter how tiny it is, is a treasure for a creative and dreamy mind".
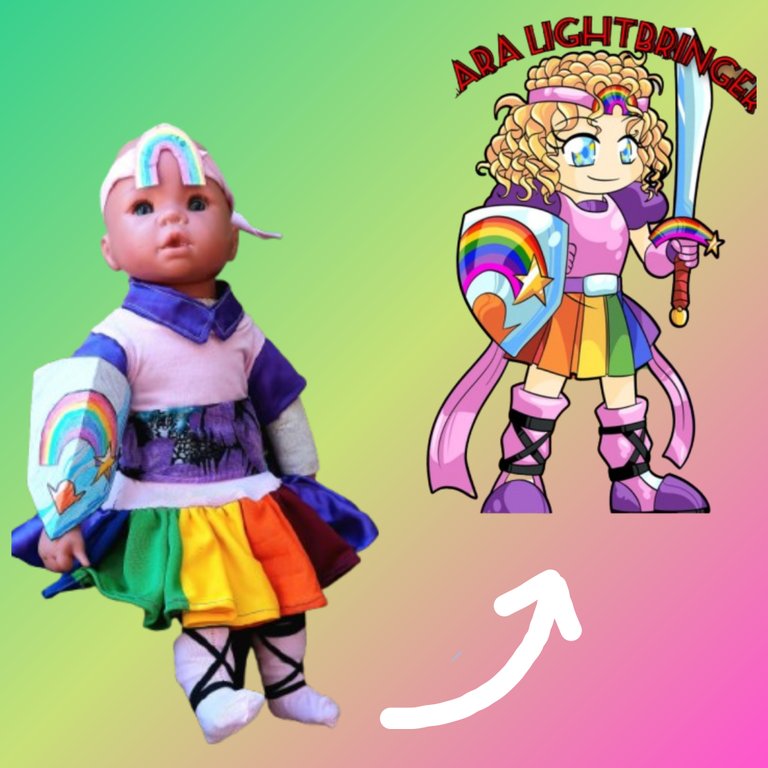
I wanted to keep as many elements similar or the same as the original, always giving it a unique, original and personal touch.
Para la elaboracion de esta linda prenda de vestir para darle la sorpresa a mi niña, tome varias recorterias de telas que sobraban de trabajos antiguos, y como yo siempre digo: "cada pedacito, por diminuto que sea, es un tesoro ante una mente creativa y soñadora".
Deseaba mantener la mayor cantidad de elementos similares o iguales al de la original, siempre dandole un toque único, original y personal.
I hope you like it and that it will be useful to those who love sewing as much as I do. Thanks for your attention.Well, without further delay, I invite you to observe and interact in this detailed step by step on how to make a cute costume inspired by one of the various cards belonging to the project "@splinterlands".
Espero y os guste, y sirva de algo a aquellos que aman tanto la costura como yo. Gracias por su atencion.Bueno, sin mas demoras, los invito a observar e interactuar en este detallado paso a paso de como confeccionar un lindo disfraz inspirado en una de las diversas cartas pertenecientes al proyecto "@splinterlands".
🪡✂️🧵🪡✂️🧵🪡✂️🧵🪡✂️🧵🪡✂️🧵🪡✂️🧵
Materiales / Materials
🪡✂️🧵🪡✂️🧵🪡✂️🧵🪡✂️🧵🪡✂️🧵🪡✂️🧵
Fabric
Scissors
Thread and needle
Elastic
Measuring tape
Pins
Sewing machine
Silicone gun
Cardboard
Colors
Procedure:
1st step:
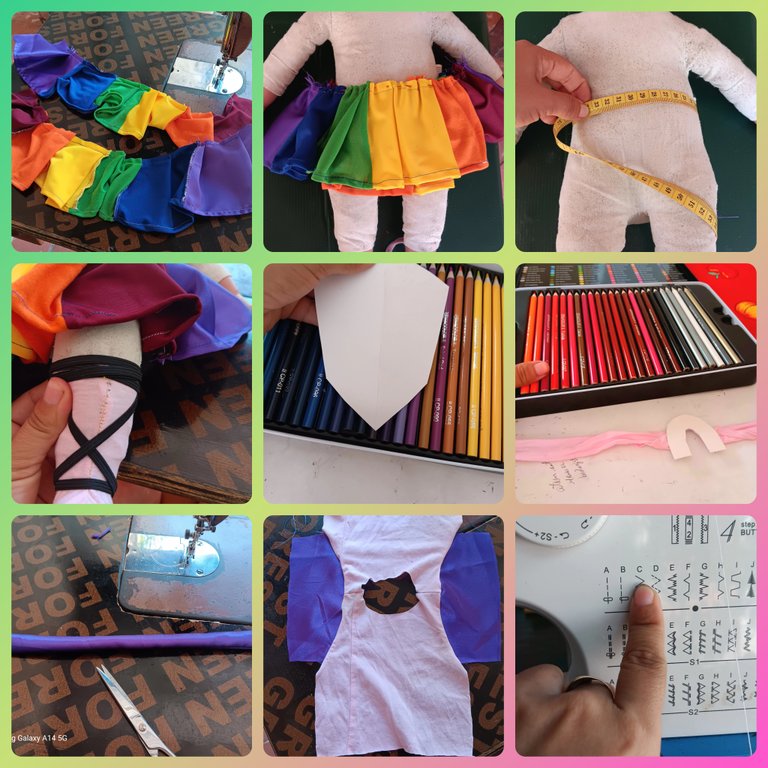
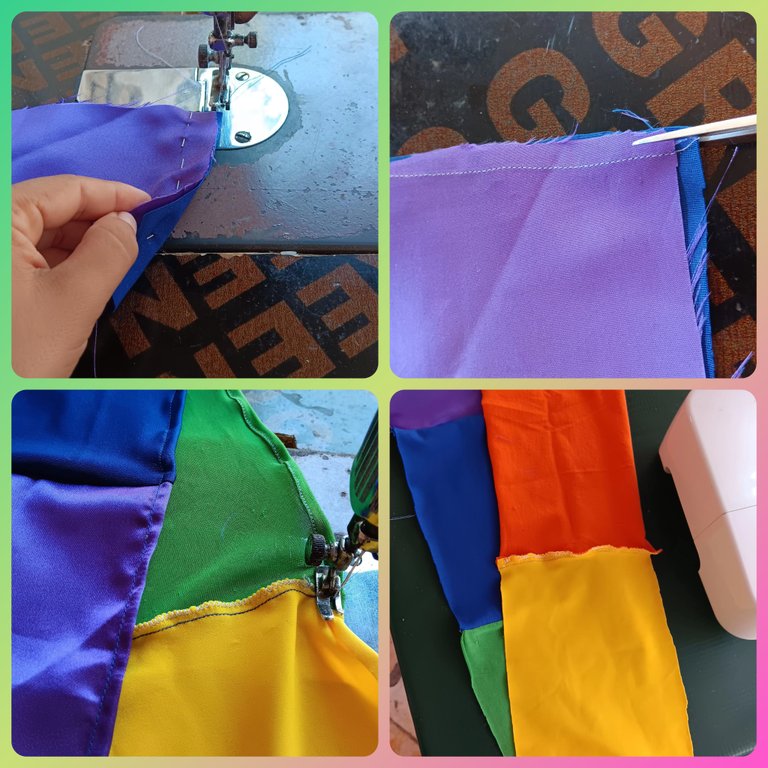
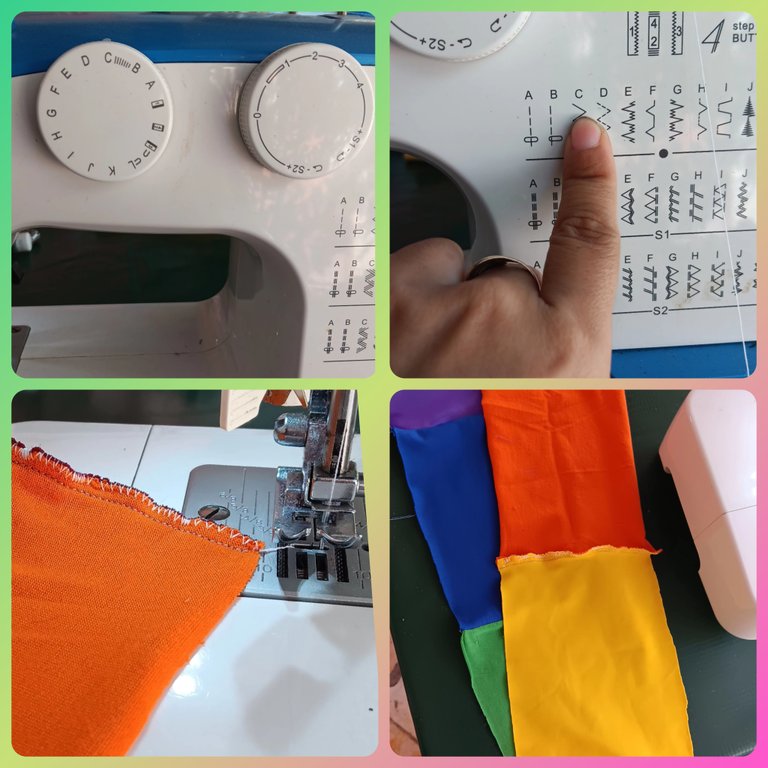
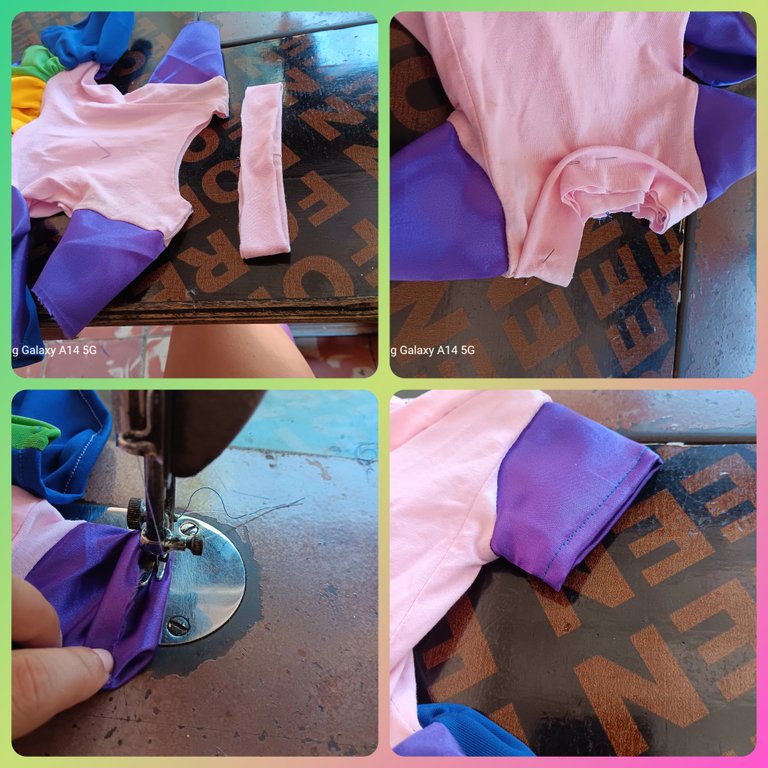
I started by matching the fabric cuttings I had available, making large rectangles, all with the same length. Obtaining 6 colors with the same measure each one.
Then, I proceeded to sew with the help of the pins, allowing the seam to be firm, straight and clean at the time of sewing. Finishing at the end with a tic tac seam, for a better finish for each tie.
Procedimiento:
1er paso:
Comencé emparejando los recortes de tela que tenía a disposición, haciendo grandes rectangulos, todos con la misma longitud. Obteniendo 6 colores con la misma medida cada uno.
Luego procedi a embastar con ayuda de los alfileres, permitiendo a la hora de pasar la costura, que esta quede firme, recta y limpia. Rematando al final con una costura en tic tac, para un mejor acabado por cada empate.
2nd step:
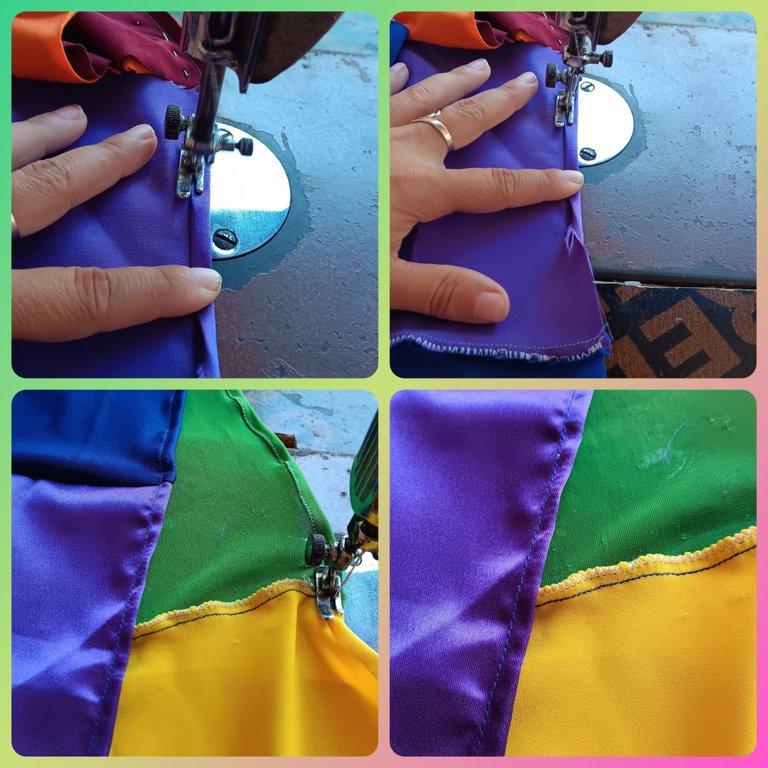
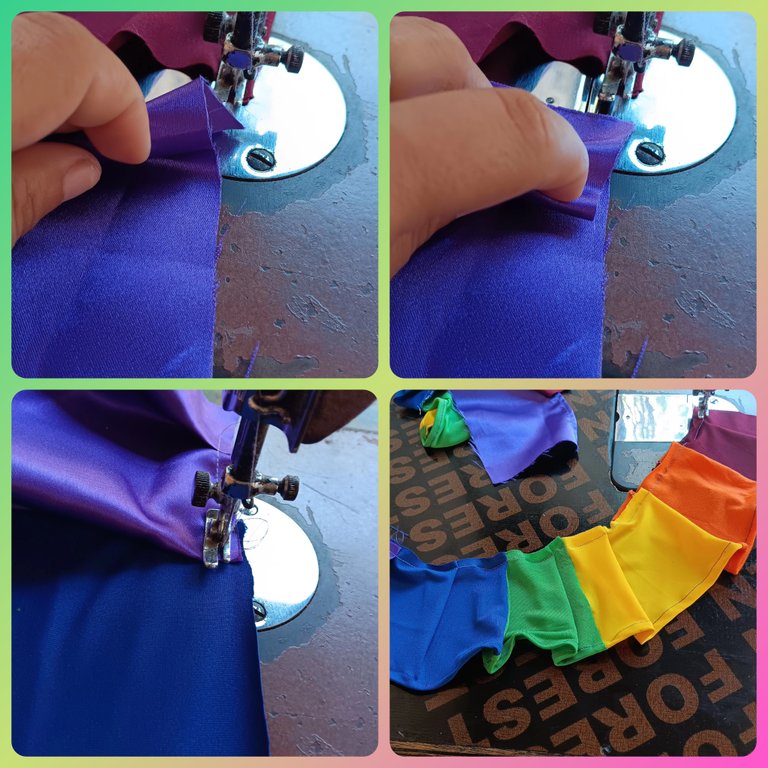
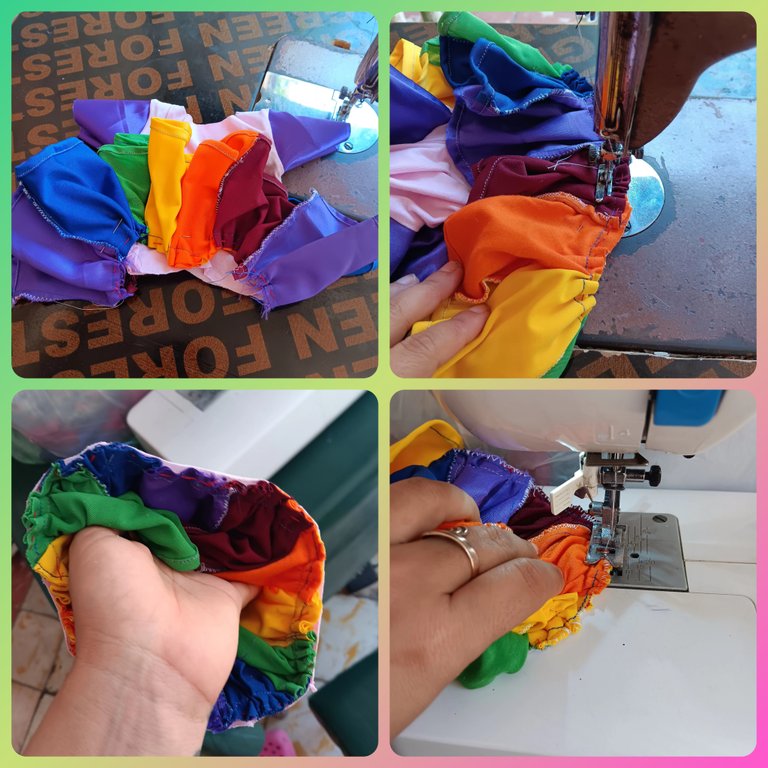
Then I hemmed the whole bottom of the dress and made with a long stitch the studs of the lower part of the dress, mounting one on top of the other, leaving 5cm of separation between each one.
2do paso:
Luego le realice el dobladillo a toda la parte de abajo y fui haciendo con una puntada larga los tachones de la parte baja del vestido, montando uno encima del otro, dejando 5cm de separación entre cada uno.
3rd step:
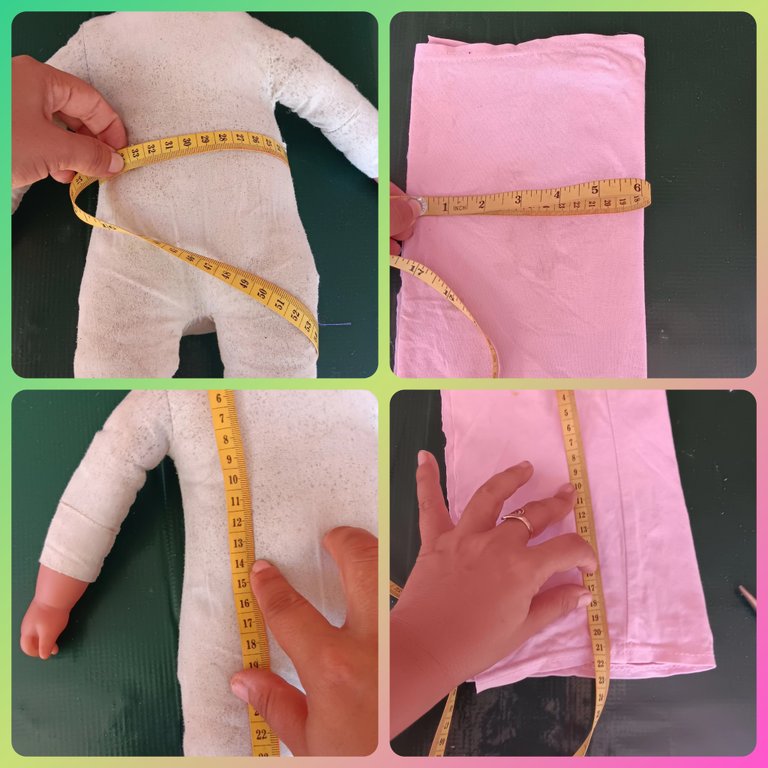
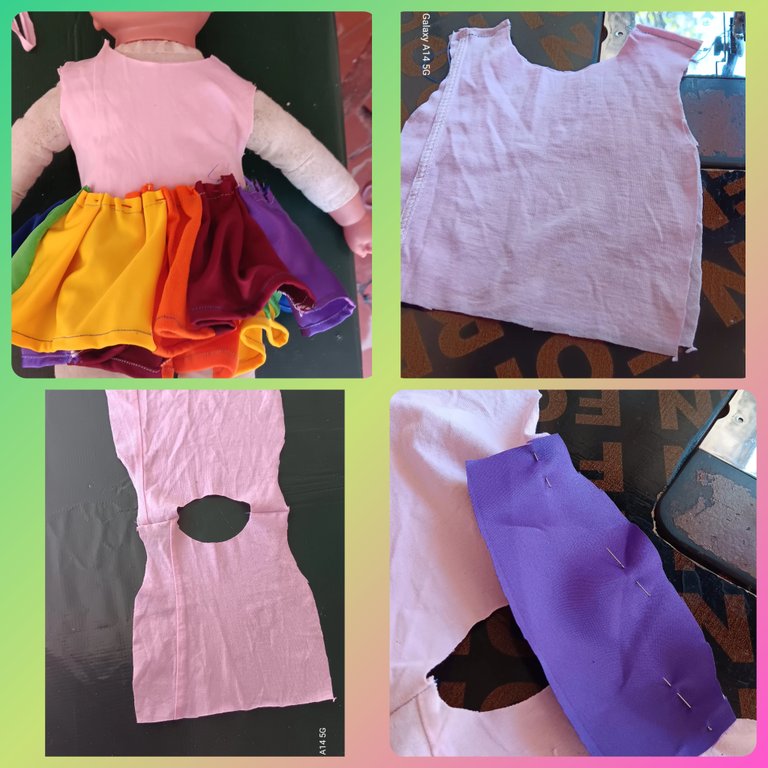
Once the lower part was ready, I proceeded to make the upper part, first I took the length and width measurements of the baby. I must say that this is my first time doing this kind of work. Once measured, I folded each piece right in half, then I made the cuts for the sleeves and the neck.
Finally, make a straight seam along the shoulders and pin the sleeves to the sleeve cuffs.
3er paso:
Ya lista la parte baja, procedi a realizar la parte de arriba, primero tome las medidas de largo y ancho del bebe. Debo decir que es 1ra vez, haciendo este tipo de trabajos. Una vez medidos, doble cada retaso justo por la mitad, luego realice los cortes para las bocamangas y el cuello.
Finalmente realice una costura recta por la parte de los hombros y sujete con ayuda de alfileres las mangas a las bocamangas.
4th step:
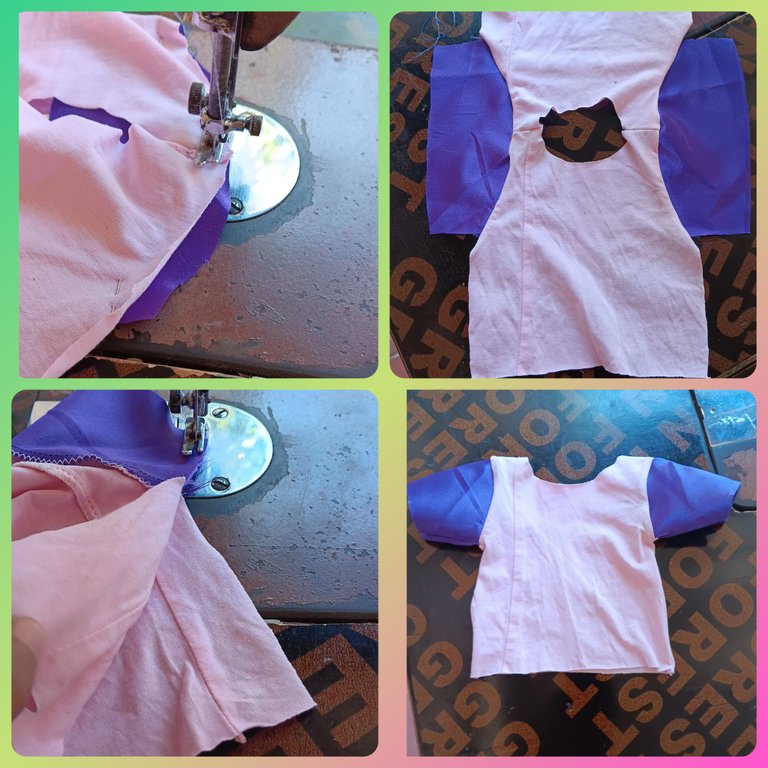
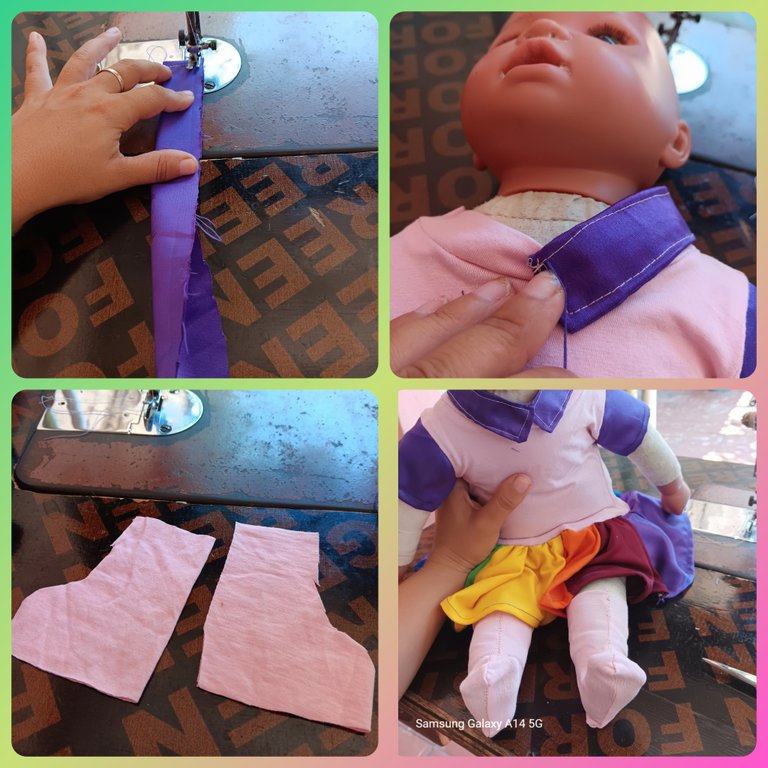
Sew a seam joining the sleeves to the blouse, then sew another seam on each side joining the front to the back.
Finally I joined the top to the bottom, first with pins, allowing a clean and straight seam, avoiding any kind of accident.
4to paso:
Pase costura uniendo las mangas a la blusa, luego le realice otra costura a cada lateral uniendo la parte delantera con la trasera.
Finalmente uni la parte de arriba con la parte de abajo, primero con alfileres, permitiendo una costura limpia y recta, evitando cualquier tipo de accidente.
5th step:
To finish this dress I proceeded to sew a collar to give it a nicer finish and hemmed the sleeves.
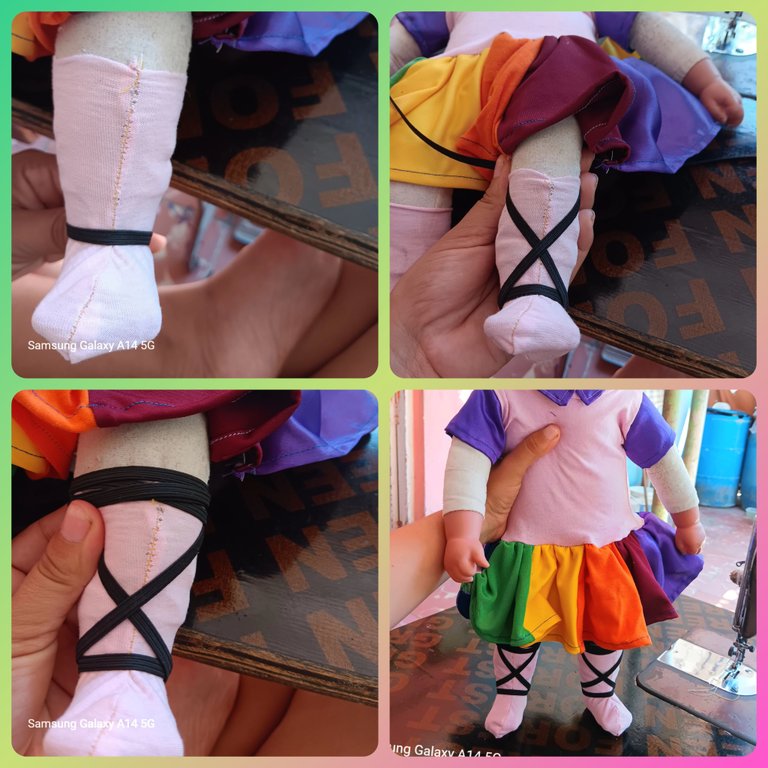
I cut and sewed two styles of stockings to make the shoes and with a black elastic, I gave a couple of laps, simulating the straps that this girl has on her shoes.
5to paso:
Para culminar este vestido procedí a coserle un cuello dandole un acabado mas bonito y le realice los dobladillos a las manguitas.
Recorte y coci dos estilos de mediecitas para hacer los zapatos y con un elástico de color negro, le di par de vueltas, simulando las tiras que esta chica tiene en sus zapatos.
6th step:
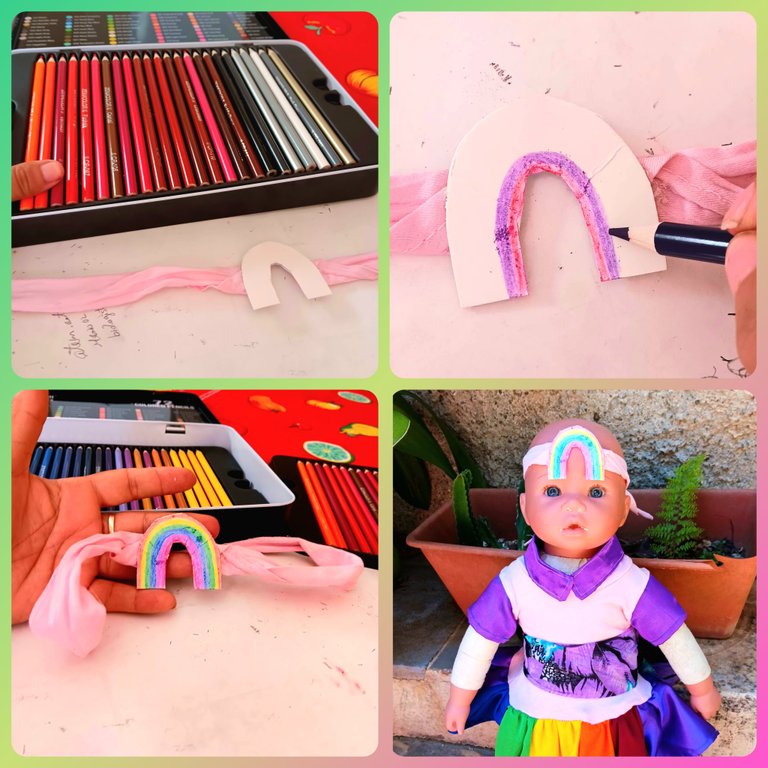
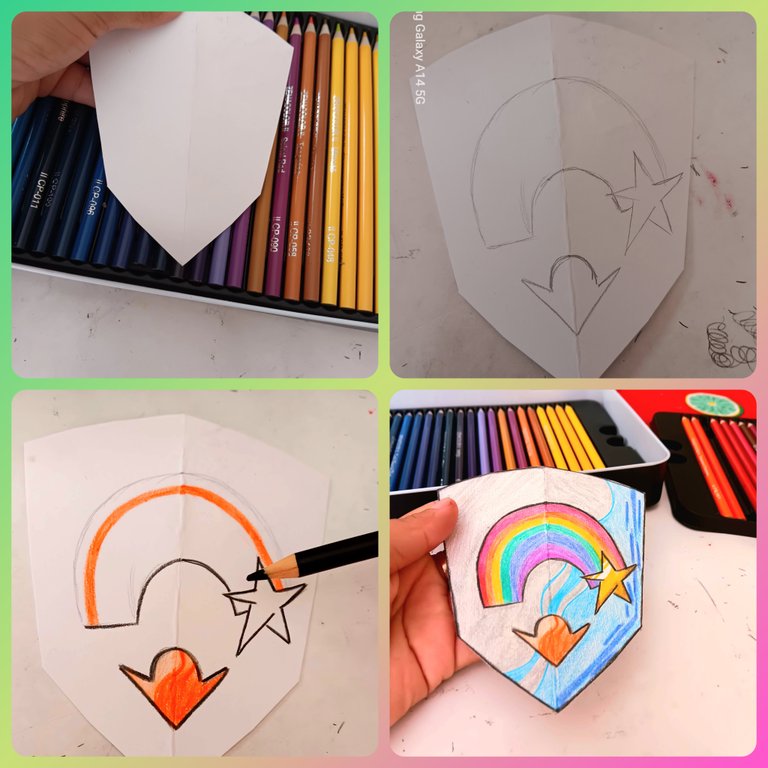
For the shield and the head accessory, I took a piece of white cardboard and cut out the shape of the rainbow and the shield. Then with colors I proceeded to apply the corresponding shades on each object and accessory. With hot silicone, I glued the rainbow to the ribbon and the shield to the baby's hand.
6to paso:
Para el escudo y el accesorio de la cabeza, tome un pedazo de cartulina blanca y recorte obteniendo la forma del arcoiris y el escudo. Luego con colores procedí a aplicar las tonalidades correspondientes en cada objeto y accesorio. Con la silicona caliente, pegue el arcoiris a la cinta y lo que sujetaria el escudo a la mano de la bebe.
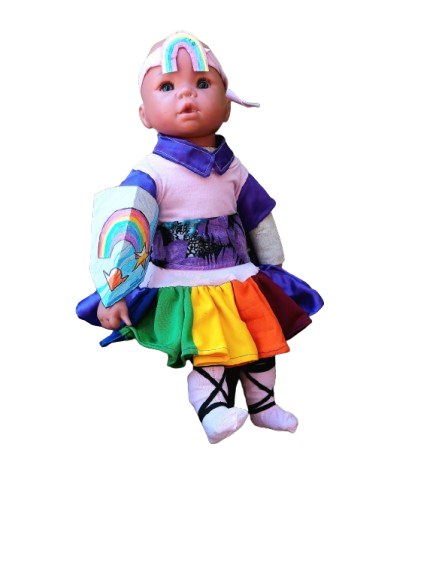
🌹🌸✨🥁Resultado/result🥁✨🌸🌹


I hope you liked this work🙏, that it will be useful to those who love challenges like me🥰. I would appreciate if you leave your nice comments and your support💪. Blessings to all and happy week to all. Kisses and success🤞.
Espero que les haya gustado este trabajo🙏, que les sirva de algo a los que aman los retos como yo🥰. Agradeceria que dejaran sus lindos comentarios y su grato apoyo💪. Bendiciones para todos y feliz semana para todos. Besos y exitos🤞.
El texto o resumen es totalmente de mi autoria.
The text or summary is entirely my own.
Thank you so much 🙏🏻☺️
Es un diseño encantador, con hermosos acabados💖 felicidades✨
Muchas gracias amiga, me alegra que te haya gustado ☺️🙏🏻
Thank you ☺️🙏🏻
A peculiar work, I like to enter the community and see very varied things, I really hope you were pleased with the result and the excellent documentation of the process.
Thank you very much for the words. I'm glad you liked it. Have a nice evening. Blessings
Que lindo, te ha quedado perfecto. Haz hecho un excelente trabajo 💯👍
Muchas gracias mi vida. Me alegra que te haya gustado.