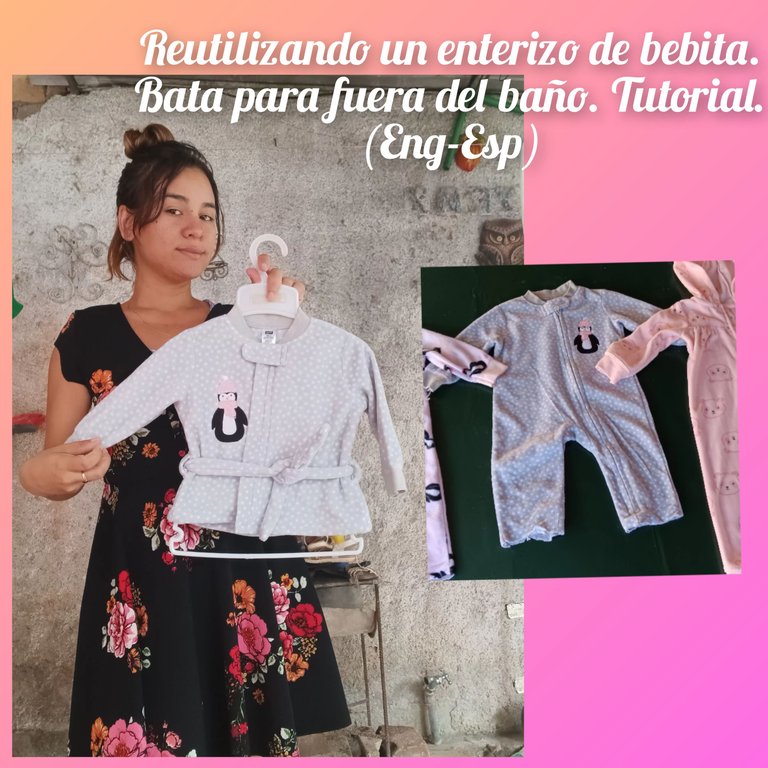
Hola, muy buenas noches, para todos los amantes de la costura, el diseño, las manualidades y los nuevos retos. Espero que todos se encuentren bien y esten teniendo un maravilloso inicio de semana, les deseo mucha buena vibra, mucho éxito y bienestar para sus negocios y familia, que al final, son los principales motores e impulsores en nuestras vidas.
En esta ocasión les traigo una bonita forma de #reciclar o #reutilizar un enterizo de bebita. A pesar de ser un trabajo sencillo, siempre se necesita prestar total atención y ponerle toda la dedicación que lo amerita...
Hello, very good evening, to all lovers of sewing, design, crafts and new challenges. I hope you all are well and are having a wonderful start of the week, I wish you lots of good vibes, much success and well being for your business and family, which in the end, are the main engines and drivers in our lives.
This time I bring you a nice way to #recycle or #reuse some baby onesies. Although it is a simple job, you always need to pay full attention and put all the dedication that it deserves...
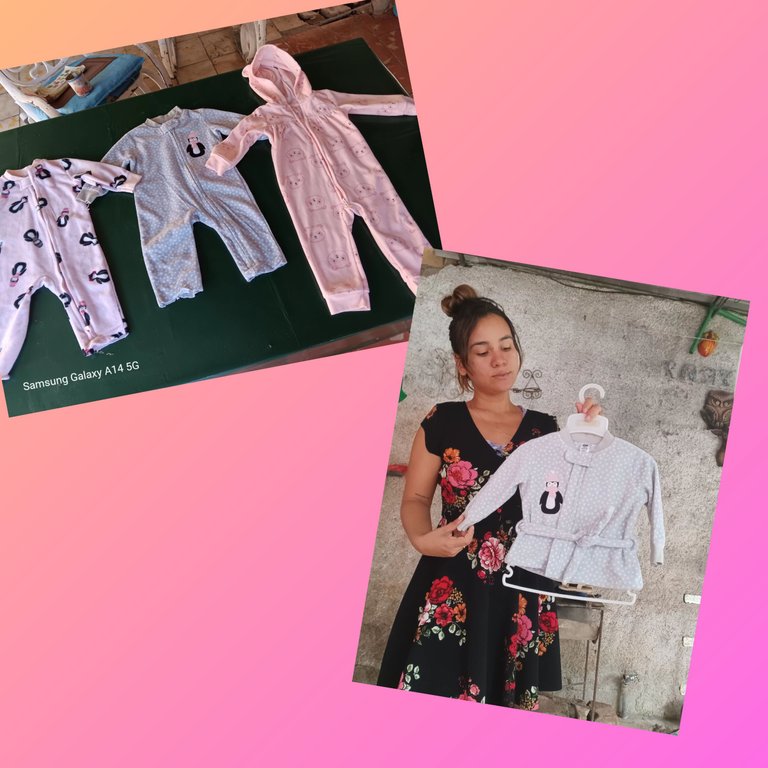
Si eres como yo, que adoro modificar y aprovechar cada pedacito de tela, estas en el lugar indicado. Les dejo las herramientas o materiales que utilicé, asi como cada paso que fui ejecutando...
Acompáñame...
If you are like me, who loves to modify and take advantage of every bit of fabric, you are in the right place. I leave you the tools or materials I used, as well as each step that I was executing...
Join me...
✂️🧵✨✨♻️♻️♻️✨✨✂️🧵
Materiales / Materials
Suits
Scissors
Thread and needle
Elastic
Measuring tape
Pins
Sewing machine
Procedimiento:
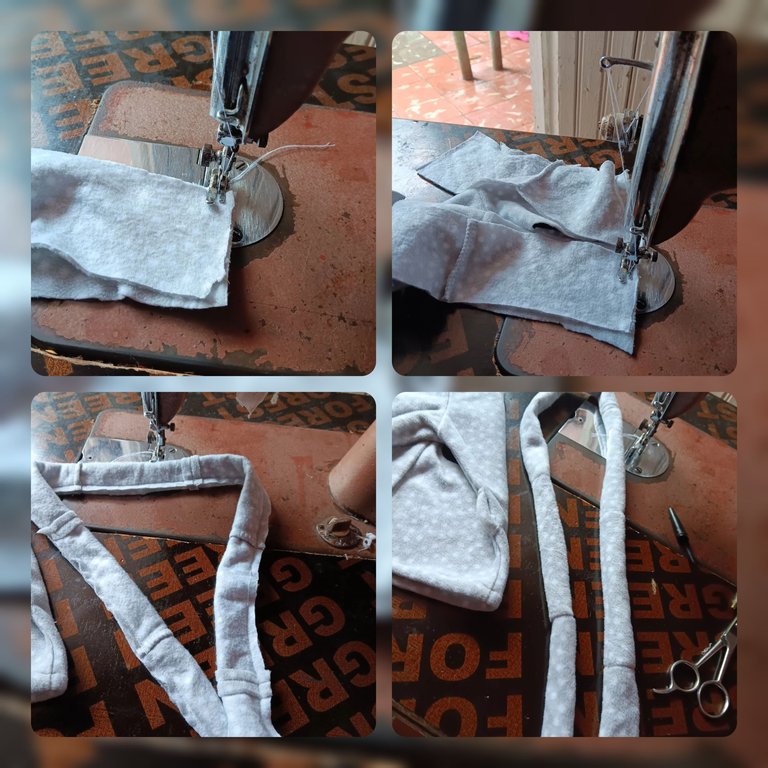
#1
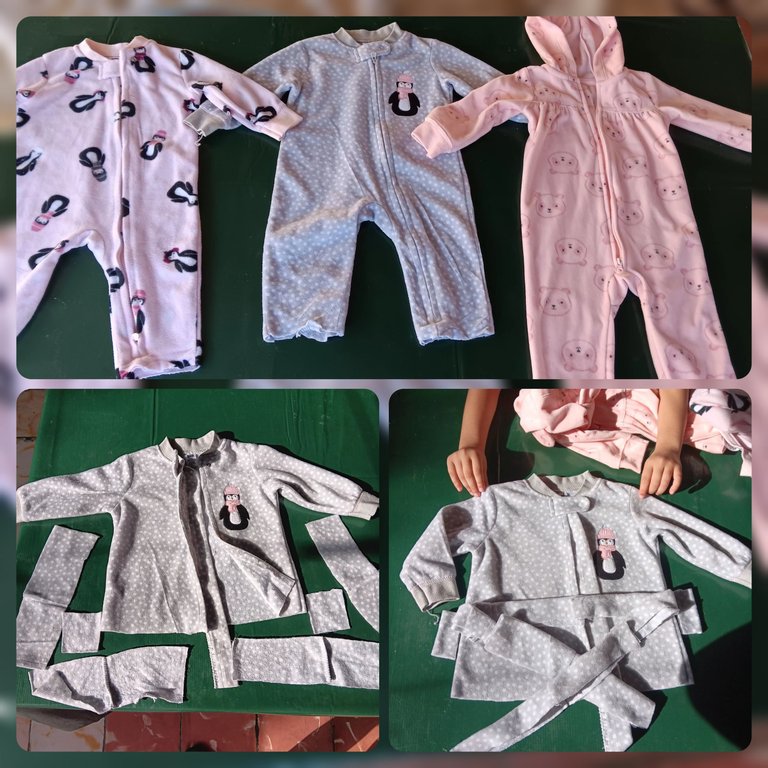
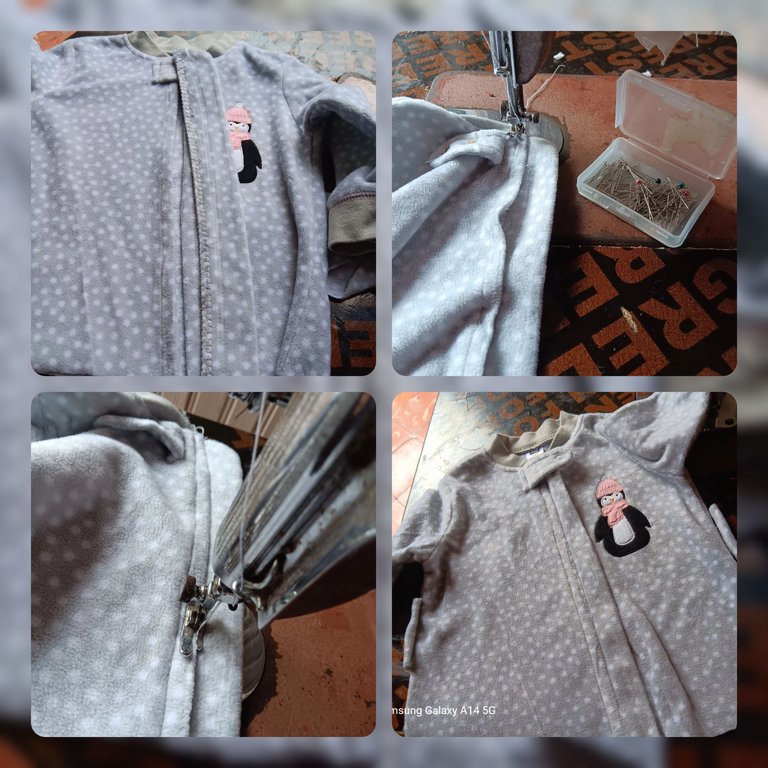
Comence cortando la parte del broche o enganche de la parte baja del enterizo. Con lo sobrante saque varias piezas para hacer el cinturon que lo amarrara en la cintura, y las dos orejitas por donde pasara la propia cinta
Procedure:
#1
I started by cutting the part of the clasp or hook of the lower part of the overall. With the leftover I took out several pieces to make the belt that would tie it at the waist, and the two little ears where the ribbon itself would go through.
#2
Luego procedi a coser la pieza que mantenia oculto el zipper, pero por fuera, sobresaliendo un costado mas que el otro. Una vez pasada la costura, volvi a pasar la misma pero a 2cm de distancia, quedando mas firme y con un acabado mas bonito.
#2
Then I proceeded to sew the piece that kept the zipper hidden, but on the outside, with one side sticking out more than the other. Once the stitching was done, I sewed the seam again, but at a distance of 2cm, making it firmer and with a nicer finish.
#3
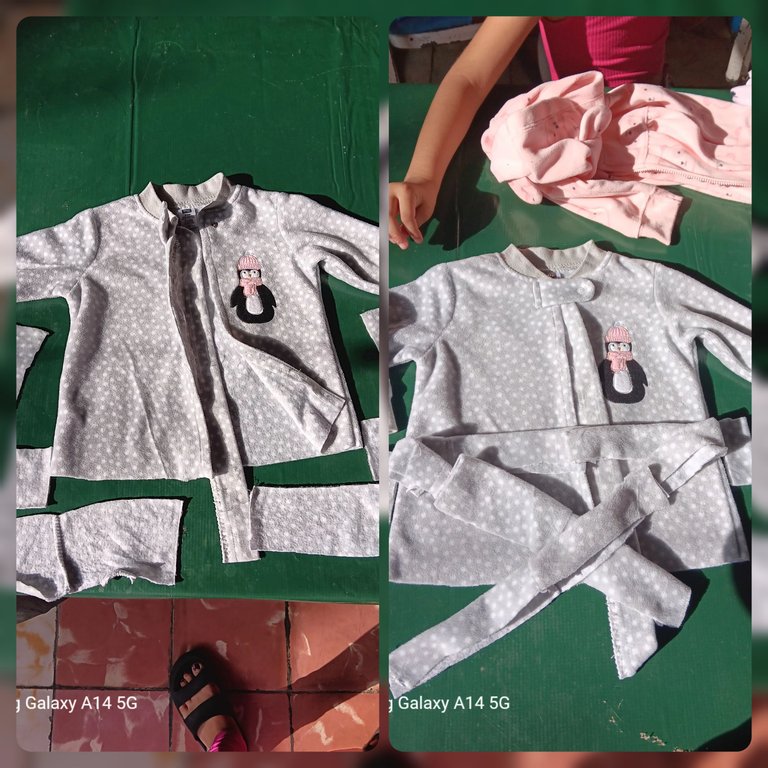
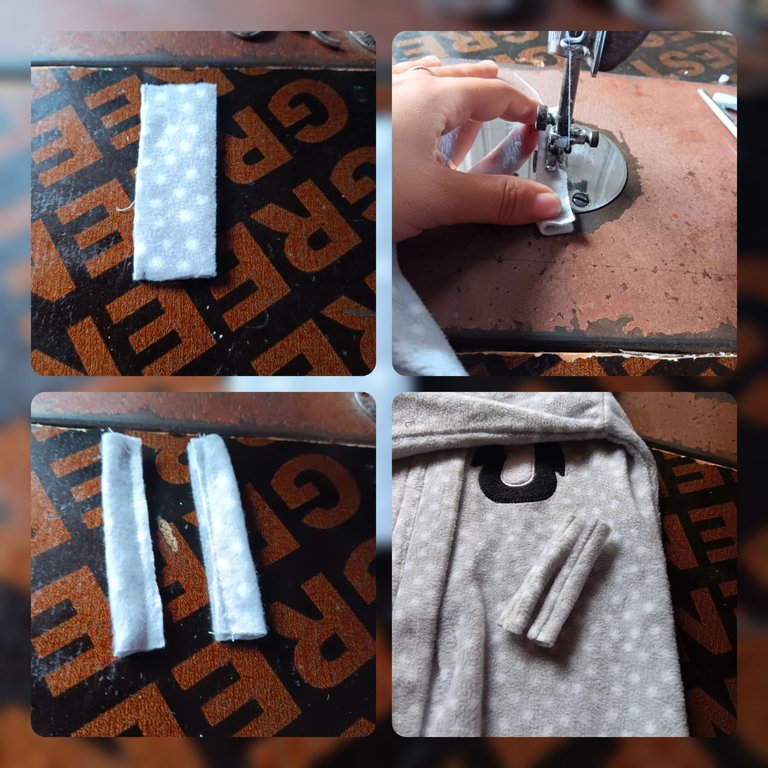
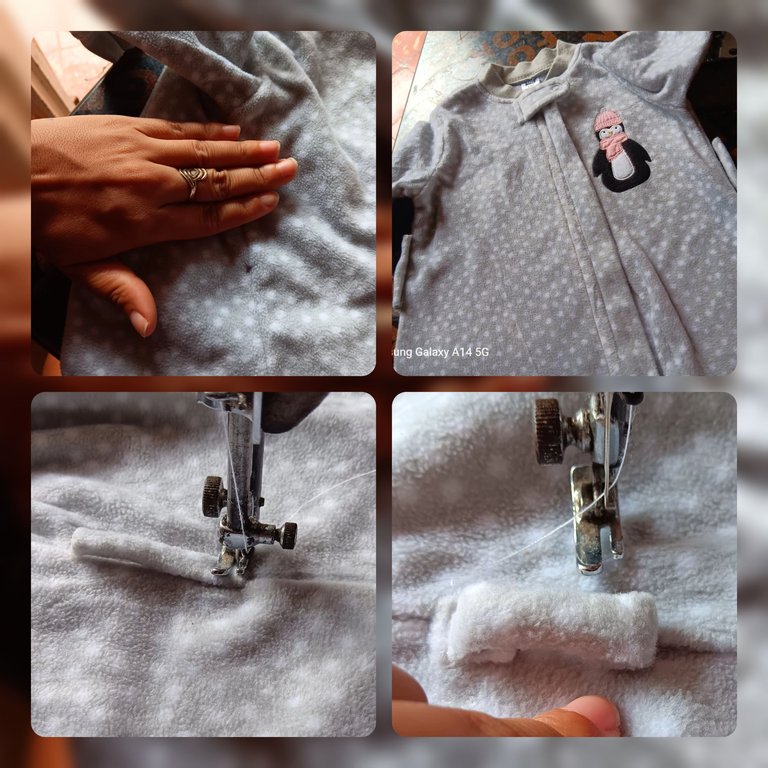
Continúe haciendo las trabillas o orejitas de la bata de baño. Para ello tome dos recortes de tela con la misma medida y tamaño. Pase costura teniendo el recorte al reves y luego lo voltee al derecho. Para que ambas quedaran al mismo nivel. Realice una marca midiendo cuatro dedos desde la bocamanga hacia abajo.
Realice otra costura recta haciendo el dobladillo a al otro costado.
#3
Continue making the loops or ears of the bathrobe. To do this, take two fabric offcuts of the same size. Stitch the cutout backwards and then flip it right side out. So that both are at the same level. Make a mark measuring four fingers from the sleeve cuff down.
Sew another straight seam making the hem on the other side.
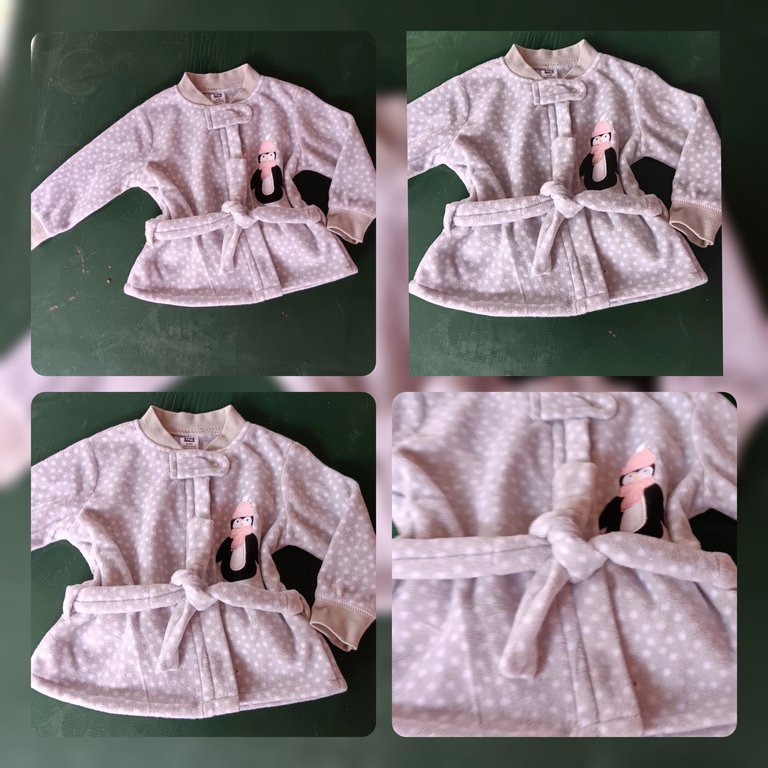
#4
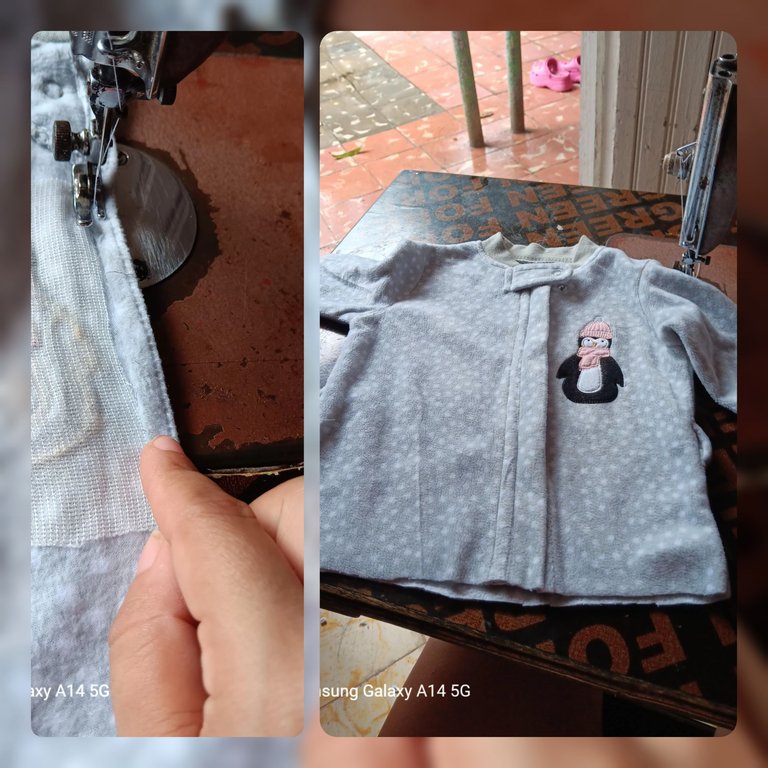
Finally I proceeded to match each piece of the belt, then I sewed a seam all around the edge, and turned it right side out. To finish placing it at the waist, adjusting it to the shape or body of the little girl.
#4
Por último procedí a empatar cada pieza del cinturón, luego pase una costura por todo el borde, y lo voltee al derecho. Para terminar colocándolo en la cintura, ajustando la asi a la forma o cuerpo de la pequeña.
Resultado/Result
🤗🙏🏻🤗🙏🏻🤗🙏🏻🤗🙏🏻🤗🙏🏻🤗🙏🏻🤗🙏🏻🤗🙏🏻
Espero que les haya gustado este trabajo, que les sirva de algo a los que aman los retos como yo. Agradeceria que dejaran sus lindos comentarios y su grato apoyo. Bendiciones para todos y feliz semana para todos. Besos y exitos.
I hope you liked this work, that it will be useful to those who love challenges like me. I would appreciate if you could leave your nice comments and support. Blessings to all and happy week to all. Kisses and success.
🤗🙏🏻🤗🙏🏻🤗🙏🏻🤗🙏🏻🤗🙏🏻🤗🙏🏻🤗🙏🏻🤗🙏🏻
El texto o resumen es totalmente de mi autoria.
The text or summary is entirely my own.
Te quedo bien linda la batica de niña, me gusto mucho amor !!
Muchas gracias me alegra que te haya gustado amorcito
beautiful, simple but looks very sweet.
Muchas gracias me alegra que te haya gustado ☺️
You are welcome, friend.