(ENG)
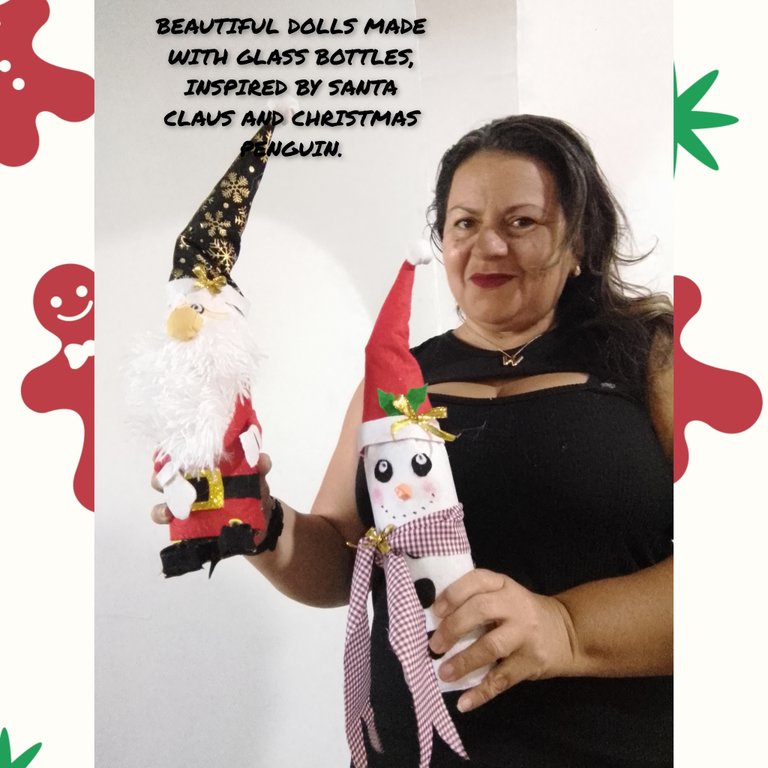
Hello everyone, how nice to be able to show you my participation. As always, December, the month of joy, long awaited by many, to enjoy Easter with their family and loved ones. I am happy to be able to participate in this contest, the last of the year, wishing the best for all of you, great creators and DIY lovers. To you at @diyhub, he dedicated this project, where inspired by characters typical of the month, such as the Christmas penguin and Santa Claus, I made two decorative dolls, for any space in the home, where I use recyclable and useful material. Without further ado, the invitation is to follow me, and I will show you step by step. I hope you like it and make yours at home.
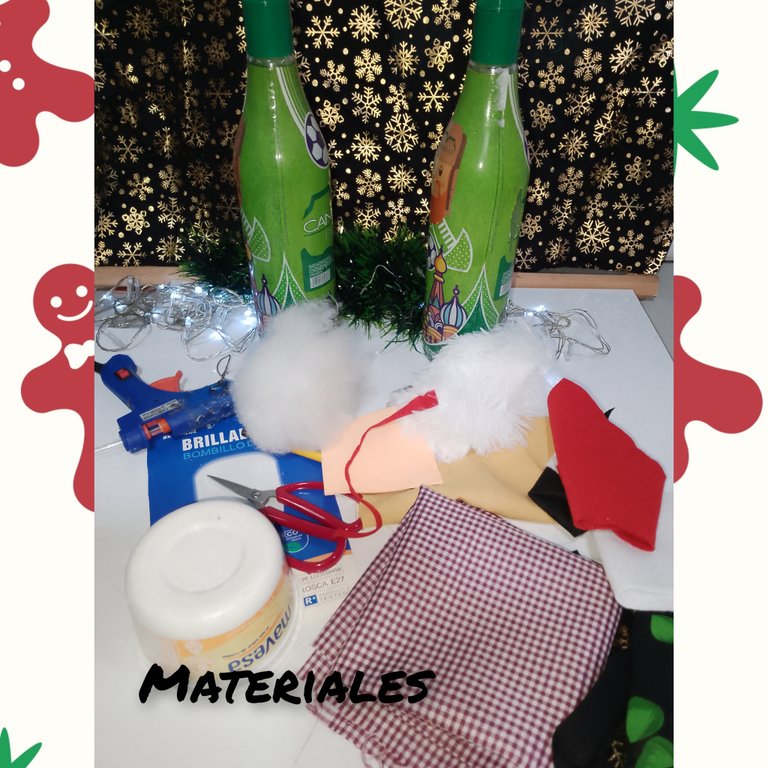
To do this, use the following materials.
. Two glass bottles.
. Felt cutouts, colored, (red, white, black, green)
. Black fabric with gold print, Christmas themes.
. Checkered fabric.
. Plush fabric.
. Stuffed.
. Cint dorda.
. Pencil.
. Cardboard.
. Hot silicon.
. Flesh colored foami.
. Needle and thread for sewing.
. Scissors.
. Butter container.
Steps to follow:
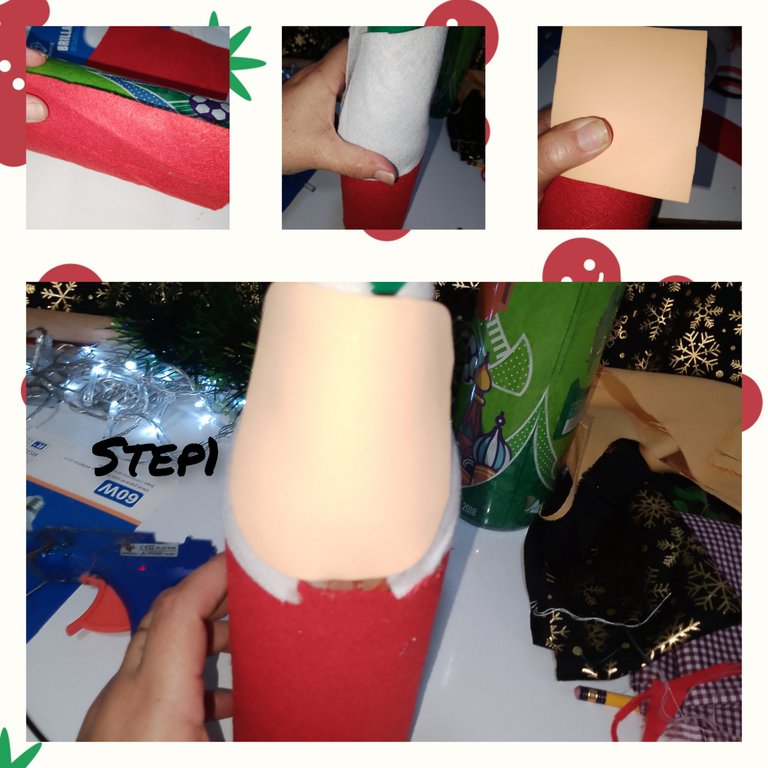
1.) SANTA CLAUS:
START: lining, a bottle, at the bottom, with red felt and the top, with white felt. To secure the felt cutouts, I apply glue. Also short, a rectangle of foam, flesh color
And I glue the culmination of the red felt, the beginning of the white felt.
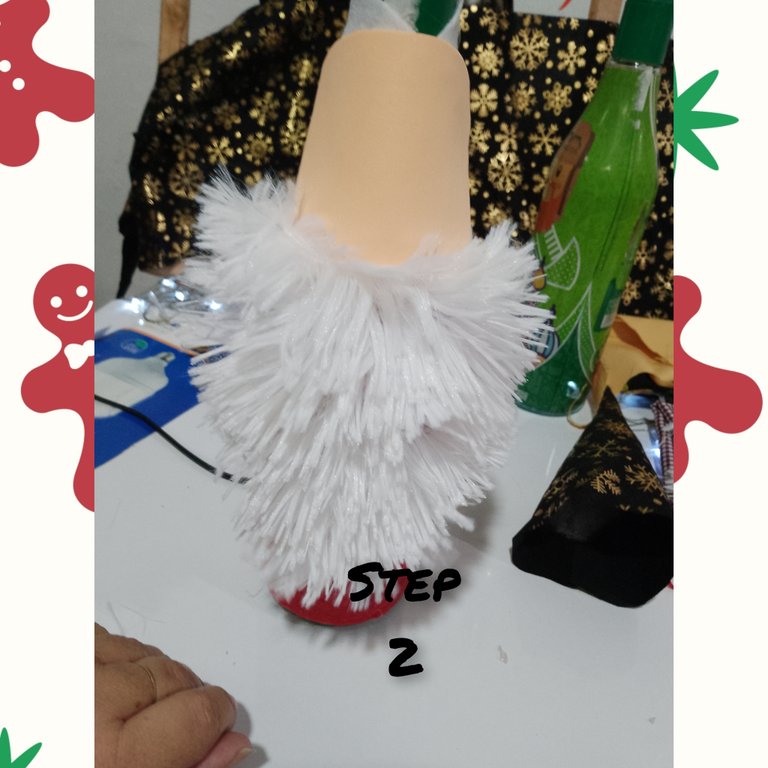
2.) I cut a piece of stuffed fabric, shaping it into a beard, this fabric I cut from the back. I apply, glue and fix it in a bottle.
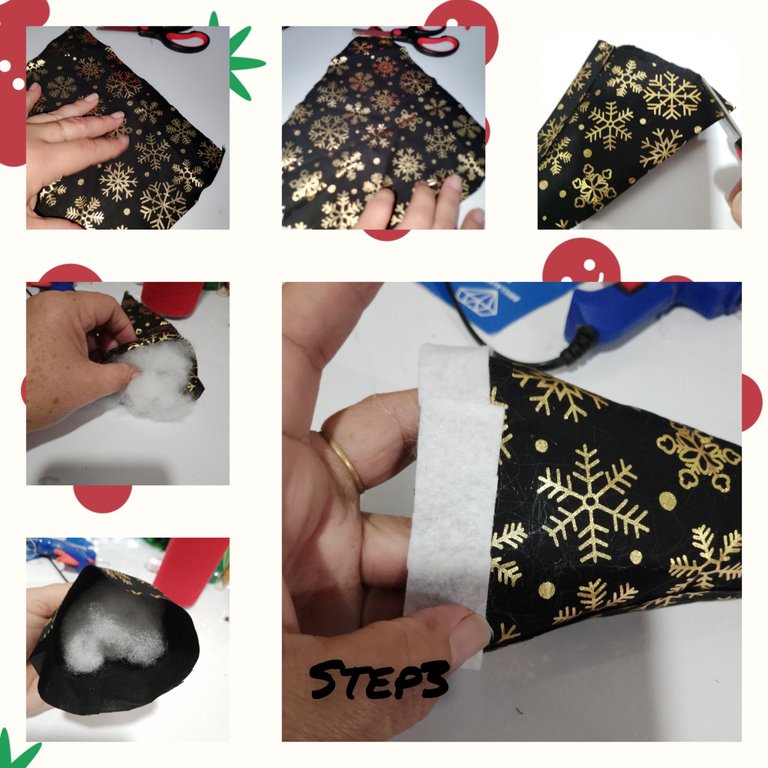
3.) I cut a triangle from the printed black fabric, round the top margin, using the plastic butter container, cut it out with scissors, guided by the marked shape, apply glue to the ends and fix both sides. It is stuffed inside, also with cord and a ribbon, made of white felt and glued on the edge, with silicone. In this way, Santa's hat is ready.
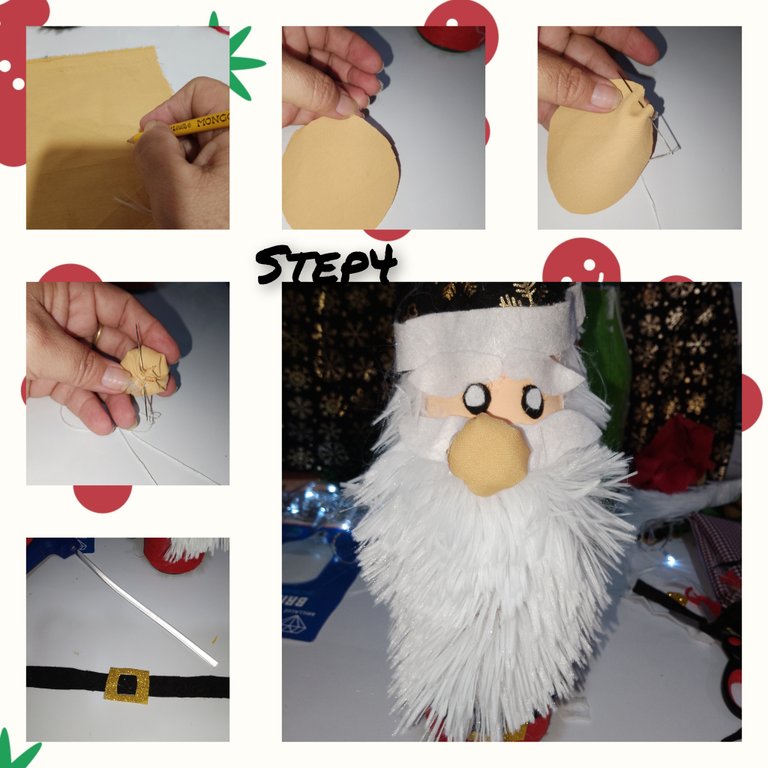
4.) On the cream-colored fabric, I make a small circle, cut it out, and with a needle and thread, sew the edge, with separate stitches, place the filling in the center, pick up the seam and finish off, forming a small sphere, which I will use For Santa's mariz, next, I cut out small circles of black and white felt, the latter being smaller in size, to form the eyes. Likewise, I will make the belt, frame, trace and glue, the eyebrows and mustache, out of white felt.
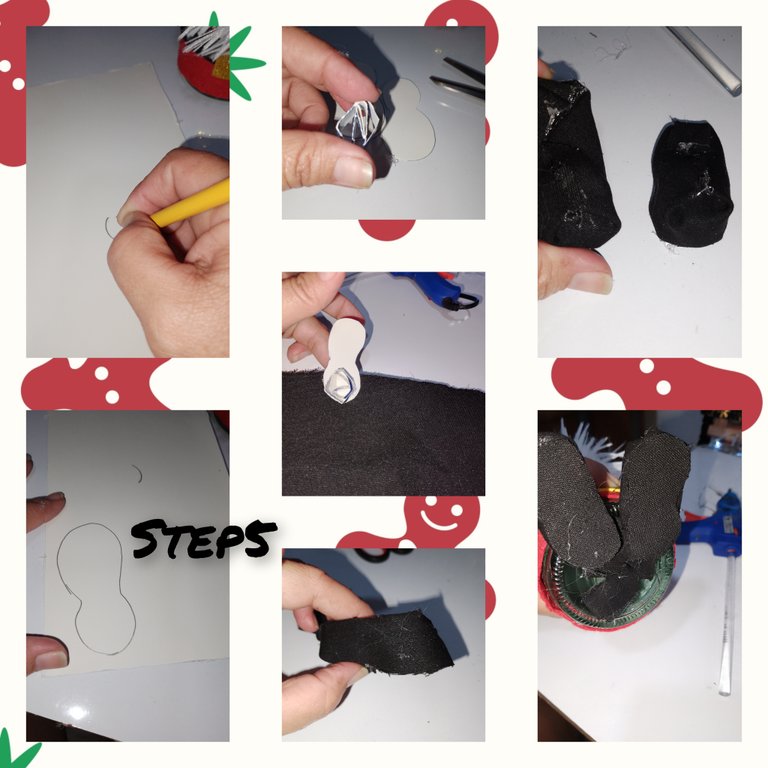
5.) On the cardboard, I draw and cut out the shoes, then I make a small spiral of cards, I glue them on the tip of the shoe for the height and I line them with black coopr felt. Once this is done, I glue the shoes to the bottom of the bottle.
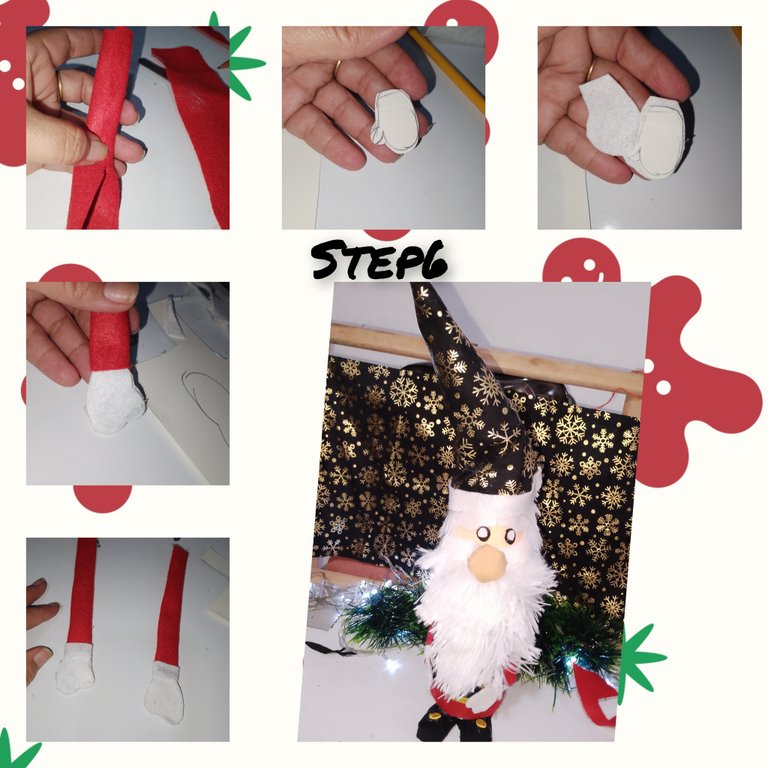
6.) I cut two strips of red felt, I glue the ends, they should be the same size. I draw a small animal on cardboard, cut it out, cover it by applying silicone on both sides, with white felt. I glue on one of the sides of the slats. Next, geno in the bottle, to simulate Father Christmas's arms. To finish, I cut a circle of white felt and make a small pegr sphere on the top of the hat. And in this way, the firstdoll.
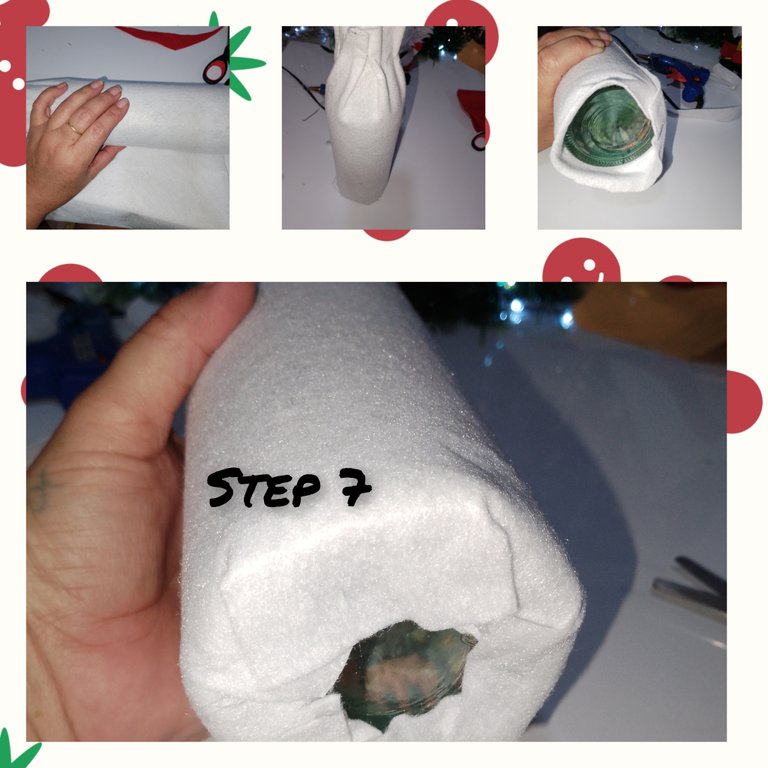
7.) For the next, decorative doll, I lined the surface with white felt, following the steps of the previous hat, I make this one, but this time using red felt.
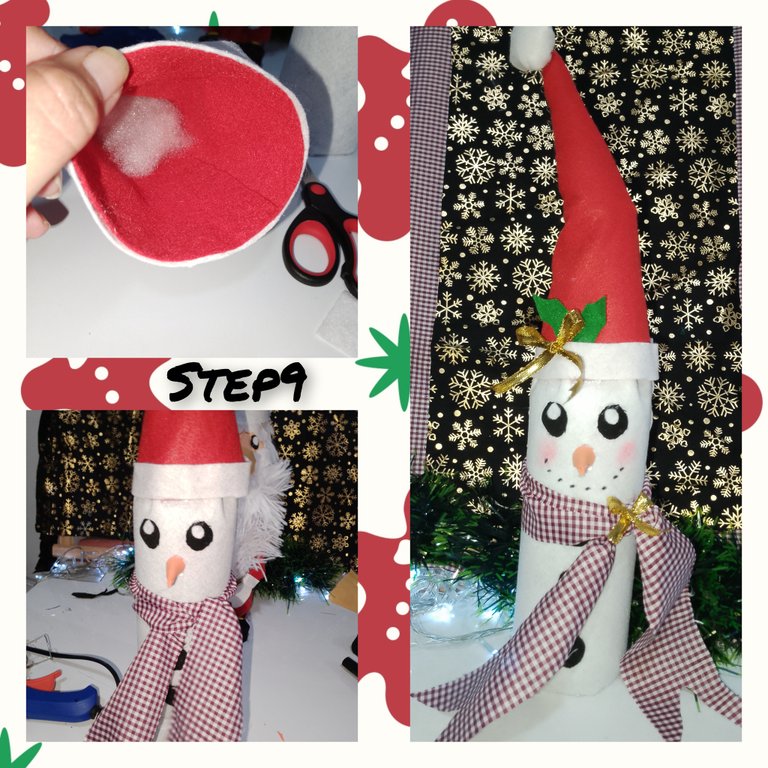
8/9.) I place, fill the hat and apply a few stitches of glue, and glue it to the top of the bottle. I mark and cut out the eyes and with orange foam, I make the pronounced nose, cut and place a long scarf, from the checkered fabric. Likewise, I simulate the smile with black marker dots, and to give a touch of shine, I make and place small bows of gold ribbon.
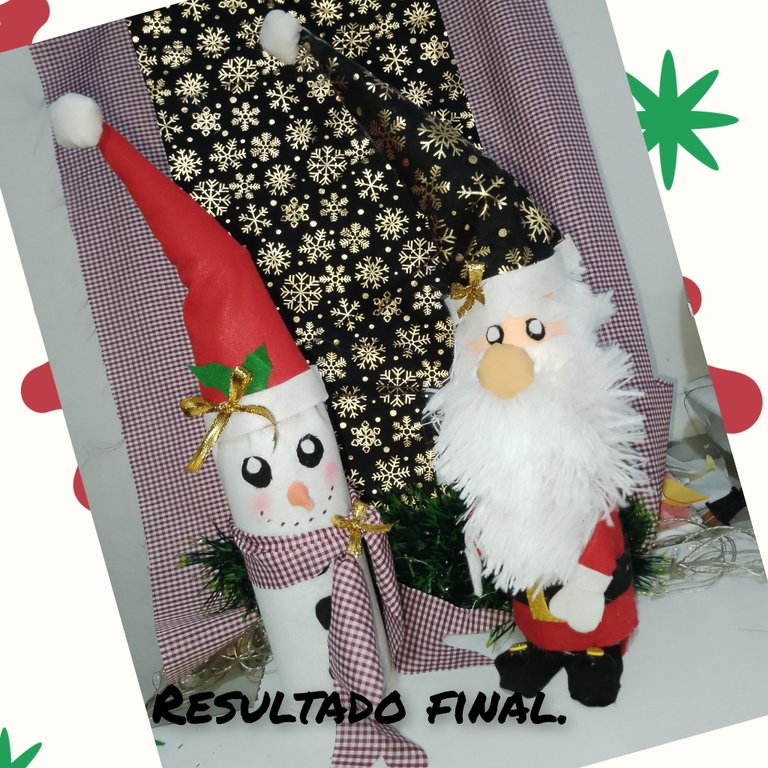
In this way, I give the final bid to me, participation. Very satisfied with the final result.
. All photos are my property.
. Use incollage to show the steps.
. Use language translator.
Thanks for visiting my blog. It is always a pleasure to have your visitor. It will be until an approximate opportunity.
(ESP)
Hola a todos, que gusto, poder mostrarle mi participación. Cómo siempre, Diciembre, mes de la alegría, las esperadas por muchos, par disfrutar las pascuas, junto a sus familiares y seres queridos. Yo feliz, de poder participar en este, concurso el último de el año, deseando, Li mejor para todos ustedes, grandes creadores y amantes del bricolaje. A ustedes en @diyhub , dedicó este proyecto, dónde inspirado en personajes, propios de el mes, como lo es el pingüino navideño y papá Noe, hice dos muñecos decorativos, para cualquier espacio en el hogar, dónde use material reciclable y de provecho. Sin más la invitación es a, seguirme, y les muestro, el paso a paso. Espero les guste y hagan el suyo en casa.

Para ello,buse los siguiente materiales.
. Dos botellas de vidrio.
. Recortes de fieltro, de colores, (rojo,blanco,negro, verde)
. Tela de color negra con estampado dorado, tematicas de navidad.
. Tela de cuadritos.
. Tela de peluche.
. Relleno.
. Cint dorda.
. Lapiz.
. Carton.
. Silicon caliente.
. Foami color carne.
. Aguja e hilo par coser.
. Tijeras.
. Envase de mantequilla.

Pasos a seguir:
1.) PAPA NOEL:
INICIO: forro, un botella, en la parte inferior, con fieltro de color rojo y el la parte superior, con fieltro de color blanco. Para asegurar los recortes de fieltro, aplico pegamento. Corto ademas,.un rectángulo de foami, color carne
Y pego en la culminación de el fieltro de color rojo, comienzo de el fieltro de color blanco.

2.) Corto un trozo de tela de peluche, dando forma de barba, esta tela, la corto por la parte de atrás. Aplico, pegamento y fijo en ña botella.

3.) corto un tringulo, de la tela de color negra estampada , redondeo el mrgen superior, usando el envase plastico de mantequilla, recorto con las tijeras, guiandome de la forma marcada, aplico pegamento en los extremos y fijo ambos lados. Comogo en su interior relleno, cordo ademas yn liston, de fieltro color blanco y pego en el orillo, con silicon. De esta maner, queda listo el gorro e papá Noe.

4.) En la tela, color crema, meco un pequeño circulo, recorto, y con aguj e hilo, cose la orilla, con puntadas separadas, coloco en el centro relleno, recojo la costura y remati, formando una pequeña esfera, que usare para la mariz de santa, seguidamente, recorto, pequeños círculos de fieltro negro y blanco, este ultimo, de menor tamaño, par formar los ojos. Asi mismo, hare eo cinturon, marco, recorro y pego, las cejas y bigote, de fieltro color blanco.

5.) En el crtin, dibujo y recorto, los zapatos, luego ago un pequeño espiral de cartos, pego en la punt de el zpato par dr altura y con fieltro de coopr negro los forro. Hecho esto, pego los zapatos en el fondo de la botella.

6.) corto dos listones de fieltro color rojo, pego los extremos, deben quedar de mismo tamaño. Dibujo, una pequeñaano en el carton, recorto, forro aplicando silicón por ambos lados, con fieltro de color blanco. Pego en uno de los lados, de los listones. Seguidmente, geno en la botella, para simular los brazos de papá Noe. Para culminar, corto un círculo de fieltro color blanco y hago un pequeña esfera par pegr en la parte superior de el gorro. Y de esta forma, culminó el primer muñeco.

7.) Para el siguiente, muñeco decorativo, forro tid la superficie, con fieltro color blanco, siguiendo los pasos de el gorro anterior, elaboro este, pero en esta oportunidad usando fieltro de colo rojo.

8/9.) coloco, relleno a el gorro y aplici, algunas puntadas de pegamento, y pego en la prte superior de la botella. Marco y recorto los ojos y con foami de color anaranjado, hago la pronuncida, nariz, corto y coloco una larga bufanda, de la tela de cuadros. Asi mismo, simulo la sinrisa con el puntos de marcador, color negro, y para dar un toque de brillo, hago y coloco pequeños lazos de cinta dorada.

De est mamera, doy pujto final a mí, participacion. Muy satisfecha con el resultado final.

. Todas las fotos, son de mi propiedad.
. Use incollage para mostrar los pasos.
. Use traductor lenguaje.
Gracias por visitar mí blog. Siempre es un gusto contar con su visista. Sera hasta un aproxima oportunidad.
What a creative and festive project The use of recyclable materials to create these adorable Santa Claus and Christmas penguin decorations is impressive.
aawww que lindos muñecos, el pingüino es mi favorito, es una ternurita adorable, estás aprovechando al máximo los envases para crear lindos adornos.
!DIY
This indeed is so beautiful and lovely
Weldone
Geniales muñecos se ven muy colorido y pintoresco gracias por compartir