(ENG)
Hello everyone, I am pleased to greet you today, wishing, be it a lot of well -being and successes for all of you. On this occasion I am pleased, going through this @diyhub community, to show a single and very useful, step by step, where you use the amigurumi technique, inspired by a striking, tulip, which you could use as a keychain, bag pendant or simply , ideal, to carry your favorite lipstick, inside or outside your wallet, bag or backpack. I invite you to follow me, I want to enjoy it.
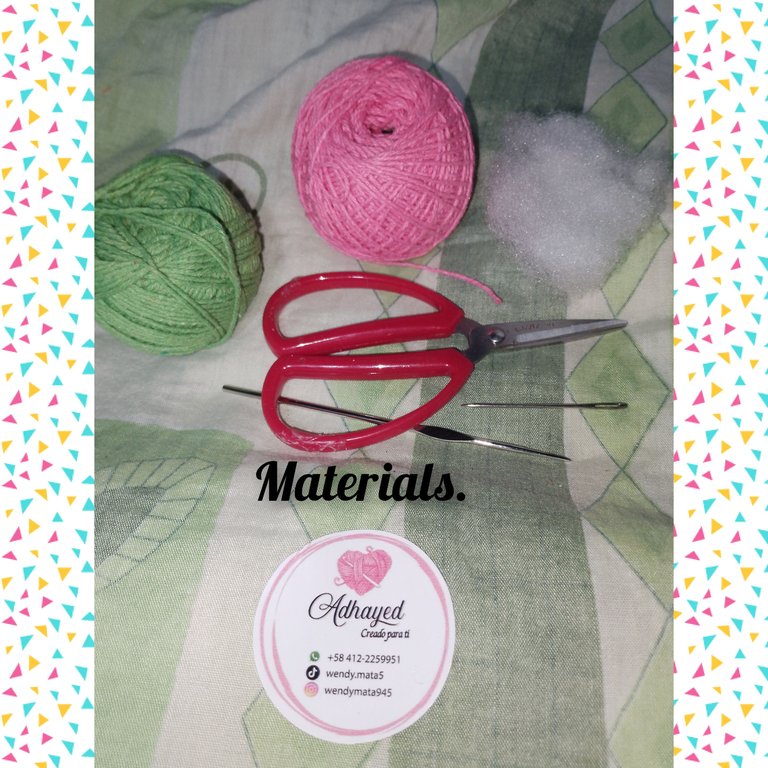
Used materials:
. Threads to weave, colors (green, pink.
. Needle to weave.
. Waterfall.
. Stuffed.
. Scissors.
! [Colorlage_20250127_202100380.jpg] ( )
)
Steps to follow:
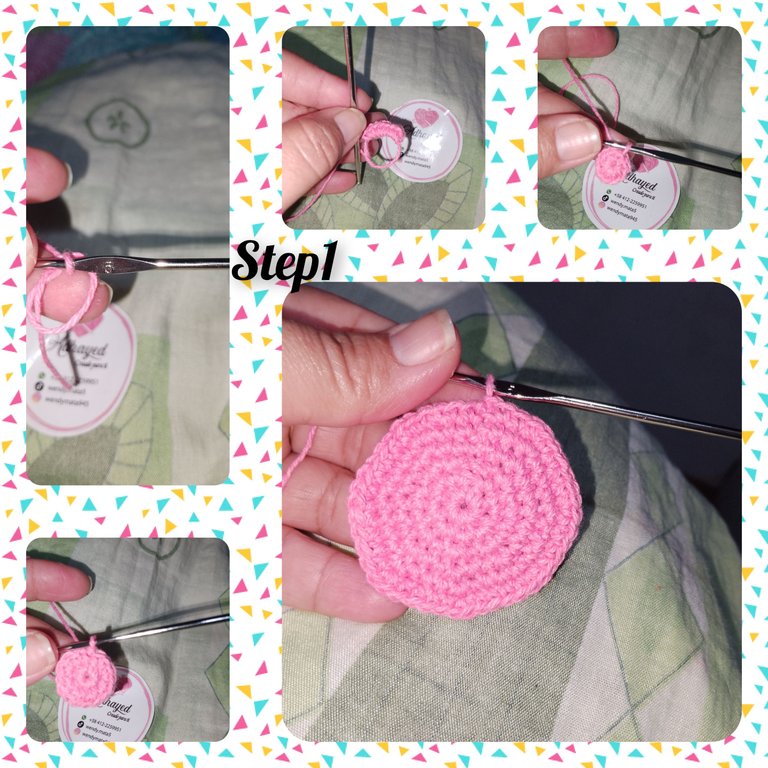
1.) Start, making a magical ring and inside this, Tejo, six media points. I close the ring and continue with six increases, for twelve media points. For the third, after, after a half -point weigh an increase, in this continuous way, I stop in the number seven, where it reaches thirty -six, half points. The base of El Tulipán is ready.
! [Colorlage_20250127_202300325.jpg] ( )
)
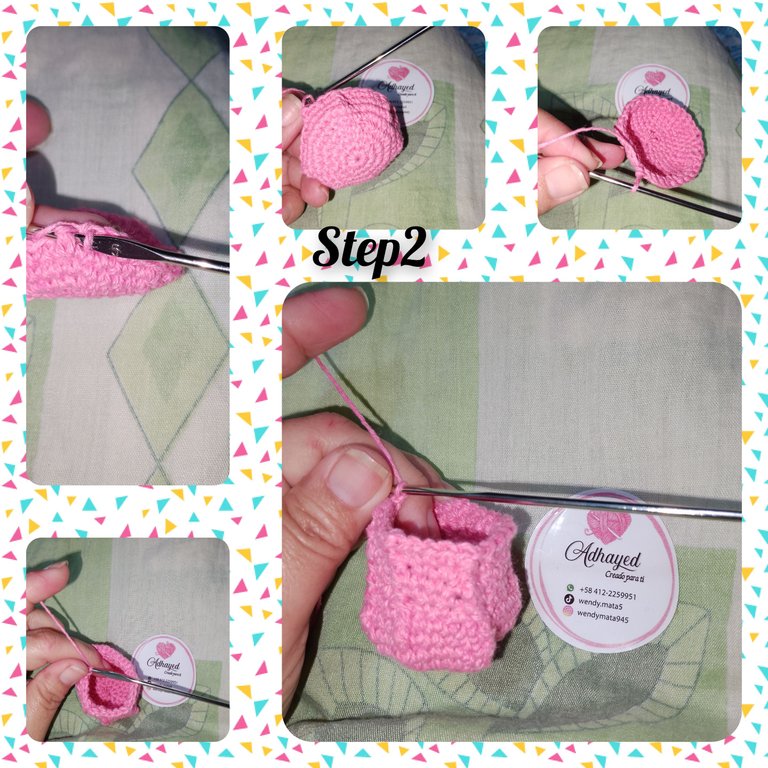
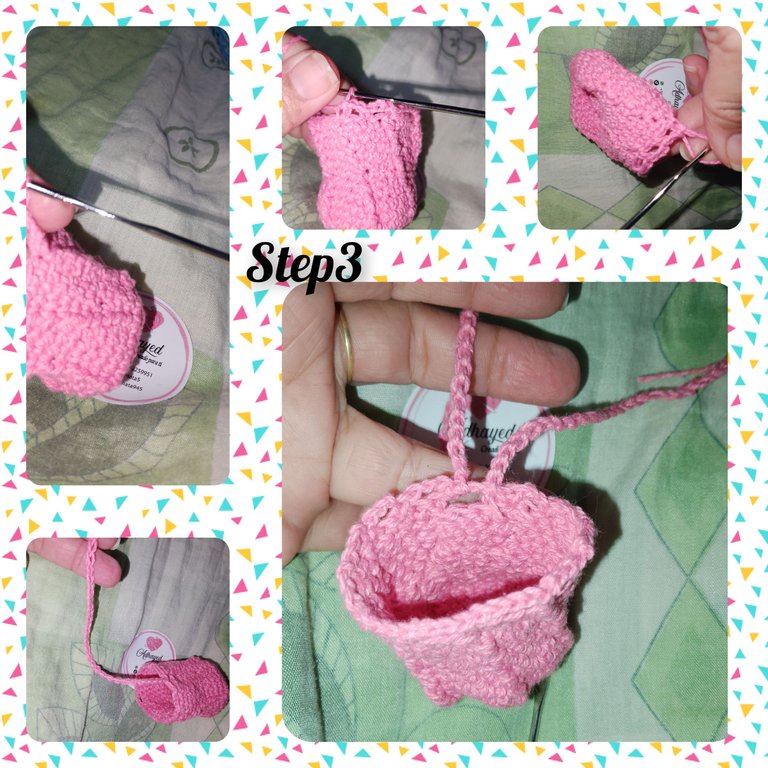
2.) To continue, I give a total of twenty laps of 36 points, but, after weaving five media points, I make a point in relief, thus forming a line of separation between the groups of five points. Finally, after having reached the ideal size of El Tulipán, weigh on the edges, three points chains, I leave two half -point spaces and weigh a half -point, in this way, I do the whole route ..
! [Colorlage_20250127_202409881.jpg] ( )
)
3.). Then, after cutting and finishing off the thread, carrying forty points chains, obtaining a cord, to transfer the flower from side to side and in this way, I will shape the tulip and that you once, will serve to protect, what within him.
! [Colorlage_20250127_202502173.jpg] ( )
)
4.) With the thread, green, start weaving in a magical ring, six media points, then an increase, in each point, and a third pass, of an increase, after half a point, completed the circle, I leave A considerable thread strand, and put the needle lanera, turn to El Tulipán and start hitting the circle with stitches, right on the number nine, thirty -six points of the flower. Before closing completely, I put some filling. Done this, I finish sealing, remote and short the thread. Again I turn to El Tulipán.
! [Colorlage_20250127_202556100.jpg] ( )
)
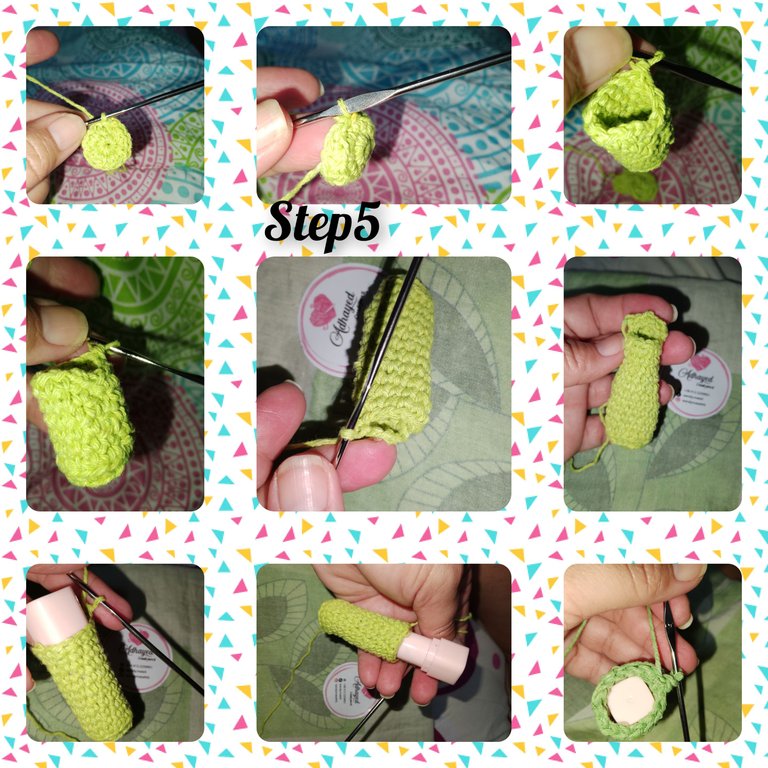
5.) In a magical ring, weigh eight half points, close and weigh eight increases, for sixteen points. Continuous, weaving one more return, of the same points, in this way, weigh ten and I take as reference the tube, of my favorite lipstick, and continue to reach a little more of its length.
! [Colorlage_20250127_202654919.jpg] ( )
)
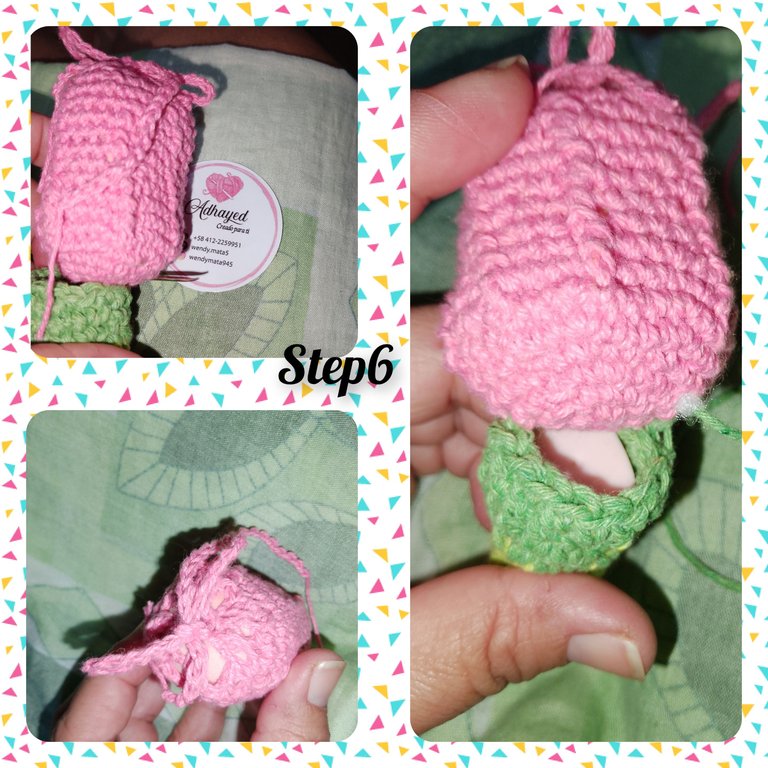
6.) With the line, I hit the small tube, at the bottom of the tulip, without sewing it in its entirety, I simply leave an opening, which allows me, introduce and extract the lipstick. As well as allows meSmall chain braid, open and close the tulip.
! [Colorlage_20250127_202758154.jpg] ( )
)
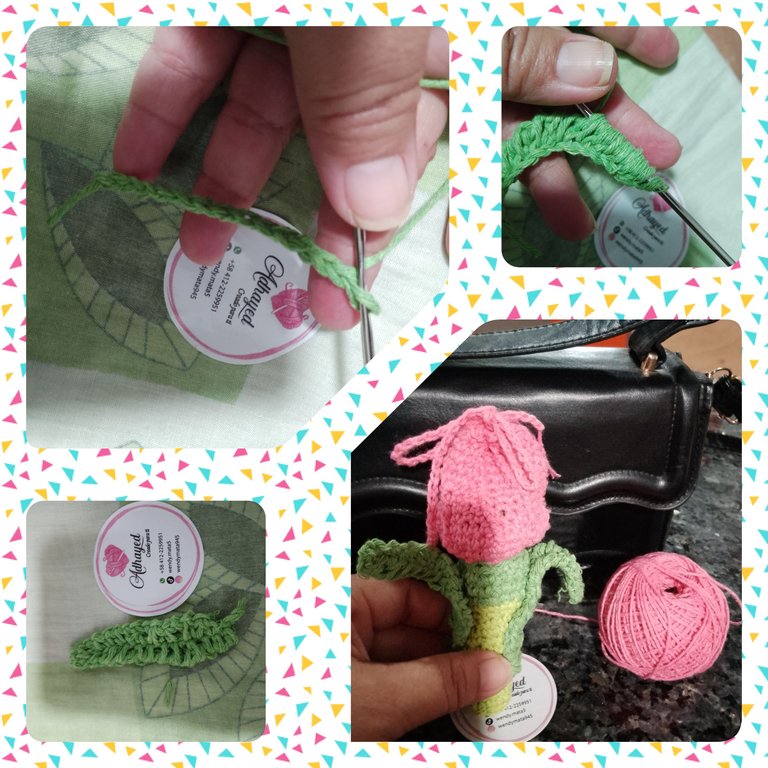
7.) With the green thread, weigh twenty, chain points, taking a lazada, picking up a first side of the chains, after two in two points I will be drawing until you reach the starting point, I also repeat on the next side shaping an elongated flower, which, hitting one on each side.
! [Colorlage_20250127_202905739.jpg] ( )
)
All photos are from me, property.
. Use colorless, to demonstrate the steps.
. Use GIF videos to show, the forms of use, of the tulip, fabric in amigurumis.
. Use language translator.
Grateful for your visit to my blog, it is always a pleasure, to have them here. It will be up to an upcoming opportunity.
(ESP)
Hola a todos, me complace saludarles el día de hoy, deseando, sea de mucho bienestar y éxitos para todos ustedes. En esta ocasión me complace, pasar por esta Comunidad @diyhub, para mostrar un sencillo y muy útil, paso a paso, dónde utilice la técnica de amigurumi, inspirado en un llamativo, tulipán, que podrías usar como llavero, colgante para bolsos o simplemente, ideal, para llevar tu labial favorito, dentro o fuera de tu cartera, bolso o morral. Les invito a seguirme, deseo lo disfruten.
Materiales usados:
. Hilos para tejer, colores (verde, rosado.
. Aguja para tejer.
. Aguja lanera.
. Relleno.
. Tijeras.
Pasos a Seguir:
1.) Inicio, haciendo un anillo mágico y dentro de este, tejo, seis medios puntos. Cierro el anillo y continuo con seis aumentos, para doce medios puntos. Para la tercera, pasada, luego de un medio punto tejo un aumento, de esta manera continuo, hago un alto en la vuelta número siete, donde alcance treinta y seis, medios puntos. Quedando de est manera lista la base de el tulipán.
2.)Para continuar, doy un total de veinte vueltas de 36 puntos, pero, luego de tejer cinco medios puntos, hago un punto en relieve, formando así, una linea de separación entre los, grupos de cinco puntos. Para finalizar, luego de haber alcanzado el tamaño ideal de el tulipán, tejo en los bordes,tres puntos cadenas, dejo dos espacios de medio punto y tejo un medio punto, de esta manera, hago todo el recorrido..
3.).seguidamente, luego de cortar y rematar el hilo, llevando cuarenta puntos cadenas, obteniendo un cordón, que traspasar de lado a lado la flor y de esta manera, daré forma a el tulipán y que asu vez, servirá para resguardar, lo que dentro de el.
4.) Con el hilo, de color verde, inicio tejiendo en un anillo mágico, seis medios puntos, luego un aumento, en cada medio punto, y una tercera pasada, de un aumento, luego de medio punto,culminado el círculo, dejo una hebra de hilo considerable, y coloco la aguja lanera, doy vuelta a el tulipán y comienzo a pegar con puntadas el círculo, justo en la vuelta número nueve, de treinta y seis puntos de la flor. Antes de cerrar completamente, coloco un poco de relleno. Hecho esto, termino de sellar, remato y corto el hilo. Nuevamente doy vuelta a el tulipán.

5.) En un anillo mágico, tejo ocho medios puntos, cierro y tejo ocho aumentos, para dieciséis medios puntos. Continuo, tejiendo una vuelta más, de igual puntos, de esta manera, tejo diez y tomo como referencia el tubo, de mí labial favorito, y continuo hasta alcanzar un poco más de su largo.
6.) Con la aguja lanera, pego el pequeño tubo, en la parte inferior de el tulipán, sin coserlo en su totalidad, simplemente, debo dejar una abertura, que me permite, introducir y extraer el labial. Así como me permite la pequeña trenza de cadenas, abrir y cerrar el tulipán.
7.) con el hilo de color verde, tejo veinte, puntos cadenas,tomando lazada, recojo un primer lado de las cadenas, luego de dos en dos puntos iré sacando hasta llegar a el punto de inicio, así mismo repito en el siguiente lado dando forma a una alargada flor, la cual, pegarle una en cada lado.
Todas las fotos son de mí, propiedad.
. Use incollage, para demostración de los pasos.
. Use videos gif para mostrar, las formas de el uso, de el tulipán, tejido en amigurumis.
. Use traductor lenguaje.
Agradecida por su visita a mí blog, siempre es un gusto, tenerlos por acá. Será hasta una próxima oportunidad.
You can check out this post and your own profile on the map. Be part of the Worldmappin Community and join our Discord Channel to get in touch with other travelers, ask questions or just be updated on our latest features.
Hola amiga.
Muy bonito tu trabajo y también el logo 😉
Bonito día 🙋🏽♀️🧶☀️😉🫂💐