(ENG)
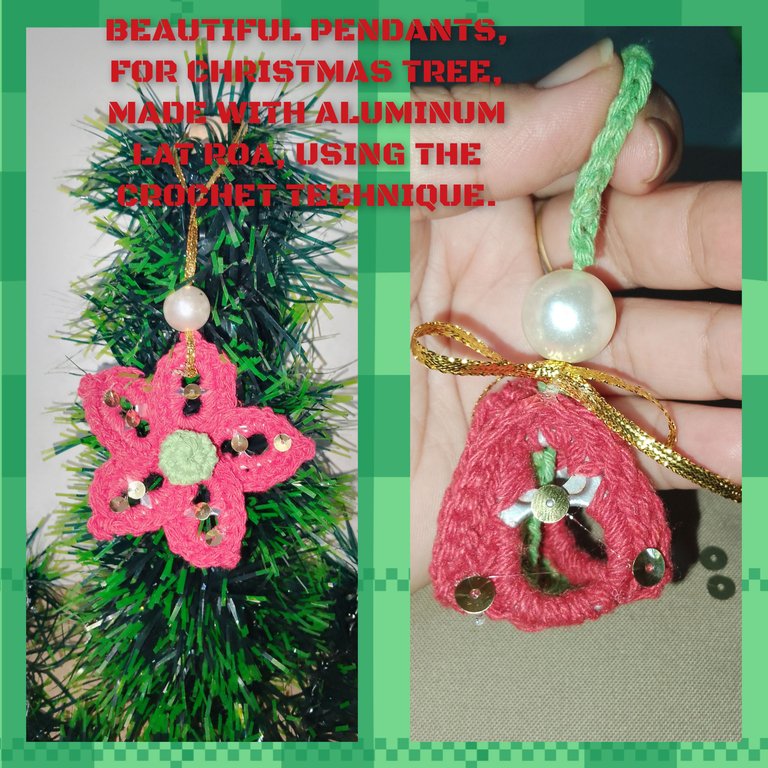
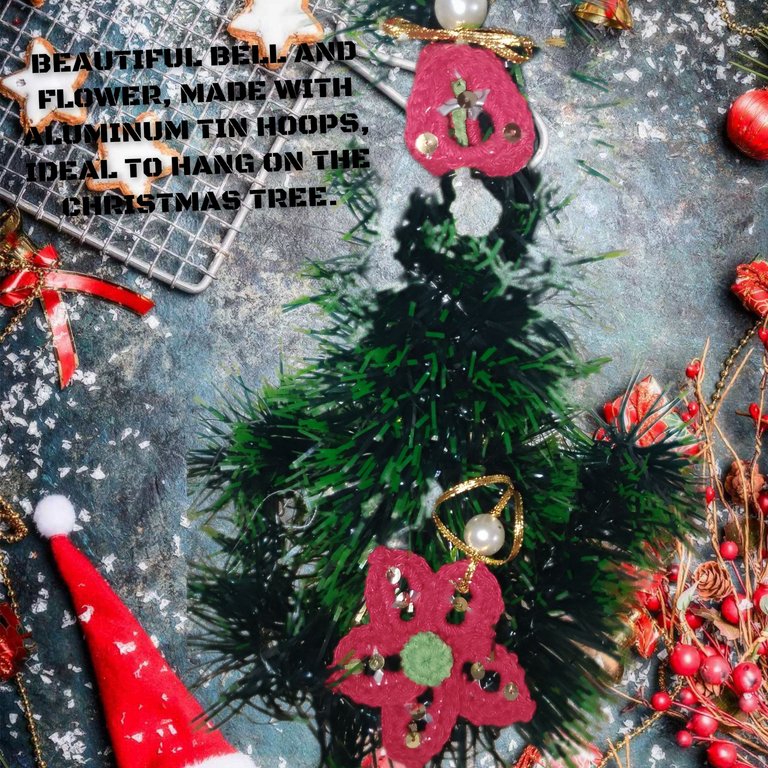
Hello everyone, how nice to be here today, starting the month of December, with a lot of enthusiasm and joy, hoping that you are in good spirits, enjoying good health and great ideas to create. Today, about starting the Christmas season, and getting ready to decorate our Christmas tree, I come to show you an easy step by step to create beautiful pendants, inspired by a delicate bell and a Christmas flower, where I used the recycling and crochet. Without further ado, wishing the best for everyone, I invite you to follow me.
Materials.
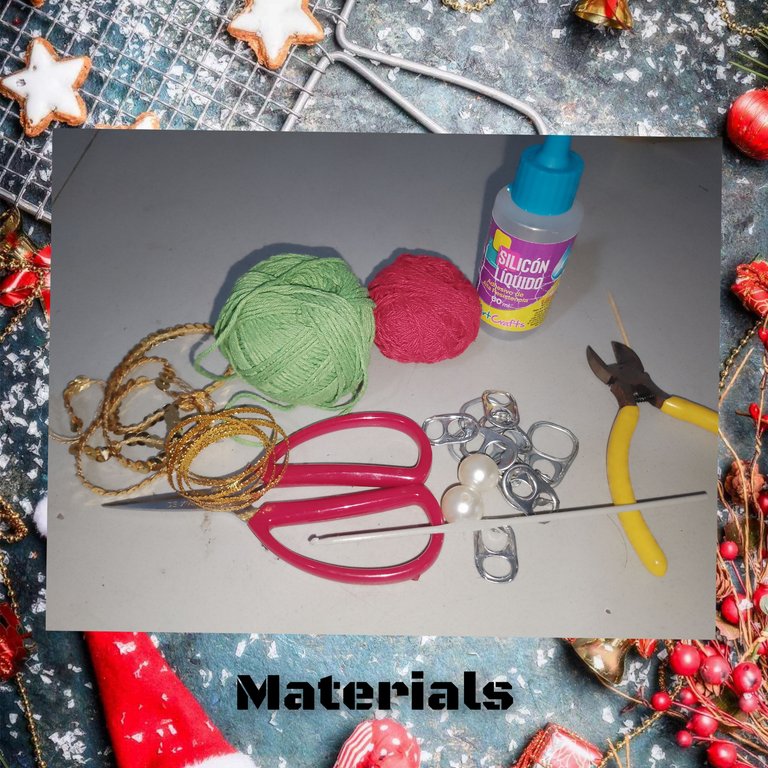
. Aluminum brass hoops.
. Wicker thread, colored (green and red.
. Knitting needle.
.needle and thread.
. Glue.
. Gold sequins.
.thin, gold plastic tape.
. White pearls.
. Cutting clamp.
. Scissors.
Steps to Follow:
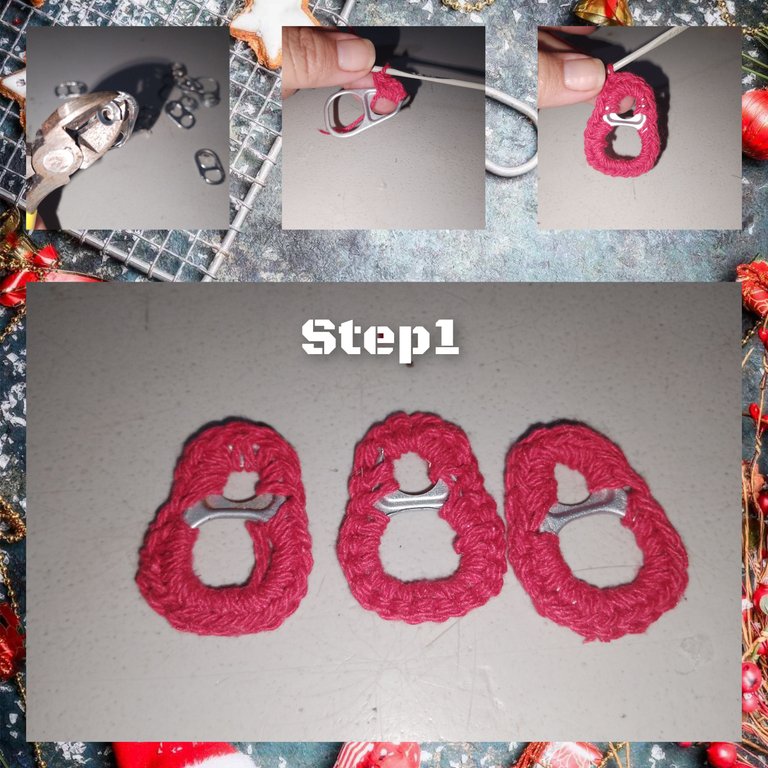
1.) Initially, I cut, using the tweezers, the aluminum residue on the earrings, in order to avoid cuts on the fingers or the thread. Once this is done, I tie the red thread in the ring and cover it completely with half stitches, and close with a slip stitch. Short and finish. In this way, I repeat in two more rings.
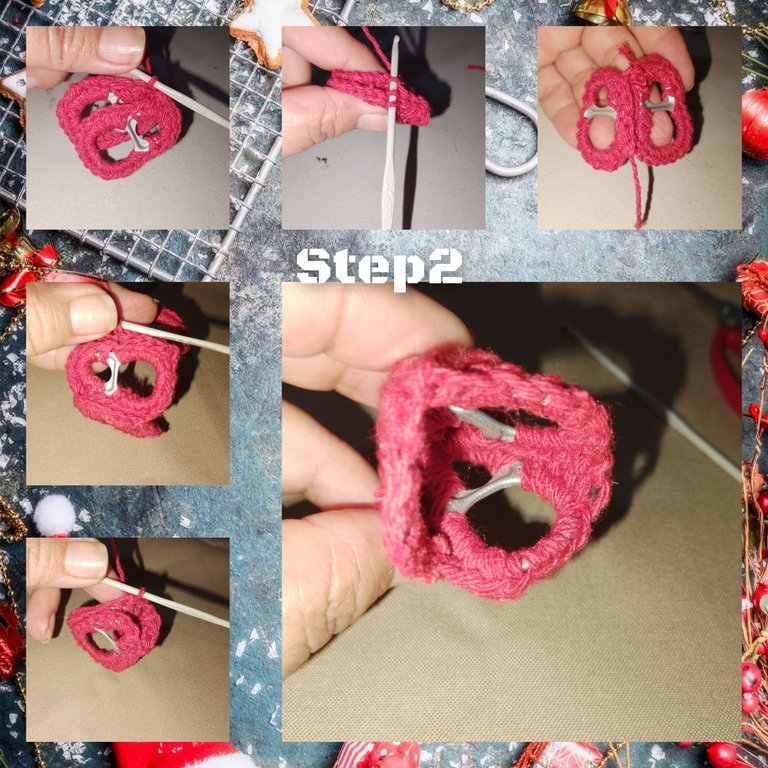
2.) I continue, and this time, with a slip stitch, I begin to join the hoops, placing the thinnest part at the top and the largest at the bottom, to shape the bell, in this way, the one with each other.
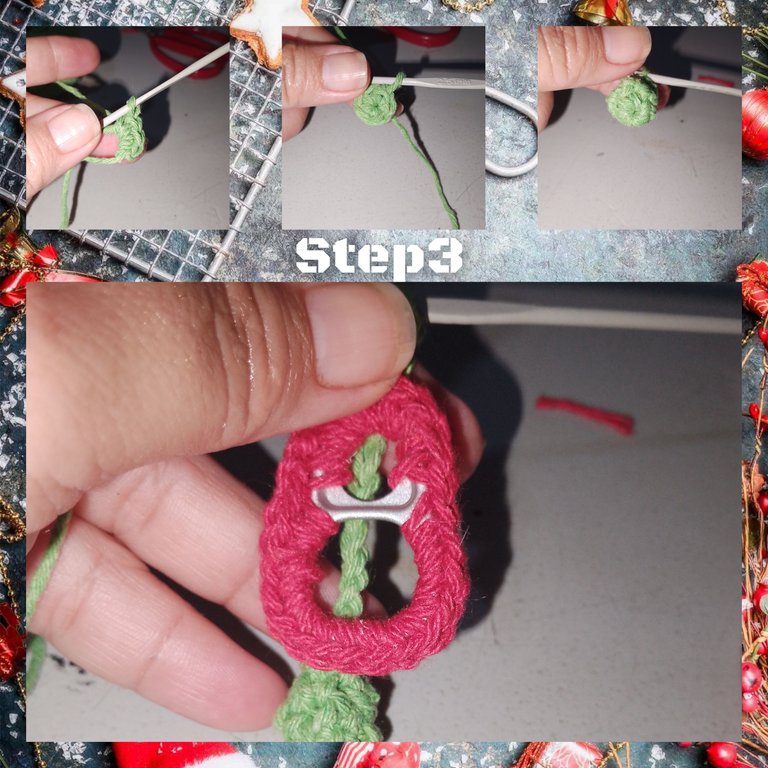
3.) Using the green thread, I make a magic ring, inside it I knit six half stitches, I close with a slip stitch, I make a second round of six half stitches, then a next round and I knit six decreases. In this way, I get a small sphere, I pick up ten, chain stitches, cut the thread, leaving a strand, long enough.
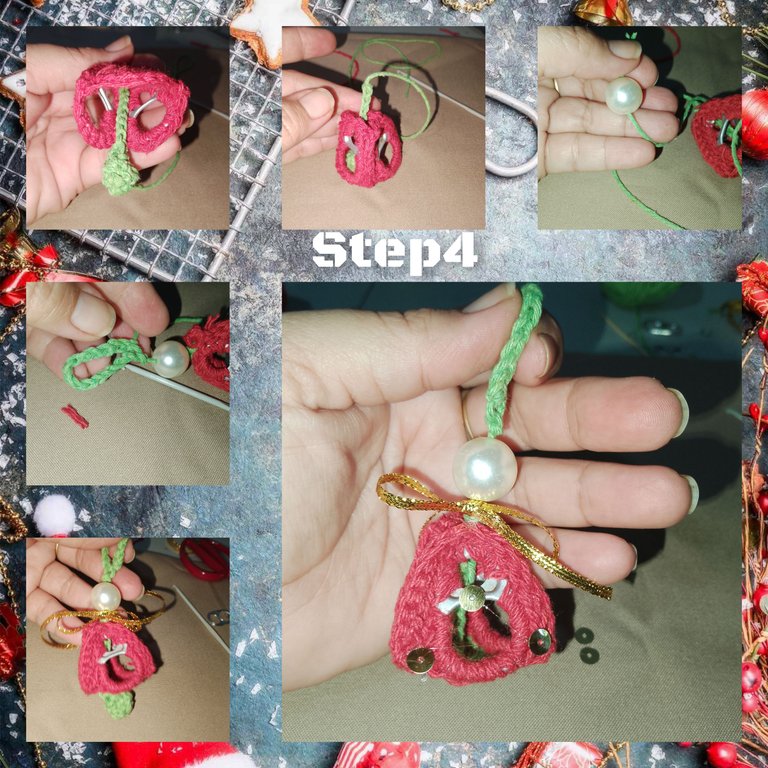
4.) I introduce, through the center of the hoops already joined, I place the bead and I knit chain stitches to form a pendant, returning to the first chain stitch, after inserting the bead. I tie a golden ribbon cord to the top of the bell and make a small bow. To finish, I glue on some gold sequins.
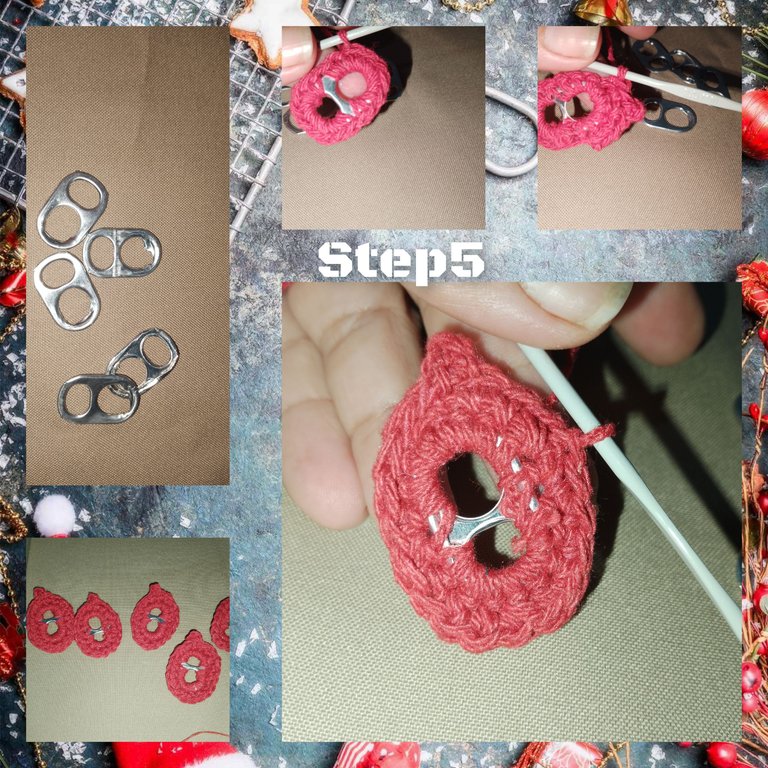
5.) For the flower, I will use five little hoops, I cover them with half stitches and knit, a second round, making a stop, in the middle, of what I consider, the middle of the upper part and I make an increase of two stitches, I pick up two chain stitches and a half stitch, and continue the journey. I cut the thread and finish off.
6.) With a needle and thread, I begin to join the petals to form the flower.
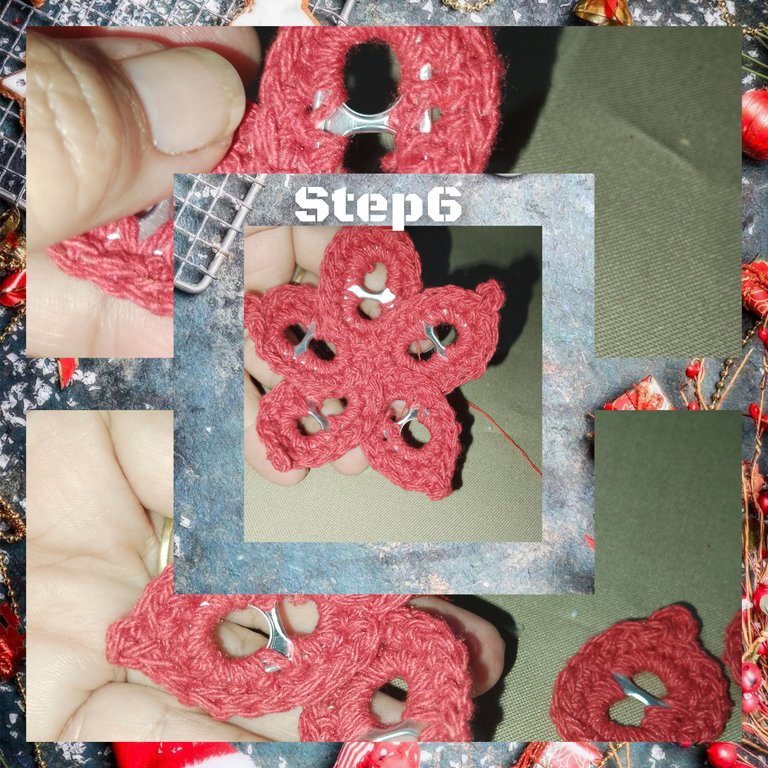
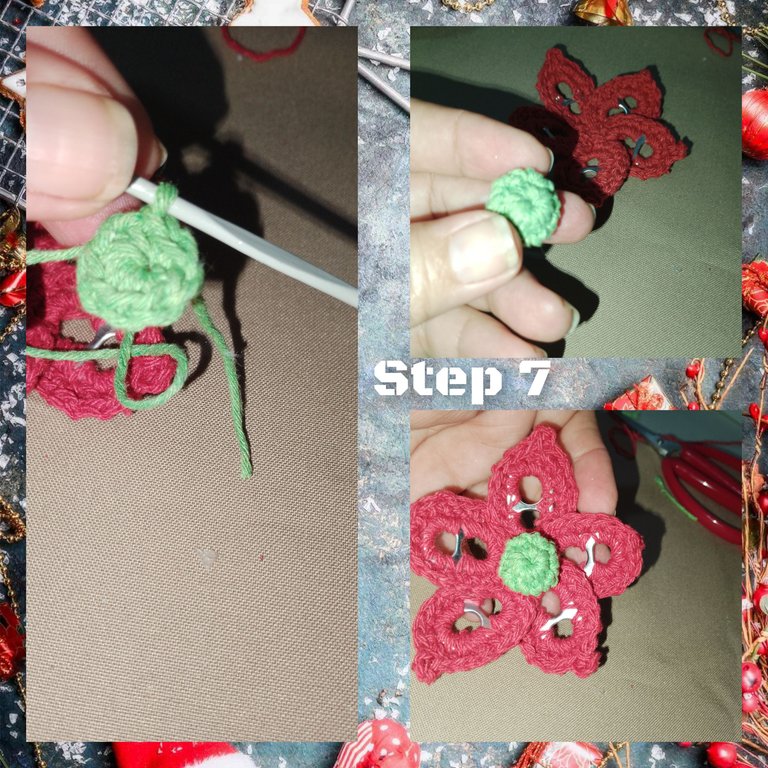
7.) In a magic ring, I knit six half stitches, and like the previous sphere, I repeat. When finished, he applied glue and stuck it in the center of theflower.
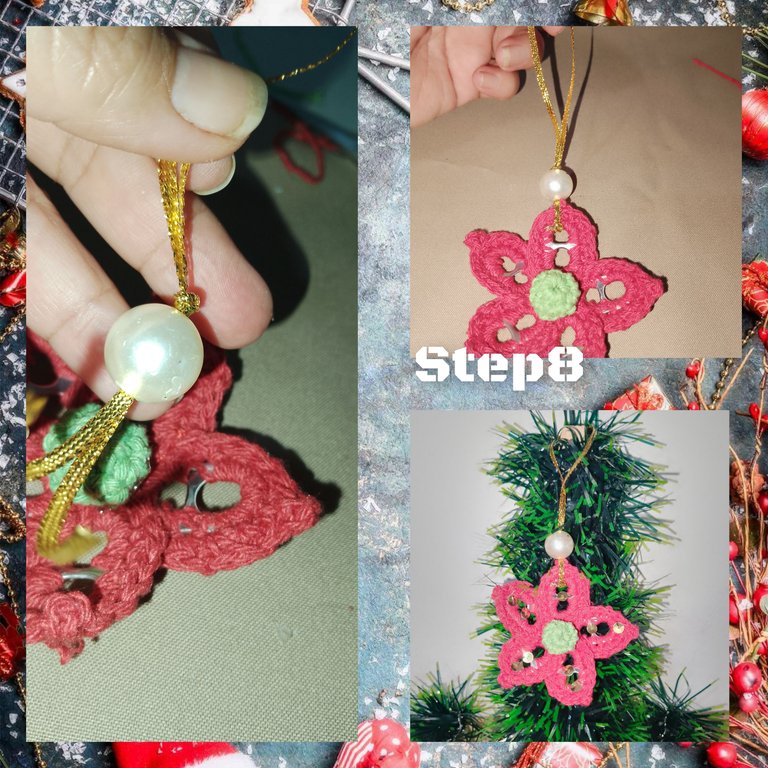
8.) To allow the flower to hang, I choose some of the petals, before inserting the bead, securing with a knot. And I will tie it well to the petal. To conclude, I glue some sequins to give light and shine to the flower.
. All photos are my property, taken with my smartphone.
. Use incollage to show the steps.
. Use language translator.
Grateful for your visit to my blog, it is always good to have your visit, I hope you liked it. It will be until a next opportunity.
(ESP)
Hola a todos, que gusto, estar hoy por acá, iniciando el mes, de Diciembre, con mucho entusiasmo y alegría, deseando se encuentren con mucho ánimo, gozando de buena salud y grandes ideas para crear. Hoy a propósito de iniciar la época Decembrina, y preparándonos para decorar, nuestro árbol navideños, Les vengo a mostrar, un fácil paso a paso, para crear unos hermosos colgantes, inspirados en una delicada campana y una flor navideña, dónde use la técnica de reciclaje y crochet. Sin más deseando lo mejor para todos, les invito a seguirme.
Materiales.
. Aritos de lat de aluminio.
. Hilo pabilo, de colores (verdes y rojo.
. Aguja para tejer.
.aguja e hilo.
. Pegamento.
. Lentejuelas doradas.
.cinta plástica delgada, dorada.
. Perlas blancas.
. Pinza par cortar.
. Tijeras.

Pasos a Seguir:
1.) Inicialmente, corto, usando la pinza los residuos de aluminio que tengan los aritos, para así evitar cortes en los dedos o en el hilo. Hecho esto, ato en el arito el hilo de color rojo y lo cubro completamente con medios puntos, y cierro con un punto deslizado. Corto y remato. De esta manera, repito en dos aritos más.

2.) Continuo, y en esta oportunidad, con punto deslizado, comienzo a unir los aritos, colocando la parte mas delgada, en la parte superior y la más grande en la inferior, para dar forma a la campana, de esta manera, los uno entre sí.

3.) Usando el hilo de color verde, hago un anillo mágico, dentro de el tejo seis medios puntos, cierro con punto deslizado, doy una segunda vuelta de seis medio puntos, luego una siguiente vuelta y tejo seis disminuciones. De esta manera, obtengo una pequeña esfera, levanto diez, puntos cadenas, corto el hilo, dejando una hebra, suficientemente largo.

4.) Introduzco, por el centro de los aritos ya, unidos, coloco la cuenta y tejo dice puntos cadenas para, formar un colgante, devolviendo me a el primer punto cadena, luego de introducir la cuenta. Ato en la parte superior de la campana, un cordón de cinta dorada y hago un pequeño lazo. Para culminar, pego algunas lentejuelas doradas.

5.) Para la flor, usaré cinco aritos, las cubro con medios puntos y tejo, una segunda vuelta, haciendo un alto, en el medio, de lo que considero, el medio de la parte superior y hago un aumento de dos puntos, levanto dos puntos cadenas y un medio punto, y continuo el recorrido. Corto el hilo y remato.

6.) con aguja e hilo, comienzo a unir los pétalos para formar la flor.

7.) En un anillo mágico, tejo seis medios puntos, y al igual que la esfera anterior, repito. Al terminarlo, aplicó pegamento y pego en el centro de la flor.

8.) Para permitir, colgar la flor, escojo, unos de los petalos, anter introduzco la cuenta, aseguro con un nudo. Y atare bien a el pétalo. Para concluir pego algunas lentejuelas para dar, luz y brillo a la flor.

. Todas las fotos son de mí propiedad, tomadas con mí teléfono inteligente.
. Use incollage para mostrar los pasos.
. Use traductor lenguaje.
Agradecida por su visita a mí blog, siempre es bueno contar con su visita, deseo les haya gustado. Será hasta una próxima oportunidad.
Greetings Katiuska! It is always a pleasure to have you visit us at DIYHub, as you are synonymous with excellence and you have proven it once again in this publication. We appreciate your detailed step by step photography, as it is an example for other members of our community 🙏 Thanks for sharing your talent with us, happy start of the week!...
Mi agradecimiento para usted, mi amigo, por sus palabras mitivadoras. Feliz inicio de semana.
Its really amazing Christmas tree thanks for share your Corporation
Buen día, gracias cariño.
Yes my pleasure thanks for everything
Wow, impressive what you can achieve with the union of so many materials, the final result was really great, thank you very much for always giving your best, it is a good job and it is also a great post that you share with us.
Gracias, muy bueno siempre contra con su apoyo y buen ojo, con mis creaciones. Abrazos
que lindo trabajo, excelente para estas fechas!
what a nice job, excellent for these dates!
Gracias ☺️ igualmente visitar mí blog y por su comentario.
Such an excellent craft idea. It's so beautiful .
!DIY
You can query your personal balance by
@ladyfoth just sent you a DIY token as a little appreciation for your post dear @katiuskamata! Feel free to multiply it by sending someone else !DIY in a comment :) You can do that x times a day depending on your balance so:!DIYSTATSIt was great to see your beautiful work. You are a very creative person.