(ENG)
Hello, my dear and always remembered friends, DIY lovers, who show their projects on @diyhub every day. I hope this is an excellent day, full of many good things. Today I am very happy, I am going to show you a very simple tutorial. How to make a cute and very striking pendant for the Christmas tree, inspired by Santa Claus, that great character, always present at Christmas. You will like this pendant, not only because it will make your Christmas tree look very pretty, but also because it is economical to make, and the little time it will take to make it. I invite you to follow me and I show you how easy and beautiful the result is.

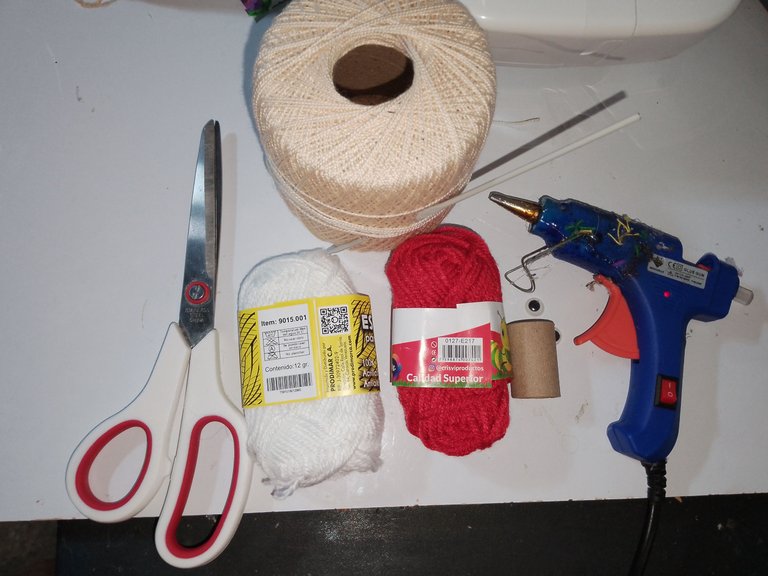
Materials used:
. Threads, stamens, colors (red, white.
. Cream knitting yarn.
. Wool needle.
. Knitting needle.
. Hot silicone.
. Small bulging eyes.
. Thin cardboard tube.
. Scissors . Thin white tape.
Steps:
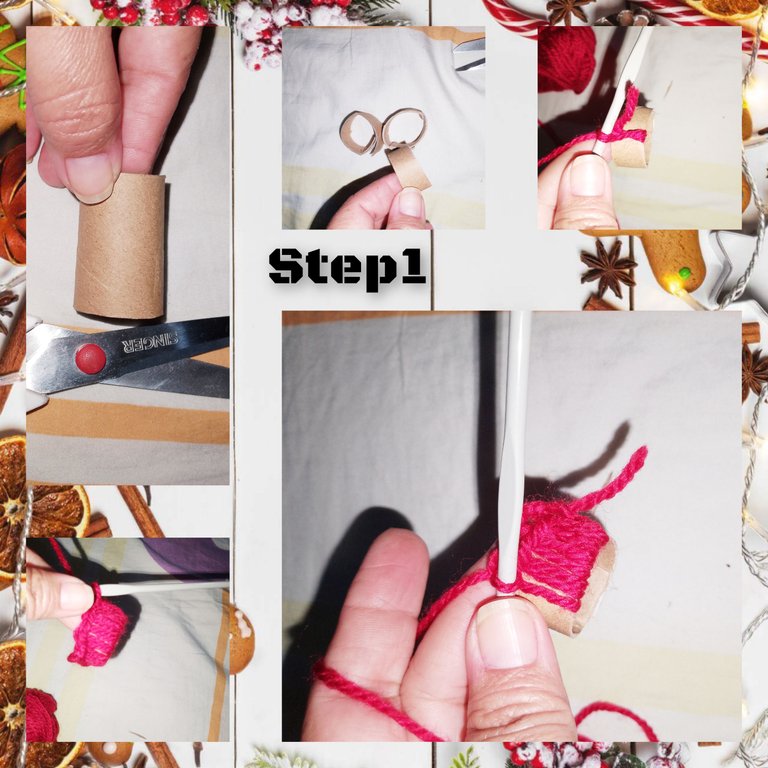
1.) Start, cutting from the small cardboard tube, which I kept after using the mini rolls of yarn to knit. So I cut three pieces of it. And with the thread, red yarn, I tie very well and cover a first cardboard ring, for this, I use the technique, which I like to use the most, for my transformations and decorations. So to cover the small cardboard ring, knit half stitches and a slip stitch to join the ends.
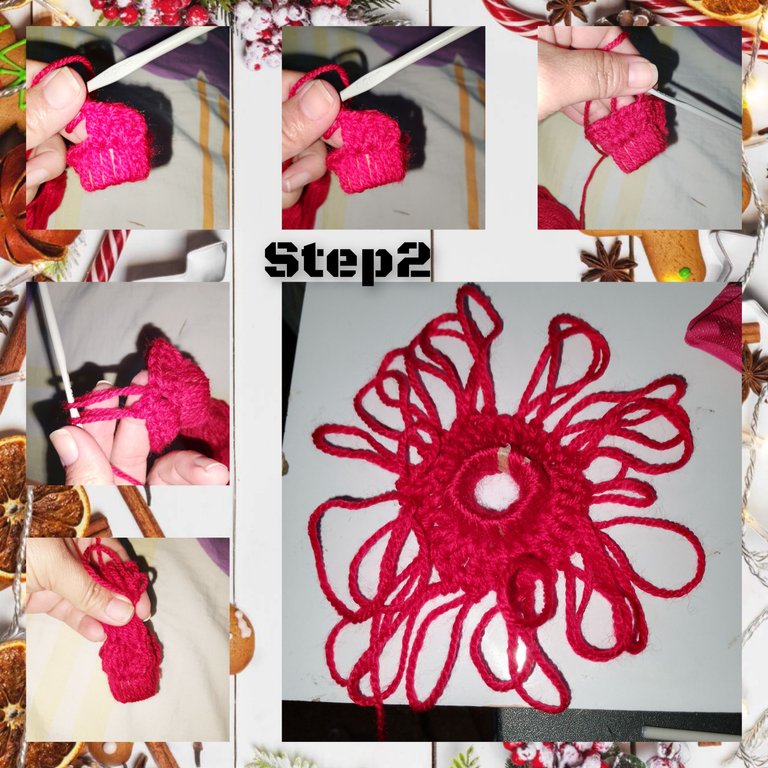
2.) I continue knitting and in this pass, I will knit a double crochet in each half stitch. Reached the route. Using the knitting needle, I begin to take out the thread, securing it with half stitches at the starting point and trying to make them the same length as possible.
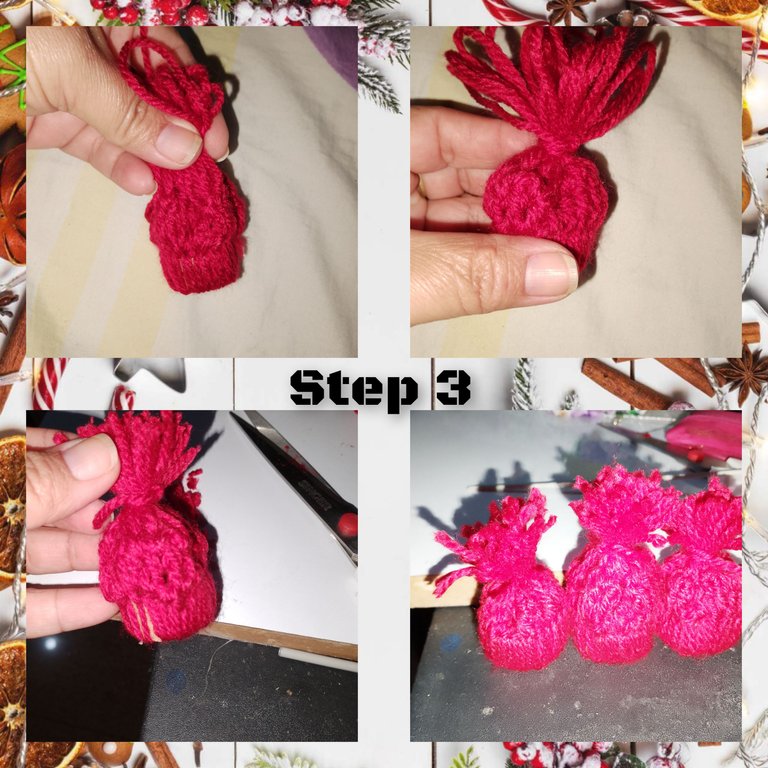
3.) Once the above is done, I join the strands of thread, and with a small piece of the same color I tie with several knots. And I cut the ends, to form the pomp of Santa's hat. I repeat to the following cardboard rings.
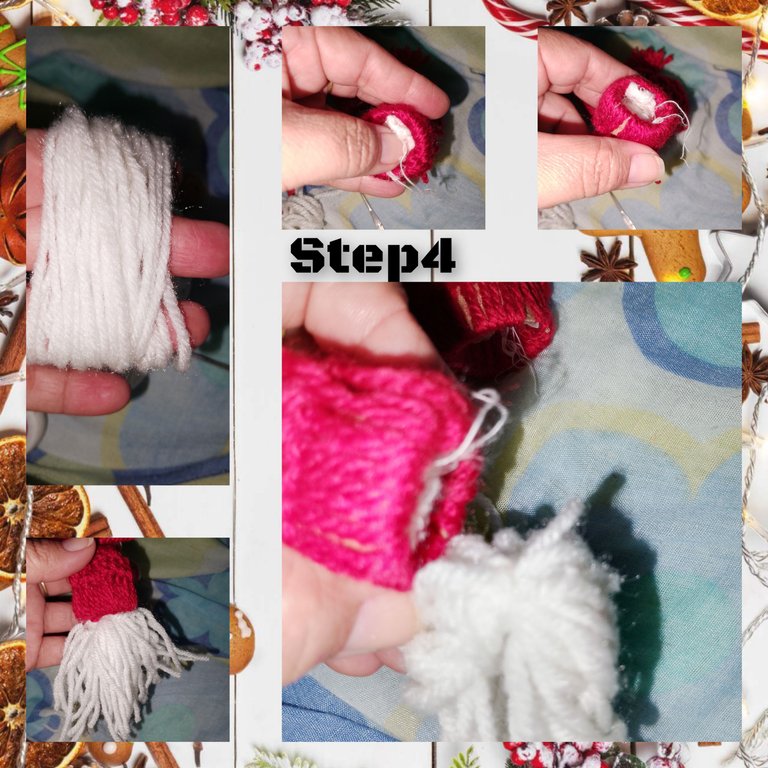
4.) With the white yarn, after placing a little filling on each of the hats. I make eighty turns between the index and pinky thread. With a strand of worsted thread, I tied it double, applied plenty of hot silicone to the thread, tied the eighty turns, and glued it inside the hat. Also cutting the ends of the threads, to simulate Santa's beard.
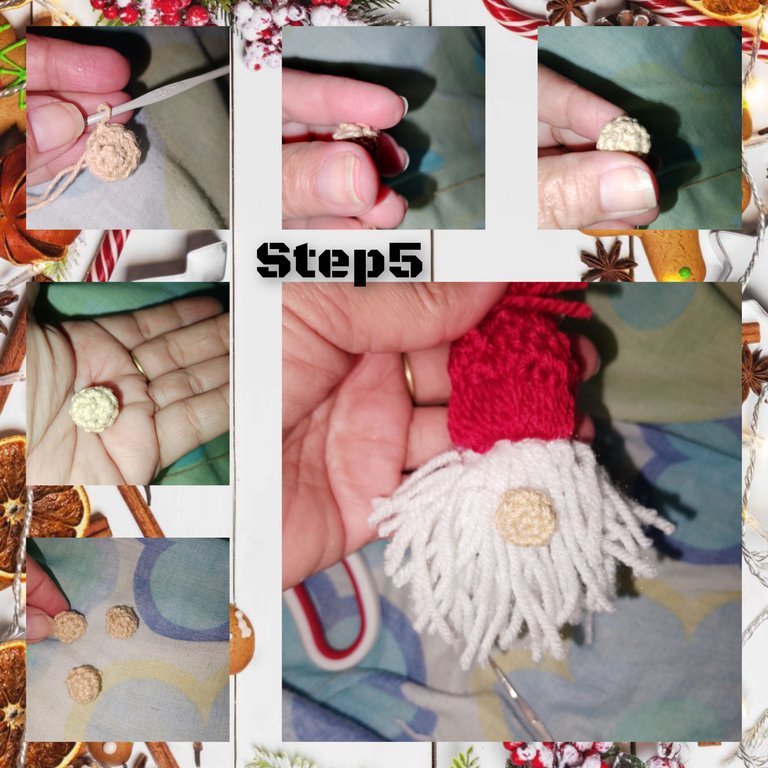
5.) with the yarn, cream color, I make a magic ring and inside it, five half stitches, I close the ring, and in the next pass, I knit five increases, for ten stitches, I knit one more round of ten stitches, and I begin to close, to form a small sphere. He applied silicone and glue on Santa's beard.
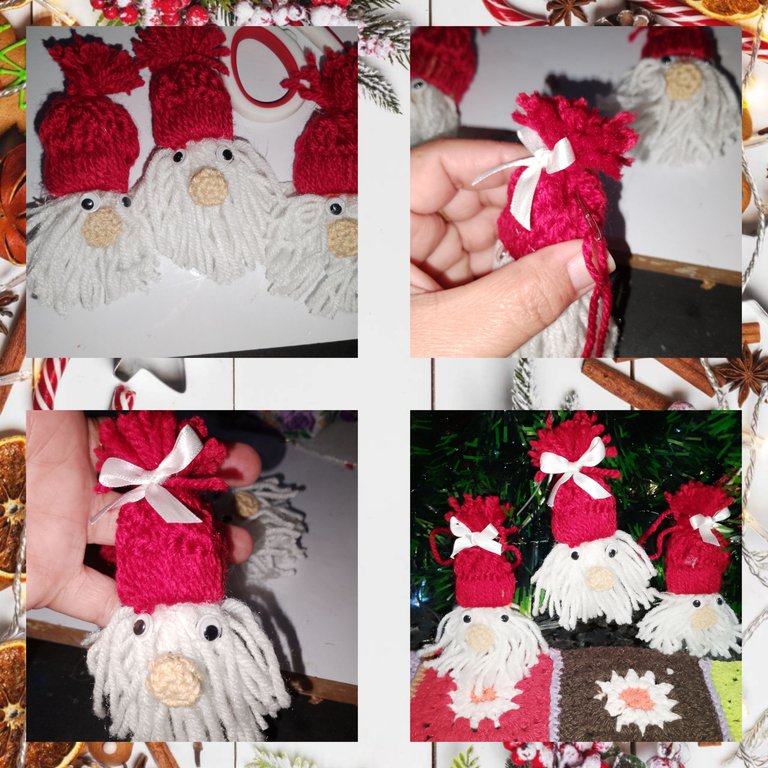
6.) I glue the eyes and with the white ribbon, I make a bow and glue it to the hat. With the wool needle, I place a strand of thread on top to make thependant.
In this way, I conclude today's project. Very happy with the final result.

. All photos are my property.
. Use incollage, to show the steps. . Use gifs videos to show the final result.
. Use language translator.
Grateful, you followed me to the end. It is a pleasure to see your visit to my blog, you are always welcome here. See you next time.
(ESP)
Hola, mis queridos y siempre recordados amigos, amantes de el bricolage, que día a día, muestran sus proyectos en @diyhub. Deseo este sea un execelente día, lleno de muchas cosas buenas. Yo hoy muy contenta, paso a mostrarles, un muy sencillo tutorial. De como hacer un lindo y muy llamativos, colgante, para el árbol de navidad, inspirado en Santa Claus, ese gran personaje, siempre presente en las navidades. Este colgante le gustará, no solo porque hará lucir, muy lindo su árbol de navidad, sino a demás, por lo económico de su elaboración, y el poco tiempo que necesitará, para su elaboración. Les invito a seguirme y les muestro lo fácil y bonito de su resultado.

Materiales usados:
. Hilos, estambres, colores ( rojo, blanco.
. Hilo para tejer color crema.
. Aguja lanera.
. Aguja para tejer.
. Silicón caliente.
. Ojos saltones pequeños.
. Tubo delgado de cartón.
. Tijeras
. Cinta delgada de color blanco.

Pasos:
1.) Inicio, cortando de el pequeño tubo de cartón, a este lo conservó, luego de usar los minis rollitos de hilo para tejer. Así que corto tres trozos de el. Y con el hilo, estambre de color rojo, ato muy bien y cubro un primer anillo de cartón, para ello, uso la técnica, que más me gusta usar, para mis transformaciones y decoraciones. Así que para cubrir el, pequeño aro de cartón tejer medios puntos y un punto deslizado, para unir los extremos.

2.) sigo tejiendo y en est pasada, tejere en cada, medio punto un punto alto. Alcanzado el recorrido. Usando la aguja de tejer, comienzo a sacar el hilo asegurando, con medios puntos en el punto de partida y tratando en los posibles estos queden de mismo largo.

3.) hecho lo anterior, uno las hebras de hilo, y con un pedacito de el mismo color ato con varios nudos. Y corto las puntas, par formar el pompo de el gorro, de Santa. Repito a los siguientes aritos de cartón.

4.) Con el estambre de color blanco, luego de colocar un poco de relleno a cada uno de los gorros. Doy ochenta vueltas entre el hilo índice y meñique. Con una hebras de hilo estambre, ato de manera doble, aplicó abundante silicón caliente gusto sobre el hilo, que ate las ochenta vueltas, y pego dentro de el gorro. Cortando además los extremos de los hilos, par simular la barba de Santa.

5.) con el hilo, me color crema, hago un anillo mágico y dentro de el, cinco medios puntos, cierro el anillo,y en la siguiente pasada, tejo cinco aumentos,para diez puntos, tejo una vuelta más de diez puntos, y comienzo a cerrar,npara formar una, pequeña esfera. Aplicó silicón y pego sobre la barba de Santa.

6.) pego los ojos y con la cinta de color blanco, hago un lazo y pego a el gorro. Con la aguja lanera, coloco en la parte superior, una hebra de hilo, para hacer el colgante.

De esta manera, doy por concluido, el proyecto de hoy. Muy contenta con el resultado final.

. Todas las fotos son de mí propiedad.
. Use incollage, para mostrar los pasos.
. Use gifs videos para, mostrar el resultado final.
. Use traductor lenguaje.
Agradecida, me hayas seguido hasta el final. Es un gusto ver su visita en mí blog, aquí siempre serán bienvenidos. Ser hasta una próxima oportunidad.
Hey friend! It's admirable that you make your Santa Clous yourself, I see you make Christmas magic with your hands. Congrats on a great job, everything looks great, including the post, thanks for detailing the step by step through the pictures and gracing our DIYHub community...
Bellos bellos estos Santas amiga. Me encanta esa barba ☺️ como siempre mostrando hermosas creaciones. Gracias 😊
Wow this is so lovely thank you so much for sharing the tutorial with us.
With this tutorial am eagerly waiting for Christmas season
Buen día @praiselove ☺️ gracias por apoyar.
Aww. This is a really colorful and beautiful pendant. Santa Claus will be glad he inspired this creative project of yours. We love it. Great job.
Gracias, si este personaje Representativo de la Navidad nos inspira y hace muy felices... gracias 😊❤️
Congratulations, your post has been added to WorldMapPin! 🎉
Did you know you have your own profile map?
And every post has their own map too!
Want to have your post on the map too?
Muy agradecida...es genial esto
Gracias 😊😊
🐝🐝🐝