
¡Hola Chicos!
Como les comenté en mi post de introducción, en esta cuenta les estaré compartiendo todo los trabajos y experiencias que giren en torno a mi marca Lakrearte. La necesidad surgió porque estaba documentando mucho contenido y no terminaba de ponerme al día por más que quisiera.
Entonces iba dejando a un lado lo que habitualmente les compartía como mis reflexiones, catarsis, vivencias diarias y las recetas que tanto me gustaba crear y compartirles.
Por eso lo que me pareció una buena opción fue crear esta cuenta para así dedicarla enteramente a esto que les menciono y mi cuenta personal dejarla libre para las otras cositas de mi vida. Es decir, esta es mi cuenta de artista.
No había encontrado un equilibrio en mi organización desde que la creé, pero gracias a unas pequeñas inversiones que hice logré amoldar todo y ya estamos acá para comenzar. 😊
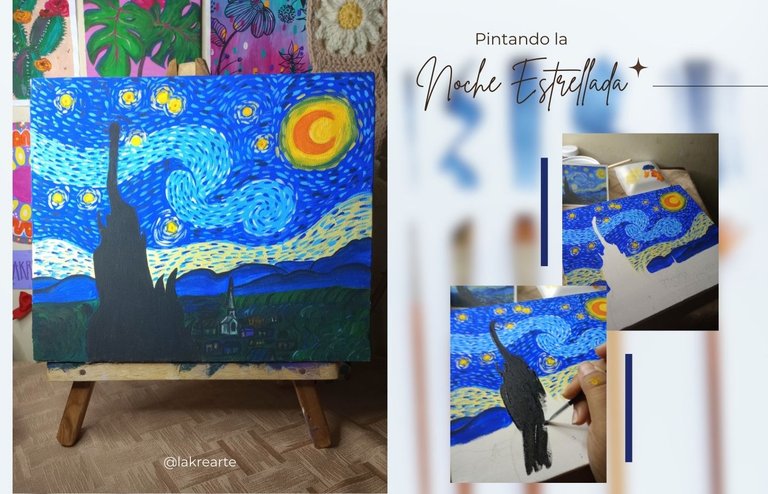
Como primer post oficial quiero compartir con ustedes el proceso de un cuadro que pinté para una sesión de arte. Este fue sobre la noche estrellada, pero lo estructuré de tal forma que pudiera ser recreado por personas que no tuvieran experiencia en la pintura.
El cuadro fue todo un éxito y logré que 24 personas lo recrearan en aquella sesión. De eso les hablé ya en mi otro blog @estefania3, por si desean saber algo de ese día.
Ahora si, les contaré como lo hice por si se animan a hacerlo. ♥
Hello Guys!
As I mentioned in my introductory post, in this account I will be sharing all the work and experiences that revolve around my brand Lakrearte. The need arose because I was documenting a lot of content and I didn't end up catching up no matter how much I wanted to.
So I was leaving aside what I usually shared with you as my reflections, catharsis, daily experiences and recipes that I loved to create and share with you.
That's why I thought it was a good option to create this account in order to dedicate it entirely to what I mentioned and leave my personal account free for the other little things in my life. That is to say, this is my artist account.
I had not found a balance in my organization since I created it, but thanks to some small investments I managed to mold everything and now we are here to start. 😊
As the first official post I want to share with you the process of a picture I painted for an art session. This one was about the starry night, but I structured it in such a way that it could be recreated by people who had no experience in painting.
The painting was a great success and I had 24 people recreate it in that session. I told you about it in my other blog @estefania3, in case you want to know something about that day.
Now, I'll tell you how I did it in case you want to do it. ♥

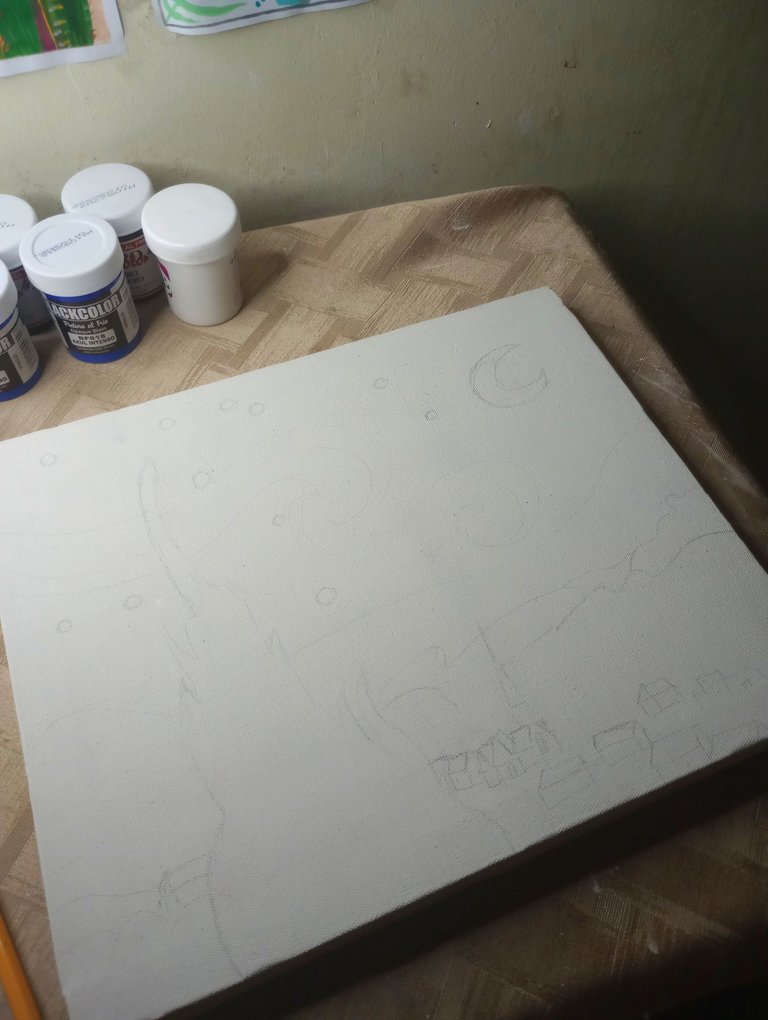
Trabajé sobre un lienzo preparado de 25 cm x 30 cm. Hice el boceto a lápiz que ayudaría a saber exactamente donde ubicar los elementos del cuadro y que secciones iba a pintar en cada color.
I worked on a prepared 25 cm x 30 cm canvas. I made the pencil sketch that would help to know exactly where to place the elements of the painting and which sections I was going to paint in each color.


Con la imagen del cuadro original ahí cerquita para detallar bien la obra, fui pintando primero el cielo, dejando un espacio para las estrellas y la luna. Luego pinté la luna y una franja amarillo claro que está en la parte baja de cielo.
Con ese mismo amarillo fui agregándole detalles a la ola celeste que esta en el cielo, la cual es característica de este cuadro.
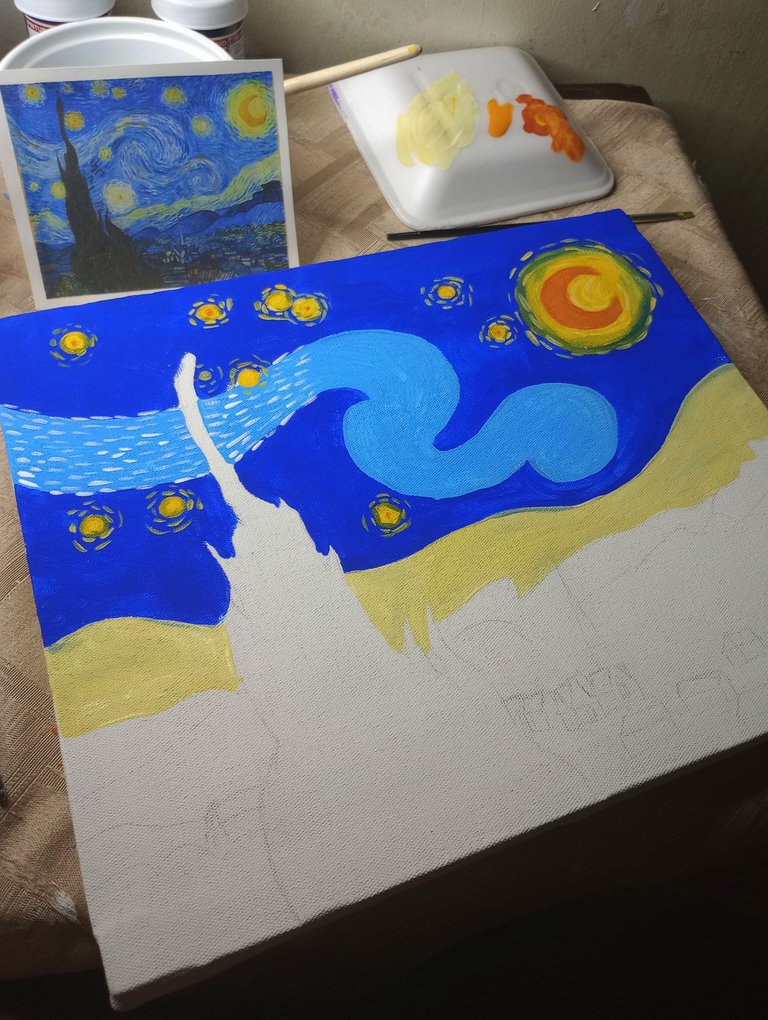
With the image of the original painting close by to detail the work, I painted the sky first, leaving a space for the stars and the moon. Then I painted the moon and a light yellow stripe in the lower part of the sky.
With that same yellow I added details to the celestial wave in the sky, which is characteristic of this painting.

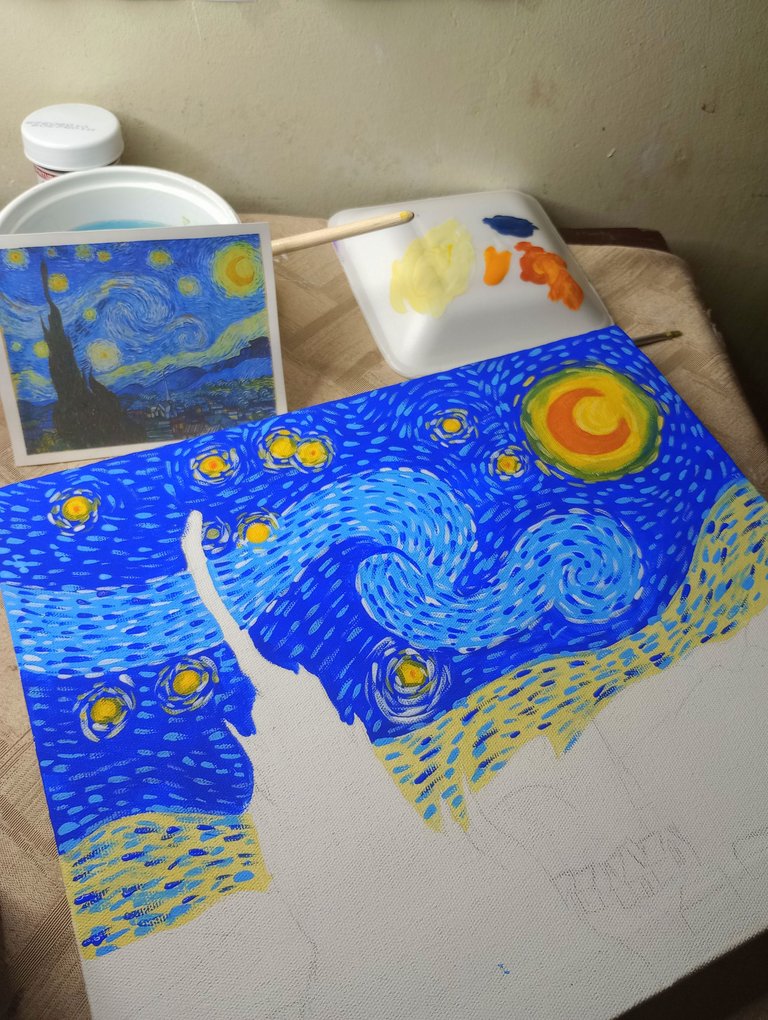
Luego decidí hacerle los detalles al cielo, que son pequeñas lineas que rodean todas las estrellas y la luna. Esto lo hice con celeste en las partes azul rey y con el azul rey en el área celeste. También le agregué un poco de blanco y azul un poco más oscuro.
Bajo la franja amarilla hice una línea de montañas en tonos azules.
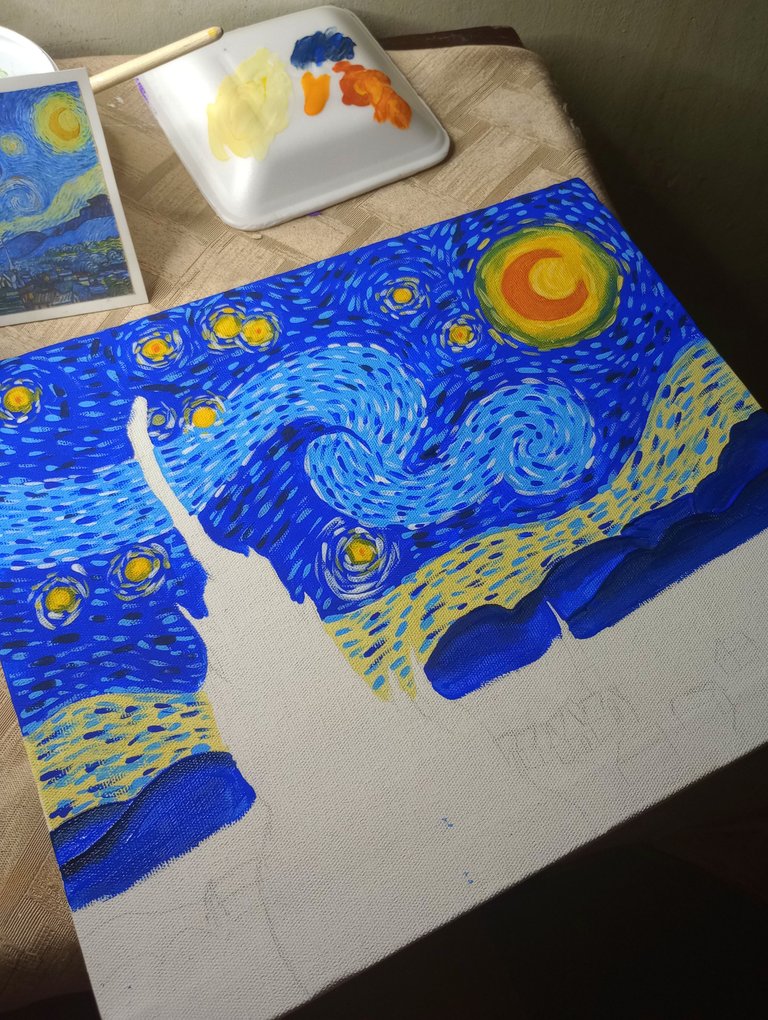
Then I decided to make the details of the sky, which are small lines that surround all the stars and the moon. I did this with light blue in the royal blue parts and with royal blue in the sky area. I also added some white and a little darker blue.
Under the yellow stripe I made a line of mountains in shades of blue.

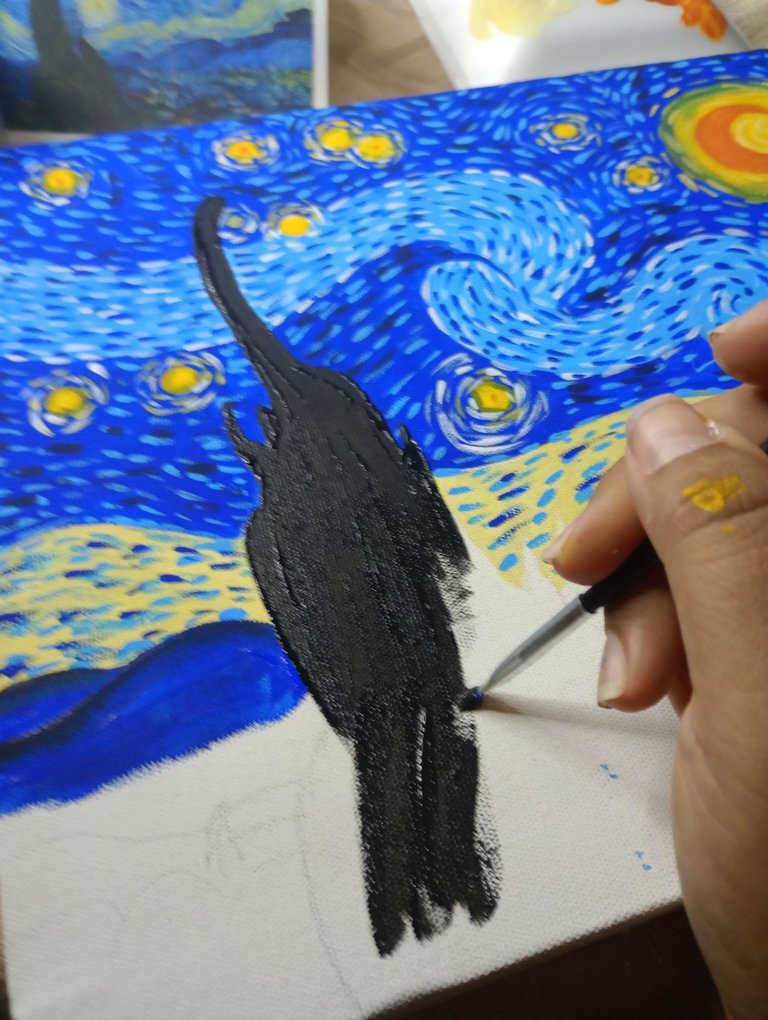
Una vez terminado todo el cielo me dediqué a pintar la cosa negra del cuadro. Debo confesar que hasta hoy no tenía ni idea de que era, pero investigué ya que siempre le decía: el castillo, la cosa negra, la montaña.
Resulta que es un enorme árbol llamado ciprés y que según dicen este árbol esta asociado con la muerte. A lo mejor era lo que quería expresar Van Gogh en su obra, eso no lo sabremos nunca.
Una vez lo pinté, quedaba la parte baja del cuadro, que es el área donde está la aldea y la vegetación. Esta parte les confieso que no la documenté porque el cuadro lo estaba pintando de noche y en ese momento me dejé llevar por la inspiración y el cansancio.
Cuando me di cuenta ya lo había terminado jajaja.
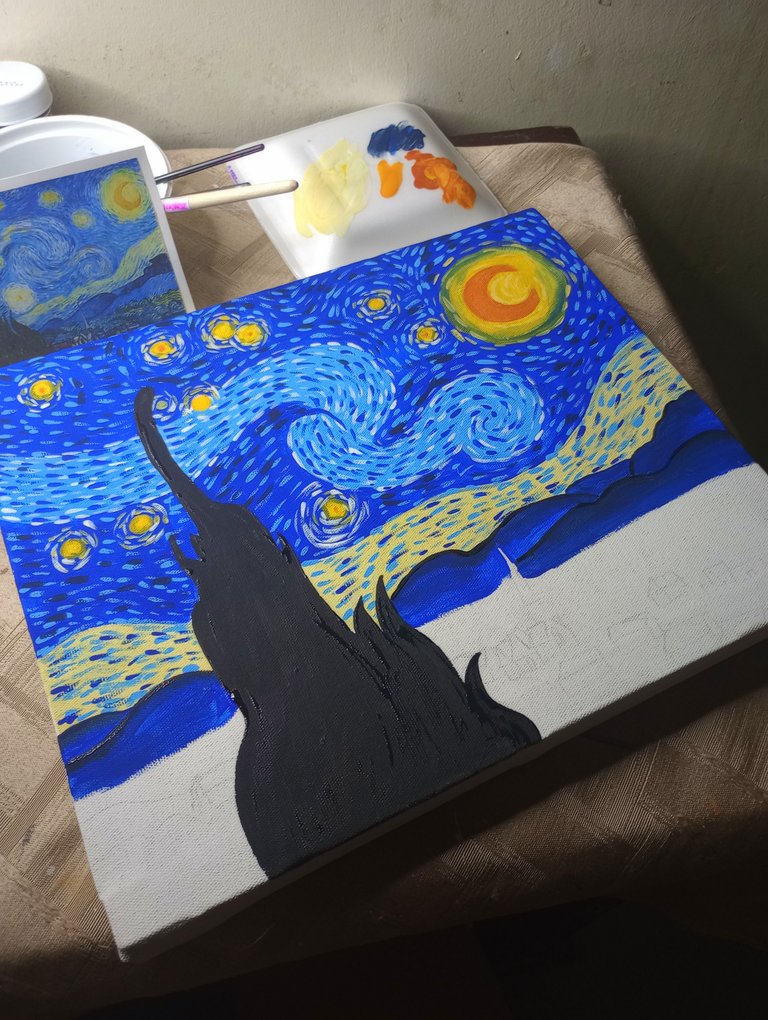
Once the sky was finished, I started to paint the black thing in the painting. I must confess that until today I had no idea what it was, but I did some research since I always used to call it: the castle, the black thing, the mountain.
It turns out that it is a huge tree called cypress and it is said that this tree is associated with death. Maybe that is what Van Gogh wanted to express in his work, we will never know.
Once I painted it, the lower part of the painting remained, which is the area where the village and the vegetation are. I confess that I did not document this part because I was painting it at night and at that moment I let myself be carried away by inspiration and fatigue.
When I realized I had already finished it hahaha.


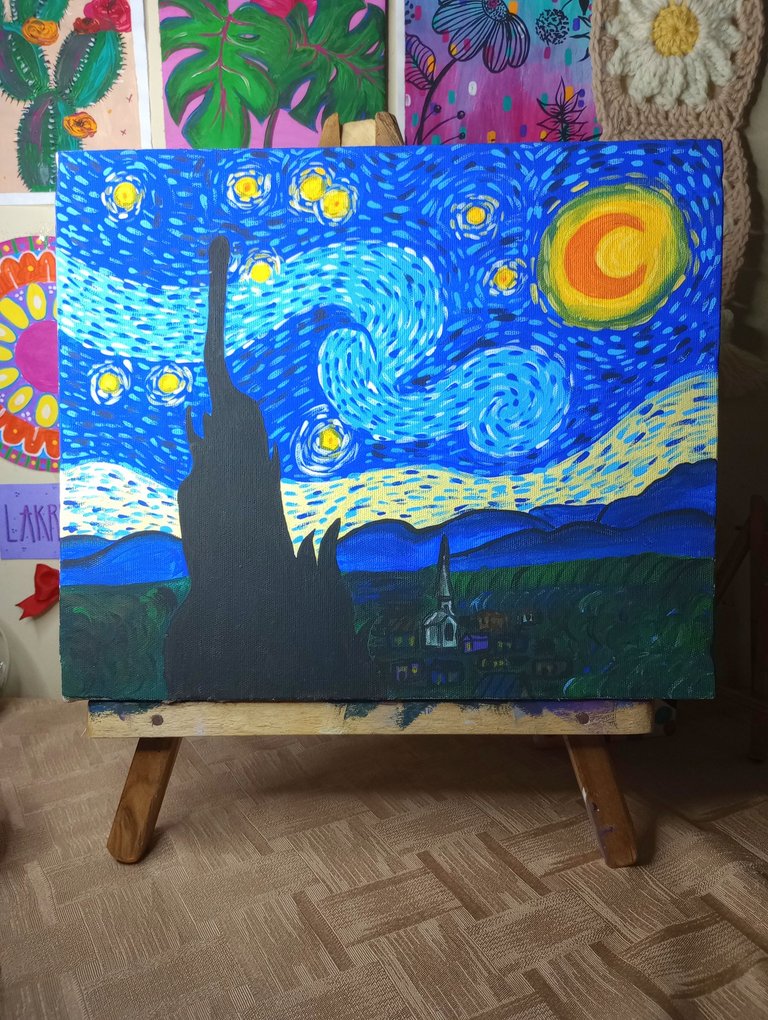
En la parte inferior utilicé una mezcla de verde oscuro con azul rey. Luego en tonos oscuro le di forma a las casitas y a la iglesia y luego con el negro los delineé.
Así finalicé mi obra, lista para llevarla a la sesión de arte. Actualmente se encuentra colgada en una pared de mi pasa como el resto de las obras que he pintado como ejemplo para las sesiones de arte. ♥
Espero les haya gustado y que les fuera de utilidad este tutorial para que puedan hacer su versión de la noche estrellada.
In the lower part I used a mixture of dark green and royal blue. Then in dark tones I shaped the little houses and the church and then with black I outlined them.
This is how I finished my work, ready to take it to the art session. It is currently hanging on a wall of my raisin like the rest of the artwork I have painted as an example for the art sessions. ♥
I hope you liked it and found this tutorial useful so you can make your version of the starry night.


.
.
.
¡Gracias por leer, comentar y votar mi contenido!
Un gran abrazo a todos
• Lakrearte en Hive •
Imágenes y separadores de mi autoría
Portada editada en Canva
Fotografías tomadas con un Moto G31
Texto traducido en Deepl.com
.
.
.

Wow! Quedó increíble, admito que tuve que googlear la original y compararlas porque de veras pienso que es una réplica hermosa de tan icónica pintura. Te felicito por tan hermoso trabajo.
Hola! Muchas gracias 🫂 me alegra que sintieras incluso la necesidad de compararla jeje saludos 🫶🏻
Es que está muy hermoso. Tienes mucho talento.
Te quedó muy hermosa, felicidades 🤗
Hola! Muchas gracias 🥹 me alegra que te haya gustado amiga. Saludos 🫶🏻
Staring at your painting and taking in everything depicted in it is so refreshing, thanks for taking us through this creative journey of yours, we are proud of your work.
Thank you so much for your support friends, I'm glad you liked my post and my painting ♥.
Bonita pintura me encanta