English
February 14th Love And Friendship
Back with a warm greeting to all the friends of DIYHub. I wanted to participate in the Valentine's Day Contest, a very special day that we celebrate with great enthusiasm, especially expressing the affection and love for our loved ones and especially our friends, for this I come with a proposal, loaded with lots of love, I will use recycling materials, I dedicated myself to make an ornament cushion and a small card for a dear friend.
Español
14 De Febrero Amor Y Amistad
De vuelta con un caluroso saludo a todos los amigos de DIYHub. He querido participar en el Concurso del día de San Valentín, un día muy especial que celebramos con mucho entusiasmo, sobre todo manifestando el cariño y amor hacia nuestros seres queridos y en especial a nuestras amistades, para ello vengo con una propuesta, cargada de mucho cariño, voy a utilizar materiales de reciclaje, me dedique a realizar un cojín de adorno y una pequeña tarjeta para una apreciada amiga.

Made with Canva
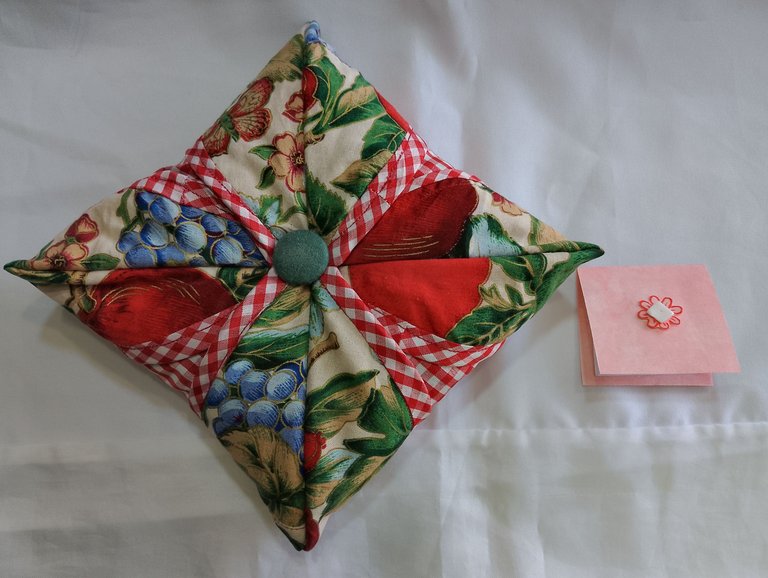
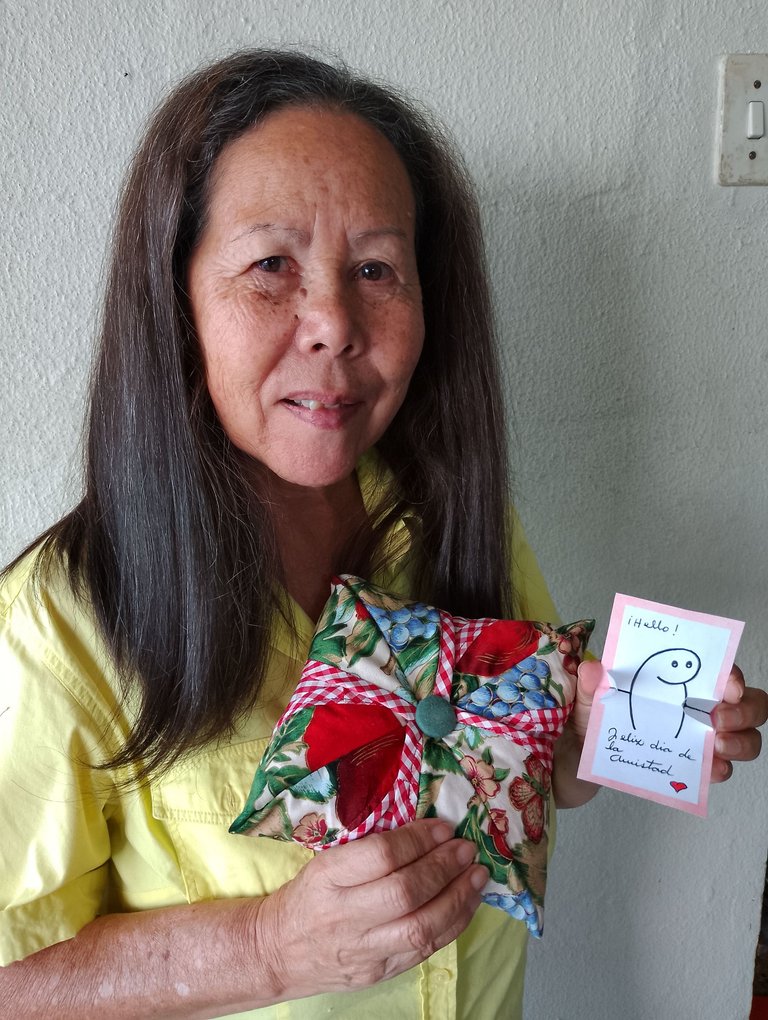
A small gift, very delicate, transforming scraps of fabric and paper into a beautiful gift, as a symbol of true friendship, where friends are in the most significant moments of our lives, whether in good or bad times.
Un pequeño obsequio, muy delicado, transformando retazos de tela y papel en un bello regalo, como símbolo de una amistad verdadera, donde los amigos están en los momentos más significativos de nuestras vidas, ya sean en los momentos buenos y malos.
This small cushion I have made it with only two types of fabric; the confection is simple. If you wish to make it. The size depends on our tastes, big or small. For the card we used only half a sheet of white paper and the cardboard is up to each person. The one I used had been stored for a long time. Now let's start.
Este pequeño cojín lo he realizado solo con dos tipos de tela; la confección es sencilla. Si deseas realizarlo. El tamaño depende de nuestros gustos, grande o pequeño. Para la tarjeta utilizamos solo media hoja de papel blanco y la cartulina queda a elección de cada quien. La que utilicé tenía mucho tiempo guardada. Ahora comencemos.
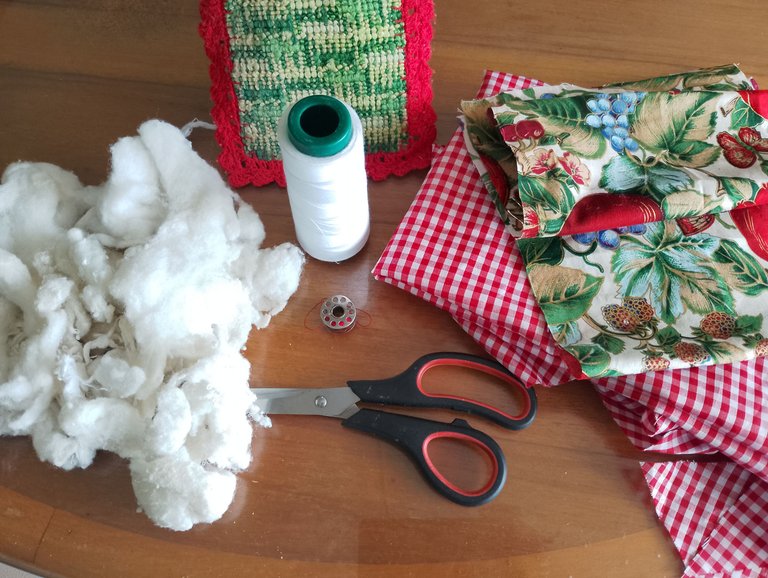
Cushion Materials:
- Fabric scraps, different colors (Can be one unicolor and one with design).
- Thread, scissors
- Sewing machine
- Stuffing
Materiales Del Cojín:
- Retazos de telas, diferentes colores (Puede ser una unicolor y otra con diseño)
- Hilo, tijera
- Máquina de coser
- Relleno
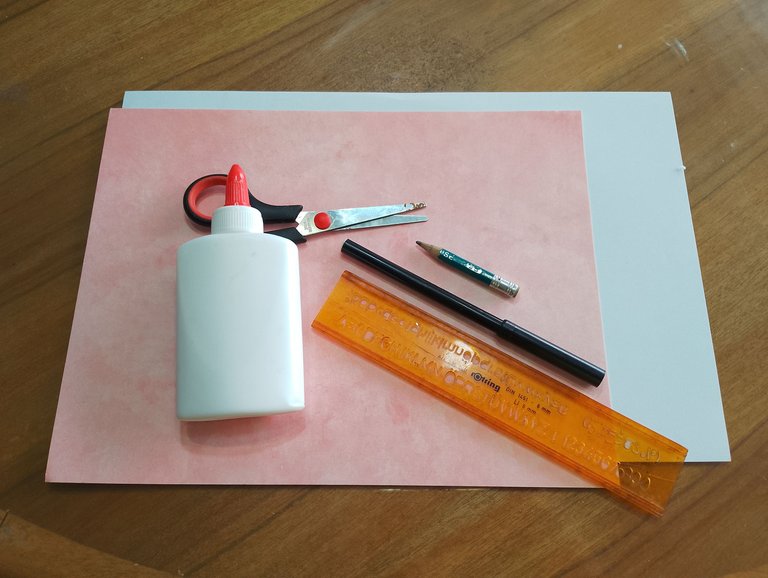
Card Materials:
- Letter size sheet
- Letter size card stock
- Black marker, pencil
- White glue
Paper cutter
Materiales De La Tarjeta:
- Hoja tamaño carta
- Cartulina tamaño carta
- Marcador negro, lápiz
- Pega blanca
- Tijera de cortar papel
Cushion Procedure:
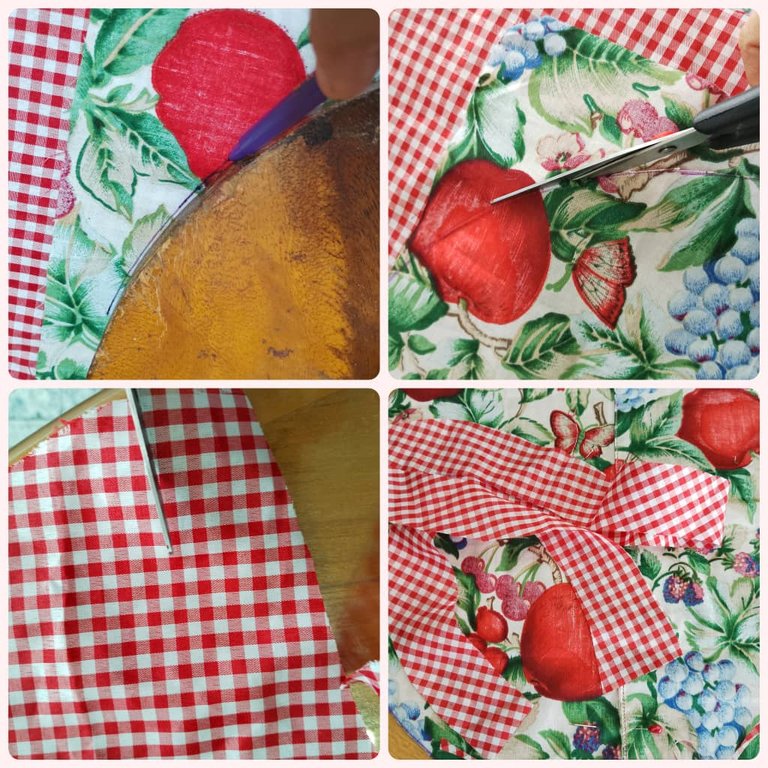
First: we take both fabrics and place them face to face, (the right side must be on top), we fix with pins. With a roundel or a cover we mark a circle, we use pencil or marker, then we cut the whole circle, then we sew the seam.
Procedimiento Del Cojín:
Primero: tomamos ambas telas y las colocamos cara con cara, (el derecho debe quedar arriba), fijamos con alfileres. Con un redondel o una tapa marcamos un círculo, utilizamos lápiz o marcador, luego cortamos todo el círculo, después le pasamos costura.
Second: once we have the circle, we now cut a strip to place a bias binding around the circle. This bias binding should be cut diagonally to the fabric, so that it can be stretched (you can place the bias binding to match any of the fabrics you are going to use). Now we glue the bias binding to our fabric, and we make a piquete to make it more comfortable to sew.
Segundo: una vez tenemos el círculo, ahora cortamos una tira para colocarle un bies alrededor del círculo. Este bies debes cortarlo diagonal a la tela, para que se pueda estirar. (pueden colocar el bies que haga juego con alguna de las telas que vas a utilizar). Ahora pegamos el bies a nuestra tela, y le hacemos piquete para que sea más cómodo de coser.
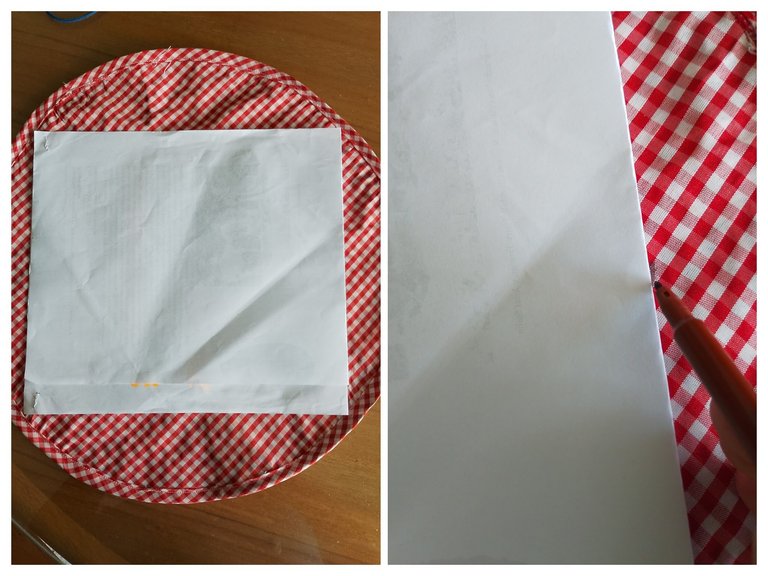
Third: we place a piece of bond paper on top of our circle, as you can see in the image, and mark all the outline of the square.
Tercero: a nuestro círculo le colocamos un papel bond encima, como lo ven en la imagen, y marcamos todo el contorno del cuadrado.
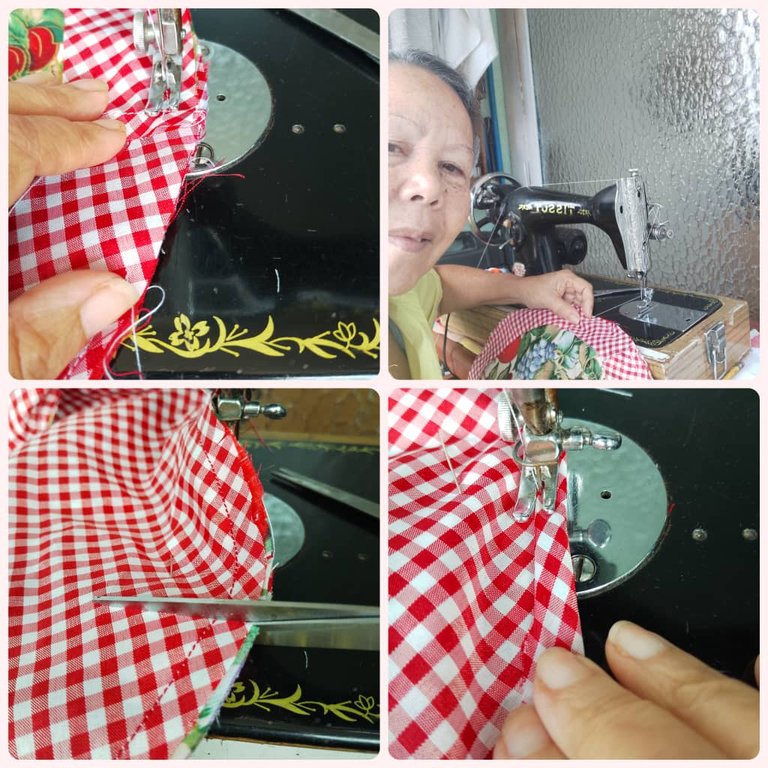
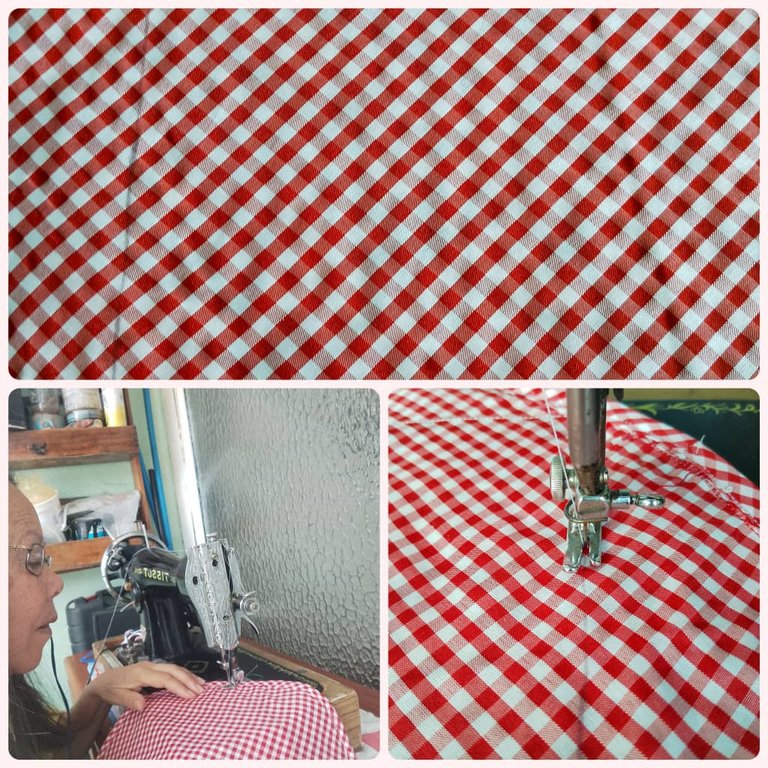
Fourth: Then we are going to sew where the mark is. Once this process is finished, fold the fabric in half and sew the two sides, as shown in the image.
Cuarto: Luego vamos a coser por dónde está la marca. Terminado este proceso, doblamos la tela a la mitad y cosemos los dos lados, como lo indica la imagen.
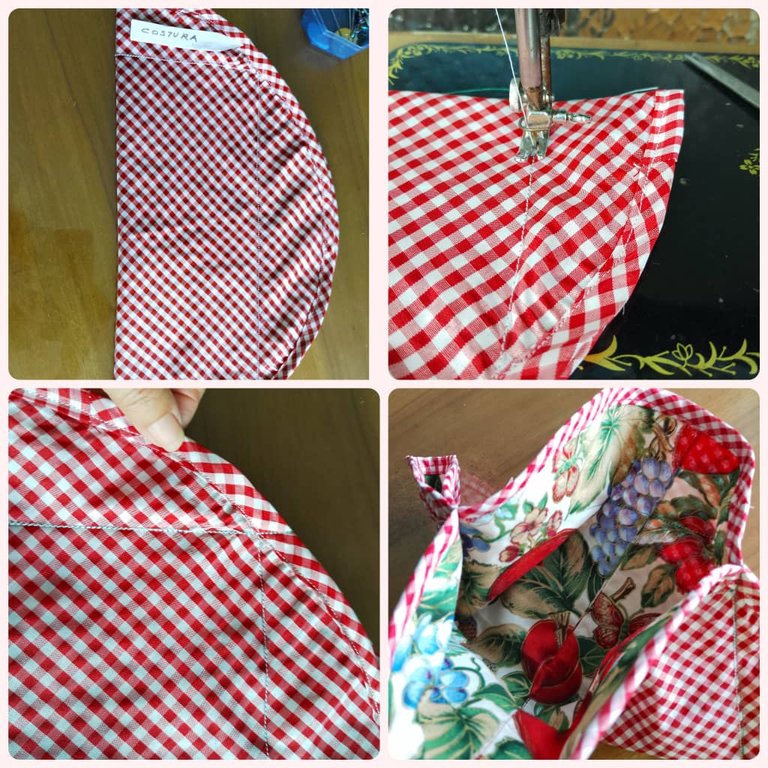
Fifth: now we continue with the other two corners, but in one of them we leave an opening to fill and see images.
Quinto: ahora continuamos con las otras dos esquinas, pero en una dejamos una abertura para rellenar y ver imágenes.
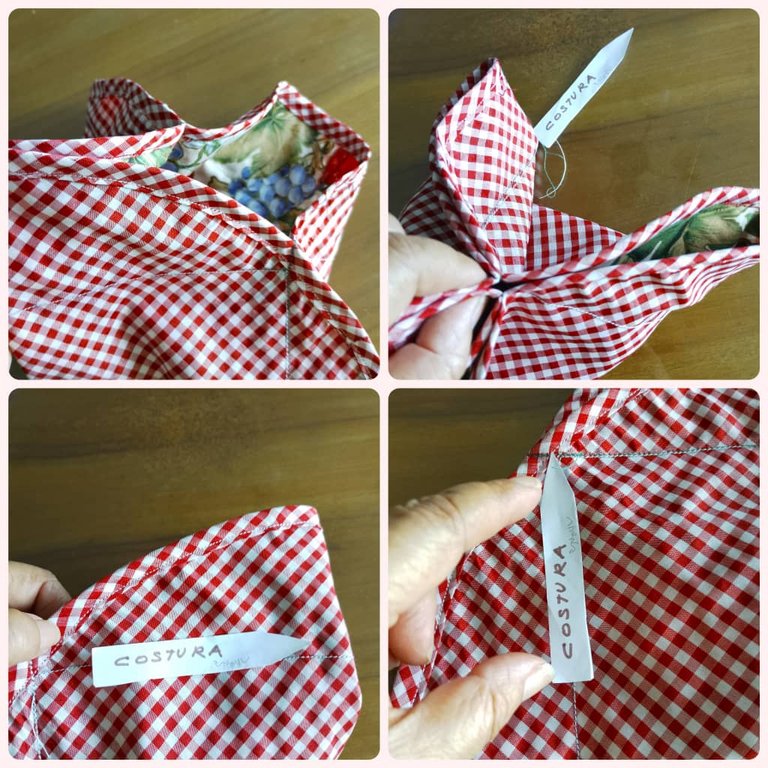
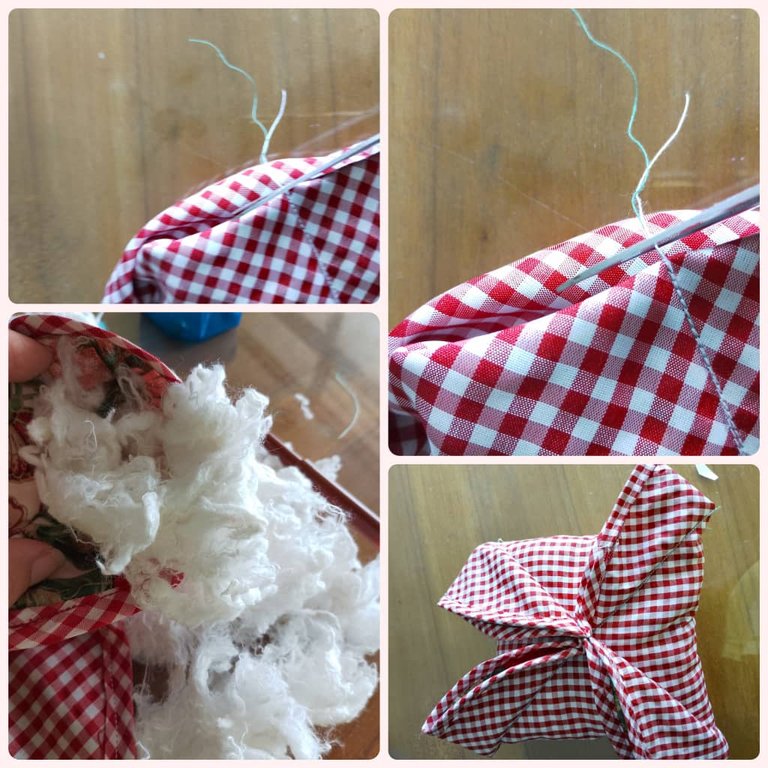
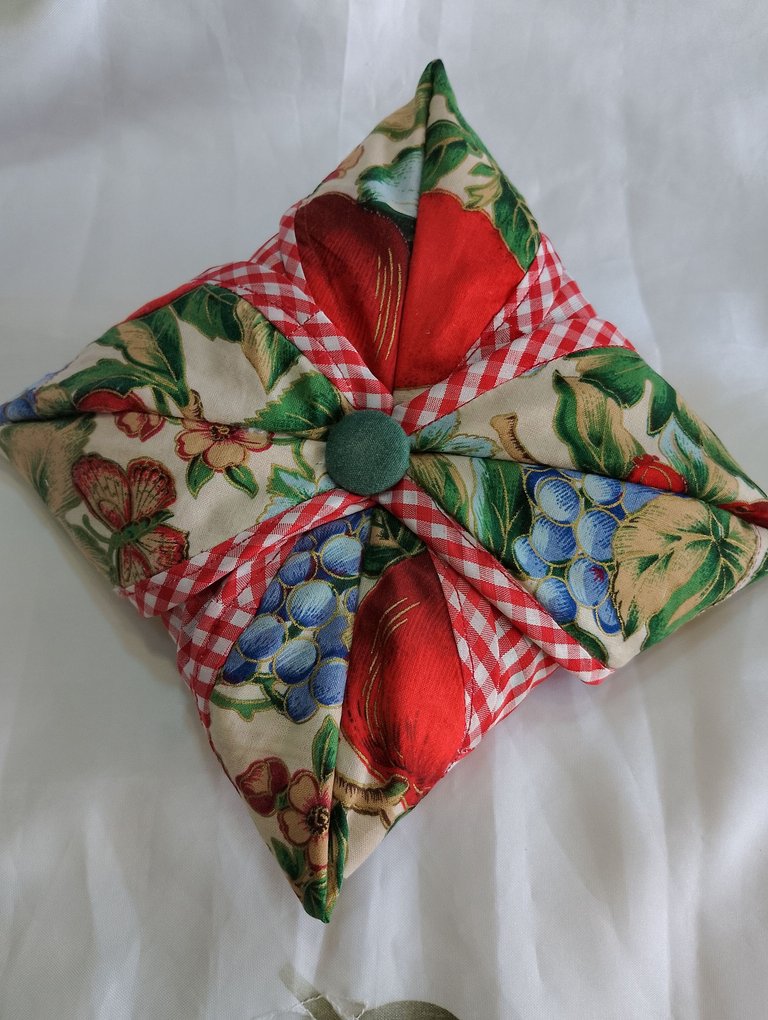
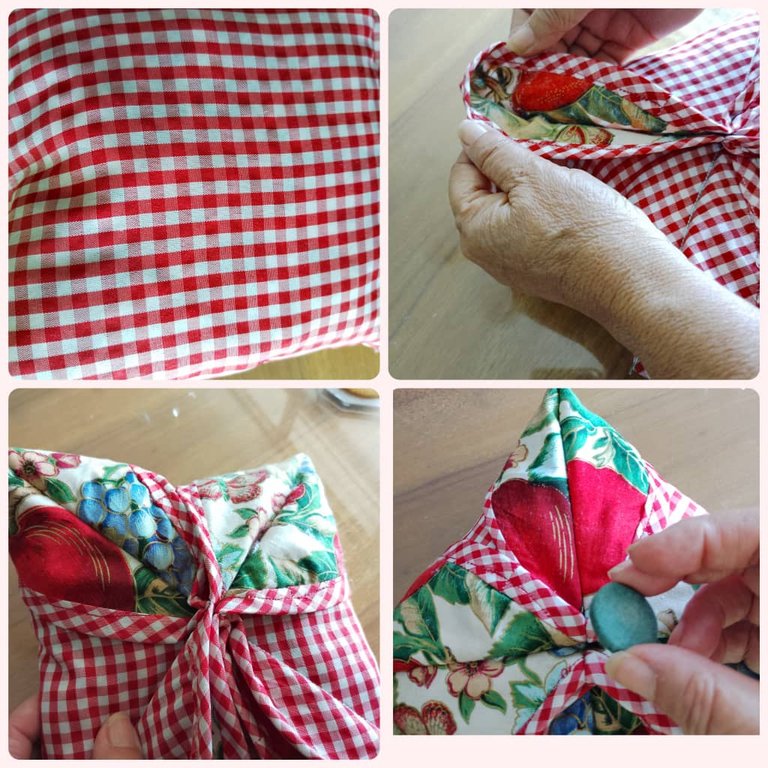
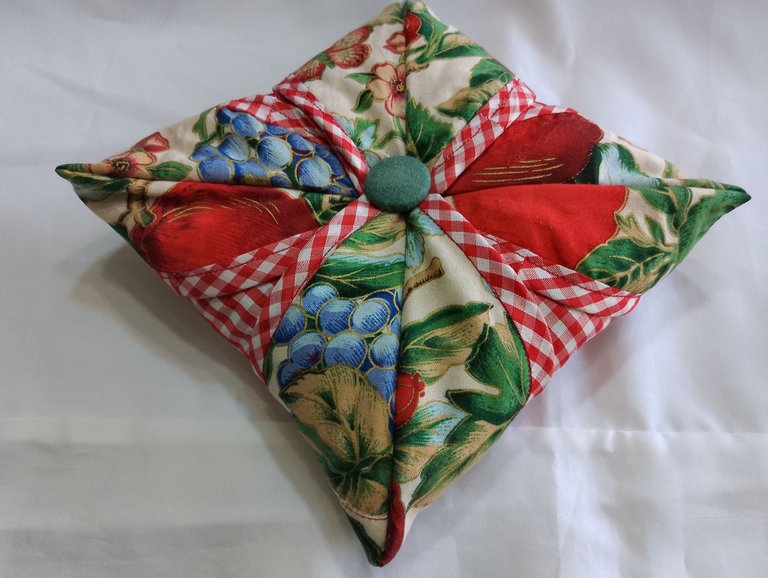
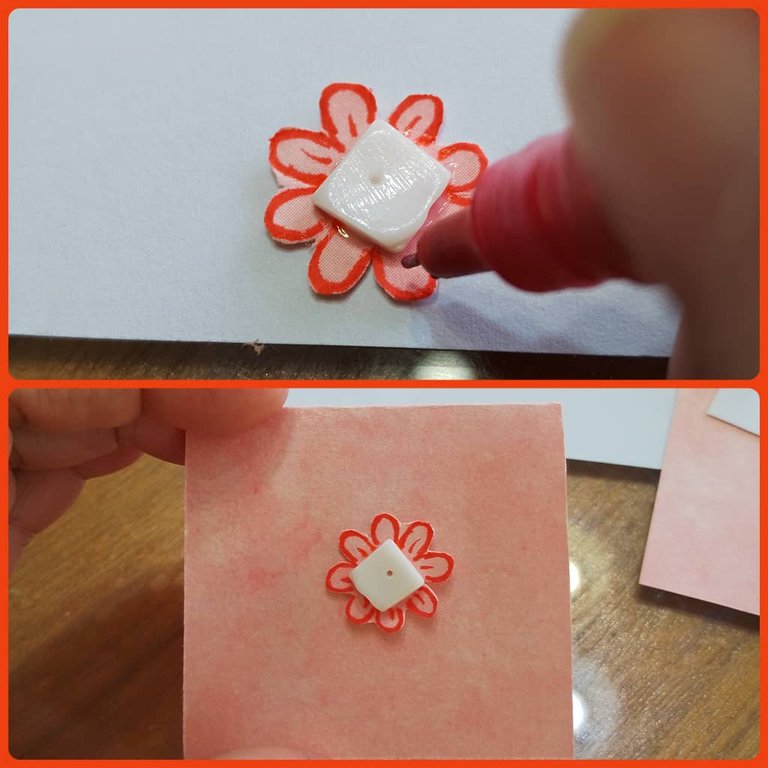
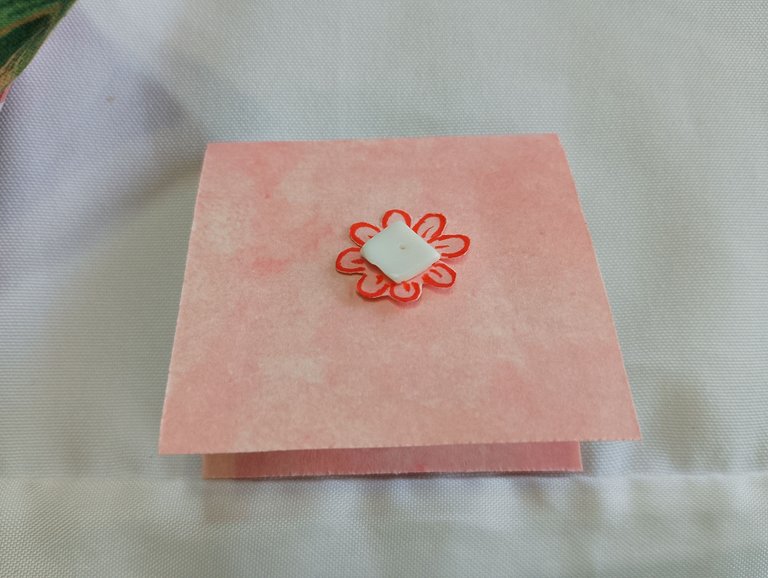
To finish, we fill the opening to our liking. When finished, we close the opening, then we turn the corners, and we can see how it has turned out. To finish, we place a button.
Para finalizar, rellenamos por la abertura a nuestro gusto. Al terminar, cerramos la abertura, seguidamente volteamos las esquinas, y vamos viendo cómo ha quedado. Para terminar, le colocamos un botón.

Card Procedure:
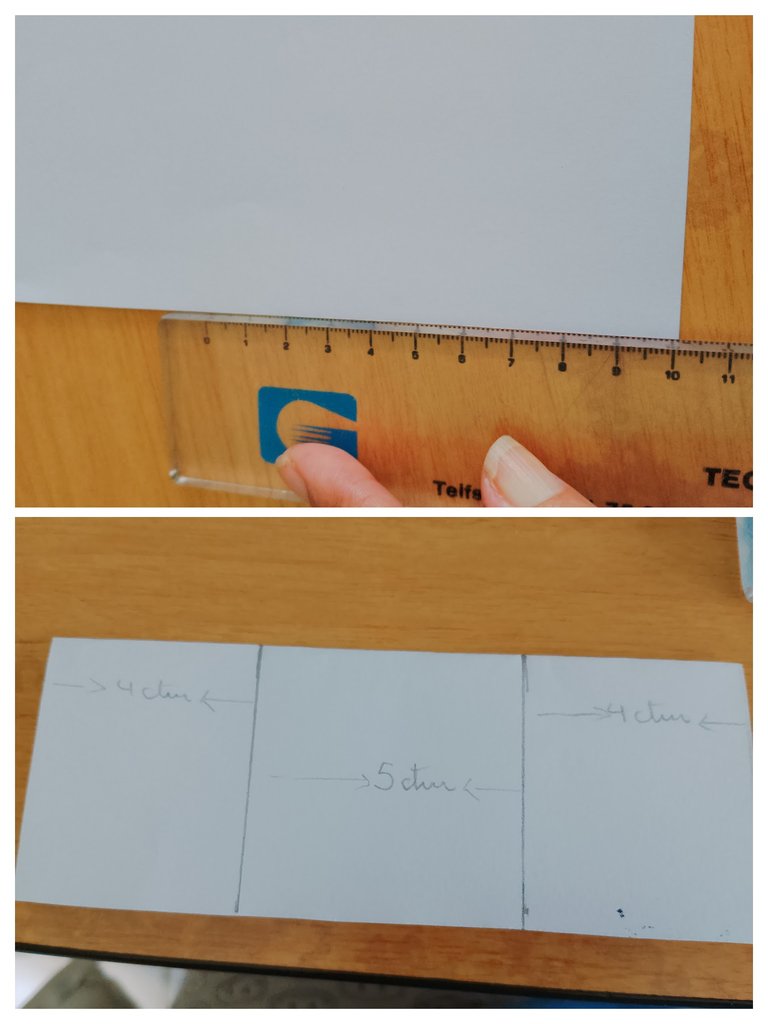
We cut the bond paper the measure is 10 high x 13 wide. Fold in half, then divide in three as follows: distribute the thirteen centimeters wide, four for both arms and five in the center.
Procedimiento De La Tarjeta:
Cortamos el papel bond la medida es 10 de alto x 13 de ancho. Doblamos por la mitad, luego dividimos en tres de la siguiente manera: repartimos los trece centímetros de ancho cuatro para ambos brazos y cinco en el centro.
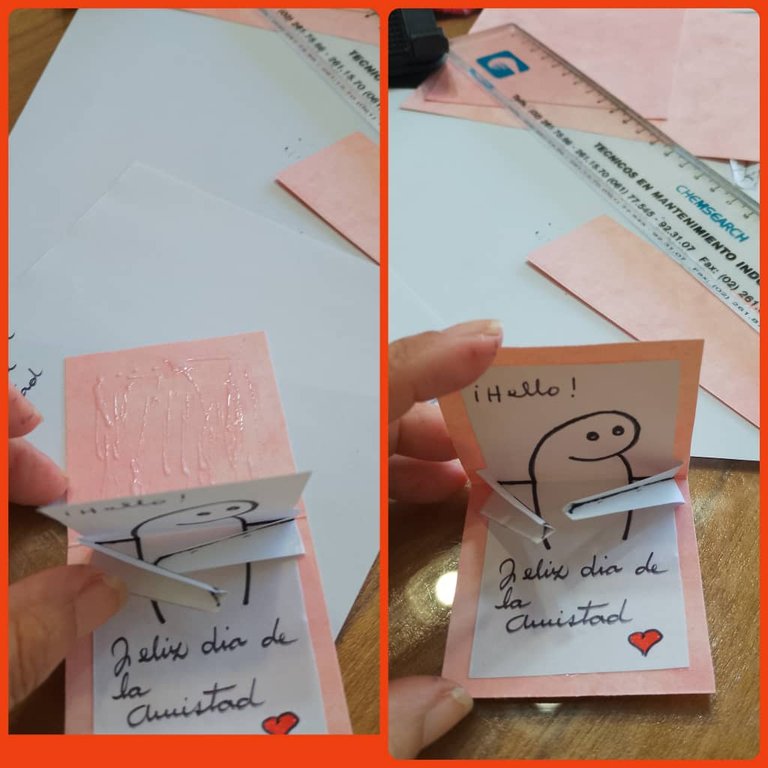
Then we make a diagonal line on both sides of the paper, and then cut out to see images. We open the paper and see the shape.
Luego hacemos una línea diagonal a ambos lados del papel, y luego recortamos para ver imágenes. Abrimos el papel y vemos la forma.
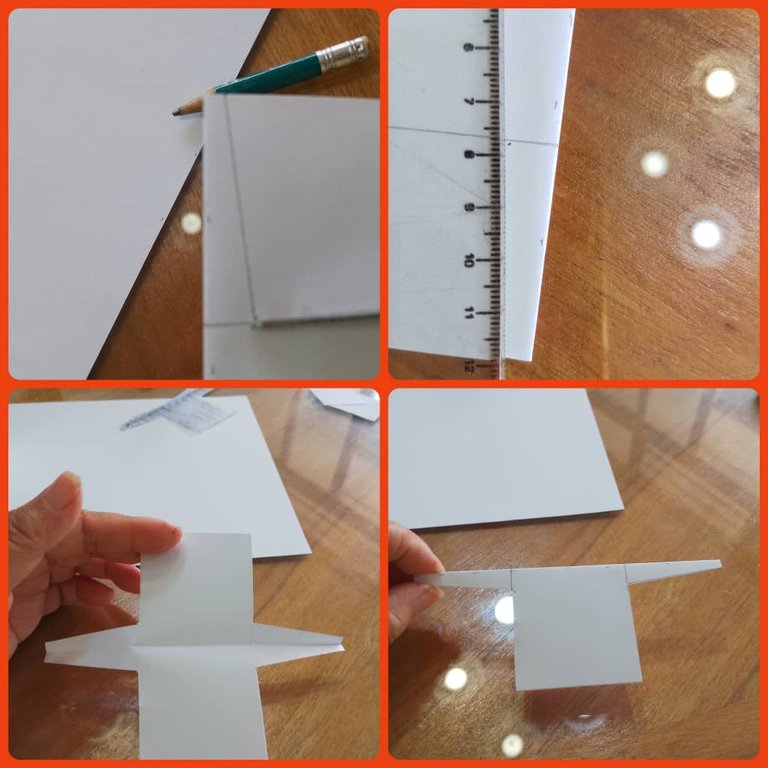
Now we fold the arms forward and then backward. Open and tuck the arms and fold the paper. Cut the cardboard to the size of the bond paper, see images.
Ahora doblamos los brazos hacia adelante y luego hacia atrás. Abrimos y metemos los brazos y doblamos el papel. Cortamos la cartulina adecuada al tamaño del papel bond, ver imágenes.

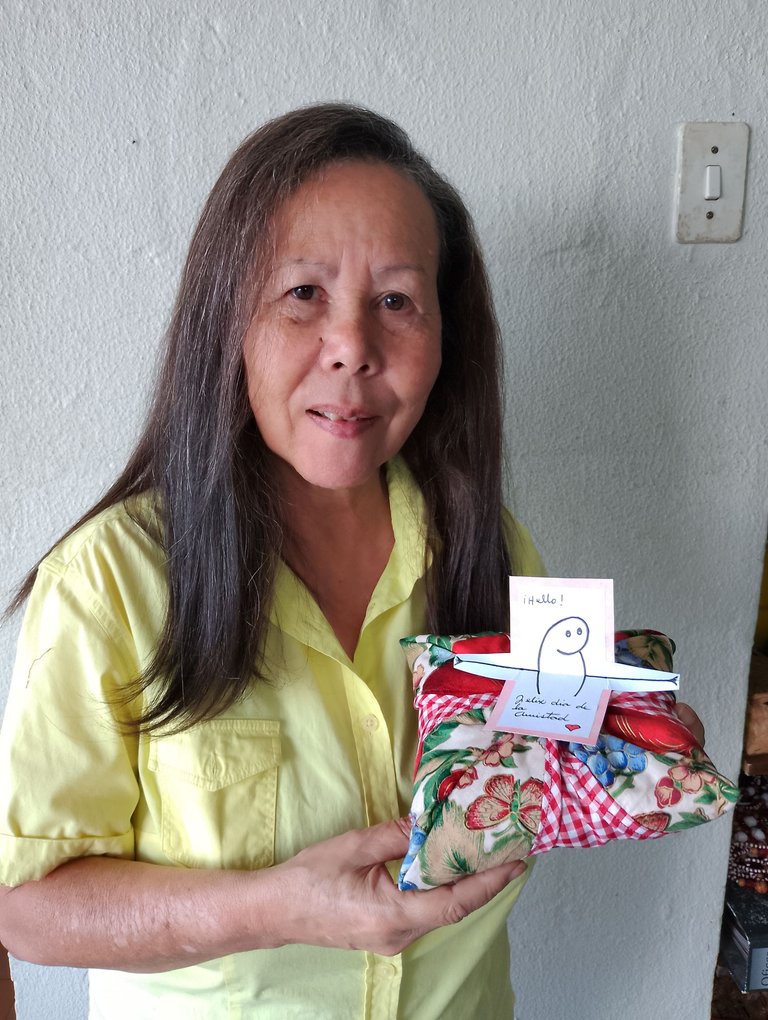
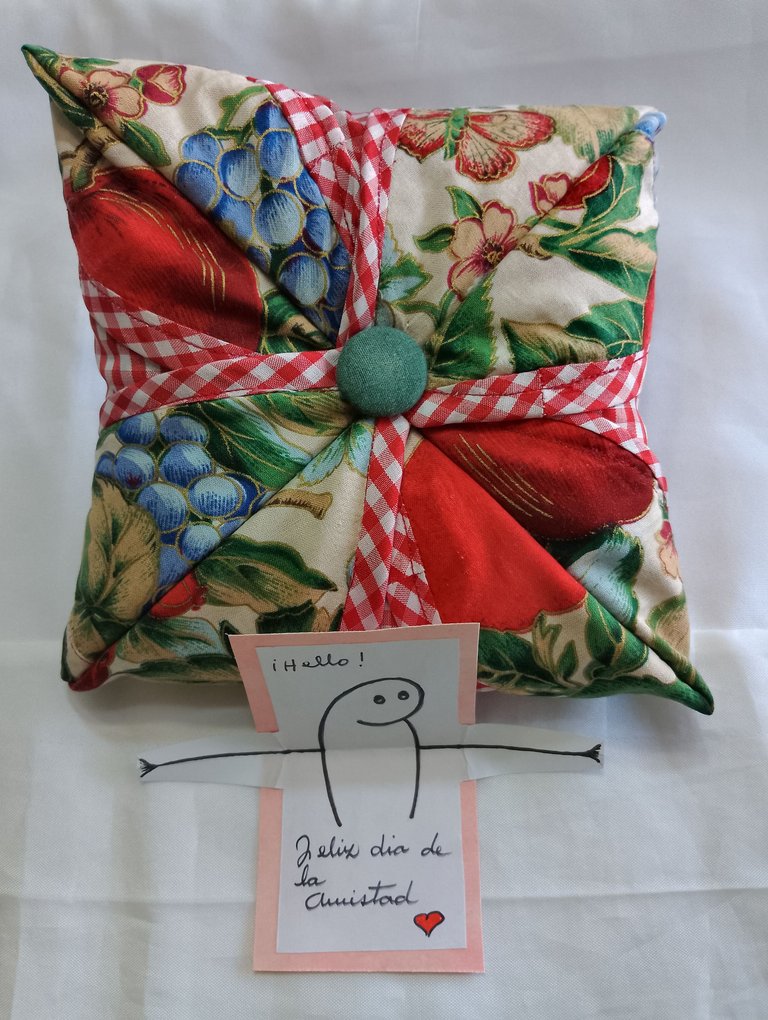
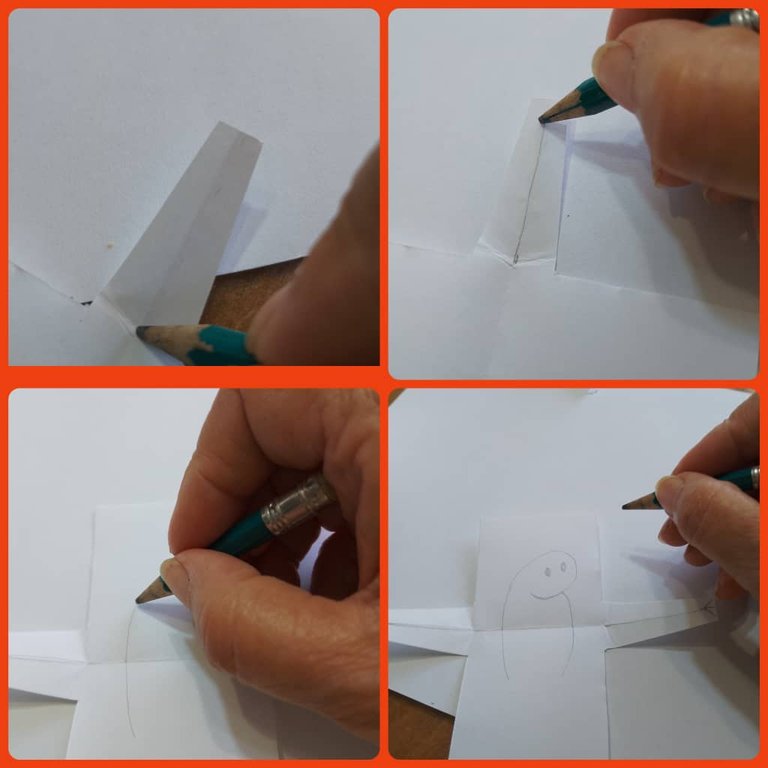
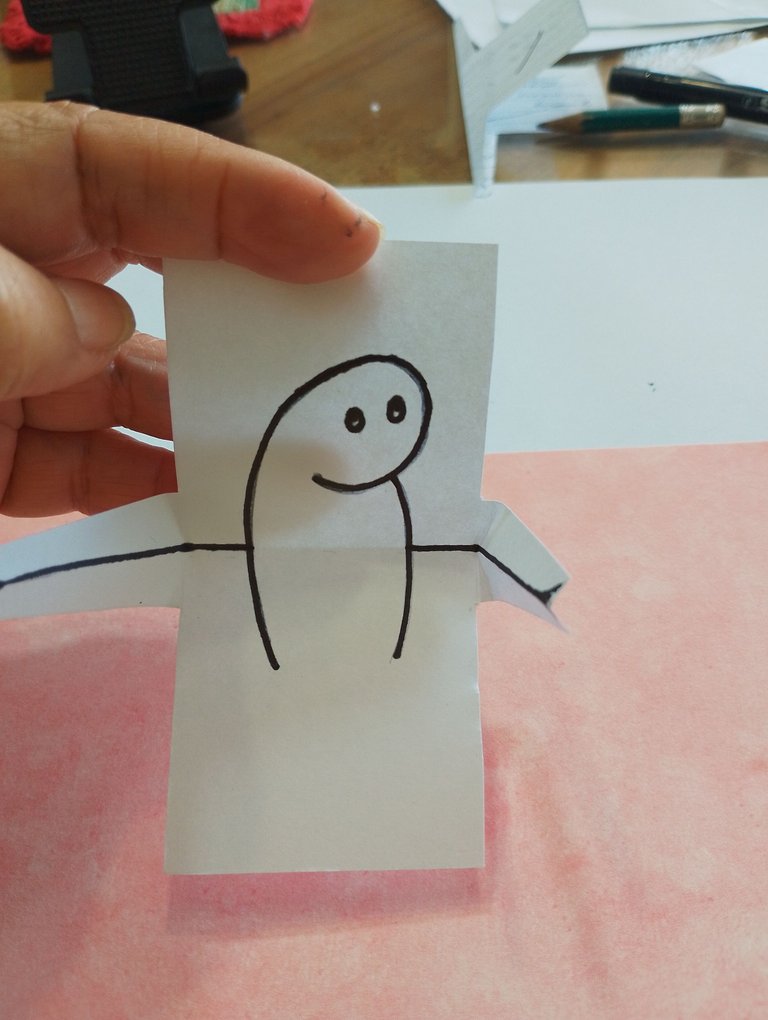
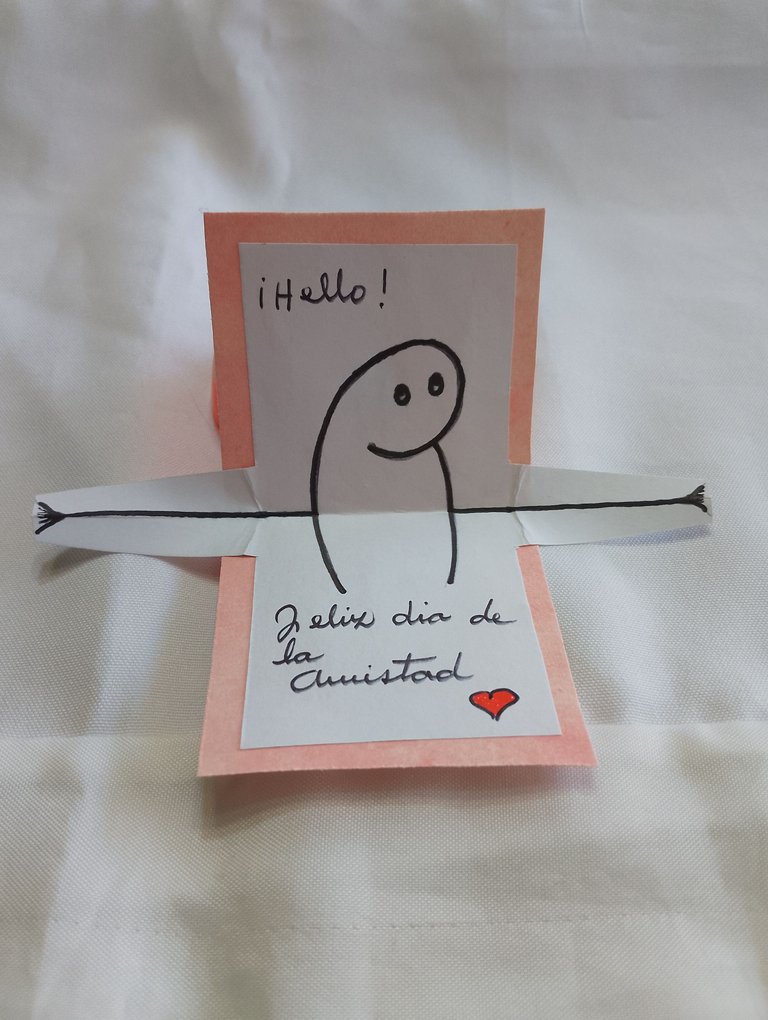
We draw the sticker, stick it to the cardboard, decorate it as we like and dedicate it. I wish you Happy Valentine's Day!
Dibujamos el sticker, y lo pegamos a la cartulina, adornamos a gusto y dedicamos. Les deseo ¡Feliz Día de San Valentin!

@lanoican, one of your Hive friends wishes you a Happy Valentine's day and asked us to give you a new badge!
To find out who wanted you to receive this special gift, click here!
You can view your badges on your board and compare yourself to others in the Ranking
Check out our last posts:
@hivebuzz Thank you very much and happy day to you.
Beautiful gift 🤗suoerb method of teaching to make it
@yousafharoonkhan Thank you very much, yes it is not so complicated to make it.
que bonito, está genial como quedo!
How nice, it's great how it looks!
@yasmarit Thank you friend for commenting, it was flirtatious.
Handmade gifts always carry a special touch, and using recycled materials makes this project even more meaningful. Great work.
@diyhub Thank you very much.
¡Felicitaciones!
1. Invierte en el PROYECTO ENTROPÍA y recibe ganancias semanalmente. Entra aquí para más información.
3. Suscríbete a nuestra COMUNIDADEntra aquí para más información sobre nuestro trail., apoya al trail de @Entropia y así podrás ganar recompensas de curación de forma automática.
4. Creación de cuentas nuevas de Hive aquí.
5. Visita nuestro canal de Youtube.
Atentamente
El equipo de curación del PROYECTO ENTROPÍA