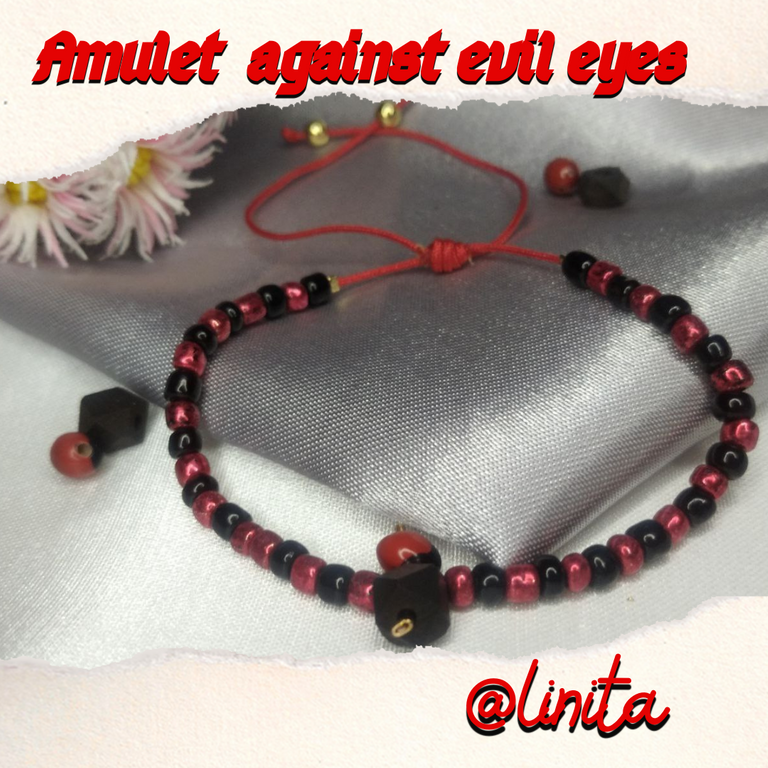
WELCOME TO MY BLOG
Since ancient times it has been said that there are people who have a heavy look, who transmit negativity and bad wishes even if they come with the best intentions, generating in the person who receives this bad energy, certain symptoms that include fever and headache, especially in children. These beliefs are ancestral and have passed from generation to generation. It is for this reason that many people resort to amulets to prevent these bad energies from reaching people vulnerable to these looks.
In many countries around the world, different amulets are used to ward off or prevent evil eyes from reaching the person to whom it is addressed. For example, in Turkey, the Eye of Horus is used, also known as the Turkish eye, which has also spread its use to other countries. In Venezuela, the amulet of protection that is used is a peony, which is nothing more than a seed that is not only used for this purpose, but also contains healing properties and jet which is a black stone that is used in many pieces of jewelry and that by putting both together, the protection of the wearer is much stronger.
About 8 years ago, we made a tour with my family through some villages in the State of Amazonas, in one of these villages we visited a market where you could see the manufacture and sale of many amulets with different types of stones and at the entrance of the market was the Shaman, who bought a piece passed through the site and the Shaman made you a prayer and with that prayer was activated the protection of the bracelet. To tell you the truth, I am somewhat incredulous about these matters but I know that there are many superstitious people who are believers and this is a culture that extends throughout the world.
Today, I want to show you what I learned years ago in that town of Amazonas, in the city of Puerto Ayacucho, which is the capital of the state and how these artisans willingly showed me how to make a bracelet for protection against the evil eye. I hope you like it.
BIENVENIDOS A MI BLOG
Desde tiempos muy remotos se ha dicho de que hay personas que tienen la mirada pesada, que transmiten negatividad y malos deseos así vengan con la mejor intención, generando en la persona que recibe esta mala energía, ciertos síntomas que incluyen fiebre y dolor de cabeza, sobre todo en los niños. Estas creencias son ancestrales y han pasado de generación en generación. Es por este motivo que muchas personas recurren a amuletos para evitar que estas malas energías lleguen a las personas vulneraBles a estas miradas.
En muchos países del mundo, se utilizan diferentes amuletos para alejar o evitar que los malos ojos lleguen a la persona a quien va dirigida. Por ejemplo, en Turquía, es utilizado Ojo de Horus, también conocido como el ojo turco, que también se ha extendido su uso a otros países. En Venezuela, el amuleto de protección que se utiliza es una peonía, que no es más que una semilla que no sólo es utilizada para este fin, sino que también contiene propiedades curativas y el azabache que es una piedra negra que se emplea en muchas piezas de bisutería y que al juntar ambas, la protección de quien la porta es mucho más fuerte.
Hace 8 años aproximadamente, hicimos un tours con mi familia por algunos pueblos del Estado Amazonas, en uno de estos pueblos visitamos un mercado donde se podía ver la fabricación y venta de muchos amuletos con diferentes tipos de piedras, y en la entrada del mercado se encontraba el Chamán, quien comprara alguna pieza pasaba por el sitio y el Chamán le hacía una oración y con esa oración se activaba la protección de dicha pulsera. La verdad, soy algo incrédula sobre estos temas pero sé que hay muchas personas supersticiosas que son creyentes y esta es una cultura que se extiende a lo largo del mundo.
Hoy, quiero mostrarles lo que aprendí hace años en ese poblado de Amazonas, en la ciudad de Puerto Ayacucho, que es la capital del Estado y cómo estos artesanos de muy buena gana, me mostraron a elaborar una pulsera de protección para el mal de ojos. Espero les guste.
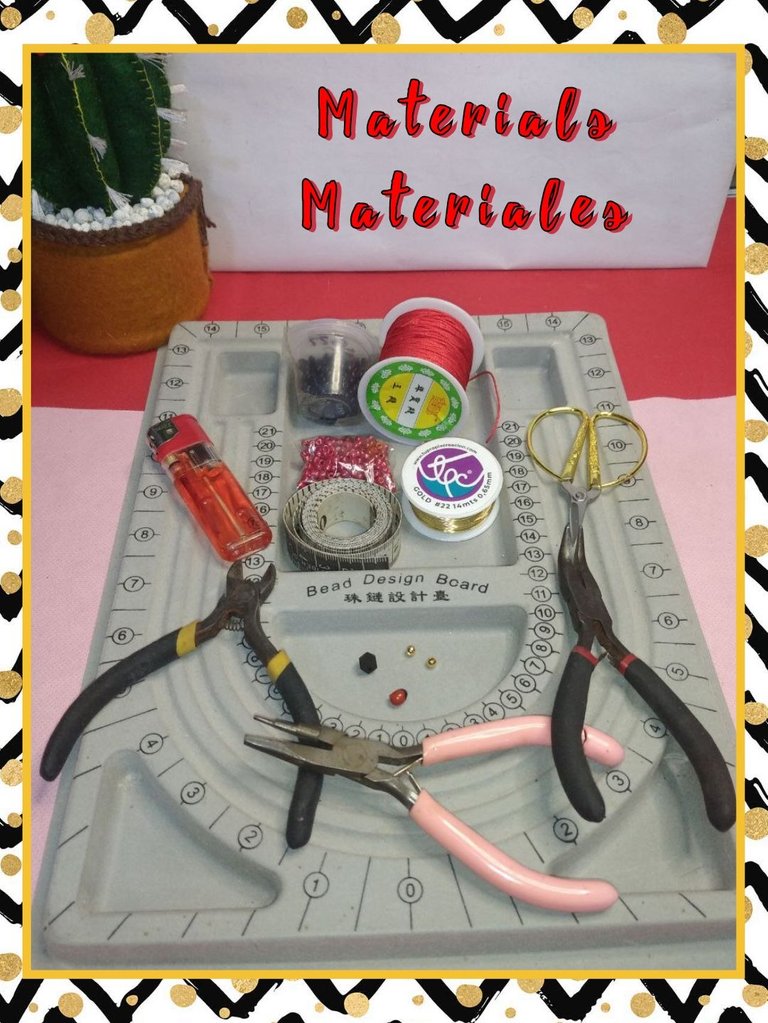
MATERIALS
Red Chinese thread
Peony seed
Jet
Mostachon (black and red)
Gold field pellets
Staples or plates
Wire #22
Jewelry design board
Tweezers (cutting, curved and conical)
Metal file
Tape measure
MATERIALES
Hilo chino color rojo
Semilla de peonía
Azabache
Mostachón (negro y rojo)
Balines de gold field
Grapas o chapas
Alambre #22
Tabla de diseño para bisutería
Pinzas (corte, curva y cónica)
Lima de metal
Cinta métrica
STEP BY STEP // PASO A PASO
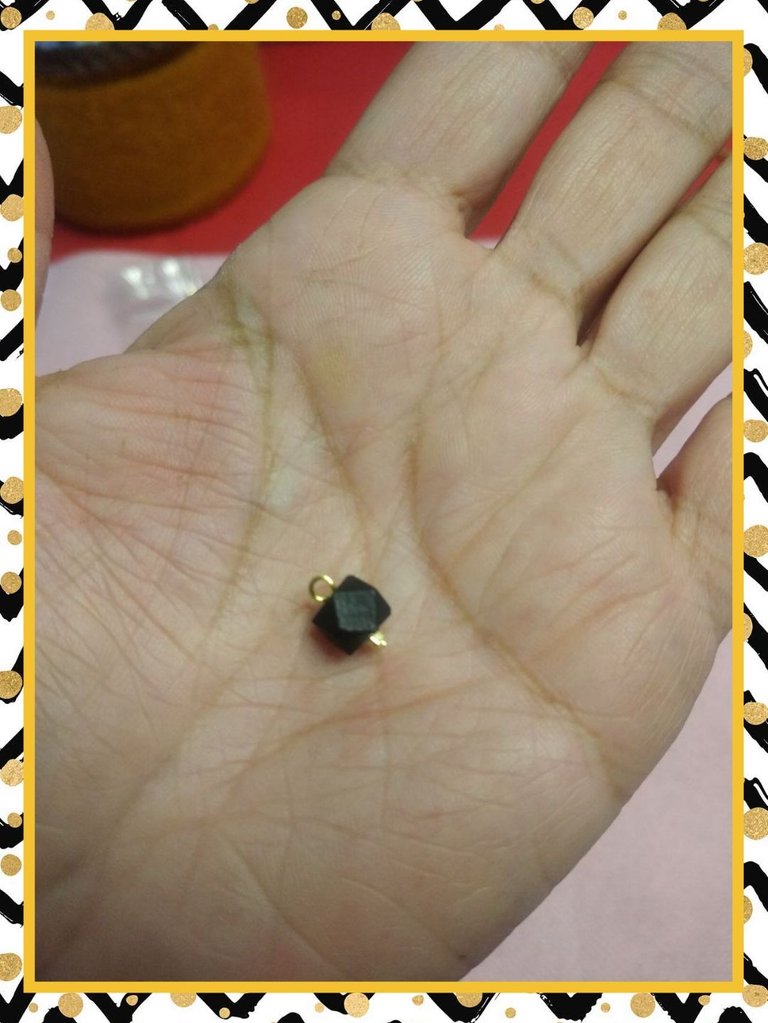
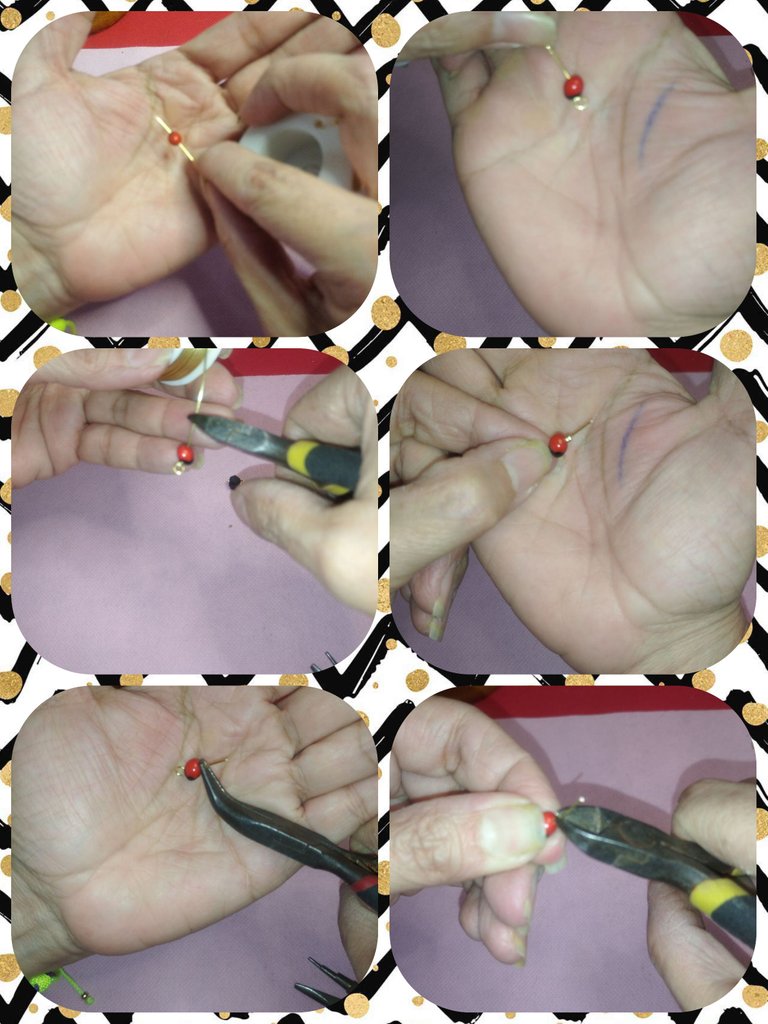
With the #22 wire we are going to crimp the jet and the peony. Take the wire and insert it through the hole in the piece. We place a clip at the tip and tighten it with the pliers to secure it and prevent the stone from coming out.
Con el alambre #22 vamos a engarzar el azabache y la peonía. Tomamos el alambre e introducimos por la perforación que tiene la pieza. Colocamos en la punta una grapa y apretamos bien fuerte con la pinza para asegurar y evitar que la piedra se salga.
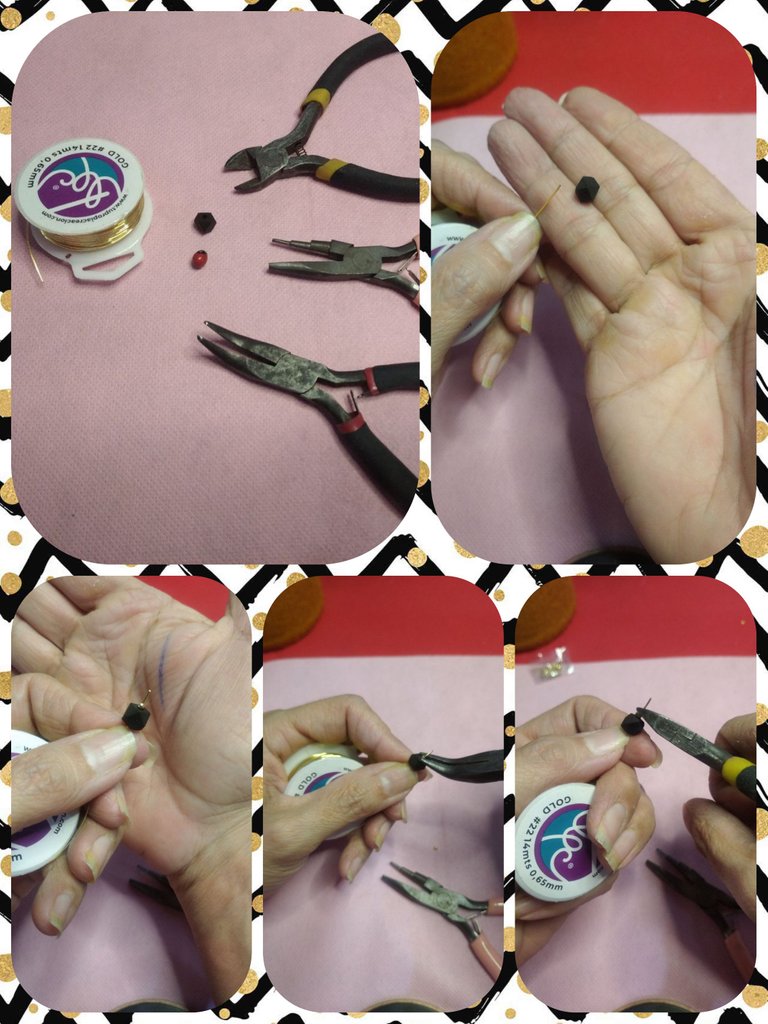
At the other end we cut 2 cm of wire and make a ring. We make a 90º bend and with the conical pin we make a ring. We cut the excess wire and with the metal sandpaper we eliminate the edge of the wire.
Por el otro extremo cortamos 2 cm de alambre y realizamos un aro. Hacemos un doblez de 90º y con la pín cónica realizamos un aro. cortamos el alambre sobrante y con la lija de metal eliminamos el filo del alambre.
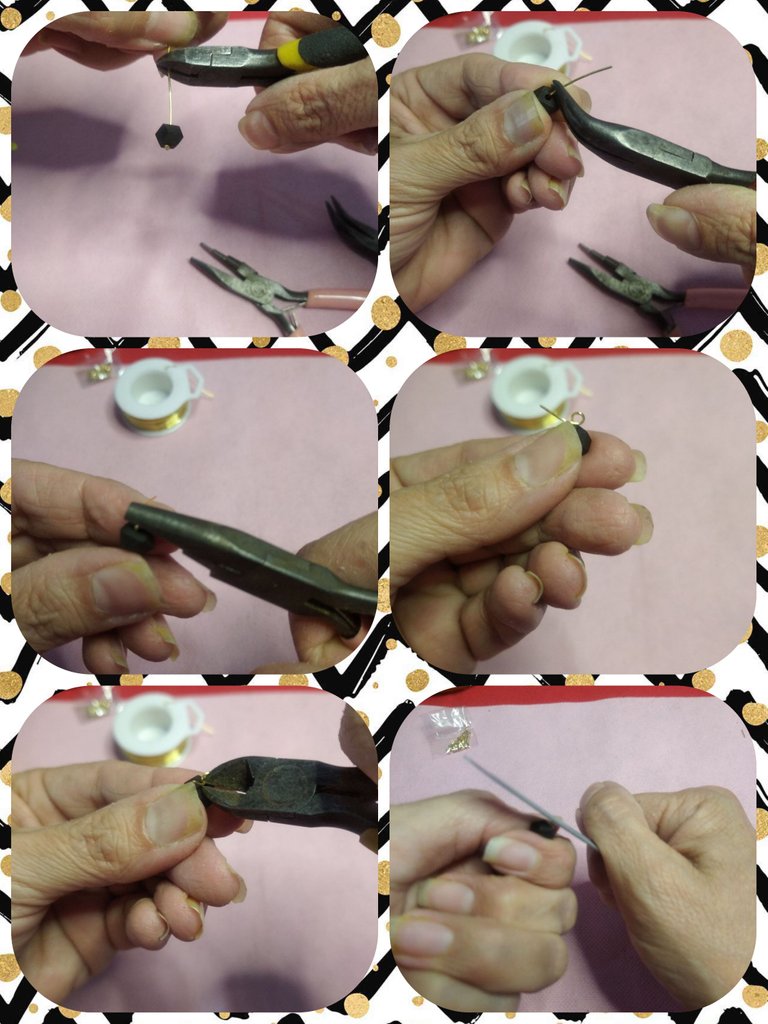
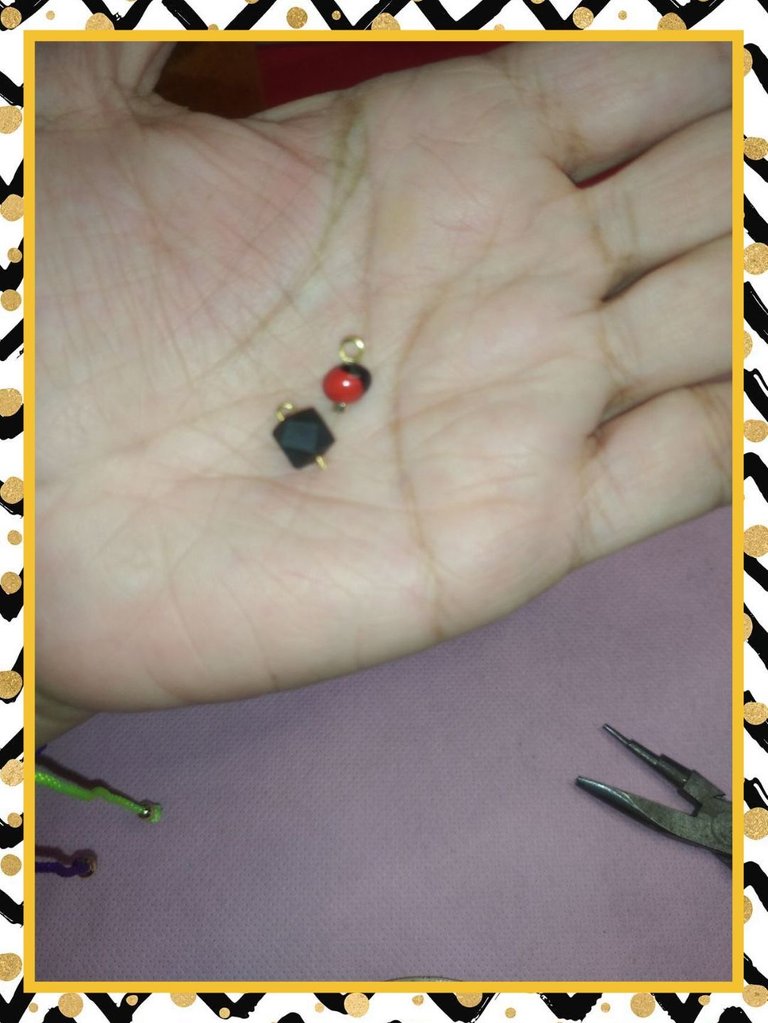
With the peony we perform the same procedure as with the jet. This can also be done starting with the ring and finish by placing the clip or plate at the end of the other end. We close tightly with the curved clamp and we have already crimped both pieces to start making the amulet.
Con la peonía realizamos el mismo procedimiento que con el azabache. Esto podemos hacerlo también comenzando con el aro y terminamos colocando la grapa o chapa al final del otro extremo. Cerramos fuerte con la pinza curva y ya tenemos engarzadas ambas piezas para comenzar a realizar el amuleto.
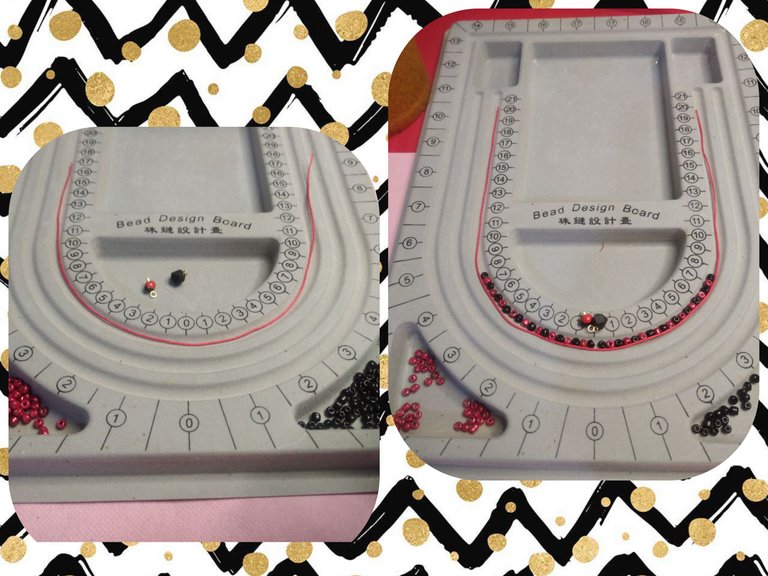
To make the bracelet we take the jewelry board and take the first curve to take the measurements and build the structure of how we want the stones to go. This table facilitates this process because once we have already formed the design we only have to pass it to the thread.
The first thing to do is to cut the thread. This is a bracelet for an adult and 35 cm of thread is required. We measure from the center to reach 50% of the measurement on one side and the other 50% on the opposite side.
Para realizar la pulsera tomamos la tabla de bisutería y tomamos la primera curva para tomar las medidas armar la estructura de cómo queremos que vayan las piedras. Esta tabla facilita este proceso porque una vez que ya tenemos formado el diseño sólo tenemos que pasarlo al hilo.
Lo primero es cortar el hilo. Esta es una pulsera para un adulto y se requieren 35 cm de hilo. Medimos desde el centro hasta llegar al 50% de la medida de un lado y el otro 50% del lado contrario.
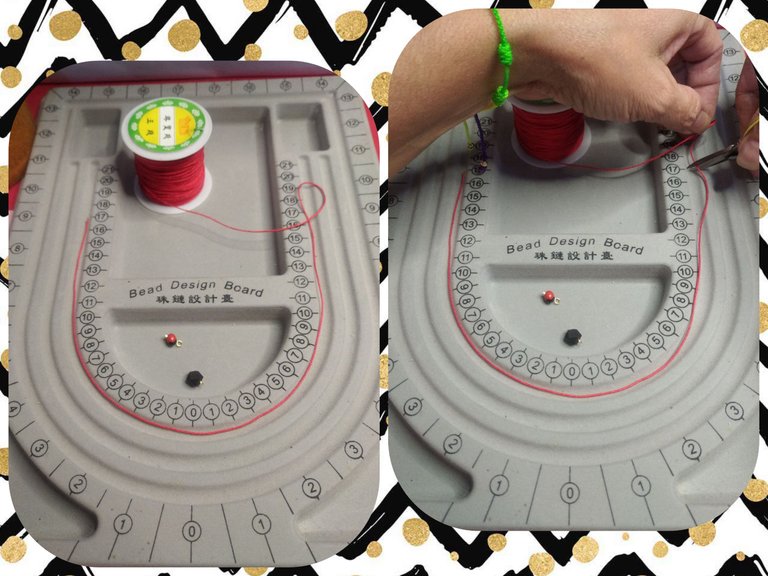
In the trays that we have at the bottom we put the mustachons to facilitate the activity and take the ones we need to form the bracelet quickly. We place one mustachon of each color in between, one red and one black, until we reach 8 cm on each side, to complete 16 cm, which would be the standard measurement of an adult wrist.
En las bandejas que tenemos en la parte inferior echamos los mostachones para facilitar la actividad y tomar las que necesitamos para formar la pulsera con rapidez. Colocamos un mostachón de cada color intercalado, uno rojo y uno negro, hasta llegar a 8 cm de cada lado, para completar 16 cm que sería la medida estándar de una muñeca de adulto.
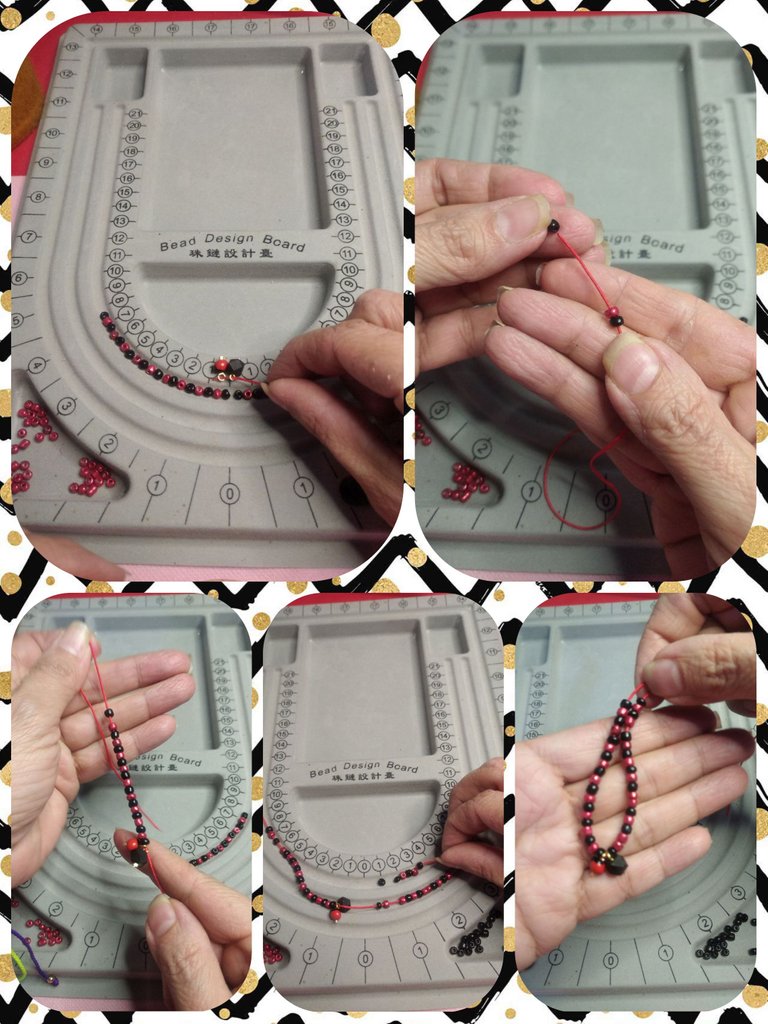
Once the design is done, we begin to assemble it. We start by introducing the peony and the jet. Then on each side we place the mustaches as we formed it on the board.
Una vez hecho el diseño comenzamos a armarlo. Comenzamos introduciendo la peonía y el azabache. Luego de cada lado colocamos los mostachones tal cual lo formamos en la tabla.
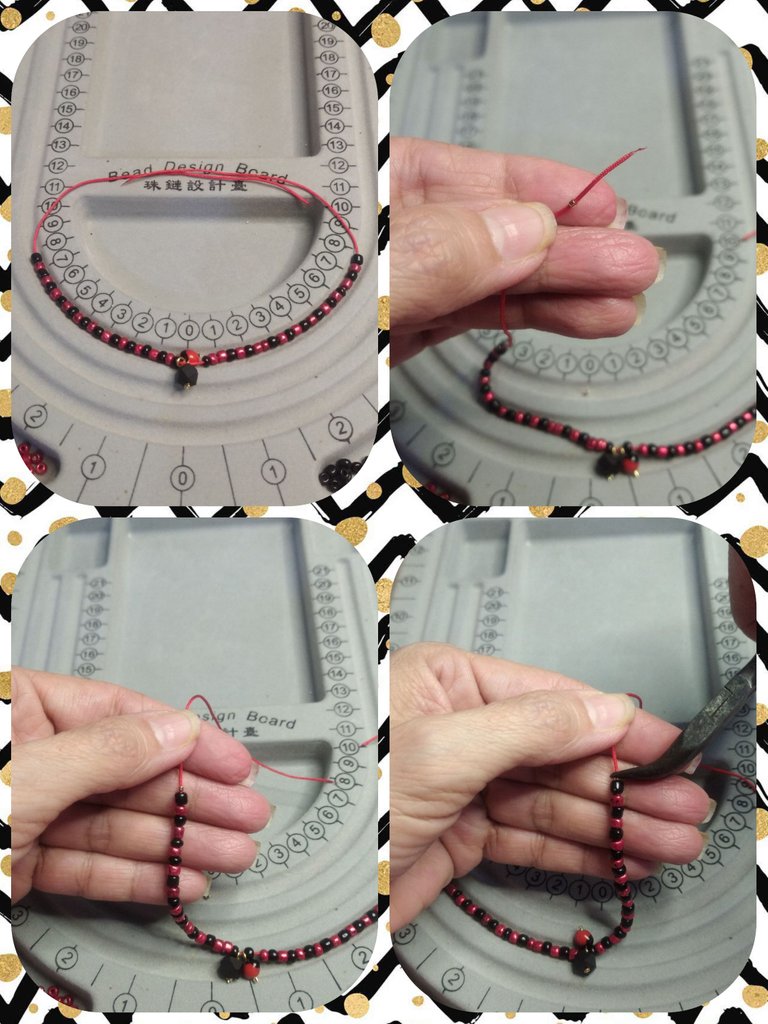
Once the bracelet is formed, place a clamp at each end to prevent the bracelets from falling or rolling off. Adjust and tighten with the curved clamp.
Ya formada la pulsera colocaremos una grapa en cada extremo para evitar que se caigan o rueden los mostachones. Ajustamos y apretamos con la pinza curva.
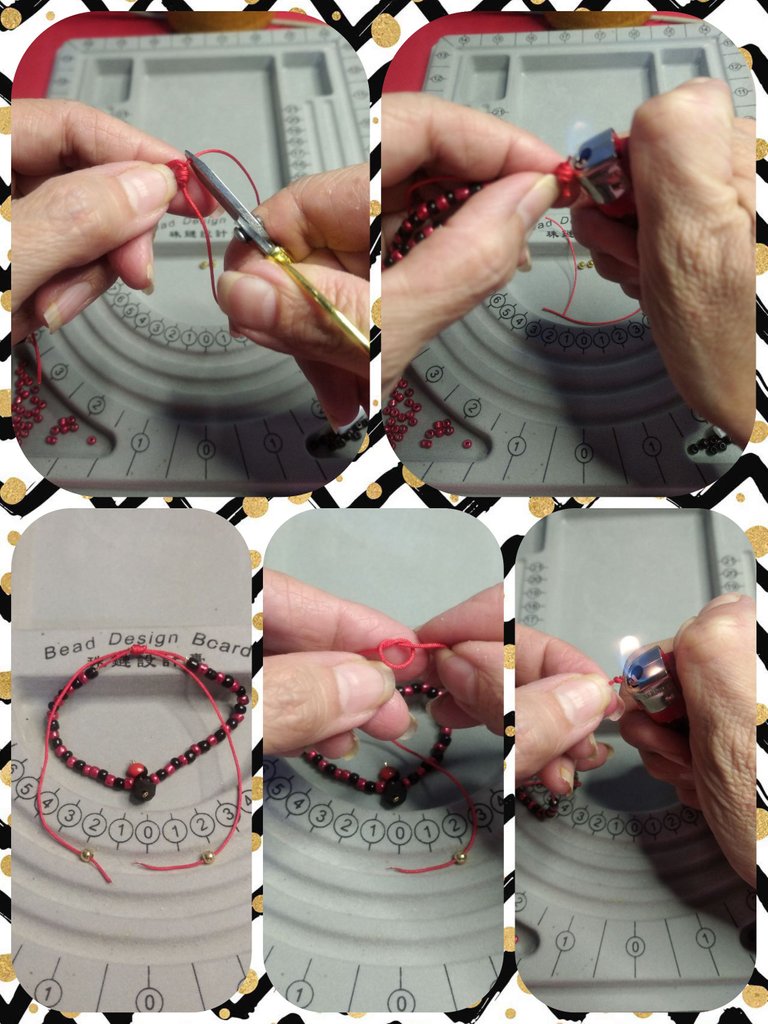
To make the insurance, we will make the Franciscan knot, taking a 15 cm strand of Chinese thread and a piece of straw. We join both threads of the bracelet and place the straw on top. Then we make 6 turns from the outside to the inside and introduce the thread inside the straw. We take out the straw and pull both threads to form the Franciscan knot.
Cut the excess threads of the Franciscan knot and seal with the lighter.
Para realizar el seguro, haremos el nudo franciscano, tomando una hebra de hilo chino de 15 cm y un trozo de pitillo o popote. Unimos ambos hilos de la pulsera y colocamos el popote encima. Luego realizamos 6 vueltas de afuera hacia dentro e introducimos el hilo por dentro del popote. Sacamos el popote y halamos ambos hilos hasta formar el nudo franciscano.
Cortamos los hilos sobrantes del nudo franciscano y sellamos con el encendedor.
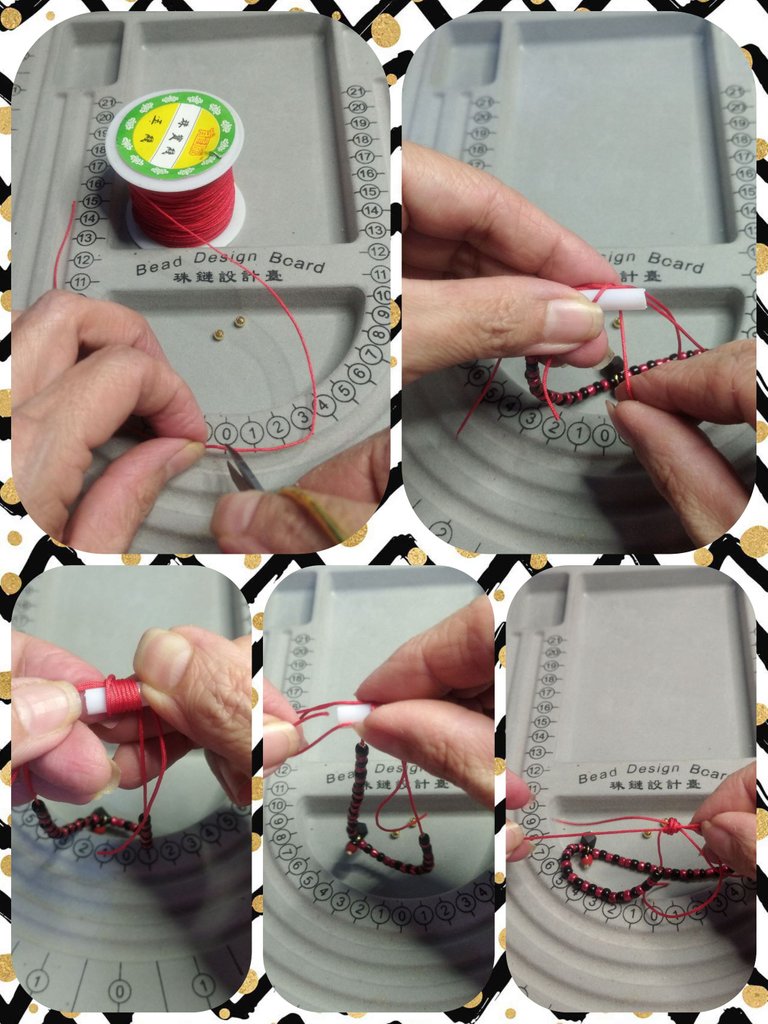
And finally, we place a gold field ball on each end of the strands. This is an adjustable bracelet. The Franciscan knot facilitates the movement of the strands of the bracelet to adjust them to the size of the wrist.
Y para finalizar, colocamos en cada extremo de los hilos un balin de gold field. Esta es una pulsera ajustable. El nudo franciscano facilita el movimiento de los hilos de la pulsera para ajustarlos al tamaño de la muñeca.
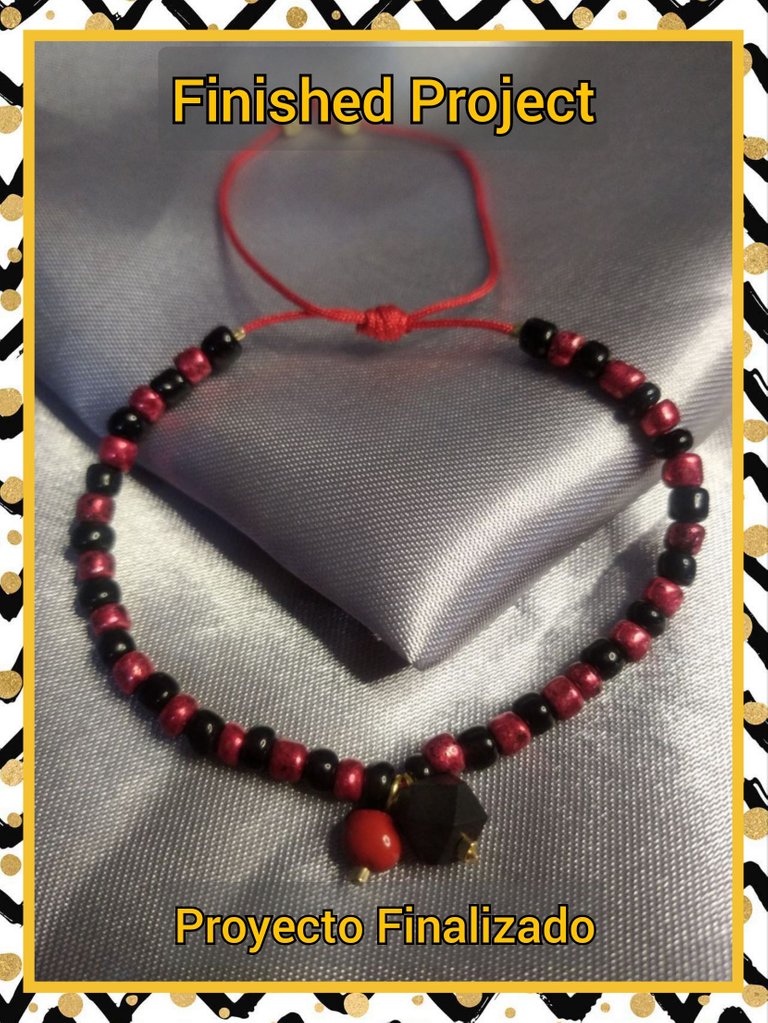
FINISHED PROJECT
In this way a protection bracelet or amulet for the evil eye is made. Although many of us are non-believers, these are teachings that are part of the culture and popular beliefs of our countries or regions. Knowledge is a fundamental tool for the personal, intellectual and spiritual growth of human beings. See you next time.
PROYECTO FINALIZADO
De esta forma se realiza una pulsera de protección o amuleto para el mal de ojos. Estos son aprendizajes que aunque muchas personas no somos creyentes, son parte de la cultura y creencias populares de nuestros países o regiones. El conocimiento es una herramienta fundamental para el crecimiento personal, intelectual y espiritual de los seres humanos. Nos vemos en la próxima.
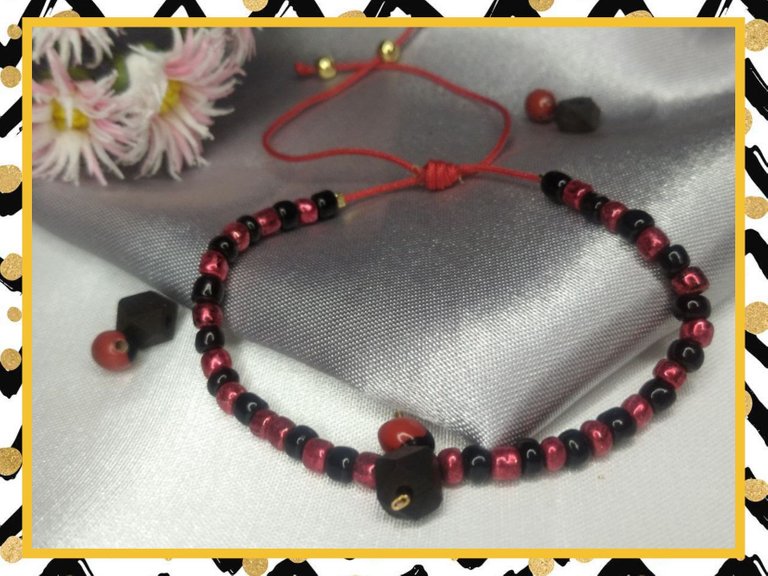
Todas las fotos son de mi autoría, tomadas con mi teléfono POCO M3
Para la edición de las fotos y separadores utilicé Polish
Utilicé https://translate.google.com para la traducción
Para la edición de las fotos y separadores utilicé Polish
Utilicé https://translate.google.com para la traducción

!discovery 25
!diy
This post was shared and voted inside the discord by the curators team of discovery-it
Join our community! hive-193212
Discovery-it is also a Witness, vote for us here
Delegate to us for passive income. Check our 80% fee-back Program
Thank you for sharing this post in the DIYHUB Community!
Your content got selected by our fellow curator stevenson7 & you just received a little thank you upvote from us for your great work! Your post will be featured in one of our recurring compilations which are aiming to offer you a stage to widen your audience within the DIY scene of Hive. Stay creative & HIVE ON!
Please vote for our hive witness <3
The rewards earned on this comment will go directly to the people( @creacioneslelys ) sharing the post on Twitter as long as they are registered with @poshtoken. Sign up at https://hiveposh.com.