WELCOME TO MY BLOG
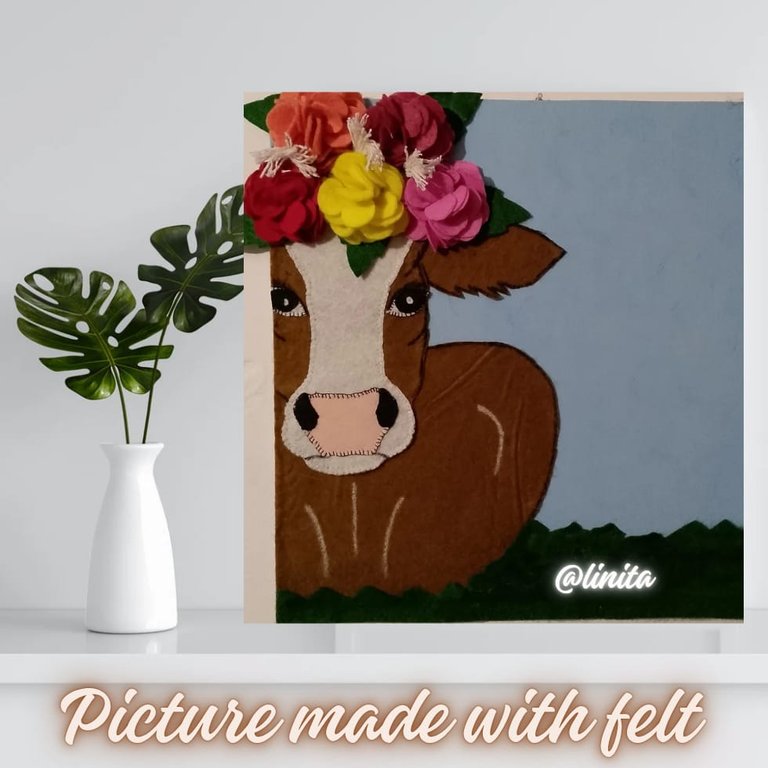
Hello, hello, hello! Greetings, my friends at DiyHub. It's a pleasure to greet you again. I'm very happy to be back with more of my little creations. This time, I'll share a painting I made at the request of one of my dearest nieces. She's currently studying veterinary medicine but loves livestock farming. A few days ago, she asked me to make her a painting and sent me an image of how she wanted it. But due to a lack of paints, I asked her if she'd like it made with felt, and she said yes.
So, I got to work and began gathering all the materials I would use, and once completed, I began making it. Below, I'll detail the step-by-step instructions. I hope you like it. Let's begin!
BIENVENIDOS A MI BLOG
¡Buenas, buenas, buenas! Saludos mis amigos de DiyHub. Un gusto saludarles nuevamente. Yo muy feliz de volver con más de mis pequeñas creaciones. En esta oportunidad les compartiré un cuadro que realicé a solicitud de una de mis sobrinas más querida. Actualmente está realizando estudios en veterinaria pero ama el ramo de la ganadería. Hace unos días me pidió que le realizara un cuadro y me envió una imagende cómo lo quería, pero por falta de pinturas, le pregunté si le gustaría que se lo hiciera con fieltros y me dijo que si.
Asi que me puse manos a la obra y comencé a recolectar todos los materiales que utilizaría y una vez completados, comencé a realizarlo. A continuación les detallo el paso a paso. Espero les guste. ¡Comencemos!
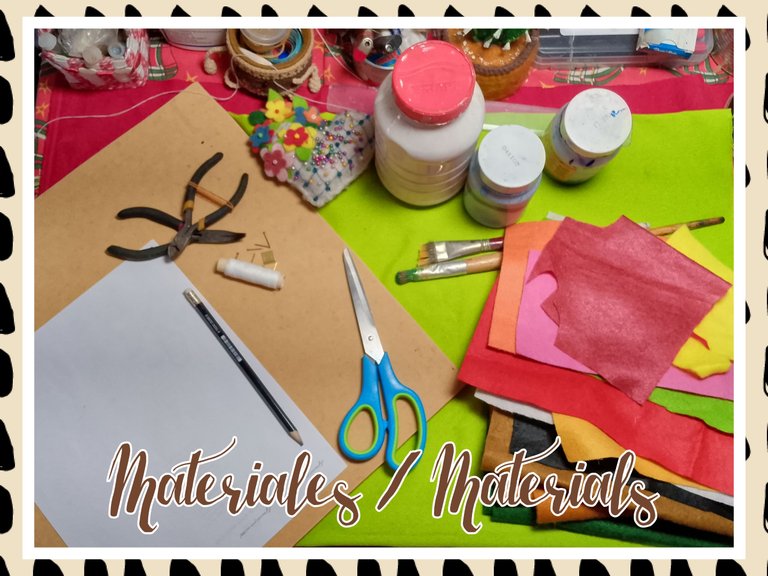
MATERIALS
- Sheets of paper
- Graphite pencil
- MDF (16 x 16 inches)
- 180 and 220 grit sandpaper
- Cold-pressed paints
- White rubber paint
- Paintbrushes
- Felt, assorted colors
- Scissors
- Cold silicone
- White wick
- Black and white markers
- Flower and leaf pattern
- Sewing needle and thread
- Pins
- Wooden nails
- Hook
- Hammer
- Pliers
MATERIALES
- Hojas de papel
- Lápiz de grafito
- Mdf 40 x 40 cm
- Lijas #180 y #220
- Pinturas al frio
- Pintura blanca caucho
- Pinceles
- Fieltro, colores variados
- Tijera
- Silicón frío
- Hilo pabilo blanco
- Marcadores negro y blanco
- Patrón de flor y hoja
- Aguja e hilo de coser
- Alfileres
- Clavos de madera
- Gancho de marquetería
- Martillo
- Pinzas
STEP BY STEP // PASO A PASO
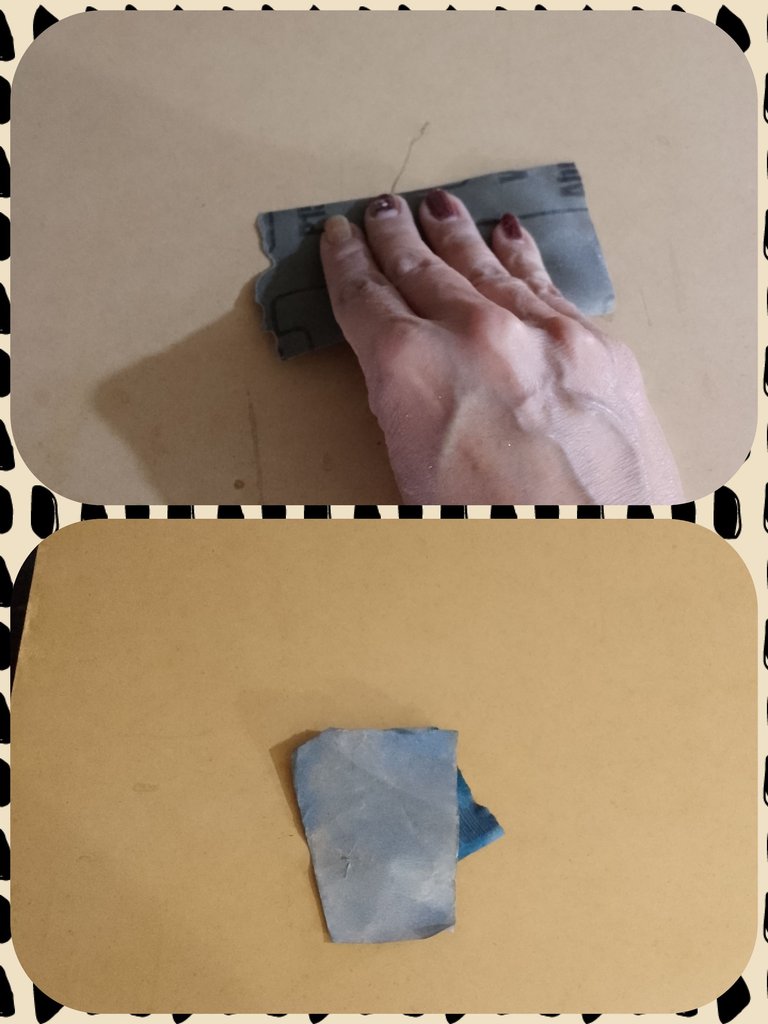
- We start by sanding the MDF with #180 sandpaper to remove residue, and then we sand it with #220 sandpaper to smooth the surface.
- Comenzamos trabajando el mdf con la lija #180, para eliminar residuos y luego pasamos la #220 para alisar la superficie.
- We apply a coat of white rubber paint on both sides of the MDF and let it dry well.
- Aplicamos una capa de pintura blanca de caucho por ambos lados del mdf y dejamos secar bien.
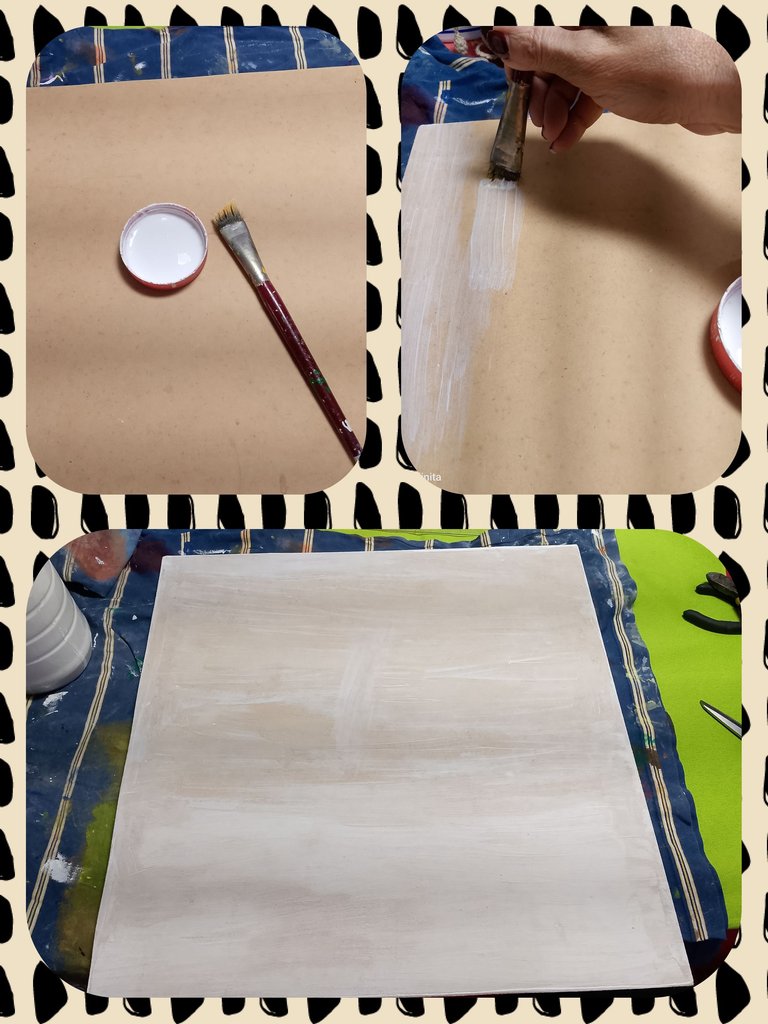
- Once dry, we sand with 220-grade sandpaper to remove excess paint and smooth the surface. This layer of paint prevents the absorption of the cold paint we will apply next.
- Una vez seca, pasamos la lija #220 para eliminar el exceso de pintura y alisar la superficie. Esta capa de pintura evita la absorción de la pintura al frío que aplicaremos a continuación.
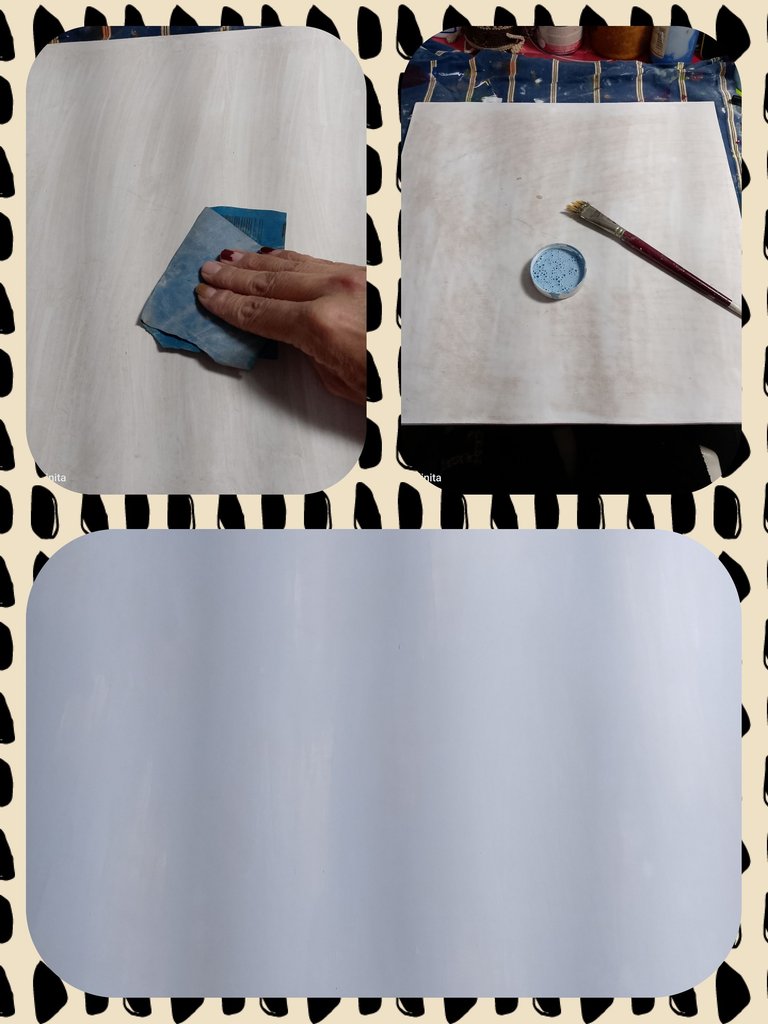
Once dry, we sand with 220-grade sandpaper to remove excess paint and smooth the surface. This coat of paint prevents the absorption of the cold-weather paint we'll apply next.
Next, we apply two coats of cold-weather sky blue paint, allowing it to dry thoroughly between each coat.
Una vez seca, pasamos la lija #220 para eliminar el exceso de pintura y alisar la superficie. Esta capa de pintura evita la absorción de la pintura al frío que aplicaremos a continuación.
Seguidamente aplicamos dos capas de pintura al frío azul cielo, dejando secar bien tre cada capa.
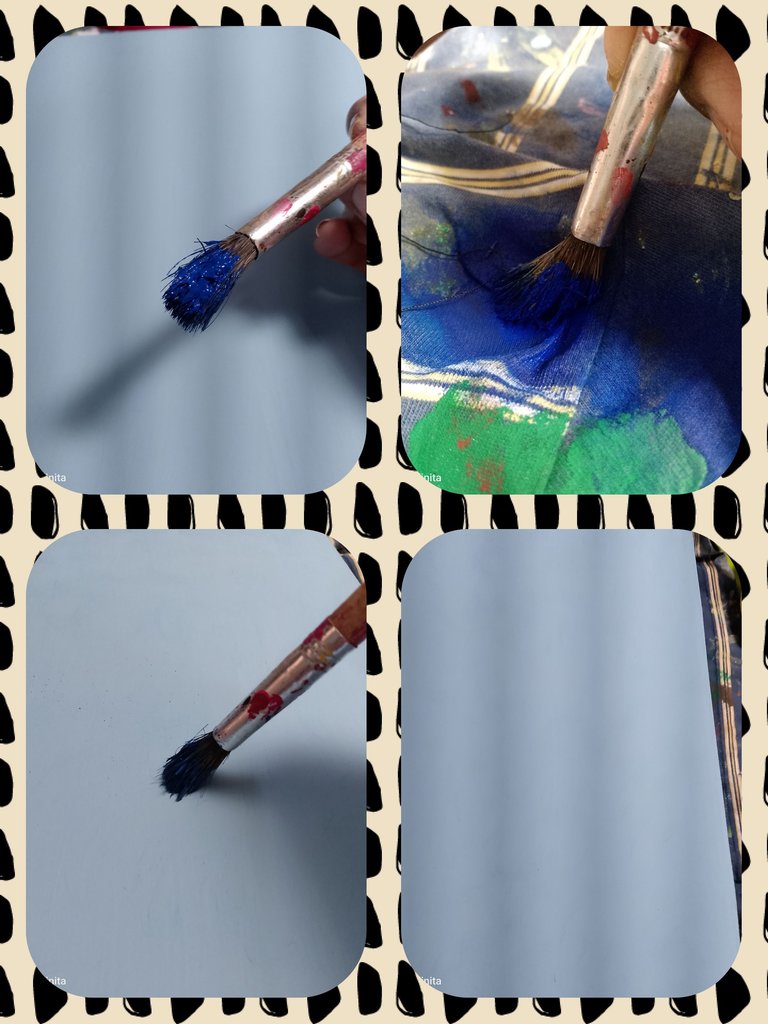
- Now we are going to blend with the round brush as follows: Wet the brush in the paint, then remove the excess on a cloth and then make circular movements on the surface.
- Ahora vamos a difuminar con el pincel redondo de la siguiente manera: Humedecemos el pincel en la pintura,luego retiramos el exceso sobre una tela y luego realizamos movimientos circulares sobre la superficie.
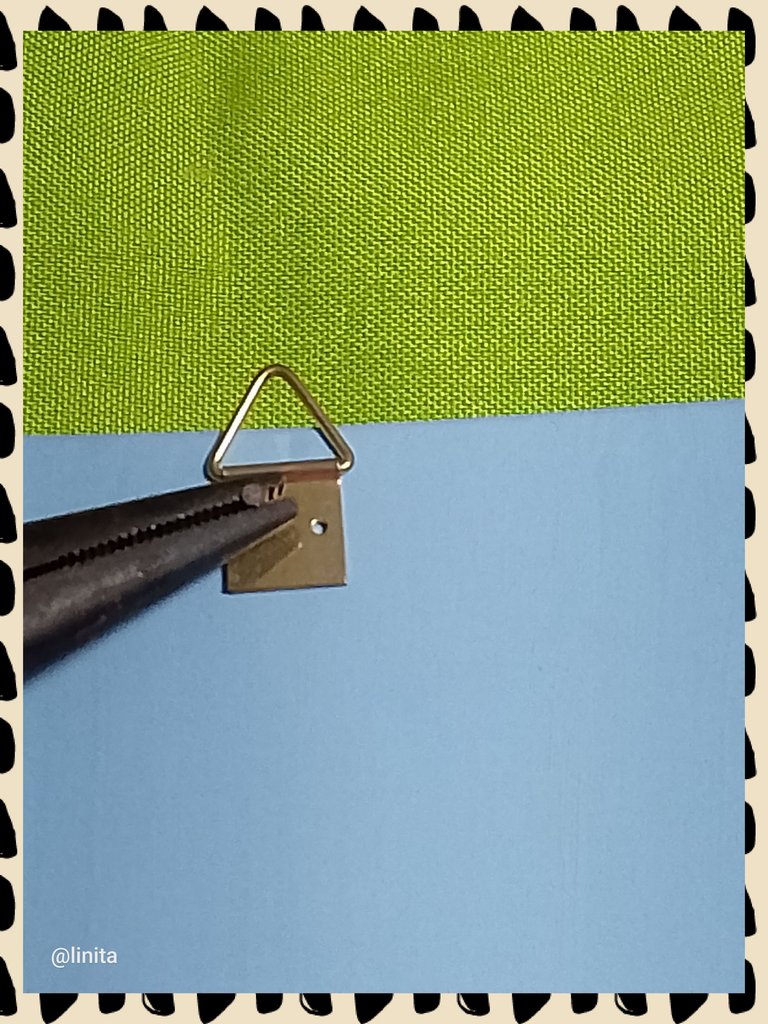
- On the back of the MDF piece, we'll attach the marquetry hook, in the top center. We'll use the flat pliers and the hammer to help.
- Por la parte trasera de la pieza de mdf vamos a colocar el gancho de marquetería, en la parte superior central. Nos ayudamos con la pinza plana y el martillo.
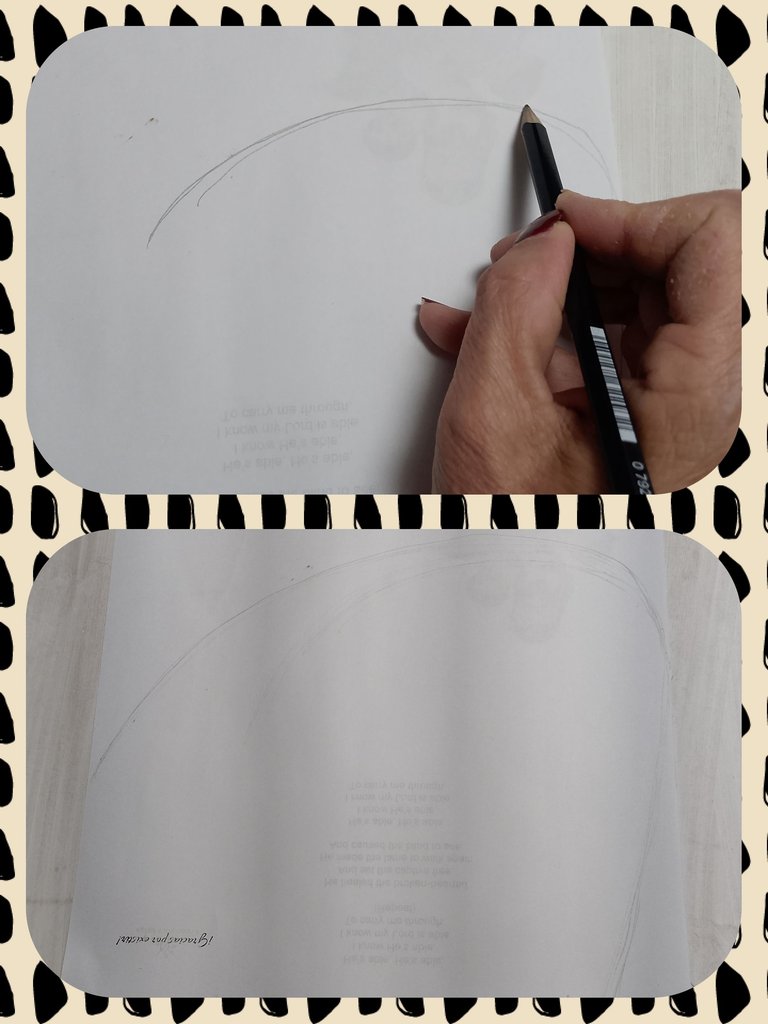
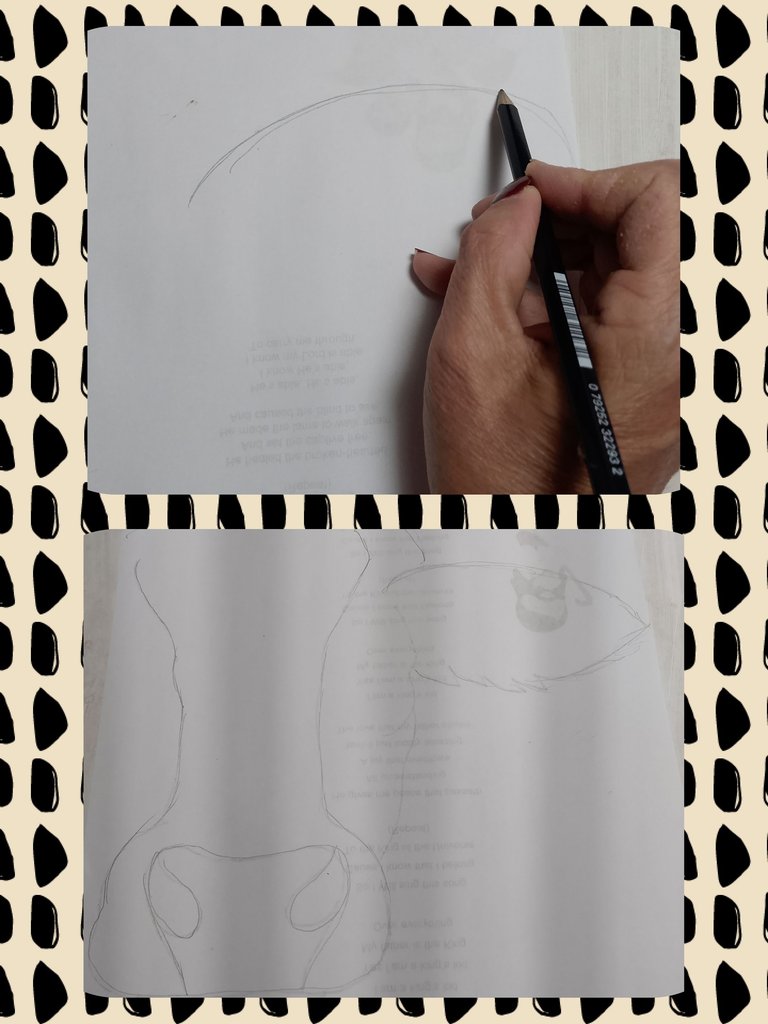
- Using the model image my niece sent me, I created the pattern for the cow, which is the protagonist of this painting.
- Con la imagen modelo que me envió mi sobrina, realicé el patrón de la vaca, que es la protagonista de este cuadro.

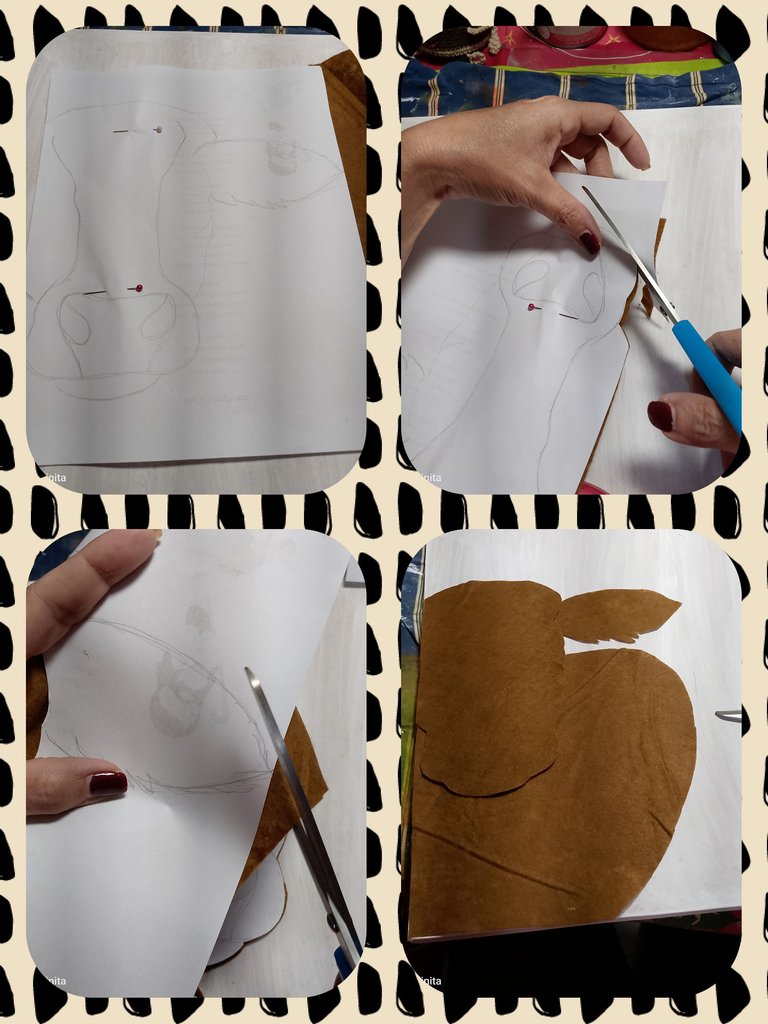
- Next, we transfer each part to the piece of felt, until we have them all.
- A continuación traferimos cada parte a la ´pieza de fieltro, hasta tenerlas todas.
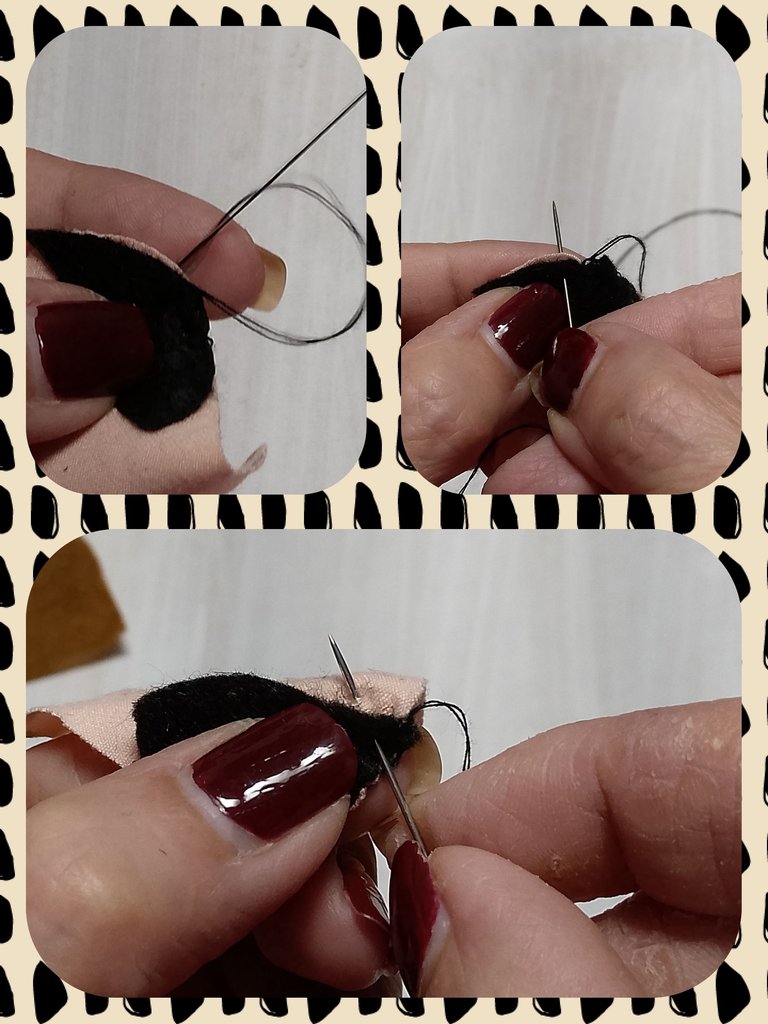
Now we are going to join the pieces with needle and thread to form the cow, starting with the snout, which we are going to join with the forehead area of the cow.
Ahora vamos a unir con aguja e hilo las piezas para formar la vaca, comenzando con el hocico, que vamos a unir con la zona de la frente de la vaca.
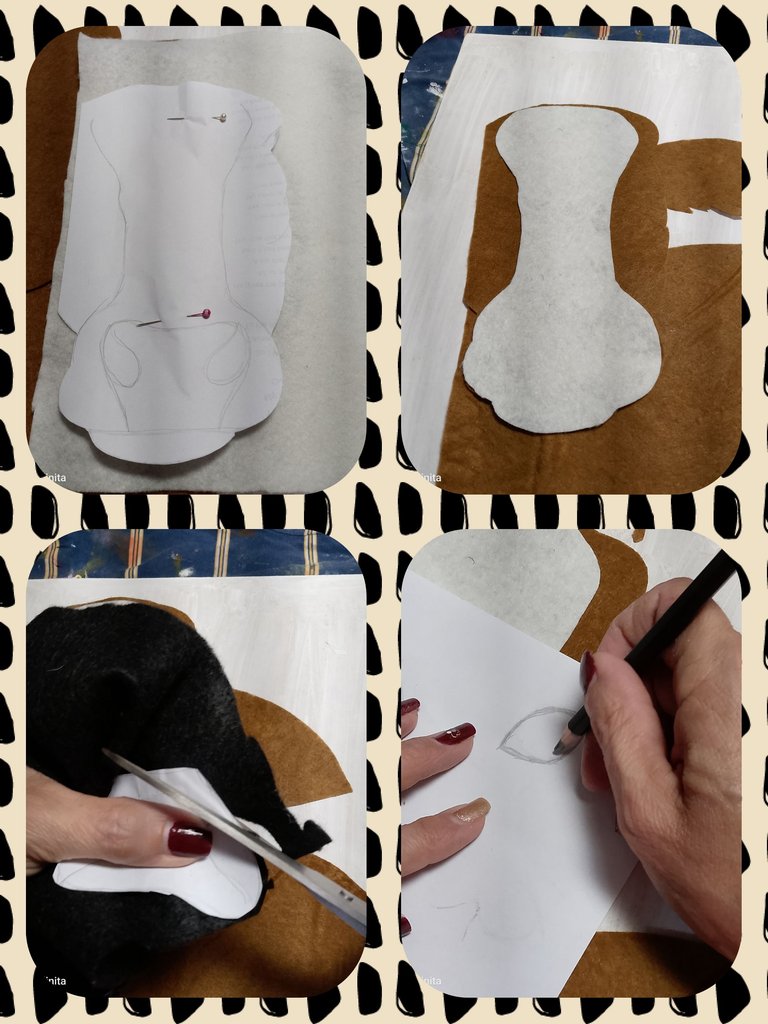
- We make the eyes and sew to join the pieces, then we transfer them to the cow's head that we have made in brown felt.
- Realizamos los ojos y cosemos para unir las piezas, luego los transferimos a la cabeza de la vaca que hemos realizadp en fieltro marrón.
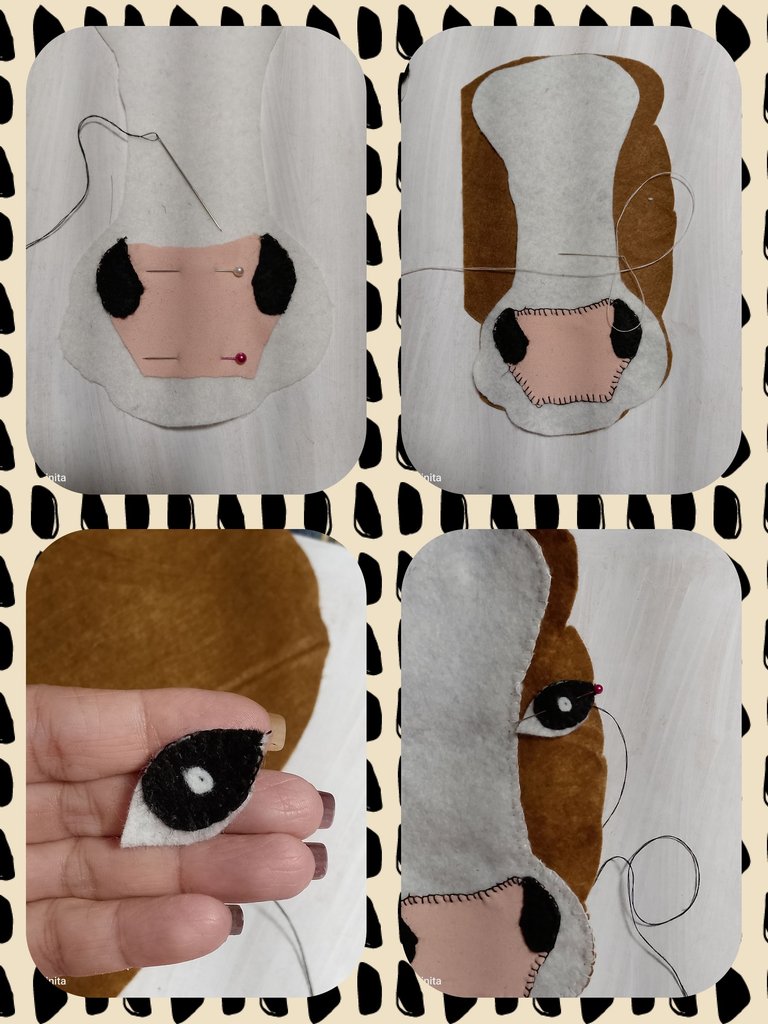
- Using a black marker, we'll outline the contours of the cow's body and ears. Using the white chalk marker, we'll mark the divisions of the cow's hips.
- Con un marcador negro vamos a delinear el contorno del cuerpo de la vaca y las orejas. Y con el marcador blanco tiza, realizaremos las divisiones de los cuadriles de la vaca.
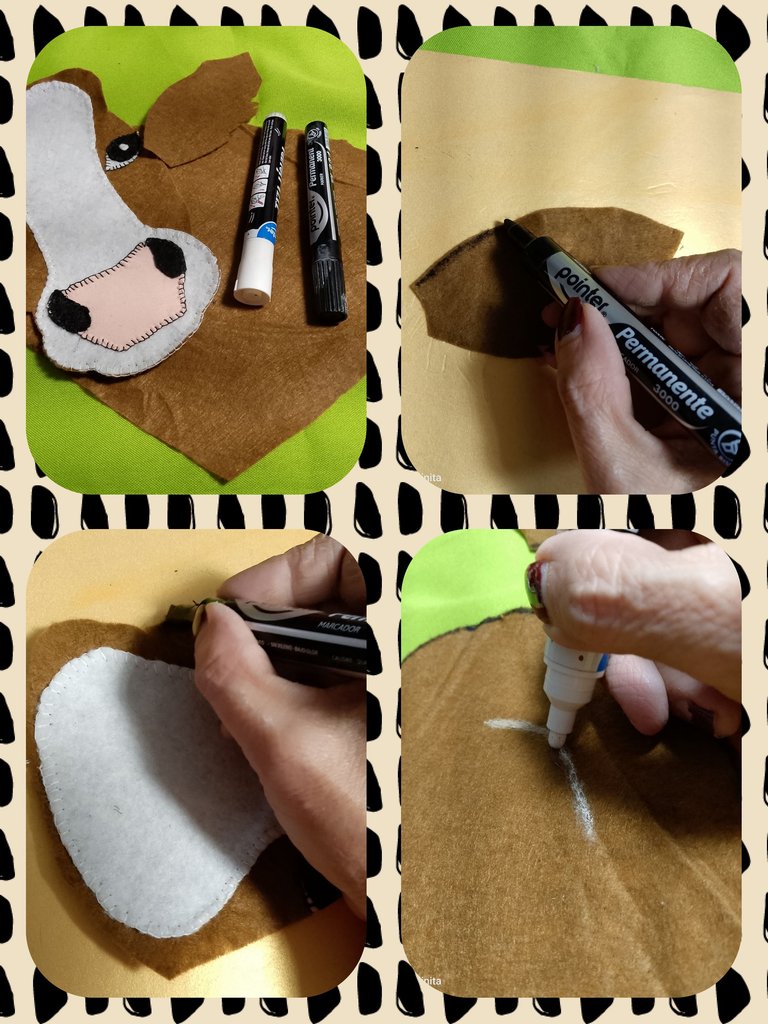
- Now we are going to glue the pieces onto the frame, using cold glue.
- Ahora vamos a pegar las piezas en el cuadro, utilizando pegamento al frio.

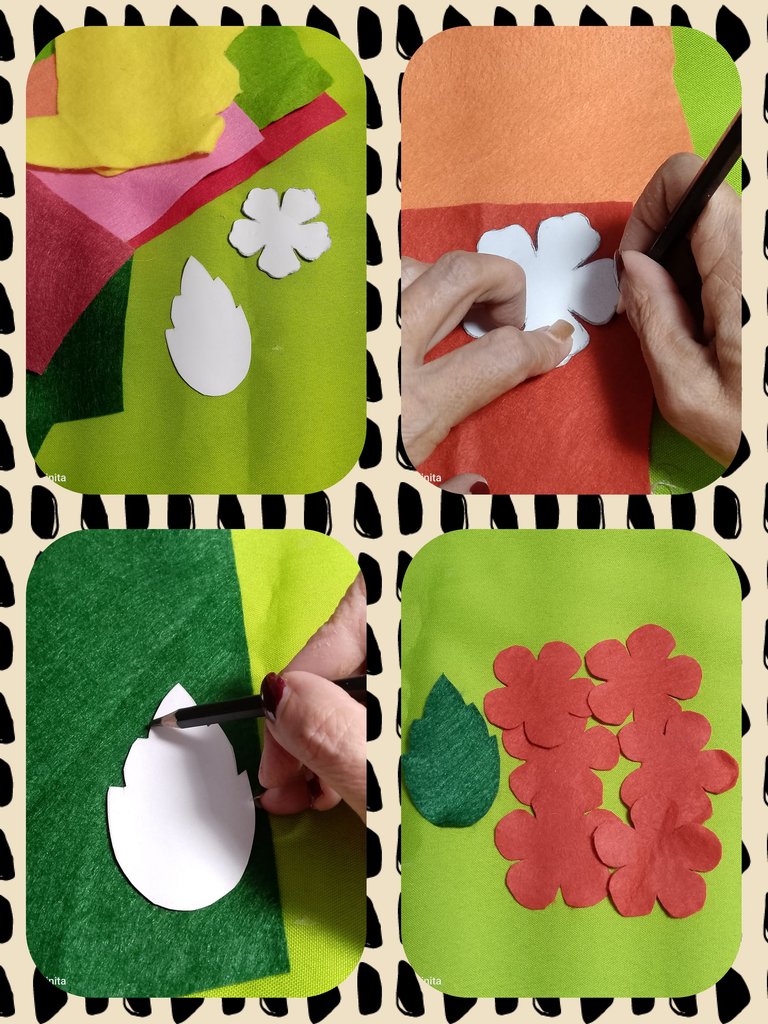
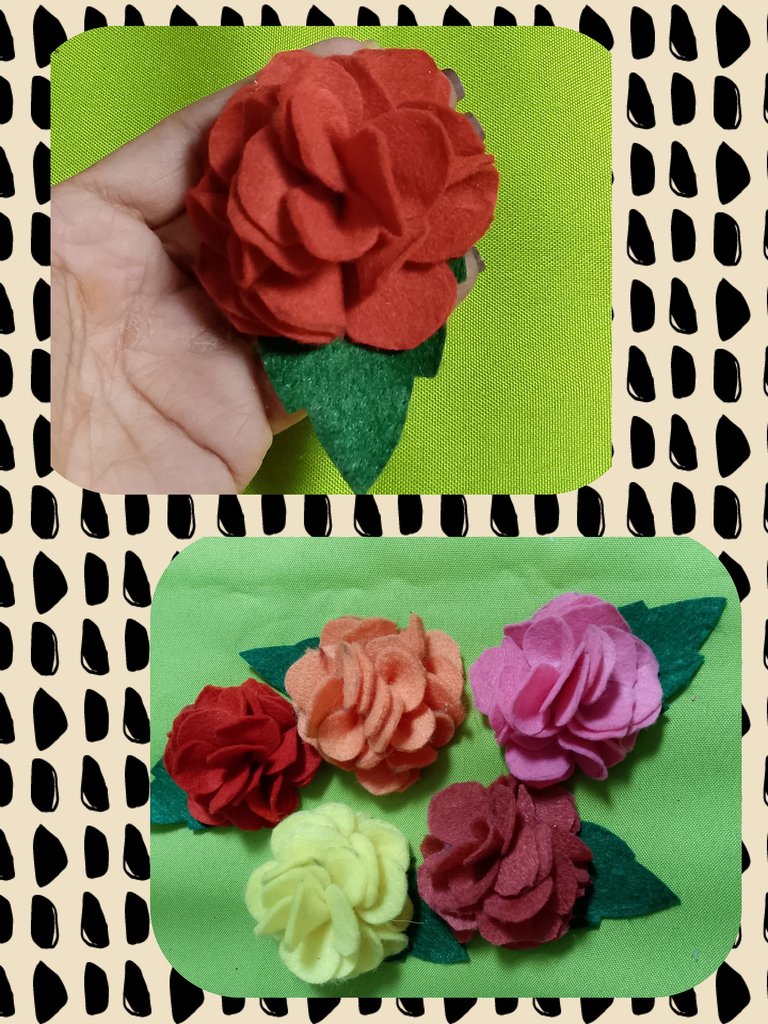
Using the flower pattern, we'll make 5 flowers consisting of 6 pieces of each felt color to form a flower.
And using the leaf pattern, we'll make two leaves for each flower. We can alternate between two shades of green.
Con el patrón de la flor, vamos a realizar 5 flores que consisten en 6 piezas de cada color de fieltro, para formar una flor.
Y con el patrón de la hoja, realizaremos dos hojas por cada flor, podeos alternar en dos tonos de verde para las mismas.
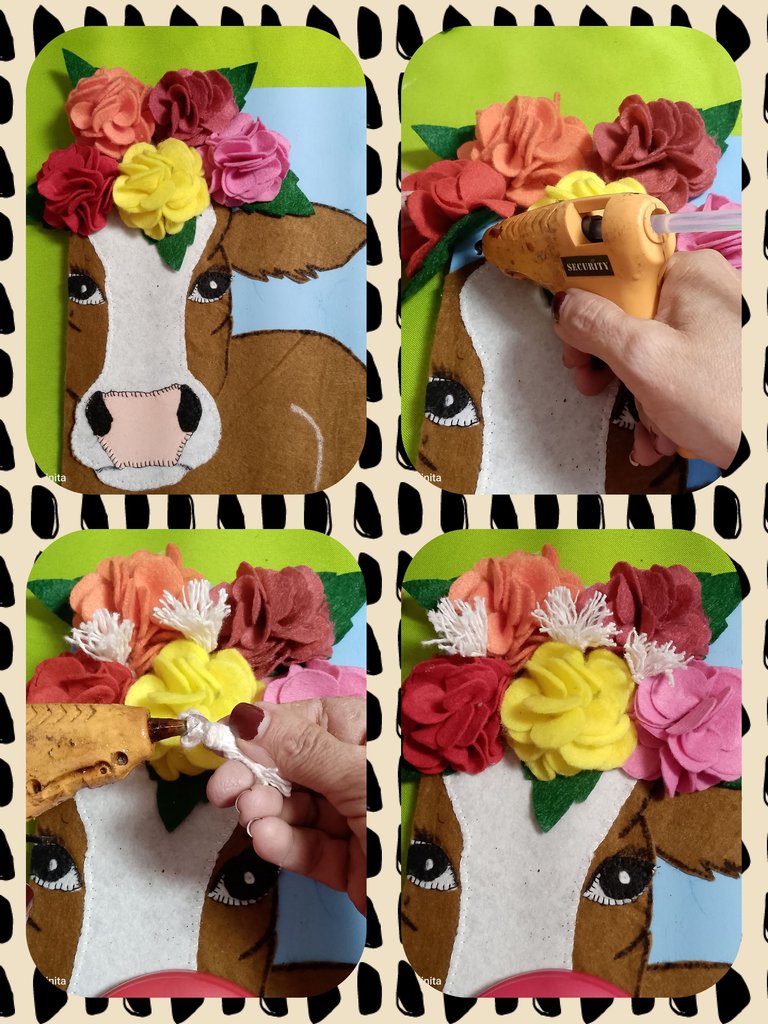
- Once we have the 6 pieces, we'll take them one by one and fold them in half. Then, using the hot glue gun, we'll make a stitch in the center of the divide and fold them. Hold until they stick.
- Una vez que tenemos las 6 piezas, vamos a tomar una a una y la doblaremos a la mitad, luego con la pistola de silicón vamos a realizar un punto en el centro de la división y doblamos. Sujetamos hasta que se pegue.
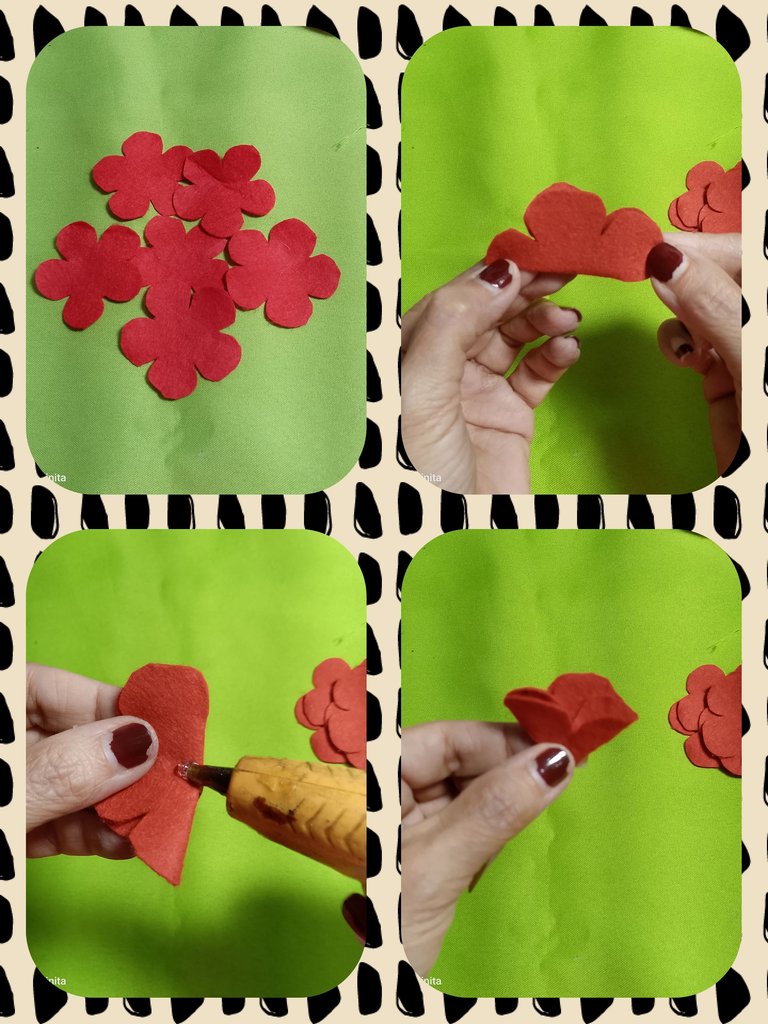
- We take 4 of the 6 pieces we formed and on one of the leaves we are going to glue them as shown in the image.
- Tomamos 4 de las 6 piezas que formamos y sobre una de las hojas vamos a ir pegando como se observa en la imagen.

- We will join the other 2 pieces end to end with silicone, then we will place it in the central part of the previous flower.
- Las otras 2 piezas las vamos a unir punta con punta con el silicón, luego la colocamos en la parte central de la flor anterior.
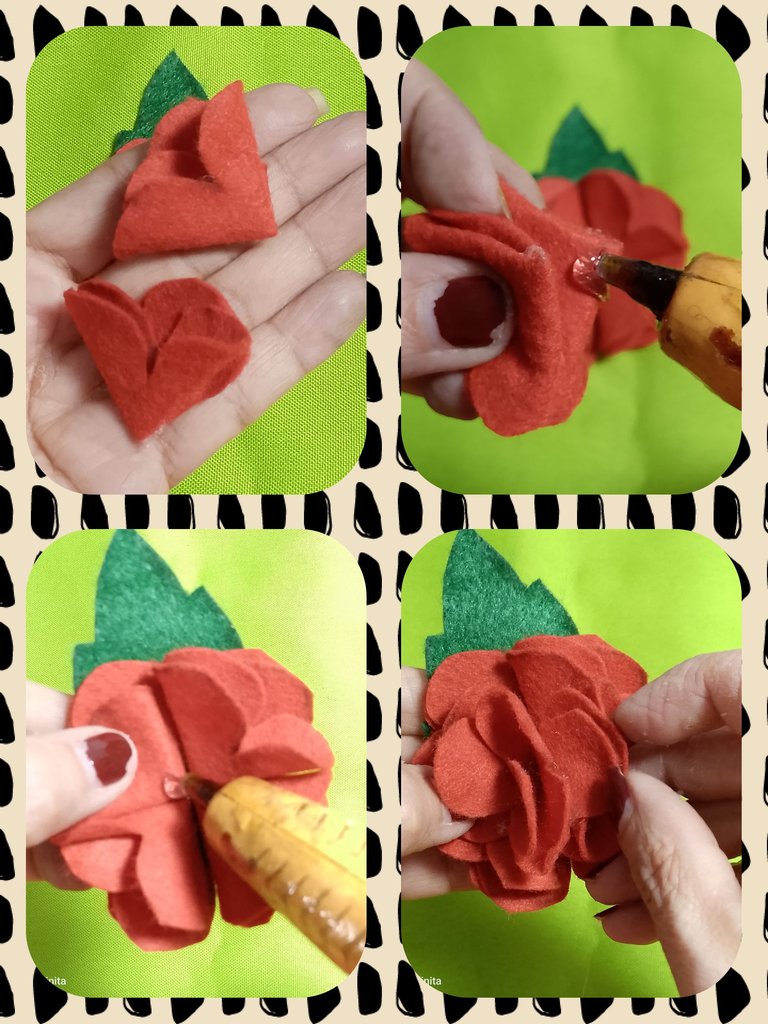
- And now we have the first flower formed. We repeat the same process with the rest of the pieces until we have all 5 flowers formed.
- Y ya tenemos formada la primera flor. Realizamos el mismo procedimiento con el resto de las piezas hasta tener las 5 flores formadas.
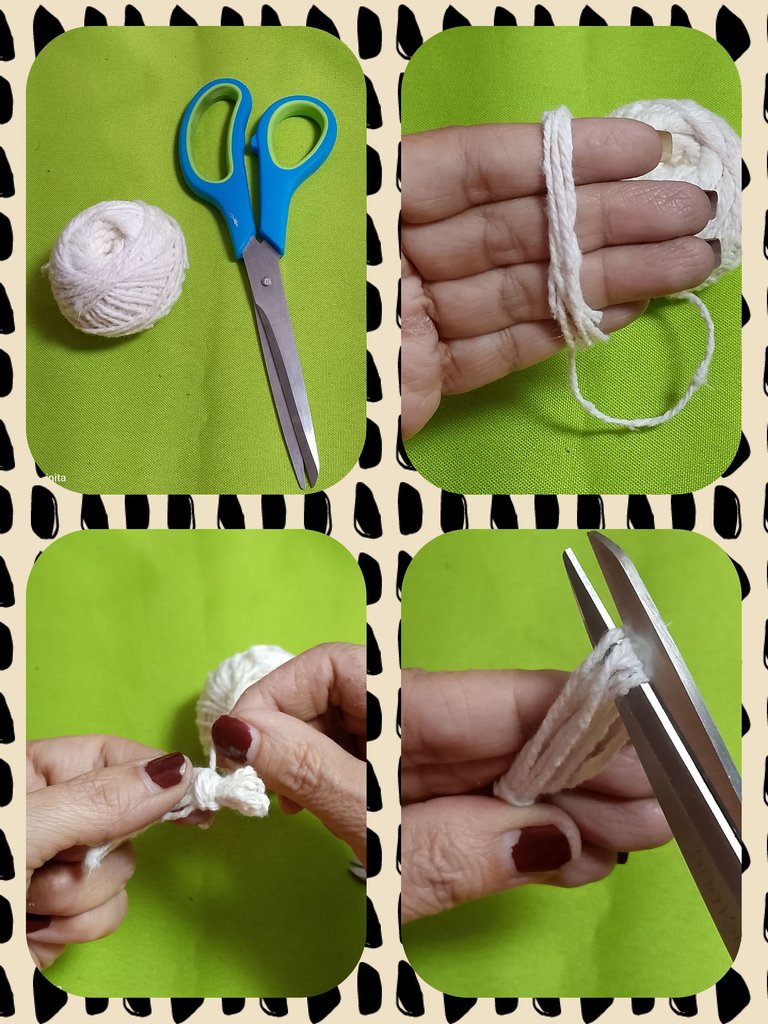
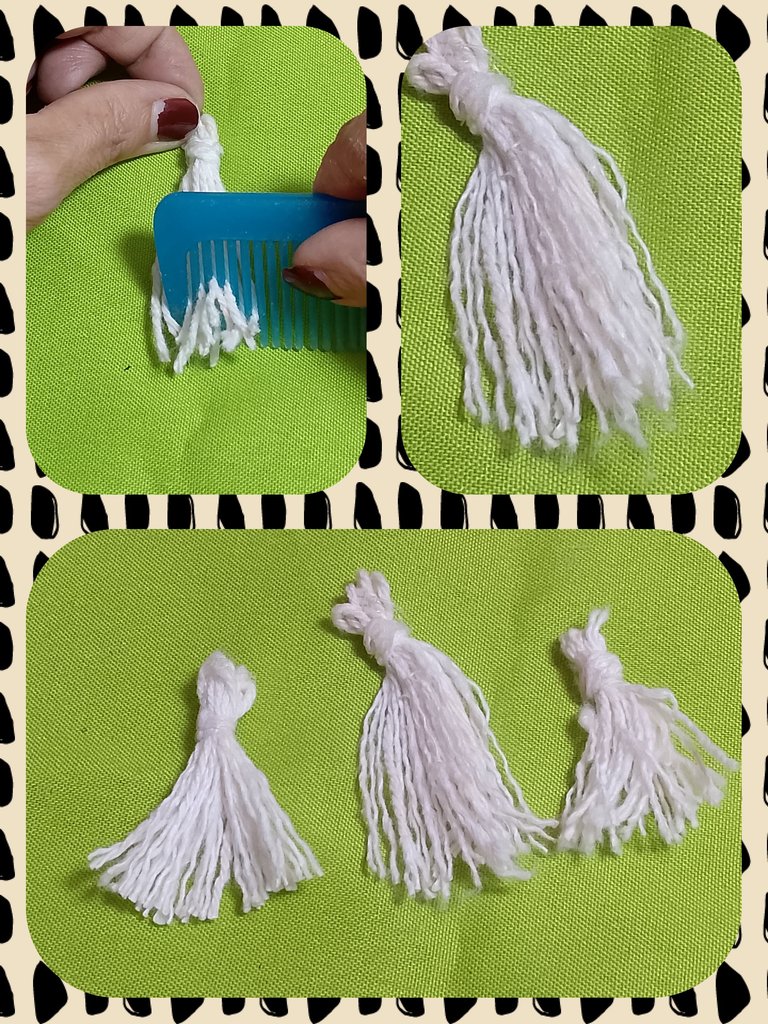
- With the white wick thread, we are going to make some tassels to highlight the flowers.
- Con el hilo pabilo blanco, vamos a realizar unas borlas para resaltar las flores.
- We proceed to make a flower crown on the cow's head, which we will then glue with silicone and alternate with the wick tassels.
- Procedemos a realizar una corona de flores sobre la cabeza de la vaca que luego pegaremos con silicón y vamos alterando con las borlas de pabilo.
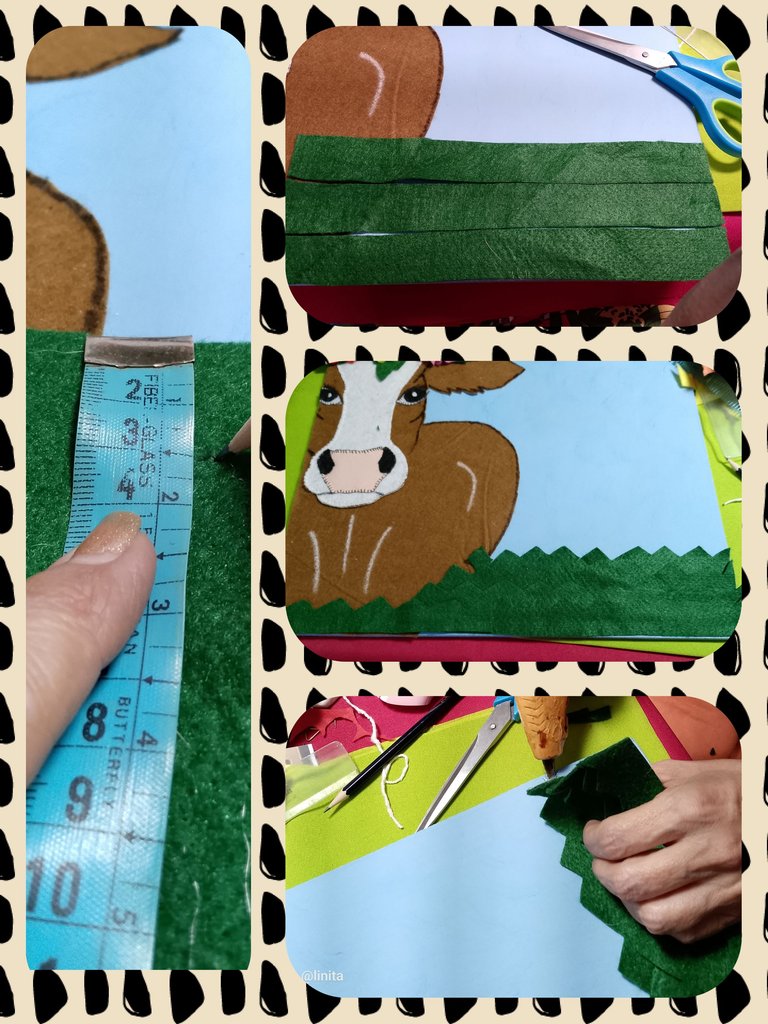
And finally, we'll make some kind of foliage or grass out of dark green felt so the cow can be seen among it.
- We'll cut strips 3 cm thick by 16 cm wide, then we'll make sag cuts and begin placing them on the frame, layer upon layer.
Y para finalizar, vamos a realizar con fieltro verde oscuro, una especie de follaje o pasto para que la vaca se vea entre éste.
- Realizamos tiras de 3 cms de grosor por 16 cms, luego realizamos cortes en sigsag y comenzamos a colocar sobre el cuadro, capa sobre capa.
- With a comb or brush, we will slide over the felt to loosen it a little and give it volume.
- Con un peine o cepillo vamos a deslizar sobre el fieltro para deshacerlo un poco y darle volumen.
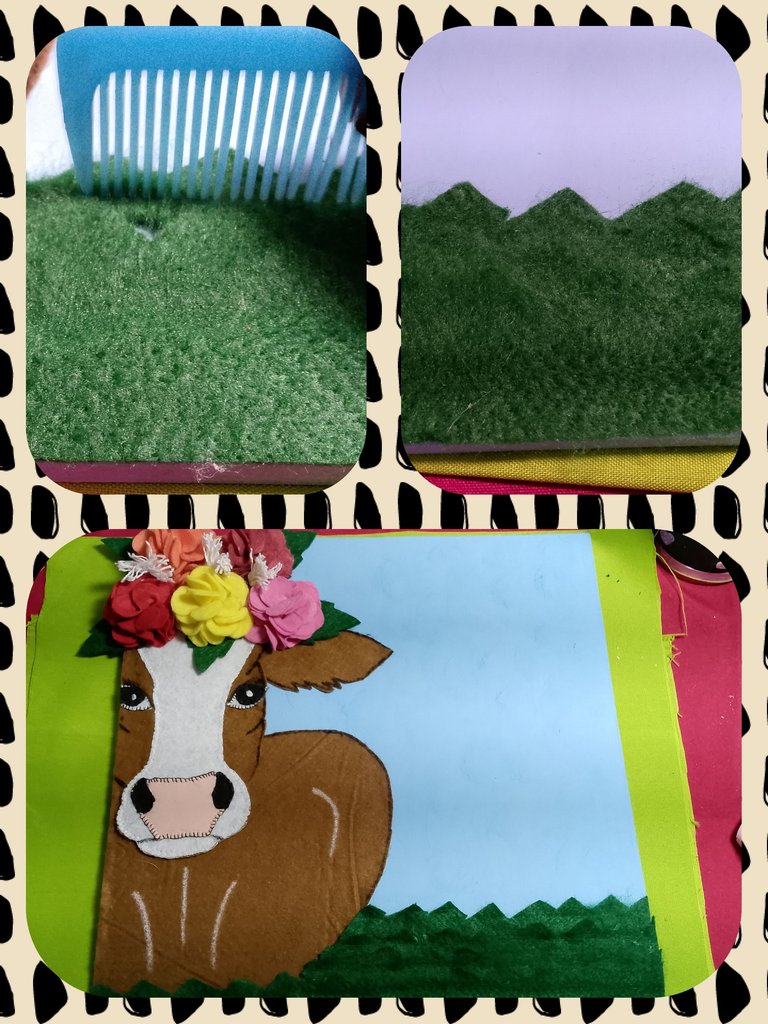
And this is the final result. A painting that's a bit laborious, but it leaves you feeling satisfied with pleasing a loved one and seeing that there are no limits when it comes to achieving something.
Y este es el resultado final. Un cuadro un poco laborioso pero queda la satisfacción de complacer a un ser querido y ver que no hay limitantes cuando se quiere hacer algo.

This was the model painting compared to the one I made. I made a few additional changes, but the result is the same. I hope my dear niece likes it. What do you think? Will she like it? I hope you like it. See you next time.
Este fue el cuadro modelo en comparación al que realicé. Algunos cambios adicionales pero con un mismo resultado, rogando que a mi sobrina querida le guste. ¿Qué creen ustedes, le gustará?. Espero les haya gustado. Nos vemos en la próxima.

Saludos @linita, que hermoso cuadro, hace años hice un curso de manualidades u usamos fieltro, es un material muy noble y de buena textura para realizar trabajos manuales, gracias por compartir.
Feliz martes!
Holaaaaa, me alegra que te guste. Gracias por comentar. Saludos.
This is really nice. You paid attention to the details. Nicely done 👍
What a delightful felt composition. A soft yet striking piece. wonderful job.
selected by @stevenson7
Wow, it looks amazing. It looks like it's not easy to make, but it's worth it in the end if you get something like that. If I ever have felt I think I would try to make something like this but with a horse.
¿Un poco? Muy laborioso diría yo.
Te quedó muy bonito. A tu sobrina le encantará.
Gracias por compartir el paso a paso. ¡Saludos!
Pues si, la verdad que el proceso es largo pero valió la pena el esfuerzo 🤭
Decorating a pet with flowers with great feeling is a really fun creative art. The flowers look very beautiful and the entire side of the animal is like a piece of creative art. Thank you so much for sharing this special art.
A special order. I thought I wouldn't be able to capture the cow the way I had in mind, but as I glued the pieces together, it began to come alive, so much so that it even seemed alive to me 😂😂. I appreciate your comment.
Ha ha ha yes it's cool best creative thanks my pleasure
Thank you for your witness vote!
Have a !BEER on me!
To Opt-Out of my witness beer program just comment STOP below
This is beautiful and amazing, your skills are very simple but unique and I love it. Thanks for sharing this wonderful piece with us and bravo
Quedó bien bonito y es muy original me gusta
Te quedo muy bello amiga, muy buen tutorial 🫶🏻✨