
Bienvenidos mis queridos amigos, amantes del arte y artistas.
El día de hoy les presentó un dibujo que he realizado a escala de grises o como muchos lo conocen, en blanco y negro, cabe destacar que es el dibujo más elaborado que he realizado en todo estos años que llevo como dibujante, eso quiere decir que me ha tomado mucho más tiempo realizarlo.
Este dibujo me ha tomado al rededor de 1 semana realizarlo, ya que entre algunas diligencias y otros deberes que he tenido que hacer en algunas ocasiones, no había podido dedicarle en su totalidad, pero si lo ponemos en la cantidad de horas, diría que me ha tomado al rededor de 72 horas, el resultado final ha sido tan satisfactorio que se ha convertido en el mejor dibujo que he realizado hasta los momentos, no se sabe qué sorpresas me depara el futuro en el mundo artístico.
Este dibujo fue un encargo de un cliente, ya que hace algunos días me convertí en profesor de curso de dibujo, donde con mis técnicas podrás hacer cualquier tipo de dibujo que quieras, aprenderemos desde lo más básico a lo más profesional, si estás interesado en ver un curso Online puede contactarme por DM y nos ponemos de acuerdo para iniciar la inducción al dibujo o te explicaré a fondo los detalles.
Welcome my dear friends, art lovers and artists.
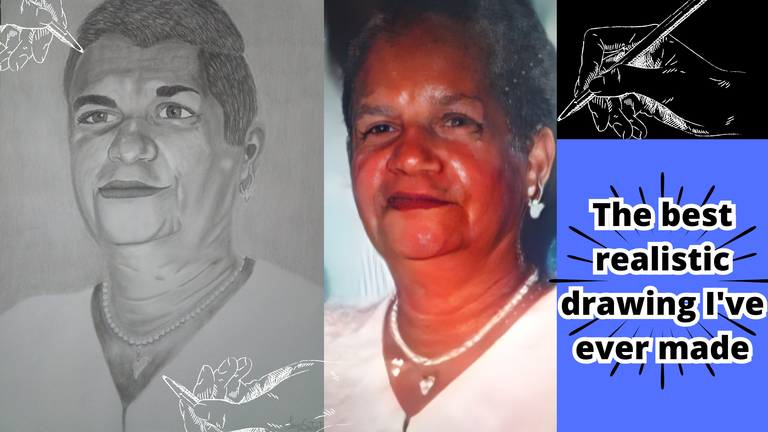
Today I present a drawing that I have made in grayscale or as many know it, in black and white, it is worth mentioning that it is the most elaborate drawing that I have done in all these years that I have been drawing, that means that it has taken me much more time to do it.
This drawing has taken me about 1 week to make it, because between some errands and other duties that I had to do on some occasions, I had not been able to dedicate it in its entirety, but if we put it in the amount of hours, I would say that it has taken me about 72 hours, the end result has been so satisfactory that it has become the best drawing I have done so far, I do not know what surprises the future holds for me in the artistic world.
This drawing was commissioned by a client, since a few days ago I became a teacher of drawing course, where with my techniques you can make any kind of drawing you want, we will learn from the most basic to the most professional, if you are interested in seeing an online course you can contact me by DM and we agree to start the induction to drawing or I will explain in depth the details.
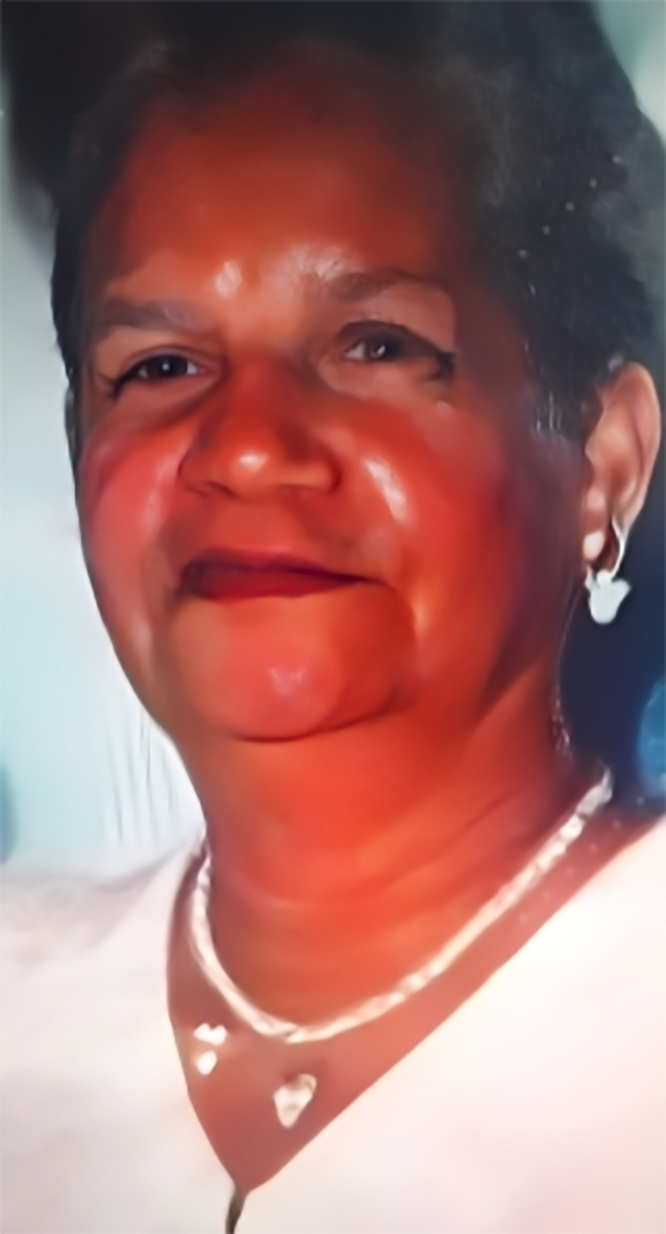
En la parte superior de este texto se encuentra la fotografía que me mando el cliente, de trata de su madre, tiene unos años que falleció y en honor a ella me pidió que se la dibujara, ha sido un cliente que todos los días me ha escrito para saber como marcha todo, eso me demostró lo importante que es este dibujo para él y quise poner todo mi esfuerzo en ello y aprender de esta persona en la fotografía porque...
No solo se trata de dibujar a una persona, sino de estudiarla y comprenderla, saber como era esa persona, el cliente me había pedido que le hiciera el dibujo mucho más alegre que en la foto, así que de ahí me guie para darle mi punto de partida en mi trabajo.
At the top of this text is the photograph that the client sent me, it's about his mother, she passed away a few years ago and in honor of her he asked me to draw it, he has been a client that every day has written me to know how everything is going, that showed me how important this drawing is for him and I wanted to put all my effort into it and learn from this person in the photograph because....
It's not only about drawing a person, it's about studying and understanding them, knowing how that person was, the client had asked me to make the drawing much more cheerful than in the photo, so that's where I was guided to give him my starting point in my work.

Parece difícil de creer, pero para poder hacer este dibujo no requiere de muchas herramientas, las cuales son:
Pinceles planos número 4, 6 y 8
Pincel de punta número 1.
Block de dibujo marca caribe.
Borrador moldeable.
Difuminadora número 2.
Borrador de color negro.
Lápiz de grafito 2B y 6B.
Regla.
Lima para afilar las puntas de los lápices.
Pañuelo.
It seems hard to believe, but to be able to make this drawing does not require many tools, which are:
Flat brushes number 4, 6 and 8.
Paintbrush with tip number 1.
Drawing block caribe brand.
Moldable eraser.
Blender number 2.
Black eraser.
Graphite pencil 2B and 6B.
Ruler.
File to sharpen the tips of the pencils.
Handkerchief.
 |  |  |
|---|
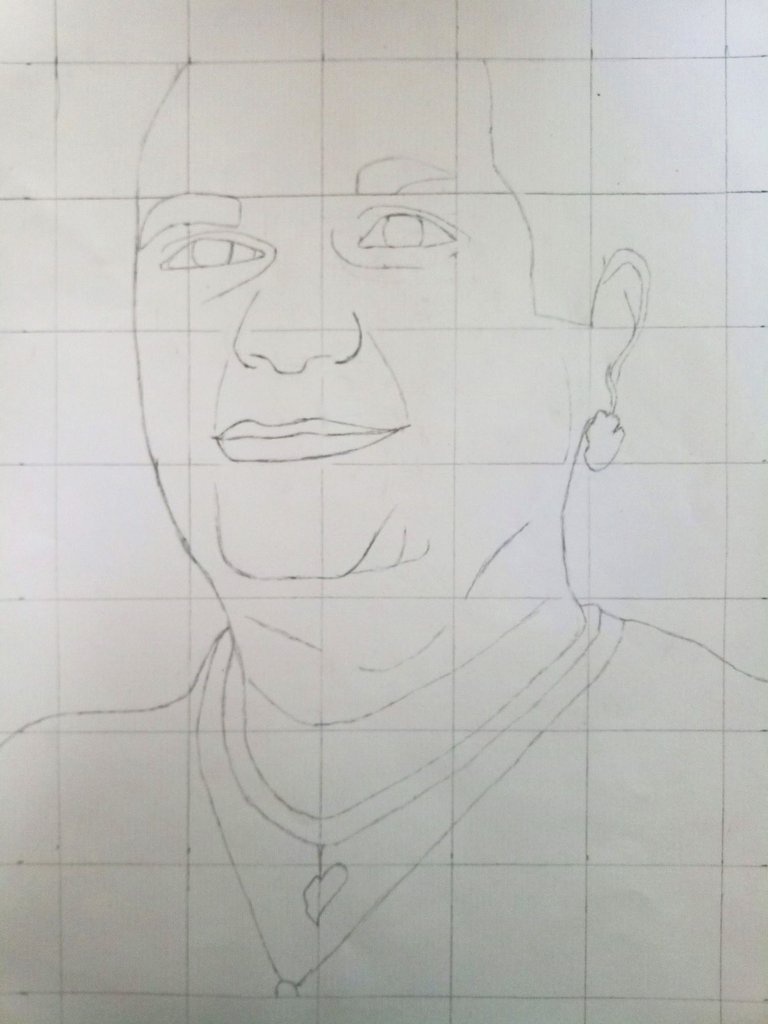
Lo primero que hice fue usar la técnica cuadricula, esta técnica está conformada por cuadrados del mismo tamaño, en este caso todos tienen 5 centímetros de ancho por alto.
Esta técnica me permite visualizar cada parte del rostro para que todo me quede proporcionado, esta técnica lo usan mucho las personas que hacen dibujos grandes, este tiene una medida de 36 centímetros de alto por 30 de ancho.
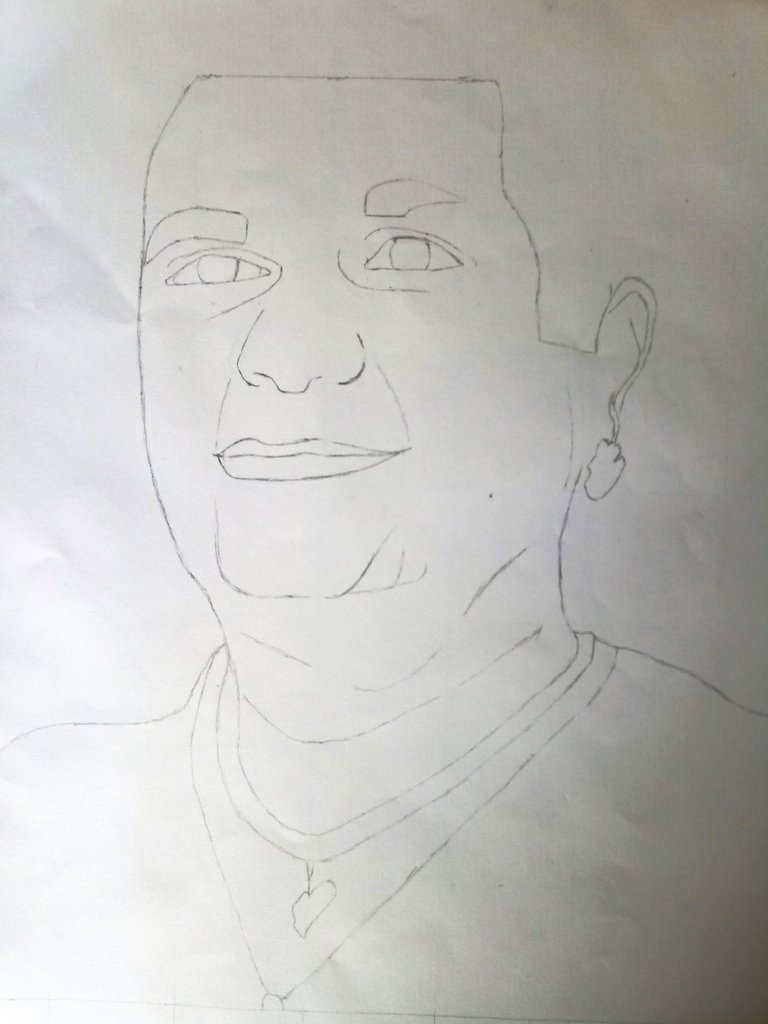
Luego de hacer los cuadros, comencé a ilustrar la fotografía en referencia en mi block de dibujo, seguidamente comencé a borrar todos los cuadros hasta dejar solamente el rostro, cabe destacar que en este proceso cuando se agrega la técnica cuadricula, es no apoyarnos muchos en el lápiz para que al momento de borrar estos cuadros no queden marcas en el material donde estamos dibujando.
The first thing I did was to use the grid technique, this technique is made up of squares of the same size, in this case they are all 5 centimeters wide by high.
This technique allows me to visualize each part of the face so that everything is proportionate, this technique is used a lot by people who make large drawings, this one has a measure of 36 centimeters high by 30 centimeters wide.
After making the squares, I began to illustrate the photograph in reference in my drawing pad, then I began to erase all the squares until leaving only the face, it should be noted that in this process when the grid technique is added, it is not to lean too much on the pencil so that when erasing these squares there are no marks on the material where we are drawing.
 |  |  |
|---|
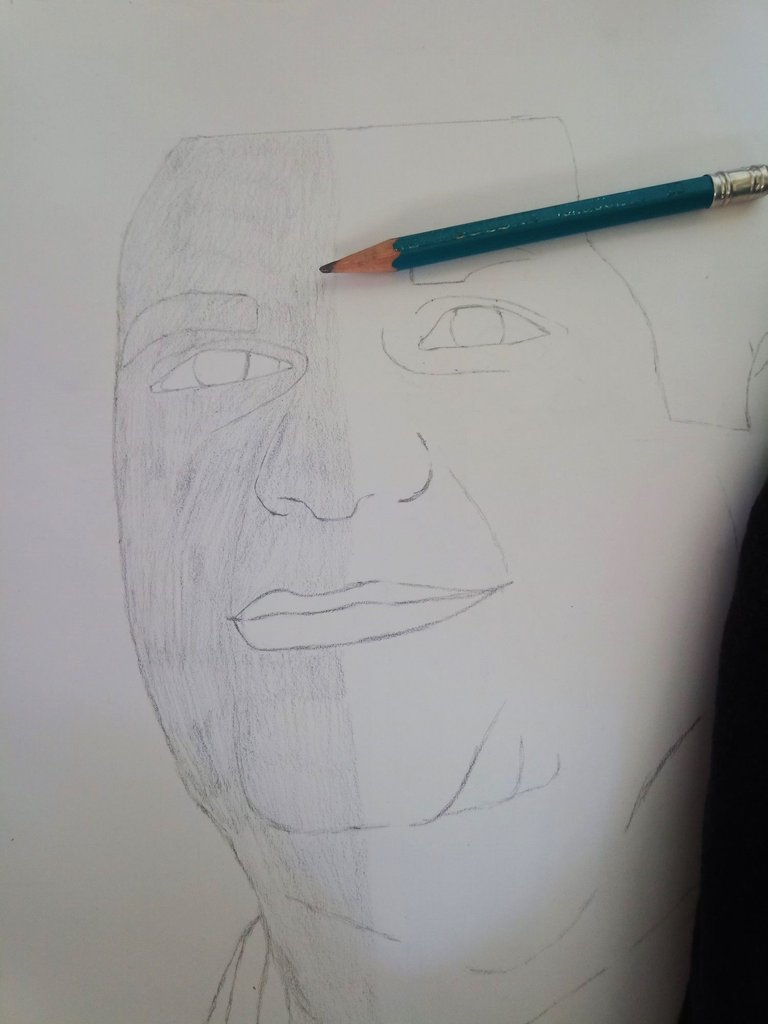
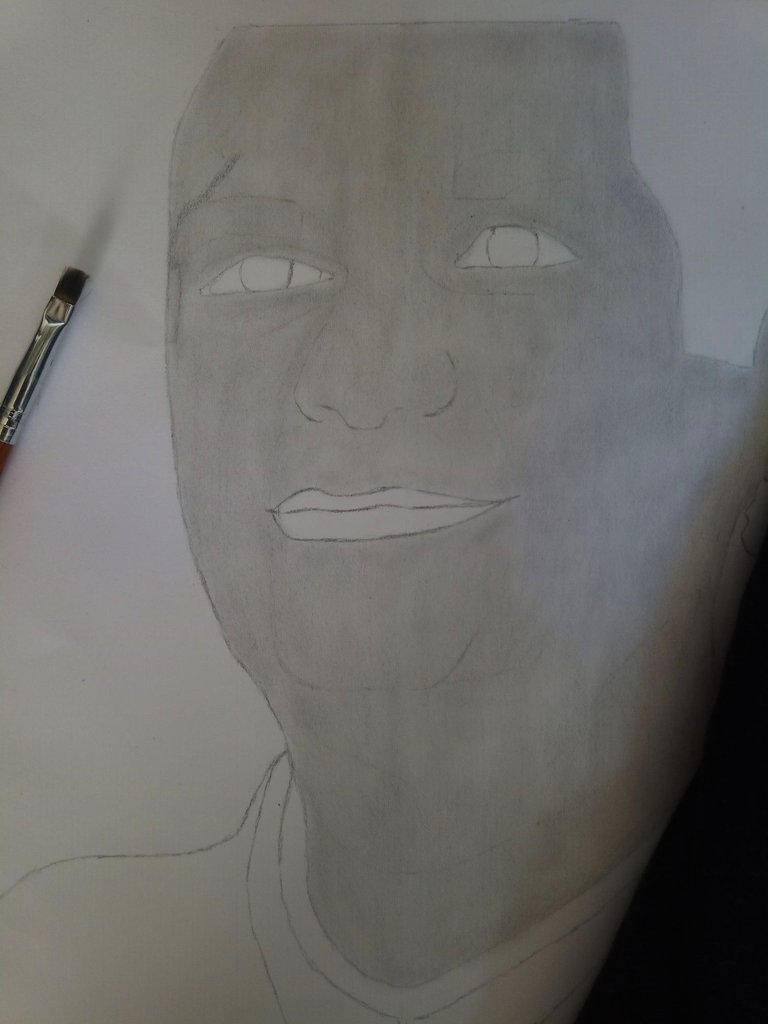
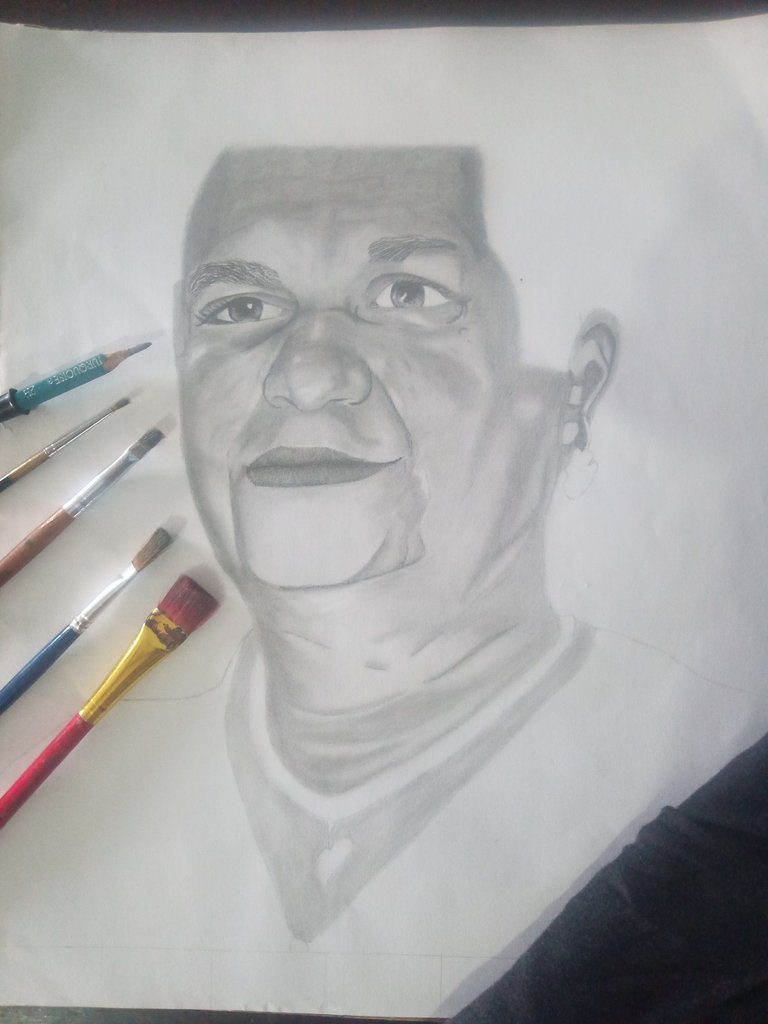
Después de haber borrado todos los cuadros, comencé a agregar la primera capa de valorizado usando el lápiz de grafito 2B, lo cual se define como pintar nuestro dibujo, primero comencé con la mitad del lado izquierdo del dibujo para luego el lado derecho.
Es importante que sobre el dibujo coloquemos un pañuelo para no colocar nuestra mano sobre nuestro dibujo y llenarlo de la grasa corporal de la piel, ya que se mancharía nuestra hoja y al momento de valorizar se ven las huellas dactilares.
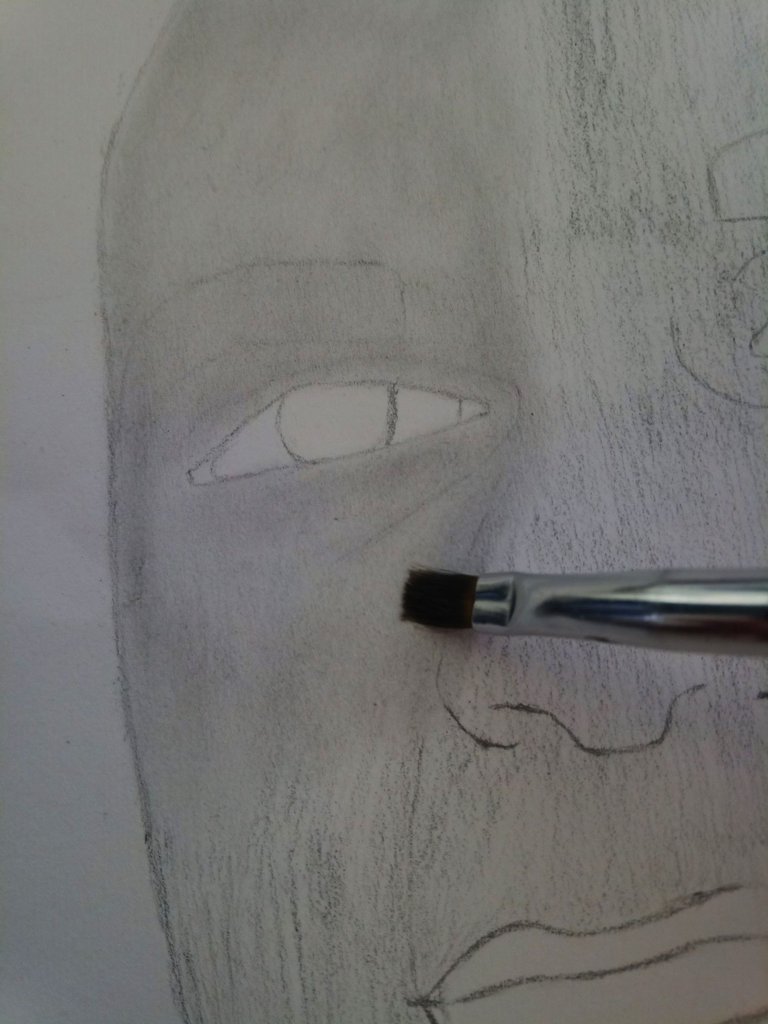
Después de valorizar toda la primera parte del rostro, comencé a usar el pincel número 4 para difuminar toda el área que trace con el lápiz de grafito, esta parte es muy gratificante, porque podemos sellar todas las porosidades que la cartulina (hoja del block de dibujo) y dejarlo totalmente plano.
Ahora prosigue la magia de las profundidades de un dibujo.
After having erased all the squares, I started to add the first layer of valorizing using the 2B graphite pencil, which is defined as painting our drawing, first I started with half of the left side of the drawing and then the right side.
It is important that we place a handkerchief over the drawing to avoid placing our hand on our drawing and filling it with the body fat of the skin, since it would stain our sheet and at the moment of valorizing the fingerprints would be seen.
After valuing all the first part of the face, I began to use the brush number 4 to blur all the area that I drew with the graphite pencil, this part is very gratifying, because we can seal all the porosities that the cardboard (sheet of the drawing block) and leave it completely flat.
Now the magic of the depths of a drawing continues.
 |  |  |
|---|
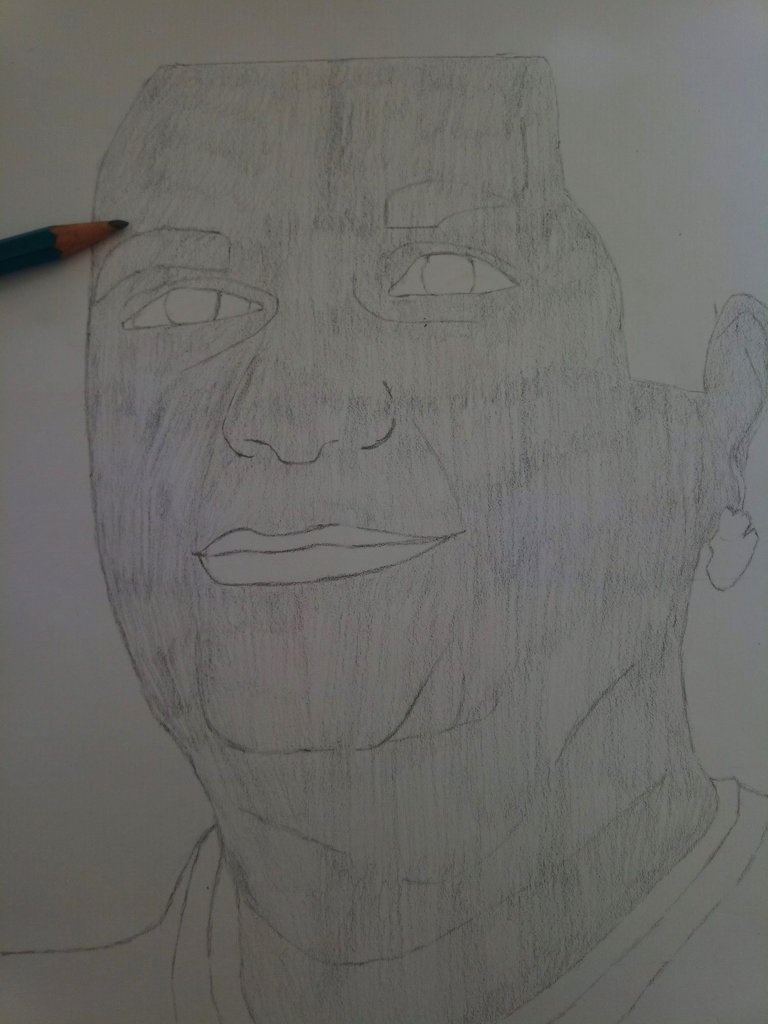
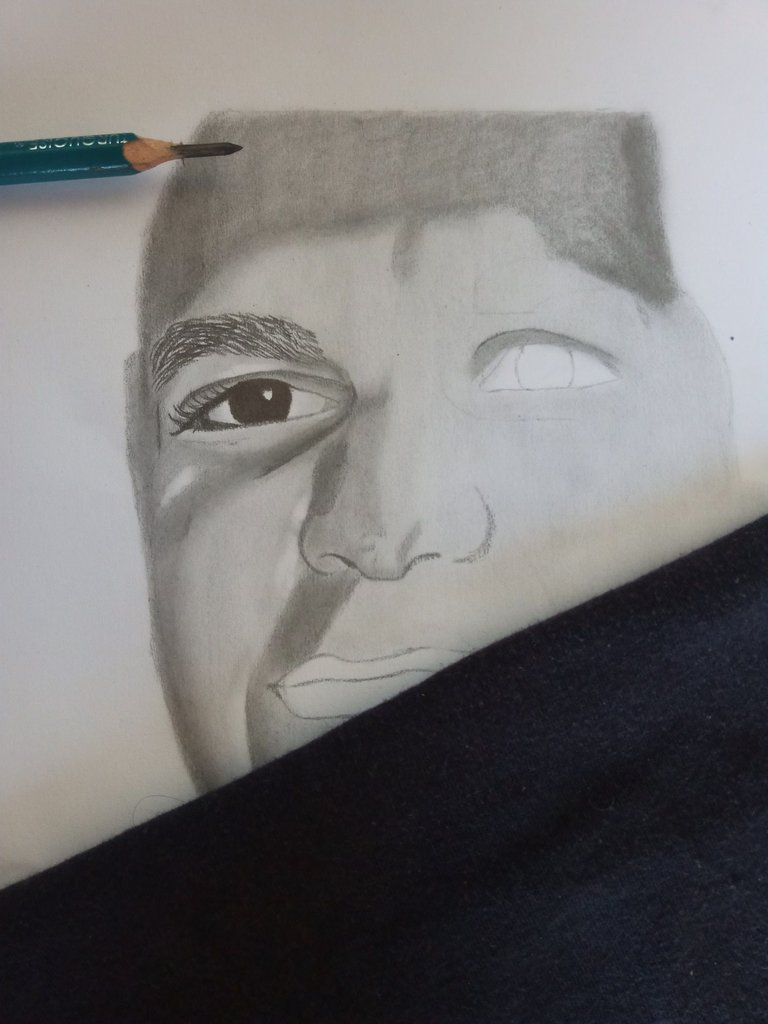
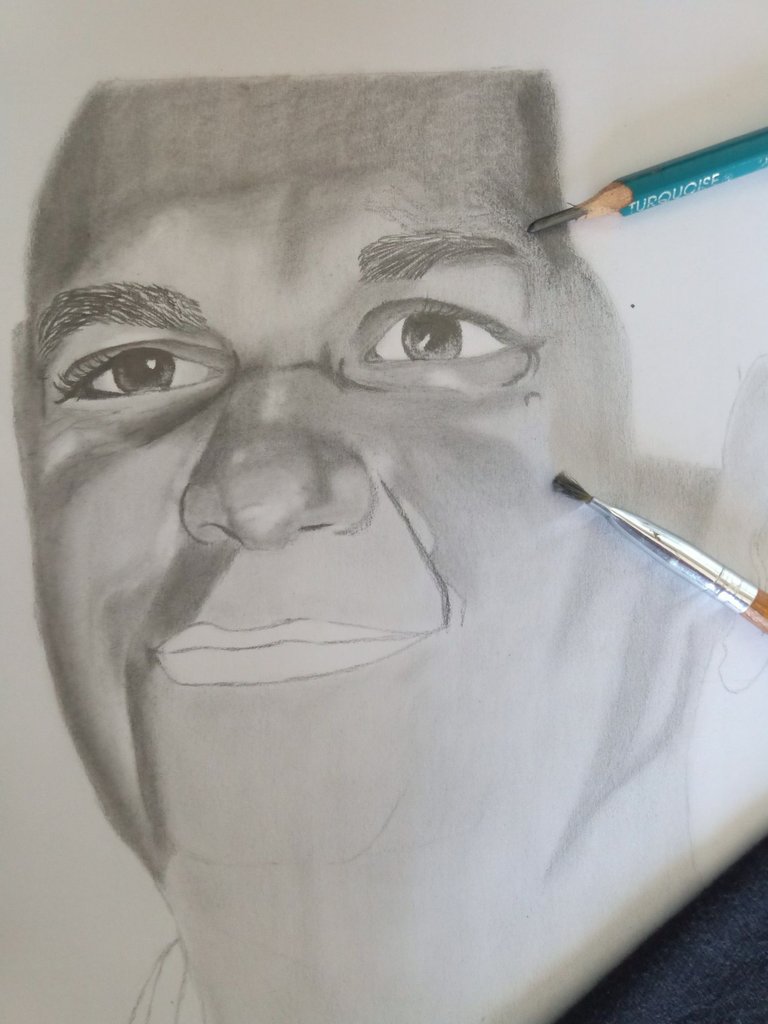
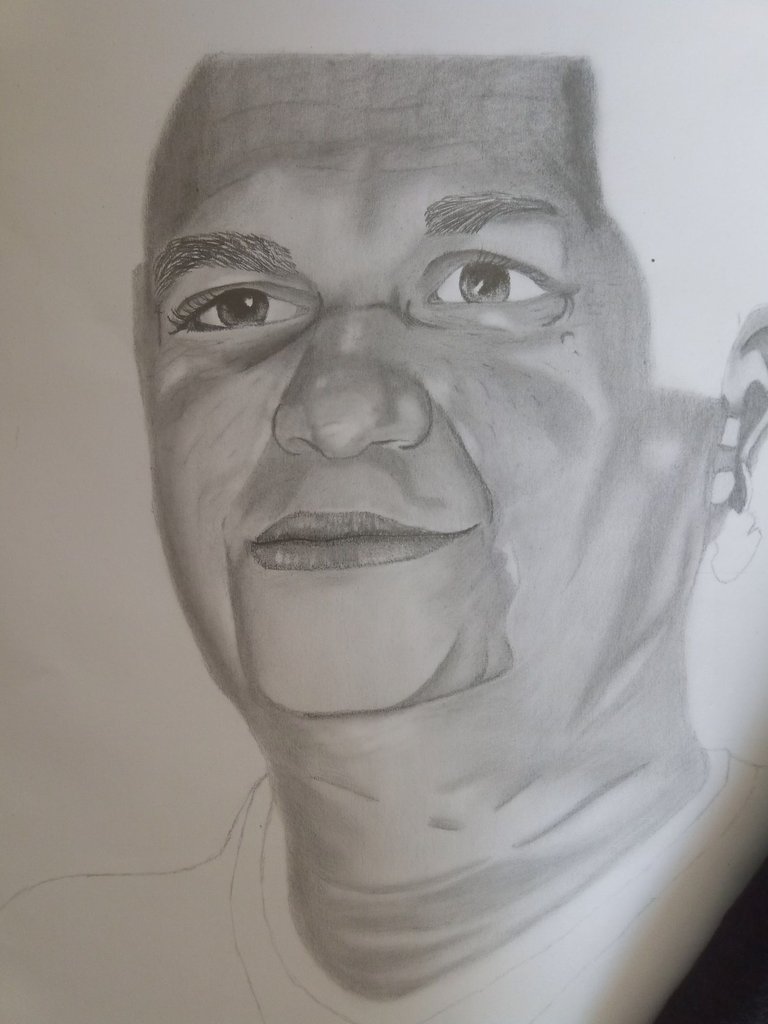
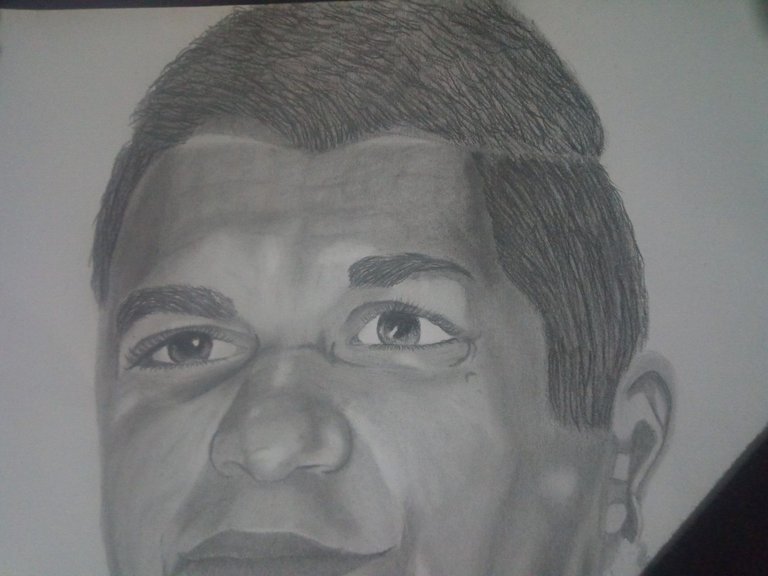
Primero comencé a profundizar la parte de la frente y el lado izquierdo del rostro, siempre utilizando el pañuelo para no manchar la cartulina con la grasa corporal de la piel, cada parte fue trabajado con detalle para darle el mayor efecto realista posible.
Algo que voy a destacar, es que cuanto más grande hagamos el dibujo, más detalles podremos agregarle, y aunque no lo crean, es más fácil hacer un dibujo grande que uno pequeño, porque los pequeños son simples por el límite de detalles que podremos hacerles al dibujar.
Estas profundidades y sombreados se lo agregué con varias capas con el lápiz de grafito 2B y pocas con el 6B, ya que con el grafito de la 6B es mucho más oscuro, así que hay que tener mucho cuidado de no apoyarnos mucho del lápiz.
First I began to deepen the part of the forehead and the left side of the face, always using the handkerchief to not stain the cardboard with the body fat of the skin, each part was worked in detail to give the greatest possible realistic effect.
Something that I will emphasize is that the bigger the drawing, the more details we can add, and believe it or not, it is easier to make a big drawing than a small one, because the small ones are simple due to the limit of details that we can make when drawing.
I added these depths and shading with several layers with the 2B graphite pencil and few with the 6B, because with the graphite of the 6B it is much darker, so you have to be very careful not to lean too much on the pencil.
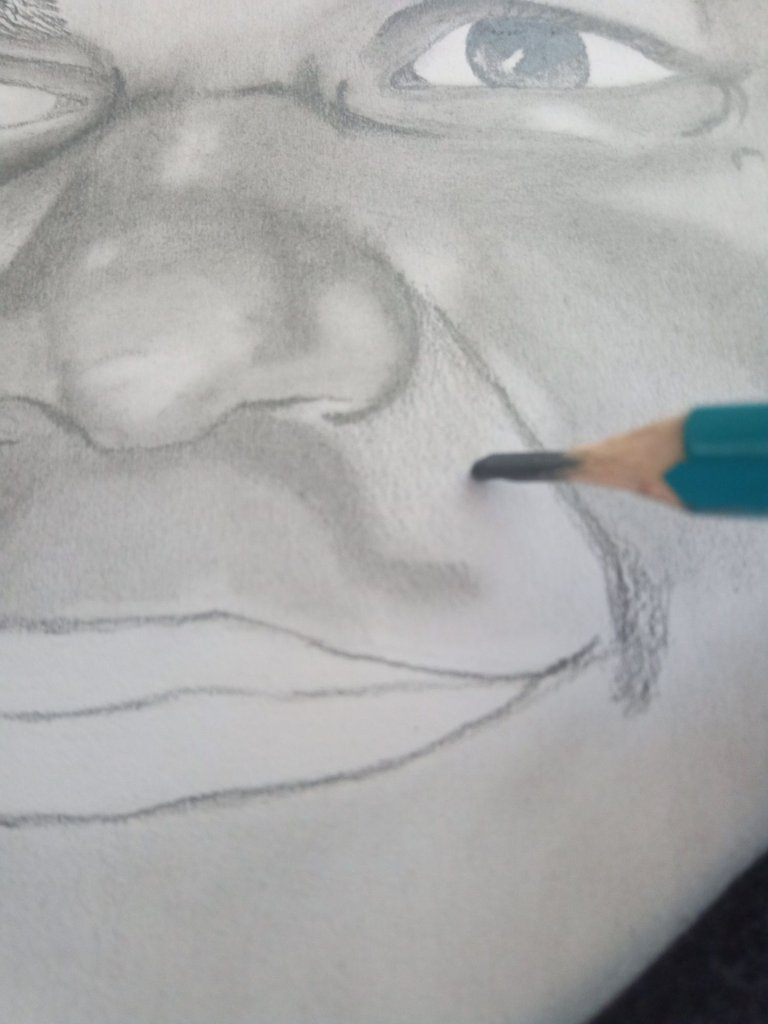
Si nos fijamos un poco en el GIF, realizar este proceso toma mucho su tiempo, en mi caso hago cada parte del dibujo con muchos trazos diminutos para que todo quede de la mejor forma y no haya espacios más oscuros que otros.
If we look a little bit at the GIF, this process takes a lot of time, in my case I make each part of the drawing with many tiny strokes so that everything is in the best way and there are no spaces darker than others.
 |  |  |
|---|
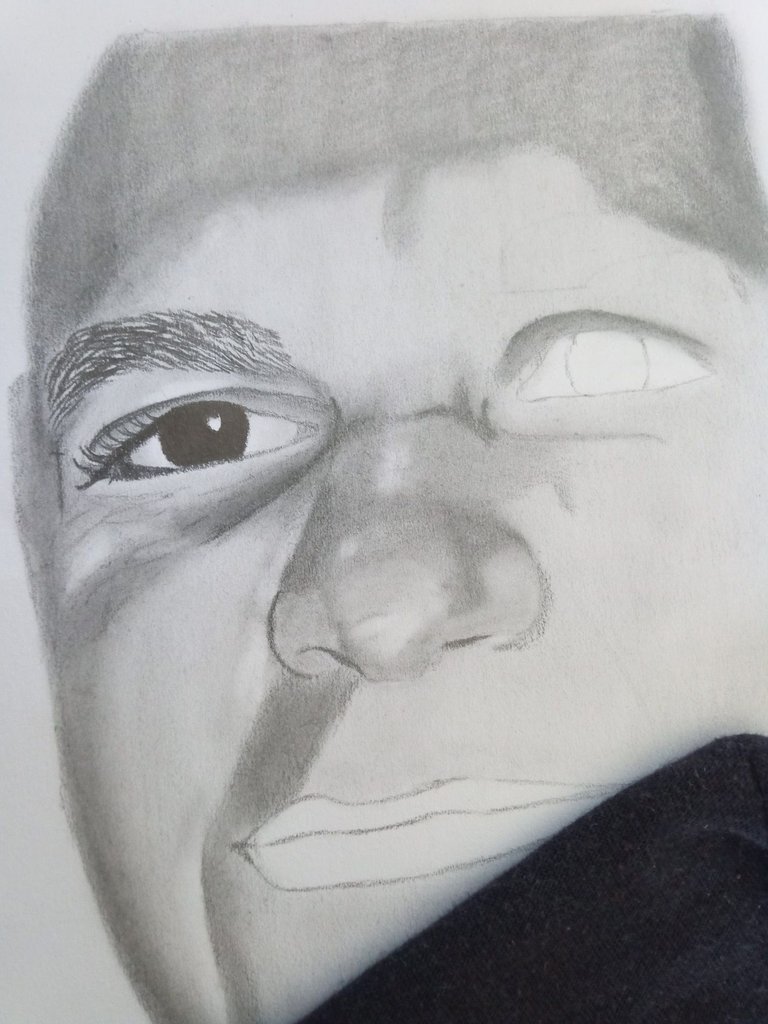
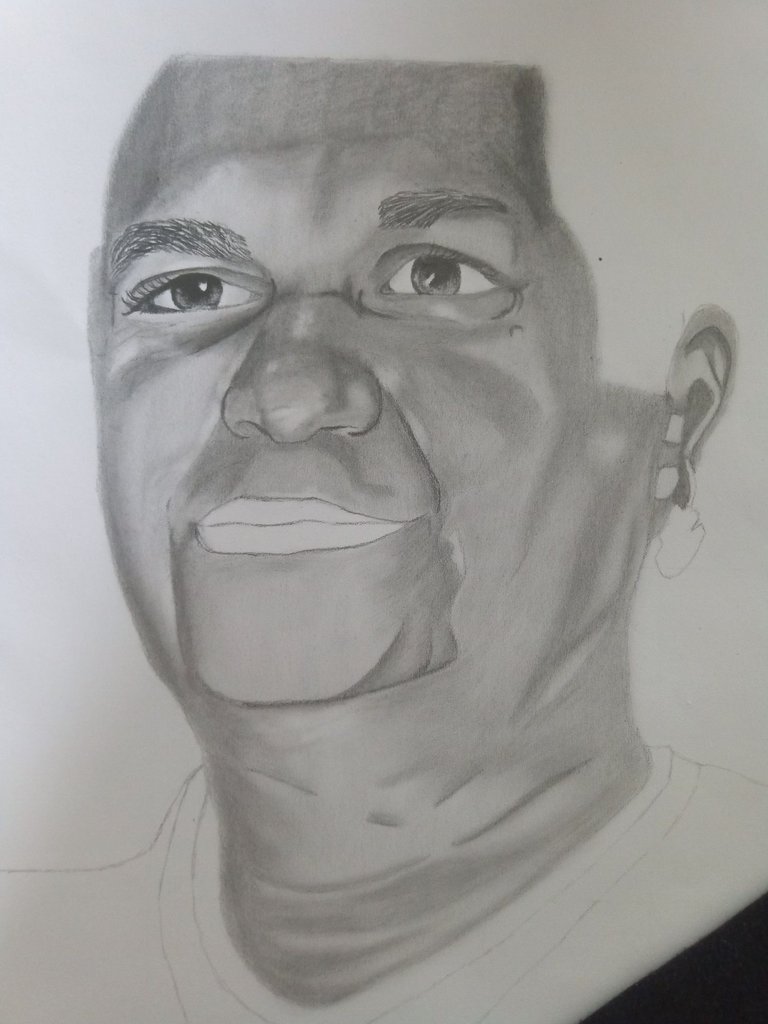
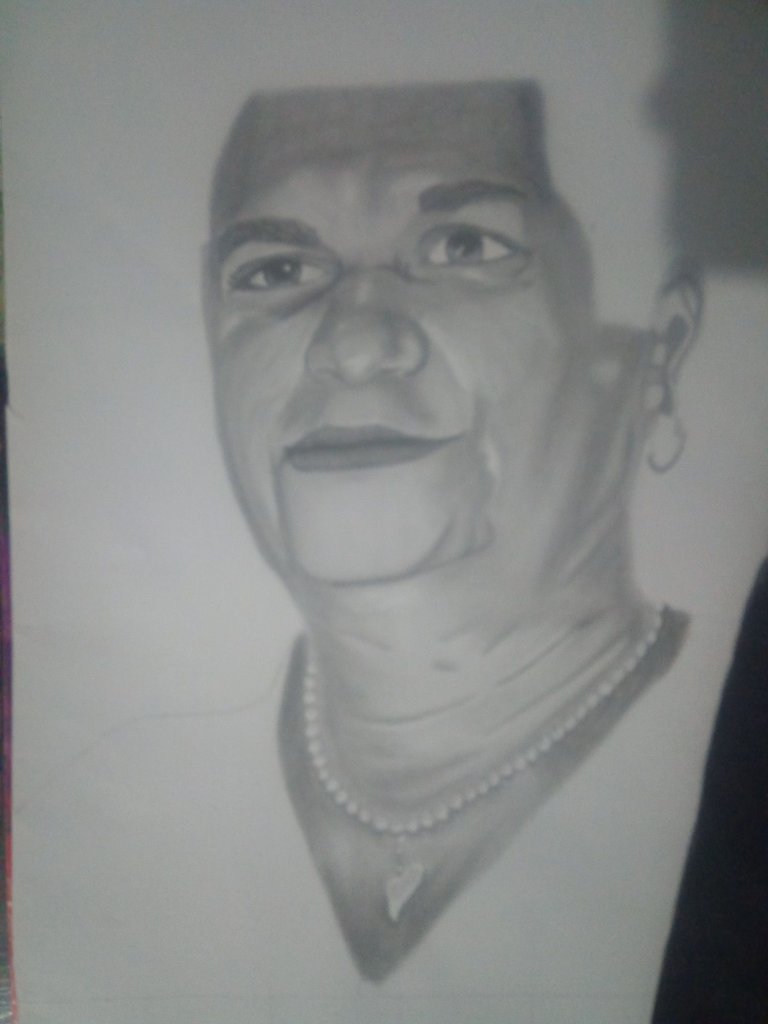
Luego de agregar todas las profundidades y sombras junto con algunos brillos para respetar los espacios más adelante, deje de último valorizar los labios, normalmente me cuesta un poco realizarlos, pero aun así voy practicando y mejorando en cada dibujo.
Cada número de pinceles es para trabajar en los lugares específicos del rostro, por ejemplo, el número 1 lo usé para los lugares más claros para que no me quedaran tan oscuros.
After adding all the depths and shadows along with some glosses to respect the spaces later on, I left last to enhance the lips, usually I find it a little difficult to do them, but still I am practicing and improving in each drawing.
Each number of brushes is to work on the specific places of the face, for example, number 1 I used it for the lighter places so they wouldn't be so dark.
 |  | |
|---|
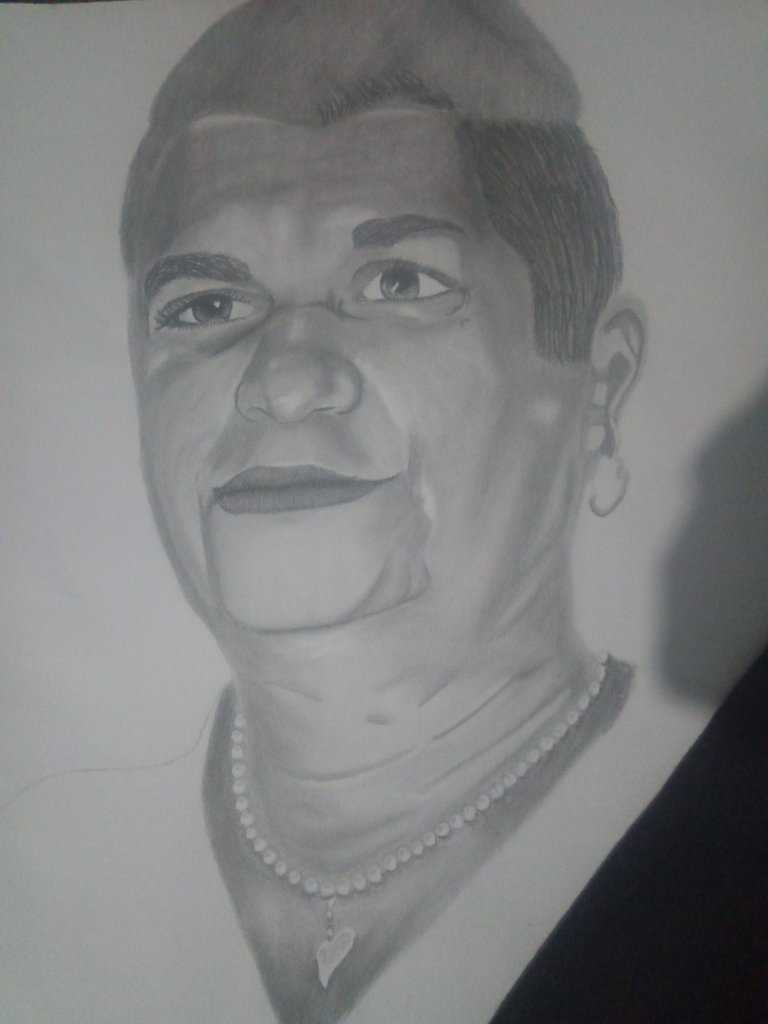
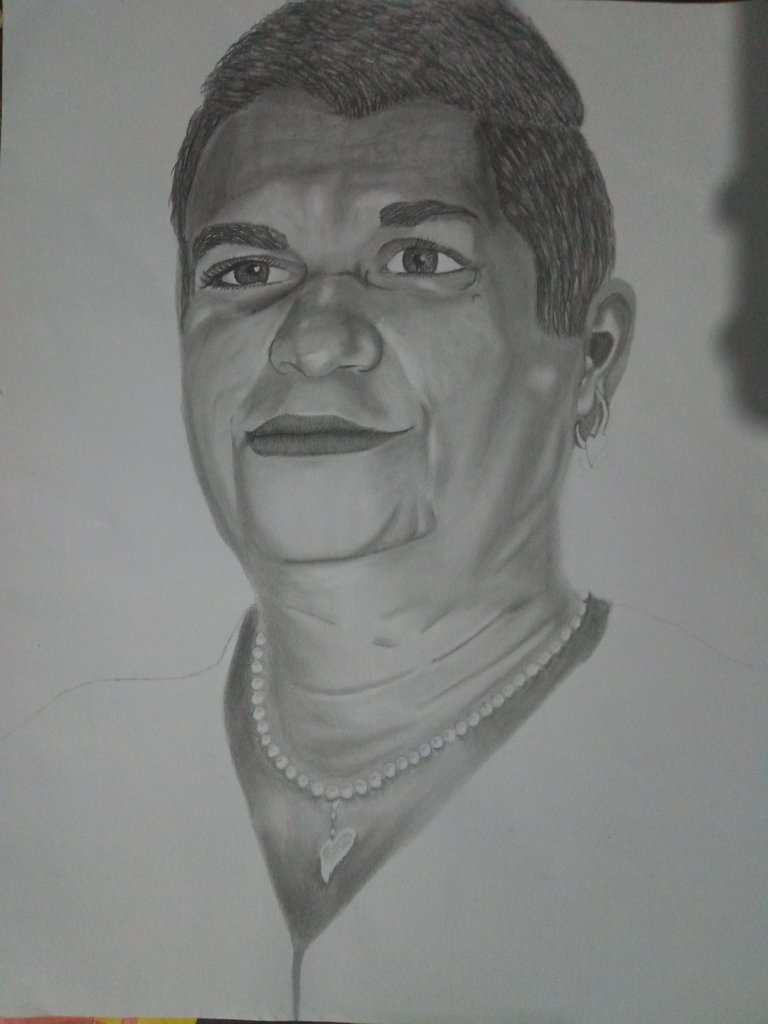
Al finalizar con la tercera parte del dibujo, comencé a trabajar con el cabello, donde según mi imagen de referencia (fotografía) la persona que estoy ilustrando tenía el pelo corto, así que quise hacerlo bien peinado para se pudiera notar aún más los detalles.
Primero agregue una capa de valorizado con el lápiz 2B, después use el pincel número 4 para difuminar toda el área valorizada y posteriormente comencé a usar cada trazo corto.
Para poderle agregar las canas, use el borrador moldeable para crear algunos espacios en blanco para sobre este hacer pequeños trazos con el lápiz 2B para que así se pudieran apreciar las canas.
When I finished with the third part of the drawing, I started to work with the hair, where according to my reference image (photograph) the person I am illustrating had short hair, so I wanted to make it well combed so that the details could be noticed even more.
First I added a layer of highlighting with the 2B pencil, then I used the number 4 brush to blur all the highlighted area and then I started using each short stroke.
In order to add the gray hair, I used the moldable eraser to create some white space to make small strokes with the 2B pencil so that the gray hair could be seen.
 |  |
|---|
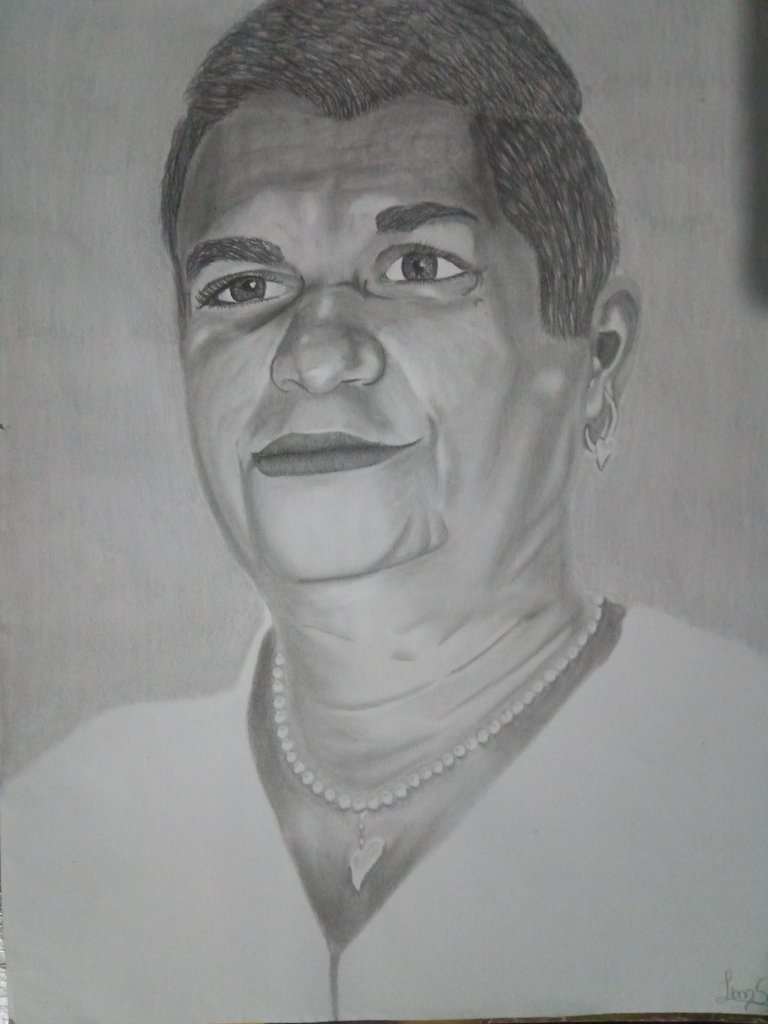
Después de terminar con todo el rostro, trabaje con el fondo para que se viera una diferencia entre el fondo con el rostro y se pueda notar una mejora con todo el rostro.
La ropa, como era en su totalidad de blanco, no fue necesario trabajar en ella.
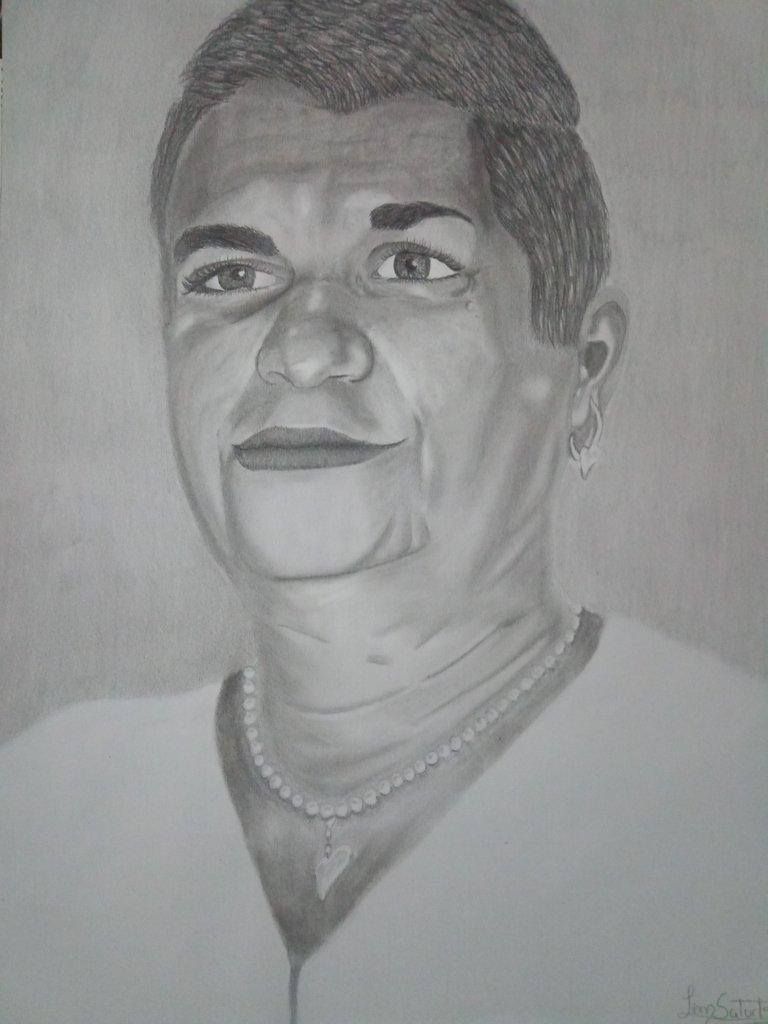
De esta manera pude realizar mi dibujo, mis estimados amigos amantes del arte y artistas, espero les sea de su agrado, hasta la próxima.
After finishing with the whole face, I worked with the background so that a difference between the background and the face could be seen and an improvement with the whole face could be noticed.
The clothes, as they were all in white, it was not necessary to work on them.
In this way I was able to make my drawing, my dear friends, art lovers and artists, I hope you like it, until next time.

![]()

Discord LionSaturBix#7545

Source / Fuente Castle of Castlevania
Source / Fuente Terra Blade of Terraria
Los separadores son de mi autoría, las fotografías fueron tomadas con la ayuda de mi teléfono Bison X Umidigi, las ediciones del GIF son creados por mí.
The separators are authored by me, the pictures were taken with the help of my Bison X Umidigi phone, the GIF edits are created by me.
Programas que utilicé para crear mi diseño es este:
This is the program I used to create my design:
Gif y portada cortesía de Canva
Gif and cover courtesy of Canva
Traducido por Deepl