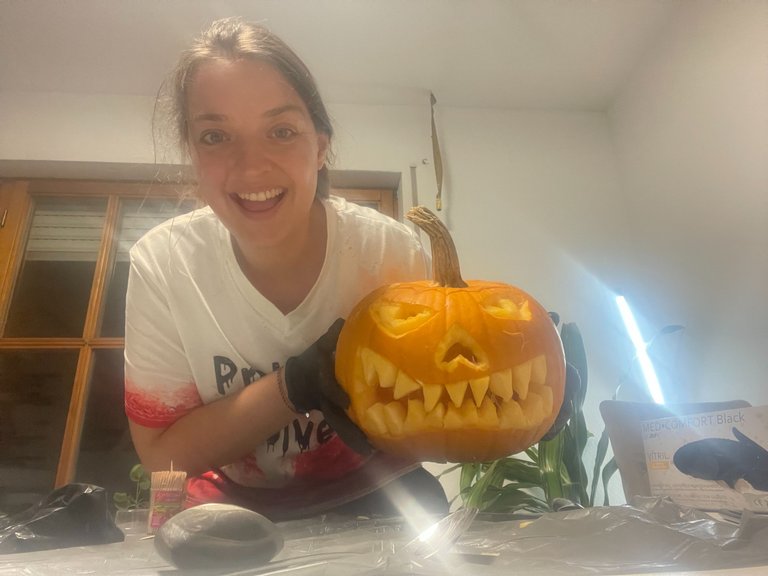
I love holidays! I know some come with trouble, vacation, chaos, and drama.. but to stay on the positive it is always a reason to come together, be happy, and in terms of this community - be creative!
Doesn´t matter if it's carnival, Valentine's Day, Easter, Halloween, or Christmas - I just love how every holiday comes with a motto and you can do something special about it.
So next week as many of you know, we have Halloween coming up on the 31st. When I was a kid, this holiday was still not very known here in Germany - with movies and globalization it came over from the gringos to our country and there are still some Germans avoiding it - as its not originally German :D
But most of us adapted and my inner child loves the concept of dressing up, going with the kids for Trick or treat, doing spooky stuff, decorating, and else.
That´s why I decided to enter this challenge and dedicate my first DIY post in this community to this holiday: Carving a spooky pumpkin in Germany.
¡Me encantan los dias festivos! Sé que algunas traen problemas, caos y drama... pero para mantenernos positivos, siempre es una razón para reunirse, ser felices y, en términos de esta comunidad, ¡ser creativos!
No importa si es carnaval, el día de San Valentín, Pascua, Halloween o Navidad: me encanta cómo cada fiesta viene con un lema y puedes hacer algo especial al respecto.
Así que la semana que viene, como saben, el 31 es Halloween. Cuando era niña, esta fiesta todavía no era muy conocida aquí en Alemania; con las películas y la globalización, llegó de gringolandia a nuestro país y todavía hay algunos alemanes que la evitan, ya que no es originalmente alemana :D
Pero la mayoría de nosotros nos adaptamos y mi niña interior ama el concepto de disfrazarse, ir con los niños a pedir dulces, decorar y demás.
Por eso decidí sumarme a este reto y dedicar mi primer post del DIY en esta comunidad a esta festividad: Tallar una calabaza espeluznante en Alemania.
Step 1: Find a pumpkin /Encontrar una calabaza
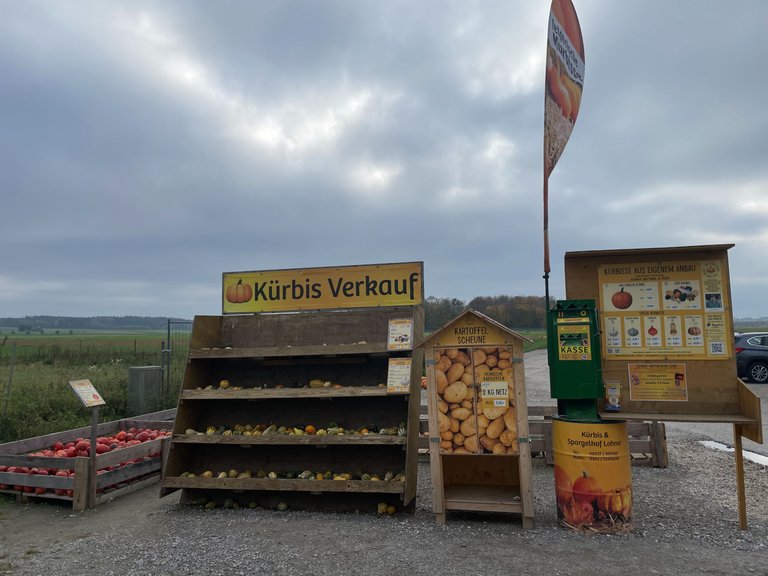
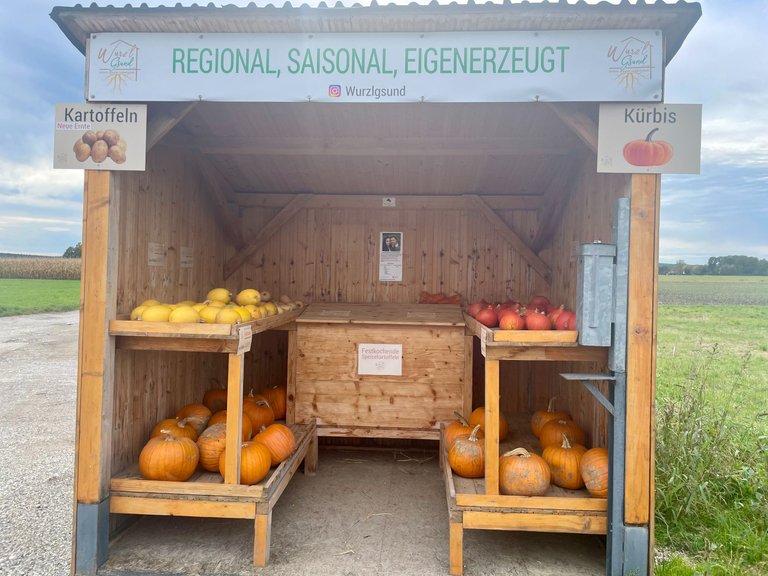
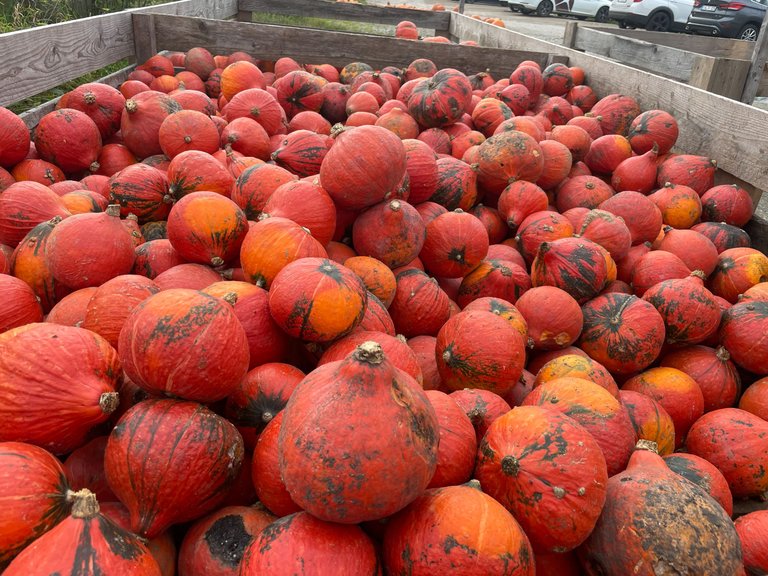
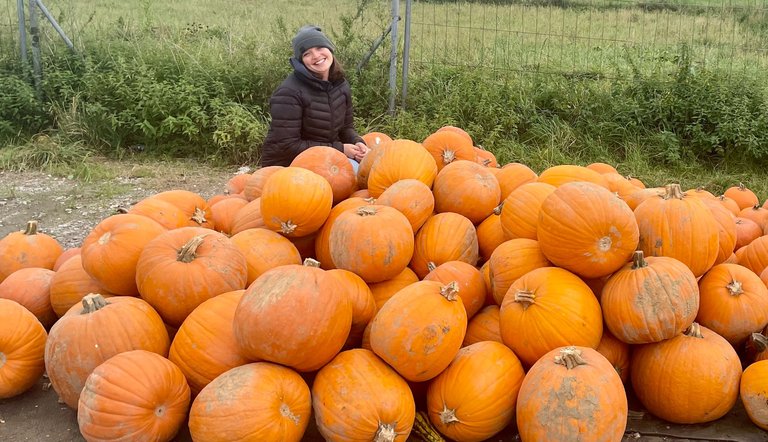
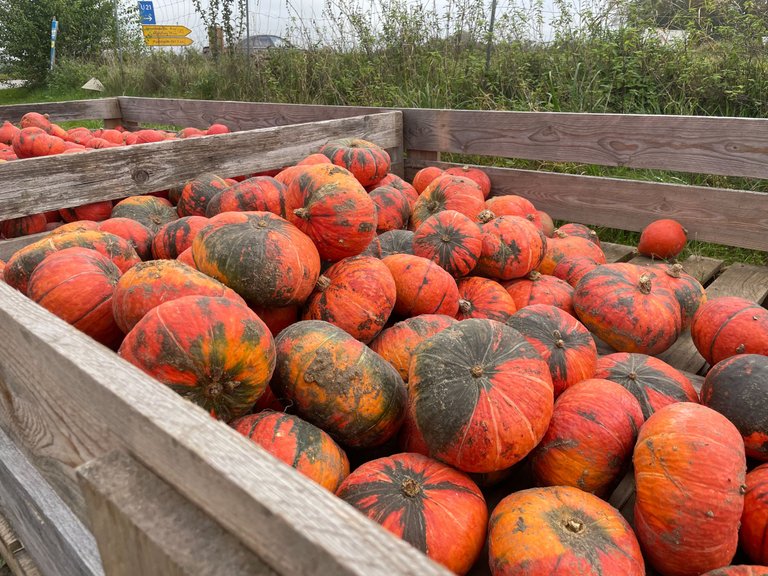
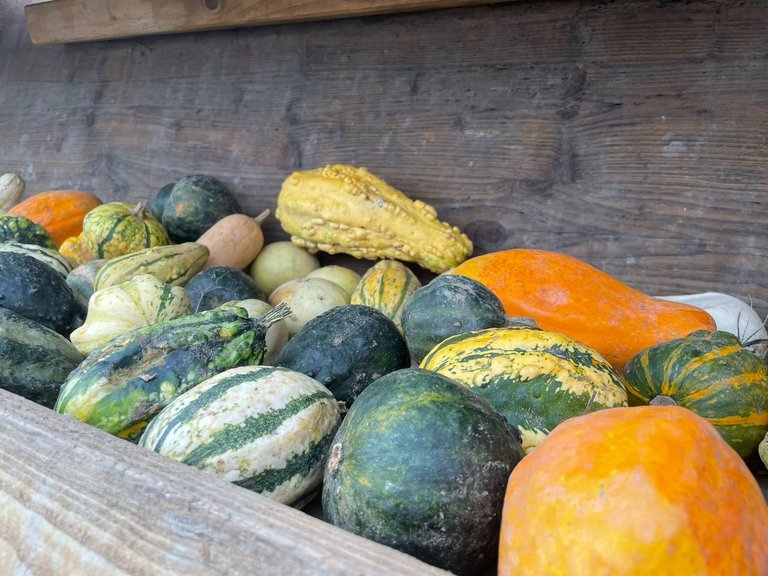
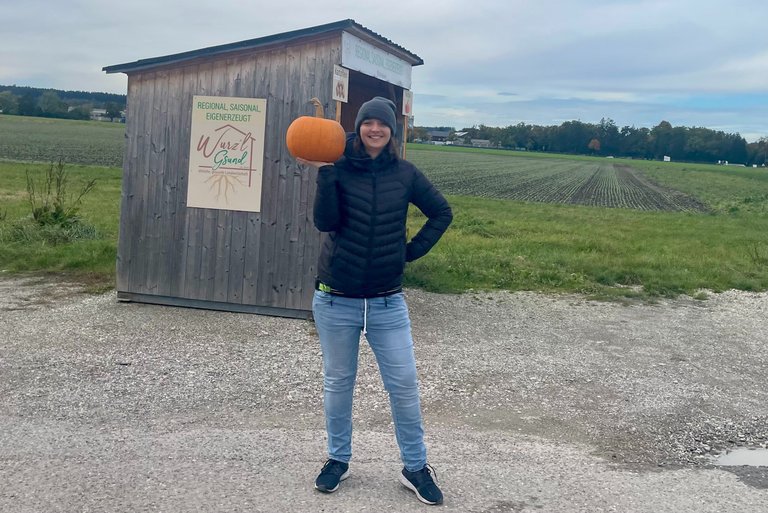
This is very easy here in Germany. As we are a very safe and trusting country, pumpkins lie around almost every 5 km in some fields. You can go there, pick one that you like and leave money for it, without anybody watching.
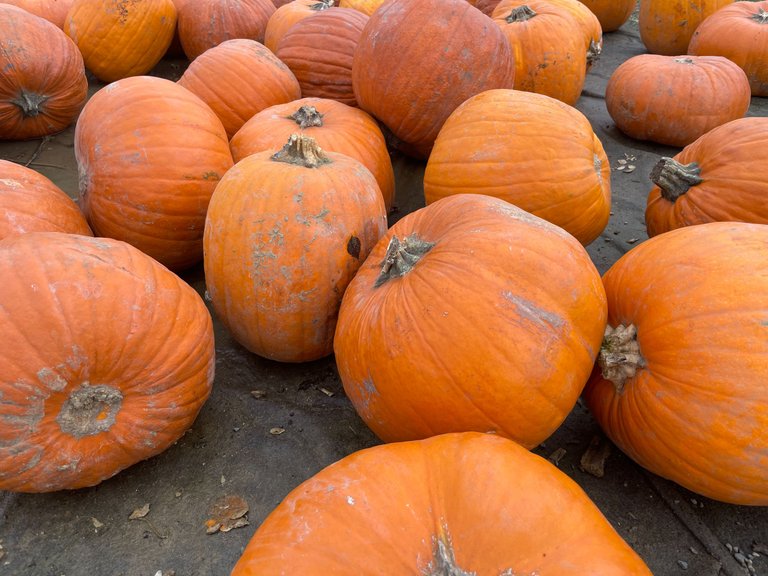
Those places are everywhere and seasonal. Depending on the time, we have them for flowers, pumpkins, strawberries, asparagus, and other things. So I drove to one close by, checked out the pumpkins, and picked one to carve.
Esto es muy fácil aquí en Alemania. Como somos un país muy seguro y confiado, en algunos campos hay calabazas casi cada 5 kilómetros. Puedes ir allí, elegir uno que te guste y dejar dinero para ello, sin que nadie te mire.
Esos lugares están en todas partes y son estacionales. Dependiendo de la época los tenemos para flores, calabazas, fresas, espárragos y otras cosas. Así que para encontrar una calabaza conduje hasta una cercana, miré las calabazas y elegí una para tallarla.
Step 2: Get inspiration / Inspírate
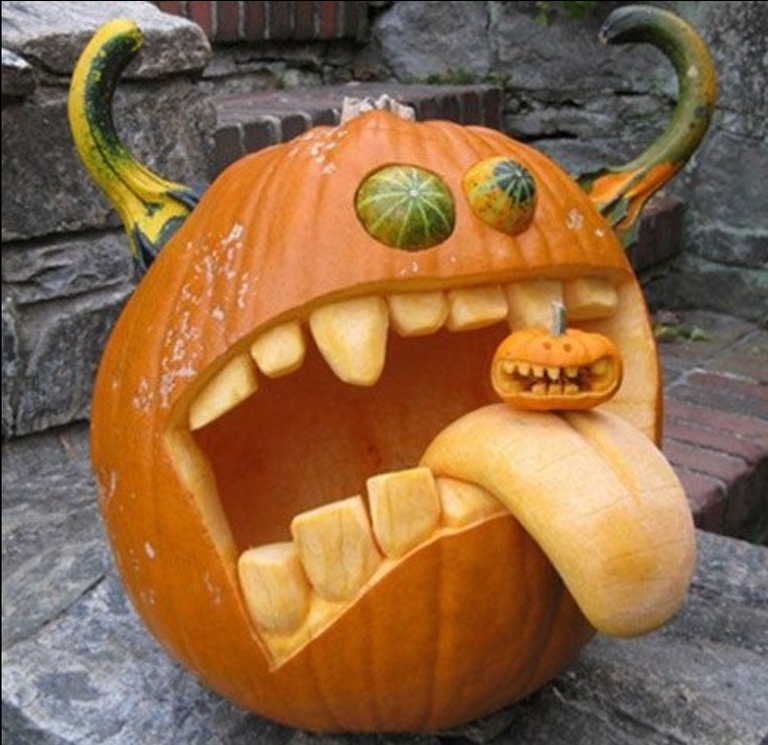
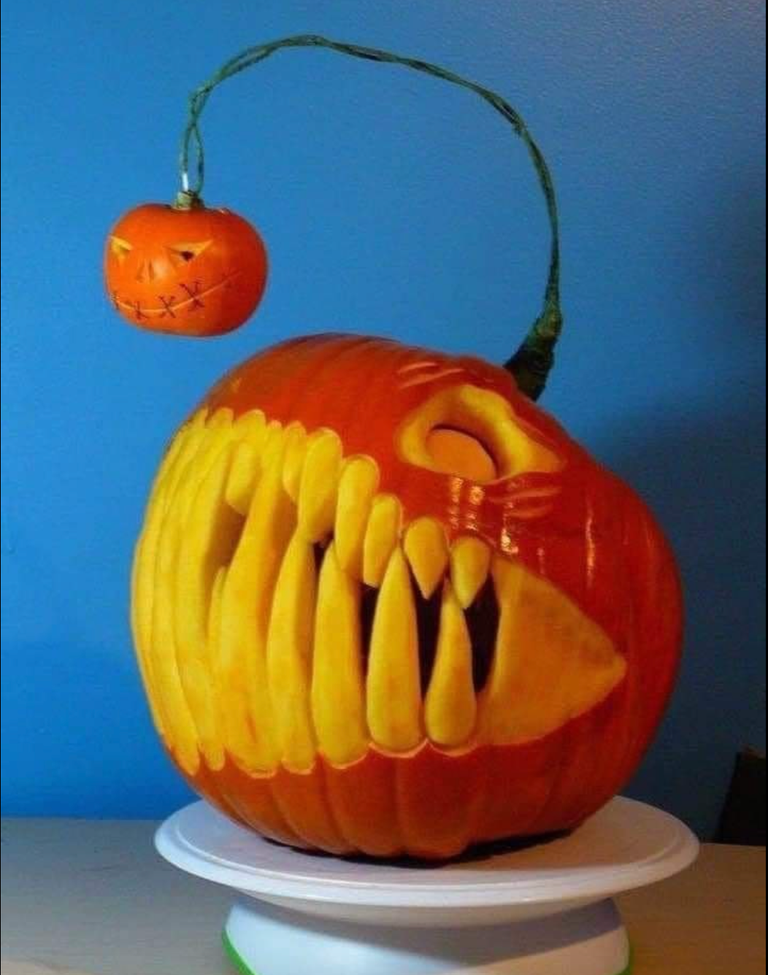
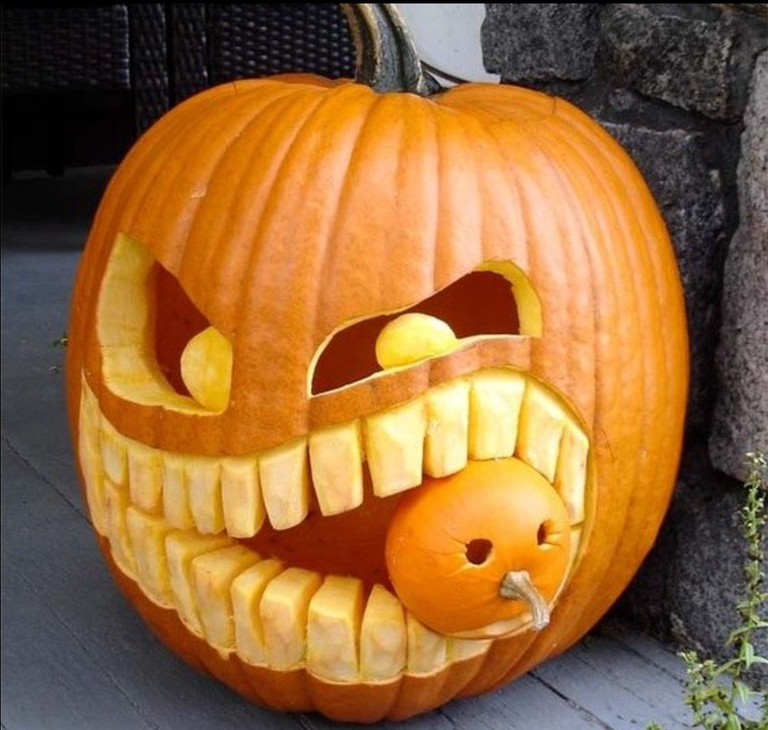
I know most of you guys are probably very creative yourself, doing just as intuition is telling you. I am more of an inspiration kind of girl. - this means I am searching for some inspiration on FB, Instagram, and Pinterest and then take it from there - not copying it but working with this input.
Here you can check out some cool posts that I found on Facebook and Pinterest.
Sé que la mayoría de ustedes probablemente sean muy creativos y hagan exactamente lo que les dice la intuición. Soy más bien una chica del tipo de inspiración. - Esto significa que estoy buscando inspiración en Facebook, Instagram y Pinterest y luego la tomo desde allí, no copiándola, sino trabajando con los imagenes que me llegan.
Aquí puedes ver algunas publicaciones interesantes que encontré en Facebook y [Pinterest](https://pin.it/ 45uoh768q).
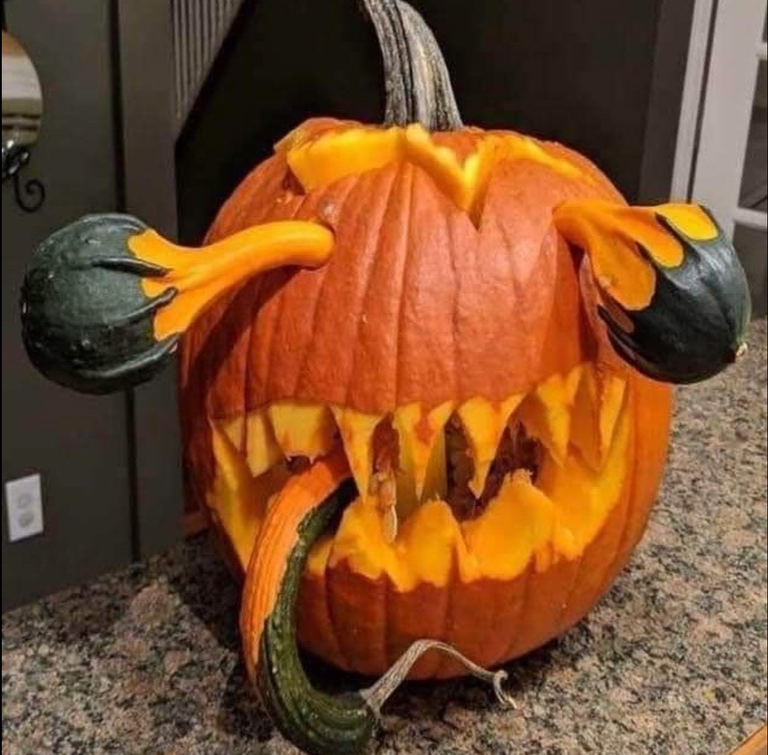
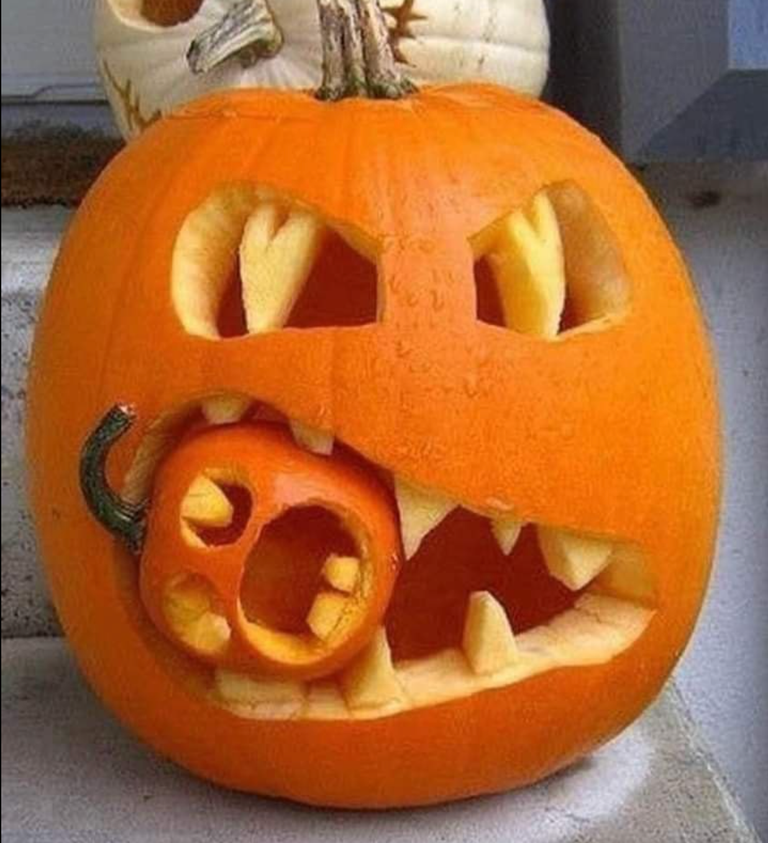
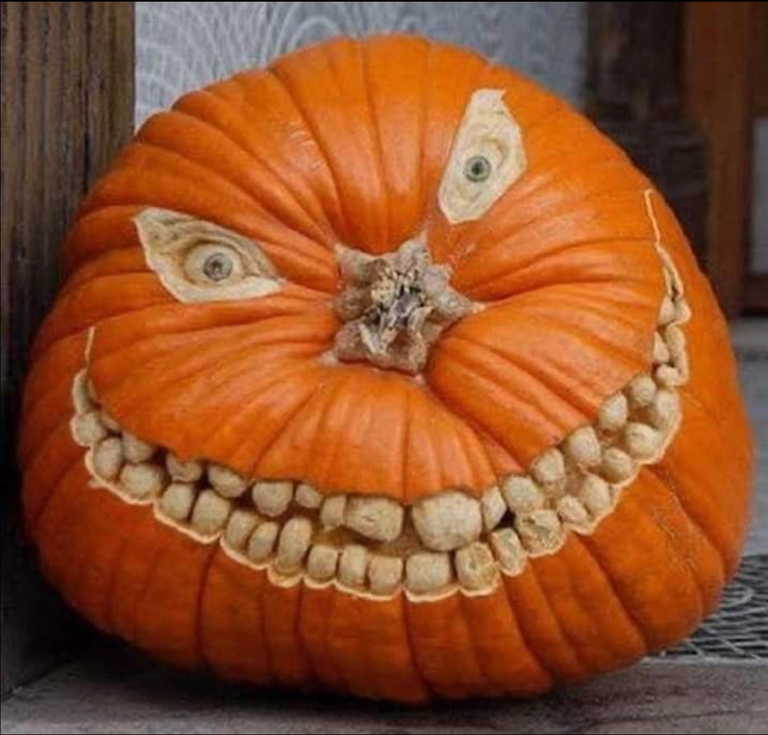
Step 3: Dressing up, setting the mood, and preparing the workplace /Vestirse, crear el ambiente y preparar el lugar de trabajo.
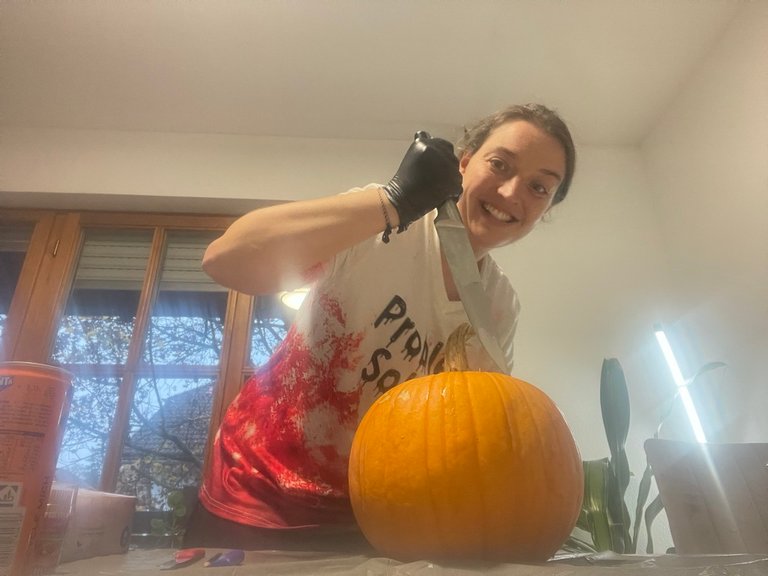
For me, it's always important to be 100% in with what I am doing to be super creative. So I got my beloved Halloween shirt on, put on a Spotify Halloween music playlist, and prepared the working place.
Para mí, siempre es importante estar 100% involucrada en lo que estoy haciendo para ser súper creativa. Así que me puse mi querida camiseta de Halloween, puse una lista de música de Halloween de Spotify y preparé el lugar de trabajo.
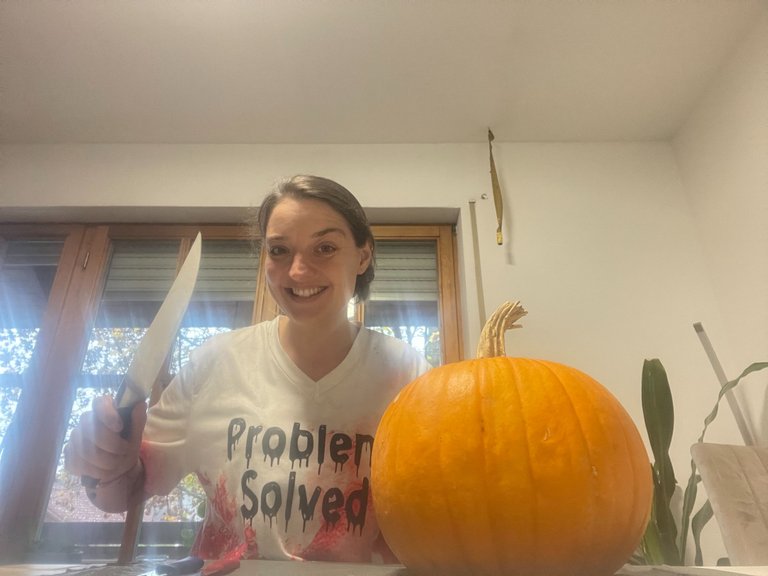
My wife always wants to have everything 100% clean (cooks :D), so I had to promise not to make a mess with this if I wanted to do it inside. As it is already freezing cold outside... yes Germany is cold in autumn :D, I preferred being inside for the next 2-3 hours with this project.
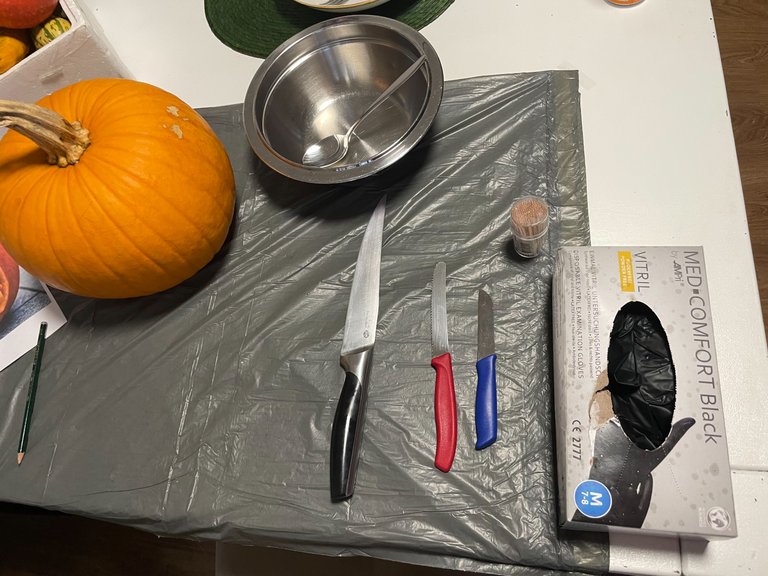
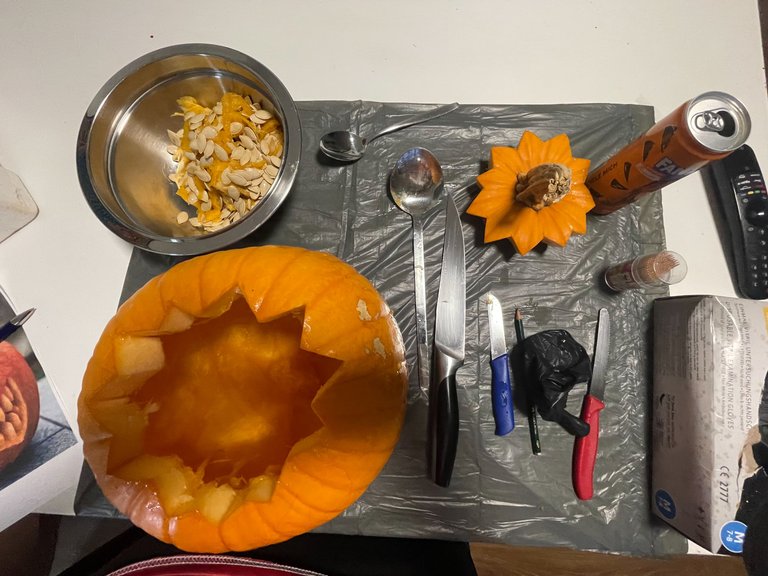
So I prepared the working place accordingly. Here is a list of everything needed:
- Plastic bag to avoid the mess on the table
- A pencil to draw your design on the pumpkin
- Different knives to cut the pumpkin, and carve what you like
- gloves to not get your hands dirty (especially the orange can stay for days on your hand)
- A spoon and bowl to get the pulp inside out and have a clean space for it
- toothpick to get the teeth back in
Mi esposa siempre quiere tener todo 100% limpio (cocinera :D), así que tuve que prometer que no ensuciaría la sala si quería hacerlo por dentro. Como afuera ya hace mucho frío... sí, en Alemania hace frío en otoño :D, preferí estar adentro durante las próximas 2 o 3 horas con este proyecto.
Así que preparé el lugar de trabajo en consecuencia. Aquí hay una lista de todo lo necesario:
- Bolsa de plástico para evitar el desmadre en la mesa.
- Un lápiz para dibujar el diseño en la calabaza.
- Diferentes cuchillos para cortar la calabaza y tallar lo que más te guste.
- guantes para no ensuciarse las manos (especialmente el naranja puede permanecer durante días en la mano)
- Una cuchara y un bol para sacar la pulpa y tener un espacio limpio para ella.
- palillo para volver a meter los dientes
Step 4: Clean the pumpkin and draw the lines of your design on it /Limpia la calabaza y dibuja sobre ella las líneas del diseño.
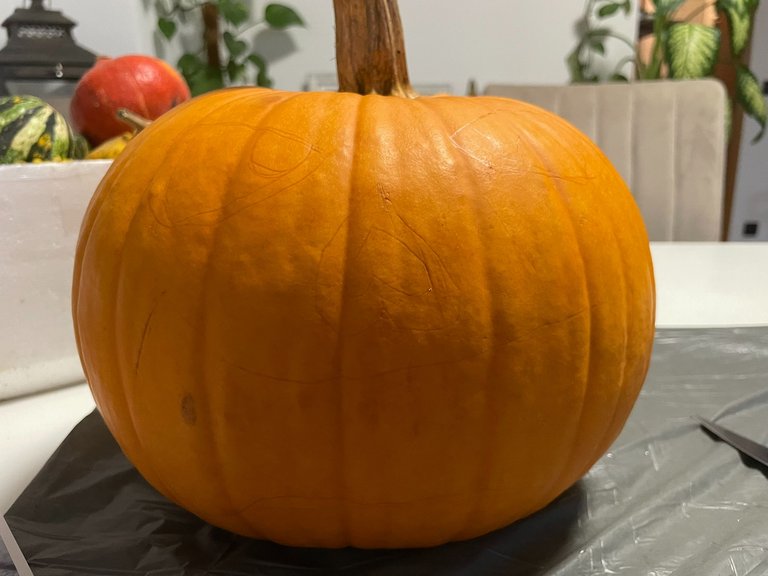
As the pumpkin here doesn´t come from any supermarket, but directly from the field, there still can be lots of dirt on it. So before you start anything else, make sure your pumpkin is clean - makes it much easier to operate on/with it ;)
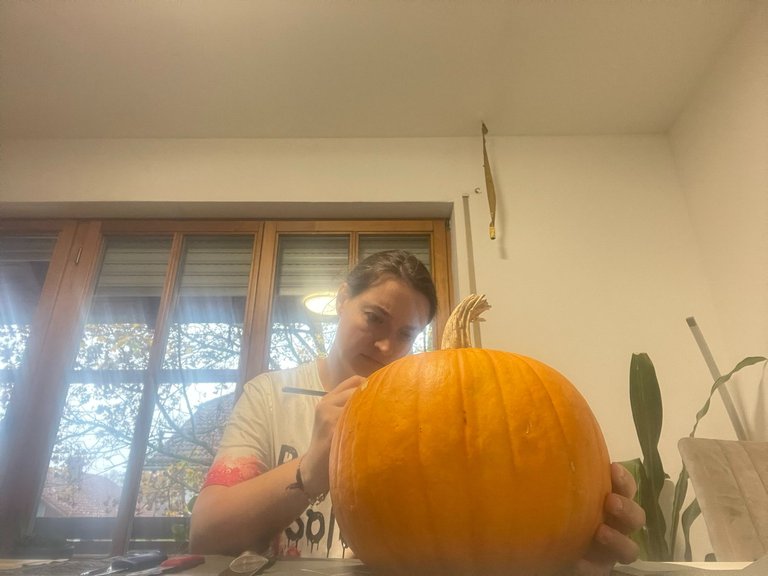
For me, it is important to have a clear idea in my head about how the finished pumpkin should look like. Of course, I can still change the way or add something, but the main concept has to be there already. That's why I drew the pumpkin's face on it at first before I did anything else.
As I had eyes, nose, and mouth I had to make sure there was enough space for all of it and the proportions were right. I started with the eyes, then put the nose in the middle and made the mouth in the end. The mouth should be as wide as the eyes - or a little bit more I thought. - to make it spooky enough. As from eyes and mouth, there wouldn't come out too much light, it was important to have a big moth showing off the spooky teeth. They are my favorite part so I wanted people to give them most of the attention when it's finished ;)
Como aquí la calabaza no viene de ningún supermercado, sino directamente del campo, todavía puede tener mucha suciedad. Entonces, antes de comenzar con cualquier otra cosa, me aseguré de que mi calabaza esté limpia; hace que sea mucho más fácil operar con ella ;)
Para mí, es importante tener una idea clara de cómo debería verse la calabaza terminada. Por supuesto, aún puedo cambiar la forma o agregar algo, pero el concepto principal ya debe estar ahí. Por eso al principio dibujé la cara de la calabaza antes de hacer cualquier otra cosa.
Como tenía ojos, nariz y boca, tenía que asegurarme de que hubiera suficiente espacio para todo y que las proporciones fueran las correctas. Empecé con los ojos, luego puse la nariz en el medio y al final hice la boca. La boca debe ser tan ancha como los ojos, o un poco más, pensé. - para hacerlo lo suficientemente espeluznante. Como de los ojos y la boca no saldría demasiada luz, era importante tener una boca grande mostrando los espeluznantes dientes. Esa es mi parte favorita, así que quería que la gente le prestara la mayor atención cuando estuviera terminada;)
Step 5: Cut the lines of your drawings on the pumpkin /Recortar las líneas de los dibujos en la calabaza
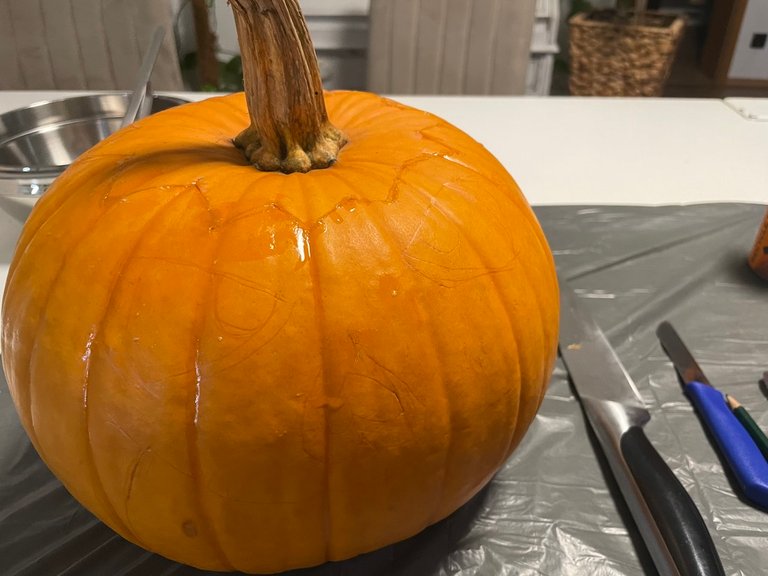
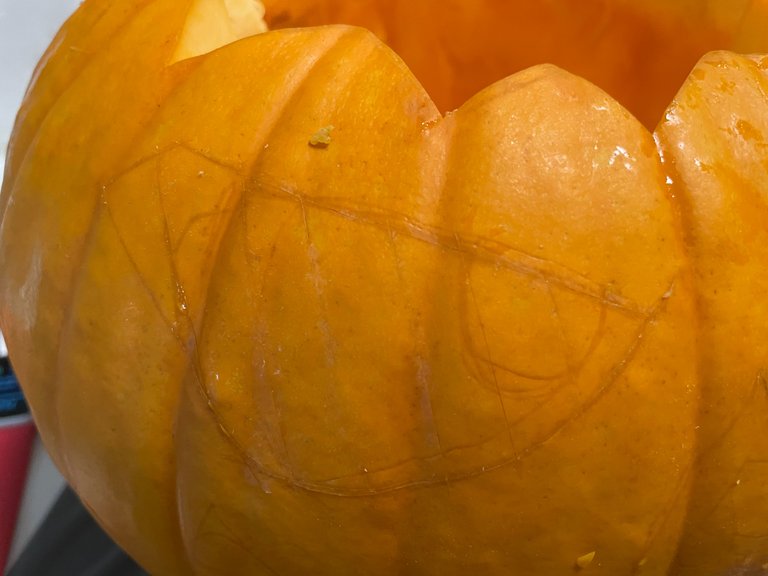
The first thing I do after drawing the lines with the pencil as I imagine the face will be, is scratching along them a little bit with a small knife. Like that, it is easier to carve it out along the lines.
As the pumpkin is fresh, it gets a little wet after scratching. Here the spooky part begins, because it looks like it is bleeding or crying as the liquid is going down the sides.
Lo primero que hago después de dibujar las líneas con el lápiz como imagino que será la cara, es rascarlas un poco con un cuchillo pequeño. De esta manera, es más fácil tallarlo siguiendo las líneas.
Como la calabaza está fresca, se moja un poco después de rasparla. Aquí comienza la parte espeluznante, porque parece que está sangrando o llorando mientras el líquido va bajando por los costados.
Step 6: Start the surgery: Open the pumpkin head /Iniciar la cirugía: abrir la cabeza de calabaza.
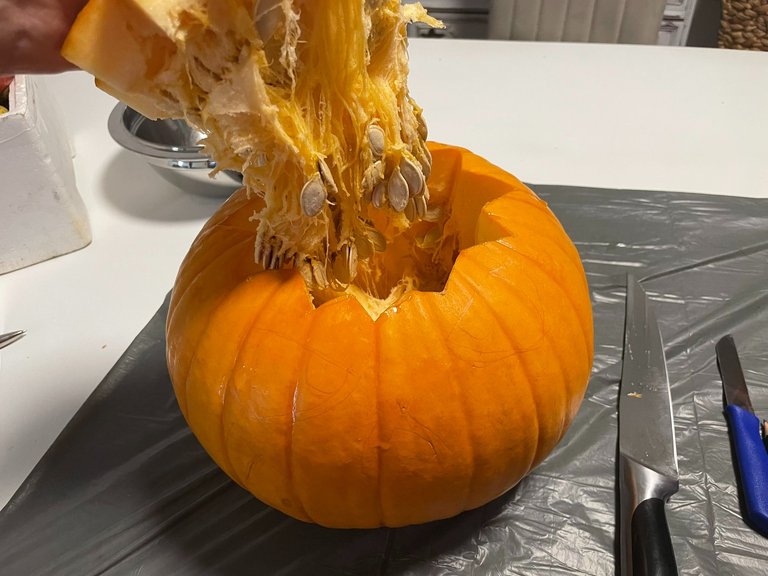
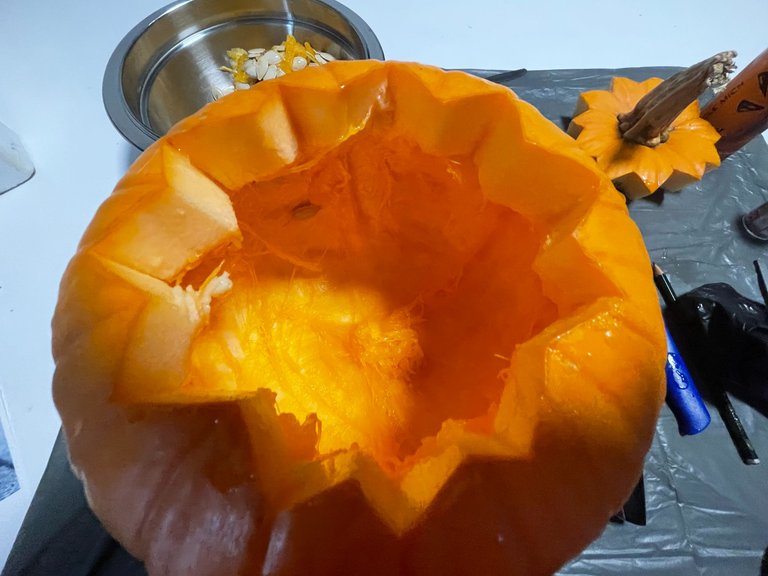
The first important thing when carving a pumpkin is to open its head and get all the pulp out. The easiest and best looking in my opinion is doing a zigzag cut not far from the stem. I am very lucky because my wife is a cook. Means we have big knives and they are pretty sharp. That made it very easy to follow my drawing and cut open the head of the pumpkin. When finished you can pull it out grabbing the stem.
Lo primero importante a la hora de tallar una calabaza es abrirle la cabeza y sacarle toda la pulpa. En mi opinión, lo más fácil y bonito es hacer un corte en zigzag no muy lejos del tallo. Tengo mucha suerte porque mi esposa es cocinera. Significa que tenemos cuchillos grandes y bastante afilados. Eso hizo que fuera muy fácil seguir mi dibujo y abrir la cabeza de la calabaza. Cuando termines, puedes sacarlo agarrando el tallo.
Step 7: Get the pulp out /sacar la pulpa
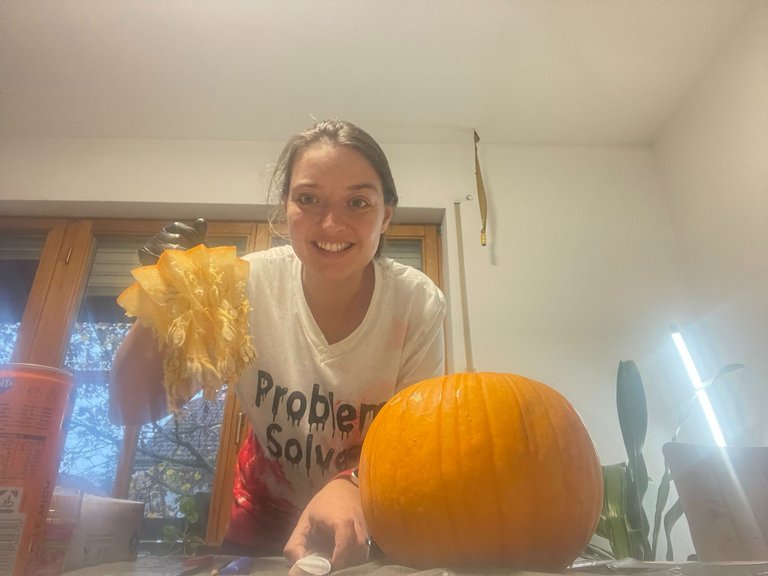
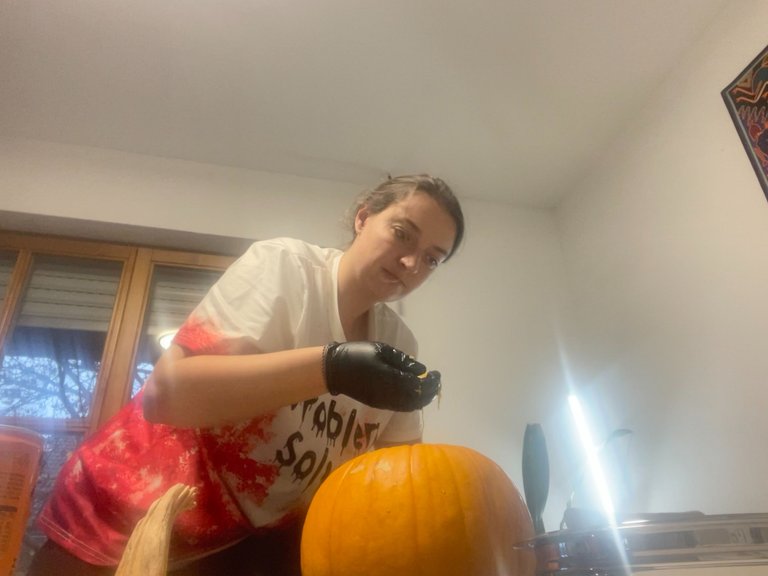
Once the pumpkin was opened on the top I could see all the seeds and pulp on the inside. Here I took the spoon to scrape out everything. Once I separated the inner part from the outside, I could pull it out with my hands and put it into the bowl. - At this moment I appreciated the gloves the most, as the pulp is very slimy, and you have to pull strongly to get it out.
Una vez que la calabaza se abrió en la parte superior pude ver todas las semillas y la pulpa en el interior. Aquí tomé la cuchara para raspar todo. Una vez que separé la parte interior de la exterior, pude sacarla con las manos y ponerla en el bol. - En este momento lo que más aprecié fueron los guantes, ya que la pulpa es muy viscosa y hay que tirar fuerte para sacarla.
Step 8: Do the eyes /hacer los ojos
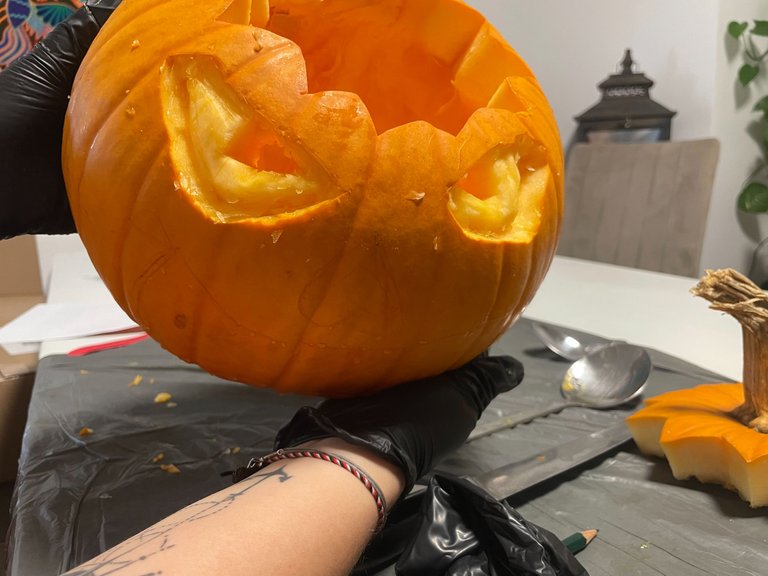
Once the inside was clean I started with the artistic part, carving the face. For me, it's always easier to start with the eyes. I don´t know why but I need some structure in this and it makes also sense to start at the top and then work down. Once the eyes are done, I see the proportions and can adapt the rest if necessary. - Also the eyes seemed to be the trickiest, so I was very focused on getting them right.
Usually, I just cut out all the eye parts to have good light coming out of the pumpkin.. But this time I saw in so many designs that the eyes weren't completely cut out - but only partly cut out and the rest was carved in an interesting shape.
This made me wonder.. in terms of - How would it look at night with the light on inside... will it then only look like small eyes or can you actually see some different lighting?? - So I gave it a shot (could have still pulled out the rest of it if it wouldn't look nice anyway).
I started with the right eye and checked the scratch I did before to make sure the shape looked nice and I could work along it when pulling out first the skin piece by piece. Removing the skin helped me mark the space I would use. After that, I carved the frame, cut in a small hole, and then carved the rest into shape.
Ya con el interior limpio, comencé con la parte artística, tallando el rostro. Para mí siempre es más fácil empezar por los ojos. No sé por qué, pero necesito algo de estructura en esto y también tiene sentido empezar desde arriba y luego ir hacia abajo. Una vez hechos los ojos, veo las proporciones y puedo adaptar el resto si es necesario. - Además los ojos parecían ser los más complicados, así que estaba muy concentrada en hacerlos bien.
Por lo general, simplemente corto todas las partes de los ojos para que salga buena luz de la calabaza. Pero esta vez vi en tantos diseños que los ojos no estaban completamente cortados, sino solo parcialmente y el resto estaba tallado. Se me hizo interesante
Esto me hizo preguntarme... en términos de: ¿Cómo se vería de noche con la luz encendida en el interior... entonces solo parecerá ojos pequeños o realmente podrás ver alguna iluminación diferente? - Así que lo intenté (todavía podría haber sacado el resto si no se viera bien de todos modos).
Comencé con el ojo derecho y revisé el rasguño que hice antes para asegurarme de que la forma se viera bien y pudiera trabajar a lo largo de ella al sacar primero la piel pieza por pieza. Quitar la piel me ayudó a marcar el espacio que usaría. Después de eso, tallé el marco, corté un pequeño agujero y luego tallé el resto para darle forma.
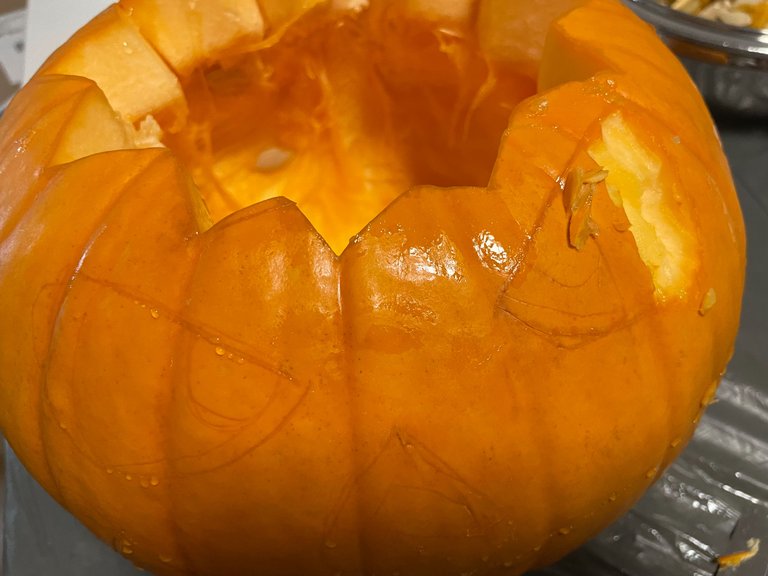
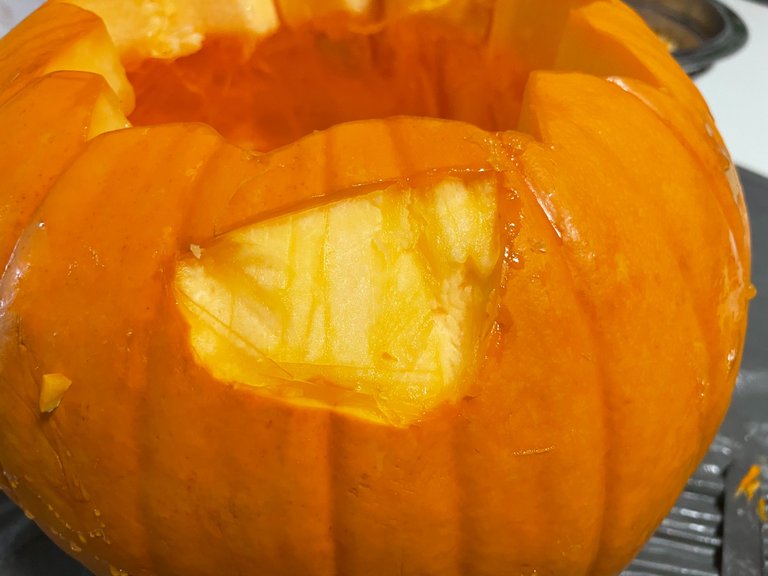
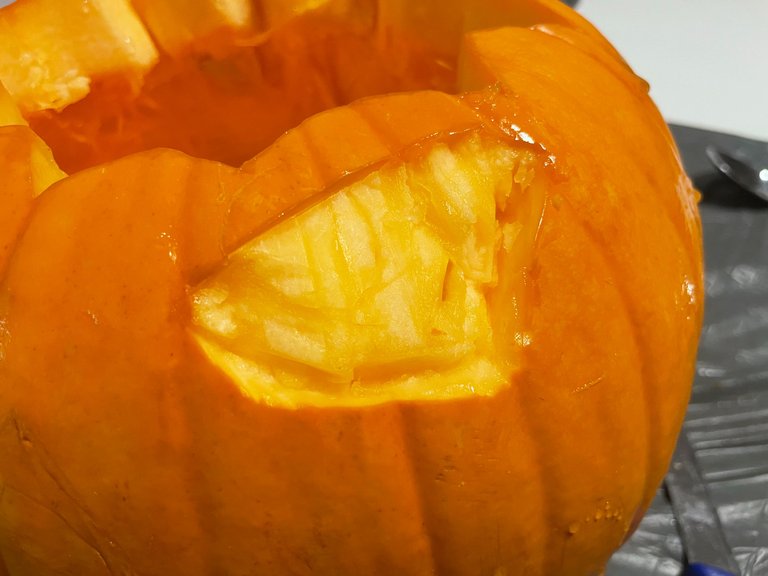
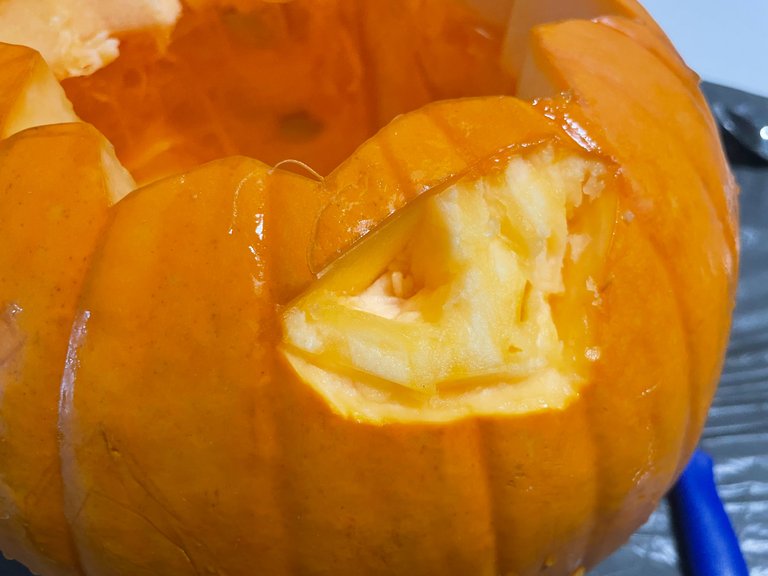
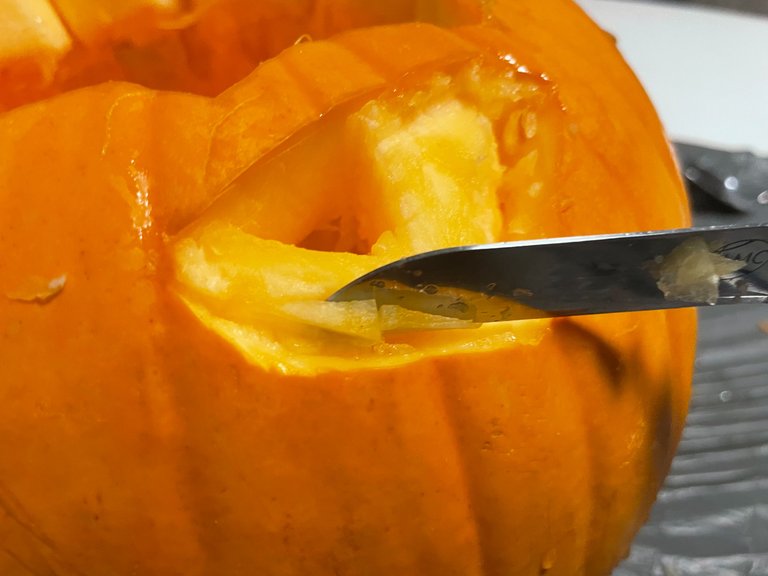
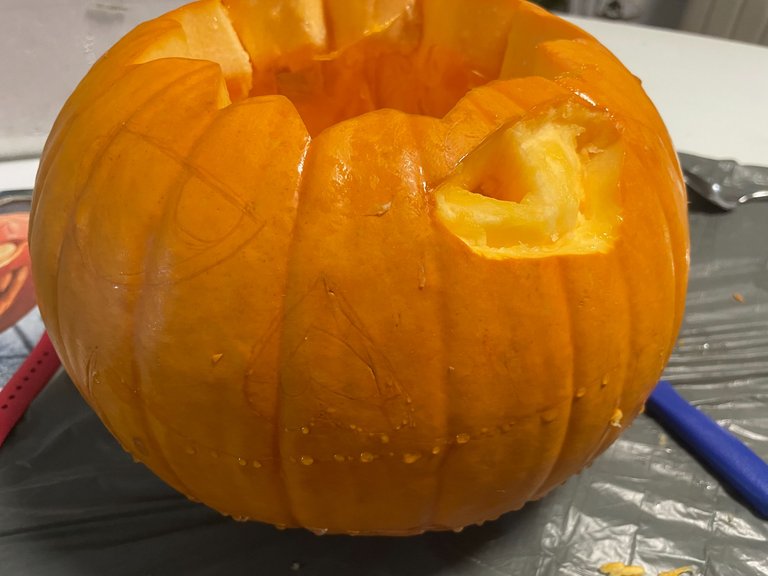
Having made the experience on the right sight of the pumpkin, made it a lot easier to do the same on the left. I adapted the shape a little bit making a new scratch to make it look equal to the other eye and started carving just the same as before. First removing the skin, then the frame, the whole, and finally the fine-tuning.
Habiendo realizado la experiencia en la vista derecha de la calabaza, fue mucho más fácil hacer lo mismo en la izquierda. Adapté un poco la forma haciendo un nuevo rasguño para que pareciera igual al otro ojo y comencé a tallar igual que antes. Primero quitando la piel, luego el marco, el conjunto y finalmente el ajuste.
Step 9: Do the nose /hacer la nariz
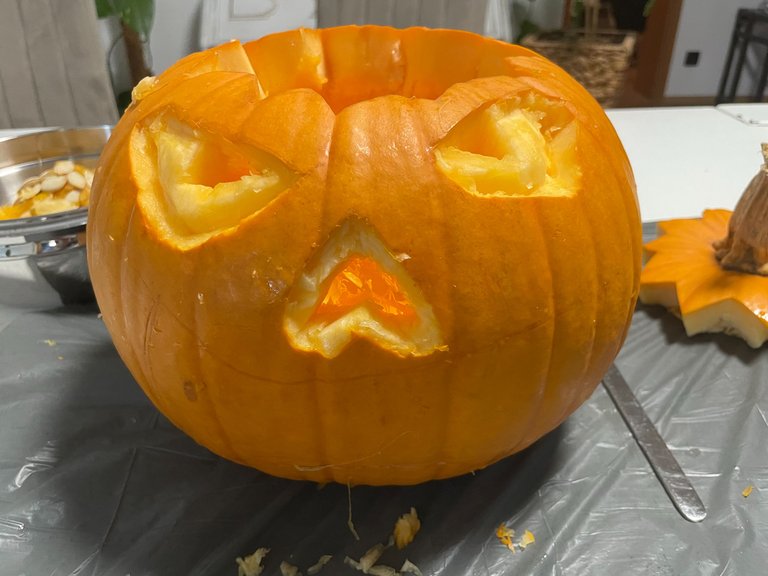
In the past years, I haven´t done a nose on my pumpkin. But as I lived in Mexico for over 5 years and have family there, around Halloween, for me the dia de los Muertos is also very present. So I decided to give my little pumpkin a Mexican-style nose a la catrina.
The shape is pretty easy to draw - as it looks just like a heart but upside down. To keep the carving style from the eyes, I decided also to start removing the skin first. I left a small frame on the outside and then made a tunnel to do a hole... a little bit of 3D mode getting smaller towards the end.
En los últimos años no le he hecho la nariz a mi calabaza. Pero como viví en México por más de 5 años y tengo familia allí, alrededor de Halloween, para mí el día de los Muertos también está muy presente. Así que decidí darle a mi pequeña calabaza una nariz estilo mexicano a la catrina.
La forma es bastante fácil de dibujar, ya que parece un corazón pero al revés. Para mantener el estilo tallado fuera de los ojos, decidí comenzar también a quitar la piel primero. Dejé un pequeño marco en el exterior y luego hice un túnel para hacer un agujero... un poco en modo 3D, haciéndose más pequeño hacia el final.
Step 10: Do the mouth and teeth / Hacer la boca y los dientes.
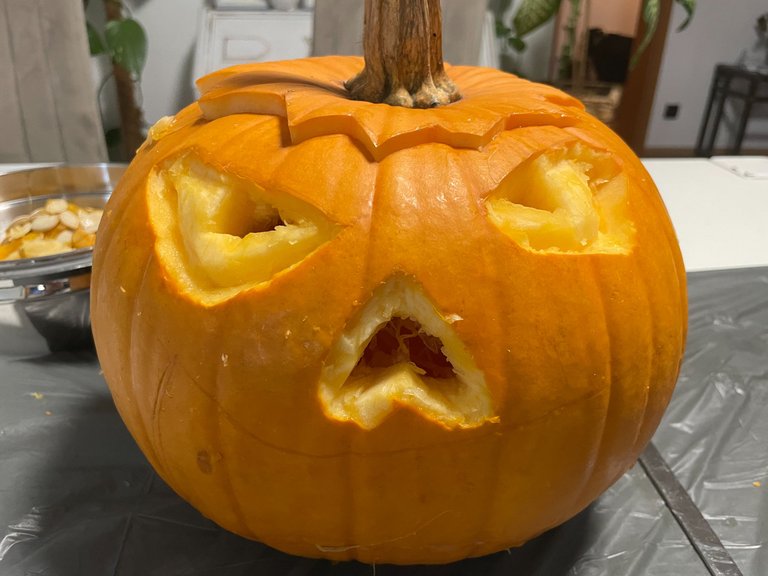
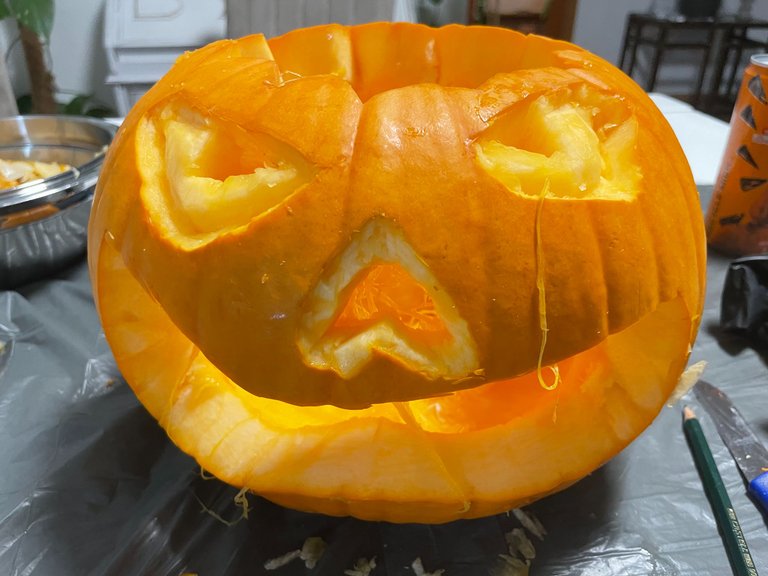
As always, the best comes last! The mouth and the teeth. While carving the pumpkin's eyes and nose had become bigger than planned, so I decided to also enlarge the mouth accordingly. As I said before, this is my favorite part of this design. I wanted it to give the most light when the candle is lit, so people would instantly look at it.
Also here usually I did the mouth and teeth together, trying not to accidentally cut a tooth out on my way :D - but with age also I get smarter 😉 - So this time I cut out the whole mouth first to have lots of space to form great teeth afterward.
Como siempre, ¡lo mejor viene al final! La boca y los dientes. Mientras tallaba los ojos y la nariz de la calabaza se habían vuelto más grandes de lo planeado, decidí agrandar también la boca en consecuencia. Como dije antes, esta es mi parte favorita de este diseño. Quería que diera la mayor cantidad de luz cuando la vela estuviera encendida, para que la gente la mirara instantáneamente.
También aquí normalmente hago la boca y los dientes juntos, tratando de no cortarme un diente accidentalmente en el camino :D - pero con la edad también me vuelvo más inteligente 😉 - Así que esta vez corté toda la boca primero para tener mucho espacio para formar grandes dientes después.
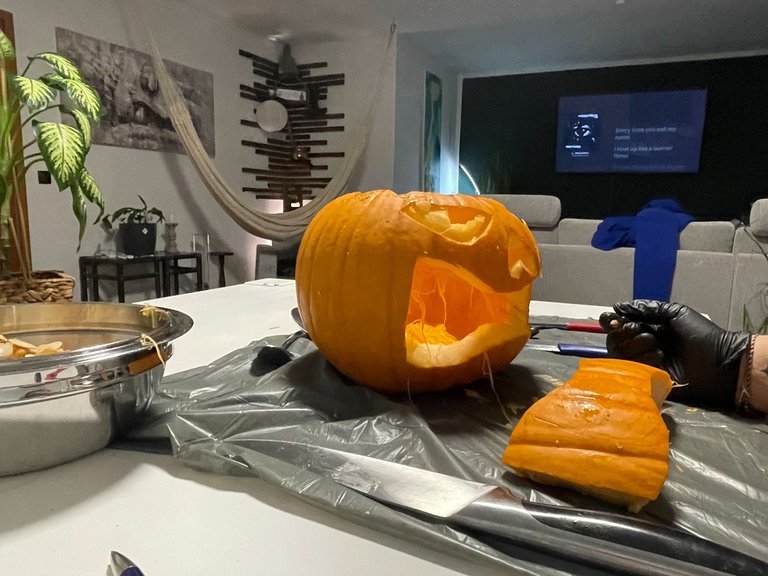
That gave me the chance to do every tooth one by one. As always I drew the teeth first with my pencil, to make sure they would fit exactly in the mouth afterward. Then I cut the piece to have the upper and the lower parts separately.
And then I started cutting out the teeth one by one shaping them nice spooky looking. When they were ready I attached them with the toothpick at the right spot. At the lower part, I did 3 teeth at a time, which I thought would be more efficient and probably easier to fix on the mouth. But I learned fast that it is easier to do it one by one - and also better looking, so the upper part of every tooth is a single one 😅
Eso me dio la oportunidad de hacer cada diente uno por uno. Como siempre, primero dibujé los dientes con mi lápiz, para asegurarme de que luego encajen exactamente en la boca. Luego corté la pieza para tener la parte superior e inferior por separado.
Y luego comencé a cortar los dientes uno por uno dándoles una apariencia espeluznante. Cuando estuvieron listos los fijé con el palillo en el lugar correcto. En la parte inferior, hice 3 dientes a la vez, lo que pensé que sería más eficiente y probablemente más fácil de fijar en la boca. Pero aprendí rápidamente que es más fácil hacerlo uno por uno y también queda mejor, así la parte superior cada diente es única 😅
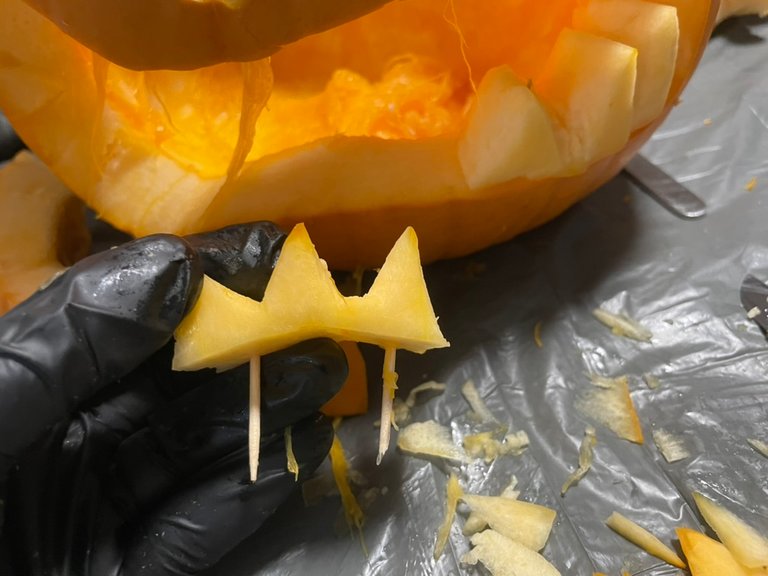
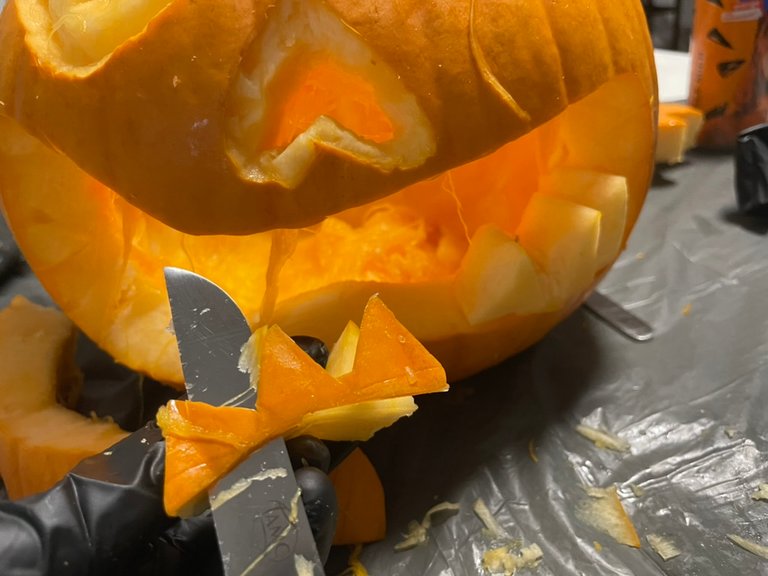
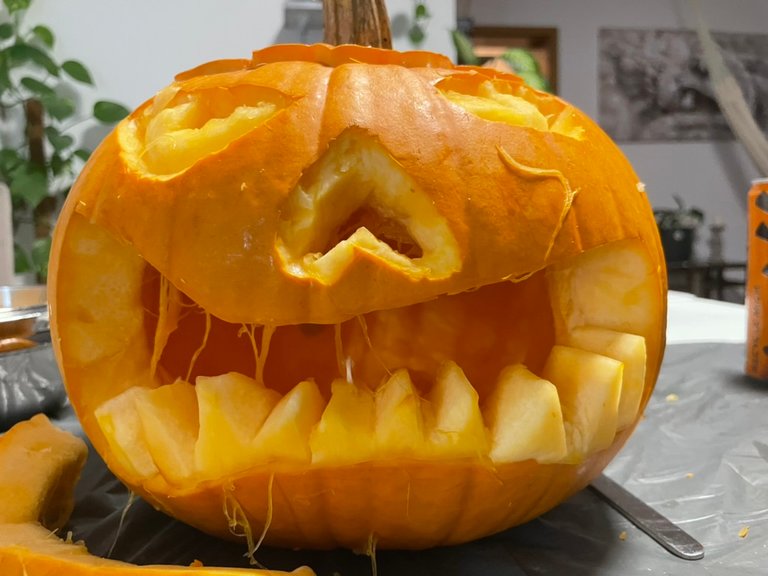
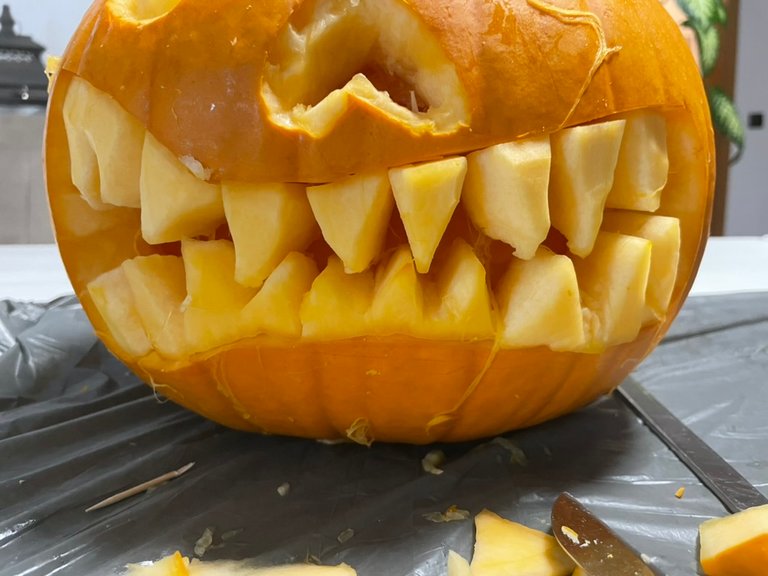
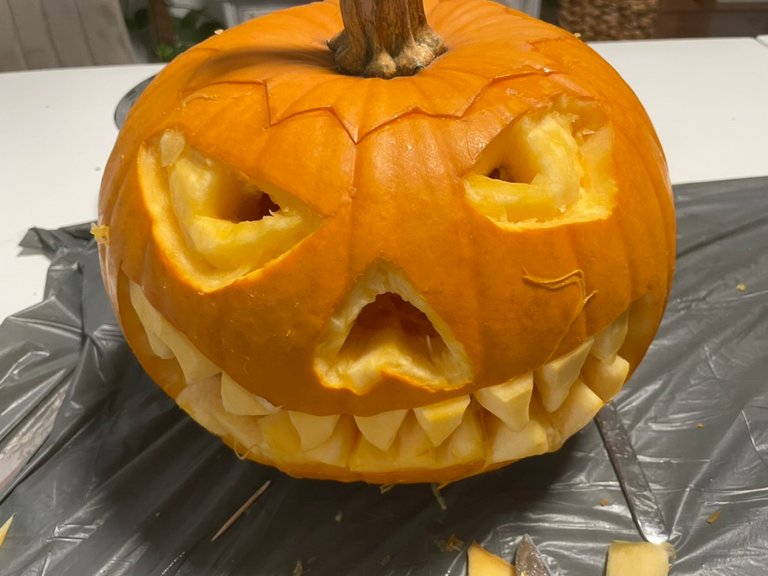
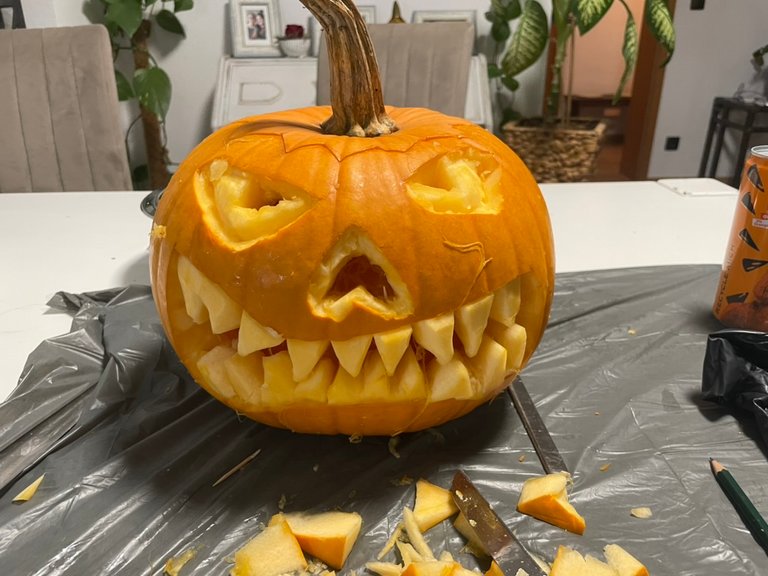
Putting in the final teeth the project was finished!!! - Now I just had to put a candle in and light it up to have the perfect Halloween decoration.
Poniéndole los últimos dientes el proyecto estaba terminado!!! - Ahora solo me quedaba ponerle una vela y encenderla para tener la decoración perfecta de Halloween.
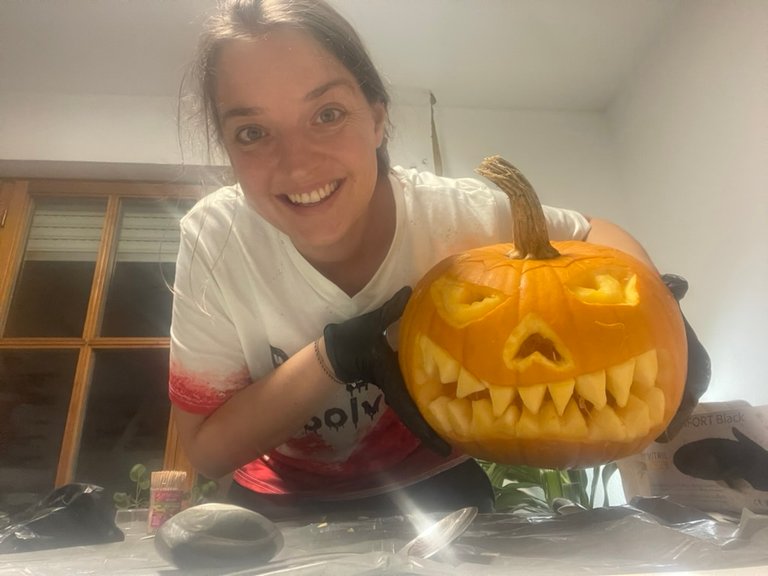
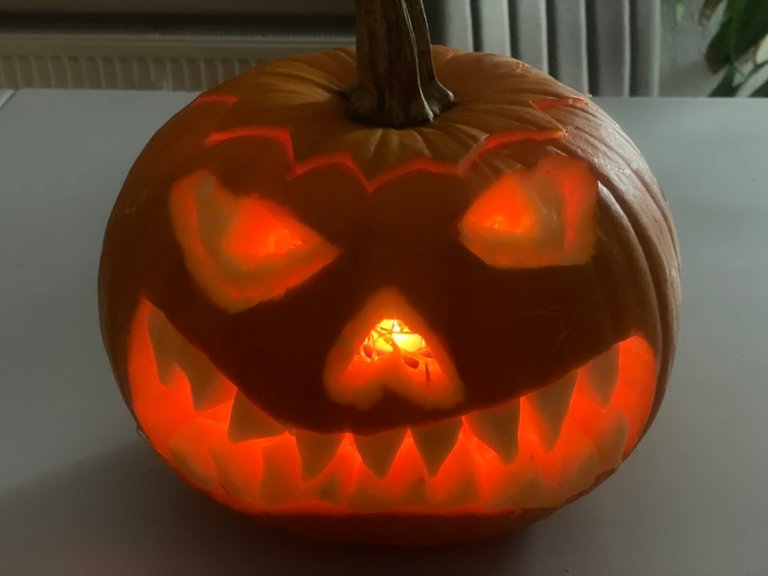
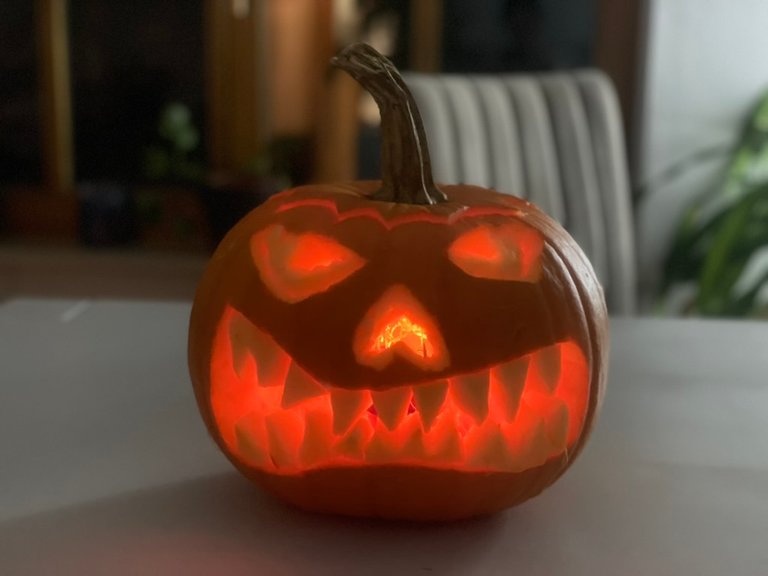
I am so happy with my design and how it all worked out. It was a lot of fun and I can highly recommend you all to get some pumpkins and try it as well! - I hope also everyone in DIYHUB Community liked that post and it will have a chance for the Halloween challenge 😎 - Also I hope it is enough for the @hivebuzz challenge to get me the Halloween badge!
If you want to watch everything in detail, feel free to check out also my DIY Video 😎
*Estoy muy feliz con mi diseño y cómo salió todo. ¡Fue muy divertido y les recomiendo a todos que consigan algunas calabazas y lo prueben también! - Espero que a todos en la comunidad DIYHUB también les haya gustado esa publicación y tengan la oportunidad de participar en el reto de Halloween 😎 - ¡También espero que sea suficiente para que el reto de @hivebuzz me consiga la insignia de Halloween!
Si quieres ver todo en detalle, no dudes en ver también mi vídeo 😎*
Cheers & Un abrazo,
Liz
Very nice handy work! Those teeth! I could never carve such a thing, I would just ruin the whole thing. You need several carving knives!
Thanks @kaminchan for stopping by and for your kind words! Glad you liked it. The teeth are truly the highlight of this pumpkin. It may look harder as it is! I am sure you could do it as well - Try it! ;) - I would love to see an entry from you!
Pumpkins are not in season here. Some people in the big city would decorate their houses and have parties for children. This wasn’t a usual custom here, but some people just like to join in for parties.
I understand. Yeah - It wasn´t a custom here either. Now they do celebrate it in the bigger cities. In the villages it is still not well seen :D
Oh, wow, you did an amazing job, I love it! 🥰 And why did you show me this? Now I have to do it too! I’d almost forgotten how much joy this brought when we used to do it as kids ☺️So, thank you for the idea! I'm going to steal a few pumpkins and work hard 😂. My balcony is going to look beautiful! 😂
Thanks @tinabrezpike! hahaha I was hoping to inspire others!!! Now that you said it you have to do it as well hehe!! Really looking forward to your work and the post! Feel free to tag me so I can´t miss it! I am excited already to read all about it.
The face of your pumpkin is amazing you’ve got real talent for carving! ;) How could I resist after seeing that? ;) Maybe I’ll do a better job this time, because when I was a kid, my pumpkins were a disaster! 😂 I’m finally free tomorrow, so let’s see some magic happen! 😂😂
What an ugly Halloween pumpkin exactly as it should be!!! You nailed it Liz 😂
Love the photo of you by all pumpkins, you look so cute, like a big kid!
hahaha, thanks @livinguktaiwan! Those words coming from you mean a lot! I know that you mean it when you say it so thanks for the compliment - I was really into it. hahaha yes, I also felt like a big kid 🤣 - Sometimes it's important to let the kid out, get your mind free, and just be creative enjoying life 😉
Oh wow! It came out gorgeous, Liz! You make it look easy, to be honest, with all them fancy knives. I'm feeling inspired to try my hand at one - I can't resist a holiday, either!
Thanks @honeydue! What a pleasant surprise to see you here <3 Once I set the mood and was 100% into it it wasn´t that hard tbh :) - Would love to see you try! feel free to tag me if you do so! Would love to see the outcome.
Aww 🥰 this is just extra ordinary, your passion for the holiday shines through, your work station very inviting and your entire working process very enjoyable to read.
Thanks a lot for your kind words @funshee 🤗😘 Makes me very happy that you liked it. Thanks for stopping by and letting me know <3
You are welcome 🤗🥰
Very nice
👍👍
✨🎃Quedo super terrorífica 🎃✨
🤣 Somehow I find the first step rather hilarious but yes, find the pumpkin! I love the result, it looks spooky and cool!
HAhaha a little fun is important 😎😂 - You know so many city kids don´t know where the stuff of supermarket comes from - you even have to explain that part 😂😂
Congratulations @lizanomadsoul! You received a personal badge!
Congratulations. Your post has met all the conditions of the Halloween challenge. This scary badge is for you. Trick or Treat?
You can view your badges on your board and compare yourself to others in the Ranking
Check out our last posts:
Awesoooome!!! Thanks a lot, Hivebuzz!! What a great achievement! I love the batch <3
Thank you! 😊 Happy Halloween 🎃👻
Happy Halloween! :)
Your Halloween pumpkin carving is fantastic and really captures the spooky vibe. Your love for holidays really shines through—thank you for sharing
Thanks a lot for stopping by and for your kind words @diyhub! I hope to have a chance at the competition. I´ll try to do another one about creative food creation if I find the time <3 - I loved doing it. Was really fun and energizing to be creative. Thanks for motivating me.
Awesome pumpkin, great work.
I carved one today too… will have to write a story around it.
!LUV
(2/10) sent you LUV. | tools | discord | community | HiveWiki | <>< daily@lizanomadsoul, @littlebee4
Thank you @littlebee4 ☀️😘 awsome! I would love to read a story about it!
You are welcome 😊
Thanks, still thinking about the story… will probably be tomorrow 🎃
Feel free to tag me so I woun´t miss it @littlebee4 <3
Will do, about to post it 😊
Thanks!
Thank you so much 😊 Happy to share, it was so much fun and worked out creatively in many ways hahaha
Enjoy your day!
Quedó espectacular amiga! Muy buen paso a paso y sobre todo se nota que lo has disfrutado! jeje
Saludos
Gracias @divergente1!! Siii, lo he disfrutado mucho 🥰🤓 que bueno que te ha gustado 🫶
truly extraordinary
Thanks @reachdreams
You're welcome.
👍
I think you enjoyed that too much!!! scary lady
HAhaha
😂 🤙
Woah, that turned out so incredibly well!! The t-shirt is on point too! haha
I loooove the t-shirt haha <3 :DThanks for your kind words @gabrielatravels <3 Always feels very special coming from you 😍 Glad you liked it and stopped by!!
Esa calabaza quedó muy espeluznante jajaja sin duda la cirugía salió bien
Gracias @evelynchacin 🤗
!PIZZA
¡Genial! team fiestas 🙌🎉
A mí también me gustan las festividades 🎆 aunque nunca he hecho una calabaza de esas, solo me las como. 😜
Oye yo había escuchado sobre esos lugares, en donde compras sin necesidad de que haya alguien cuidando el negocio, pero hasta ahora no había visto uno, me parece increíble, ojalá eso pudiera pasar en todos lados. Se ven hermosos todos los tamaños y colores, hay montones. Las pequeñitas que te llevaste a casa ¿eran por si surgía alguna otra idea o para la cena? xD
Jajaja creaste todo un ambiente tenebroso para pelear con una calabaza, yo hubiese imaginado silencio total para concentrarte en tantos detalles que tiene, pero tu cara de seriedad en el video demuestra que te tomaste tu trabajo muy en serio. Oye no había considerado que, obviamente, tendrías cuchillos buenos, eso es una grana ventaja.
xD JAJAJAJAJA muy buenas reacciones escalofriantes, la narración es tan descriptiva como las caras de asco que pones en el video.
Los ojos son diferentes a lo común, creo que yo también hubiese pensado primero en hacer un hueco y ya, pero genial que te aventuraras a probar esta forma, porque además de que el resultado está genial, es como si estuvieses dándole volumen y textura realista. El proceso sin embargo, sí me parece un poco más viscoso/feo x’D.
En esta foto, parece que tuviese vida propia y que te hablara jaja:
Buen trabajo con el detalle de hacer cada diente, quedaron espeluznante por lo enorme y afilados que se ven con la luz.
El video muy muy genial, más paso a paso sería imposible, pero lo mejor es el bailecito final de la victoria jajajaja. ¡Problem solved! 🔪🎃
Aqui de verdad hay muchos de esos lugares. No se si todos pagan so que deberian, pero parece que vale la pena. Y a mi me gusta mas que irme al supermercado :). Bien visto querida hehe, los chiquitos los vamos a necesitar como decoracion en un gran evento con excelete comida ;)
Haha si, además no saqué todo del interior.. se me hizo más tenebroso dejar algunos de esos como hilos adentro. Asi parece como si hubiera comido algo o alguien recien :D
Jaja gracias por tomarte el tiempo. Sé que mis posts son muy largos y además vienen con video... es mucho entertainment.. tal vez a veces demasiado. Pero lo quiero hacer bien - Y para mi en un Do it yourself el video no debe faltar! ;) Aprecio tus palabras y espero que ya estas mejor querida. Te mando un abrazo
Wow wow wow
You left us speechless with your awesome work and creativity.
This indeed is incredible and awesome.
Weldone.
Aww thanks a lot for your very kind words @praiselove!! Happy to get reactions like that! - I did really have fun with this project and its cool to see others like it as well - so Thanks <3