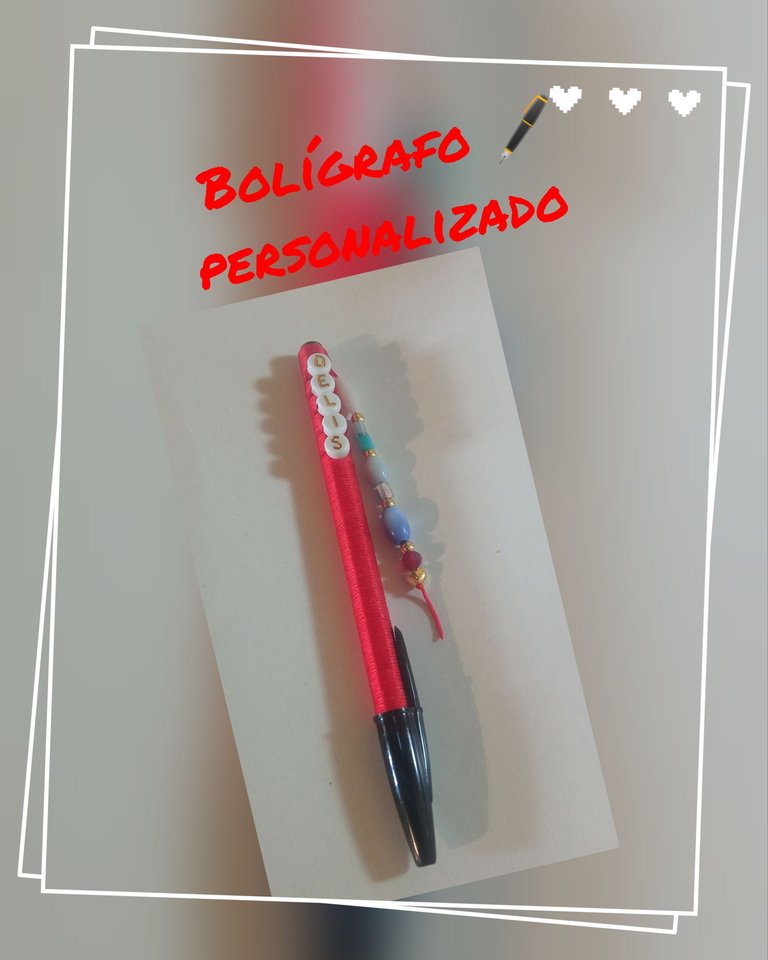
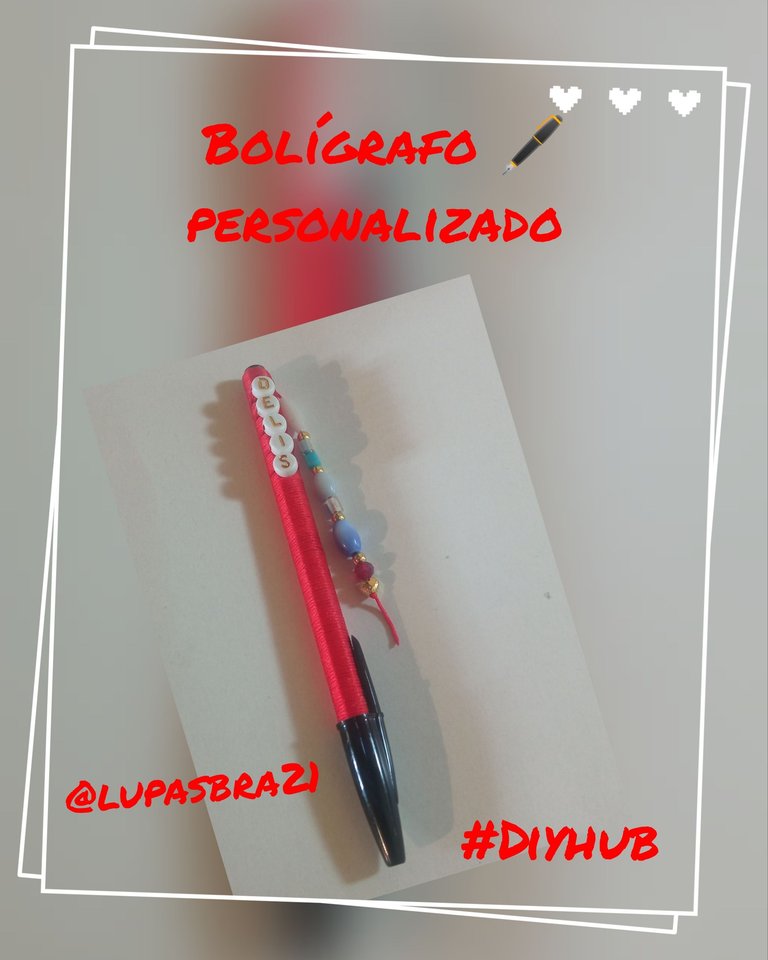
Hola, hola comunidad #Hive y comunidad de #Diyhub deseo se encuentren todos bien , tengo una hermana que es maestra y quise hacerle un pequeño detalle para que corrija los exámenes de sus alumnos y fue así como le realice este bello bolígrafo 🖋️ personalizado con su nombre y otros pequeños detalles para hacerlo más vistoso, así que por acá les traigo el tutorial o paso a paso para realizarlo, es muy apropiado para recuerdos de graduación por ser muy practico o simplemente para un detalle, espero les guste el proyecto.
Hello, hello #Hive community and #Diyhub community I wish you are all well, I have a sister who is a teacher and I wanted to make her a little detail to correct the exams of her students and that's how I made this beautiful pen 🖋️ personalized with her name and other small details to make it more colorful, so here I bring you the tutorial or step by step to make it, it is very appropriate for graduation memories to be very practical or just for a detail, I hope you like the project.
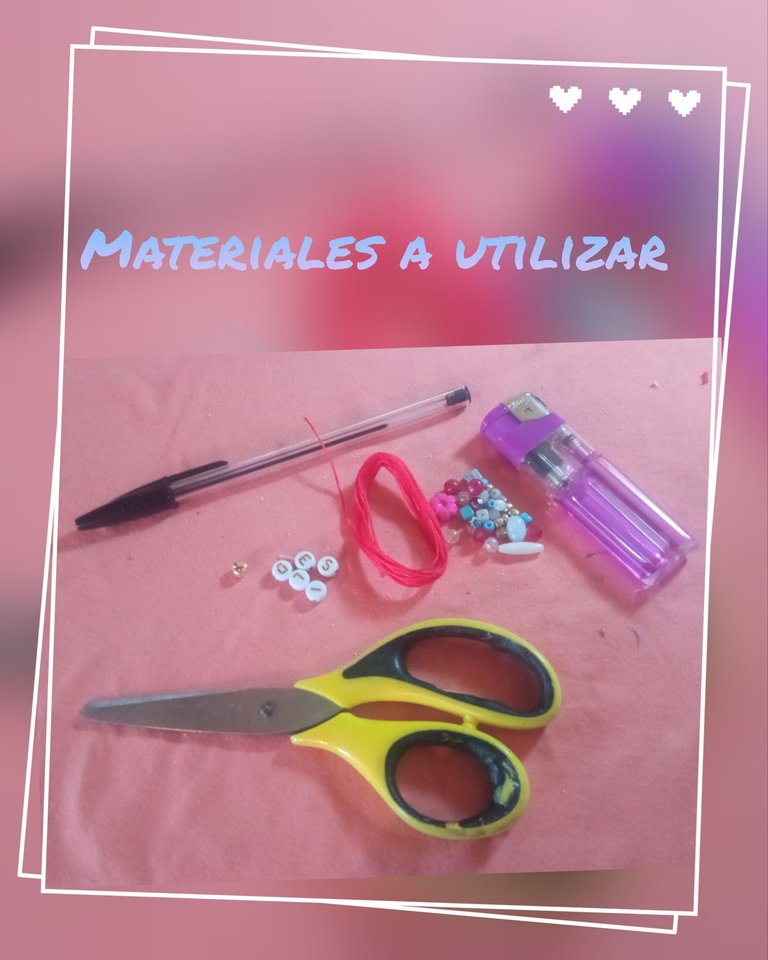
Materiales a utilizar
☑️ 2 1/2 metros de hilo chino escogí rojo ya que es el color preferido de mi hermana.
☑️ 1 bolígrafo.
☑️ Letras en acrílicos.
☑️ Cuentas o piedras .
☑️ Balines en goldfieeld.
☑️ Un dije de corazón en goldfieeld.
☑️ Yesquero.
☑️ Silicón frio.
☑️ Tijeras.
Materials to use
☑️ 2 1/2 meters of Chinese thread I chose red as it is my sister's favorite color.
☑️ 1 pen.
☑️ Acrylic letters.
☑️ Beads or stones .
☑️ Balines in goldfieeld.
☑️ A heart charm in goldfieeld.
☑️ Tinder.
☑️ Cold silicone.
☑️ Scissors.
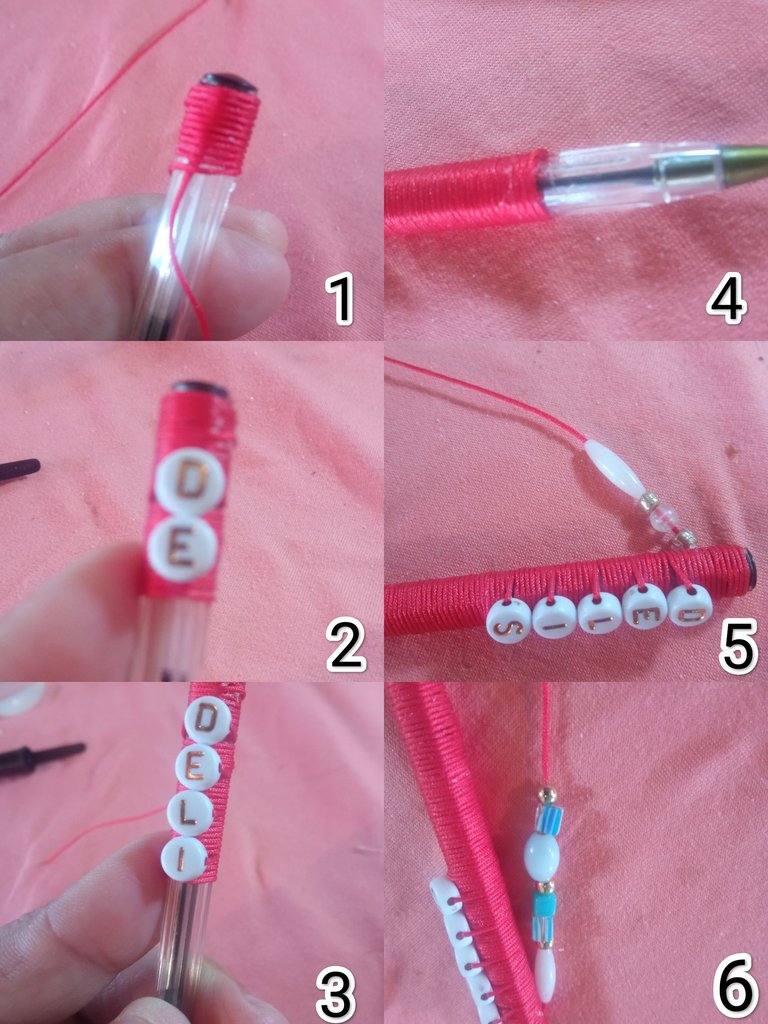
Tutorial o paso a paso
Comienzo cortando 2 metros y medio de hilo chino , luego coloco un poquito de silicón a la parte de arriba del bolígrafo y empiezo colocando el hilo dejando unos 20 cm más o menos hacia abajo , el cual va a ser en donde voy a colocar las piedras o cuentas, comienzo a forrar el bolígrafo, luego de dar 10 vueltas empiezo a colocar las letras , luego de introducir una letra doy unas 5 vueltas como separacion entre cada letra , luego al terminar de colocar las letras y formar el nombre sigo forrando el bolígrafo con el hilo chino hasta llegar en dónde llega la tapa del bolígrafo, ahí coloco otro poquito de silicón y realizo un nudo, corto el sobrante y quemo la punta para asegurar el hilo, luego en el hilo de 20 cm que queda a un lado empiezo a introducir las cuentas o piedras y balines ( 1 al 6).
Tutorial or step by step
I start cutting 2 and a half meters of Chinese thread, then I put a little bit of silicone to the top of the pen and start placing the thread leaving about 20 cm or so down, which will be where I will place the stones or beads, I begin to line the pen, after giving 10 turns I start to place the letters, after introducing a letter I give about 5 turns as separation between each letter , then when I finish placing the letters and form the name I continue lining the pen with the Chinese thread until I reach where the top of the pen arrives, there I place another little bit of silicone and make a knot, cut the excess and burn the tip to secure the thread, then in the 20 cm thread that remains on one side I begin to introduce the beads or stones and pellets (1 al 6).
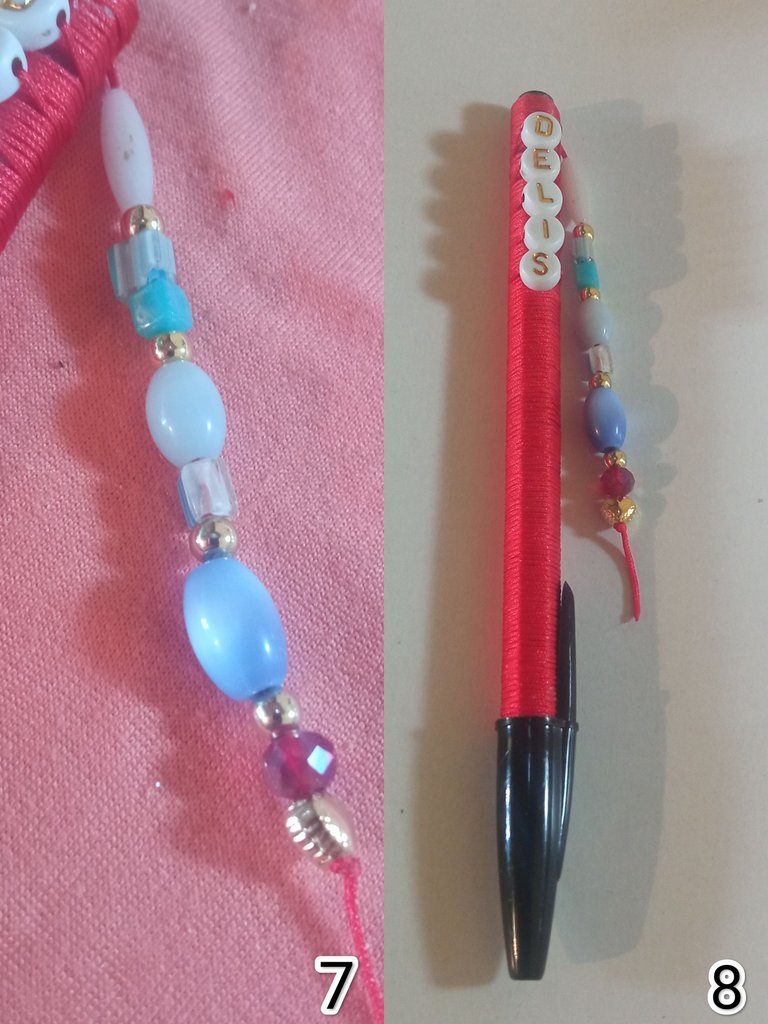
Luego de introducir todas las piedras o cuentas y balines al final coloco el dije de corazón en goldfieeld y realizo un nudo normal, verifico que todo esté bien asegurado (7 al 8).
After inserting all the stones or beads and balls at the end I place the heart charm in goldfieeld and make a normal knot, I verify that everything is well secured (7 to 8).
Espero les haya gustado el trabajo, el cual quedó muy bonito.. todas las fotos fueron tomadas con mi teléfono inteligente Redmi, usé la aplicación polish para la edición de fotos y usé el traductor Deepl translate, será hasta una próxima oportunidad que este nuevamente con ustedes.
I hope you liked the work, which was very nice... all the photos were taken with my Redmi smartphone, I used the polish application for photo editing and I used the translator Deepl translate, it will be until next time that I will be with you again.
Congratulations @lupasbra21! You have completed the following achievement on the Hive blockchain And have been rewarded with New badge(s)
Your next target is to reach 700 comments.
You can view your badges on your board and compare yourself to others in the Ranking
If you no longer want to receive notifications, reply to this comment with the word
STOPCheck out our last posts:
Gracias por el apoyo.
¡Eso es genial @lupasbra21! ¡Estamos emocionados de ver tu participación en Hive! ¡Sigue así!
Notamos que extrañamos su apoyo a nuestra propuesta. Ayúdenos a continuar brindando gamificación, entretenimiento y diversión a la cadena de bloques de Hive. ¡Consulte nuestra propuesta de financiamiento y considere apoyarnos!
Gracias!
that looks cute thanks a lot for sharing, keep up the good work. have a great day and week ahead.
Gracias por su comentario y por el apoyo.
Hola amiga. Me encanta como te quedó. Sencillo y muy bonito. Se pondrá muy feliz tu hermana. Saludos.
Gracias amiga @creacioneslelys , siii, le encantó.
muy bonito, genial para que en el trabajo no te lo agarren jeje
very nice, great for not getting caught at work hehehe
Esa es la idea .. jajajaja