Español
Saludos amigos creadores🙋🌷
Transcurriendo el primer mes del nuevo año, y me he enfocado en la tarea de renovar algunos artículos del hogar, entre ellos mi cepillera, la que hoy, con gusto le compartiré el paso a paso de cómo la confeccioné, ya que el método utilizado fue reciclando amigos, un método útil, que nos permite darle vida a materiales en desuso que se encuentran en buen estado, como son los retazos de tela.¡Comencémos!
✨Materiales✨
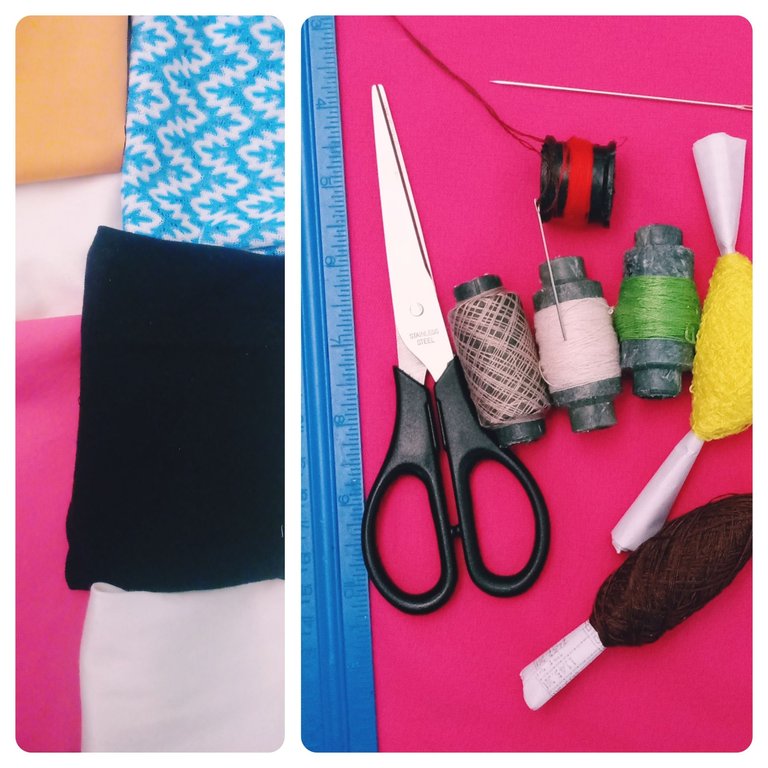
.Retazos de tela
.Hilo( Reciclado el amarillo , resultado de una felpa antigua destejida).
.Tijera
.Regla
.Lapicero
.Agujas
✨Modo de confección✨
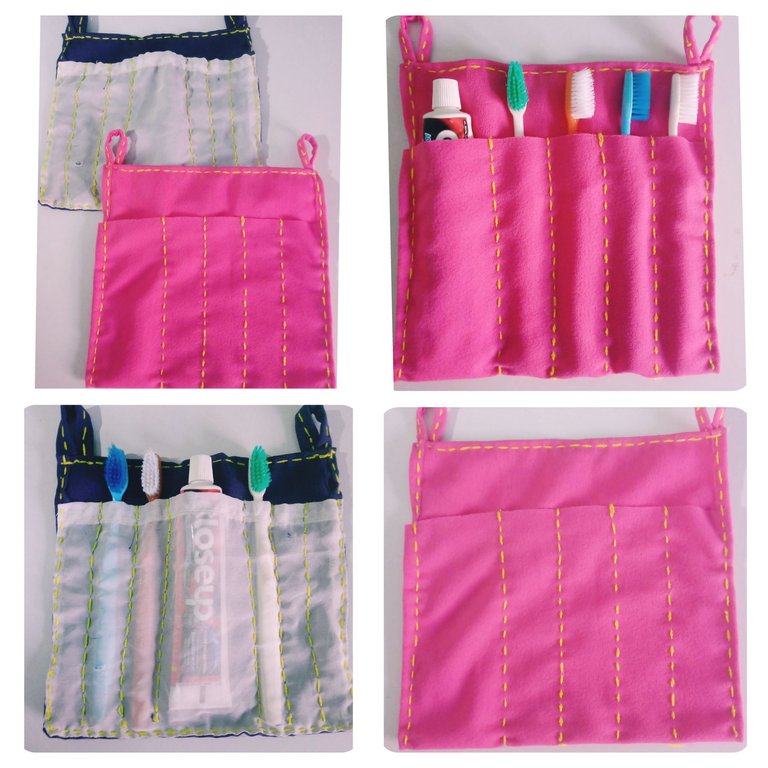
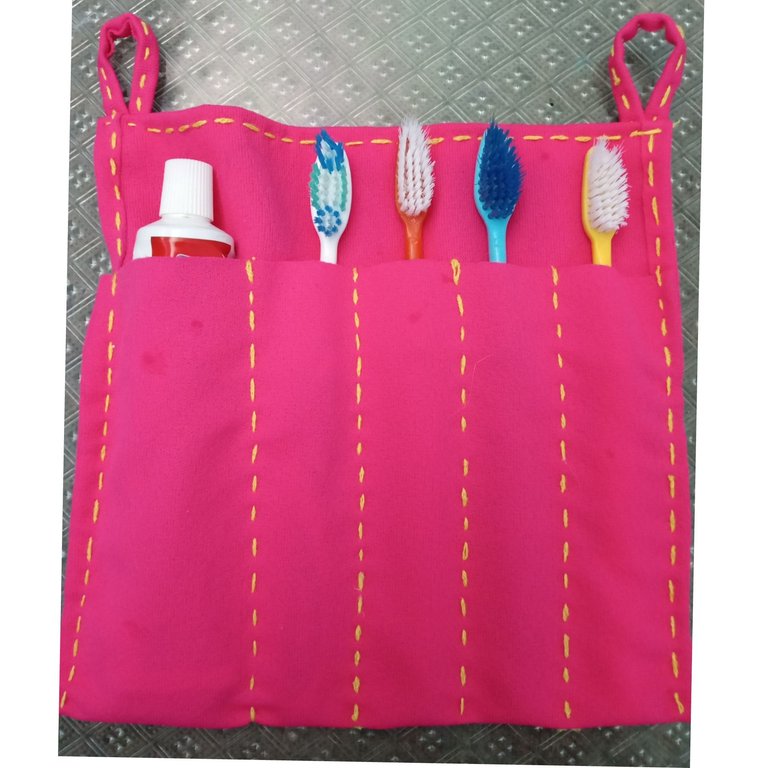
Los modelos para confeccionar las cepilleras son diversos, este que yo empleé se los recomiendo, pues además de sencillo, le permite tener organizada la pasta dental y los cepillos, a más de un miembro en la familia.
Pasos
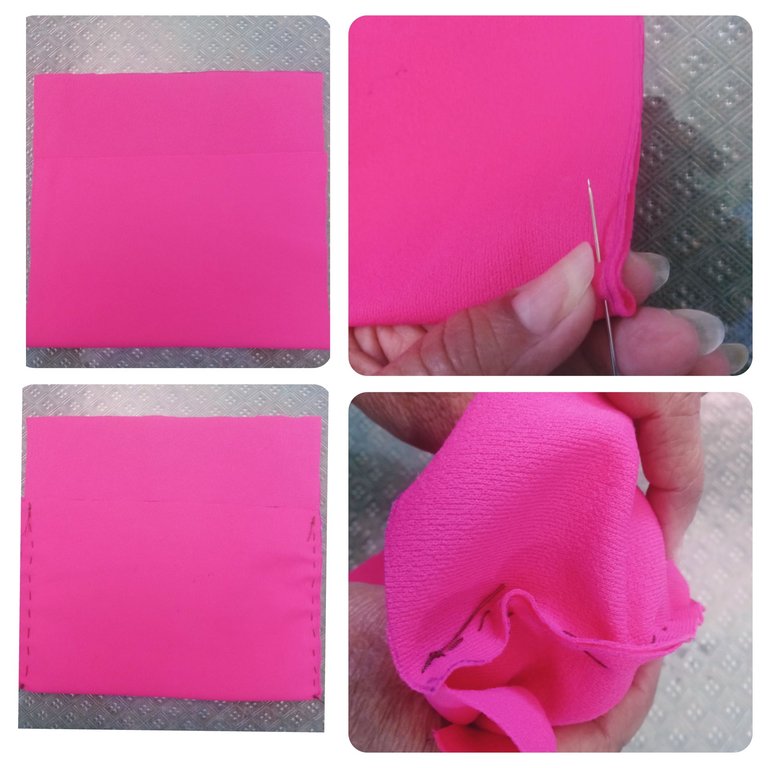
1- Primeramente en nuestro retazo de tela escogido, con ayuda del lapicero y la regla, marcaremos los diámetros de la cepillera , que en este caso serán: 36 cm de largo y 24cm de ancho. Ustedes pueden variar las medidas según si la desean de mayor a menor amplitud.
2-Seguidamente, utilizando la tijera cortamos por la guía trazada, obteniendo un rectángulo de tela bien conformado.

3- Doblamos la tela hacia su parte delantera hasta llegar a 15 cm, conformando un sobre, y cosemos con ayuda de nuestro hilo y aguja ambos laterales. Luego, viramos el sobre obteniendo sus costuras hacia dentro.
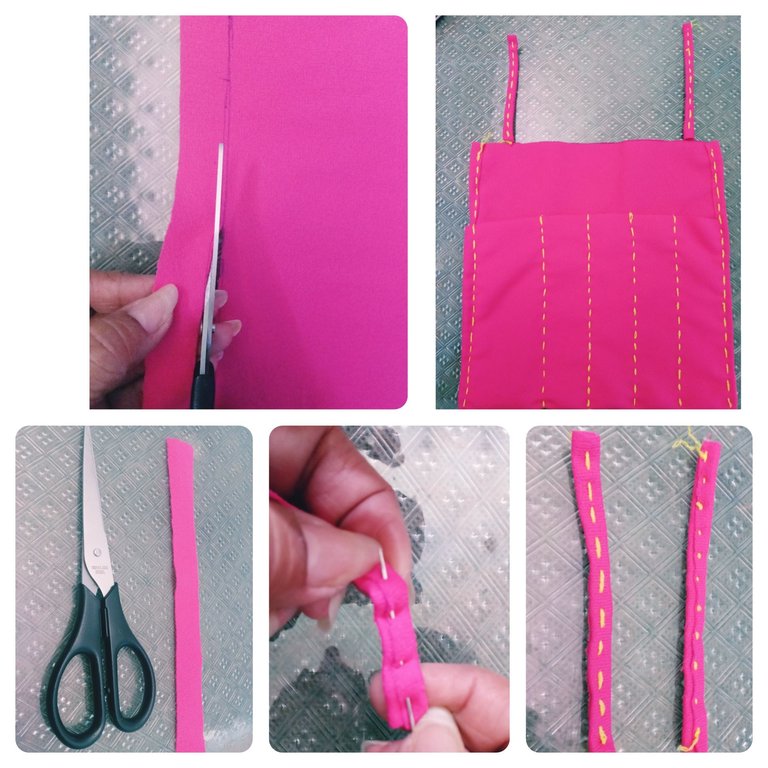
4-Conformada la base de la cepillera, seleccionamos el modelo en que la queramos, y con ayuda de un hilo grueso y aguja, comenzamos a dar puntadas alternas, que nos permitirán además de dividirla , decorarla. Tener en cuenta que la división destinada para la pasta dental debe ser de mayor amplitud.

Ya tenemos casi lista nuestra cepillera , ahora pasamos a crearles las asitas por donde será colgada.
Para hacer sus asas:
1-Marcar con la regla en un retazo de tela un rectángulo de 12 cm de largo y 2 cm de ancho, obteniendo un delgado listón de tela.
2-Seguidamente cortar por la mitad el listón, obteniendo dos listones de un mismo diámetro.
3-Doblamos los laterales en cada uno de los listones hacia su centro, y luego, utilizando la aguja e hilo grueso, pasamos una hebra alterna por todo su medio, logrando obtener unas asitas decoradas y resistentes.
4-Cosemos nuestras asas a nuestra cepillera dejándola lista para ser utilizada.
Como pueden apreciar es un método sencillo , que nos permite mediante el reciclado confeccionar bellas , útiles , y de variados estilos cepilleras.
Espero que les haya gustado y los exhorto a que se animen a su confección, reciclando.
Una bendecida y excelente semana para todos🙋☀
Confecciones y fotografías propias.
English
Greetings fellow creators🙋🌷
Passing the first month of the new year, and I have focused on the task of renovating some household items, including my planer, which today, I will gladly share the step by step of how I made it, since the method used was recycling friends, a useful method, which allows us to give life to unused materials that are in good condition, such as scraps of fabric.Let's get started!
✨Materials✨
.Scraps of fabric
.Yarn (Recycled the yellow one, result of an old unwoven plush).
.Scissor
.Rule
.Pen holder
.Needles
✨Mode of preparation✨
The models to make the brush holders are diverse, this one I used I recommend them, because besides being simple, it allows you to have organized the toothpaste and the brushes, to more than one member in the family.
Steps
1- First in our chosen piece of fabric, with the help of the pencil and the ruler, we will mark the diameters of the planer, which in this case will be: 36 cm long and 24 cm wide. You can vary the measurements according to whether you want it from larger to smaller amplitude.
2-Then, using the scissors we cut along the traced guide, obtaining a well-shaped rectangle of fabric.
3- Fold the fabric towards the front until it reaches 15 cm, forming an envelope, and sew with the help of our thread and needle both sides. Then, we turn the envelope getting its seams inward.
4-Having formed the base of the planer, we select the model in which we want it, and with the help of a thick thread and needle, we begin to give alternate stitches, which will allow us not only to divide it, but also to decorate it. Keep in mind that the division intended for toothpaste should be wider.
We have almost ready our planer, now we have to create the little handles where it will be hung.
To make their handles:
1-Mark with the ruler on a piece of fabric a rectangle 12 cm long and 2 cm wide, obtaining a thin ribbon of fabric.
2-Then cut the ribbon in half, obtaining two ribbons of the same diameter.
3-We fold the sides in each of the slats towards its center, and then, using the needle and thick thread, we pass an alternate strand through its entire middle, managing to get some decorated and resistant asitas.
4-We sew our handles to our planer leaving it ready to be used.
As you can see, it is a simple method that allows us to make beautiful, useful, and varied styles of brush holders through recycling.
I hope you liked it and I urge you to encourage your sewing, recycling.
A blessed and excellent week to all🙋☀
Own photographs and clothing
Wow, me encantó este organizador de cepillos dentales. Gracias por compartir el tutorial, el proceso está bien explicado y el resultado es maravilloso.
Muchas gracias.Que satisfacción saber que le haya gustado esta manualidad mediante del reciclado.Espero que le sea útil en futuras confecciones hogareñas.Saludos🙋☀
Thank you very much.What a pleasure to know that you liked this craft through recycling.I hope it will be useful for you in future home-made.Greetings🙋☀
This is really innovative and creative, now I can creat a space for my brushes at home all thanks to your post. Nice creation and well done my friend.
Thank you very much friend.Greetings🙋🌈
It looks pretty good. It is very useful to hold brushes and other stuffs. You did a wonderful job! Thanks!
Thank you very much. An excellent and blessed week.🙋✨