Español
¡Feliz inicio de mes, amigos creadores!. 🙋🌈💖
¡ Qué el amor, salud, éxito, prosperidad reinen en sus días!.
Hoy, tengo el gusto de compartir con ustedes en forma de tutorial, la confección de mis floreros navideños, los que emplearé para generarle un toque acogedor y positivo a mi hogar, en esta navidad cercana .
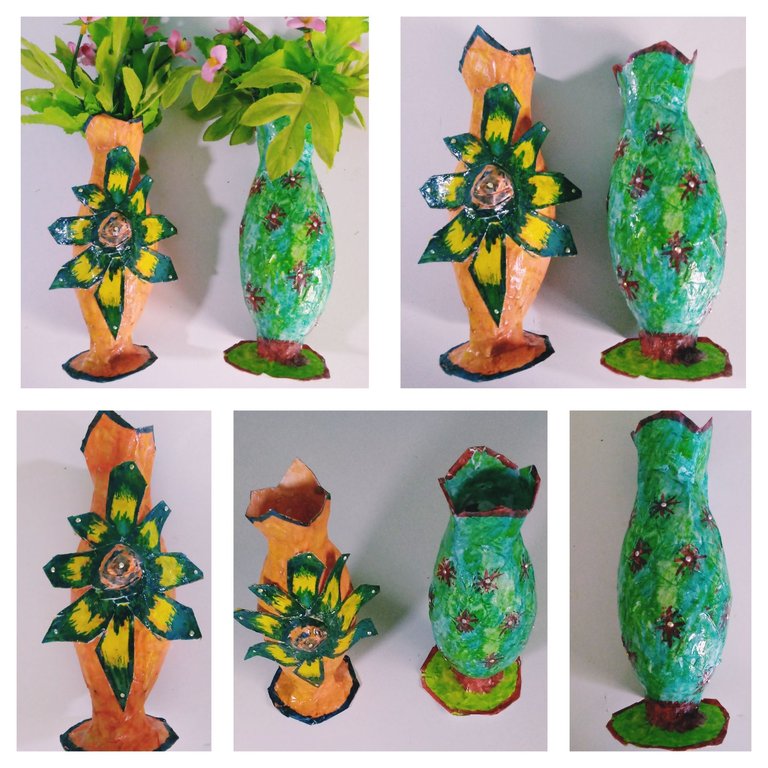
Estos floreros, amigos, al personalizarlos podemos también destinarlos para obsequiarlos a nuestros seres queridos, amantes de las manualidades y del reciclado. ¡Comencémos!
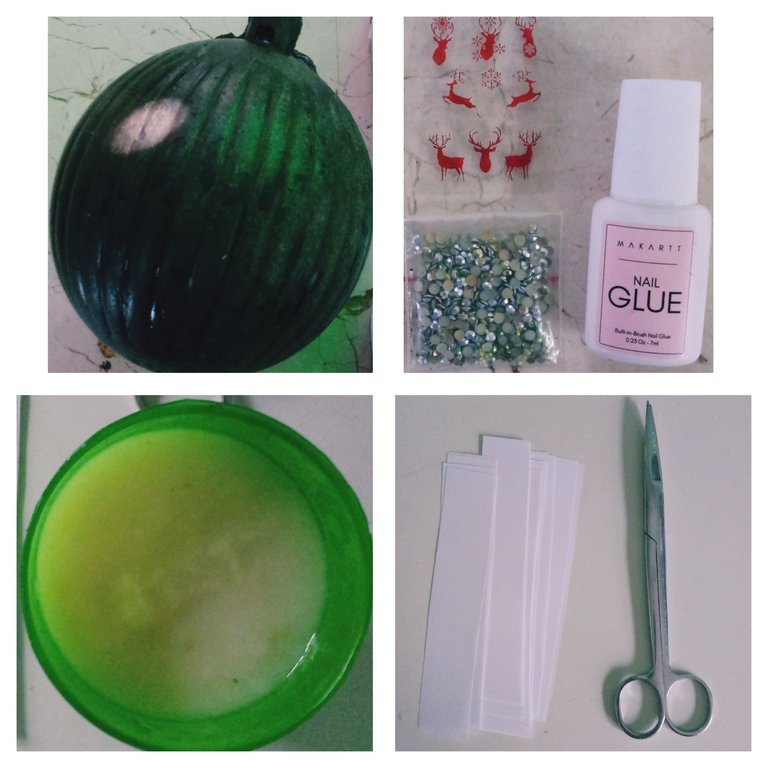
Materiales
.Molde: Objeto redondo
.Papel
.Cartulina
.Tiras de papel blanco
.Pega elaborada de harina
.Tijera
.Pegamento
.Acuarelas
.Barniz
.Piedresitas brillosas
Modo de confección
Diversas formas podemos utilizar para obtener nuestros floreros , una de ellas es partiendo de un florero de molde, que nos permite obtener una replica semejante estructuralmente al original, pero hoy, nuestro molde será un objeto redondo, el que permitirá que de él se obtengan dos floreros con diferentes estilos.
Pasos
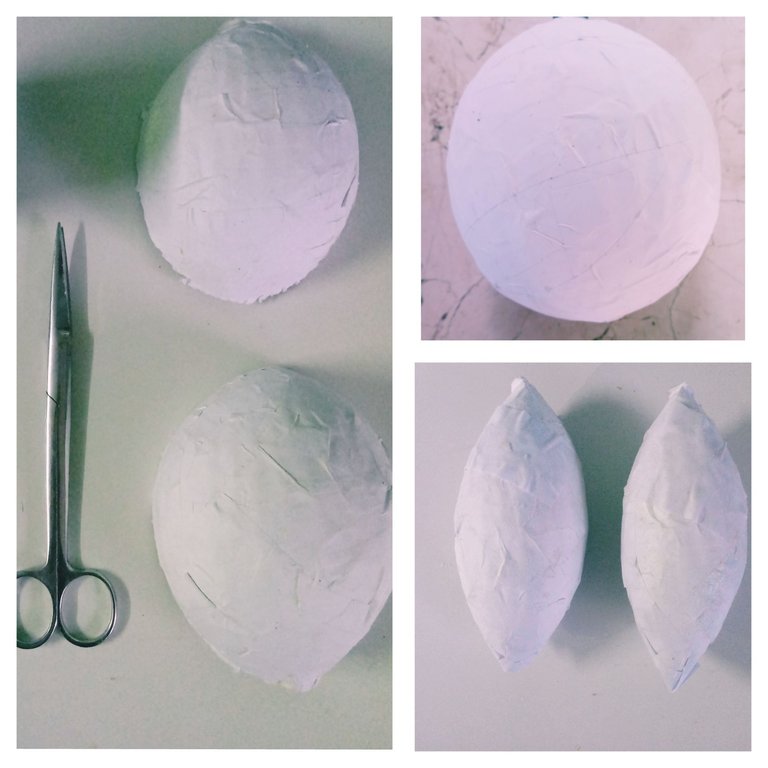
1-Tomar el molde redondo, y utilizando un algodonsito impregnado de aceite, cubrir toda su superficie.
2-Utilizando las tiras de papel blanco y la pega elaborada de harina, darle tres capas de empapelado y dejar secar por ocho horas.
3-Utilizando una tijera, realizar una grieta por todo su centro, permitiéndonos al desmontar del molde, obtener dos mitades de igual diámetro.
Hasta aquí, hemos logrado obtener la base para conformar los floreros, que serán dos, generados por las mitades resultantes .¡Continúamos!.
4-Doblamos las semicircunferencias obtenidas, hasta unir sus vértices y mantenemos esta estructura cerrada, empapelandólo completamente utilizando tiras de papel blanco y la pega elaborada de harina.
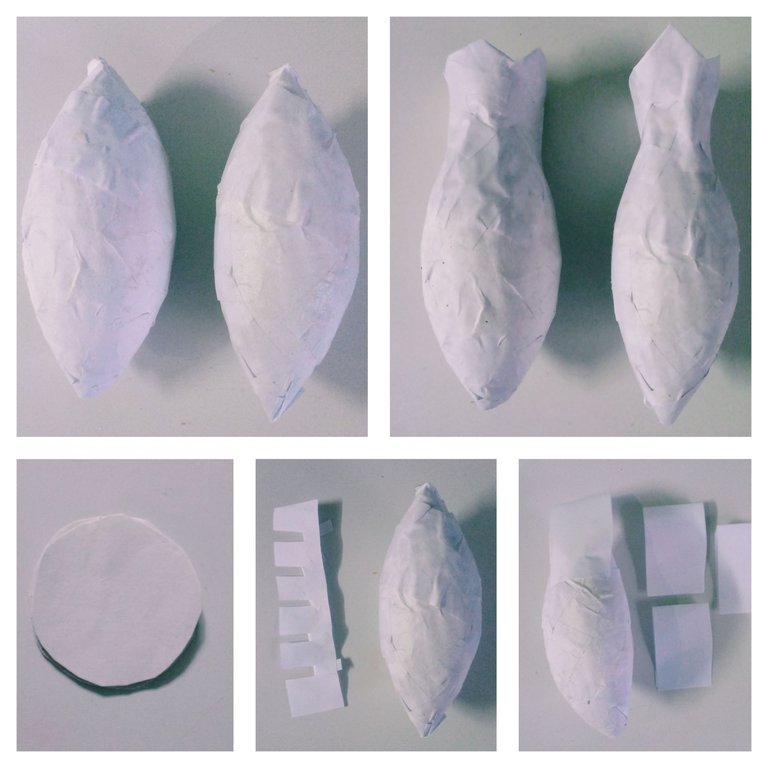
5-Teniendo el centro de nuestros floreros listo, pasamos a confeccionarle la parte superior, y la inferior, que permitirá su sostén.
Para la parte superior, la podemos realizar de dos formas: una, es adhiriendo con pegamento tiras de papel blanco de forma consecutiva al centro, y la otra, tomamos una tira larga, le realizamos cortes y la adherimos alrededor del centro por todo su vértice.
Para confeccionar la parte inferior: cortamos círculos medianos de cartulina, los adherimos con pegamento al centro y luego, empapelamos con tiras de papel blanco y pega elaborada de harina para generarle dureza.
Hasta aquí, amigos, tenemos floreros simples, pero podemos personalizarlos agregándoles relieve por toda su superfice, utilizando pegamento y rollitos de papel estrujados, además de flores de papel previamente confeccionadas.
Para confeccionar las flores
Pasos:
1- Dibujar con el lápiz pétalos ovalados y centro de forma circular en una cartulina.
2-Recortar utilizando la tijera por la guía trazada.
3- Adherir con pegamento al florero.
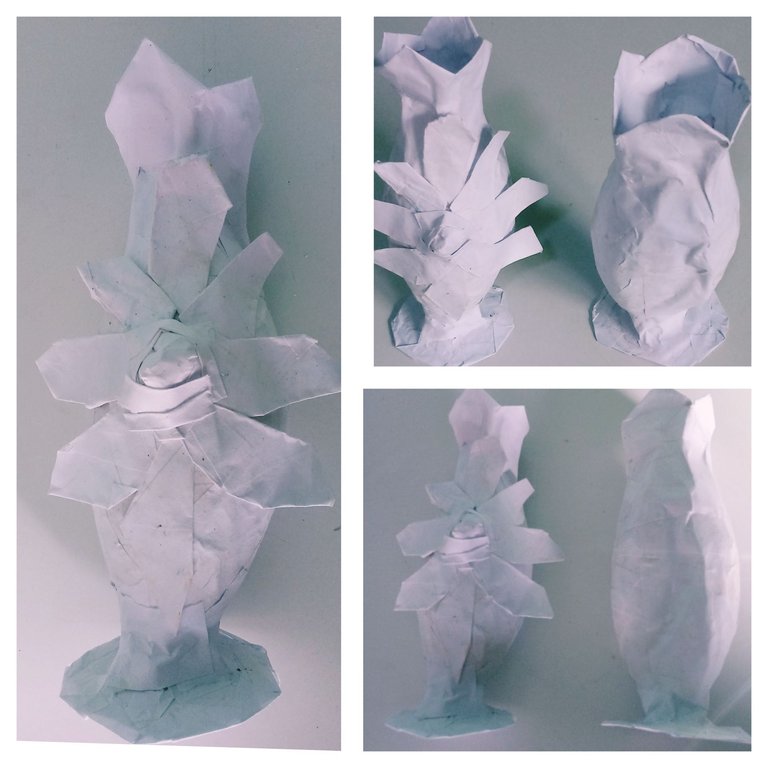
Ya teniéndolos conformados a nuestro gusto, pasamos a decorar con temperas y pinceles. Los colores que quise que predominaran fueron el verde , naranja, rojo y azul, colores llamativos y alegres, muy gustados para estas fechas. Para darle su acabado brilloso, utilicé barníz, y adherí pequeñas piedresitas brillantes con pegamento.
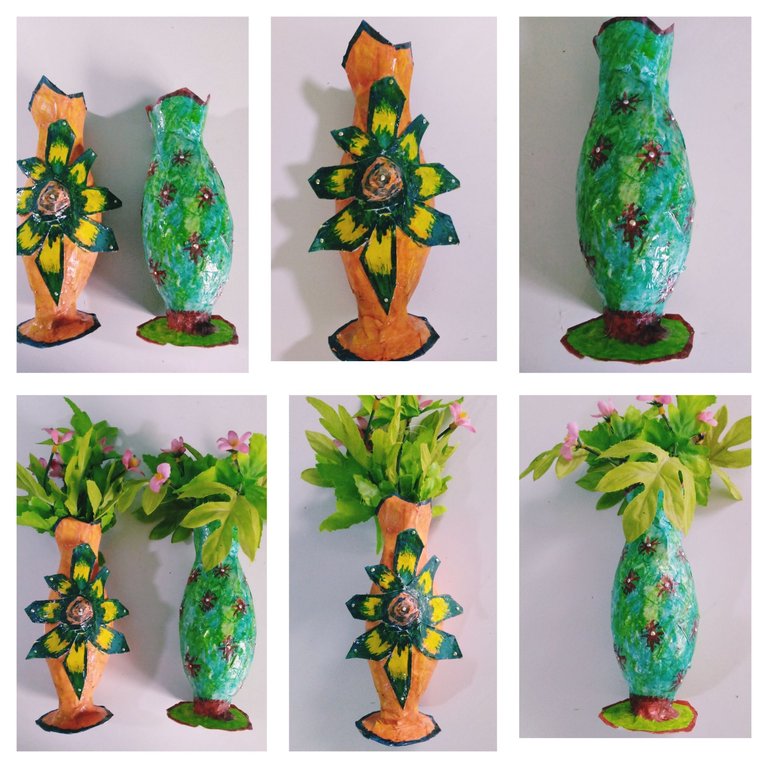
Me encantaron, amigos, los floreros navideños, relucen hermosos decorando la sala, junto a mi arbolito.
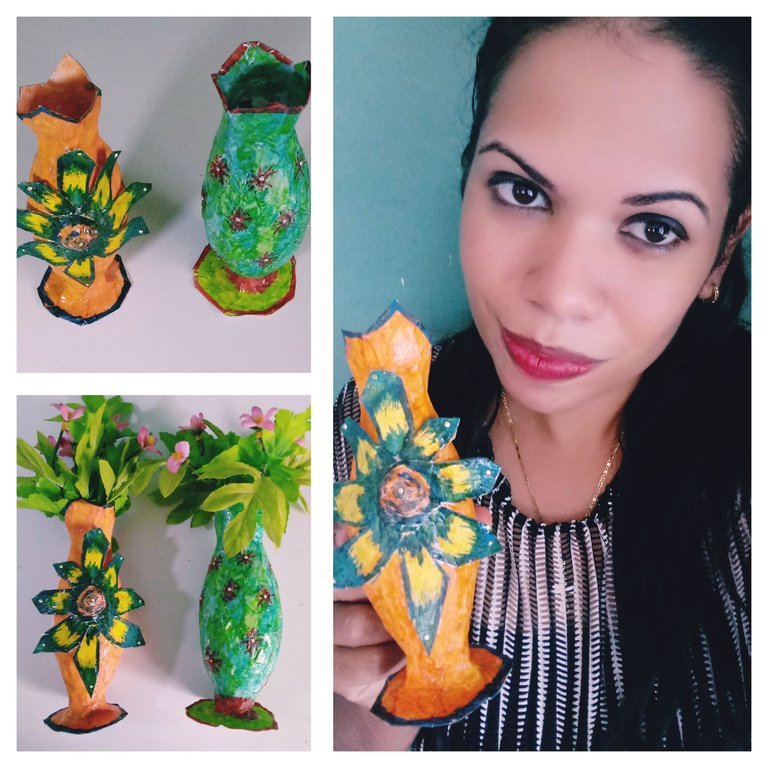
Los exhorto a que disfrunten confeccionándolos, pues serán bien gustados por los familiares y amigos que compartirán en unión esta bella fecha festiva.
Bendecida y excelente semana para todos.🙋🎄🎆.
Fotografías y confecciones propias.
English
Happy start of the month, fellow creators!. 🙋🌈💖
May love, health, success, prosperity reign in your days!.
Today, I have the pleasure to share with you in the form of a tutorial, the making of my Christmas vases, which I will use to generate a cozy and positive touch to my home, this Christmas near.

These vases, friends, by personalizing them we can also use them to give them to our loved ones, lovers of crafts and recycling. Let's get started!
Materials
.Mould: Round object
.Paper
.Cardboard
.White paper strips
.Paste made of flour
.Scissor
.Glue
.Watercolors
.Varnish
.Shiny pebbles

Mode of preparation
We can use different ways to obtain our vases, one of them is starting from a mold vase, which allows us to obtain a structurally similar replica to the original, but today, our mold will be a round object, which will allow two vases with different styles to be obtained from it.
Steps
1-Take the round mold, and using a cotton pad impregnated with oil, cover its entire surface.
2-Using the strips of white paper and the glue made of flour, give it three layers of wallpaper and let it dry for eight hours.
3-Using a scissors, make a crack all over its center, allowing us to disassemble the mold, get two halves of equal diameter.
So far, we have managed to obtain the basis for forming the vases, which will be two, generated by the resulting halves.Let's continue!.
4-We fold the obtained semicircles, until joining their vertices and we keep this structure closed, wallpapering only completely using strips of white paper and the glue made of flour.

5-Having the center of our vases ready, we go on to make the upper part, and the lower, which will allow its support.
For the upper part, we can make it in two ways: one, is by adhering strips of white paper consecutively to the center with glue, and the other, we take a long strip, make cuts and adhere it around the center for all its vertex.
To make the bottom: we cut medium circles of cardboard, we adhere them with glue to the center and then, we paper over with strips of white paper and elaborate flour glue to generate hardness.

So far, friends, we have simple vases, but we can customize them by adding relief all over their surface, using glue and squeezed paper rolls, in addition to previously made paper flowers.
To make the flowers
Steps:
1- Draw with the pencil oval petals and circular shaped center on a cardstock.
2-Cut using the scissors by the traced guide.
3- Attach with glue to the vase.

Having already shaped them to our liking, we went on to decorate with tempera and brushes. The colors that I made predominant were green, orange, red and blue, bright and cheerful colors, very liked for these dates. To give it its shiny finish, I used varnish, and adhered small shiny pebbles with glue.

I loved, friends, the Christmas vases, they shine beautiful decorating the room, next to my little tree.

I urge you to enjoy making them, because they will be well liked by family and friends who will share this beautiful festive date together.
Blessed and excellent week to all.🙋🎄🎆.
Photographs and own clothing.
Mary, happy Monday! I see you are starting the week with all the vitamins, as this work is beautiful (as always). I notice the difference between those first terrifying masks I saw of your art and now these beautiful Christmas vases, I feel that part of your creativity is to give soul to your work, because that is projected in the photographs. Bravo!...
Thank you very much, friend.Blessed and excellent week.🙋🌈🎄
Unos floreros muy lindos y creativos, me encanta la idea... 😉
Muchas gracias.Feliz y bendecido diciembre🙋🎆🎄.
Wonderful artwork with paper.you did a great job. Thanks for sharing.❣️
Thank you very much it is always a pleasure to interact with you. Blessings🙋☀
Great and very colorful! Your skills to create with paper mache will always be well received on DIYHub, plus you are excellent at writing your post and sharing elegant photographs, good for you my friend.
Greetings🙋🎄.Thank you very much from my heart. Blessed and inspiring month of December to all.☀
hermoso el florero que elaboraste, me recuerda mi niñez. 😳
cuando hacíamos un trabajo similar a estos pero menos talentosos 😅
mi abuelita y yo nos la pasábamos super, excelente trabajo.
Muchas gracias , me alegro que te haya generado recuerdo y más con esas abuelitas de luz, que siempre tratan de sacar sonrisas a sus nietos. Bendiciones🙋🌈
This is stunning! and creatively executed; I love your photography and mode of presentation as well.
Thank you for sharing; I wish you and your loved one a blissful season.
!LUV
(2/5) sent you LUV. | tools | discord | community | HiveWiki | <>< daily@marydeluz, @funshee
Thank you very much.Blessed days✨✨
You are welcome 🤗
Wow, this is truly extraordinary work, it deserves a thumbs up👍
Thank you very much. Greetings🙋☀
You are welcome, friend.
Wonderful artwork with paper you did a great job