Español
¡Feliz día, amigos creadores.!🙋🌈💞
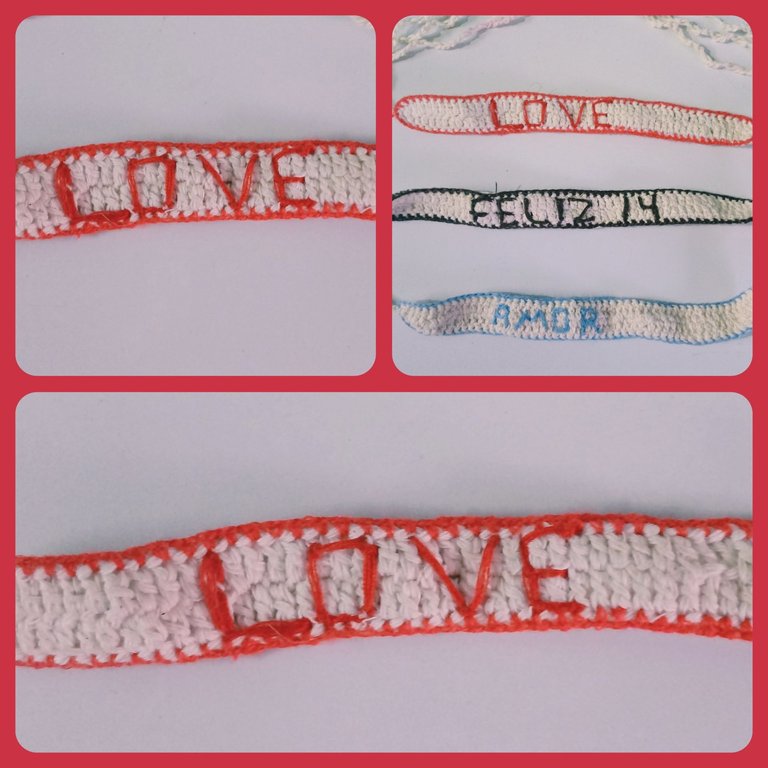
Cada día que aprendemos algo nuevo, debemos considerarlo como exitoso y afortunado, ya que nos ayuda a crecer en virtudes. Hoy, quiero compartirle el método que recientemente aprendí, para realizar hermosas pulseras tejidas, que con hermosos letreros dedicados al día del amor, conformarán parte de lo obsequios destinados para mis familiares y amigos. Los invito a que me acompañen a su paso a paso.¡Comencemos!
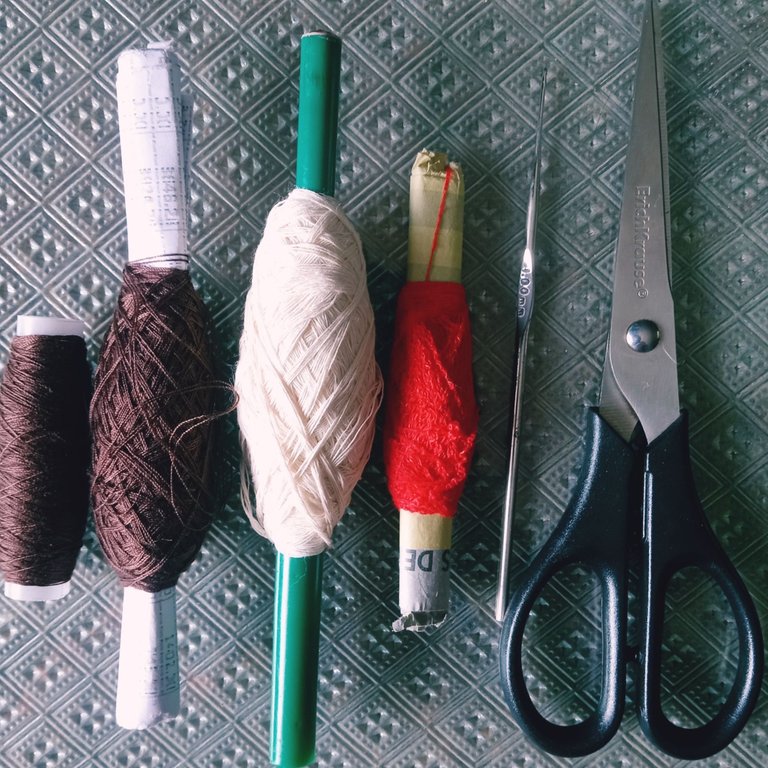
✨Materiales✨
.Hilo de tejer
.Hilo de coser
.Aguja de tejer
.Aguja de coser
.Tijera
.Lapicero
✨Modo de confección✨
Nuestra pulsera la vamos a crear en dos momentos, un primer momento donde crearemos su estructura base, con hilo y aguja de tejer, y un segundo , cuando la decoraremos con ayuda de hilo y aguja de coser. Para realizar ambos, tenemos que escoger previamente las tonalidades de los colores del hilo. Yo utilicé el blanco, por significar pureza, paz, para la estructura base, y para su decorado, el rojo, por significar pasión y amor, ambos colores ideales para lucir este 14 de febrero.
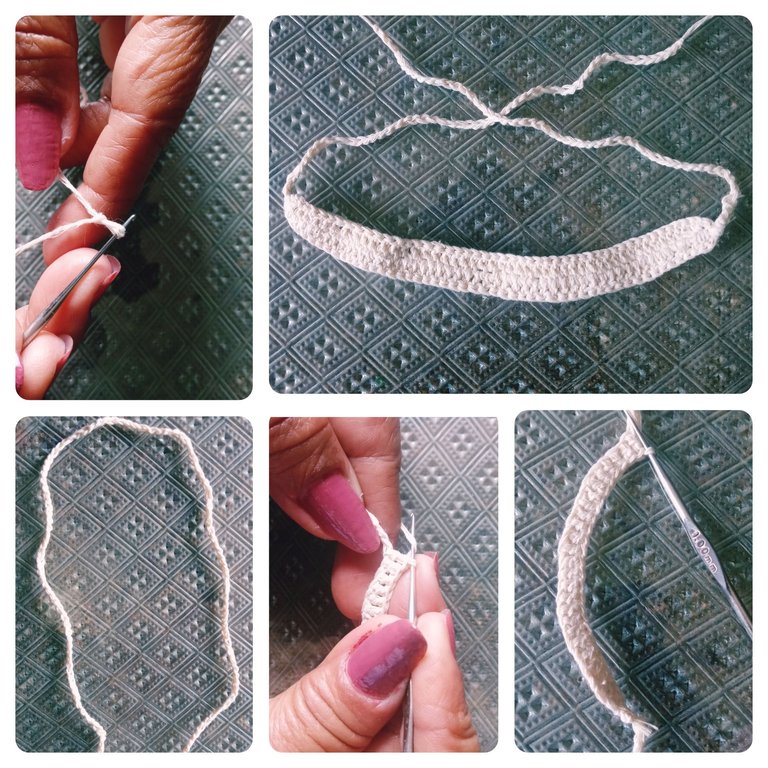
✨ Pasos para crear la estructura base de la pulsera
1-Primeramente, tomamos nuestro hilo y aguja, y comenzamos realizando una cadeneta de 150 eslabones.
2-Ya teniendo nuestra cadeneta conformada, contaremos por uno de sus extremos hasta llegar al eslabón 50, que marcará el inicio del cuerpo de nuestra pulsera, ya que los primeros 50 eslabones y los últimos 50, conformarán los amarres.
3-Teniendo ubicado el eslabón, tomamos nuestra aguja e hilo de tejer, y realizaremos una vuelta, tejiendo puntos de varetas simples, en los cincuenta eslabones centrales, logrando que una vez terminado el tejido, obtengamos la parte superior de nuestra pulsera.
4-Seguidamente pasamos a tejer la parte inferior, bajando con una cadeneta de dos eslabones hasta la cadeneta inicial, donde realizaremos un punto deslizado.
Al llegar aquí, para facilitar nuestro trabajo en la parte inferior, voltearemos nuestro tejido y comenzamos a tejer una cadeneta de dos eslabones, que continuaremos con punto vareta hasta llegar al final de los cincuenta eslabones centrales. Luego, cerramos el tejido con una cadeneta de dos eslabones y un punto deslizado.
Ya teniendo nuestra estructura de la pulsera confeccionada, pasaremos a decorarla con nuestra aguja y tonalidad de hilo escogido.
Yo escogí la palabra Love(amor), pero ustedes pueden decorarla con las frases que deseen.
Pasos
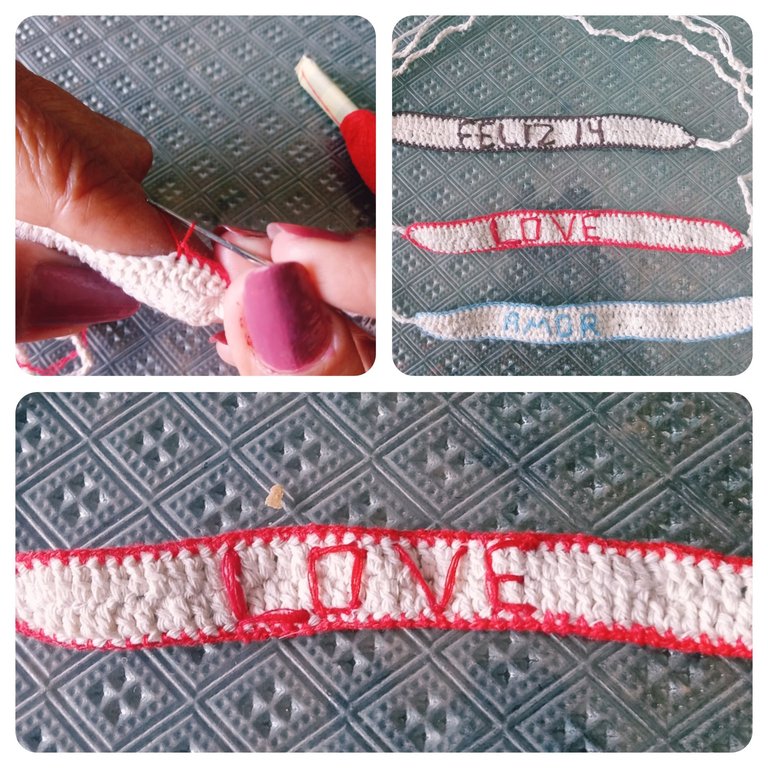
1-Marcamos ligeramente con un lapicero el letrero por la cara inferior de la pulsera, logrando obtener nuestra guía.
2-Luego, tomamos nuestra aguja e hilo, y comenzamos a dar puntadas conformando cada letra por separado.
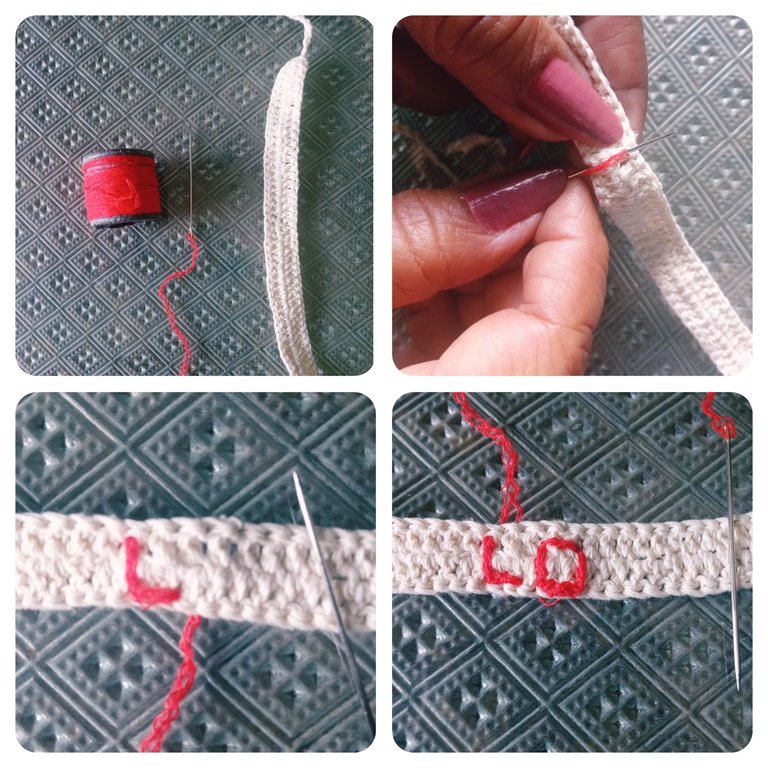
Ya teniendo nuestro letrero confeccionado, culminaremos el decorando de nuestra pulsera, tejiendo con hilo rojo y aguja de tejer, un punto bajo por todo su borde.
Como pueden apreciar amigos las pulseras además de ser un bello accesorio para lucir, pueden expresar sentimientos profundos si deseamos obsequiarlas a quienes amamos.
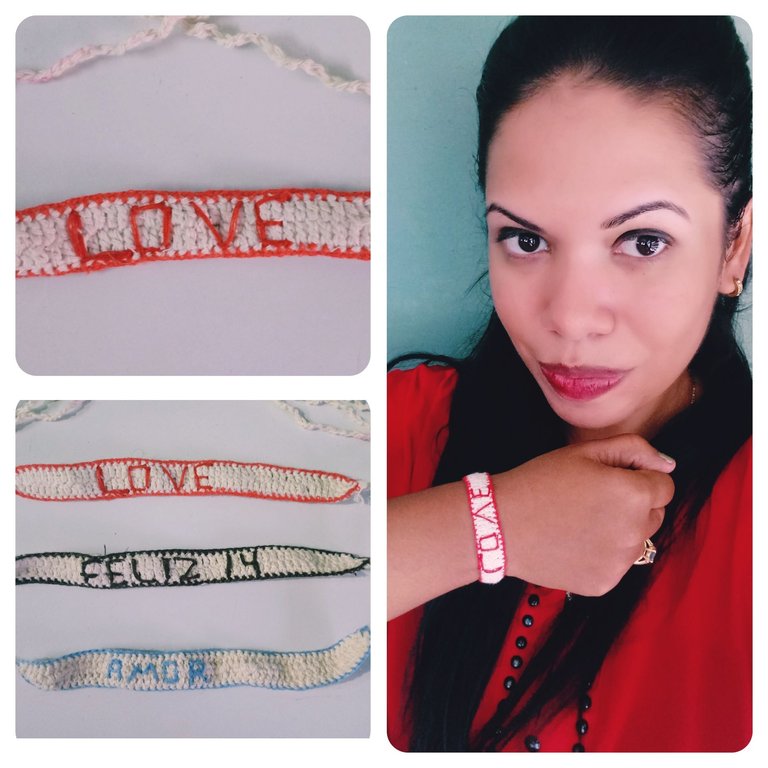
Los exhorto a que se anímen a su confección, y que sorprendan a sus seres queridos con estos detalles personalizados, que aún pequeños, ¡ llenan el alma!.
Una excelente semana para todos.
Confecciones y fotografías propias🙋💞
English
Happy day, fellow creators.!🙋🌈💞
Every day that we learn something new, we should consider it as successful and lucky, as it helps us grow in virtues. Today, I want to share the method I recently learned, to make beautiful woven bracelets, which with beautiful signs dedicated to the day of love, will be part of the gifts intended for my family and friends. I invite you to accompany me step by step.Let's get started!
✨Materials✨
.Knitting yarn
.Sewing thread
.Knitting needle
.Sewing needle
.Scissor
.Pen holder
✨Way of making✨
We are going to create our bracelet in two moments, a first moment where we will create its base structure, with thread and knitting needle, and a second, when we will decorate it with the help of thread and sewing needle. To make both, we have to choose the shades of the colors of the thread beforehand. I used white, to mean purity, peace, for the base structure, and for its decoration, red, to mean passion and love, both ideal colors to wear this February 14th.
✨ Steps to create the base structure of the bracelet
1-First, we take our thread and needle, and start making a chain of 150 links.
2-Already having our chain shaped, we will count on one of its ends until we reach link 50, which will mark the beginning of the body of our bracelet, since the first 50 links and the last 50, will form the moorings.
3-Having located the link, we take our knitting needle and thread, and we will make a round, knitting simple crochet stitches, in the fifty central links, achieving that once the weaving is finished, we get the upper part of our bracelet.
4-Then we go on to knit the bottom, going down with a two-link chain to the initial chain, where we will make a slipped stitch.
When we get here, to facilitate our work at the bottom, we will turn our knitting and start knitting a two-link chain, which we will continue with varette stitch until we reach the end of the fifty central links. Then, we close the fabric with a two-link chain and a slipped stitch.
Once we have our bracelet structure ready, we will decorate it with our chosen needle and thread shade.
I chose the word Love, but you can decorate it with the phrases you want.
Steps
1-We lightly marked the sign on the bottom side of the bracelet with a pen, managing to get our guide.
2-Then, we take our needle and thread, and we start to make stitches conforming each letter separately.
Once we have our sign ready, we will finish the decoration of our bracelet, knitting with red thread and knitting needle, a low stitch all over its edge.
As friends can appreciate bracelets besides being a beautiful accessory to wear, they can express deep feelings if we want to give them to those we love.
I urge you to cheer up their making, and to surprise your loved ones with these personalized details, that even small, fill the soul!.
An excellent week for everyone.
Own clothing and photographs🙋💞
Yo amo estos detalles artesanales. Me hacen pensar ennel cariño, la delicadeza y dedicación con que la persona trabajó para hacerlas. Muy bonitas las tuyas. Dios bendiga la obra de tus manos.
Saludos, muchas gracias de corazón. Feliz y bendecida semana de amor para usted y familia .🙋🌈💞
Un sencillo detalle para obsequiar en este día del amor y la amistad.
Gracias por regalarnos tu paso a paso 💕
!discovery 30
Muchas gracias.Saludos🙋💞
Hermoso detalle.
Muchas gracias.Lindo día🙋🌷
This post was shared and voted inside the discord by the curators team of discovery-it
Join our Community and follow our Curation Trail
Discovery-it is also a Witness, vote for us here
Delegate to us for passive income. Check our 80% fee-back Program
que lindo, el diseño está muy bien hecho!
how cute, the design is very well done!
Muchad gracias, el amor inspira. Bendiciones🙋🌈.
Thank you very much, love inspires.Blessings.🙋🌈
These bracelets are very pretty and you can't go wrong giving a special detail on this day of love and friendship.. Good creative process Thanks for leaving it in our community
Thank you very much. May the feeling of love continue to grow and inspire this community of creators, where the heart is put into crafts. Happy week of love to everyone🙋💗
Que bello te quedo, algún día intentaré realizar esta misma manualidades. Excelente idea✨🫶🏻
Muchas gracias.De seguro si te ánimas en aventurarte en confeccionarlas, te quedarán hermosas.Feliz semana de amor🙋✨💞