Español
Saludos amigos creadores 💁🌅
¡Feliz e inspiradora semana para todos!.
Hoy, amigos, me sumo a ustedes para participar en la temática del mes dedicada al: Día Mundial del Agua, con la confección de una centro de mesa decorativo en forma de fuente, utilizando la técnica de papel maché.¡Comencemos!
💧Materiales💧
.Molde: Dos objetos redondos
.Tiras de papel blanco
.Pega elaborada de harina
.Pegamento
.Tijera
.Acuarelas
.Pincel
.Nailon
💧Modo de confección 💧
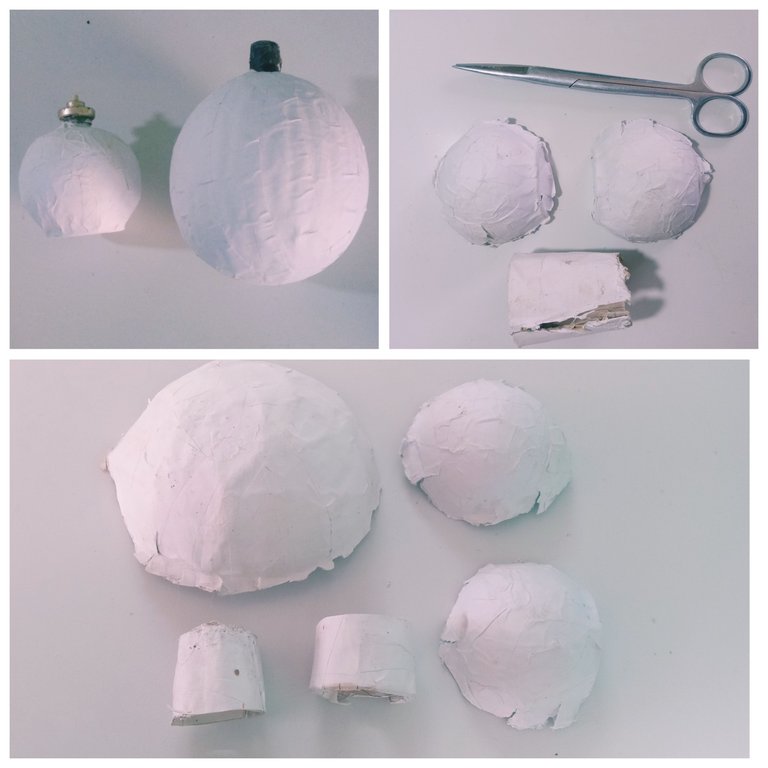
1-Impregnamos con un algodón humedecido de aceite nuestros dos moldes, y seguidamente le daremos a su totalidad tres capas de empapelado con tira de papel blanco y la pega elaborada de harina. Dejamos secar por ocho horas.
2-Utilizando la tijera, vamos a realizar una grieta central en ambos moldes, logrando a su desmonte de la estructura cuatro semicircunferencia, a las que vamos a disponer de forma descendente partiendo de su base.
Mi fuente, la confeccioné de tres departamentos, por lo que empleé el material de una semicircunferencia para crear sus regiones centrales, cortándolos en tres listones y enrollandolos.
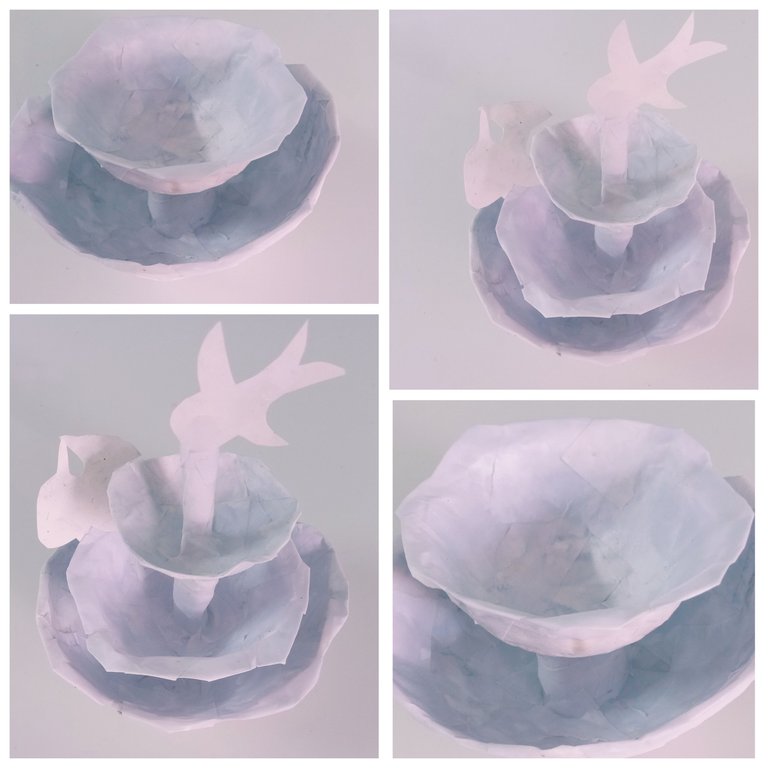
3- Ya teniendo las partes de nuestra fuente listas, pasamos a unificarlas utilizando pegamento. Luego, para generarle dureza, le daremos una capa de empapelado con tiras de papel blanco y pega elaborada de harina.
Dejamos secar por cinco horas .
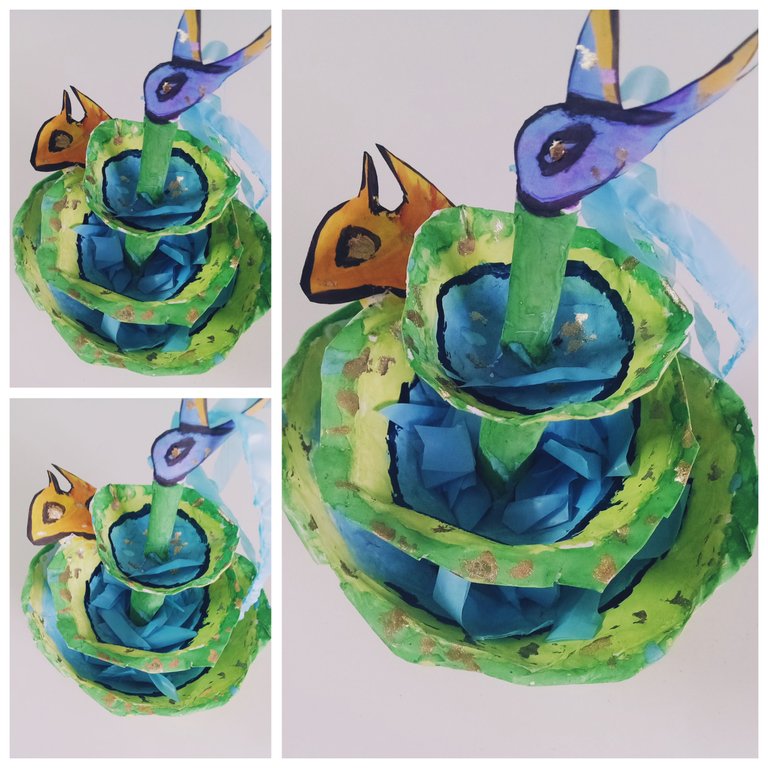
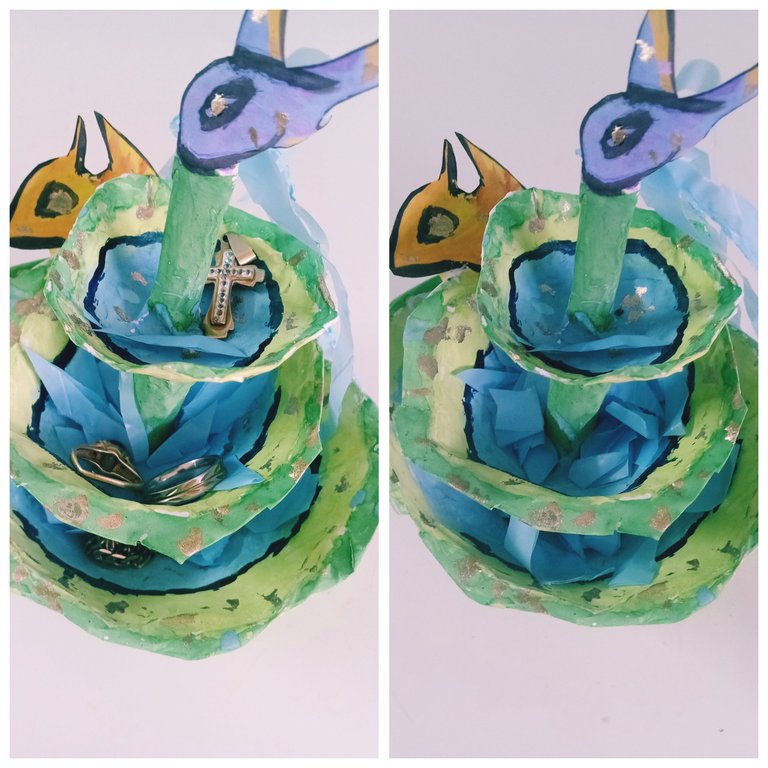
Transcurrido el tiempo de secado nuestra fuente está lista para personalizar y decorar a nuestro gusto.Yo opté por confeccionar peces, para reflejar la vida marina y representar el elemento Piscis, elemento del agua, bajo el que nacen varias personas de Marzo.
💧Pasos para crear los peces💧
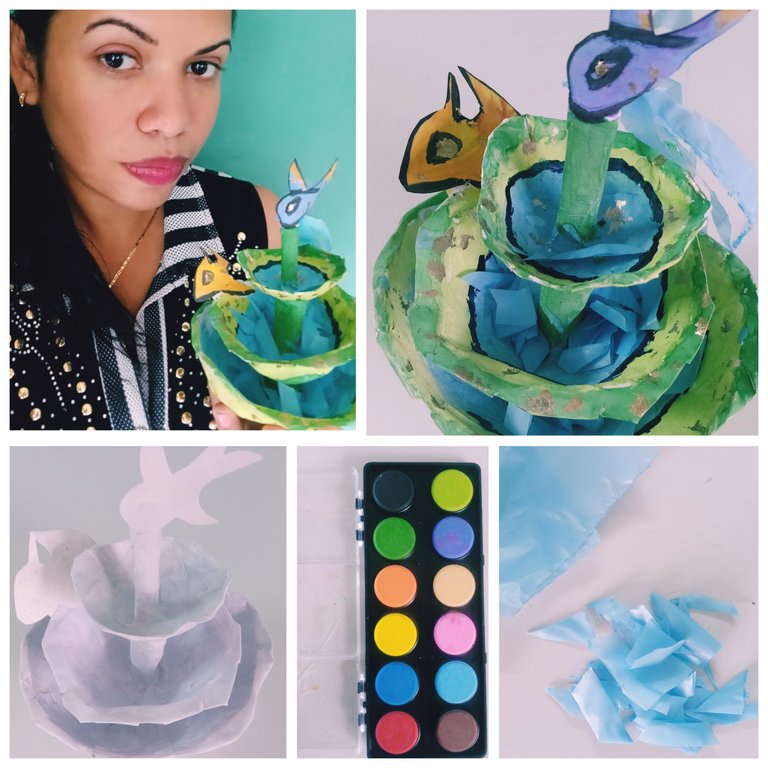
1-Dibujamos en una cartulina con un lapicero el modelo de pez deseado, luego, utilizando la tijera cortamos por la guía trazada y adherimos con pegamento a nuestra fuente.
¡Continuamos , amigos, personalizando nuestra fuente con temperas y acuarelas!, las tonalidades empleadas fueron verde y azul , resaltadas con negro y dorado. El resultado con estos colores combinados,¡ me encantó ! y más, cuando con tiras de nailon , previamente cortadas reflejé la caída del agua.
Como pueden observar es un método sencillo para confeccionar pequeñas fuentes decorativas , que además de ser empleadas como centro de mesa en nuestros hogares, podemos utilizarlas como organizador de prendas pequeñas y demás artículos, según el tamaño que la confeccionemos.
Espero que les haya gustado estás pequeñas fuentes decorativas y que se animen a recrearlas para sus hogares, generarán una energía positiva, pues el agua es Vida . Les deseo una excelente y bendecida semana para todos .💁🌊
English
Greetings fellow creators 💁🌅
Happy and inspiring week to everyone!.
Today, friends, I join you to participate in the theme of the month dedicated to: World Water Day, with the making of a decorative centerpiece in the form of a fountain, using the papier mache technique.Let's get started!

💧Materials💧
.Mould: Two round objects
.White paper strips
.Paste made of flour
.Glue
.Scissor
.Watercolors
.Brush
.Nylon
💧Mode of preparation 💧
1-We impregnate our two molds with a cotton wool moistened with oil, and then we will give it three layers of wallpaper with a strip of white paper and the glue made of flour. Let it dry for eight hours.
2-Using the scissors, we are going to make a central crack in both molds, achieving to its disassembly of the structure four semicircles, to which we are going to arrange in a descending way starting from its base.
My font, I made it in three departments, so I used the material of a semicircle to create its central regions, cutting them into three slats and rolling them.
3- Already having the parts of our font ready, we move on to unify them using glue. Then, to generate hardness, we will give it a layer of wallpaper with strips of white paper and glue made of flour.
Let it dry for five hours.
After the drying time our fountain is ready to customize and decorate to our liking.I chose to make fish, to reflect the marine life and represent the element Pisces, element of water, under which several people are born in March.
💧Steps to create the fish💧
1-We draw on a cardboard with a pencil the desired fish model, then, using the scissors we cut along the traced guide and adhere with glue to our source.
We continue, friends, personalizing our font with tempera and watercolors!, the shades used were green and blue, highlighted with black and gold. The result with these combined colors, I loved it! and more, when with nylon strips, previously cut I reflected the fall of the water.
As you can see, it is a simple method to make small decorative fountains, which besides being used as a centerpiece in our homes, we can use them as an organizer of small garments and other items, depending on the size we make it.
I hope you liked these small decorative fountains and that you are encouraged to recreate them for your homes, they will generate a positive energy, because water is Life. I wish you an excellent and blessed week for everyone.💁🌊
This decorative fountain you're sharing with us today is very interesting and brilliant. You've applied the technique very well and provided us with a detailed step-by-step guide.Good job thanks for letting us have our community
Thank you very much, community.It is always a pleasure to interact with you.Blessings💁☀️
!discovery 25
the results are beautiful and interesting, keep honing your talents, my friend👍
Thank you very much.Greetings and an excellent week.💁🌟
Yes, you're welcome, I hope you have a nice week too, friend.
This post was shared and voted inside the discord by the curators team of discovery-it
Join our Community and follow our Curation Trail
Discovery-it is also a Witness, vote for us here
Delegate to us for passive income. Check our 80% fee-back Program