Español
Saludos amigos amantes de las manualidades🙋🎄☀
Muchas son las actividades compartidas en familia para la espera del nuevo año. Juegos, anécdotas, obsequios, hacen tener un día especial junto a nuestros seres amados, con quiénes degustamos una exquisita cena navideña. Este año, en mi familia, seré la anfitriona de la fiesta, por lo que he decidido realizar unos porta vasos bicolores, para decorar la mesa y otorgárle con estos, un toque colorido y navideño a mi hogar.
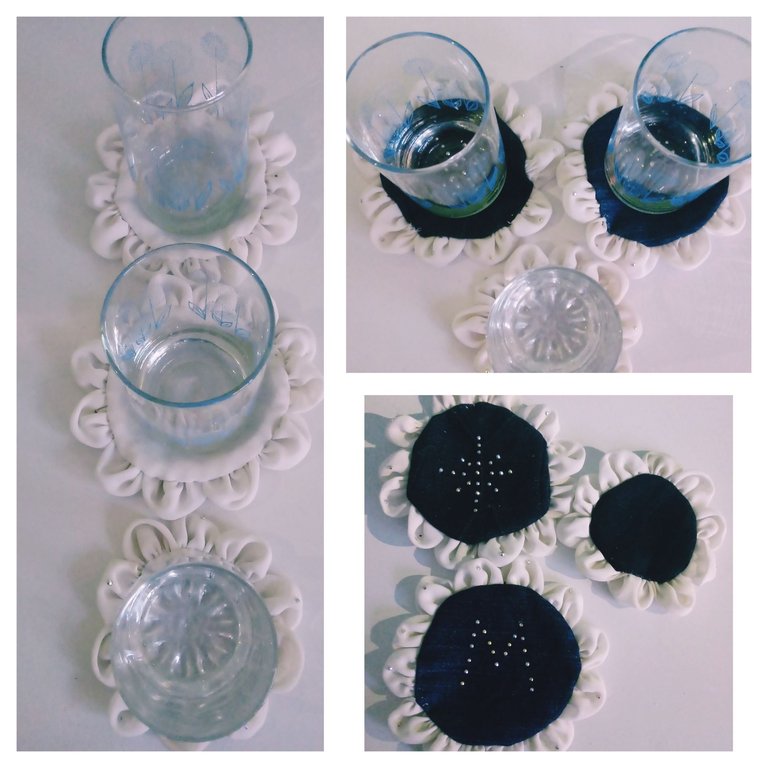
Los invito a que me acompañen al tutorial de hoy, en el que le expondré de forma sencilla el paso a paso de estos porta vasos navideños, que les aseguro que si se aníman a confeccionarlos, lucirán hermosos a la vista. Coméncemos.
Materiales
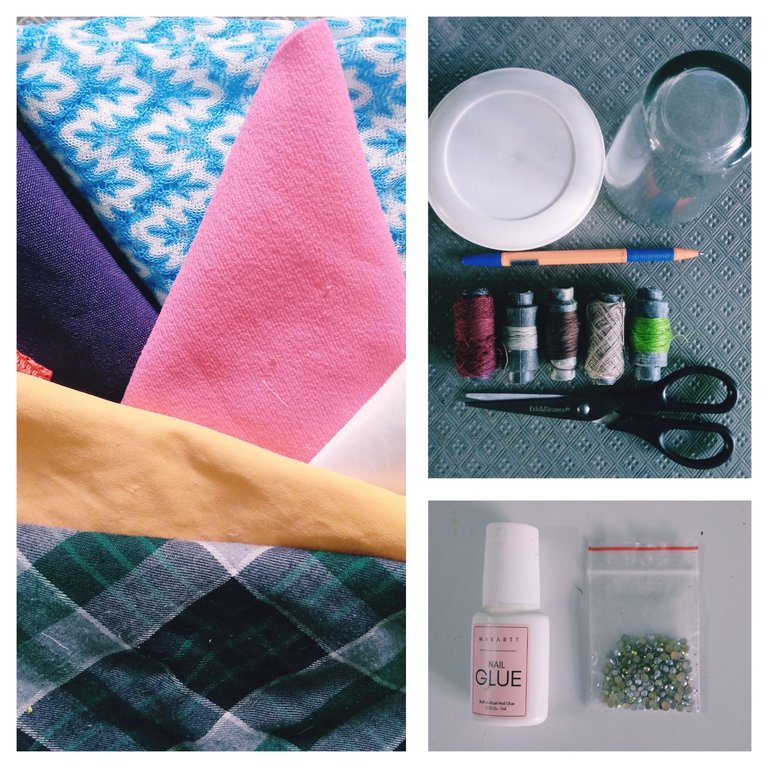
Los materiales son reciclados amigos, por lo que podemos obtenerlos fácilmente.
.Objetos: Tapa, vaso
.Retazos de tela
.Tijera
.Regla
.Lapicero
.Hilo
.Aguja
.Pegamento
.Piedresitas de colores
Modo de confección
Los porta vasos podemos confeccionarlos de diferentes modelos, yo como soy amante de las rosas y girasoles, escogí realizarlos en forma de flor.
Pasos
Lo primero que vamos a realizar son pétalos, de la siguiente forma:
1-Colocamos el vaso sobre la tela escogida para nuestros pétalos, y con la ayuda del lapicero marcamos doce círculos.
2-Recortamos con ayuda de la tijera siguiendo la guía trazada.
3-Doblamos los círculos resultantes por la mitad, y utilizando una hebra de hilo larga vamos insertándolos a cada uno por su vértice.
4-Alamos la hebra de hilo y anudamos, permitiéndonos obtener doce pétalos consecutivos.
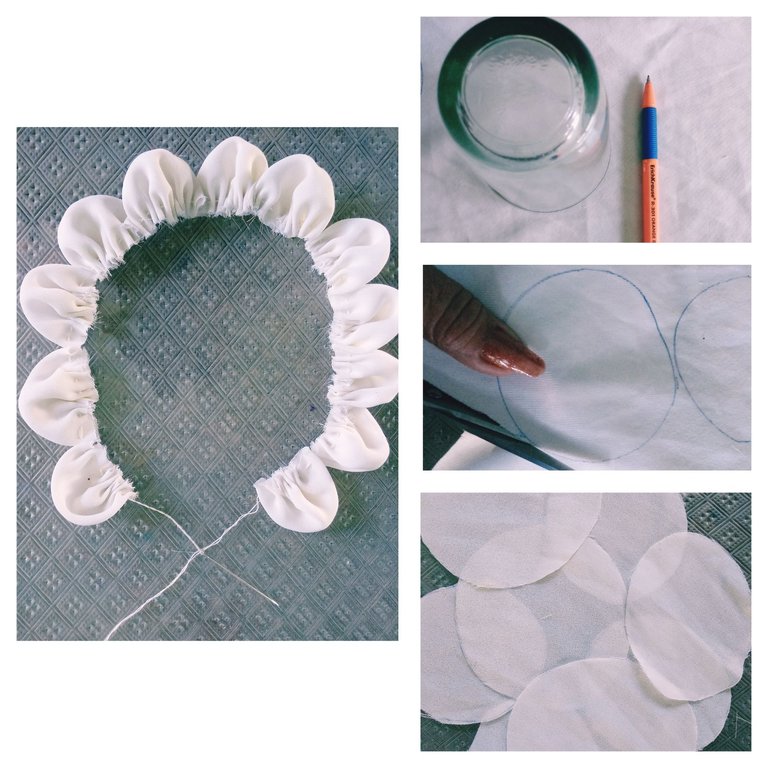
Estos pétalos, amigos, que esamblados de esa forma dan la apariencia de un hermoso collar, lo resguardamos unos instantes y vamos a pasar a la confección de nuestro centro o base de nuestro porta vaso.
1-Escogemos dos tonalidades de tela distintas, de preferencia que combinen con los manteles que decorarán la mesa.
2-Luego, utilizando una tapita ó un objeto circular de mayor amplitud que el empleado para los pétalos, marcamos con ayuda del lapicero dos círculos, uno en cada retazo de tela.
3-Recortamos siguiendo la guía con la tijera, obteniendo dos círculos de diferentes tonalidades y de un mismo diámetro.
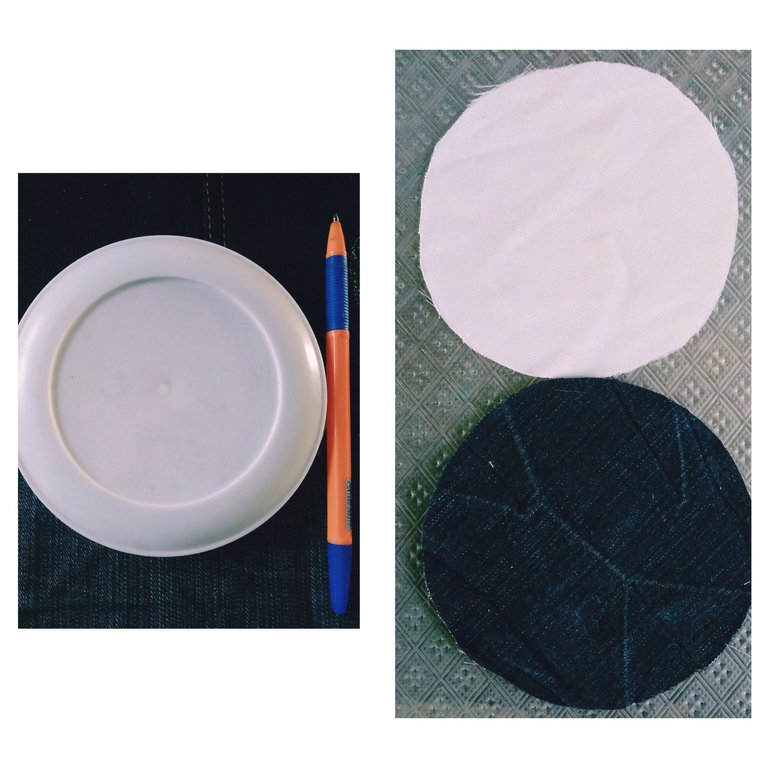
Ya teniedo las dos estructuras que conformarán nuestro porta vasos que son: los pétalos y nuestro centro, pasamos a su ensamblado de la siguiente forma:
1-Tomamos un primer círculo y encima de éste, colocamos nuestros pétalos haciendo coincidir sus vértices, con el del círculo, quedando la punta de los pétalos hacia el centro.
2-Tomamos el segundo círculo y lo colocamos sobre los pétalos, y ayudándonos de una aguja e hilo , vamos cosiendo por todo el borde de las tres estructuras, logrando unificarlas. Dejamos tres centímetros sin coser.
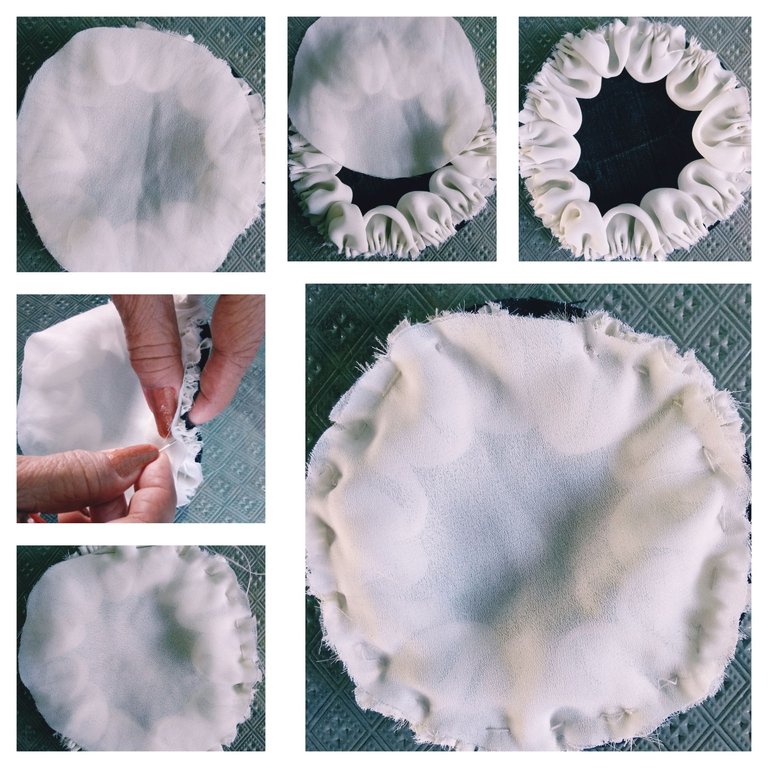
3-Por la región no cosida, vamos a comenzar a virar cuidasosamente nuestro porta vasos, logrando que al tenerlo revertido en su totalidad, obtengamos una estructura de flor de dos tonalidades y con pétalos salientes.
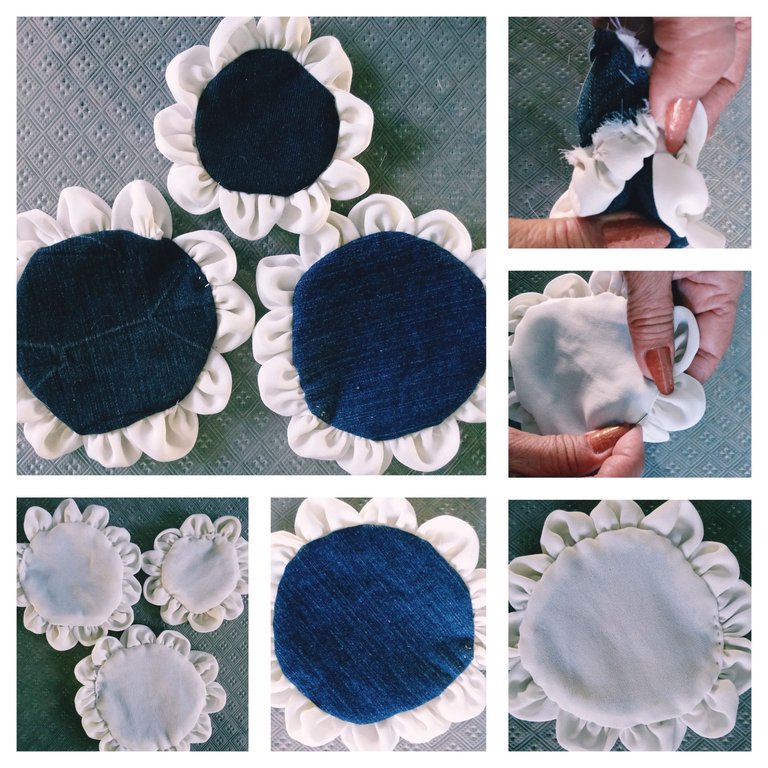
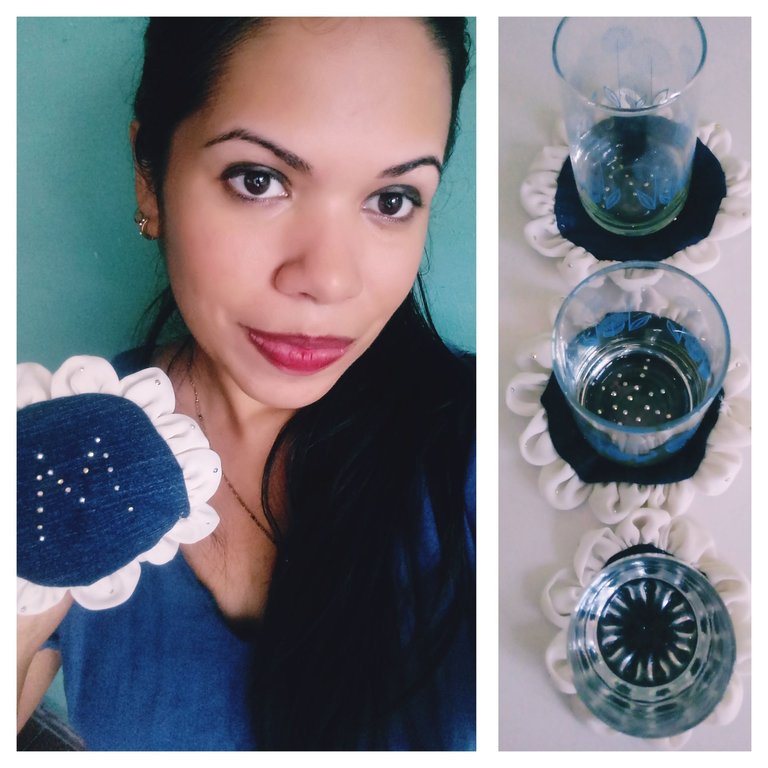
Ya confeccionados nuestros porta vasos, pasamos a decorarlos empleando botones, lentejuelas, todo lo que nos permita personalizarlo a nuestro gusto, yo empleé piedresitas brillantes y coloridas, con las que conformé iniciales de nombres y estrellitas.
Como pueden observar amigos, es un método sencillo para confeccionar bellos porta vasos bicolores. Los exhorto a que se anímen a crearlos, pues, además de decorar sus hogares, pueden obsequiarlos a familiares y amistades cómo recuerdo de la noche y cena navideña.
Bendiciones y excelente semana para todos 🙋🎄☀
Confecciones y fotografías propias.
English
Greetings friends who love crafts🙋🎄☀
There are many activities shared as a family to look forward to the new year. Games, anecdotes, gifts, make having a special day together with our loved ones, with whom we tasted an exquisite Christmas dinner. This year, in my family, I will be the hostess of the party, so I have decided to make some two-color cup holders, to decorate the table and give with these, a colorful and Christmas touch to my home.

I invite you to join me to today's tutorial, in which I will explain in a simple way the step by step of these Christmas cup holders, which I assure you that if you dare to make them, they will look beautiful to the eye. Let's eat.
Materials
The materials are recycled friends, so we can get them easily.
.Objects : Lid, glass
.Scraps of fabric
.Scissor
.Rule
.Pen holder
.Thread
.Needle
.Glue
.Colorful pebbles

Mode of preparation
The cup holders can be made of different models, as I am a lover of roses and sunflowers, I chose to make them in the form of a flower.
Steps
The first thing we are going to make are petals, as follows:
1-Place the glass on the fabric chosen for our petals, and with the help of the pencil mark twelve circles.
2-We cut with the help of the scissors following the traced guide.
3-Fold the resulting circles in half, and using a long thread strand we are inserting them to each one by its vertex.
4-We praise the strand of thread and knot, allowing us to obtain twelve consecutive petals.

These petals, friends, that assembled in that way give the appearance of a beautiful necklace, we protect it for a few moments and we are going to move on to the making of our center or base of our glass holder.
1-We choose two different shades of fabric, preferably that match the tablecloths that will decorate the table.
2-Then, using a lid or a circular object of greater amplitude than the one used for the petals, we marked with the help of the pencil two circles, one on each piece of fabric.
3-We cut following the guide with the scissors, obtaining two circles of different shades and of the same diameter.

I already have the two structures that will make up our cup holder which are: the petals and our center, we pass to its assembly as follows:
1-We take a first circle and on top of it, we place our petals by matching their vertices, with that of the circle, leaving the tip of the petals towards the center.
2-We take the second circle and place it on the petals, and using a needle and thread, we are cooking around the edge of the three structures, managing to unify them. We left three centimeters without sewing.

3-For the unstitched region, we are going to start carefully turning our cup holder, making sure that by having it reversed in its entirety, we get a two-tone flower structure and with protruding petals.

Once our cup holders are made, we go on to decorate them using buttons, sequins, everything that allows us to customize it to our liking, I used bright and colorful pebbles, with which I formed initials of names and little stars.
As friends can see, it is a simple method to make beautiful two-color cup holders. I urge you to encourage yourself to create them, because, in addition to decorating your homes, you can give them to family and friends as a souvenir of the Christmas night and dinner.

Blessings and a great week to all 🙋🎄☀
Own clothing and photographs.
Welcome to the world of art. Made this amazing cup holder for holding cups. Which is mainly through the use of cloth. Thank you so much for sharing this amazing art with sewing.
Thank you very much.It's always a pleasure to interact with you and learn about new creative techniques. Blessings🙋☀
Yes my pleasure you are most welcome thanks for everything
Good work👏
Thank you very much.Blessed and excellent week🙋🎊.
Thanks